1
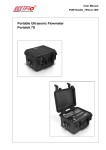
219 East Main Street Mechanicsburg, PA USA, 17055 Toll Free: 866-337-4356 Fax: (717) 697-2122 Simplified Installation of the EESiFlo Portalok 7S Ultrasonic Flow Computer Setup and Installation of the Portalok 7S Ultrasonic Flow Computer involves three simple steps. Define the Parameters of the Pipe and Fluids (PAR on the main menu) Select the Output Options (OPT on the main menu) Enter the Measure Mode (MEA on the main menu) Defining the Pipe and Fluid Parameters >PAR< 1) Plug the Transducer into the receptacle marked Transducer. 2) Turn the instrument ON by pressing the PWR button 3) Using the Arrow keys scroll to PAR (parameters) on the main menu and press ENTER. 4) Enter the pipes Outer Diameter by using the Down arrow key to change the values and the right arrow key to move to the next position then press ENTER. Remember, this is the OD of the pipe not the pipe size. For example a 2 inch pipe has an Outside Diameter of 2.375 inches. 5) Next, enter the pipe Wall Thickness using the arrow keys then press ENTER 6) Select a Pipe Material using the arrow keys to scroll up and down through the available list then press ENTER. 7) Answer YES or NO to the prompt for Lining. If you answered YES, then enter the Lining Type (using the arrow keys) and then the Lining Thickness 8) Enter the internal Roughness of the pipe (this is an estimate, if unknown leave as default) then press ENTER 9) Using the arrow keys, select the Medium (Liquid Type) from the available list then press ENTER. 10) Enter the approximate Medium Temperature then press ENTER. 11) Enter Additional cable length (if no extension is used select 0) then press ENTER and you will return to the main menu. Selecting Output Options >OPT< 1) Using the arrow keys, scroll to OPT (Output Options) then press ENTER. 2) The meter will prompt you for the Physical Quantities for your desired output. Use the arrow keys to scroll up and down through the available list (Volume Flow is the most common). Press ENTER. 3) Using the arrow keys, choose your Volume In units from the available list then press ENTER. 4) Choose a Damping (averaging) time in seconds (if unknown leave as default 10s) then press ENTER 5) The meter is fitted with an internal data logger for logging time stamped data. Answer NO to Store Meas. Data (if you wish to setup the data logger please consult the user manual) then press ENTER. 6) The meter is fitted with a Serial Output Interface. Answer NO to Serial Output (if you wish to setup the serial interface for instantaneous output please consult the user manual) then press ENTER. 7) The meter is fitted with a 4 to 20 mA output, answer NO to Current Loop (if you wish to setup the 4 to 20mA output please consult the user manual) then press ENTER. 8) The meter is fitted with an Alarm Output, answer NO (if you wish to setup the Alarm Output please consult the user manual) then press ENTER and you will return to the main menu. Enter the Measure Mode >MEA< 1) Using the arrow keys, scroll back to MEA (Measuring) then press ENTER. 2) If you have setup the Store Meas. Data function then at Meas. Point No. select a file name for the storage record then press ENTER. 3) When Sound Path appears, the number indicated below this prompt represents the number of Sound Paths (please consult the user manual definition). This value may be manually adjusted by the User. Choose a Sound Path that matches your needs, and then press ENTER. 4) The Transd. Distance will indicate how far apart the transducers must be separated. 5) Select an appropriate transducer Installation Site by following the guidelines in the selecting transducer mounting location document. 6) Apply Ultrasonic Couplant to the bottom of the Transducers 7) Install Transducers with arrow pointing in the same direction and in the direction of flow. 8) Ensure Transducers are correct distance apart by pressing ENTER and reviewing the SIGNAL STRENGTH as discussed in the user manual. Then press ENTER. 9) At Transd. Distance press ENTER. 10) You are now displaying the flow measurements!!! Once measurements are complete, press and hold the PWR button to shut the instrument off.