1
LightConverse User Manual
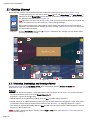
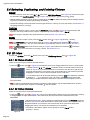
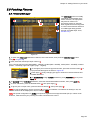
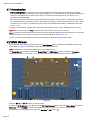
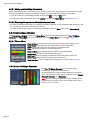
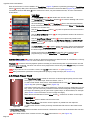
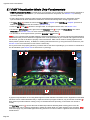
Each of the Tracks 1-2-3-4 are edited in its Track Menu (Figure 79) which is opened by pressing the Track Menu
button ([5] above). Many of the functions are similar to the functions in the Scene Menu (Figure 75), however, the
Track Menu functions will affect all of the scenes in the track, not just individual scenes, as is the case with the
Scene Menu.
Track Menu
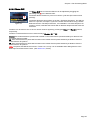
The Duplicate All button [6] will double each scene in the track.
6
The Delete Odd and Delete Even buttons [7] are used for deleting odd or even
scenes in the track.
7
Click and drag the Scene [8] and FadeOut [9] bars to set Scene and Fadeout
times of all scenes in the track. Scene and Fadeout time Wave and Randomize
functions can set here also.
8
9
Use the Paste all Scenes button [10] to paste a copied scene into all scenes in
the track.
10
Use the Clear all Scenes button [10] to clear parameter values of all scenes in
the track.
11
Use the Load Preset->Scene button [11] to load a previously saved Preset
scene into all scenes in the track. The Mix Preset->Scene and UnMix Preset>Scene buttons [11] are used for merging and unmerging preset data in all
scenes in the track.
12
13
14
The New Track button [12] is used to delete all scenes in the track and start with
a fresh track. The Leave One Scene button [13] will delete all of the scenes in
the track except for the selected one.
15
16
Figure 79
Tracks can be saved as Track-Files so that they can be used for future
programming by using the Save Track and Load Track buttons [14].
Enable X-fade in Load [15] is used to enable or disable the FadeIN time when the track is crossfaded in a "GroupFile" (see Sections 4.6.5 - 4.6.6 for more information on Group-Files).
Playback [16] is used to set track playback options. Normally, the track will loop back to the first scene once the
last scene has completed. The track can also be set to playback the scenes only once (Single mode) or reverse
direction (Rebound mode).
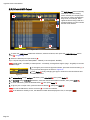
Note: If any of Tracks 1-2-3-4 contain a scene, the 1-2-3-4 button will turn red (see Figure 76).
Note: Many of the above operations can be performed quickly by using Hot-Keys (see Section 4.8).
4.5.3 Flash Preset Track
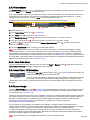
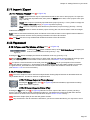
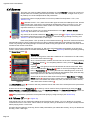
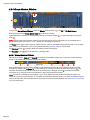
This Flash Preset Track consists of one scene. It has the highest priority over the other
track types, i.e., the DMX-Input Track and Tracks 1-2-3-4.
1
To edit a Flash Preset Track scene, select desired fixtures in the 2D or 3D Main Screen
(Figure 69), then press the Flash button (Figure 76)
The Flash Preset Track scene can be used as an "override" scene by assigning it to a HotKey. In fact, you can have many individual override scenes assigned to many individual
Hot-Keys, thus allowing you do quick colour / gobo bumps, or strobe effects, for example.
(See Section 4.8 for information on how to assign Hot-Keys).
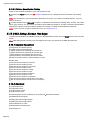
When the track is switched off via its Mute button [1], it will have no effect on the output.
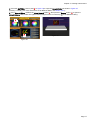
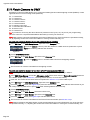
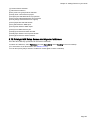
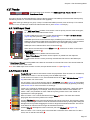
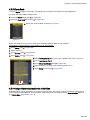
Scene Menu [2]:
• Clear Scene: Press to delete scene from the track.
2
Figure 80
• Copy / Paste Scene: The scene can be copied to or pasted from the clipboard.
• Load Preset->Scene: Load a previously saved Preset-File scene to the Flash Preset
Track.
• Save Scene->Preset: Flash Preset data can be saved as a Preset-File scene. The saved Preset-File can then
be used in other tracks.
Note: If the Flash Preset Track contains a scene, the Flash button will turn red (see Figure 76).
Page 48