1
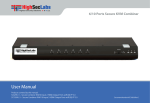
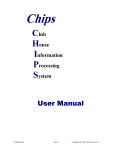
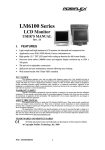
ONE POS USER MANUAL © Copy Right One Touch Ltd, 1992-‐2014 – All Rights Reserved John Mackay Page 1 23/05/2014 Contents 01 02 03 04 08 09 10 11 12 13 16 17 18 19 21 - Front Cover Contents Introduction System Setup Till Mode Basic Usage (completing a sale) Printing Receipts Voiding Entire Transactions Refunds Price Map (Changing Prices) Assigning Fobs Z/X Readings Using Tables PLU (Stock Control) User Stats © Copy Right One Touch Ltd, 1992-‐2014 – All Rights Reserved John Mackay Page 2 23/05/2014 Introduction Congratulations on purchasing your NEW EPOS system. EPOS stands for “Electronic Point Of Sales” Which is the name given to any Till which is computer based. OnePos is the name given to the One Touch Point of sales system which has been developed primarily for the Pub / Restaurant and Club markets. When if comes to Point or Sales systems (or POS for short), there is an overwhelming choice by a variety of vendors. When researching into the POS systems more closely we discovered most systems were over complex and packed with features that you would never actually use, however, in the real world you would surely prefer to spend less money on a system that's not only easy to use, but also better tailored to your industry, easy to configure, simple to maintain and offering features that are actually of benefit to your premises. Bearing all this in mind, we set our software development team the task of generating a POS system that is not only user friendly but also with features and options that would actually be of use to the intended consumer. The team started developing the product in 1992 and completed the first release in late 1992, since the first release, the team has continued to develop and improve on the system, we listened to the buyers adding features and options they requested and now we have a mighty system. Introducing One POS, a touch screen Point of Sales system that is designed to work for any location it is situated offering an easy to use interface and flexible usable features along with networking and other great benefits. © Copy Right One Touch Ltd, 1992-‐2014 – All Rights Reserved John Mackay Page 3 23/05/2014 System Setup When your till first arrives, it will be packed requiring setup. The standard starter package comprises of… 1. Touch Screen (Posiflex) Computer 2. Star TSP 100 Printer 3. Till Drawer In certain cases the till may have been purchased with additional items such as barcode scanner, Key fob with Keys, Keyboard or a Network Kit. First unpack your Kit, assembling the equipment to resemble the image shown above. Connect all cables as follows… 1. Star TSP Printer Connect the mains plug to the mains Connect the USB to both the printer and Touch Screen Terminal 2. Till Drawer Connect the till drawer cable to the external kicker (small white box) or to the Star Printer if no kicker was supplied with your unit (If a kicker was supplied connect the kicker USB to the Touch Screen) 3. Peripherals Connect any other devices to the touch screen terminal (and mains socket where appropriate) The USB connections can be connected to ANY USB Port on your touch screen terminal. Your now ready to start your till, switch on via the power button (located under the flap on the left side of the posiflex touch screen terminal) Press the Flap in the centre to open. The system will now boot to the on-screen system setup page… © Copy Right One Touch Ltd, 1992-‐2014 – All Rights Reserved John Mackay Page 4 23/05/2014 System Setup (Continued)… The System Setup page will show the System Date and Time, Till Drawer communication method and wireless network options. Check the date and time shown is correct for your country, should you need to change the value of either the date or time you can do so by touching the Up/Down arrows, settings are automatically saved when changed. Set your drawer kicker as appropriate, the standard kicker settings for most till drawers is port 6 and method Star or if kicking via the printer select port 0 and method Printer, touch “Test” to check the settings are correct, the till drawer should fire open. If the drawer does not fire open then change the method and test each port number for each method until the drawer fires open. If the till was supplied with a wireless kit then see “Networking” section. © Copy Right One Touch Ltd, 1992-‐2014 – All Rights Reserved John Mackay Page 5 23/05/2014 Touch the Red “X” (top right) to save and apply the new settings. System Setup (Continued)… The Till “Settings” screen will now be shown, don’t worry if your screen is not showing the pie chart as above, the chart will be available later after you process some sales. Touch “System Setup” (Second button down on the left side of the screen)… The “System Settings” screen (like the one shown left) will appear. Using the on-screen Keyboard… In Till Name, enter the name of the Till, example: Till1 (Make sure each of your tills have different names!) In RCPT Line 1-3, enter your premises name, Address and Postcode In VAT NO, enter your VAT number © Copy Right One Touch Ltd, 1992-‐2014 – All Rights Reserved John Mackay Page 6 23/05/2014 If you have a starting float in your till enter it in the Float box (enter as pennies so £10.00 is 10000) System Setup (Continued)… Touch “CPOS PIN” box and enter a 4 digit pin (only enter numbers in this box) this will be used later to re-gain access to the management screen. The recommended print size is “10” but set to a larger size if you prefer. You will notice there are 5 tick boxes, set them up according to your needs… 1. CONFIRM CASH PAYMENTS This option if enabled will prompt the clerk to confirm they want to pay by cash each time they try to cash a sale off 2. CONFIRM CARD PAYMENTS Like the confirm cash payments, this option will prompt a clerk to confirm the payment method each time they try and pay by card. 3. AUTO PRINT FOOD ORDERS This option will automatically generate a food receipt each time a food order is processed, you can select where to send the order with the food printer, so printing orders to a remote kitchen printer is easy. 4. NOTIFY IF CASH DRAWER IS OPEN This option if enabled will cause an alarm sound if the cash drawer is left open too long. (External Kicker and certain Till Drawers only support this option) 5. FORCE PIN ACCESS This option will force a clerk to enter a PIN in order to use the Till without a FOB key. FOOD PRINTER Select where Food orders are printed to. MAIN PRINTER Select where All other print outs are sent to. Press the Green Save button at the top of the screen to save and apply the new settings. Now close all open screens using the red “X” at the top right of the screens to exit setup © Copy Right One Touch Ltd, 1992-‐2014 – All Rights Reserved John Mackay Page 7 23/05/2014 The screen will go red and the till will now restart in “Till” mode. Till Mode When your till starts each day you will be presented with the price map, if your starting your till for the first time the above “Default” price map will be shown. This is now using “Till mode” which means the till is ready to use. © Copy Right One Touch Ltd, 1992-‐2014 – All Rights Reserved John Mackay Page 8 23/05/2014 Basic Usage Start by pressing a “Clerk” key or scanning your Fob (Note: Fobs must be setup, see-assigning Fobs for how to setup fob keys) If you selected the “Force Pin Access” option when setting up your till then you will need to enter a Pin for the clerk. (Note: If this is the first you are using the clerk then the pin you enter will become the pin for that clerk.) Now press any item, Fosters for example. You can now cash this off by touching the “Cash” button. (Note: if you selected the “Confirm Cash Payments” option during setup then you will be presented with a YES, NO Screen to confirm the cash payment, if this is the case then touch “YES”). The sale will now complete, the till drawer should fire open and a “change” box will be shown. If you dial in the amount given in pennies (so £10 will be 1000) before pressing the “Cash” button then the change will be automatically calculated in the “Change” box. You have now completed your first sale! If a customer buys 10 fosters, you can dial in 10 on the keypad and press fosters as appose to touching the fosters key 10 times. You can also pay by card by pressing the card button, should you wish to part pay by cash and card then enter the card payment first which will be deducted from the total. © Copy Right One Touch Ltd, 1992-‐2014 – All Rights Reserved John Mackay Page 9 23/05/2014 Printing a Receipt Start by pressing a “Clerk” Key or scanning your Fob. (Note: Fobs must be setup, see-assigning Fobs for how to setup fob keys) If you selected the “Force Pin Access” option when setting up your till then you will need to enter a Pin for the clerk. (Note: If this is the first you are using the clerk then the pin you enter will become the pin for that clerk.) Now press the Pink “Show RCPT” button (next to the numbers pad)… The “Receipts” screen (like the one shown above) will be displayed. The last sale should be automatically selected along with the default printer you assigned in the till setup screen. Select the desired receipt then press “Print” (Note: should you wish to print to another printer then press the down arrow in the box below the receipt followed and select desired printer, then press “Print”) © Copy Right One Touch Ltd, 1992-‐2014 – All Rights Reserved John Mackay Page 10 23/05/2014 Voiding Entire Transaction No Special user rights are required to void an entire transaction, Start by pressing a “Clerk” Key or scanning your Fob. (Note: Fobs must be setup, see-assigning Fobs for how to setup fob keys) Touch the VOID button TWICE… Touch the YES button CONFIRM © Copy Right One Touch Ltd, 1992-‐2014 – All Rights Reserved John Mackay Page 11 23/05/2014 Refunds Only MANAGERS may refund on the till, start by pressing a “Clerk” Key or scanning your Fob. (Note: Fobs must be setup, see-assigning Fobs for how to setup fob keys) Touch the MANAGER button and enter your pin (This is the pin you assigned during setup of your Till), the word manager will appear in green at the top of the screen to confirm management mode… Now Touch 1 on the on screen keypad followed by VOID and the item to refund. The item will appear on the screen as a negative, press cash to confirm the action. The Till drawer will now fire open allowing you to access the money to give back to the customer. The item refunded will be put back into the stock and the end of day Z reading will be automatically adjusted with the refund given. Note: Any refunds given are shown in the “REFUNDS” section of the Z Report. © Copy Right One Touch Ltd, 1992-‐2014 – All Rights Reserved John Mackay Page 12 23/05/2014 Price Map Only MANAGERS may make changes to the price map on the till, start by pressing a “Clerk” Key or scanning your Fob. (Note: Fobs must be setup, see-assigning Fobs for how to setup fob keys) Touch the MANAGER button and enter your pin (This is the pin you assigned during setup of your Till), the word manager will appear in green at the top of the screen to confirm management mode… Touch the MANAGER button AGAIN… The Settings screen will now be loaded, Touch the PRICE MAP button. The main screen will now show with additional buttons at the top of the screen… ACTION : Touching the Action button will make the till execute the action of a button instead of editing the button SWAP : Touching the Swap button allows you to swap 2 screen buttons with each other, first press Swap then choose the first button to swap then the second button, the two items will swap places. (Note: Remember to press SWAP again to stop the swap mode) Done : Touching Done confirms your changes and returns the system to Till Mode. © Copy Right One Touch Ltd, 1992-‐2014 – All Rights Reserved John Mackay Page 13 23/05/2014 Price Map Continued… If you want to create a new button, edit or delete an existing button then just touch the button while in Price Map Mode… The Price Map Editor screen is selfexplanatory, the screen comprises of a small preview of how your finished button will look and details of the button settings. Description: This is the description of the button; this text will be shown both on the button and the receipt if printed. Price: This is where you enter a price for your item, the price should be entered in pennies, so £2.50 would be 250 Food Item: You can tick this box by touching on it, if a tick is shown the till will treat the item as “Dry Sales” otherwise as “Wet Sales” Menu Link: Sometimes you may need to have additional options for a product, for example if you had a “Steak” button, you may want to ask if the steak should be cooked as “Rare”, “Medium Rare”, “Medium”, “Medium to Well Done” and “Well Done”, to achieve this the menu link will be used, type “Steak” into the menu link button and touch the blue “…” to the right of the menu link to setup your menu options for the item. © Copy Right One Touch Ltd, 1992-‐2014 – All Rights Reserved John Mackay Page 14 23/05/2014 Price Map Continued… FD Category: You define here if your food is a “Starter”, “Side Dish”, “Main Course”, “Desert” or “Other”. When the food order is printed for the kitchen the order will be separated into these sections. Set Button Function: Buttons on your price map can be items or function buttons, touch the “Set Button Function” then a function for your button… Text Colour: Touch to set the colour for your buttons Text Button Colour: Touch to set the back colour for your button Delete Button: Touch to delete the button from the price map (Button will be still show on the till but now as a generic un-set button) Cancel: Touch to return to the price map without saving your new changes Save: Touch to return to the price map with your new changes saved and applied Note: When making multiple buttons, sometimes it’s easier to copy a previously created buttons design. To do this first touch a button you would like to copy, Touch Save, now touch where you would like to create your new button, touch the blue “Load Last Button Design” button. Remember: When making buttons for items you want to sell to always choose button function “ITEM”. © Copy Right One Touch Ltd, 1992-‐2014 – All Rights Reserved John Mackay Page 15 23/05/2014 Assigning Fobs Only MANAGERS may assign Fobs on the till, start by pressing a “Clerk” Key or scanning your Fob. (Note: Fobs must be setup) Touch the MANAGER button and enter your pin (This is the pin you assigned during setup of your Till), the word manager will appear in green at the top of the screen to confirm management mode… Touch the MANAGER button AGAIN… Touch the MANAGER button The Settings screen will now be loaded, Touch the Fob Setup button. The Fob Setup Screen will now be loaded… To Create a New Fob, Touch the ID box then scan the fob, the fob ID will automatically appear. Now touch the Down Arrow to the right of the Clerk Box and select the desired clerk to assign the fob too. Note: If the clerk is not listed then return to till mode and press the required clerk to create a clerk profile. Touch Save to apply. To Edit an Existing Fob, touch the FOB ID in the Fob list, (If you do not know the FOB ID then touch ID and scan the fob to view the ID). Change the clerk then touch save to edit or touch Delete to remove the Fob from the system. © Copy Right One Touch Ltd, 1992-‐2014 – All Rights Reserved John Mackay Page 16 23/05/2014 Z/X Readings Only MANAGERS may view Z/X Reports on the till, start by pressing a “Clerk” Key or scanning your Fob. (Note: Fobs must be setup, see-assigning Fobs for how to setup fob keys) Touch the MANAGER button and enter your pin (This is the pin you assigned during setup of your Till), the word manager will appear in green at the top of the screen to confirm management mode… Touch the ZX Till button… The Z/X Till screen will now load, the screen shows a live X report, touch “Print” to print the live report or touch “Z Till” button to clear down the Till and print the days Z Report. © Copy Right One Touch Ltd, 1992-‐2014 – All Rights Reserved John Mackay Page 17 23/05/2014 Using Tables No Special user rights are required to void an entire transaction, Start by pressing a “Clerk” Key or scanning your Fob. (Note: Fobs must be setup, see-assigning Fobs for how to setup fob keys) Ring in the transaction as normal, when your done, instead of pressing cash or card, touch “TAB” to load the tables screen… Choose the table number to charge the bill too. Note: Green Tables indicates that the table currently has no bill assigned; Red Tables indicates that the table is in use. You may still charge to open tables. Settling the Bill… Sign onto the Till as normal, without ringing any items into the till, Touch Tab, Touch the Table to load it into the Till. You can now card or cash off the table as you would a normal sale. © Copy Right One Touch Ltd, 1992-‐2014 – All Rights Reserved John Mackay Page 18 23/05/2014 PLU Only MANAGERS may view the PLU reports on the till, start by pressing a “Clerk” Key or scanning your Fob. (Note: Fobs must be setup, see-assigning Fobs for how to setup fob keys) Touch the MANAGER button and enter your pin (This is the pin you assigned during setup of your Till), the word manager will appear in green at the top of the screen to confirm management mode… Touch the MANAGER button AGAIN… The Settings screen will now be loaded, Touch the Stock Control button. The Stock screen will now load… The PLU is automatically displayed, touch PRINT to print a copy of the PLU or touch CLEAR to archive the PLU into the History screen and start all counters again from zero Note: To keep your till running fast as possible it is recommended that you clear your PLU every 3090 days. © Copy Right One Touch Ltd, 1992-‐2014 – All Rights Reserved John Mackay Page 19 23/05/2014 PLU Continued… If you clear your PLU down frequently but only do your stock take at certain intervals (every quarter for example) then it is possible to recall the data to a single report… Touch the History Button within the PLU Screen… Touch any shown PLU within the list to view that PLU on its own, or touch select dates to provide 2 given dates to list all stock for. The Multi+ Button allows you to tick individual reports to merge as a single report. © Copy Right One Touch Ltd, 1992-‐2014 – All Rights Reserved John Mackay Page 20 23/05/2014 User Stats Only MANAGERS may view the PLU reports on the till, start by pressing a “Clerk” Key or scanning your Fob. (Note: Fobs must be setup, see-assigning Fobs for how to setup fob keys) Touch the MANAGER button and enter your pin (This is the pin you assigned during setup of your Till), the word manager will appear in green at the top of the screen to confirm management mode… Touch the MANAGER button AGAIN… The Settings screen will now be loaded, Touch the User Stats button. The User Stats screen will now load… The Stats screen will automatically display the stats for the current Z Reading; touch on a Clerk to view all their sales for the session. Note: To change to another Z Session, Down Arrow beneath the Pie chart and select a date from the List. © Copy Right One Touch Ltd, 1992-‐2014 – All Rights Reserved John Mackay Page 21 23/05/2014