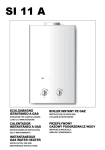
1
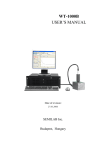
Gebrauchs- und Montageanleitung
Operating and installation instructions
GEBRUIKS- EN INSTALLATIEVOORSCHRIFTEN
Instrucciones de uso y montaje
Instrukcja obsŁugi i montaŻu
Инструкция ПО ЭКСПЛУАТАЦИИ И МОНТАЖУ
Instrucţiuni de montaj şi utilizare
elektronisch geregelter durchlauferhitzer | Electronically controlled
instantaneous water heater | Elektronisch geregelde elektrische doorstromer
| Calentador instantáneo con regulación electrónica | Elektronicznie
regulowany przepływowy ogrzewacz wody | Проточный водонагреватель с
электронной регулировкой | Încălzitor instant controlat electronic
»
»
»
»
»
DEL 18 SLi 25A electronic LCD
DEL 18/21/24 SLi electronic LCD
DEL 27 SLi electronic LCD
DEL 18 A
DEL 27 A
List of contents
1
Operating instructions for the user and the qualified installer_________________________________ 18
1.1 Unit description_____________________________________ 18
1.2 The main features in brief_ ____________________________ 18
1.3 Safety instruction____________________________________ 18
1.4 Important information________________________________ 18
1.5 Hot water output____________________________________ 18
1.6 Thermal cut-out_____________________________________ 18
1.7 External remote operation_ ___________________________ 18
1.8 Recommended setting________________________________ 18
1.9 First Aid in the event of faults__________________________ 18
1.10 Care and maintenance________________________________ 18
1.11 Instructions for Installation and Use_____________________ 18
2 Installation instructions for the qualified installer_________ 19
2.1 Brief description_____________________________________ 19
2.2 Important information________________________________ 19
2.3 Instructions and regulations____________________________ 19
3 Standard installation for the qualified installer_ __________ 20
3.1 General installation information_________________________ 20
3.2 Place of installation___________________________________ 20
3.3 Equipment preparation for installation_ __________________ 20
3.4 Securing the mounting bracket _________________________ 20
3.5 Trimming the power cable to size_______________________ 20
3.6 Equipment installation ________________________________ 20
3.7 Water connection ___________________________________ 20
3.8 Electrical connection_ ________________________________ 20
3.9 Completing the installation_ ___________________________ 20
3.10 Initial start-up_______________________________________ 20
4 Installation alternatives for the qualified installer_ ________ 21
4.1 Mounting bracket when equipment is replaced _ __________ 21
4.2 Electrical connection – finished walls_____________________ 21
4.3 Electrical connection – from above _ ____________________ 21
4.4 Rotated equipment cap_______________________________ 21
4.5 Installation of cable grommet___________________________ 21
4.6 Priority control _____________________________________ 21
4.7 Compression fittings – finished walls_____________________ 21
4.8 Soldered fitting – finished walls_________________________ 21
4.9 Installation of back-wall base___________________________ 21
4.10 Offset installation for tiled surfaces______________________ 21
4.11 Operation with pre-heated water_______________________ 22
4.12 Temperature cut-out _ _______________________________ 22
5 Installation alternatives for the qualified installer_ ________ 22
5.1 Technical Data ______________________________________ 22
5.2 Area of application___________________________________ 22
6 Troubleshooting by the user and the qualified installer_____ 23
7 Special accessories_ ______________________________ 24
8 Guarantee_____________________________________ 24
9 Environment and Recycling_ ________________________ 24
14
A
16
17
english
15
18 21 24
kW
13
14
12
11
10
9
18
19
20
8
7
6
5
4
1
3
26_02_02_0622
21
2
B
225
140
20
105
44
G½
35
110
478
414
368
22
114
5
6
C26_02_02_0915
35
30
100
4
mm
15
C
D
a
b
1
2
e l e c t ro n i c c o m f o r t
a
b
1
c
C26_02_02_0625
C26_02_02_0624
2
d
F
E
a
a
18 2124
kW
6
C26_02_02_0544
b
b
G
H
I
3 4
1
160 mm
4
C26_02_02_0934
15
2
30 mm
I
II
24
25
I
23
16
C26_02_02_0005
C26_02_02_0627
L
a
2 3/4
II
L1`
L2`
L
I
UF
L3`
L
3/PE 400 V
3/PE~400V
C26_02_02_0537
1
5
d
c
c
max.43°C
LR1-A
b
a
a
b
b
P
a
≤18Nm
SW24
WKMD
WBMD
R
S
m2 m
a
3
d
c
C26_02_02_0550
M
C26_02_02_0629
26_02_02_0628
72 mm
325 mm
18 21 24
kW
c
english
20 mm
C26_02_02_0530
165 mm
9,5 mm
b
C26_02_02_0549
b
C26_02_02_0630
K
C26_02_02_0528
O
C26_02_02_0830
c
C26_02_02_0552
330 mm
a
44 mm 50 mm
C26_02_02_0573
J
L
b
a
N
max.60°C
60
43
a
c
a
Q
a
≤18Nm
SW24
c
b
b
17
1. Operating instructions for the user and the qualified installer
1.1 Unit description
Description:
The instantaneous water heater heats water
as it flows through the appliance. The hot
water outlet temperature can be regulated
infinitely. The set temperature appears on the
display.
Above a flow rate of 2.5 l/min the control
switches on the right heating power depending on the temperature setting and the cold
water temperature.
1.2 The main features in
brief
e l e c t ro n i c L C D
e l e c t ro n i c L C D
Display with temperature
indication
Temperatur-Einstellknopf
Thermostat
By turning the adjustment button the
required temperature can be infinitely adjusted and read off on the display.
If with the tap fully open and maximum
temperature setting a sufficient outlet
temperature is not reached, more water is
flowing through the unit than the heating
element can heat. In this case the water
quantity must be reduced accordingly at
the tap.
1.3 Safety instruction
There is a risk of scalding at outlet
! temperatures above 43 °C.
Where children or persons with limited
physical, sensory or mental capabilities are
to be allowed to control this equipment,
ensure that this will only happen
under supervision or after appropriate
instructions by a person responsible for
their safety. Children should be supervised
to ensure that they never play with the
equipment. Risk of scalding!
If this is unavoidable, we recommend
a permanent temperature limit (see
„Temperature cut-out“).
1.4 Important information
If the water supply to the appliance
! is interrupted, e.g. because of a risk
of frost, or work on the water pipe, the
following measures must be taken prior to
bringing the appliance back into use:
1. Remove the fuses and/or trip the MCBs,
or switch off the appliance by means
of the temperature selector (“OFF”
position).
2. Open a draw-off valve downstream of
the equipment until all air has been purged from the cold water supply line and
the equipment.
3. Replace the fuses and/or reset the
MCBs or switch the appliance back on.
1.5 Hot water output
Cold water temperatures vary depending on
the time of year. The following maximum output volumes, or mixed water volumes, can be
achieved with these different cold water inlet
temperatures (see Table 1):
ϑ1 = Cold water inlet temperature
ϑ2 = Mixing water temperature
ϑ3 = Output temperature.
• Useful temperature:
–approx. 38 °C: For example, for showers,
hand basins, filling baths, etc.
–approx. 60 °C: For dishwashers and when
using thermostatic fittings.
ϑ2 = 38 °C (Mixing water temperature)
18 kW 21 kW 24 kW 27 kW
l/min *
ϑ1
6 °C
8.0
9.4
10.7
12.1
10 °C 9.2
10.7
12.3
13.8
14 °C 10.7
12.5
14.5
16.1
ϑ3 = 60 °C (Output temperature)
18 kW 21 kW 24 kW
l/min *
ϑ1
6 °C
4.8
5.6
6.4
10 °C 5.2
6.0
6.9
14 °C 5.6
6.5
7.5
ϑ3 = 50 °C (Output temperature)
18 kW
l/min *
ϑ1
6 °C
5.9
10 °C 6.4
14 °C 7.2
27 kW
7.2
7.7
8.4
27 kW
8.8
9.7
10.7
Table 1
*The values in this table relate to a supply
voltage of 400 V. The actual outlet volume is
subject to the available supply pressure and
mains voltage.
18
1.6 Thermal cut-out
A thermal cut-out at 43 °C can be set by the
qualified installer.
1.7 External remote
operation (not for DEL ... A)
The temperature can be set externally via the
radio remote control FFB 1 and FFB 2 (see
“7. Special fittings”).
1.8 Recommended setting
Operation with thermostatic fitting
The temperature must be set on the device
to the maximum value.
1.9 First Aid in the event of
faults
• Check the fuses
• Check that the fittings and shower controls are free of limescale or dirt contamination, see also “6. Fault finding”.
If a qualified installer is called in for a current
problem, he must be given a few details from
the unit rating plate ( A 20) so that he can
provide better and faster help:
DEL . . SLi
Nr.: . . . . . . -. . . . - . . . . . .
1.10 Care and maintenance
Maintenance work, such as checking
! electrical safety, may only be carried out
by a qualified installer.
All that is needed to clean the housing is
a damp cloth. Do not use any abrasive or
caustic cleaning substances.
1.11 Instructions for
Installation and Use
Follow these instructions carefully, and,
! in the event of change of ownership,
pass them on to the new user. If any
maintenance or repair work is necessary, give
them to the qualified installer for him to read.
2. Installation instructions for the qualified installer
The electronically controlled instantaneous
water heater is a pressurised unit suitable
for heating cold water or for further heating
water pre-heated up to 55 °C.
The maximum permissible inlet temperature
is 65 °C. At higher temperatures the unit may
be damaged.
With the special fitting “Central thermostat“
(see “7. Special fittings”) the max. inlet
temperature can be limited to 60 °C.
One or more taps can be supplied with the
unit.
The bare-wire heating system is enclosed with
pressurised copper cladding.
The heating system is suitable for low-lime
and lime-containing water (see “5.2 Areas of
use”).
Appliance with output options
For the DEL 18/21/24 SLi instantaneous water
heater, the output is adjustable in three stages.
In its delivered condition the appliance is set
to 21 kW. If the appliance is installed with a
different output, take the following steps:
• Replug coding card on the appliance PCB
above the information label, according
to the output selected. For rated current
and fuse, see Specification.
• Mark the selected output on the type
plate with a permanent marker.
2.2 Important information
Air trapped in the cold water supply
! can damage the bare wire heating
system inside the equipment, or trip the
safety system (see “1.4 Important
information”).The DEL is equipped
with an air detector which, to a
great extent, prevents damage to the
heating system:
If, during operation, air is drawn into the DEL,
the equipment shuts down the power for a
few seconds, thereby protecting the heating
system.
• Valves:
• Stiebel Eltron pressure valves for
instantaneous water heaters, for
installation on finished walls (see “7.
Special accessories”)
• Installation may be carried out using
commercially available pressure valves.
• Thermostatic pressure valves (see note
“1.8 Recommended adjustment”).
• All information in these operating and
installation instructions must be followed
carefully. They contain important details
regarding safety, operation, installation and
maintenance of the equipment.
2.3 Instructions and
regulations
• The installation (water and electrical
work) and commissioning, as well as the
maintenance of this equipment, must only
be carried out by a qualified contractor in
accordance with these instructions.
• Perfect function and safe operation can
only be guaranteed when using original
accessories and spare parts intended for
this equipment.
• Observe all locally applicable instructions
and regulations regarding water and
electrical connections.
• Observe all local water and electricity
supply company regulations.
• Install the lower area of the equipment
flush with the wall (observe dimension
≥ 110 mm B ).
• The type plate (open the hinged flap on
the equipment cap).
• See also “5. Specification”.
The specific electrical resistance of
! the water may not be below the value
written on the rating plate.
If the water is coming from a water-network the lowest value of the water resistance must be considered, (see „5.2 area of
application“).
The specific electrical resistance of the
water is generally known by the water provider.
18 21 24
kW
26_02_02_0935
• Install the equipment only in an enclosed,
frost-free room. Store dismantled
equipment in frost-free conditions, since
there is always a little water left inside the
equipment.
• The protection level IP 25 (hose-proof)
is only guaranteed if a correctly installed
cable grommet is used.
Water installation:
– Cold water pipe material:
Steel, copper or plastic pipe systems.
– DHW pipe material:
Copper or plastic pipe systems*
Operating temperatures up to a max.
60 °C can be reached with the
DEL…SLi instantaneous water heater
(max. 50 °C with DEL ... A). Maximum
loads of 80 °C / 1.0 MPa may occur
briefly in the installation in the event of a
fault. The plastic pipe system used must
be designed for such conditions.
• A safety valve is not required.
• Never use valves for open systems!
Electrical installation:
• Electrical connection only to permanently
wired mains power cables
• The equipment must be able to be
disconnected from the mains power
supply, for example by fuses that
disconnect all poles with at least 3 mm
contact separation.
19
english
2.1 Brief description
3.Standard installation for the qualified installer
Electro: UP – bottom; Water: UP
Legend Diagram A - G
1 User interface
2 Equipment cap
3 Base, back wall
4 DHW compression fitting
5 Cold water compression fitting
(three-way shut-off valve)
6 Cable grommet (electrical supply cable
from below)
7 Mains terminal
8 Top, back wall
9 Electronics
10 Safety pressure limiter (AE 3) with reset
button
11 Heating system
12 Flow sensor (DFE)
13 Plug position of thermostat fly lead cable
14 LED for operating and fault display
15 Fixing bar
16 Plug of thermostat fly lead cable
17 Safety thermal cut-out (STB)
18 Outlet sensor (NTC)
19 Locating hook for mounting rack (Service)
20 Unit rating plate
21 Hanging bracket
22 Filter in cold water screw connection
23 Flow rate limiter (DMB)
24 Form disc
3.1 General installation
information
The equipment is prepared at the factory for standard installation (see figs.
C - I ):
• Installation above a worktop C (a).
• Water connection, unfinished walls, compression fitting G (4 and 5).
• Electrical connection, unfinished walls, in
the lower equipment area F (6).
• Output 21 kW for the beim DEL 18/21/24 SLi.
3.2 Place of installation
Install the DEL... SLi vertically in accordance
with C (a – above or b – below worktop) in
a room free from the risk of frost.
3.3 Equipment preparation
for installation
Open the equipment D :
a Pull the flap forward.
b Open the flap downwards.
c Release the fixing screws.
d Remove the equipment cap.
Remove the back wall base E :
a Press down both snap-in tabs.
b Remove the back wall base by pulling
forwards.
• Remove the fixing toggle F (15).
•
•
3.4 Securing the mounting
bracket F
• Mark out the fixing holes for the mounting bracket using the installation template
supplied.
• Secure the mounting bracket with 2
screws and rawl plugs (not supplied;
selection subject to the material of the
relevant wall).
20
3.5 Trimming the power
cable to size
Trim the power cable to size in accordance
with H .
Note: Cap (a) should be used as an aid for
installing the power cable.
3.6 Equipment installation
F
• Route the power cable through the cable
grommet (6) and press the back wall over
the threaded studs of the mounting bracket.
• Fit the equipment, secure the fixing toggle
(15).
3.7 Water connection
G
Important instructions:
Thoroughly flush cold water supply
! line!
The filter supplied (22) must always
be fitted with the flow rate limiter (23,
DMB) or the form disc (24) (parts in the
bag on the CW connection and in the
accompanying pack) in the CW screw
connection. Generally the DMB - 12 l/min
(brown) is to be installed.
3.10 Initial start-up
(only by a qualified contractor)
Exception:
– DMB - 7.5 l/min (blue) for use with a
thermostatic fitting.
– Form disc for low water pipe pressure.
Upon replacement installation the presence of the filter must be checked.
Never use the three-way shut-off valve (5)
to reduce the flow rate.
3.8 Electrical connection
Connect the electrical supply cable to the
terminal strip (see Wiring diagram I ).
Important information:
The protection level IP 25 (hose-
! proof) can only be ensured with a
correctly fitted cable grommet A (6) and
seal on the cable bush.
Connect the equipment to earth.
3.9 Completing the
installation
1. Open the three-way shut-off valve G (5).
2. Fit the back wall base E .
1
2
1 Fill and vent the equipment.
Please note: risk of running dry!
Open and close all connected draw-off
valves several times, until the air has
been purged from the pipework and
the equipment, see “2.2 Important
information”.
2 Activate the safety pressure limiter. The DEL…SLi electronic LCD
is supplied with the safety pressure
limiter (AE 3) in a tripped state (press
the reset button).
3 Push set value transducer cable
plug onto the PCB.
4 Fit the equipment cap and secure
with the screw.
5 Switch on the mains power.
6 Check the instantaneous water
heater function.
7 Remove the protective film from
the user interface.
Equipment handover
Explain the equipment function to the user
and familiarise the user with its operation.
Important information:
• Make the user aware of possible dangers
(scalding).
• Hand over these instructions to the user
for safekeeping.
3
4
elect ro n ic com fo r t
5
26_02_02_0634
4.Installation alternatives for the qualified installer
Electro: UP – top, AP – bottom/top, Load-shedding relay; Water: AP; Turned device cover; Tile offset
Alternative installations are shown in
figures J - S .
4.1 Mounting bracket when
equipment is replaced J
• The existing mounting bracket can be
used when replacing Stiebel Eltron
equipment (except “DHF”). Use a suitable
grommet in the back wall.
• When replacing “DHF”, turn the mounting bracket (a) 180° (logo “DHF” turned
towards the reader) and move the threaded stud (b) to the upper r.h. corner.
• When replacing third party equipment,
use suitable holes for rawl plugs (c) to
secure the mounting bracket supplied.
4.2 Electrical connection –
finished walls
• Cut or make an opening for the power
cable in the back wall and equipment cap
(see K for possible locations for openings.
• The protection level changes to IP 24
(splash-proof) for electrical connection on
finished walls.
Attention:
The equipment type plate must be marked as follows in ballpoint pen:
Cross through IP 25 and put a cross in
the box IP 24.
4.3 Electrical connection –
from above L
• Cut a hole for the power cable in the cable grommet.
• Push the terminal strip upwards from
below, for this press in the snap-in tab (a)
and isolate the terminal strip.
Attention:
Install flexible wires under the cable guide
(b).
Snap the terminal strip into place at the
top (c).
4.4 Rotated equipment cap
The equipment cap can be rotated for
under-worktop installation M :
• Press in the snap-in tab to remove the
user interface (a) from the equipment
cap.
• Rotate the equipment cap (b) (not the
equipment). Insert the user interface and
lock all snap-in tabs into place.
Attention:
Do not install a user interface with damaged snap-in tabs.
• Push set value transducer cable plug onto
the PCB (see 3 “3.10 Initial start-up”).
• Hang the equipment cap (b) at the bottom and swing up into position on the
back wall. Push the cap forwards and
backwards to ensure correct seating of
the surrounding back-wall gasket.
• Screw down the equipment cap.
4.5 Installation of cable
grommet
The equipment may be installed with a retrofitted cable grommet N .
• Press out the cable grommet using a screwdriver (a).
• Secure the equipment on the mounting
bracket.
When using a 10 or 16 mm² power cable,
enlarge the hole in the cable grommet.
• Push the cable grommet over the power
cable (b, installation aid), fit to the back
wall (c) and snap in place (d).
4.6 Priority control
O
When used in conjunction with other electrical equipment, e.g. electric storage heaters, use
the load circuit breaker:
a Load circuit breaker (see “7. Special accessories“).
b Control cable to the contactor of the
other equipment (e.g. electric storage heater),
c Control contact – opens when switching
the DEL ... SLi on.
The load breaker trips as soon as the
DEL ... SLi starts.
Only connect the load circuit breaker to the
centre phase of the equipment terminals
(mains power).
4.7 Compression fittings –
finished walls
Stiebel Eltron pressure valve (finished
walls)
WKMD or WBMD P
(part no. see “7. Special accessories”)
• Fit the water plug G ½ with gaskets (a)
(part of the standard delivery of Stiebel
Eltron pressure valves for finished walls).
Two water plugs (special accessory set)
(see “7. Special accessories”) are required
for third party pressure valves.
• Fit the valves.
• Push the back-wall base below the valve
connection pipes and snap it into the
back-wall top.
• Screw the connection pipes to the equipment.
Prepare the equipment cap for this installation R :
• Break out the bush knock-outs (a) in the
equipment cap cleanly, if necessary use a
file.
• Knock out the lips from the cap guides
supplied (b). If the valve connection pipes
are slightly offset, the cap guides (b) can
be used without knocking out the lips. In
this case, the back-wall guides (c) are not
used).
• Snap the cap guides into the bush knockouts in the equipment cap.
• Fit the back-wall guides supplied (c) onto
the pipes (press top and base onto pipe
and push together).
• Push back-wall guides (c) onto back wall
of the equipment until it stops.
Securing equipment
When connected to flexible water pipe
systems, the back wall must be secured at the
bottom by means of an additional screw (d).
Hang the equipment cap (b) at the top and
swing down onto the back wall. The webs of
the cap guides must grip into the back-wall
guides and lock into them.
4.8 Soldered fitting –
finished walls
Using the special accessory Q (a), part no.
see “7. Special accessories”, it is possible
to provide a screw connection with the
customer’s 12 mm copper pipes.
• Install parts of the special accessory.
• Solder the insert to the copper pipes.
• Push the back-wall base underneath the
valve connection pipes and snap into the
top of the back wall.
• Screw the connection pipes to the equipment.
Attention:
Note the information in “4.7 Compression
fittings – finished walls”:
• Equipment cap, equipment back wall and
equipment fixing must be prepared for
this installation method.
• Equipment fixing.
• Cap installation.
4.9 Installation of back-wall
base
With connection fittings for finished walls,
the back-wall base can also be fitted after
the valves have been fitted S :
• Cut the back-wall base (3) as shown in
the diagram (a).
• Insert the links (b from the extra item
ordered) from the back into the centre
part.
• Guide the centre part underneath the
pipes, push up and fit with the back-wall
base.
• Fit the back-wall base to the back wall.
The back-wall base must be secured with
an additional screw (c).
• Fit the valve connection pipes to the
equipment fittings.
4.10 Offset installation for
tiled surfaces
When the equipment is fitted onto a tiled
surface ( B max. 20 mm), the toggle
( F 15) initially adjusts the wall clearance and
then secures the equipment.
21
english
4. Installation alternatives for the qualified installer
Operation with pre-heated water; Temperature cut-out
4.11 Operation with preheated water
4.12 Temperature cut-out
The DEL ... SLi electronic LCD permits further
heating of the inlet water up to max. 60 °C
(50 °C by DEL ...A).
With inlet temperatures above 55 °C
! the water is not heated.
M
A cut-out on the outlet temperature at 43 °C
can be set by the following steps:
1. Unscrew cover fixing screw and remove
unit cover.
2. Push slide switch into position “43”.
3. Fit unit cover and tighten screw.
A maximum inlet temperature of 60 °C
is ensured by the installation of a central
thermostat fitting (see “7. Special
fittings”).
5.Technical data and areas for the qualified installer
5.1 Technical Data
(The data on the unit rating plate apply)
Typ
Rated current
Fuse protection
Output can be selected
Pressure drop *
With DMB (brown)
Without DMB
Flow rate limiter (DMB)
DEL 18/21/24 SLi
DEL 27 SLi
electronic LCD
electronic LCD
electronic LCD
227498
Part number
Rated output
DEL 18 SLi 25 A
400 V
380 V
400 V
380 V
kW
kW
A
A
A
MPa / l/min
MPa / l/min
l/min
color
Temperature setting
Rated content
Design
Rated pressure
Weight
Protection class to EN 60335
Protection class to EN 60529
Test mark
Water connection (external thread)
Electrical connection
VDEW approval
Bare wire heating system
Cold water inlet temperature
Area of use
227499
18
16,2
26
24,7
25
nein
18
16,2
29
27,6
32
ja
0,075 / 5,2
0,05 / 5,2
12,0 / 7,5
brown / blue
21
19
33
31,4
32
ja
24
21,7
35
33,3
35
ja
DEL 18 A
DEL 27 A
227500
230136
230137
27
24,4
39
37,1
40
nein
18
26
25
nein
27
39
40
nein
0,075 / 5,2
0,095 / 6,0
0,125 / 6,9
0,155 / 7,7
0,075 / 5,2
0,155 / 7,7
0,05 / 5,2
0,065 / 6,0
0,085 / 6,9
0,105 / 7,7
0,05 / 5,2
0,105 / 7,7
12,0 / 7,5
12,0 / 7,5
12,0 / 7,5
12,0 / 7,5
12,0 / 7,5
12,0 / 7,5
brown / blue brown / blue brown / blue
brown / blue
brown / blue
brown / blue
30 - 60 °C
30 - 50 °C
0,4 l
Closed
1 MPa (10 bar)
4.5 kg
1
IP 25 (IP 24 at electrical connection- finished walls)
See chapter on application areas
G½A
3/PE ~ 380 - 400 V 50 Hz
3/PE ~ 400 V 50 Hz
vorhanden
See chapter on application areas
max. 65 °C
Low-lime and lime-containing water
≥ 2.5 l/min
Flow rate “in”
Table 2
* * Values for 400 V. The values for pressure drop also apply to minimum flow pressure to DIN 44851/ flow rate for heating from 10 °C to 60 °C
(∆ϑ 50 K). With reference to DIN 1988 part 3, table 4, a pressure drop of 0.1 MPa is recommended for sizing the pipework.
5.2 Area of application
Specific electrical resistance and specific electrical conductivity.
Details as
Resistance
Conductivity
Conductivity
Table 3
22
Ranges of use for different references temperatures
Normes details
at 15 °C
Ωcm ≥ 900
mS/m ≤ 111
µS/cm ≤ 1110
bei 20 °C
≥ 800
≤ 125
≤ 1250
bei 25 °C
≥ 735
≤ 136
≤ 1360
6.Troubleshooting by the user and the qualified installer
Fault
Cause
Further diagnosis Elimination
with service
monitor *
No hot water
/ Outlet temperature not
correct
No mains voltage
User:
AE3 has tripped
Qualified installer: Clarify cause. Rinse heating-system of unit, in
order to avoid over-heating. Switch AE3 on again
(check correct connection STB).
No LED on
Electronic fault
Qualified installer: Check electronics and if necessary replace
Failure of a phase
Unit at power limit
Green LED
flashing Yellow LED off
User:
Check fuse in the house installation
Power bar 100 % User:
Reduce flow
Qualified installer: If necessary install DMB
Inlet temperature
> 55 °C
Green LED
flashingRed LED
on
Display C1 (inlet)
Qualified installer: Limit inlet temperature
DFE faulty or not
plugged in
Green LED
flashing
Yellow LED of
Check flow
Qualified installer: Check or replace DFE connection
Heating system
faulty
Green LED
flashing
Yellow LED on
Qualified installer: Check heating system and replace if necessary
Inlet sensor faulty
Error E1 (ELEC)
Green LED
flashing Red LED Error E2 (NTC)
permanently on
Qualified installer: Replace electronics
Green LED
flashing Red
LED on in tap
operation
Error E3 (AE3)
Qualified installer: Attach AE3 connection cable and check AE3
(Check flow)
User:
Outlet sensor
faulty
Error in the safety
electronics
Flow too
small
Check fuse in the house installation
Showerhead/perlators scaled
Fouling
Qualified installer: Check connection if necessary replace outlet
sensor
Check fuse in the house installation
Qualified installer: Clean filter
LCD display
Loose connecting
completely off cable to control
unit
Control unit electronics faulty
Qualified installer: Attach/check connecting cable
Green LED
flashing
Qualified installer: Check control unit if necessary replace
Set value
cannot be set
above 43 °C
Temperature cutout is activated
Short term
cold water
No flow break in
< 2.5 l/min
Unit goes automatically back into operation if sufficient flow present
> 2.5 l/min
Air recognition
trips (cold water
for approx. 1 min)
Unit goes automatically back into operation with delay
Green LED
flashing
Qualified installer: Deactivate temperature cut-out
*
Table 4
LED display options
english
Display diagnosis LED
The service monitor Order No 22 13 32 offers further diagnosis option
(see “7. Special fittings”).
red yellow green
23
7. Special accessories
Remote controls for DEL…SLi
The radio remote controls are operated by
means of wireless user interfaces. Perfect
communication is guaranteed up to 25 m
in buildings. The instantaneous water heater
can be operated with a maximum of 6 radio
remote controls (not for DEL ... A)
The control unit on the equipment only
shows the temperature set in the remote
control, it can not adjust the temperature!
• FFB 1 – Radio remote control
Part no. 16 94 78
Operation from two locations:
Equipment and radio remote control.
Accessory: radio remote control (transmitter), connection module (receiver) and wall
mount.
ele
ctr
oni
c
com
for
26_02_02_0632
t
• FFB 2 – Radio remote control
Part no. 16 94 82
Radio remote control as an extension of
FFB 1
Accessory: radio remote control (transmitter) and wall mount.
ele
ctr
fort
oni
com
c
ic
com
tron
for
elec
26_02_02_0633
t
Two-handle pressure valves
• Kitchen valve WKMD
Part no. 22 24 37
• Bath valve WBMD
Part no. 22 24 38
Installation accessories
• Under-worktop set – unfinished
walls
Part no. 07 05 65
Connections for finished walls, G 3/8”, top
• Set 2x water plugs G ½
Part no. 07 43 26
Required with third party pressure valves
( P a).
Note:
Not required for Stiebel Eltron valves
WKMD and WBMD.
• Installation set for finished walls
Solder fitting – copper pipe:
Part no. 07 40 19 ( Q a)
comprising:
– 2 x water plug G ½”.
– 2 x union nut ½” with insert for solder
fitting Ø 12 mm.
Compression fitting – copper pipe:
Part no. 22 23 80
– 2 x water plug G ½”.
– 2 x compression fitting ½” x 15 mm, plus
gaskets.
Compression fitting – plastic pipe:
Part no. 22 23 81
– 2 x water plug G ½”.
– 2 x compression fittings ½” x 16 mm
(Viega: Sanfix-Plus or Sanfix-Fosta), plus
gaskets.
• Offset installation – unfinished walls
Part no. 22 02 90
consisting of:
– universal mounting frame (see part no. 22 02 91 for specification).
– pipe bends for vertical displacement of the
equipment by 90 mm downwards compared to the water connection.
• Gas water-heater replacement set
Part no. 22 05 10
consisting of:
– universal mounting frame (see part no.
22 02 91 for specification).
– pipe bends for installation at existing gas
water-heater connections (cold water
left and hot water right).
• Load circuit breaker LR 1-A
Part no. 00 17 86
Priority control of the DEL…SLi electronic
comfort for simultaneous operation of e.g.
electric storage heaters. For connection of
the LR 11-A, see O .
• Accessories for operation of a
DEL ... SLi with pre-heated water
ZTA 3/4 – central thermostatic valve
Part no. 07 38 64
By adding cold water via a bypass pipe, the
central thermostatic valve installed immediately above the storage water cylinder
guarantees that the outlet temperature of
60 °C is not exceeded.
• Service monitor
Part no. 22 13 32
Diagnostic unit for fault recognition in the
DEL ... SLi / DEL ... A..
• Universal mounting frame
Part no. 22 02 91
consisting of:
– mounting frame with
– electrical wiring
This set creates a gap of 30 mm between the equipment back wall and the
installation wall.
This enables the electrical connection to
be routed over unfinished walls at any
point behind the equipment. It increases
the equipment depth by 30 mm and
reduces the protection level to IP 24
(splash-proof).
8. Guarantee
For guarantees please refer to the pespective terms and conditions of supply for your
country.
9. Environment and
Recycling
The installation, electrical connection
! and first operation of this appliance
should be carried out by a qualified installer.
The company does not accept liability for
failure of any goods supplied which accordance with the manufacturer‘s instructions.
24
Recycling of obselete appliances
Appliances with this label must not be
disposed off with the general waste.
They must be collected separately and
disposed off according to local regulations.
25
english