1
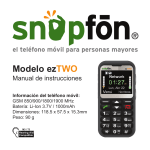
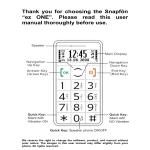
the cellphone for seniors
Model ezTWO
Owner’s Manual
Tech Data:
GSM 850/900/1800/1900 MHz
Battery: Li-Ion 3.7V / 1000mAh
Dimensions: 118.5 x 57.5 x 15.3mm
Weight: 90 g
M3 / T3
Hearing Aid
Compatible
Table of Contents
Safety Precautions
6
Getting Started
8
8
8
8
9
9
9
9
Turning on the Phone
Setting up Voicemail
Making a Call
Answering an Incoming Call
Disconnecting a Call
Call Waiting
Conference Call
10
10
11
The Snapfōn® Home Screen
Field Definitions
Icons
External Features
High-Intensity LED Flashlight
Keypad Lock
Camera Launch Button
+/- Button
2
12
12
12
12
12
Lanyard Connection
Headphone Port
Power Port
Keypad
Diagram of External Features
Key Functions
The Menu
16
16
16
17
17
18
18
18
18
18
Phonebook
Options
Messaging
Write Messages
Inbox
Draft
Outbox
Sent
Delete Messages
Call History
Missed Calls
Dialed Calls
Received Calls
Delete Call Logs
12
13
13
13
14
15
3
19
19
19
20
20
Photos
21
21
21
22
23
23
23
23
24
24
24
25
26
26
26
27
28
28
29
29
30
31
The Photo Album
The Camera
Camera Key Functions
Settings
Tone Settings
Phone Settings
Time and Date
Language
SIM Card
Speed Dial
Bluetooth
SMS & VM Number
Low Battery
Restore Factory Settings
SOS Settings
Button Status
Siren
Contacts
Text Messages
Alarm
Silent Mode
4
Installing the Battery & SIM Card
SIM Card Installation Diagram
Battery Installation Diagram
Warranty to the Original Purchaser
Intended Usage
Disposal
FCC RF Exposure Information & Statement
Address and Contact Info
5
32
33
34
35
36
36
37
38
Safety Precautions
1. When using this unit, basic safety precautions should always be
2.
3.
4.
5.
6.
7.
8.
9.
followed to reduce the risk of fire, electric shock, or
personal injury.
Read and understand all instructions.
Do not use liquid or aerosol cleaners. Use a damp cloth for
cleaning.
Do not use this unit near water such as bathtub, shower or pool.
Immersion of this unit in water could cause an electrical
shock.
Place the unit securely on a stable surface. Serious damage and/or
injury may result if the unit falls.
Do not cover slots and openings on the unit. They are provided for
ventilation and protection against overheating.
Install the unit in a place where it cannot be walked on.
Never push any objects through slots in this unit. This may
result in the risk of fire or electric shock. Never spill any liquid
on the unit.
To reduce the risk of electric shock, do not disassemble this unit.
Contact Snapfōn® if service or repair work is required. Opening
or removing covers may expose you to dangerous voltages or
other risks. Incorrect reassembly can cause electric shock
during subsequent use.
6
10. Do not expose the unit to extreme temperatures such as areas
near a hot radiator or stove or in a hot car.
11. Do not place lighted objects such as candles or cigarettes on the
unit.
12. Do not use this unit to report a gas leak in the vicinity of the leak.
13. Power off mobile telephone in hospitals or near medical devices.
There should be a minimum distance between switched-on phone
and a pacemaker.
14. Do not operate a vehicle while holding or using your mobile
telephone. Follow the local laws and traffic rules of the area you
are in.
15. Always power your mobile telephone off while in an airplane.
16. Do not use near gas stations or other explosive materials.
17. Never shine the LED flashlight into a human’s or animal’s eyes
(protection class 3).
WARNING: To prevent the risk of fire or electric shock, do not expose
this unit to rain or any type of moisture.
7
Getting Started
Thanks for buying the Snapfōn® ezTWO! Please read this manual
thoroughly before use. This section is intended for Snapfōn®
customers who purchased their handset with a Snapfōn® service
plan. If you purchased a handset without service, additional steps
may be required.
Turning on the Phone
Press and hold the red Power button for 3-5 seconds. Release the
button when the phone plays its start-up chime, and the screen
animation begins.
Setting Up Voicemail
After the phone has powered on, press and hold down the 1
button on the phone’s keypad until it begins to call your
voicemail box. When the call connects, simply follow the
spoken instructions.
Making a Call
With the phone powered on, enter the 10-digit phone number of
the person you wish to call and press the green Send button.
8
Answering an Incoming Call
When the phone rings and/or vibrates, press the green
Send/Answer button to answer the call.
Disconnecting a Call
Press the Red Power button to end a call at any time.
Call Waiting
While a call is engaged, press the Answer or Ignore Option Buttons
when the second incoming call is displayed.
To swap between lines when call waiting is in use, select “swap”
from the Options menu, or press the green OK/Send button one
time.
Conference Call
After answering a second call (Call Waiting), Select “Options,” then
select “Conference” to merge both lines.
9
The Snapfōn® Home Screen
Field Definitions
1.
2.
3.
4.
Signal Status Indicator
Battery Charge Indicator
Icons
Cellular Service Type
5.
6.
7.
8.
10
Time
Date
Option Left
Option Right
Icons
SOS Button Enabled
Ring Only
Vibrate & Ring
Vibrate Only
Alarm Set
Missed Call
You have Voicemail(s)
Bluetooth
You have SMS Text Message(s)
Hands-Free Headset
Keypad Lock Engaged
Silent Mode Engaged
11
External Features
High-Intensity LED Flashlight
Switch up: ON
Switch down: OFF
Keypad Lock
Slide this switch to the down position to lock the keypad and
prevent unintentional dialing. Slide it back up to unlock and use as
normal. Calls can still be answered when the keypad is locked.
Camera Launch Button
Long press this button to launch the camera. Once the camera is
open, press this button to take a picture. See page 22 for a full list
of functions and features.
+/- Button
This button adjusts the phone’s volume and also moves through
various menus. See Key Functions on page 15 for a full
description.
Lanyard Connection
Use with our optional lanyard.
12
Headphone Port
Plug in a qualified Snapfōn® or Nokia 3.5mm headset to use your
Snapfōn® ezTWO hands-free headset.
Power Port
The Snapfōn® ezTWO uses a mini-USB connection to charge the
phone with your wall charger, car charger, or your computer’s
USB port.
Keypad
The keypad will be used for dialing phone numbers, entering text
for contacts and SMS text messages, controlling many of the
phone’s features, progressing through menus, making calls and
terminating them.
13
Diagram of External Features
Lanyard Connection & Flashlight
Camera
Launch
Flashlight
On/Off
Volume
Up/Down
Keypad Lock
On/Off
USB Port & Headset Port
14
Camera & SOS Button
Key Functions
Button
Function(s)
Option Left / Right
Selects command displayed in the bottom left and bottom right corners
of the screen.
Send / Answer
(Green)
Incoming Call: Press once to answer call.
Outbound Call: Press once after entering a 7 or 10-digit phone number
to place a call.
Standby Mode (Home Screen): Press once to see All Calls.
End / Power
(Red)
+/- Button
Navigation Button
1
Phone Off: Press for 3-5 seconds to turn phone on.
Phone On: Press and hold for 3-5 seconds to turn phone off.
Operating: Press once to End Call.
From Any Menu Screen: Press once to return to Home Screen.
Operating: Press to adjust speaker volume.
Standby Mode (Home Screen): Adjusts ringer volume.
Any Menu or List: Move Up/Down.
Short Press: Dial “1.”
Long Press: Call Voice Mail.
2-9
Short Press: Dial numbers 2-9.
Long Press: Dial speed-dial contact (if assigned).
0
Standby: Dial “0.”
Operating: Press and hold to engage Speaker.
Text Entry: Inserts a space between characters.
Camera: Press to take a picture.
#
*
Standby: Press to dial “#.”
Text Entry: Press to change Case, Language, & Numbers.
Standby: Press once to dial “*,” twice to dial “+,” or three times to
dial “P” for international numbers.
Text Entry: Press to bring up punctuation options.
15
The Menu
Phonebook
The Phonebook allows you to store up to 250 contacts to your
SIM card. Contacts may be added manually with the “Add new
contact” feature.
To make a call from the Phonebook, simply move the white
highlight bar over the contact’s name and press the green
Send button.
To see the full list of options for a contact, move the white
highlight bar over their name and press the Option Left button.
Scroll through the list of options using the Navigation button and
press the Option Left button on any option you choose. To return
to the Phonebook, press the Option Right button. To return to the
Home Screen, press the red Power button.
Options
1. Call – Allows you to call the contact.
2. View – Allows you to see the name and phone number
of the contact.
3. Edit – Allows you to edit the name and/or phone number of the
contact.
4. Send text – Allows you to write and send a text message.
16
5. Send PIC – Allows you to send a picture in a text message
(requires MMS data plan).
6. Delete – Deletes the contact permanently.
Messaging
The Messaging menu allows you to read and write both SMS text
messages and MMS Multimedia Messages (MMS is only
supported if your cellular service includes a data/MMS
messaging-capable plan).
Write Message
To write a message, use numbers 2-9 on the keypad to enter
letters, and 0 to enter a space. The # button will change text
between upper and lower case English, Spanish, and Numbers.
The Right Option button functions as a backspace (short press)
or a clear (long press).
The * button brings up special characters and punctuation marks,
which can be scrolled through with the +/- button on the left side
of the phone and the Navigation Button (up/down arrows). Select
a character with the Left Option button.
You may Send your message or Save it to Drafts with the Left
Option button while in the text entry screen.
17
Inbox
The Inbox contains all the messages that have been sent to you.
Draft
The Draft folder contains all the text messages you have written
but have not sent.
Outbox
The Outbox stores any messages you have attempted to send, but
which did not actually successfully transmit. The typical reason a
message would not successfully transmit is if you attempted to
send it in an area with insufficient or no cellular signal. To re-send
a message in your outbox, highlight the message and select
“Resend” from the options menu.
Sent
The Sent folder contains all of the messages you have sent to
other people.
Delete Messages
Delete Messages allows you to delete the contents of the Inbox,
Drafts, Sent, or Outbox folders independently or All Messages.
The All Messages option will completely delete the contents of all
of the message boxes. There is no way to undo this option.
18
Call History
The Call History menu stores a record of all Missed, Dialed, and
Received calls. Viewing any call list, you will have the option to
return the call, see greater detail about the call, send the caller a
SMS text message, add the caller to your Phonebook, or delete
the call from the call record.
Missed Calls
The Missed Call listing displays any calls that were not answered,
with the newest call at the top. As each line is highlighted with the
white bar, the time the call was missed will be displayed in a light
blue bubble. To call the number back, either hit the green Send
button, or view all of your options by pressing the Left Option
button.
Dialed Calls
Dialed Calls will display any calls you have made, with the most
recent at the top. Like the Missed Call list, you may redial one of
these numbers by highlighting it and pressing the Send button, or
you may see all of your options by pressing the Left Option button.
19
Received Calls
Received Calls will display any calls made to your phone number,
with the most recent at the top. Like the Missed and Dialed Call
lists, you may redial one of these numbers by highlighting it and
pressing the Send button, or you may see all of your options by
pressing the Left Option button.
Delete Call Logs
Delete Call Logs allows you to delete Dialed, Missed, Received, or
All calls. Simply highlight which you want and press the Left
Option button.
20
Photos
The Photo Album
The Photo Album displays thumbnails of every picture taken. To
select a photo to view, use the up/down arrow button to move
the red highlight box to the picture you wish to view. Once highlighted, press the Left Option button for the option to View,
Rename, or Delete the picture, or Delete all to delete all photos
stored in your camera (note – this can NOT be undone).
The Camera
The Snapfōn® ezTWO includes a .3 megapixel camera with a
number of useful features. The following is a list of buttons and
their associated functions.
21
Camera Key Functions
Button
Function(s)
Navigation Button
Controls up to 2X zoom.
Camera Button,
Send (Green),
or 0 Button
End / Power (Red)
+/- Button
Takes a picture.
Exits the camera.
Control the exposure/brightness of an image before taking a picture.
1
Select the desired Image Size before taking a picture
(160x120, 320x240, or 640x480).
2
Select the desired Image Quality before taking a picture
(Low, Normal, or Good).
3
Select the desired Effect Setting before taking a picture
(Normal, Grayscale, Sepia, Sepia Green, Sepia Blue, or Color Invert).
4
Select the desired White Balance before taking a picture (Auto,
Daylight, Tungsten, Fluorescent, Cloudy, or Incandescent).
6
Set the Delay Timer (No Delay, 5, 10, or 15 seconds). Press the
shutter to initiate the timer.
7
Select whether to take continuous shots when you take a picture (Off,
1, 3, or 5 shots).
8
Press to turn off on-screen camera function icons.
22
Settings
Tone Settings
The Tone Settings menu allows you to set the ring tone, alert type,
and volume for incoming calls, voicemails, and incoming SMS text
messages. It also allows you to turn the speaking keypad feature
On/Off, and adjust its volume.
Phone Settings
The Phone Settings menu allows you to set the time & date,
language, and SIM card information.
Time and Date
To set the time & date, enter the 4 digit time using the number
buttons. Move to the AM/PM field using the down arrow on the
navigation button and set it with the +/- button. Use the down
arrow button to navigate to the date field and enter the 2 digit
month, 2 digit day, and 4 digit year using the numeric keypad.
When done, press the left option button and the changes will be
saved.
23
Language
The Snapfōn® ezTWO supports both English and Spanish.
To change to Spanish rather than the default English, highlight and
enter the language option, then highlight the language you prefer to
use and press the left option button to save your selection.
SIM Card
The SIM card menu allows you to see memory status, copy contacts
and delete all contacts.
Speed Dial
Speed dial is a convenient way to call contacts from your phonebook
by pressing a single button. The speed dial menu will allow to totally
turn off speed dial (and turn it back on if you have turned it off), or
to select up to 8 of your contacts to assign to the speed dial contact
list.
24
Bluetooth
The Snapfōn® ezTWO includes Bluetooth technology to allow you
to connect to other Bluetooth devices, such as your car or a
hands-free headset. The Bluetooth menu is designed to be as
easy to navigate as possible.
• On/Off – Bluetooth may be turned on or off.
• Discoverable – This option may be turned off or on to allow your
phone to be easily detected by other Bluetooth devices, such as
your car or computer. In some states, use of a hands-free device is
required while operating a vehicle.
• Paired Devices – This will list any devices your phone is currently
paired to.
• Search for Devices – This will allow you to search for Bluetooth
devices with which to pair.
• Phone Name – Displays your phone’s name and allows you to edit
it. The factory programmed name is “Snapfon ezTWO.”
• Advanced – The advanced menu allows you to set:
Audio Path – Allows you to either forward audio to a
Bluetooth device or leave the audio in your phone.
My Address – Displays the phone’s address should you need
it to manually pair the phone to another device.
25
SMS & VM Number
This menu option is to be used only in the event that your VM or
SMS number must be changed due to a network or other error. In
this case, please contact Snapfōn® or your service provider for
assistance.
Low Battery
The Low Battery alert is designed to notify up to 4 of your contacts
that your phone’s battery is low. The alert may be turned off if you
don’t want to use it, and you may customize the message sent by
the phone.
Restore Factory Settings
Restore Factory Settings allows the user a fresh start. You will
need your phone’s password to do this. Be prepared, restoring
your phone’s factory settings will take the phone back to its
original state and eliminate all of your customized settings, but
you will retain any information saved to your SIM card, such as
contacts and pictures.
26
SOS Settings
The SOS Button is the feature that sets Snapfōn® apart from every
other senior phone on the market. This button is capable of
emitting a loud siren, sending text messages to as many as 4
contacts in your phonebook, and dialing the same contacts until it
reaches either an answer or a voicemail box – all at the press of a
button. When someone does answer your emergency call, the
Snapfōn® immediately becomes a speakerphone. This section will
tell you how to get the most out of the SOS Button.
Note: If you purchased your phone with ezContacts, your SOS
Button may already have contacts loaded.
If you ordered a Premium Plan with oneCall Urgent Monitoring
Service, the SOS Button will be pre-programmed with oneCall’s
phone number in the 1st position. It is critical that you do not
modify or delete oneCall from your SOS Button’s 1st position.
27
Button Status
The button status option allows a user to completely turn their
SOS button off, or back on. The button’s current status will be
displayed in a light blue bubble when highlighted with the white
bar. Also, when the SOS Button is on, you will see the
icon at
the top left of the home screen.
Please be aware that if the SOS Button is turned off, it will NOT
work if pressed.
Siren
The Siren, when engaged, sounds when the SOS Button is pressed
and is intended to alert those around you that you need help. If
you prefer, you may disengage the siren by selecting the Siren
menu option and selecting off. Disengaging the siren will not
affect any of the SOS Button’s other features.
The siren’s current status will be displayed in a light blue bubble
when highlighted with the white bar.
28
Contacts
The Contacts feature allows you to select up to four (4) contacts
from your Phonebook to alert in the event of an emergency.
Important - If you have oneCall Mobile Monitoring, leave oneCall
in the first position and NEVER delete it from your Phonebook. You
may select any other three (3) contacts from your Phonebook for
positions 2, 3, and 4.
If you do not have oneCall Mobile Monitoring, we encourage you
to select 911 for position 1.
Text Message
The Text Message option allows you to customize the SMS text
message that will be sent to your Contacts when the SOS Button is
pressed. The default message pre-programmed into the phone is,
“Emergency, please help!”
29
Alarm
The Snapfōn® ezTWO includes an alarm which will allow you to
set up to 4 different alarm times with their own individual
characteristic tones.
To set an alarm, go to the Alarm menu, highlight any of the 4
alarm positions, and press the left option button to Edit.
Use the +/- button to turn the alarm from off to on.
Press the down arrow on the navigation button and set the time
using the numeric keypad (use hh:mm format).
Press the down arrow again to move to the AM/PM field and use
the +/- button to select either AM or PM.
Press the down arrow again to move to the Repeat selection.
This allows you to select (using the +/- button) whether the alarm
will go off one time (Once), or if you would like it to go off at the
same time every day (Everyday), or if you would like it to go off on
only certain days (Custom).
If you selected Custom, pressing the down arrow again will take
you to the day selector where you can program what days the
alarm should go off. Use the +/- button to progress through the
days and the Left Option button to turn the day On or Off.
Press the down arrow button 2 times and then press the Left
Option button to select the alarm tone you would like to use.
30
Press the down arrow button again to select the Snooze time for
the alarm with the +/- button (select from a range of 1-10 minutes).
Press the down arrow button again to select the alert type for your
alarm. The +/- button will select from either Vib(rate) only,
Vib(rate) and ring, or Ring only.
When you have finished, press the Right Option button to select
Done and save your alarm.
Silent Mode
We know you bought this phone because of all the noise it can
make, but sometimes you will want it to be quiet and we want it
to be easy to make it do that.
To engage or disengage Silent Mode from the Home Screen:
• Press the Option left button to enter the Menu.
• Press the Navigation Button up one time to the Silent Mode icon
and press OK.
• Navigate either to On or Off and press Select.
31
Installing the BATTERY & SIM CARD
The Snapfōn® ezTWO is a GSM phone, and requires a SIM card to
operate. The SIM card is a small removable chip that stores your
contacts and links the handset to your cellular service.
• If you ordered your Snapfōn® with service, the SIM card has
already been installed.
• If you intend to use another carrier’s service, you will need to
install their SIM card.
To Install the SIM Card:
1. Remove the back cover of your Snapfōn®.
2. Install the SIM card as shown. See Figure 1.
3. Install the Battery as shown. See Figure 2.
4. Replace the back cover.
Once you have completed these steps, hold down the
red End Call/Power Button on the keypad for 3-5 seconds to turn
the phone on. Within a few seconds, the phone will recognize the
SIM card. You will be able to confirm you have successfully
installed an active SIM card if the Signal Status Indicator shows
any number of bars, and the name of your service will be
displayed above the Time & Date (see page 10, box 4).
32
Figure 1. SIM Card Installation Diagram
A. Slide SIM Card
(gold contact side facing
down) under top edge of
SIM TAB as shown.
SIM TAB
B. Slide SIM Card
(gold contact side facing
down) under SIM TAB
toward bottom of phone
until seated.
33
Figure 2. Battery Installation Diagram
A. Insert battery - logo
side up with gold contacts
facing down into the
compartment at an angle
as shown.
B. Press top of battery
down until flat into the
compartment as shown.
34
Manufacturer’s Warranty for Snapfōn®
ezTWO Handset, Battery and Accessories
The Snapfōn® ezTWO handset is warranted against defect, malfunction, and
product failure for one year from the date of purchase.
Snapfōn® ezTWO accessories are warranted against defect, malfunction, and
product failure for 90 days from the date of purchase.
The Snapfōn® ezTWO battery is warranted against defect, malfunction, and
product failure for 30 days from the date of purchase.
The warranty covers problems or defects that are a result of normal usage. At
our option, we will either: repair it, replace it with a new/refurbished unit, or
issue a refund. Refunds may be prorated based on use and condition of the
returned merchandise.
If a problem develops during the warranty period, please contact us via email or
telephone (800) 937-1532 for instructions regarding warranty service. All
warranty service must be approved prior to shipment, and a RMA (Returned
Merchandise Authorization) number should be present on the package or the
shipment may be refused. The Snapfōn® ezTWO handset should be returned
with all the accessories, with clear return shipping instructions that include your
address, phone number, and a detailed description of the reason for the return.
This warranty does not apply to damage as a result of shipping, misuse, abuse,
neglect, accident, exposure to any type of moisture, or damage from voltage
fluctuations as a result of thunderstorms or other events causing power surges.
This warranty is void if batteries other than Snapfōn® authorized or recommended batteries listed in your ezTWO Owner’s Manual have been used.
35
If a problem develops due to a third party battery, or charging adapter please
contact the manufacturer of that accessory.
EXCEPT AS PROVIDED HEREIN THERE ARE NO OTHER WARRANTIES, WHETHER
EXPRESS OR IMPLIED, WRITTEN OR ORAL, INCLUDING ANY WARRANTY OF
MERCHANTABILITY OR FITNESS FOR A PARTICULAR PURPOSE. FURTHER, THERE
SHALL BE NO LIABLITY TO PURCHASER FOR SPECIAL, INDIRECT, OR
CONSEQUENTIAL DAMAGES OF ANY NATURE WHATSOEVER, INCLUDING BUT NOT
LIMITED TO LOST PROFITS, RESULTING FROM ANY BREACH OF WARRANTY.
Intended Use
This mobile telephone is durable and intended for mobile use. It is to be
protected from moisture and impacts. Do not expose to prolonged
direct sunlight. Improper use may lead to damage of product and could
be associated with hazards such as electrical shock or fire. The entire
product may not be altered or rebuilt, nor may the housing be opened.
The power adapter is designed for use in household wall outlets with
public electricity grids of 100-240 VAC – 50/60 Hz.
Disposal
Packaging and packaging aids are recyclable and should be entered into
the recycling process. Batteries should be disposed of at local collection
centers only. Do not dispose of batteries in your household trash.
When the handset is eventually taken out of service, please dispose of it
at a local collection center. Do not dispose of it in your household trash.
36
FCC RF Exposure Information & Statement
This device complies with part 15 of the FCC rules. Operation is subject to the
following two conditions: (1) this device may not cause harmful interference, and
(2) this device must accept any interference received, including interference that
may cause undesired operation.
This device has been tested and found to comply with the limits for a Class B
digital device, pursuant to part 15 of the FCC Rules. These limits are designed to
provide reasonable protection against harmful interference in a residential
installation. This equipment generates, uses, and can radiate radio frequency
energy and, if not installed and used in accordance with the instructions, may
cause harmful interference to radio communications. However, there is no
guarantee that interference will not occur in a particular installation. If this
equipment does cause harmful interference to radio or television reception,
which can be determined by turning the equipment off and on, the user is
encouraged to try to correct the interference by one or more of the following
measures:
• Reorient or relocate the receiving antenna.
• Increase the separation between the equipment and receiver.
• Connect the equipment to an outlet or a circuit different from that to which
the receiver is connected.
• Consult the dealer or an experienced radio/TV technician for help.
The SAR limit allowed by the FCC (USA) is 1.6 W/kg (watts per kilogram) averaged
over one gram of tissue. The Snapfōn® ezTWO (FCC ID: ZXL-EZTWOB) has been
tested against this SAR limit. The highest SAR value reported under this standard
during product certification for use at the ear is 0.749 W/kg and when properly
worn on the body is 1.071 W/kg. This device was tested for typical body-worn
operations with the back of the handset kept 1.5 cm from the body.
37
To maintain compliance with FCC RF exposure requirements, use accessories
that maintain a 1.5cm separation distance between the user's body and the
back of the handset. The use of belt clips, holsters and similar accessories
should not contain metallic components in its assembly. The use of accessories
that do not satisfy these requirements may not comply with FCC RF exposure
requirements, and should be avoided.
NOTE: The manufacturer is not responsible for any radio or TV interference
caused by this equipment. SeniorTech, LLC (dba Snapfōn®) has not approved
any modifications/changes to the device made by the user. Such modifications
or changes could void the user’s authority to operate the equipment.
Please send all correspondence and RMA’s to:
SeniorTech LLC
100 Cherokee Blvd Ste 216
Chattanooga, TN 37405
(800) 937-1532
website: www.snapfon.com
email: [email protected]
38