1
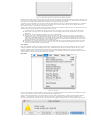
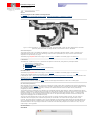
Figure 2. Initial empty window, here reduced for illustration purposes.
Once the plugin is fired, an empty window covering the whole screen should appear. This window contains two sections: the upper, and
the lower one. The upper section is the gridded area where the user can interactively arrange tiles; the lower section contains tiles that
have not yet been arranged. This window cannot be resized, but scroll bars appear when needed.
The mosaic is built in two stages. First, the user interactively loads, discards, arranges, and otherwise manipulates tiles, or thumbnails
thereof. This stage is visual, mouse- and menu- driven, and its goal is to provide a rough version of the final mosaic. Second, the
plugin works on its own to automatically refine this rough version.
The menu bar is holding five menus that are directly related to MosaicJ: File, Edit, Object, Scale, and Help. The operations that are not
available through menus include the direct manipulation of tiles, such as:
Activating a tile. This is performed by clicking a tile that lies in the lower area of the screen. The tile will be placed in the
center of the upper area, where it can be operated upon. It will be selected, and previously selected tiles, if any, will be
deselected.
Moving a tile. This is performed by dragging a tile or a set of selected tiles.
Selecting a tile. This is achieved by clicking a tile that lies in the upper area of the screen. If the click is performed on a
superposition of tiles, only the topmost tile is selected; conversely, the last selected tile automatically becomes topmost. In
case a tile is inaccessible because it would be covered entirely by other tiles, it is possible to temporarily hide the top tiles
until the desired tile becomes accessible. It is also possible to rearrange the tiles so that the topmost tile is sent to the back.
Selecting several tiles. This is achieved by shift- clicking the tiles.
Identifying a tile. A tool tip identifies the name of the file associated with the tile and indicates its slice number in the stack.
This tool tip is displayed when the user hovers the cursor over a tile in the lower section of MosaicJ's window. It does not
obtrude once tiles are moved to the gridded area.
Color Images
When color images are provided, the registration proceeds on a grayscale version that is built as a weighted sum of the red, green,
and blue components—even when the stack is pseudo- color. The weights can be made to correspond to the BT.709 norm, but by
default they depend on the whole stack and are determined by a principal- component analysis in such a way as to provide the
maximum possible contrast. The colors are restored upon completion of the interaction and automatic registration stages, so that the
created mosaic is in full color when at least one input tile is colored.
[File] Menu
Figure 3. File menu.
The menu [Open Image...] will allow access to one file at a time; it is always available so that more tiles can be added to the mosaic
at will. If the file contains a stack, all slices will be considered as independent tiles.
The menu [Open Image Sequence...] will allow access to every file inside a folder/directory, except to the files that start with the
character '.' (a leading dot). To access the folder, select any file within, but please note that the exploration of folders is not
hierarchical. Types and sizes of images can be mixed freely. An error message is displayed when an unrecognized file type is found.