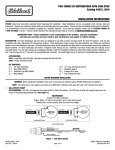
1
Intercept
User’s Manual
0302118003
Rev.00
Version 3.34
July 15, 1998
COASTAL ENVIRONMENTAL SYSTEMS
820 First Avenue South • Seattle, WA 98134
(206)682-6048 Fax: (206)682-5658
INTERCEPT
1.
INTRODUCTION
1.1
1.2
1.3
1.4
2.
1
WHAT IS INTERCEPT?
ON-LINE HELP
ON-LINE HELP
HOW TO USE THIS MANUAL
1
2
2
3
ROUTINE OPERATION OF INTERCEPT
2.1
2.1.1
2.1.2
2.2
2.3
2.3.1
2.3.2
2.3.3
2.3.4
2.3.5
2.3.6
2.3.7
2.4
2.4.1
2.4.2
2.4.3
2.4.4
2.5
2.5.1
2.5.2
2.6
2.6.1
2.6.2
2.6.3
2.6.4
2.6.5
2.7
2.8
3.
USER MANUAL
INSTALLING INTERCEPT
WINDOWS 3.X, WINDOWS NT 3.51
WINDOWS 95, WINDOWS NT 4.0
STARTING UP INTERCEPT
INTERCEPT DISPLAY OPTIONS
THE INSTRUMENT PANEL DISPLAY
CHANGING THE DISPLAY
THE SUMMARY DISPLAY
THE ARCHIVE DISPLAY
THE RECENT DATA DISPLAY
THE RECENT ACTIVITY DISPLAY
THE TERMINAL WINDOW
CHARTS
OVERVIEW
PRINTING CHARTS
HIDING AND DELETING CHARTS
SETTING UP AND EDITING CHARTS
ALARMS AND BUILT-IN-TESTS
NUMERICAL ALARMS
BUILT-IN-TESTS
STORING DATA AND TRANSFERRING DATA TO OTHER APPLICATIONS
THE ACTIVITY LOG FILE
ARCHIVE FILES
TRANSFER FILES
DYNAMIC DATA EXCHANGE
PRINTING DATA
SAVING AND LOADING CONFIGURATIONS
PASSWORD PROTECTION AND SUPERVISOR MODE
INTERCEPT COMMUNICATIONS MANAGEMENT
3.1
3.1.1
3.1.2
3.1.3
3.1.4
3.2
3.2.1
SERIAL COMMUNICATIONS
DATA FORMAT FOR UNSOLICITED MESSAGES
POLL-RESPONSE PROTOCOL
POLLING SEQUENCE
TELEMETRY OPTIONS
TROUBLESHOOTING SERIAL COMMUNICATIONS
CCSAIL OR AT COMMAND
Coastal Environmental Systems (206) 682-6048
4
4
4
4
4
5
5
6
8
8
10
10
11
13
13
13
14
14
16
16
16
17
18
18
19
19
20
20
21
23
23
24
24
26
27
28
31
Page i
INTERCEPT
4.
CONFIGURING INTERCEPT
4.1
4.2
4.3
4.4
4.4.1
4.4.2
4.5
4.5.1
4.5.2
4.5.3
4.5.4
4.6
FILES READ BY INTERCEPT
SETTING UP INTERCEPT
ACTIVITY LOG FILES
SERIAL COMMUNICATIONS
DIAL-UP MODEMS
DDE SOURCE LINK INPUT
SETTING UP A NEW STATION
INTERFACE
ARCHIVE FILES
TRANSFER FILES
ALARMS
COMPLETING THE SETUP
USER MANUAL
33
33
34
34
36
38
38
39
40
42
43
43
44
A. PRINTING AND CHARTING DATA USING EXCEL
45
B. ZENO CONFIGURATIONS
47
C. CCSAIL
48
Coastal Environmental Systems (206) 682-6048
Page ii
INTERCEPT
USER MANUAL
1. INTRODUCTION
1.1 WHAT IS INTERCEPT?
Coastal Environmental Systems’ Intercept™ software lets you manage the data collected and
transmitted by one or many stations – such as Coastal’s ZENO®-3200 and WEATHERPAK®
systems. Intercept can be used for routine monitoring and long-term analysis of weather
conditions.
Intercept™ will:
•
•
•
•
•
gather and display the latest data collected by your data acquisition systems;
monitor the data quality;
let you transfer data to other Windows™ applications for further display and analysis;
check the data for alarm set-points in real time, and issue alarm messages accordingly;
archive the data to disk.
Intercept™ runs under Microsoft Windows® 3.11, Windows 95, and Windows NT 3.51 or 4.0.
We do not recommend that you run Intercept versions later than 2.4 under Windows 3.1.
The figure on the following page illustrates the overall data flow. In outline, the following things
happen.
•
Intercept receives measurement data from one or more stations. A station may be a
Weatherpak, or it may be a ZENO®-3200 data logger connected to one or more sensors.
•
If archiving has been switched on, Intercept appends the latest data to the archive file. A
separate archive file is written for each station on each day.
•
If a significant event has occurred – such as a sensor reading going into alarm, or a failed
poll – then Intercept writes a message to the screen, and to an activity log file. A new activity
log file is written each day. When alarms occur, Intercept also generates an audible alarm,
and flags each out-of-range reading on the screen.
•
Intercept can also write transfer files. These are typically used to transfer raw data from the
sensors through to other applications (e.g., database loaders). Alternatively, DDE links1 are
available to transfer data to other applications.
1
A Dynamic Data Exchange (DDE) link is a dynamic link between a part of Intercept and a document created in
another Windows application. To set up a DDE link, go to the Setup drop down menu and click on DDE Source
Link. A new result will appear in the document whenever Intercept updates the field.
Coastal Environmental Systems (206) 682-6048
Page 1
INTERCEPT
USER MANUAL
Station
Displays, audible
and visible
alarms
Intercept
DDE
Link
Archive
files
Activity
log files
Other
applications
Transfer
files
1.2 ON-LINE HELP
Because it is a Windows product – with full context-sensitive help facilities – Intercept is easy to
learn and operate. DDE links and other data exchange mechanisms let you update databases and
graphical analysis packages in real time. Intercept’s outputs are in a format compatible with most
Windows applications, which means that you can carry out further graphical and statistical
analysis of the data however you wish. Using Intercept does not lock you into our analysis
methods.
1.3 ON-LINE HELP
Detailed context-sensitive, on-line help is available. To access the Help facility, you can:
•
•
•
use the commands on the Help menu, including a keyword search;
click on the Help button when one is available (as it will be in most dialog boxes);
press the F1 key at any time.
Coastal Environmental Systems (206) 682-6048
Page 2
INTERCEPT
USER MANUAL
1.4 HOW TO USE THIS MANUAL
We assume in this manual that you are familiar with Windows-based software. If you are not,
please refer to the documentation delivered with your PC.
Most often, Intercept is delivered fully configured by Coastal. In this case, you do not need to
understand full details of how to configure the software from scratch. Section 1 takes you
through Intercept’s basic operation, concentrating on the different displays.
Sections 3 and 4 describe full configuration of Intercept, including setting up multiple stations on
one or more serial ports. Section 3 describes how Intercept manages its serial communications,
and gives basic serial communication troubleshooting. Section 4 goes through each configuration
option in turn. Many of the configuration options are password-protected to prevent accidental or
unauthorized changes. If you are only intending to run a copy of Intercept which has been preconfigured by Coastal for your application, you probably do not need to refer to these later
sections. You need only use them if you are intending to configure Intercept yourself, for
possible troubleshooting, or if you wish to have a deeper understanding of its operation.
You may also wish to change the messages received from your stations: for example, if you add
another sensor. To do this, you will have to reconfigure both the station and the Intercept
software. This manual does not describe this configuration. See the ZENO User’s Manual for
information on reconfiguring your stations, and the Intercept Format Editor (a separate
application) for information on configuring Intercept to receive new types of messages.
Coastal Environmental Systems (206) 682-6048
Page 3
INTERCEPT
USER MANUAL
2. ROUTINE OPERATION OF INTERCEPT
2.1 INSTALLING INTERCEPT
2.1.1 Windows 3.x, Windows NT 3.51
Start by closing all running applications (including any mail applications, Office toolbars, etc.)
Insert the Intercept Installation Disk labeled “1 of 2” into drive A (or drive B).
In Program Manager, open the File menu and select Run. The Run dialog box will open. Type
a:\setup.exe (or b:\setup.exe if necessary) in the Command Line text box, and press ENTER.
Follow the instructions on the screen to complete the installation. Remember to remove the disk
after the installation is complete.
2.1.2 Windows 95, Windows NT 4.0
Start by closing all running applications (including any mail applications, Office toolbars, etc.)
Insert the Intercept Installation Disk labeled “1 of 2” into drive A (or drive B).
Open the Windows Start menu and select Run. The Run dialog box will open. Type a:\setup.exe
(or b:\setup.exe) in the Open text box, and click on OK. Follow the instructions on the screen to
complete the installation. Remember to remove the disk after the installation is complete.
2.2 STARTING UP INTERCEPT
Start by setting up your station with power and with its communications running –
including connecting its cable to the port at the back of your PC, if appropriate.
To start Intercept, double-click on the Intercept icon in the new Intercept program
group. Alternatively, use the Start menu, and select Intercept under Programs.
If Intercept has been delivered fully configured, it will immediately open either an Instrument
Panel or a Summary display. These displays show data fields for one or all of your stations,
respectively. Initially, of course, these data fields will be blank. As your station transmits data,
the Instrument Panel will update the corresponding data fields in real time. You will see a
message on the status bar (just below the menus) that the startup connection to your COM port
has been successful. The message will be something like the following:
6/2/97 4:25:03 PM: INFO: DI: Startup: Connection successful on COM 2
Coastal Environmental Systems (206) 682-6048
Page 4
INTERCEPT
USER MANUAL
To exit Intercept, select the Exit command on the File menu. You will be prompted to enter a
password to exit.
The default password is WEATHERPAK
2.3 INTERCEPT DISPLAY OPTIONS
One of the main purposes of Intercept is to provide you with different views on the data received
from the stations. The main displays provided by Intercept are the Instrument Panel display and
the Summary Display. The Instrument Panel shows the most recent data from one station. (The
Instrument Panel also gives you access to the Station Menu, which allows you to configure a
particular station. See Section 4.5 for a discussion of the Station Menu). The Summary Display
gives the most recent data for all stations, in a spreadsheet form.
You can also view data from other perspectives. You can access a limited historic view, in a
tabular format, of data from all the stations with the Recent Data display. The Recent Activity
display shows the most recent activity – for example, polling activity, or alarms going on and
off. An additional utility decodes built-in-test, or BIT, information received from the station.
This BIT is the first line of defense in monitoring the quality of data from the station.
2.3.1 The Instrument Panel Display
The Instrument Panel display shows the latest data for a single station. You can carry out most of
the routine monitoring functions for a single station using the Instrument Panel display alone. In
addition, if you wish to change any of the configuration relating to a single station – for example,
the polling rate – you must first go to the Instrument Panel display. To move to another station,
use the Window. . .Select Instrument Panel menu option.
Status messages, describing the current state of the system performance, are displayed at the top
of the Instrument Panel display. For example, if a serial communication port is opened or closed
a status message to that effect will appear. The most significant of these status messages –
particularly warnings and alarm messages – are also saved in the Activity Log file, if this is
configured. See Section 2.6.1 for details.
Coastal Environmental Systems (206) 682-6048
Page 5
INTERCEPT
USER MANUAL
The different parts of the Instrument Panel display are shown in the illustration below.
Status Bar
Click on the check-mark at the
left to acknowledge status
messages
Alarm highlight
Appears when an
alarm goes off
Three-digit ID
number uniquely
identifies your
instrument
Data field
Updated in real
time
Reset Alarm button
Click here to reset an
audible alarm
Units button
Click here to change the
display units (this has no
effect on saved values)
When an alarm condition occurs, a beep sounds every 10 seconds. Click on the Reset Alarm
button to quiet the alarm. After you have clicked on the Reset Alarm button, the audible alarm
will not occur again until first after all data fields have gone out of an alarm state, and then a data
field goes into alarm again. (It is not unusual for multiple fields to go into an alarm state more or
less simultaneously; this stops the audible alarm going off when the instantaneous rain rate goes
high, and again when the average rain rate goes high, and again when the rate of change of water
level goes high....) An icon is displayed beside the data field which caused the alarm.
2.3.2 Changing the Display
You can change a number of the display details. The simplest possible change is the units – by
clicking on the units button to the right of each data field, you can cycle the displayed value
through all available units. For example, you can show temperatures in °F, °C or K. Doing this
only affects the display – data will still be archived in the units in which they are received by
Intercept.
Coastal Environmental Systems (206) 682-6048
Page 6
INTERCEPT
USER MANUAL
To change other aspects of the display, select the Setup. . . Display Fields option. You will be
presented with the following dialog box.
For example, if your station has a large number of sensors, or several null fields, you may not
wish to display all the sensor outputs. To do this, use the Display Fields command in the Setup
menu. From this dialog box, you can do the following:
•
Choose whether or not to display each data item. For example, you may wish to hide the Unit
ID number, which never changes.
•
Change the text describing each field. For example, you can change Avge Wind Speed to
Mean Wind Speed.
•
Change the units in which each field is displayed – as can be done by clicking on the Units
button.
When you change any of these display items, both the Instrument Panel (for all stations) and the
Summary Display are affected. However, all data values – including those no longer displayed –
are still archived in the units in which they were received by Intercept.
To change the name displayed on screen for each station, use the Setup. . . Station Name menu
option. You can select each station in turn, and enter a new name for that station. Doing this will
affect the names appearing on screen, and logged in the Intercept archive files.
Coastal Environmental Systems (206) 682-6048
Page 7
INTERCEPT
USER MANUAL
2.3.3 The Summary Display
The Summary Display is a spreadsheet version of the Instrument Panel display. It gives the latest
values for all stations being managed by Intercept. Like the Instrument Panel display, the
Summary Display window is always open whenever Intercept is running.
Functionally, the Summary Display is very similar to the Instrument Panel display, apart from
the fact that multiple stations are displayed. Sensor readings in alarm are indicated by an
exclamation mark next to the sensor reading, and the Alarm Reset button (not shown here) is
identical to that in the Instrument Panel display.
2.3.4 The Archive Display
The Archive Display shows you data saved to file, for a single station, for the current day or for
a previous day. Intercept can optionally be configured to save the data received from one or
more stations to archive files. If this configuration option has been chosen (see Section 4.5.2),
Intercept writes all the data received from a given station on a single day to a single archive file.
Each archive file name is of the form Aryymmdd.nnn, where yymmdd is the date corresponding
to the data written to that file, while nnn is the ID number of the corresponding station. Section
2.6.2 describes archive files in more detail.
Coastal Environmental Systems (206) 682-6048
Page 8
INTERCEPT
USER MANUAL
To view an archive file within Intercept, use the Utilities...Archive command. You will be
presented with a dialog box, prompting you to choose an archive file.
The archived data are displayed in a spreadsheet format. You can copy the data values, and paste
them into another Windows application.
Alternatively, you can open an archive file using Excel or similar Windows applications. This
procedure is described in Appendix A. You can easily chart or print the archive data from Excel.
We do not recommend that you keep an archive file for the current day open for long periods of
time, because Intercept cannot write to the file while it is open. Eventually, if you keep the file
open, you will start to lose data. You will receive a warning message on the status bar if this
happens.
Coastal Environmental Systems (206) 682-6048
Page 9
INTERCEPT
USER MANUAL
2.3.5 The Recent Data Display
The Recent Data display shows you the most recent data for a single station. The most recent
thirty messages are stored for each station. To access the Recent Data display, use the Utilities. .
. Recent Data command. Using the drop-down list, select the station to be examined. You will
see a spreadsheet-format display, which looks very similar to the Archive display above, from
which you can copy data values to other applications.
Although the Recent Data display looks very similar to the Archive display, there are a number
of differences.
•
You can only access the Archive display for a particular station if you have configured
Intercept to write an archive file for that station (see Section 4.5.2 to carry out this
configuration). You can always access the Recent Data display for any station, because the
recent data are maintained internally by Intercept.
•
The Recent Data display can only show data received by Intercept in the current session. If
you quit Intercept, and re-start it, you will initially see no data in the Recent Data display.
•
The Recent Data display is updated in real-time: the display is updated whenever new data
are received, with the newest data appearing at the top of the display. The archive files
cannot be updated while they are being displayed.
2.3.6 The Recent Activity Display
The Recent Activity Display shows you the last 100 status messages generated by Intercept.
Typical status messages might include:
•
•
•
•
•
Intercept is starting up;
A new alarm has been generated, or a previous alarm condition has receded;
A serial port has been closed;
A modem dialed by Intercept has failed to connect;
Intercept is polling a station, or has failed in such a poll.
Coastal Environmental Systems (206) 682-6048
Page 10
INTERCEPT
USER MANUAL
These status messages also appear on the Status Bar on the Instrument Panel display. In order to
access the Recent Activity display, select the Utilities. . . Recent Activity menu option.
There are four types of status message:
•
INFO messages contain general system information, such as the opening and closing of serial
ports.
•
UPDATE messages specify whenever polling attempts occur, and when intermediate polling
attempts fail.
•
WARNING messages are generated when something in the system fails, for example, when
the last polling attempt fails. Warning messages indicate that a system element has failed,
and should be investigated.
•
ALARM messages relate specifically to sensor values measured by the stations. For example,
an alarm on message might be generated when the battery drops below a certain level, or for
high wind speeds; alarm off messages are also generated, when the alarm condition no longer
holds at the station. See Section 2.4 for more details of the alarm functionality.
You can also log these messages to the Activity Log File. The Activity Log File contains all the
status messages except for the Updates (which are routine, and would fill up your hard drive
unnecessarily). See Section 2.6.1 for details of logging activity messages.
2.3.7 The Terminal Window
The Terminal Window is primarily used in troubleshooting communications. It shows the raw
data stream that passes between your PC and your remote stations. Select the Utilities. . .
Terminal Window option to access the Terminal Window. There is a different tab for each serial
port available on your PC (in many cases, only COM1 and COM2 will be visible).
Coastal Environmental Systems (206) 682-6048
Page 11
INTERCEPT
USER MANUAL
For example, on this terminal review you can see the following interactions:
•
Intercept has dialed out to 224-7140;
•
a connection at 9600 baud has been achieved;
•
Intercept has sent a polling command (the line beginning #0927) to the station with ID
number 927;
•
Intercept has received a response from the station, and two lines of data are shown (the two
lines beginning 927,97/07/28).
You can send a command directly to the station by typing the desired command into the text box
at the bottom of the screen and by clicking on the Send button. However, you cannot go into the
ZENO User Interface using the Terminal Window – you must switch to another application, such
as HyperTerminal.
You cannot access the ZENO User Interface
through the Terminal Window.
Use HyperTerminal or other serial communications program instead.
Section 3.2, which gives a number of troubleshooting tips, describes several specific commands
which can be used through the Terminal Display.
Coastal Environmental Systems (206) 682-6048
Page 12
INTERCEPT
USER MANUAL
2.4 CHARTS
2.4.1 Overview
Intercept can show one or multiple trend charts. Each trend chart can show historical data for one
or more sensor readings, for a single station. The following is a typical example of an Intercept
chart.
This chart is typical in that it shows multiple temperature readings. You can put up to 12
different trends on a single chart, as long as they are all of the same kind. For example, you
could show the Vector Average Wind Speed and the Maximum Wind Gust on a single chart,
because they are both speeds, and could both be displayed in mph; you cannot also show the
Wind Direction on the same chart, because that is a direction rather than a speed. You can
always set up another Wind Direction chart, however.
2.4.2 Printing Charts
You cannot print a chart directly from Intercept. If you want to print charted data, we
recommend that you use Excel or other, similar, application, which gives you more flexibility as
to the formatting, labeling, etc., of the charts. Appendix A describes in some detail how to chart
stored data using Excel.
Coastal Environmental Systems (206) 682-6048
Page 13
INTERCEPT
USER MANUAL
2.4.3 Hiding and Deleting Charts
When you create a new chart, it will only contain the latest data value – you will not
immediately see a trend. If you delete a chart, and immediately recreate it – or even if you
change the chart setup, perhaps adding or removing one or more lines – then you will lose the
historical trend line. (This is because it would require a massive amount of RAM for your PC to
store all historical values, at all times, in case it was needed for a new chart
When you close a chart window, you lose the historical trend line.
If you set up a new window, it will start with no historical data.
The trend line builds up as Intercept receives new data.
You can, however, hide a chart so that does not clutter up the Intercept window while it is not
used. If you click on the Minimize button, the chart will actually disappear.
To retrieve the chart again – including all the historical trend data – go to the Window. . . Chart
window. Choose the chart which you want to see – the charts will be listed by the site, and by the
type of quantity (e.g., temperatures) being charted.
When you minimize a chart window,
that window will be completely hidden.
Use Window. . . Chart Window to retrieve the chart
2.4.4 Setting Up and Editing Charts
To set up a chart, simply select the File. . . New Chart Window option. Select the station for
which you want to set up a chart. You will then be presented with the Chart Setup window.
Coastal Environmental Systems (206) 682-6048
Page 14
INTERCEPT
USER MANUAL
Alternatively, to edit an existing chart, first click on that chart so that the chart window is
highlighted. Then use the Setup. . . Chart Details option. You will be presented with the Chart
Setup window again.
If you are setting up a new chart, the Fields To Chart: list box will contain all the numeric data
fields available for that station. Click on any data field to select that field for charting. Once you
have selected one data field, all data fields of a different type will be removed from the list. In
the case shown above, once the Air Temperature had been selected, the wind speed, wind
direction, relative humidity, etc., were removed from the list – so that only temperatures
remained.
The Chart Setup window lets you choose:
•
which data fields are to be charted;
•
the minimum and maximum values of those data fields to be shown;
•
the units in which the values will be shown (these need not be the same as the numerical
display units);
•
the length of time, between 5 minutes and 1440 minutes (one day), for which data will be
shown.
For a new chart, you will not be able to click on the OK button – creating the chart – until all of
these data values have been filled in. The chart will be labeled with the name and number of the
site, and with the kind of data value (e.g., temperature) being shown.
Coastal Environmental Systems (206) 682-6048
Page 15
INTERCEPT
USER MANUAL
2.5 ALARMS AND BUILT-IN-TESTS
2.5.1 Numerical Alarms
Intercept can be set by the user to detect high and low alarm points. When a field value exceeds a
high alarm set-point, or drops below a low alarm set-point, the following actions occur:
•
A High or Low Alarm icon
the alarm condition.
•
An Alarm icon
condition.
•
An alarm message appears in the status display.
•
If no other alarm has already been triggered, an audible alarm will
sound every 10 seconds, and an Alarm Reset button will appear in the
top right-hand corner of the Instrument Panel and Summary displays. Click on this button to
quiet the audible alarm.
is placed on the Instrument Panel to the left of the field with
is placed on the Summary Display to the left of the field with the alarm
An example of a data alarm is one triggered on a high wind, e.g. above 25 m/s. The
corresponding alarm message, appearing in the status display, might be:
ALARM ON: STATION: HAZMAT Weatherpak #101: High Wind: 27.3 m/s
The message shows the alarm type, ID number, alarm condition and the field value. When the
wind speed is no longer in an alarm condition, the following status message appears.
ALARM OFF: STATION: HAZMAT Weatherpak #101: High Wind
2.5.2 Built-In-Tests
Most stations generate a Built-In-Test (“BIT”) field. This is a compressed message from the
station, which is generally used to alert the user to possible sensor problems or other potential
station failures. This is distinct from alarm messages, which typically alert you to dangerous, not
suspect, sensor readings. For example:
•
an alarm might be generated by Intercept because the wind speed exceeds 35 m.p.h.;
•
a BIT field might be generated by a station, and reported by Intercept, because the wind
direction has not changed in two hours – which is very unlikely to happen in practice.
A possible set of bit assignments – counting from the least significant bit, number 1 – is:
BIT1 = System Reset
BIT2 = Data Logging Message Initialized
BIT3 = Serial Sensor Communication Failure
Generally, a 0 in a particular bit position indicates a good status; a 1 should be taken as a
warning. In this case, therefore, a BIT value of 2 – written in binary as 0010 – would imply that
the real time clock is suspect. The bit assignments are defined in the di.ini file. See Section 4.1
for more details of this file.
A BIT value of 0 generally means that there are no potential problems with the operation of your
station. The BIT Translator is available to let you understand non-zero BIT values. The BIT
Coastal Environmental Systems (206) 682-6048
Page 16
INTERCEPT
USER MANUAL
Translator is available through the Utilities menu (select Utilities. . . BIT Translator). The BIT
Translator Window has the following appearance.
If you select the BIT Translator from the Instrument Panel, it immediately enters the current BIT
value for the displayed station. As shown in this illustration, the meaning of each non-zero BIT
field is given. In this case, a BIT value of 12 hex (18 decimal) is decomposed into 2 + 16, that is,
BIT field 2 and BIT field 5.
If you select the BIT Translator from the Summary Display, the BIT Value box will initially be
empty (Intercept cannot tell which station you are interested in). Type the BIT value into the BIT
Value box, and click on the Translate button. You can do this repeatedly, if you are interested in
multiple BIT values. (To see all possible BIT fields, enter FFFF and click on Translate).
2.6 STORING DATA AND TRANSFERRING DATA TO OTHER APPLICATIONS
One of the main features of Intercept is that it makes it easy to pass measured data on to other
Windows applications – it is an application with an open architecture. Intercept can write three
different kinds of data file:
•
the Activity Log File, which contains status information and warning messages;
•
Archive Files, which contain the data received from all specified stations in a tab-delimited
format, suitable for importing to most other Windows applications;
•
Transfer Files, which contain the data received from all specified stations in a raw format
(the same as the data transmission format, except that header and footer information is
removed).
In addition, you can transfer data automatically to other applications through a Dynamic Data
Exchange link.
Appendix A gives an explicit example of data transfer: it shows how to graph data gathered by
Intercept using Microsoft Excel.
Coastal Environmental Systems (206) 682-6048
Page 17
INTERCEPT
USER MANUAL
2.6.1 The Activity Log File
Activity log files record all activity other than the normal transmission and reception of data. For
example, if a modem fails to connect, an alarm is triggered, or the user requests that Intercept
exit, this information will be recorded – this is precisely the information which appears on the
status bar of the Instrument Panel display. Activity log files are simple text files, and can be
accessed using any text editor. To configure Intercept to generate an Activity Log File, use the
Setup. . .Activity Log command. (See Section 4.3 for detailed options.)
Each activity log file has a name of the form diyymmdd.log, corresponding to the date on which
the file is written. For example, a file written on December 23rd, 1996 will have the file name
di961223.log. You may find – if your system operates normally, without alarms, for some days –
that no activity log file is generated on some dates. All messages which appear in the Status Bar
and in the Recent Activity Review window are logged, with the exception of UPDATE messages.
This essentially means that successful polls are not logged, but all other activity is.
There is one line for each entry in the activity log. Each entry begins with the time of the entry,
followed by the entry message. Two typical lines might be:
1996/4/21 14:34:16
STATION ALARM ON: Location: Jetty #134: Mean Wind Speed: 25 m/s
1996/4/21 12:12:54
INFO: COM2 closed by User
You can view the 100 most recent activity messages – even if you have not enabled collection of
the activity log file – by choosing the Recent Activity command of the Utilities menu.
2.6.2 Archive Files
Each archive file contains all the data received by Intercept from a single station, for a single
day. Each archive file name is of the form Aryymmdd.nnn, where yymmdd is the date
corresponding to the data written to that file, while nnn is the ID number of the corresponding
station. (For a polled system – and for any system where the date and time are included in the
message – the date on which the data were measured, rather than the date on which Intercept
received the data, is used to decide in which archive file the data line fits.) The first few lines of
an archive file, including the header, might be as follows.
Inst#334,Juanita,HAZMAT PSD
Unit ID
Sample Date and Time
334
5/5/97 11:57:49 AM
334
5/5/97 11:58:22 AM
Unit ID
334
334
Wind Speed
6.4
6.9
Wind Dir.
129
126
Sigma-theta
3.5
3.2
The first line of the header shows the unit ID, the station name, and the station format. The next
line gives a header for each column of the data received. Finally, each message is given as a
separate line, in tab-delimited form, with the unit ID and the sample date and time shown at the
start of each sample. As a tab-delimited file, this is very easy to read using other Windows
applications such as Excel: see Section A for a detailed example.
You can configure Intercept to write only a subset of the data lines received, for example, to
write data only once every five minutes, however often data are actually received. This inhibits
Intercept from filling up your hard drive too fast. Similarly, you can specify that archive files of
more than a certain age (e.g., more than one week old) should be deleted. Use the Station. . .
Coastal Environmental Systems (206) 682-6048
Page 18
INTERCEPT
USER MANUAL
Archive command to specify whether an archive file is to be written for a given station, and to
configure these options. See Section 4.5.2 for details.
2.6.3 Transfer Files
Transfer files are temporary files used to transfer data, in real time, from Intercept to another
application. For example, they might be used to transfer data over a network link to an Access or
Oracle database. Intercept allows you to write a set of up to four transfer files for each station.
To configure Intercept to write a transfer set, use the Station. . . Transfer Set command. See
Section 4.5.3 for details of the configuration options.
The transfer files are “owned” by the other application, which must regularly open the files,
rename or read the file, close the file and then delete it. When the application wants more data it
need only check for the existence of the file to see whether more data were received and
processed by Intercept. If the application fails to do this, after the transfer files exceed a userdefined size, Intercept will issue a warning message (in the Status Bar, to the Recent Activity
Review, and to the Activity Log File if defined), and will delete all the data currently in the
transfer files before starting again. This means that the oldest data are always lost.
Up to 4 transfer files can be defined for each station. Each transfer file name is of the form
TRm.nnn, where m is the transfer file number running from 1 to 4, and nnn is the ID number of
the station. For example, file number 3 relating to station number 123 will have the file name
TR3.123. Four transfer files for station number 123 would have names TR1.123, TR2.123, TR3.123
and TR4.123 in the selected directory. Each file will contain identical information.
The format of the transfer files is identical to the data stream transmitted by the stations, with
any header and footer information stripped out and with each new line of data separated by a
carriage return. Normally, this means that the transfer files contain comma-delimited data, with
the first field of each data line being the station ID number and the second and third fields often
being the date and time (see Appendix C for a full description of the data format). Typical lines
in a transfer file are the following:
If Intercept receives data and attempts to append to a transfer file while another application has
the file open, Intercept will store the information for the file until the file is available again.
Intercept will then open a new transfer file if necessary, and write new data to the end of the file.
2.6.4 Dynamic Data Exchange
By setting up a DDE link between Intercept and another Windows application, you can
automatically update data values in the other application in real time. For example, you can set
up a bar chart in Intercept, which shows the latest water stage heights received from each of a
number of stations.
To set up a DDE link, carry out the following steps.
•
In the Instrument Panel display, switch to the station whose data you want to transfer
automatically to another application.
•
Select the Utilities. . . Copy Link command.
•
Switch to the other application which you wish to receive the data.
Coastal Environmental Systems (206) 682-6048
Page 19
INTERCEPT
USER MANUAL
•
Using the Paste Special command, or similar, paste the link into the desired place. After a
second or so, you will see the entire data message in tab-delimited form. This message will
update as Intercept receives new data.
•
If required, save the file in the application receiving the data.
You can set up multiple DDE links for multiple stations: simply repeat the above procedure for
each station.
Some applications, such as the Windows Notepad, do not have a Paste Special or Paste Link
command. You cannot send a DDE link to such applications.
2.6.5 Printing Data
Intercept does not provide any built-in facilities for printing data. Instead, Intercept writes all its
data files in a standard, tab-delimited, Windows text format. This means that you can read
archive files written by Intercept using many Windows applications: Notepad, Excel, Quattro
Pro, for example. Appendix A gives details of how to print historical data using Excel; the
method is very similar for other applications.
2.7 SAVING AND LOADING CONFIGURATIONS
An Intercept configuration file describes such information as:
•
•
•
•
•
•
the baud rate and modem setup for any open COM ports;
the type and ID number of each station communicating with each COM port;
the display units for each measurement value (e.g., are temperatures shown in ºC or ºF?);
any alarms that have been set;
the password for that configuration;
whether or not you are in supervisor mode.
Intercept configuration files have file extension .dis, and are normally installed in the c:\intercep
directory. In most cases, Intercept will be installed with its configuration file already set up. This
file – di.dis – is loaded automatically when Intercept starts up.
To save a new configuration – for example, to save newly input alarm set-points – select the
Save Setup or the Save Setup As command of the File menu. The Save Setup command saves the
new configuration with the same filename as the old one; the Save Setup As command prompts
you for a new filename. If you want the new configuration to be loaded automatically when
Intercept starts up, save it as di.dis, and put it into the same directory as the Intercept executable
file.
If you are in Supervisor Mode when you save a configuration,
you will remain in Supervisor Mode whenever you re-open that
configuration
The configuration file includes information as to whether you are in supervisor mode. If you
have switched to supervisor mode to reconfigure your system, we recommend that you switch
back to operator mode (i.e., disable supervisor mode) before saving the configuration.
Coastal Environmental Systems (206) 682-6048
Page 20
INTERCEPT
USER MANUAL
To open a previously saved configuration, go through the following steps:
•
•
•
•
select the Open command of the File menu;
choose whether you want to save the current setup;
double-click on the required configuration file;
when prompted, enter the current password.
2.8 PASSWORD PROTECTION AND SUPERVISOR MODE
To avoid accidental changes to your Intercept configuration, password protection has been
implemented. In the operator mode, whenever you try to change the configuration, you will be
prompted for a password. The default password is WEATHERPAK; you can change this password
using the Password command in the Setup menu.
Most setup and control operations are done in supervisor mode, which prevents unauthorized or
unfamiliar users from changing setup parameters that would affect the data collection process.
Intercept setup parameters, such as transfer file path, polling interval, etc., can be viewed in
dialog boxes by any user. If you change a parameter in a dialog box, however, you will be asked
to enter a password. The setup change cannot take affect without the valid password. The default
password, which you can change using the Password command of the Setup menu, is
WEATHERPAK.
To exit Intercept, select the Exit command on the File menu. You will be prompted to enter a
password (this is to prevent accidental exit).
If you are setting up or making a number of changes to a system, this continual password
verification can become irritating. You can overcome this by entering supervisor mode. To enter
supervisor mode, use the Setup. . . Supervisor Mode command, and enter the password once
only. To exit supervisor mode and return to operator mode, use the same command. You will not
be prompted for a password when leaving supervisor mode.
If you are in supervisor mode, there will be a check mark against this command on the setup
menu.
Coastal Environmental Systems (206) 682-6048
Page 21
INTERCEPT
USER MANUAL
3. INTERCEPT COMMUNICATIONS MANAGEMENT
3.1 SERIAL COMMUNICATIONS
Intercept receives station data through any one of the standard PC serial communications ports
(COM1, COM2, and, in some versions, COM3 and COM4). Specific port parameters, such as
interrupt and address assignment, are made through the Microsoft Windows Control Panel. To
fully specify a communication interface you need to define, for each open port:
•
•
•
•
•
port number (COM1, COM2, etc.);
baud rate (1200, 9600, etc.);
whether two-way communications are available on that port;
device type (direct line, dial-up modem, etc.);
if a phone modem is configured, the modem parameters.
You can use multiple serial ports simultaneously
to handle communications for large systems
Intercept can communicate with each station in a polling mode, or in receive-only mode. In
polling mode (solicited data), Intercept periodically sends a request for data to the station, which
responds with the most recent data. In receive-only mode, the stations send data to Intercept
independently, either periodically, or when specified alarm conditions occur at the station. The
stations must, of course, be set up to match Intercept’s communication scheme: see Appendix B
for an overview of ZENO configuration settings.
If polling is enabled, even if Intercept is shut down for a period, when it starts up again in polling
mode it downloads any missing data from the station. You cannot poll over a receive-only port.
You cannot poll over a read-only port
If polling is enabled, Intercept will poll the stations on a regular basis,
and download any missing data on start-up
If Intercept is set up to poll, it will also accept any unsolicited messages received from stations it
is configured to recognize, provided that these messages have the expected format.
Intercept will not recognize and display a message if any of the following is true:
Coastal Environmental Systems (206) 682-6048
Page 22
INTERCEPT
USER MANUAL
•
the message does not have the correct format, typically beginning with a carriage-return line
feed pair, comma-delimited, with the station ID number as the first field;
•
the station ID does not correspond to one of those configured;
•
the message has too few data fields;
•
the checksum, if any, is incorrect.
3.1.1 Data Format for Unsolicited Messages
Unsolicited messages sent from the stations to Intercept use a plain text ASCII protocol:
•
•
•
•
message start with a carriage return-line feed pair (<CR><LF>);
data fields are separated by commas;
there is no specific end character other than the comma after the last data field;
the first field after the <CR><LF> must be the station ID number.
A final, four-figure checksum may be defined for unsolicited messages. This checksum is
calculated as the numerical sum of all previous ASCII characters in the message, taken mod
10000 (decimal). A typical unsolicited message, coming from station number 936, might be:
<CR><LF>936,97/07/31,17:01:10,2.9,4.3,293,62,1002.1,2214,
This format includes the Aloha protocol, widely used for hazardous materials applications, as a
special case.
The second and third data fields are often a date and time stamp. The date and time are not
required for unsolicited messages. Subsequent data fields have meanings defined by their
positions, for a given set of stations. For example, in the above data line, the wind speed in 2.9
m/s, the wind gust is 4.3 m/s, the wind direction is 293°, etc.; the last field is the checksum.
These meanings are defined within the di.ini file, which is read by Intercept on start-up; Section
4.1 describes this file in more detail.
3.1.2 Poll-Response Protocol
Intercept uses the CCSAIL command protocol to poll stations. CCSAIL has the following main
characteristics:
•
it is addressed, meaning that it can be used safely in a radio system with multiple stations;
•
it involves a checksum, meaning that there is a check on data integrity.
It is not necessary to understand CCSAIL to use Intercept, or even to understand how the polling
works. If you do not wish to read this section, which is included for the sake of completeness,
simply skip over to Section 3.1.3.
Appendix C gives a full definition of the CCSAIL protocol. This section covers the commands
and the response formats used within Intercept.
The polling command used by Intercept typically has the following form.
#09360000DA97073117400010,45^C
Coastal Environmental Systems (206) 682-6048
Page 23
INTERCEPT
USER MANUAL
This description is given for the sake of completeness, and for possible use in troubleshooting.
The command given above has the translation:
“To station number 0936 from host number 0000, give me the first 10 data sets which you have logged
with time-stamps after 17:40:00 on July 31, 1997”.
The different parts of the command are as follows.
#
Attention character; all CCSAIL commands start with #.
0936
Destination ID number, in a fixed four-digit format. In this case, the destination is
the station being polled.
0000
Source ID number, in a fixed four-digit format. In this case, the source is
Intercept. Intercept always has an ID number of 0.
DA
Command identifier – “give me DATA AFTER the following date and time”.
970731
The data start date, with format yymmdd.
174000
The data start time, with 24-hour clock format hhmmss.
03,
The number of data sets to be transferred in the response to this command. This
number is followed by a comma, to separate it from the checksum.
45
The checksum. The CCSAIL checksum is the sum of the ASCII values of all
preceding characters except for the initial #, mod 100.
^C
The end-of-transmission character, ASCII value 3.
The station responds with a message such as the following.
#00000936
<CR><LF>936,97/07/31,17:56:20,0.0,0.0,0,23.9,62,13.4,
<CR><LF>936,97/07/31,17:56:30,0.0,0.0,0,23.8,62,13.5,
<CR><LF>EOF,94^C
The first line of this is simply the destination address (now Intercept, with ID 0) and the source
address (the station, with ID 937).
The second line is a data line in a format identical to that used for unsolicited messages (see
Section 3.1.1). For polled systems, however, the date and time must be included in the message.
This is because the time at which the measurements were made is not the same as the time at
which the data are received in response to a poll command. The data values are retrieved from
the station’s logging memory. In contrast, unsolicited messages are sent immediately once the
measurements were made, so the PC clock can be used.
The EOF string indicates that no later data are currently available in the station’s logging
memory. In the above case, three data sets were requested, but only two were available.
Finally, 94^C is the checksum and the end-of-message character.
3.1.3 Polling Sequence
The following actions describe the polling sequence for Intercept, in a situation where there are
multiple stations.
Coastal Environmental Systems (206) 682-6048
Page 24
INTERCEPT
USER MANUAL
•
On startup, Intercept checks in the win.ini file to see whether any previous data have been
retrieved from each station. (Section 4.1 describes the relevant file format). If any previous
data sets have been retrieved from any station, the time corresponding to that data set is
noted. If no previous data sets have been retrieved from any particular station, Intercept
arbitrarily assumes that only the past 24 hours’ worth of data are of interest.
•
Intercept polls on a regular schedule, at a frequency defined by the user (see Section 4.5.1).
Whenever a poll is due for a given station, Intercept carries out the following actions – in
parallel for multiple serial ports, if these are being used.
1. Intercept checks whether the serial port assigned to this station is free. If the port is not
free – generally because another station is already being polled on that port – Intercept
waits until it is free. Once the port is free, Intercept writes an UPDATE status message to
the Status Bar stating that polling is beginning for the station concerned. The number of
polling attempts is set to zero at this point.
2. If the station is to be polled over a phone modem, Intercept begins the dial-out sequence.
The rest of this list assumes that the dial-out is successfully made; the next main bullet •
describes how the phone modem communications are handled.
3. Once the modem connection is successfully made – and in all cases for non-telephonic
systems – Intercept then sends the first polling command. This requests a fixed number of
data sets logged after the latest data set received by Intercept.
4. Intercept waits for a response to the polling command. If the response is received with
the expected station ID number, and if the checksum is correct, Intercept then parses the
message, displays it, and disseminates it to the archive file, transfer files, etc. Intercept
also updates the time of the latest data set in the win.ini file. Bullet 7 describes what
happens if no response is received, or if the response is incorrect.
5. If the response included an EOF flag – meaning that no more logged data are available in
the station – Intercept frees up the serial port for other stations, and takes no more action
until the next scheduled poll time for that station.
6. If the response did not include an EOF flag, Intercept returns to bullet 3, and polls for the
next set of data.
7. If, at any time, no response or a bad response was received, Intercept increases the
number of polling attempts by one. Intercept then releases the serial port to other stations,
and waits for its turn before it tries to poll again (bullet 3). If three consecutive polling
attempts have failed, Intercept gives up, and waits until the next scheduled poll time for
that station.
This polling sequence means that each station is polled in turn. If a polling attempt fails,
Intercept polls the other stations before returning to the station with problematic
communications. Intercept does not delay the other stations while repeatedly polling a noncommunicating or otherwise defunct station.
•
If the station is being polled over a phone modem, Intercept dials out before any polling
commands are sent, and hangs up after all responses – including multiple responses to
multiple commands – have been received. That is, Intercept hangs up after bullet 6. If the
Coastal Environmental Systems (206) 682-6048
Page 25
INTERCEPT
USER MANUAL
dial-out attempt fails, Intercept makes three attempts, releasing the serial port to other
stations after each attempt. If the dial-out succeeds, but the poll command fails, Intercept
sends three polling commands without releasing the serial port before hanging up.
3.1.4 Telemetry Options
Intercept can communicate with the stations through any one of the following devices:
•
Direct
This defines a cable connection from the station to the COM port connector on the Intercept
PC. This connection can be used for either unsolicited or polled operation. This connection
option also covers most radio systems, because there is no handshaking visible to the PC.
•
Dial-up Modem
This defines a Hayes AT compatible wireline or (unusually) cellular modem connection from
the PC to the station. When a COM port is first opened for dial-up modem connection, the
modem is commanded to dial to the receiving modem at the station. When the station modem
answers and the carrier connection is complete, the Intercept modem remains off-hook until
either Intercept is closed, the COM port is closed, the station modem hangs up or the modem
connection is broken.
The dial-up modem can be used for either unsolicited or polled operation, but since it
remains off-hook continuously it is not suitable for long-distance or cellular operation. In
most cases, the Polled Dial-up Modem option should be used.
•
Polled Dial-up Modem
This is similar to the dial-up modem, except that whenever Intercept polls the station for new
data the PC modem dials the receiving modem at the station, extracts the required
information, and then hangs up. This means that the polled dial-up modem option is suitable
for long-distance or cellular operation.
•
Leased-Line Modem
The leased-line modem connection is treated like a direct connection (e.g., there are no setup
parameters and no initialization) with the exception that the DCD (Data Carrier Detect) line
of the COM port is monitored. If the DCD line is deasserted a WARNING message is
generated.
•
Radio Modem
For the purposes of running Intercept, you should treat radio modems as being equivalent to
a direct link.
3.2 TROUBLESHOOTING SERIAL COMMUNICATIONS
Intercept may not receive data from a station for several reasons: failure of the communication
link, loss of power to the station, etc.
If the data fields on the Instrument Panel remain blank for longer than the polling period (or the
data transmission period for non-polled operation), check the Recent Activity display (use the
Coastal Environmental Systems (206) 682-6048
Page 26
INTERCEPT
USER MANUAL
Utilities. . . Recent Activity menu command). This may contain error messages which explain
the problem.
If this does not clear up the problem, most probably either Intercept or the station is not correctly
connected or configured. The best way to check this is to use the Terminal Window, which
shows the raw data stream that passes between your PC and your remote stations. Use the
Utilities . . . Terminal Window command. There is a different tab for each serial port available
on your PC (in many cases, only COM1 and COM2 will be visible.
You can send a command directly to the station by typing the desired command into the text box
at the bottom of the screen and by clicking on the Send button. Intercept will automatically add
the checksum for CCSAIL commands. However, you cannot go into the ZENO User Interface
using the Terminal Window – you must switch to another application, such as HyperTerminal.
This manual does not cover the ZENO User Interface: see the ZENO User’s Manual if this is
necessary.
•
Check that the station is powered up. For a direct link, check that its communications cable is
well seated in the COM port connection at the back of your PC. For a phone modem or radio
link, check that the modem or base station is switched on, and that its communications cable
is plugged in.
•
Start up Intercept, and open up the Terminal Window. Switch to the tab relating to the COM
port which you are using. If the COM port has been opened by Intercept, the label at the top
of the terminal window will state the communication parameters. In this case, continue to the
step 3. If the COM port is not open, the terminal window will contain the single word
(Closed). In this case, you must open the communications port. See Section 4.4 for
Coastal Environmental Systems (206) 682-6048
Page 27
INTERCEPT
USER MANUAL
instructions on opening the communications port. (It may be that the assigned COM port
cannot be opened on your PC, because a mouse or other device is using the port; in this case,
Intercept will give a status message that the assigned port is not present or not available. If
this happens when you try to open the communications port, select another port.)
•
After the system has been running for a few minutes, check the Recent Activity window.
There may be messages in this display which explain the problem.
•
If the port is open, and you are still not receiving data, check the communication type as
described in Section 4.4, and the baud rate. These details are stated on the Terminal Window
tab for each open port. Normally, you should expect to use the following baud rates:
1. 1200 baud for communication with the one-way receiver box (a small, gray box);
2. 9600 baud for communication with the two-way radio (a blue box with white face plate),
over a phone modem, or over a direct link.
If your baud rate does not match this, or if the documentation which came with your system
shows a different baud rate (this will only occur for non-standard systems), you must change
the baud rate on your port. An error message referring to a framing error also means that the
baud rate is incorrectly set. To change the baud rate, you must close and re-open the port. See
Section 4.4 for details.
•
For one-way, unsolicited communications, you should now see data coming through to the
Terminal Window. (On a receiver box, a two-way radio base station, or a phone modem, the
signal lights indicate when data are received. If you expect unsolicited communications, and
the lights are not flashing, there is a problem with the station – not with Intercept). If you see
data lines arriving on the Terminal Window display, and the data still do not appear on the
Instrument Panel or Summary displays, there is a problem with the configuration. Check the
following points:
1. The data fields should be comma-delimited.
2. The first new line of each field should be a number equal to the Station ID number. If the
ID number is different, you must open a new station. (See Section 4.5.1 for instructions.)
3. If the ID numbers match, but you still do not have communications, there is most likely a
problem with the setup of the station. Appendix B gives the requirements for the ZENO
setup for Intercept communications. However, we recommend that you contact Coastal
Environmental Systems before attempting to reconfigure the system.
•
For polling systems, first check that the station is assigned to the correct COM port. Go to
the Instrument Panel display, and use the Station. . . Interface menu command. Check that
the correct COM port is selected under Polling Port.
•
If the correct COM port is selected, check that the two-way communications are working
correctly. For a phone modem, this requires that you Intercept is successfully dialing out.
(Skip this step for other systems). If this does not seem to be happening, carry out the
following steps.
1. Go to the Setup . . Group menu command, and check that the correct phone number is
specified, including any 9 or 8 which your phone system needs to dial out.
Coastal Environmental Systems (206) 682-6048
Page 28
INTERCEPT
USER MANUAL
2. Be sure that you have an analog phone line connected to your modem. The phone lines
used for digital office phone systems generally do not support phone modems.
3. Now quit and restart Intercept, and open the Terminal Window. After about 20 seconds,
you should see the message ATDT followed by your phone number, and the modem
should start to dial out. If the modem does not connect, you will see a message on the
screen, such as BUSY, NO DIAL TONE, or NO ANSWER. This normally indicates a
problem with the phone number, a bad phone line at your end, or a problem with the
station.
4. If you receive a CONNECT message, the modem has successfully dialed out. Normally,
the CONNECT message includes the connection speed (e.g., CONNECT 9600 for 9600
baud). Generally, stations communicate at 9600 baud for wireline modems, and at 2400
or 1200 baud for cellular modems. Unusually, the connection speed can be lower than
this for very bad phone lines. If this is the case, there can be data overrun problems at the
station – meaning that all the data transmitted by the station is not getting through. If the
connection speed is too slow, you may need to reconfigure the station’s modem. Contact
Coastal Environmental Systems in this case.
•
If you have a connection – phone modem, radio, or direct line – and the polling is still not
working, check that the station is configured to respond with the right ID number and the
right format to polling commands. First, click on the Clear button, then type the following
string into the box labeled CCSAIL or AT Command:
#99990001DL3,
(Include the comma). Click on the Send button. This message states “give me the last three data
lines” to all stations. If two-way communications are properly set up, you should receive a
response which will contain the following parts:
1. The first line will take the form #00010927. The last four digits should be equal to the
station ID number configured within Intercept. If the ID number is different, you must
open a new station. (See Section 4.5.1 for instructions.)
2. The subsequent lines should be comma-delimited, with the first field of each line equal to
the station ID number.
3. The second and third fields of each line should give the date and time stamp.
If the data lines have a different format there is most likely a problem with the station setup.
Contact Coastal Environmental Systems for further assistance.
•
Finally, note the time stamp on the data lines which you received. Click on the Clear button,
and wait until Intercept sends another polling command. This will be of a form similar to
#09270000DA9706230800003,41. If Intercept responds with an EOF message, and no data
lines, then most likely there is a problem with time stamps. Intercept regularly asks for data
more recent than the last data received, and if for some reason a data line was received with a
time stamp in the future, then Intercept will not download any more data until after that
future time. To cure this, open the win.ini file in your Windows directory (using Notepad or
other text editor). Search for the section headed [DI], and then for the line beginning
LastSample#927= (for station 927; search for the line corresponding to your station). Delete
this line, and re-start Intercept.
Coastal Environmental Systems (206) 682-6048
Page 29
INTERCEPT
•
USER MANUAL
If you receive data lines which seem to have the right format, but data are still not getting
through to the Instrument Panel or Summary displays, most there is most likely a problem
with the station setup. Contact Coastal Environmental Systems for further assistance.
3.2.1 CCSAIL or AT Command
You can send commands to the station (CCSAIL commands) or directly to a connected phone
modem (AT commands) using the Terminal Window. This section gives a brief review of useful
commands. For more details of the CCSAIL command set, see Appendix C. For more details of
the Hayes AT command set, see the documentation which came with your modem.
All CCSAIL commands begin with the following three fields:
•
•
•
the # character;
the four-digit ID number of the station (the destination address);
the four-digit ID number of the source (Intercept always uses 0000).
CCSAIL commands end with a checksum and a ^C. Intercept fills these final characters in for
you, whenever you enter a command which starts with #. All stations respond to address 0000.
Useful CCSAIL commands include:
• #99990001DL3,
Give me the last three data sets. The station should respond with three data lines. If fewer than
three data sets are currently logged, the message EOF will mark the end of the data.
•
#99990001DN,
Tell me the number of data sets currently logged. The station should respond with the total
number of data sets logged.
All AT commands start with the characters AT, and end with a carriage-return. Intercept fills in
the carriage-return for you, whenever you enter a command which starts with AT. Useful AT
commands include:
• AT
Attention command. The modem should respond with OK. If there is no response, Intercept will
not recognize the modem. If you are certain that the modem is connected and switched on,
check your modem documentation for details of how to re-enable verbose responses to
commands.
• ATI4
Many modems give a response to the string ATI4 with some setup or identification information,
even if they do not respond to the AT command. This is a good way of checking that the
modem is physically present, but with responses disabled.
•
ATDT followed by a phone number
Dial out to the specified number.
• +++
Communicate with the modem once it is off-hook. This command breaks the modem out of data
mode into command mode. If the modem is downloading data from a station, you may have
to repeat this command to break in.
Coastal Environmental Systems (206) 682-6048
Page 30
INTERCEPT
•
USER MANUAL
ATH
Hang up. Normally, you must use the +++ command before hanging up. The modem should
respond with OK.
Coastal Environmental Systems (206) 682-6048
Page 31
INTERCEPT
USER MANUAL
4. CONFIGURING INTERCEPT
4.1 FILES READ BY INTERCEPT
When Intercept starts up, it opens three files.
•
The initialization file di.ini, found in the application directory (normally c:\intercep),
describes the format of the message or messages received from your stations. This covers:
1. the set of data fields (e.g., unit ID number, temperature in ºC, battery voltage in VDC,
followed by a BIT field and a checksum);
2. the definition of each bit in the BIT message;
3. any header or trailer information.
Each station monitored by a single copy of Intercept must have the same message format.
The station’s ID number must be the first field in each message; knowing the Unit ID allows
Intercept to parse the rest of the message.
•
The configuration file di.dis, or other defined .dis file, found in the application directory,
describes the way Intercept is currently configured. This covers:
1.
2.
3.
4.
5.
which serial ports are open, and their communication setup;
the ID number and message format for each station;
whether any archive files, transfer sets or activity log files are being written by Intercept;
the password, and whether Intercept is in supervisor mode;
whether any alarms have been defined for the numeric data fields.
By default, Intercept opens the file c:\ intercep \di.dis on startup. If it cannot find this file, a
warning message to that effect will appear in the status message display. If you want
Intercept to open a different file on startup, go to the Windows Program Manager and, with
the Intercept icon selected, select the Properties command of the File menu. Change the
Command Line field to read c:\ intercep \int_333.exe yourfile.dis.
•
The Windows file c:\windows\win.ini. Intercept attempts to read the time corresponding to
the last data sample received from each configured station. If no data have ever been
received from a given station, Intercept gives a status message to that effect.
Whenever a message is received from a station in response to an Intercept request, the time
stamp for the corresponding sample is saved in the win.ini file in the [DI] section. This has no
real effect for receive-only stations. However, for polled stations, it means that whenever
Coastal Environmental Systems (206) 682-6048
Page 32
INTERCEPT
USER MANUAL
Intercept restarts, it can read the time stamp from the win.ini file and send a request for all
data received since that time.
You cannot change the di.ini file from Intercept; to define new message formats, you must use
the Intercept Format Editor, which is a separate application. You can change the di.dis file, or
write a new .dis file, by using the Save or Save As. . . command of Intercept’s File menu.
4.2 SETTING UP INTERCEPT
The suggested setup procedure is, in outline:
1. Set up the necessary physical connections between your station(s) and the Intercept
computer.
2. Start up Intercept without a setup file. If a file di.dis is present, you must first rename it. If
you have previously set Intercept to start up with a different setup file, you should change
this (with the Intercept icon selected, select the Properties menu of the Program Manager File
menu, and enter c:\intercep\int_333.exe in the Command Line text box).
3. If you want a record of all system activity, activate the Activity Log (see Section 4.3).
4. Put Intercept into the Supervisor Mode, by using the Setup. . . Supervisor Mode command.
You will be prompted for the password at this time (the default password is WEATHERPAK).
5. Set up all serial communications (Section 4.4).
6. Set up your station(s) (Section 4.5), including: the interface between the station and the
Intercept computer; the Instrument Panel display; any archiving; any transfer sets; and any
alarms.
7. Check that Intercept is correctly receiving and disseminating data from the station.
8. Turn off the Supervisor Mode.
9. Save the setup to a .dis file.
4.3 ACTIVITY LOG FILES
The Activity Review display shows essentially all of the actions carried out by Intercept.
Activity log files record all activity other than the normal transmission and reception of data. For
example, if a modem fails to connect, an alarm is triggered, or the user requests that Intercept
exit, this information will be recorded – this is precisely the information which appears on the
status bar of the Instrument Panel display. Activity log files are simple text files, and can be
accessed using any text editor.
Use the Activity Log command of the Setup menu to enable or disable collection of activity log
files. Note that this is a configuration change: you will be prompted for password confirmation
(the default password is WEATHERPAK). To conserve memory, Intercept deletes all activity log
files older than a user-defined number of days.
Each activity log file has a name of the form DIyymmdd.LOG, corresponding to the date on which
the file is written. For example, a file written on December 23rd, 1994 will have the file name
Coastal Environmental Systems (206) 682-6048
Page 33
INTERCEPT
USER MANUAL
DI941223.LOG. You may find – if your system operates normally, without alarms, for some days
– that no activity log file is generated on some dates.
There is one line for each entry in the activity log. Each entry begins with the time of the entry,
followed by the entry message. Two typical lines might be:
1995/4/11 14:34:16 STATION ALARM ON: Location: Jetty #134: Mean Wind Speed: 25 m/s
1995/3/16 15:12:54 INFO: COM2 closed by User
You can view the 100 most recent activity messages – even if you have not enabled collection of
the activity log file – by choosing the Recent Activity command of the Utilities menu.
Activity files log the status messages generated by Intercept. For example, if a modem fails to
connect, an alarm is triggered, or the user requests that Intercept exit, this information will be
recorded – this is precisely the information which appears on the status bar of the Instrument
Panel display. All status messages generated during one day, from midnight to midnight, are
appended to one file. Each activity log file has a name of the form DIyymmdd.LOG,
corresponding to the date on which the file is written. For example, a file written on December
23rd, 1994 will have the file name DI941223.LOG. You may find – if your system operates
normally, without alarms, for some days – that no activity log file is generated on some dates.
We strongly recommend that you use activity log files. You will know when requests for data are
made, and can trace at what times alarm set-points were reached.
To set up activity log files do the following:
1. Select the Activity Log command of the Setup menu.
2. Click on the “Enable Activity Logs” check-box to enable activity files.
3. Click on the “Activity Log Path” list box to select the disk drive where the log files will be
written.
4. Click on the directory path below the drive list box to select the sub-directory on the selected
disk drive that will hold the log files.
Coastal Environmental Systems (206) 682-6048
Page 34
INTERCEPT
USER MANUAL
5. Enter the maximum age, in days, allowed for activity log files. Activity log files older than
the maximum age will be deleted every day just after midnight. If you want to keep all
activity log files generated then enter “0”.
6. Select the OK button after all the settings are made. If you want to close the dialog box at
any time without changing the archive log settings select the Cancel button.
4.4 SERIAL COMMUNICATIONS
All stations are attached to Intercept through one of the serial ports (COM1, COM2, etc.) on
your computer. You have to open a serial port before you can set up a station: each new station
must be assigned to a serial port. You can open more than one serial port, each communicating
with multiple stations, and each port can have different communication parameters.
Before setting up a station, you must open the serial port
connected to it
To open a serial port on your PC:
1. Select the Setup . . . Serial Communications command, and select the COM port which you
wish to open. Check whether the Open Port button or the Close Port button is available (i.e.,
which one is not grayed out). If the Close Port button is available − as in the following
illustration − then the port which you have selected is already open. In this case, you must
click on the Close Port button before you can change any of the communication parameters
for that port.
2. Using the Port list box, select the COM port connected to the station. On the standard
Intercept, only COM1 and COM2 will be available; specific hardware is needed to enable
COM3 and COM4. (Special versions of Intercept are available for use with multiple serial
ports).
Coastal Environmental Systems (206) 682-6048
Page 35
INTERCEPT
USER MANUAL
Other hardware – such as a serial mouse – may interfere
with one or more of your COM ports
3. Click on the Baud Rate list box to see a list of available baud rates. Choose the correct baud
rate for the station (in most cases, 9600 baud is used, with 1200 baud sometimes used for
radio communications).
4. Click on the Device Type on Port list box and select the type of physical interface between
the station and the computer. Section 3.1.4 describes the different device types. If you are
using a phone modem, you should be careful to decide whether to use the Dial-Up Modem or
the Polled Dial-Up Modem. The difference is that the Dial-Up modem stays connected to the
remote modem for as long as Intercept is operating; the Polled Dial-Up Modem regularly
dials out to the remote modem, polls the station for data, and then hangs up.
5. If you have chosen Dial-Up Modem or Polled Dial-Up Modem, click on the Modem Setup
button. (See Section 4.4.1 for details of the modem setup.)
6. If you have one-way communications (generally, if you are using Coastal’s gray radio
receiver box), check the Read-Only Port box. This will prevent you from later, accidentally,
attempting to poll over a one-way communications link.
7. Once you have defined the communication parameters for this serial port, click on the Open
Port button. If the port opens successfully, the Open Port button will gray and become
disabled, and the Close Port button will become black and be enabled. (You can only open
the port if it is currently closed; you can only close it once it is open). Expect this process to
take a little time
•
Direct and Leased-Line ports will open in one to two seconds, if the port is available.
(Generally, the port is unavailable only if it is already in use by another device, such as
your mouse, or by another application. For example, if you are running another
communication program such as Procomm Plus, it is very likely to be controlling a port).
•
With Dial-up Modem ports, Intercept will open the port, initialize the modem and attempt
to dial the remote modem. This can take up to a minute (you will normally hear the
modem attempting to dial out and connect). Once the connection is made, Intercept keeps
the line open until you choose to close the port, or until you quit Intercept. If the modem
does not successfully connect, Intercept will close the port again.
•
With Polled Dial-up Modem, Intercept will open the port and initialize the modem. (If
Intercept fails to initialize the modem, it will close the port again. This means that you
must have the modem physically connected to your computer’s serial port, and switched
on, in order to open the port). However, Intercept only dials out when it is ready to
request data. You may not open a port as a Polled Dial-up Modem if you have checked
the Read-Only box.
You may set up and open more than one port while the Serial Port Setup dialog. When you are
done setting up the ports select the OK button.
Coastal Environmental Systems (206) 682-6048
Page 36
INTERCEPT
USER MANUAL
You cannot change any communications settings on an
open port: you must close it first.
Simply clicking the OK button does not open the
selected port! You must click the Open button.
4.4.1 Dial-up modems
Most standard Hayes-compatible modems are supported by Intercept. To set up Intercept for the
dial-up or polled dial-up modem:
1. From the Serial Port Setup dialog box select the Modem Setup button.
2. For polled dial-up modems, the phone number is associated with the station: you can have
more than one station called up from a single serial port in this case. The Phone Number Dial
Command text box will be grayed out and disabled in this case. For standard dial-up
modems, enter the phone number for the remote modem. You can also add additional
characters, such as 9 for outside lines, *70 to suspend call waiting (where applicable), etc.
3. In the Dialing group box click on the button for the type a line that will be dialed: Tone for
touch tone phone systems and Pulse for rotary dial systems.
4. In the Time-Out text box enter the number of seconds to allow for initializing the modem and
dialing to the remote modem. If the modem does not connect within the time-out period then
Intercept closes the port.
5. Select the OK button after entering all the parameters. If you want to close the dialog box at
any time without changing the dial-up modem settings select the Cancel button.
4.4.2 DDE Source Link Input
As described in Section 2.6.4, Intercept can act as a source for Dynamic Data Exchange (DDE)
links. This allows another application to receive new data automatically from Intercept.
Intercept can also accept data over a DDE link, as an alternative to serial communications. That
is, Intercept can receive data generated by an application running on the same PC. This is not the
normal operational mode for Intercept; it is occasionally useful for unusual systems. (For
example, Coastal Environmental Systems occasionally produces translators, which receive nonstandard messages from other manufacturers’ stations, translate them into a form recognized by
Coastal Environmental Systems (206) 682-6048
Page 37
INTERCEPT
USER MANUAL
Intercept, and relay those messages to Intercept over a DDE link). Stations accessed over a DDE
Source Link are treated by Intercept exactly like stations accessed over a read-only serial
communications link.
To set up a DDE source link, first start up the application (such as a Data Stream Translator)
which will act as the source for data to be received by Intercept. Use the appropriate command to
copy the link.
Now, use the Setup. . . DDE Source Link command. You will be presented with the Intercept
DDE Source Link Setup dialog box. If the Paste Link button is enabled, click on it. The three
text boxes Application Name, Topic, and Item will be filled in.
If the Paste Link button is not enabled, you have not copied the DDE link into your PC’s
clipboard. In this case, you must dismiss this dialog box by clicking on the OK button, copy the
link from the source application, and call up the DDE Source Link dialog box again.
Next, enter the source application into the Application Path text box. The easiest way to do this
is normally to click on the Browse... button, and to select the source application from the
presented files.
Finally, click on the Open Link button. Intercept will start accessing data from the Source Link.
Click on OK to finish the process.
If you save the setup, and quit and re-start Intercept, the source application will be started up
automatically when Intercept starts up.
4.5 SETTING UP A NEW STATION
Once you have set up the serial communications for any station, you can set up the station itself.
You cannot define a station until there is an available communication link.
To set up a new station, carry out the following steps.
1. Set up and open the serial port (see Section 4.4), if you have not already done so.
Coastal Environmental Systems (206) 682-6048
Page 38
INTERCEPT
USER MANUAL
2. Select the New Station command of the File menu. You will be presented with the New
Station dialog box.
3. Enter the Unit ID number in the ID text box. This ID number is defined in the ZENO or
Weatherpak configuration. If your station has come pre-configured, and you do not know the
ID number, call Coastal. (It is often set to the serial number stamped on the top of the ZENO
or Weatherpak).
4. Click on the Format list and select the station output format. This defines the set of message
fields transmitted by the station.
5. Enter a description of the station (site name, test name, etc.) that will appear in the caption
bar of the Instrument Panel. The description, while optional, is strongly recommended.
6. If you wish to use polled operation, select the polling port. For unsolicited reporting from the
stations, leave this option at None (receive only). Intercept will accept unsolicited messages
over any open serial port on your computer.
7. Click on the Next button to go on to set up the station parameters.
Once you have clicked on Next, the Station Setup dialog will appear with the Interface tab
selected. If you change you mind about setting up a new station you can click on the Cancel
button at any time.
You should then continue by setting up: the interface between the station and the Intercept
computer (Section 4.5.1); any archiving (Section 4.5.2); any transfer files (Section 4.5.3); any
alarms (Section 4.5.4); and display details (Section 2.3.2). Once you have finished setting up
your station, press the OK button on any one of the tabs of the Station Setup dialog.
4.5.1 Interface
The Interface Setup box lets you define polling details, or simply the frequency with which data
messages are expected for unsolicited operation. You can poll over any port which has not been
set to read-only operation: if no such ports are open, only unsolicited operation is available.
Intercept will accept unsolicited data messages on any serial port.
Coastal Environmental Systems (206) 682-6048
Page 39
INTERCEPT
USER MANUAL
If Intercept is to poll the station, enter the following values.
•
The port over which polling is to occur.
•
The interval, in minutes, between requests for data from Intercept.
•
The offset, in minutes, of the time when Intercept should request data compared to integer
multiples of the polling interval. For example, if Intercept is to poll at 15 minutes after every
hour, the interval should be set to 60 minutes and the offset to 15 minutes.
•
The amount of time Intercept should wait in seconds, after sending a request, before
repeating the request.
•
The number of data samples (i.e., how many data sets) you expect on each request. Changing
the number of data samples does not affect how much data you receive from the station, or
when you receive it. However, it affects the efficiency with which the data is retrieved. When
Intercept polls a station, it asks for the last n data sets, where n is the number specified here.
The station returns n data sets. Intercept then asks for the next n, and so on until the last
logged data set has been retrieved. If the number n of samples in each request is large (15 or
20), then this procedure happens more rapidly. However, for noisy communications links,
such as radios or cellular modems, there may be problems with asking for large data sets. For
example, the probability of a checksum error may be high. In such cases, communication will
be more efficient if a small number of data sets is requested at each stage – if the data have to
be re-sent, the overhead is low. We suggest a value of 2 or 3 for radio communications, and
10 to 15 otherwise.
•
For polled dial-up modems, you must also enter the telephone number of the station. (This
option is not shown in the above illustration: it only becomes visible when you select a serial
port connected to a polled dial-up modem).
Coastal Environmental Systems (206) 682-6048
Page 40
INTERCEPT
USER MANUAL
If you have unsolicited (receive-only) communications, you need only enter the time-out period,
in minutes, after which Intercept should issue a warning if no message has been received from
the station.
4.5.2 Archive Files
To configure Intercept to archive the data received from a given station, use the Archive tab of
the Station Setup dialog.
1. Click on the Enable Archive check-box to enable archiving for this station.
2. Use the Drive list box and the directory path to select the directory that will hold the archive
files.
3. Enter the interval, in minutes, at which you want data to be archived. To save disk space, you
need not archive data from each message received. A five-minute archive interval is typical
for meteorological stations.
4. Enter the maximum age, in days, allowed for archive files. Archive files older than the
maximum age will be deleted every day just after midnight. If you want to keep all archive
files generated then enter 0.
Coastal Environmental Systems (206) 682-6048
Page 41
INTERCEPT
USER MANUAL
4.5.3 Transfer Files
To configure Intercept to write transfer files for a given station, use the Archive tab of the
Station Setup dialog. Up to four transfer files can be defined for each station. For example, file
number 3 relating to station number 123 will have the file name TR3.123. Thus, if you want four
transfer sets for station number 123, you will have files named TR1.123, TR2.123, TR3.123 and
TR4.123.
1. Check the Enable Transfer Set box if you want to write transfer files for this station.
2. Check the box corresponding to each transfer file that you want to write. For example, check
the 1 box to write a file tr1.
3. Set the maximum size, in bytes (characters), of the transfer files in the Max File Size box.
The maximum transfer file size is about 512000 bytes. If the transfer file size exceeds this
maximum, Intercept will issue a warning message and stop writing data.
4. Select the transfer file path (the drive and sub-directory where the transfer files will reside) in
the drive and directory list boxes.
4.5.4 Alarms
You can set high and low alarm set-points for most numerical data fields, and for special cases
such as the BIT (Built-In-Test) field, using the Alarms tab of the Station Setup dialog. The
dialog box requests that you input an alarm set and reset for any high and/or low alarms.
Coastal Environmental Systems (206) 682-6048
Page 42
INTERCEPT
USER MANUAL
You can set a high alarm (e.g., high wind speed), a low alarm (e.g., low battery voltage), both or
neither. In the above example, both high and low alarms are being set.
•
On the high alarm, Intercept will go into an alarm state when the battery voltage first reaches
16.0 VDC. It will stay in the alarm state until the battery voltage drops next below 15.8
VDC. By defining the alarm reset below the alarm set point, you avoid the possible irritation
of an alarm continually going off with the battery voltage hovering about 16 VDC.
•
On the low alarm, Intercept will go into an alarm state when the battery voltage first drops
below 11.7 VDC. It will stay in the alarm state until the battery voltage next rises above 11.9
VDC. The alarm reset point must lie above the alarm set point, for a low alarm.
After you have entered the alarm set and reset points for a given field, click on the Accept
Setpoints button.
There are two special cases for which the alarm set and reset fields shown above are replaced by
check boxes.
•
For BIT fields, a single check box is shown. If the box is checked, then an alarm will occur
whenever the BIT value is non-zero.
•
For road condition fields (which are field codes running between 0 and 11), a check box is
shown for each potential condition. If a given box is checked, then an alarm will occur
whenever the road condition reaches that checked value. For example, you might want an
alarm to occur for wet or icy pavements, but not for dew.
Coastal Environmental Systems (206) 682-6048
Page 43
INTERCEPT
USER MANUAL
4.6 COMPLETING THE SETUP
Once the Instrument Panel has been built, Intercept is ready to receive or download data from the
station. In polled mode, Intercept will start the download process within about 15 seconds.
After data has appeared in the display, and you have confirmed the operation of other features
(transfer files, activity files, alarms, etc.) then you will probably want to save the setup for future
use. Use the Save or the Save As . . . command of the File menu. For more information on saving
setups, see Section 2.7.
Very occasionally, the Instrument Panel cannot be constructed, and you will receive a message
Could not open Instrument Panel. This is generally caused by a lack of Windows resources, and
usually occurs if you attempt to display too many fields in one Instrument Panel. If you see this
message then repeat the New Station setup, but turn off more display fields in the Display dialog
(see Section 2.3.2). You may also need to close any other applications you are running.
Coastal Environmental Systems (206) 682-6048
Page 44
INTERCEPT
USER MANUAL
A. PRINTING AND CHARTING DATA USING EXCEL
A simple way to examine data graphically is to open an archive file from another application
such as Excel. Alternatively, you can cut and paste values from either the Archive or the Recent
Data display. Because the formats used by Intercept are compatible with most Windows
applications, you can easily create a wide variety of charts, and carry out statistical analysis the
way you want it. (If you are not currently writing archive files, you must first set Intercept up to
do this. Section 4.5.2 describes how to instruct Intercept to write archive files).
For example, to create a chart such as this one, carry out the following steps.
•
Write an archive file from Intercept (see Section 4.5.2 for instructions as to setting up
Intercept to write archive files). Recall that archive files have names of the form
Aryymmdd.nnn, where yymmdd is the date on which the file was written and nnn is the
station ID.
•
Start up Excel.
Coastal Environmental Systems (206) 682-6048
Page 45
INTERCEPT
USER MANUAL
•
Open the archive file as a text file. In Excel’s Text Import Wizard, select tab-delimited, and
start the import at line 2.
•
When the file is opened, the second column generally shows ########. This is simply
because that column is not wide enough to show the full date and time – you can drag the
column boundary to show the full date and time.
•
Now use the Excel Chart Wizard to plot the desired quantities as a function of time.
Coastal Environmental Systems (206) 682-6048
Page 46
INTERCEPT
USER MANUAL
B. ZENO CONFIGURATIONS
In order to carry out any two-way communication with the ZENO – including polling, manual
download of data, or data download on startup – you must enable the CCSAIL check box on the
Serial Communications menu.
The ZENO configuration in this case must have the following characteristics.
•
The ZENO must be set to accept CCSAIL commands. This will happen automatically with
all ZENO systems with ZENO software version 1.65 or later. For earlier software versions,
this must be factory set – contact Coastal if you have any questions.
•
In the ZENO System Functions Menu, the following items must be set:
•
-
Line Item 3, Data Dump Format, must be set to 3 (Match the Real-Time Format).
-
Line Item 4, Real Time Output Format, must be set to 3 (CCSAIL).
In the ZENO Data Output Menu, the following fields must be defined.
-
The first field is a carriage return-line feed, beginning a new line of data output.
-
The second field is the unit ID number.
-
The third field is a time stamp.
-
Subsequent fields are the normal data fields.
-
The last field is a checksum (field code type 2, i.e. not the NMEA checksum).
•
All the normal data fields must be one of the types Transmit Only or Transmit and Log. If
any of the data fields are of the type Transmit Only, when Intercept polls for data values the
corresponding fields will be returned with the value <Null>.
•
The data format in the di.ini file must specify the date and time stamps as such (this is set
within the Intercept Format Editor).
•
The checksum must not be included in the Intercept format.
A final point is that the ZENO clock time and the time on the Intercept computer should be kept
within a few minutes of one another, or some logged data may be lost.
Coastal Environmental Systems (206) 682-6048
Page 47
INTERCEPT
USER MANUAL
C. CCSAIL
Polling is carried out using the CCSAIL communications protocol. This is an extension of the
ANSI/IEEE Std. 997-1985 “Serial ASCII Instrumentation Loop (SAIL) Shipboard Data
Communication”. CCSAIL extends SAIL to include message checksums and acknowledgment/
non-acknowledgment responses.
In this appendix, the PC running Intercept, which initiates the CCSAIL commands, will be
referred to as the HOST, and the station which responds to those commands will be referred to as
the REMOTE.
The HOST (Intercept) and the REMOTE (the station) transmit and receive requests for data, data
messages, etc., framed by CCSAIL. Each device – computer, station, etc., – connected via
CCSAIL has a unique address. Messages are sent from source to destination addresses along the
interconnection. When the destination device receives a message it sends an acknowledgment to
the source (in other words, the source and destination are “turned around”). The originator of the
message expects an acknowledgment within a time period before attempting to retransmit the
message. The source will attempt retransmission for a certain number of times, which is
optionally set in the station.
CCSAIL COMMUNICATIONS
Frame Format
All communication within the CCSAIL system is asynchronous and uses the 256 character IBM
standard character set, including control characters. The data transfer protocol is: one start bit, 8
data bits, one stop bit, no parity bit. The use of an end-of-message checksum provides message
and data verification. All communications are to be Half Duplex to accommodate the phone or
radio modem constraints.
CCSAIL Command Format
All CCSAIL commands and messages begin with an attention character and end with an end-oftransmit character. In most instances a CCSAIL command is addressed to a particular REMOTE
unit from a particular HOST unit, though there are global commands which are not addressed
and are intended for all REMOTE units listening. The CCSAIL protocol includes a response or
acknowledgment sequence for every non-global command to insure the proper receipt of each
message. In addition, every CCSAIL message contains a checksum value to insure that the
message itself is not corrupt. If a received message has an incorrect checksum then the message
is ignored.
Coastal Environmental Systems (206) 682-6048
Page 48
INTERCEPT
USER MANUAL
Message Definition
A CCSAIL message is comprised of:
attention character, ATN
address, ADR
return address, RTN
message string, MSG
checksum, CHK
end-of-transmission character, ETX.
Attention (ATN): The # (ASCII decimal 35) is the attention character (ATN) for all messages
defined by the CCSAIL protocol. This character marks the beginning of a CCSAIL command or
response message.
Address (ADR): This is a four character field indicating the message destination unit ID number.
The ID value 9999 is a universal number which can address all REMOTE units which are
listening for commands. This ID value should be used with caution when there is more than one
REMOTE unit capable of simultaneously responding to HOST commands. The universal ID
number feature is typically utilized in situations where there is only one REMOTE unit on the
communication line.
Return Address (RTN): This is a four character field indicating the message originator’s ID
number.
Message string (MSG): The MSG is any string of characters which will be interpreted by the
receiving device in a particular way. The string can be a simple command or it can be an
extensive ASCII data output with embedded control characters. If the message string contains
command or data parameters, each field should be comma delimited from each other and from
the concluding checksum value field. The ATN and ETX characters are excluded from any
outputs.
Checksum (CHK): The checksum is a two digit ASCII decimal number. The checksum is
computed by adding the ASCII value of all characters in ADR, RTN, and MSG. The checksum
does not include the ATN or ETX characters. The ASCII sum is divided by 100 and the
remainder is the checksum: CHK = SUM(ASCII characters) mod 100.
End-Of-Transmission (ETX): The ETX character has an ASCII value of 3, and marks the end of
every CCSAIL command or response message.
Intercept Polling Command
Intercept typically retrieves data using the following polling command.
DAyymmddhhmmssnn,
Request nn data sets logged on or after the indicated start date-time value. The value of nn may
range from 1 to 9999 inclusive, and must be comma delimited to separate it from the checksum.
If the value of nn is greater than the actual number of logged data sets found, the REMOTE
sends all data sets logged after the specified time, followed by an EOF string.
Coastal Environmental Systems (206) 682-6048
Page 49
INTERCEPT
USER MANUAL
For example, in the following poll-response sequence, the HOST (with ID 0) polls REMOTE
number 134 for the first 11 data sets logged in October 1997. (Intercept always uses HOST
address 0).
HOST:
#01340000DA97100100000011,61(ETX)
REMOTE:
#00000134
97/10/01,09:13:26,25,15,
97/10/01,09:13:28,25,14,
97/10/01,09:13:30,25,14,
97/10/01,09:13:32,25,14,
97/10/01,09:13:34,25,14,
97/10/01,09:13:36,26,14,
97/10/01,09:13:38,25,14,
97/10/01,09:13:40,25,14,
EOF,35(ETX)
Other CCSAIL Commands
Global Commands (Not addressed)
When the first character of the CCSAIL address is a letter A-Z rather than a digit 0-9, the
message is not addressed to a particular unit but rather is a global command intended for all units
on the network. REMOTE units will not return an acknowledgment to the global command.
TMyymmddhhmmss
Global time set command. No message is returned from the REMOTE in response to this
command. Time is in 24 hour format. This command is useful for synchronizing multiple ZENO
units.
EXAMPLE: #TM94100212000056(ETX)
Set Date and Time to October 2, 1994, 12:00:00 PM. (ETX) represents 0x03 character.
Data Retrieval Commands (Addressed)
X-modem versions of many of these commands are available. However, Intercept cannot handle
X-modem data transfer. These commands are therefore not listed here.
D*
Request all data sets residing in the REMOTE’s data logging memory. Caution should be
considered before using this command as it may require several minutes of data transfer time if
there are numerous data sets stored in the REMOTE’s logging memory.
EXAMPLE: #01340001D*03(ETX)
To ID 0134 from 0001, send all data sets in logging memory.
D@nn,
Request nn unmarked or recent data sets. These are data sets which have not been acknowledged
by the HOST as having been received. The value of nn can be any positive integer from 1 to
9999, or the asterisk character. The nn parameter must be comma delimited to separate it from
the checksum. If the requested number of data sets is larger than the actual number of sets in
logging memory, the REMOTE will send all data sets in logging memory followed by an EOF
Coastal Environmental Systems (206) 682-6048
Page 50
INTERCEPT
USER MANUAL
string. The HOST station should acknowledge the receipt of valid data set messages with a
CCSAIL OK message. This indicates to the REMOTE to mark the previously transmitted data
sets as having been sent. The REMOTE will then respond to the next D@nn command by
sending data sets logged after the last marked set. If the received message from the REMOTE
fails the proper format check, then the requesting station ignores the received message, and sends
the request command again. The full poll-response sequence is:
The data retrieval sequence is set up to allow both senders and receivers full ability to confirm
that the command and reply was done properly. The sequence is as follows:
DATA RETRIEVAL COMMAND. The HOST sends a command requesting data from the
REMOTE.
DATA REPLY. The REMOTE replies to the data request command by sending the requested
data stream as a CCSAIL message, or with special commands, as an X-Modem file transfer.
HOST ACKNOWLEDGMENT. If the HOST receives the data and checksum intact, it returns a
CCSAIL OK message. Otherwise if the data or checksum are invalid, the HOST re-sends the
data retrieval command.
REMOTE ACKNOWLEDGMENT. On receipt of the HOST OK message, depending on the
specific data retrieval command, the REMOTE may mark the recently transmitted data sets as
having been successfully transferred. No message is returned from the REMOTE in response to
the HOST acknowledgment. The HOST may now either request more data sets, issue other
CCSAIL command, or cease communications.
EXAMPLE: #01340001D@*,11(ETX)
To ID 0134 from 0001, send all data collected since last D@nn or DX@nn command.
EXAMPLE: #01340001D@5,22(ETX)
To ID 0134 from 0001, send 5 data records collected since the last D@nn or DX@nn command.
DD
This command deletes all existing data sets inside the REMOTE’s data logging memory. The
REMOTE will return an OK message in response to this command.
EXAMPLE: #01340001DD29(ETX)
To ID 0134 from 0001, delete all data sets in logging memory.
DByymmddhhmmssyymmddhhmmss (start date-time , stop date-time)
Request all data sets which were logged between the indicated start and stop date-time strings. If
there are no data sets within the time specification, the REMOTE returns an EOF message. This
is a fixed-field format message so there is no need to comma delimit the date-time parameters.
EXAMPLE: #01340001DB94100100000094103123595945(ETX)
To ID 0134 from 0001, send all data sets logged during the month of October 1994.
DLnn,
Request the latest nn data sets stored in data logging memory. The value of nn may range from 1
to 9999 inclusive, and must be comma delimited to separate it from the checksum. If the value of
Coastal Environmental Systems (206) 682-6048
Page 51
INTERCEPT
USER MANUAL
nn is greater than the actual number of logged data sets found, the REMOTE sent all data sets
logged after the specified time, followed by an EOF string.
EXAMPLE: #01340001DL10,78(ETX)
To ID 0134 from 0001, send the latest 10 data sets stored in data logging memory.
DN
Request a count of the total data sets residing in the REMOTE’s data logging memory.
EXAMPLE: #01340001DN39(ETX)
To ID 0134 from 0001, inquire how many data sets are in logging memory.
An example response to the DN command would look like the following:
#00010134
122,09(ETX)
To ID 0001 from 0134, there are 122 data sets in logging memory.
Other Addressed Commands
OPEN
Request the REMOTE to go to the normal User Menu communications. This command cannot
be used within Intercept. The REMOTE will cease using the CCSAIL protocol for
communications, and will immediately jump into the regular user menu communication format.
The user may enter any regular ZENO®-3200 menu command at this time. When the user enters
Q for quit, or the menu system times-out due to inactivity, the REMOTE will resume the
CCSAIL protocol.
EXAMPLE: #01340001OPEN99(ETX)
To ID 0134 from 0001, go to user menu command line operation.
OK
This command is returned from either the HOST or the REMOTE to acknowledge the receipt of
a CCSAIL command other than the several data request commands or any system-wide global
command.
EXAMPLE: #00010134OK47(ETX)
To ID 0001 from 0134, acknowledge receipt of command.
NAK
This command is returned from either HOST or the REMOTE to indicate a negative
acknowledgment for a recently received CCSAIL message with an unknown command or with a
invalid parameter.
EXAMPLE: #01340001NAK11(ETX)
To ID 0134 from 0001, negative acknowledge of received command.
TMyymmddhhmmss
Coastal Environmental Systems (206) 682-6048
Page 52
INTERCEPT
USER MANUAL
Addressed time set command. This command functions similarly to the global time set command
but is addressed to only one REMOTE rather than the entire system. If the REMOTE correctly
receives this addressed command it responds with an OK message. The time information is in 24
hour format.
EXAMPLE: #01340001TM94100212000049(ETX)
Set Date and Time to October 2, 1994, 12:00:00 PM.
Coastal Environmental Systems (206) 682-6048
Page 53
INTERCEPT
Coastal Environmental Systems (206) 682-6048
USER MANUAL
Page 54