1
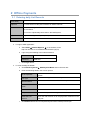
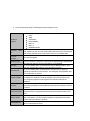
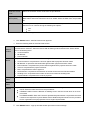
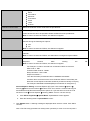
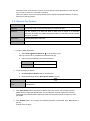
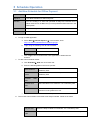
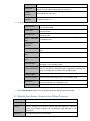
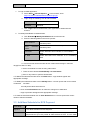
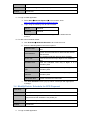
PMS Training Material For CDR2 Project Contents1 Counter Activity 1 1.1 To Take Payments made at BSNL Counters ......................................................................................... 1 1.2 Reconcile running Payment Batch made at BSNL Counters ................................................................. 3 1.3 To Cancel Payments of the Customers made at BSNL Counters. ........................................................ 4 1.4 To Close BSNL Counters ...................................................................................................................... 5 1.5 To generate Daily List at BSNL Counters .............................................................................................. 6 1.6 TR Reconciliation .................................................................................................................................. 7 1 Counter Activity 1.1 To Take Payments made at BSNL Counters Case Study 1 Objective To Take Payments made at BSNL Counters Scenario You are working in a call center as a CSR Counter and you need to take payment from the customer. Application PMS Duration 5 Minutes 1. To login to PMS application: a. Select Start Internet Explorer In the browser, enter http://10.193.215.21:7777/PMS/CommonFiles/Login.jsp b. Login using the following User Id and Password: c. User Id CSRHYD Password CSRHYD Role Counter Click and wait till the entire application is loaded into the browser. 2. To Take Payment : a. Click on Counter Payments Single Payment tab on left menu bar. b. Single Payment screen will open. Provide the required details in the screen.Either of Account Number Phone Number and Invoice Number is mandatory. Payment Against Select among the values: CDR GSM NIB 3.0 NIB 3.1 ES PANINDIA ES ZONAL Demand Note It is Mandatory. AccountNumber It represents the account number of the Customer. Phone Number It represents the phone number of the Customer. c. Invoice Number It represents the invoice number of the Customer. Old Account Number It represents the source account number of the customer. Demand Note Id It represents the Demand Note Id of the Customer,In Case of Payment Against as Demand Note. Click Get Details Button. Details such as Customer Name,Bill Date etc will be automatically populated according to the Values entered. d. Enter the Amount paid ,Currency Used and select Payment Mode: Currency Used Payment Mode Select the currency in which the payments are being made by the Customer. Select the Payment Mode in which payment is being made by the Customer. It consists of following options in case of INR currency: Cash Credit Card Debit Card Cheque Demand Draft EFT And it consists of the following options in case of other currencies: Cheque Demand Draft EFT Instrument Number It represents the cheque/DD number of the Customer. Instrument Date It represents the date of instrument number of the Customer. MICR Code It represents the MICR number of instrument of the Customer. Bank Name It represent the bank Name of Instrument of the Customer. Note: By Default the amount paid value will be same as Amount Due, Currency Name will be INR and Payment Mode will be CASH.In Payment Mode Drop Down only those values will be visible which have been configured for Currency Type Selected. e. Click Make Payment Button. Receipt for this payment will appear as a pop up window. 1.2 Reconcile running Payment Batch made at BSNL Counters Case Study 2 Objective To Reconcile running Payment Batch made at BSNL Counters Scenario You are working in a call center as a CSR Counter and you need to Reconcile your present running batch of that Counter. Application PMS Duration 5 Minutes 1. To login to PMS application: a. Select Start Internet Explorer In the browser, enter http://10.193.215.21:7777/PMS/CommonFiles/Login.jsp b. Login using the following User Id and Password: c. User Id CSRHYD Password CSRHYD Role Counter Click and wait till the entire application is loaded into the browser 2. To Reconcile the Running Batch: a. Click on Batch Reconciliation tab on left menu bar. b. Batch Reconciliation screen will open. No. of the payments for each Currency with total amount is displayed. c. Click on Post Batch Button to post the present running Batch. d. A pop up window with success message for batch posting will appear. 1.3 To Cancel Payments of the Customers made at BSNL Counters. Case Study 3 Objective To Cancel Payments of the Customers made at BSNL Counters. Scenario You are working in a call center as a CSR Counter and you need to Cancel Payments of the Customers made at that Counters. Application PMS Duration 15 minutes 1. To login to PMS application: a. Select Start Internet Explorer In the browser, enter http://10.193.215.21:7777/PMS/CommonFiles/Login.jsp b. Login using the following User Id and Password User Id CSRHYD Password CSRHYD Role Counter c. Click and wait till the entire application is loaded into the browser. 2. To Cancel Payments: a. Take Some Payments as Explained in Case Study 1. b. Click now on Payment Cancellation Cancellation tab on left menu bar. c. Enter the Following Fields: Account Number Account Number of Case Study 1 Receipt Number Receipt Number of Case Study 1 Note:One among the Account Number and Receipt Number is mandatory field. d. Click GetDetails button.Details of that Payment is Displayed. e. Select the payment which is to be cancelled. Select the reason for cancellation. f. Click on Submit Button. A pop up window with success message for Payment Cancellation will appear. g. Now again reconcile the running batch as Explained in Case Study 2 and try cancelling payments again. Note:Once the Running Batch is Reconciled the payments cannot be cancelled.It need to be reversed. 1.4 To Close BSNL Counters Case Study 4 Objective To Close BSNL Counters. Scenario You are working in a call center as a CSR and you need to close that counter. Application PMS Duration 15 minutes 1. To login to PMS application: a. Select Start Internet Explorer In the browser, enter http://10.193.215.21:7777/PMS/CommonFiles/Login.jsp b. Login using the following User Id and Password c. User Id CSRHYD Password CSRHYD Role Counter Click and wait till the entire application is loaded into the browser. 2. To Close the Counter: a. Take Some Payments as Explained in Case Study 1. b. Reconcile last running Batch as Explained in Case Study 2. c. Click on Counter Close tab on left menu bar. d. Click Close Cash button. e. Enter the denominations for the total Cash amount and Click Close Cash button. f. A pop up window with success message for Cash Close will appear. g. Click Close Instrument button. Select the Currency and Click Close Instruments button. Note:Only those Currency will be displayed with which payment is taken. h. . A pop up window with success message for Instrument Close will appear. i. Once cash and instruments are closed successfully a pop up message with success message for Cash Close will appear. 1.5 To generate Daily List at BSNL Counters Case Study 5 Objective To generate Daily List at BSNL Counters. Scenario You are working in a call center as a CSR and you need to generate Daily List at that Counters. Application PMS Duration 15 minutes 1. To login to PMS application: a. Select Start Internet Explorer In the browser, enter http://10.193.215.21:7777/PMS/CommonFiles/Login.jsp b. Login using the following User Id and Password c. User Id CSRHYD Password CSRHYD Role Counter Click and wait till the entire application is loaded into the browser. 2. To generate Daily List at BSNL Counters: a. Take Some Payments as Explained in Case Study 1. b. Close the Counter as Explained in Case Study 4. c. Click on Generate Daily List tab on left menu bar. d. Enter the date for which Daily List need to be generated. Note:By Default the Date will be Present Date. e. Enter the denominations for the total Cash amount and Click Close Cash button. f. Click Submit Button. Daily List will be generated for that payment Date. 1.6 TR Reconciliation Case Study 6 Objective To Reconcile all Collections made in a SSA. Scenario You are working in a SSA and you need to Reconcile all Collections made in that SSA. Application PMS Duration 5 Minutes 1. To login to PMS application: a. Select Start Internet Explorer In the browser, enter http://10.193.215.21:7777/PMS/CommonFiles/Login.jsp b. Login using the following User Id and Password: User Id CSRHYD Password CSRHYD Role AOCash(Coll) c. Click and wait till the entire application is loaded into the browser 2. To Reconcile the Collections: a. Close some counters as explained in Case Study 4. b. Click on TR Reconciliation tab on left menu bar. c. TR Reconciliation screen will open.List of Collection Office Codes and User Id’s will be displayed. d. Select the counters needed to be reconciled. e. Click Reconcile Button. f. A pop up window with success message of reconciliation will appear. PMS Training Case Studies For CDR2 Project Contents 1 Offline Payments ........................................................................................................................... x 1.1 Entering daily List Records .................................................................................................................... x 1.2 View/Modify Daily List Batches .............................................................................................................xii 1.3 Post Daily List Batches .......................................................................................................................xiv 1.4 Adding File Structure ........................................................................................................................... xv 1.5 Upload Batch ...................................................................................................................................... xvii 1.6 Receipt For Dealers .............................................................................................................................xix 2 Offline Payments 2.1 Entering daily List Records Case Study 1 Objective To make entries of daily list received from offline channels. Scenario You are working in a SSA and received a daily list from a offline channel such as Bank. You have to upload daily list records in the PMS system. Application Payment Management System(PMS) Duration 30 Minutes 3. To login to PMS application: a. Select Start Internet Explorer In the browser, enter http://10.193.215.21:7777/PMS/CommonFiles/Login.jsp b. Login using the following User Id and Password: c. User Id CSRHYD Password CSRHYD Click Login button. 4. To enter the daily list details: a. Click Offline Payments Add Payment Batch tab on left menu bar. b. Enter the following fields in the screen opened: List Type Enter the Number of Payment entries to be done in the system Select the ListType.It is a mandatory field. Channel Name Select the Channel Name. It is a mandatory field. Collection Center Code Select the Collection Center Code from the list. Collection Desk Code Select the Collection Desk Code from the provided list Daily List Date Enter the Daily List Date using calender Total Daily List amount Enter the total amount of all the payments mentioned in the daily list. No of Payments c. Click Submit button.Next screen(Add Payment Batch Details) should open. 5. Enter the following fields in Add Payment Batch Details screen: Payment against Demand Id Note Account Number Amount Paid Bill Date Amount Due Payment Mode Instrument Number Instrument Date Branch Code Transaction Id Select the Payment against from the drop down. CDR GSM ES ZONAL ES PANINDIA NIB 3.0 NIB 3.1 DEMAND NOTE If the Payment against is selected as Demand Note.Enter the demand note id.Based on this Account number Bill Date,Amount Due and Amount paid should populate.In this case Amount Paid is non editable field. Enter the Account Number. Based on this Amount paid,Bill Date,Amount Due should populate. Enter the amount of Payment. If the Payment Against field is selected as Demand Note then the Amount Paid field is not modifiable. It is a non editable field. It represents the date of Bill Generation. This field gets autopopulated after Account Number is entered It is a non editable field. It represents the Amount Due for payment against the entered Account Number. This field gets autopopulated after Account Number is entered It is a dropdown. It displays the mode of payment. Choose from the provided list to modify the mode of payment. This list is dynamic such that configured payment modes against the selected channel are displayed Enter the Cheque/Demand Draft Number. This field is mandatory only when Payment Mode is Cheque/Demand Draft and the selected channel is E-Seva Enter the Cheque/Demand Draft Date. This field is mandatory only when Payment Mode is Cheque/Demand Draft and the selected channel is ESeva Enter the Branch code of the bank from where instrument is drawn. This field is mandatory only when Payment Mode is Cheque/Demand Draft and the selected channel is E-Seva. Enter the Transaction Id. This field is mandatory only when Channel Name is selected as E-Seva Note: By default, Amount Paid field is populated whenever you enter the Account number or demand note id field; In case of payment is against demand note amount paid is not editable field.User can change Amount Paid if it is different. a. Click Submit Payment button in the Add Payment Batch Screen. b. A pop up screen should appear with success message and batch id. 2.2 View/Modify Daily List Batches Case Study 2 Objective To view/modify entries of daily list already entered in the PMS. Scenario You are working in a SSA and entered a daily list from a offline channel such as Bank.You want to view list records in the PMS system. Application Payment Managemant System. Duration 15 Minutes 3. To login to PMS application: a. Select Start Internet Explorer In the browser, enter http://10.193.215.21:7777/PMS/CommonFiles/Login.jsp b. Login using the following User Id and Password c. User Id CSRHYD Password CSRHYD Click Submit. 4. To view/modify payment batch: a. Click Offline Payments View/Modify Payment Batch tab on left menu bar. b. Enter the following fields in View/Modify Payment Batch screen: List Type Select thye ListType.It is a mandatory field. Channel Name Select the Channel Name. It is a mandatory field. Collection Center Code Select the Collection Center Code from the list It is a mandatory field. Collection Desk Code Select the Collection Desk Code from the provided list. It is a mandatory field. Daily List Date Enter the Daily List Date using calender. It is a mandatory field. Upload Method This field appears only when Channel Name is selected as E-Seva. It is a dropdown. It represents the method of File Upload. Choose from the following 2 options: Database Upload Manual Entry Note: In case of channel as E-SEVA Upload method field represents the way of entering E-SEVA records in the PMS system. Database Upload is done using Offline payments Upload Batch link while Manual Entry is done by using link Offline payments Add Payment Batch. 5. Click Submit button in the View/Modify Payment Batch screen. It displays the Batches for the provided input. Select the Batch whose details has to be viewed/modified. 6. A) Click View Batch Button to View the selected Batch Details. View Payment Batch screen appears. The details of all the individual payments taken in a batch is displayed. B) Click Modify Batch to Modify the selected Batch Details. Modify/Delete Payment Batch screen appears. The details of all the individual payments taken in a batch are displayed. To modify the details of individual records in the batch, Click respective Edit button provided at the end of each row. Modify the required details. Note: Only Running Batch can be modified. Once the Batch is Posted it cannot be modified. Note: To delete the batch click Delete Batch. A message showing “Batch Deleted Successfully” is displayed. Total Daily List amount Payment against Demand Id Note Account Number It displays the sum of all the payments taken in the batch. If Amount Paid Field of individual payments is been modified, then modify the Total Daily List amount accordingly to match with the Total Amount Field. It is a dropdown. It represents the Service Type against which payment has been made. Choose among the following options: CDR GSM ES ZONAL ES PANINDIA NIB 3.0 NIB 3.1 DEMAND NOTE If the Payment against is selected as Demand Note.Enter the demand note id.Based on this Account number and Amount paid should populate. Enter the Account Number. Based on this Amount paid,Bill Date,Amount Due,Payment Mode should populate. Bill Date Enter the amount of Payment. If the Payment Against field is selected as Demand Note then the Amount Paid field is not modifiable. It is a non editable field. It displays the date of Bill Generation. Amount Due It is a non editable field. It displays the Amount Due for payment against the Account Number. Amount Paid Payment Mode Instrument Number Instrument Date Branch Code Transaction Id Total Amount It is a dropdown. It displays the mode of payment. Choose from the provided list to modify the mode of payment. This list is dynamic such that configured payment modes against the selected channel are displayed Enter the Cheque/Demand Draft Number. This field is mandatory only when Payment Mode is Cheque/Demand Draft and the selected channel is E-Seva Enter the Cheque/Demand Draft Date. This field is mandatory only when Payment Mode is Cheque/Demand Draft and the selected channel is E-Seva Enter the Branch code of the bank from where instrument is drawn. This field is mandatory only when Payment Mode is Cheque/Demand Draft and the selected channel is E-Seva. Enter the Transaction Id. This field is mandatory only when Channel Name is selected as E-Seva It is a non editable field. It displays the sum of the Amount Paid of all the individual payment entries. Note: The Total Daily List Amount should tally with the Total Amount of all the individual payment entries 7. Click Modify Batch to save the modified details. A success message is displayed. 2.3 Post Daily List Batches Case Study 3 Objective To post entries of daily list already entered in the PMS. Scenario You are working in a SSA and entered a daily list from a offline channel such as Bank.You want to post records in the PMS system. Application Payment Managemant System. Duration 15 minutes To login to PMS application: a. Select Start Internet Explorer In the browser, enter http://10.193.215.21:7777/PMS/CommonFiles/Login.jsp b. Login using the following User Id and Password c. User Id CSRHYD Password CSRHYD Click Login and wait till the entire application is loaded into the browser. 1. To post payment batch: a. Click Offline Payments Post Payment Batch tab on left menu bar. b. Select Search Criteria either as Batch Id or as collection desk code. c. In case of search as batch id enter the batch id in batch id text field. d. Enter the following fields in Post Payment Batch screen: (in case of search as batch id) List Type Select thye ListType.It is a mandatory field. Channel Name Select the Channel Name. It is a mandatory field.On selecting this Collection center code list is auto populated. Collection Center Code Select the Collection Center Code from the list It is a mandatory field. On selecting this Collection Desk Code list is auto populated. Collection Desk Code Select the Collection Desk Code from the provided list. It is a mandatory field. Daily List Date Enter the Daily List Date using calender. It is a mandatory field. e. Click Submit button in the Post Payment Batch screen. Post Payment Batch Details screen appears. The details of all the individual payments taken in a batch are displayed. These details are modifiable while posting the batch. To modify the details of individual records in the batch, Click respective Edit button provided at the end of each row. Modify the required details as described in case study 2. f. Click Post Batch. A warning window will oena bout confirmation of batch posting.Click OK button to confirm the batch posting. A pop up window will should open with success message. 2.4 Adding File Structure Case Study 4 Objective To adding file structure of payment files to be received from offline channels such as Bank. Scenario You are working in a SSA and received a payment files in soft copy form.You have to upload payment file in the PMS system.To sucsessfully uploading a file you need to first add file structure of the payment file for a Collection Center. Application Payment Managemant System. Duration 15 minutes 1. To login to PMS application: a. Select Start Internet Explorer In the browser, enter http://10.193.215.21:7777/PMS/CommonFiles/Login.jsp b. Login using the following User Id and Password c. User Id CSRHYD Password CSRHYD Click Login and wait till the entire application is loaded into the browser. 2. To add file structure: a. Click File Structure Add tab on left menu bar. Channel Name Select the channel of the Collection Office whose File Structure has to be added. On selecting Channel,Collection Center Code list is populated. Collection Center Code Select the Collection Center Code from the provided list. Organisation Name (Bank) This field appears only when Channel Name is selected as Bank. It represents the Bank Name whose File Structure has to be added. Select the Bank from the provided list ECS Enabled It is a dropdown . It represents whether the selected Bank provides Electronic Clearing Services or not. Choose among the following two options: Yes No b. Enter the following fields in Add File Structure screen: 3. Click Submit Button. Add File Fields screen appears. 4. Enter the following fields in Add File Fields screen Search Criteria There are 3 search fields provided out of which atleast one is mandatory to be filled. Each field is provided with a checkbox. Select the field to add its Starting Index and End Index. Select atleast one out of following three: Account Number Bill Number Phone Number Field Name It represents the name of the file fields. The existing File Fields are: Starting Index Enter the Starting Index for the provided Field Names. End Index Enter the End Index for the provided Field Names. Format It represents the format of the Field Names. Add Format for the following Field Names: DATE: Select the Date format from the provided list HEADING LINES: Enter the Number of Heading Lines in the File Format which is not to be processed PAYEMNT MODES: Enter the Format for provided Payment Modes. It represents the name refered to the respective Payment Modes .Select Default Payment Mode from the provided list if a organisation excepts payments from a single Payment Mode Account Number: It represents the account against which payment has been made Bill Number: It represents the bill Number against which payment has been made Phone Number: It represents the phone Number against which payment has been made Amount: It represents the payment amount Date: It represents the date of payment File Extension: It represents the extension of the file whose structure has been added. Heading Lines: It represents the number of lines to be treated as heading lines. Payment Mode: It represents the mode of payment 5. Click Submit Button. A pop up window should open with success message. Note: Similarly already added file structure can be viewed or modified using link File Structure Modify/View. 2.5 Upload Batch Case Study 5 Objective To upload a payment file received from offline channels such as Bank. Scenario You are working in a SSA and received a payment files in soft copy form.You have to upload payment file in the PMS system. Application Payment Managemant System. Duration 16 minutes 1. To login to PMS application: a. Select Start Internet Explorer In the browser, enter http://10.193.215.21:7777/PMS/CommonFiles/Login.jsp b. Login using the following User Id and Password c. User Id CSRHYD Password CSRHYD Click Login 2. To upload payment batch: Before uploading the records of the received file into PMS, it should be saved in a predescribed path and with a predescribed Name. Predescribed Path: C:\PMS\<CHANNELNAME>\<SSA_CODE> Make a folder named PMS in C: drive and under that folder make another folder named as SSA Code and save the file in this folder.Note: File should be in text format(text document). Predescribed Name: The File Name should start with the SSA code where the Collection Office whose file is to be uploaded belongs to. It is followed by the Collection Office Code, followed by the daily list date (date format should be DDMMYYYY . For Example: for 19 januray 2009 date should be 19012009 ) which is then followed by a Sequence Number which is given to uniquely identify each file. Channel Name Select the channel of the Collection Office whose File has to be uploaded. Choose from the following options: Bank Post Office Bill Desk Franchisee Kiosk IVRS E-Seva Collection Center Code Select the Collection Center Code from the provided list Organisation Name (Bank) This field appears only when Channel Name is selected as Bank. It represents the Bank Name whose File has to be uploaded. Select the Bank from the provided list. Note: In case of channel as E-SEVA, this field do not appear. ECS Enabled It represents whether the selected Bank provides Electronic Clearing Services or not. Choose among the following two options: Yes No Note: In case of channel as E-SEVA, this field do not appear. File Date Enter the Date of the received file. Select the date using calender. Note: In case of channel as E-SEVA, this field name is changed to Payment Date. Sequence Number This Number is provided to each file for its unique identification. Enter the provided Sequence Number while naming Note: In case of channel as E-SEVA, this field do not appear. the For Example: If a File is received from a Collection Office such that its: SSA Code is : KRL Collection Desk Code is : BK001 Daily List Date is: 19-01-2009 Sequence Number: 1 Then the File Name provided should be: KRLBK001019120091 If another file is received from the same Collection Office of same Daily List Date then a new Sequence Number should be provided to identify it uniquely, For Example: KRLBK001190120092(Sequence Number is changed to 2) Internet Explorer Setting: In Internet Explorer (IE) open Tools Internet Options Security Select zone as Internet Custom Level. Go to Active X controls and Plug-ins and Enable/Prompt (Recommended) all the options in it. (Do the same for zone as Local Intranet in Tools Internet Options Security). Note: This is a one time activity. a. Click Offline Payments Upload Batch. Upload Batch screen appears. b. Enter the following fields in Upload Batch screen: 3. Click Submit button. A warning message is displayed about Active X control. Click Yes to continue. Note: If the File being uploaded has already been uploaded (or some of its records) then a file. message” Some of the records in file are same as the file earlier uploaded for same daily list. Do you want to continue?”.Click OK to continue. Note: As E-SEVA records are directly fetched from E-SEVA intermediate database, E-SEVA batch will be directly posted. 2.6 Receipt For Dealers Case Study 6 Objective To print the recipt for franchisee dealers for a particular date. Scenario You are working in a SSA and want to take print of recipts of a particular franchisee for a date.The details of payments taken by franchisee should alreadt entered in the PMS. Application Payment Managemant System. Duration 10 Minutes 1. To login to PMS application: a. Select Start Internet Explorer In the browser, enter http://10.193.215.21:7777/PMS/CommonFiles/Login.jsp b. Login using the following User Id and Password c. User Id CSRHYD Password CSRHYD Click Login. 2. To print receipts for dealers: a. Click Receipt For Dealers tab on left menu bar. b. Enter the following fields in Receipt For Dealers screen: Payment Date Enter the date from the provided calender Collection Desk Code Select the Desk Code provided to the particular franchisee for its unique identification. 3. Click View Details button. Receipt For Dealers (Second) screen. The existing payment details which includes Receipt Number, Account Number, Amount Paid for the selected Franchisee and selected date is displayed. Select the payments whose receipts has to be generated. 4. Click Submit button. The receipts for selected payments is generated. Click Print button to get the printout of the receipts PMS Training Case Studies - 2 For CDR2 Project Contents 1 Schedule Operation .................................................................................................................... 21 1.1 Add New Schedule for Offline Payment............................................................................................... 21 1.2 Modify/View/Delete Schedule for Offline Payment ............................................................................. 22 1.3 Add New Schedule for ECS Payment.................................................................................................. 23 1.4 Modify/Delete Schedule for ECS Payment ......................................................................................... 24 3 Schedule Operation 3.1 Add New Schedule for Offline Payment Case Study 1 Objective Add New Schedule for Offline Payment. Scenario You are working in a SSA and uploaded all daily lists received from a offline channel such as Bank.and you have posted all offline batches in the PMS system. Application Payment Management System(PMS) Duration 30 Minutes 6. To login to PMS application: a. Select Start Internet Explorer In the browser, enter http://10.196.215.38/PMS/CommonFiles/Login.jsp b. Login using the following User Id and Password: c. User Id CSRHYD Password CSRHYD Click Login button and wait till the entire application is loaded into the browser 7. To add a New schedule details: a. Click Schedule Add tab on left menu bar. b. Enter the following fields in the scrren opened: Select Channel Select Collection Centre Schedule Date c. Start Select Channel Name from drop down list. It is a mandatory field. Select Collection Centre from drop down list. It is a mandatory field Select Start Date from Calendar. It is a mandatory field. Schedule End Date Select End Date From Calendar. It is a mandatory field. No. Of Entries It is number of daily list that would be in Schedule.it ‘svaluse must be greater than one. Click Submit button.Next screen would open. 8. This screen has two tables.In first table enter Daily list deatils. Fields are as follow Daily list Date Select the Daily list Date from Calendar. It is a mandatory field. Collection Desk Code Select Collection Desk Code from drop down list. It is a mandatory field. Enter the Total amount of the daily list. It is a mandatory field. List Amount Amount Mismatch If, for selected date and collection desk code there is no daily list in to the system then this field automatically has valuse as ‘Y’. If the system amount is not tallied with list amount entered then this field automatically has value as ‘Y’. Override Mismatch By default it’s value is ‘N’ in case of amount mismatch user can forcibily change it’s value to ‘Y’. Missing List 9. In second table enters the schedule details: Total Collection Service Tax Education Cess Higher Cess Education Enter total collection it must be the sum of all daily list’s list amount. It is a mandatory field. Enter the value for service type it must be digits only. It is a mandatory field. Enter the value for Education Cess it must be digits only. It is a mandatory field. Enter the value for Higher Education cess it must be digits only. It is a mandatory field. Enter the value for Commission Deducted it must be digits only. Commission Deducted Commission Due Commission Date Start Commission Date End It’s value automatically calculated by the system. It is a mandatory field. Select the it’s value from Calendar. It is a mandatory field. Select the it’s value from Calendar. It is a mandatory field. Cheque Number/Transaction Id Select it’s value from drop down list,it’s value can be “CHEQUE’ or ‘OTHERS’. It is a mandatory field. If instrument type is selected as ‘CHEQUE’ then enter checque numer in this field,or if instrument type is selected as ‘OTHERS’ then enter Transaction Id in this field. It is a mandatory field. Instrument Date Date of the Instrument/cheque. It is a mandatory field. Instrument Amount Amount of the instrument/cheque. It is a mandatory field. Instrument type Bank Name MICR Code Select the Bank Name from drop down list which has issued the instrument/cheque. It is a mandatory field. MICR code of the bank branch. It is a mandatory field. 10. Click Post Schedule button.a pop up window will appear with appropriate message. 3.2 Modify/View/Delete Schedule for Offline Payment Case Study 2 Objective Modify/View/Delete existing Schedule of Offline Payment. Scenario You are working in a SSA and a schedule has been added for a collection centre of the offline channel such as Bank.and That Schedule is not posted yet. Application Payment Management System(PMS) Duration 30 Minutes 1. To login to PMS application: a. Select Start Internet Explorer In the browser, enter http://10.196.215.38/PMS/CommonFiles/Login.jsp b. Login using the following User Id and Password: c. User Id CSRHYD Password CSRHYD Click Login button and wait till the entire application is loaded into the browser 2. To Modify/View/Delete schedule details: a. Click Schedule Modify/View/Delete tab on left menu bar. b. Enter the following fields in the scrren opened: Select Channel Select Centre From Date To Date c. Collection Select Channel Name from drop down list. It is a mandatory field. Select Collection Centre from drop down list. It is a mandatory field Select Start Date from Calendar. It is a mandatory field. Select End Date From Calendar. It is a mandatory field. Click Submit button.Next screen would open. d. This screen lists all the schedule whose creation date belongs in selected range(From date-To date). e. Chose a schedule from the list using radio button. f. There are three buttons Delete,Modify and View Details. g. Click on any button to perform desired task. 3.To Delete the selected schedule Click on Delete Button. A pop window appear with appropriate message. 4.To Modify the selected schedule click on Modify Button .a screen opens with current values of selected schedule. a.modify these values with new one. b.click on Post Schedule button to reflect the changes in to data base. c.a pop up window will appear with appropriate message. 5.To View the selected schedule click on View Details Button .a screen opens with current values of selected schedule. 3.3 Add New Schedule for ECS Payment Case Study 3 Objective Add New Schedule for ECS Payment. Scenario You are working in a SSA and uploaded all daily lists of ECS paymentsk.and you have posted all offline batches of ECS in to the PMS system. Application Payment Management System(PMS) Duration 30 Minutes 11. To login to PMS application: a. Select Start Internet Explorer In the browser, enter http://10.196.215.38/PMS/CommonFiles/Login.jsp b. Login using the following User Id and Password: c. User Id CSRHYD Password CSRHYD Click Login button and wait till the entire application is loaded into the browser 12. To add a New schedule details: a. Click Schedule Add ECS Schedule tab on left menu bar. b. Enter the following fields in the screen opened: Collection Date Total Collection Service Tax c. Select Collection date from calendar. It is a mandatory field. System find total collection for date selected and fills that field itself. If no records found then gives an error message. Enter the service Tax only in digits. It is a mandatory field. Education Cess Enter the education cess only in digits. It is a mandatory field. Higher education cess Enter the higher education cess only in digits. It is a mandatory field. Commission Deducted Enter the Commission deducted only in digits. It is a mandatory field. Commission Due System calculates it’s value itself. Click Post Schedule button.a pop up widow would open with appropriate message.. 3.4 Modify/Delete Schedule for ECS Payment Case Study 4 Objective Modify/Delete existing Schedule of ECS Payment. Scenario You are working in a SSA and a schedule has been added for ECS payment.and That Schedule is not posted yet. Application Payment Management System(PMS) Duration 30 Minutes 3. To login to PMS application: a. Select Start Internet Explorer In the browser, enter http://10.196.215.38/PMS/CommonFiles/Login.jsp b. Login using the following User Id and Password: c. User Id CSRHYD Password CSRHYD Click Login button and wait till the entire application is loaded into the browser 4. To Modify/View/Delete schedule details: a. Click Schedule Modify ECS Schedule tab on left menu bar. b. Enter the following fields in the scrren opened: Collection Code From Date To Date c. Centre Select Collection Centre from drop down list. It is a mandatory field Select Start Date from Calendar. It is a mandatory field. Select End Date From Calendar. It is a mandatory field. Click Submit button.Next screen would open. d. This screen lists all the schedule whose creation date belongs in selected range(From date-To date). e. Chose a schedule from the list using radio button. f. There are two buttons Delete and Modify. g. Click on any button to perform desired task. 3.To Delete the selected schedule Click on Delete Button. A pop window appear with appropriate message. 4.To Modify the selected schedule click on Modify Button .a screen opens with current values of selected schedule. a.modify these values with new one. b.click on Post Schedule button to reflect the changes in to data base. c.a pop up window will appear with appropriate message.