1
CAUTION
Turn the power off at the circuit breaker
before installing the Controller.
 Installation
For ease of installation, manufacturer recommends use of a deep wall box. The
device is equipped with flying leads to simplify installation, however, if desired,
they may be removed by loosening the screw terminals.
1. Disconnect power to circuit by turning circuit breaker OFF before installation.
2. Remove existing wall plate and switch.
3. Strip existing wires 1/2”. If two wires will be connected to the same terminal
on a Miro device, both wires must be the same gauge (12AWG or 14AWG).
4. Wire the LINE (black), NEUTRAL (white) and GND (green or bare) supply wires
to the correspondingly marked terminals, according to the wiring diagram
below.
5. Attach the wall plate.
6. Switch the circuit breaker ON.
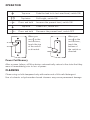
7. Make sure the LED on the DRD8 controller is lit. It should be yellow; if not, see
TROUBLESHOOTING.
NEUT
GND
LINE
SUPPLY
WIRES