1
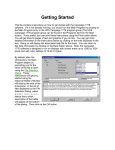
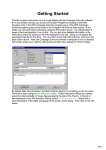
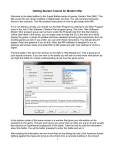
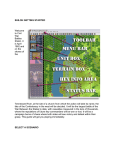
Getting Started
This file contains instructions on how to get started with the Campaign 1776
software. If it is not already running, you should run the Main Program by
clicking on the Main Program entry in the John Tiller Software Campaign 1776
program group (The Campaign 1776 program group can be found in the All
Programs list from the Start button). If you prefer, you can print these
instructions. You will get about 6 pages of text and graphics if you do this.
By default, after the introduction, the
Main Program begins by prompting
you for the name of the file to open
using the File Selection Dialog.
These instructions will get you
started using the historical Battle of
Bunker Hill playing the side of the
Americans. In the list of files
displayed by the File Selection
Dialog, select:
Bunker Hill_a.scn
Notice that a short description of the
battle will appear at the bottom of the dialog. Then click on the OK button.
Next, the A/I Selection Dialog will
appear. Since we are going to play as
the Americans, select Automatic in the
British A/I group on the right hand side
of the dialog. This will cause the
computer to play as the British side. If
we want to give the computer an
advantage, we could move the
Advantage slider towards British side,
but leave it in the middle for now.
Later on, you can also use this dialog
to experiment with Optional Rules by
clicking on the Rules button. For now,
click on the OK button.
1
The Bunker Hill battlefield will be
drawn on the screen and in the
middle of the screen, the Phase
Dialog will appear. Important:
click anywhere in the dialog
picture to cause the program to
begin the A/I portion of the
battle. If you click on the Close
button, the program will just sit
there and you will need to click
on the A/I Toolbar Button to get
it to do something.
When the A/I completes, the
Phase Dialog will reappear.
Now it is your turn. Click
anywhere in the Phase Dialog
picture area. At this point, you
may want to review your forces
in this battle. You can click on
any location on the map and at
the left of the screen, it will tell
you what leaders and units are
located there. Also notice that
the map is scrollable by using the scroll bars that appear at the right and
bottom of the map area.
Find the location displayed in the
picture at right and click on it.
Notice that a red hexagon will
appear at the location and that at
the left of the screen, you will see
that the location is defended by Col.
Prescott and 3 companies of
Massachusetts infantry.
We’ll start by doing some firing on the enemy forces. There are
several issues involved in valid firing involving range, weapon, and
line-of-sight. However, it is always easy to find units capable of
action in the current phase by clicking on the Next Unit Toolbar
Button while holding down the Control (Ctrl) key. Locate the button displayed
at left in the toolbar area and click on it while holding down the Control (Ctrl)
key.
2
Notice that each time you hold down the Control (Ctrl) key,
the cursor changes to indicate that you have changed mode
from Move mode to Fire mode. While you can change mode
like this when you want to fire, if you find holding down the
Control (Ctrl) key a problem, you can toggle between Move and Fire Mode by
pressing the Mode button in the toolbar.
At the left of the screen, you should see that the
computer has found two cannons that can fire in
this phase. If you don’t see this, you can
continue clicking on the Next Unit button until the
program cycles back around to these units.
Click on the top unit picture and notice that it
becomes highlighted. You have just selected
that unit. You can experiment with selecting
the units at this point and notice that you can
toggle selection on and off for either or both
units. Leave the top unit selected and go on to
the next step.
Now the question is: what targets does this unit have? In particular,
the targets must be visible from the location of the cannon. So at
this point, find the Visible Hexes Toolbar Button on the toolbar
and click it.
You’ll notice that the hexes that cannot be seen from
the current location are shaded on the map. If you
scroll the map to the right (using the scroll bar at the
bottom of the map), you will see some British units that
are unshaded. These are potential targets if they are
also in range and the firing unit is facing them.
3
To fire, click on the target
location using the right
mouse button while
holding down the Control
(Ctrl) key. Note: clicking
using the left mouse button
always changes the current
location. If you should
change the current location,
you will need to relocate your
firing units and reselect them. If your target location has more than one target,
the Target Dialog will be displayed so you can select which one you want to
fire at. So at this point, right click on a target hex while holding down the
Control (Ctrl) key and do some firing. Each time you fire, you will get a report
indicating the damage you did to the target. Remember that clicking on the
Next Unit button while holding down the Control (Ctrl) key will take you to the
next valid firing unit. When you are done, you probably want to turn off the
visible hex shading by reclicking on the Visible Hexes button in the toolbar.
For illustration, let’s advance Stark’s force against the
British. Find the location indicated at right, possibly by
scrolling the map up some. If you click on the correct
location, you should see Stark and up to 3 infantry
companies displayed at the left of the screen. Note: in
rare instances, it may occur that Stark and his force
has routed from their assigned location due to the British fire. If you find that
this has happened, you probably want to restart the program and then return to
this point in the instructions.
You can select an entire location by double-clicking. Do
this so that all units are highlighted at the left of the
screen. Now click using the right mouse button in the
hex just in front of Stark and then the hex just in front of
that. You’ll notice that the units move to the hex you
have clicked on and that your movement is marked by
arrows appearing on the map as you see in the picture on the right. Bring
Stark’s group up until they are just in front of the British advancing along the
shoreline. If you want, you can experiment with moving other units as well.
You may be fired upon by the British at this point, and you will have a chance
to fire as well. If you wish, you could select Stark’s force and fire on the British
before it.
4
Now we want to see if we can dislodge the British
from their location by performing a melee. Select
Stark and any units with him that do not say
DISRUPTED. The picture on the right shows what
you will see if a unit is Disrupted. If you select any
Disrupted units at this point, you will be an error
message when you try the next step so make sure
than any such units are not highlighted in the Unit
List at the left of the screen.
To initiate the melee, right click on the British location. You should see a threearrow symbol appear as in the picture on the left. You should also get a
message in the middle of the screen telling you the relative strengths of the
forces involved in the melee. You would use this information to decide whether
to follow through with the melee or not.
To resolve the melee, go to the Melee
menu and select the Resolve Melee menu
item. You will see a dialog in the middle of
the screen indicating the outcome of the
melee.
That’s a lot to cover. But the good news is that you have now
done 90% of what you need to know to fight a complete battle.
Bringing reinforcements onto the map is the only major issue not
addressed in these instructions. At this point, you should just continue with
what you know and begin exploring other options. Notice you can change your
view perspective by using the Zoom-In and Zoom-Out buttons in the picture on
the right.
When you are through with your turn, you click on the Next
Turn Toolbar Button in the toolbar. Important: if you should
click on the A/I Button at the end of your turn thinking that it will
start the A/I running, you will actually cause the A/I to complete
your own turn for you. So use the Next Turn Button to avoid this.
5
The first time you advance the
turn, the program will prompt
you to save your battle. This
allows you to come back at a
later time and start where you
left off. A default filename is
displayed in this dialog, but you
can change the filename if you
want to have several battles
going at one time. Click on the
Save button to save the battle.
To get more help, you should investigate the on-line help files. In
each program, these are accessible using the Help button in the
toolbar, by selecting General Help from the Help menu, or by
pressing the F1 key.
Your goal in this battle is to defend your Objectives. You can
see where those are on the map by clicking on the Objectives
button in the toolbar or by selecting the Objectives menu item
in the Display menu. Each of your Objectives will be indicated
by an American flag on the map. Furthermore, when you click on an Objective,
the value of that Objective will be displayed at the bottom of the screen in the
brown box. In this battle, Prescott is defending one Objective on Breed’s Hill
and there is a second Objective back on Bunker Hill. Try to cause as many
British casualties as you can while avoiding casualties of your own. At the end
of the battle, the Victory Dialog will be displayed indicating the outcome of the
battle. Feel free to save this battle and come back to it later if you want to do
more exploring at this point or if you would really prefer to play the British side.
Whatever file you save the battle in will be displayed when you select the Old
button in the File Selection Dialog.
To get more information, see the following help files:
• User Manual
• Main Program Help File
• Scenario Editor Help File
• Campaign Editor Help File
6