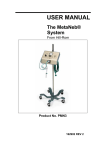
1
USER MANUAL
The Vest Airway
Clearance System,
Model 205
®
From Hill-Rom
Product No. P205
140643 REV 2
© 2007 by Hill-Rom Services, Inc. ALL RIGHTS RESERVED.
Manufactured by:
HILL-ROM
4349 CORPORATE ROAD
CHARLESTON, SC 29405
UNITED STATES
Authorized European Union Representative:
HILL-ROM SAS
B.P. 14 - Z.I. DU TALHOUET
56330 PLUVIGNER
FRANCE
TEL: +33 (0)2 97 50 92 12
No part of this text shall be reproduced or transmitted in any form or by
any means, electronic or mechanical, including photocopying,
recording, or by any information or retrieval system without written
permission from Hill-Rom Services, Inc. (Hill-Rom).
The information in this manual is confidential and may not be disclosed
to third parties without the prior written consent of Hill-Rom.
Second Edition
First Printing 2006
Printed in the USA
3M® is a registered trademark of Minnesota Mining and Manufacturing
Company.
Citris II® is a registered trademark of Beaumont Products, Inc.
Dispatch® is a registered trademark of Caltech Industries, Inc.
Hill-Rom® is a registered trademark of Hill-Rom Services, Inc.
Matar® is a registered trademark of Huntington Laboratories, Inc.
The UL logo is a registered trademark of Underwriters Laboratories,
Inc.
The Vest is a registered trademark of Hill-Rom Services, Inc.
®
Underwriters Laboratories Inc.® is a registered trademark of
Underwriters Laboratories Inc.
Velcro® is a registered trademark of Velcro Industries, BV (a Dutch
corporation).
Viraguard® is a registered trademark of Veridien Corp.
®
The Vest Airway Clearance System, Model 205
User Manual (140643 REV 2)
i
Virex® is a registered trademark of S. C. Johnson & Son, Inc.
Wex-Cide™ is a trademark of Wexford Labs, Inc.
The information contained in this manual is subject to change without
notice. Hill-Rom makes no commitment to update or keep current, the
information contained in this manual.
Hill-Rom reserves the right to make changes without notice in design,
specifications, and models. The only warranty Hill-Rom makes is the
express written warranty extended on the sale or rental of its products.
To order additional copies of this manual (140643), refer to the back
cover for contact information. For countries not listed on the back cover,
contact your distributor.
NOTE:
The back cover is a comprehensive list of Technical Support contact
information for Hill-Rom. The product discussed in this manual may
not be available in all of the countries listed.
Revision
Original Issue
2
ii
Pages Affected
Date
July 2006
September 2007
All
®
The Vest Airway Clearance System, Model 205
User Manual (140643 REV 2)
Table of Contents
Document Symbols . . . . . . . . . . . . . . . . . . . . . . . . . . . . . . . . . . . . 1
Precautions . . . . . . . . . . . . . . . . . . . . . . . . . . . . . . . . . . . . . . . . . . . 2
Intended Use . . . . . . . . . . . . . . . . . . . . . . . . . . . . . . . . . . . . . . . . . 4
Introduction . . . . . . . . . . . . . . . . . . . . . . . . . . . . . . . . . . . . . . . . . . 4
Contraindications . . . . . . . . . . . . . . . . . . . . . . . . . . . . . . . . . . . . . . 4
Relative Contraindications . . . . . . . . . . . . . . . . . . . . . . . 5
Features . . . . . . . . . . . . . . . . . . . . . . . . . . . . . . . . . . . . . . . . . . . . . 6
Air Pulse Generator . . . . . . . . . . . . . . . . . . . . . . . . . . . . . . . . 6
Push Bar . . . . . . . . . . . . . . . . . . . . . . . . . . . . . . . . . . . . . . . . . 6
Remote Control . . . . . . . . . . . . . . . . . . . . . . . . . . . . . . . . . . . 7
Height Adjustment Release Lever . . . . . . . . . . . . . . . . . . . . . 7
Locking Casters . . . . . . . . . . . . . . . . . . . . . . . . . . . . . . . . . . . 7
Stand . . . . . . . . . . . . . . . . . . . . . . . . . . . . . . . . . . . . . . . . . . . . 7
Storage Basket . . . . . . . . . . . . . . . . . . . . . . . . . . . . . . . . . . . . 7
Air Hose Connector Ports . . . . . . . . . . . . . . . . . . . . . . . . . . . . 7
Air Hoses . . . . . . . . . . . . . . . . . . . . . . . . . . . . . . . . . . . . . . . . 7
Control Panel . . . . . . . . . . . . . . . . . . . . . . . . . . . . . . . . . . . . . 7
Assembly . . . . . . . . . . . . . . . . . . . . . . . . . . . . . . . . . . . . . . . . . . . . 8
Instructions for Use . . . . . . . . . . . . . . . . . . . . . . . . . . . . . . . . . . . . 9
Put on the Disposable, Single-Patient Use
(SPU) Vests . . . . . . . . . . . . . . . . . . . . . . . . . . . . . . . . . . . . . . 9
Wrap SPU Vest . . . . . . . . . . . . . . . . . . . . . . . . . . . . . . . . 9
Full SPU Vest . . . . . . . . . . . . . . . . . . . . . . . . . . . . . . . . 10
Connect the Air Hoses . . . . . . . . . . . . . . . . . . . . . . . . . . . . . 10
Set Up the Air Pulse Generator . . . . . . . . . . . . . . . . . . . . . . 12
Use The Vest Airway Clearance System,
Model 205 . . . . . . . . . . . . . . . . . . . . . . . . . . . . . . . . . . . . . . . 12
®
Use the Normal Mode . . . . . . . . . . . . . . . . . . . . . . . . . . 13
Setting and Using a New Program Mode . . . . . . . . . . . 15
Using the Program Mode . . . . . . . . . . . . . . . . . . . . . . . 18
®
The Vest Airway Clearance System, Model 205
User Manual (140643 REV 2)
iii
Setting and Using a New Ramp Mode . . . . . . . . . . . . . 19
Using the Ramp Mode . . . . . . . . . . . . . . . . . . . . . . . . . . 23
Change the Language . . . . . . . . . . . . . . . . . . . . . . . . . . 24
Disable the Program Modes
(Program and Ramp) . . . . . . . . . . . . . . . . . . . . . . . . . . . 25
Set Facility Custom Default Settings . . . . . . . . . . . . . . 27
Move the Air Pulse Generator . . . . . . . . . . . . . . . . . . . . . . . 30
Raise or Lower the Air Pulse Generator . . . . . . . . . . . . . . . . 31
Cleaning . . . . . . . . . . . . . . . . . . . . . . . . . . . . . . . . . . . . . . . . . . . . 32
General Cleaning . . . . . . . . . . . . . . . . . . . . . . . . . . . . . . . . . 33
Steam Cleaning . . . . . . . . . . . . . . . . . . . . . . . . . . . . . . . . . . . 33
Cleaning Hard to Clean Spots . . . . . . . . . . . . . . . . . . . . . . . . 34
Disinfecting . . . . . . . . . . . . . . . . . . . . . . . . . . . . . . . . . . . . . . 34
Maintenance . . . . . . . . . . . . . . . . . . . . . . . . . . . . . . . . . . . . . . . . . 34
Disposable Vests and Replacement Parts . . . . . . . . . . . . . . . . . . 35
Size the Disposable Vest . . . . . . . . . . . . . . . . . . . . . . . . . . . 36
Service Calls . . . . . . . . . . . . . . . . . . . . . . . . . . . . . . . . . . . . . . . . 36
Troubleshooting . . . . . . . . . . . . . . . . . . . . . . . . . . . . . . . . . . . . . . 36
Air Pulse Generator Does Not Power On . . . . . . . . . . . . . . . 36
No Air Pulses into the Disposable Vest . . . . . . . . . . . . . . . . 37
Screen Shows “Please Call for Service” Message . . . . . . . . 37
An Air Hose Comes out of the Air Pulse Generator or
Disposable Vest during Operation . . . . . . . . . . . . . . . . . . . . 37
Screen Shows “RESTARTING” . . . . . . . . . . . . . . . . . . . . . 38
Product Symbols . . . . . . . . . . . . . . . . . . . . . . . . . . . . . . . . . . . . . 39
Specifications . . . . . . . . . . . . . . . . . . . . . . . . . . . . . . . . . . . . . . . . 42
Classification and Standards . . . . . . . . . . . . . . . . . . . . . . . . . 43
Frequently Asked Questions . . . . . . . . . . . . . . . . . . . . . . . . . . . . 48
iv
®
The Vest Airway Clearance System, Model 205
User Manual (140643 REV 2)
Document Symbols
This manual contains different typefaces and symbols to make the
content easier to read and understand:
• Standard text—used for regular data.
• Boldface text—emphasizes a word or phrase.
• NOTE:—sets apart special data or important instruction
clarification.
• WARNING or CAUTION
–
A WARNING identifies situations or actions that may have an
effect on patient or user safety. To ignore a warning could
cause patient or user injury.
–
A CAUTION identifies special procedures or precautions that
persons must obey to help prevent equipment damage.
• CAUGHT HAZARD WARNING
• CHEMICAL HAZARD WARNING
• ELECTRICAL SHOCK HAZARD WARNING
®
The Vest Airway Clearance System, Model 205
User Manual (140643 REV 2)
1
Precautions
• Federal USA law restricts this device to sale by or on the order of a
physician.
• Unplug this system immediately after you use it.
• Do not use the system near flammable chemicals or products,
including flammable anaesthetics. To do so could cause personal
injury or equipment damage.
• Use close supervision when this system is used by or near children or
patients with physical limitations.
• Use this system only for its intended use. Use only those attachments
that are specified by the manufacturer.
• Patients that may have difficulty clearing secretions from the upper
airway (such as those with DMD or other advanced neuromuscular or
neurological disorders) may require specialized therapy regiments
involving manually or mechanically assisted coughing or other
®
techniques in conjunction with The Vest Airway Clearance System,
Model 205 therapy. Please consult your physician to determine if
additional therapy is appropriate.
• To help prevent cross-contamination, replace the single-patient use,
disposable vest between patients.
• Only authorized persons should service the unit.
• If service is necessary, call Hill-Rom Technical Support. For contact
information, refer to the back cover. For countries not listed on the
back cover, contact your distributor.
• Do not operate the Air Pulse Generator without the disposable vest
and Air Hoses attached. Equipment damage could occur.
• If it is difficult to connect the Air Hoses to the Air Pulse Generator or
disposable vest, do not use lubricant. Equipment damage could
occur.
• If it is difficult to connect the Remote Control to the Air Pulse
Generator, do not use lubricant. Equipment damage could occur.
• Do not use harsh cleansers, solvents, or detergents.
• Frequent exposure to Matar® germicidal detergent may discolor the
Air Pulse Generator.
1
1. Matar® is a registered trademark of Huntington Laboratories, Inc.
2
®
The Vest Airway Clearance System, Model 205
User Manual (140643 REV 2)
• When you use Dispatch® disinfectant or CSI disinfectant spray,
make sure you wipe the unit dry. Failure to do so could result in the
build-up of residue or equipment damage.
1
KEEP THESE INSTRUCTIONS
1. Dispatch® is a registered trademark of Caltech Industries, Inc.
®
The Vest Airway Clearance System, Model 205
User Manual (140643 REV 2)
3
Intended Use
®
The Vest Airway Clearance System, Model 205 was developed to
provide effective Airway Clearance Therapy. The system consists of a
disposable vest attached to an Air Pulse Generator that rapidly inflates
and deflates the disposable vest. This causes the chest wall to be gently
compressed and released, which creates airflow within the lungs. This
process moves mucus toward the large airways where it can be cleared
by coughing or suctioning. This type of Airway Clearance Therapy is
referred to as High Frequency Chest Wall Oscillation (HFCWO).
Introduction
This manual includes instructions for setup, use, and maintenance of
®
The Vest Airway Clearance System, Model 205. It is to be used as a
reference guide. Please review all sections carefully before you use the
system.
®
The Vest Airway Clearance System, Model 205 is intended for use as
prescribed by a physician.
Contraindications
WARNING:
®
If patient conditions exist that cause the use of The Vest Airway
Clearance System, Model 205 to present a risk to the patient, do
not use the unit except as directed by a physician. Death or
serious injury could occur.
®
The Vest Airway Clearance System, Model 205 is contraindicated if
these conditions are present:
• Head and/or neck injury that has not yet been stabilized
• Active hemorrhage with hemodynamic instability
4
®
The Vest Airway Clearance System, Model 205
User Manual (140643 REV 2)
Relative Contraindications
If the patient has one or more of the conditions below, carefully consider
®
and assess the patient’s case before you decide to use The Vest Airway
Clearance System, Model 205.
• Intracranial pressure (ICP) >20 mm Hg, or patients in whom
increased intracranial pressure is to be avoided
• Uncontrolled hypertension
• Hemodynamic instability
• Pulmonary edema associated with congestive heart failure
• Bronchopleural fistula
• Subcutaneous emphysema
• Large pleural effusions or empyema
• Recent esophageal surgery
• Active or recent gross hemoptysis
• Pulmonary embolism
• Uncontrolled airway at risk for aspiration such as tube feeding or
recent meal
• Distended abdomen
• Bronchospasm
• Suspected pulmonary tuberculosis
• Recently placed transvenous pacemaker or subcutaneous pacemaker
• Recent epidural spinal infusion or spinal anesthesia
• Recent spinal surgery or acute spinal injury
• Rib fractures, with or without flail chest
• Surgical wound, healing tissue, recent skin grafts, or flaps on thorax
• Burns, open wounds, and skin infections on the thorax
• Lung contusion
• Osteomyelitis of the ribs
• Osteoporosis
• Coagulopathy
• Complaint of chest wall pain
®
The Vest Airway Clearance System, Model 205
User Manual (140643 REV 2)
5
Features
J
A
B
I
C
H
D
G
F
E
A
B
C
D
E
Air Pulse Generator
Push Bar
Remote Control
Height Adjustment Release
Lever
Four Locking Casters
F
G
H
I
Stand
Storage Basket
Air Hose Connector Ports
Air Hoses
J
Control Panel
Air Pulse Generator
When correctly connected, the Air Pulse Generator controls the
disposable vest and supplies pulsations to the chest wall.
Push Bar
Permits the unit to be moved around a room or from room to room.
6
®
The Vest Airway Clearance System, Model 205
User Manual (140643 REV 2)
Remote Control
Can be used instead of the ON/OFF button to pause or resume the Air
Pulse Generator.
Height Adjustment Release Lever
Used to raise or lower the Air Pulse Generator to a comfortable working
height.
Locking Casters
Keeps the stand and Air Pulse Generator from unintentionally moving.
Stand
Holds the Air Pulse Generator.
Storage Basket
Can be used to store disposable vests.
Air Hose Connector Ports
Air Hoses connect to the Air Hose Connector Ports on the front of the
Air Pulse Generator.
Air Hoses
Connect the disposable vest to the Air Pulse Generator.
Control Panel
Shows the modes, system settings, and system messages.
®
The Vest Airway Clearance System, Model 205
User Manual (140643 REV 2)
7
Assembly
1.
Align the two posts on the rubber
mat with the holes in the top of
the stand.
2.
Align the holes on the bottom of
the Air Pulse Generator with the
posts on the rubber mat.
NOTE:
The screen on the Air Pulse Generator
faces the side of the stand that the
basket is on.
8
3.
Install the four screws to attach
the Air Pulse Generator to the
stand.
4.
Tighten, but not overtighten, the
four screws with the supplied
wrench.
®
The Vest Airway Clearance System, Model 205
User Manual (140643 REV 2)
Instructions for Use
Put on the Disposable, Single-Patient Use (SPU) Vests
NOTE:
For comfort, a single layer of cotton clothing should be worn under the
disposable vest. The disposable vest should be adjusted so that it is
comfortable.
Wrap SPU Vest
1.
Turn the patient towards you.
2.
With the Wrap SPU Vest
deflated, begin to lay it flat on
the bed so it is perpendicular
with the patient’s torso.
3.
Roll the patient away from
you and on the open portion of
the Wrap SPU Vest.
4.
Put the Wrap SPU Vest in
position just beneath the
patient’s underarms, and
continue to pull the Wrap SPU
Vest around the patient’s torso.
5.
Roll the patient to a supine
position.
6.
Pull both ends of the Wrap
SPU Vest around the patient’s
chest, and use the Velcro®
fasteners to temporarily attach
both ends to each other.
1
Have the patient inhale deeply, and
then attach the ends of the Wrap
SPU Vest so it fits close to the
body, but is not uncomfortable.
1. Velcro® is a registered trademark of Velcro Industries, BV (a Dutch corporation).
®
The Vest Airway Clearance System, Model 205
User Manual (140643 REV 2)
9
Full SPU Vest
NOTE:
For comfort, a single layer of cotton clothing should be worn under the
Full SPU Vest. The Full SPU Vest should be adjusted so that it is
comfortable.
1.
Separate the front flaps of the Full SPU Vest at the Velcro®
fasteners.
2.
Turn the Full SPU Vest so the front flaps will meet in front of the
patient. Then put the patient’s arms through the arm openings in the
Full SPU Vest.
3.
With the Full SPU Vest deflated, use the Velcro® fasteners to
attach the front flaps of the Full SPU Vest to each other.
4.
Make sure there is
approximately 3" to 4"
(8 cm to 10 cm) between
the bottom edge of the
front of the Full SPU Vest
and the patient.
1
Adjust the Velcro® fasteners at
the shoulder straps so the
bottom edge of the Full SPU
Vest is level with the top of the
patient’s hip bone.
Connect the Air Hoses
1.
Slide one end of each Air
Hose into each Air Hose
Connector Port on the
front of the Air Pulse
Generator. Use a slight
twist motion as you push
the Air Hose to help keep
it in position.
1. Velcro® is a registered trademark of Velcro Industries, BV (a Dutch corporation).
10
®
The Vest Airway Clearance System, Model 205
User Manual (140643 REV 2)
2.
Connect the Air Hoses to the
disposable vest:
For a Wrap SPU Vest, do as
follows:
a.
Slide the other end of
each Air Hose into the
disposable vest Air Hose
slits.
b.
Use the Velcro® loops
on the side of the
disposable vest to hold
the Air Hoses in position.
1
For a Full SPU Vest, slide the
other end of each Air Hose over
the disposable vest Air Hose ports.
To help keep the Air Hoses in
position, slightly twist the Air
Hoses as you push them over the
Full SPU Vest Air Hose ports.
1. Velcro® is a registered trademark of Velcro Industries, BV (a Dutch company).
®
The Vest Airway Clearance System, Model 205
User Manual (140643 REV 2)
11
Set Up the Air Pulse Generator
1.
Install the Remote Control into the Air
Pulse Generator.
NOTE:
Use of the Remote Control is optional.
2.
Plug the Power Cord into the power
inlet on the back of the Air Pulse
Generator.
3.
Plug the Power Cord into a grounded,
three-pronged outlet.
®
Use The Vest Airway Clearance System, Model 205
Make sure the unit is set
up correctly (see “Set Up
the Air Pulse Generator”
on page 12). Once power
is connected, the unit will
show a blank screen for up
to 15 seconds. Then it will
show the software revision
level and the total therapy hours for the unit. This screen will show for
10 seconds or until you press the ON button.
12
®
The Vest Airway Clearance System, Model 205
User Manual (140643 REV 2)
NOTE:
To show the total therapy hours, press the OFF button when the display
shows the main screen.
Use the Normal Mode
1.
Press the Up arrow
above NORMAL for
the standard mode.
The screen will show
the previously
programmed
Frequency, Pressure,
and treatment Time
settings (or the default settings, depending on how it was
programmed).
2.
Confirm the settings on the screen. If the settings match the
prescribed treatment, continue to step 3. Otherwise, adjust the
settings to match the prescription.
a.
To adjust the
Frequency
setting, press the
left Up or Down
arrow buttons
until the
prescribed
treatment shows
on the screen. The Frequency or Hertz (Hz) may be set
between 5 and 20 cycles per second.
b.
To adjust the Pressure setting, press the middle Up or Down
arrow buttons until the prescribed treatment Pressure shows on
the screen. The Pressure may be set between 1 and 10.
c.
To adjust the treatment Time, press the right Up or Down
arrow buttons until the prescribed treatment Time shows on the
screen. The treatment Time may be set between 1 and 60
minutes.
NOTE:
It is not necessary to stop the treatment to adjust the settings.
NOTE:
If the backlight turns itself OFF, press any button to turn it back ON.
®
The Vest Airway Clearance System, Model 205
User Manual (140643 REV 2)
13
3.
Press the ON button.
The disposable vest
will inflate.
NOTE:
If the unit is left in this
mode for 10 minutes, it
will turn off.
4.
Press the ON button again to begin the treatment. The set treatment
Time shows as it counts down to zero.
5.
If it is necessary to pause the treatment during a session, do as
follows:
a.
Press the OFF
button or Remote
Control once.
The unit will stop
the pulsations,
but the settings
will continue to
show on the
screen.
NOTE:
When the unit is paused, the disposable vest will deflate.
b.
6.
To resume
treatment, press
the ON button or
the Remote
Control again.
If it is necessary to
end the treatment
session before it is complete, press the OFF button.
NOTE:
Pressing the OFF button does not turn off the screen.
7.
14
When the OFF button
is pressed, the
disposable vest
deflates and the
“Incomplete X Min
Remain” message
shows on the screen.
®
The Vest Airway Clearance System, Model 205
User Manual (140643 REV 2)
You must press ON to continue to the main screen.
8.
When the treatment session is complete:
a.
The “Session
Complete”
message shows.
b.
The pulsations
stop.
c.
The disposable
vest deflates.
d.
Immediately unplug the system from its power source.
e.
Remove the Air Hoses from the Air Hose ports on the
disposable vest.
f.
Remove the disposable vest from the patient.
Setting and Using a New Program Mode
New Program Mode allows the caregiver to program up to eight (8)
points with various settings within a single therapy session.
1.
Press the Down arrow
below New Pgm to
create a new program.
The screen will show
the Frequency,
Pressure, and
treatment Time
settings for the first Programming Point.
NOTE:
All the settings can be adjusted.
NOTE:
You can program up to 8 different Programming Points, each with its
own combination of Frequency, Pressure and treatment Time.
2.
For Programming
Point 1, if the settings
match the prescribed
treatment, continue to
step 3. Otherwise,
adjust the settings to
match the prescription
®
The Vest Airway Clearance System, Model 205
User Manual (140643 REV 2)
15
by pressing the Up and Down arrows associated with Frequency,
Pressure and treatment Time.
3.
Once you have
Programming Point 1,
proceed to
Programming Point 2
by pressing the ON
button (to move to a
previous
Programming Point,
press the OFF button). Adjust the settings to match the prescription
and repeat for all 8 Programming Points.
4.
If the prescription does not call for all 8 Programming Points, after
Programming Point 2, set the Time to 0 MIN for the following
segments, press the ON button to advance through the remaining
Programming Points.
NOTE:
Once you change the Programming Point Time to 0 MIN and press the
ON button, it will take you to the start of the program to begin therapy.
5.
Press the ON button.
The disposable vest
will inflate.
6.
Press the ON button
again to begin the
treatment program.
The set treatment
Time shows as it counts down to zero for each Programming Point.
7.
Therapy will
automatically end
after it has gone
through each
Programming Point.
8.
If it is necessary to
pause the treatment
during a session, do as follows:
a.
16
Press the OFF button or Remote Control once. The unit will
stop the pulsations, but the settings will continue to show on
the screen.
®
The Vest Airway Clearance System, Model 205
User Manual (140643 REV 2)
NOTE:
When the unit is paused, the disposable vest will deflate.
b.
9.
To resume
treatment, press
the ON button or
the Remote
Control again.
If it is necessary to
end the treatment
session before it is complete, press the OFF button.
NOTE:
Pressing the OFF button does not turn off the screen.
10. When the OFF
button is pressed, the
disposable vest
deflates and the
“Incomplete X Min
Remain” message
shows on the screen.
You must press ON to
continue to the main screen.
11. When the treatment session is complete:
®
a.
The “Session
Complete”
message shows.
b.
The pulsations
stop.
c.
The disposable
vest deflates.
d.
Immediately unplug the system from its power source.
e.
Remove the Air Hoses from the Air Hose ports on the
disposable vest.
f.
Remove the disposable vest from the patient.
The Vest Airway Clearance System, Model 205
User Manual (140643 REV 2)
17
Using the Program Mode
Allows the caregiver the capability to use a previously created New
Program Mode, see “Setting and Using a New Program Mode” on page
15.
1.
Press the Up arrow
above PGM to run the
previously created
program, or selected
default program.
2.
Press the ON button.
The disposable vest
will inflate.
3.
Press the ON button
again to begin the
treatment program.
The set treatment
Time shows as it
counts down to zero
for each Programming
Point.
4.
The therapy will
automatically end
after it has gone
through each of the
Programming Points.
5.
If it is necessary to
pause the treatment
during a session, do as follows:
a.
Press the OFF button or Remote Control once. The unit will
stop the pulsations, but the settings will continue to show on
the screen.
NOTE:
When the unit is paused, the disposable vest will deflate.
18
®
The Vest Airway Clearance System, Model 205
User Manual (140643 REV 2)
b.
6.
To resume
treatment, press
the ON button or
the Remote
Control again.
If it is necessary to
end the treatment
session before it is complete, press the OFF button.
NOTE:
Pressing the OFF button does not turn off the screen.
7.
When the OFF button
is pressed, the
disposable vest
deflates and the
“Incomplete X Min
Remain” message
shows on the screen.
You must press ON to
continue to the main screen.
8.
When the treatment session is complete:
a.
The “Session
Complete”
message shows.
b.
The pulsations
stop.
c.
The disposable
vest deflates.
d.
Immediately unplug the system from its power source.
e.
Remove the Air Hoses from the Air Hose ports on the
disposable vest.
f.
Remove the disposable vest from the patient.
Setting and Using a New Ramp Mode
Allows the caregiver capability to create a new Ramp Program to ease
the patient from a lower setting to a higher setting within the percent of
the total therapy session.
®
The Vest Airway Clearance System, Model 205
User Manual (140643 REV 2)
19
1.
Press the Down arrow
below New Ramp to
adjust the program
settings.
2.
Look at the settings
on the screen. Ramp
Time Percent is the
portion of the
treatment Time
required to increase
from the initial
settings (Ramp Start) to the final settings (Ramp End). To adjust
the percent to the prescribed therapy, press the right Up or Down
arrows.
3.
Press the ON button to advance to the next screen.
4.
Review the settings for Frequency and Pressure for the initial
setting, Ramp Start.
a.
To adjust the Frequency setting, press the left Up or Down
arrow buttons until the prescribed treatment shows on the
screen. The Frequency (or Hertz (Hz)) may be set between 5
and 20 cycles per second.
b.
To adjust the
Pressure setting,
press the middle
Up or Down
arrow buttons
until the
prescribed
treatment
Pressure shows on the screen. Pressure may be set between 1
and 10.
5.
Press the ON button to advance to the next screen.
6.
Review the settings on the screen. Frequency and Pressure for the
final setting, Ramp End, are shown as treatment Time.
a.
20
To adjust the Frequency setting, press the left Up or Down
arrow buttons until the prescribed setting shows on the screen.
®
The Vest Airway Clearance System, Model 205
User Manual (140643 REV 2)
Frequency or Hertz (Hz) may be set between the Ramp Start
setting and 20 cycles per second.
b.
To adjust the Pressure setting, press the middle Up or Down
arrow buttons until the prescribed setting shows on the screen.
Pressure may be set between the Ramp Start setting and 10.
c.
To adjust the
treatment Time,
press the right Up
or Down arrow
buttons until the
prescribed
treatment Time
shows on the
screen. The treatment Time may be set between 1 and 60
minutes.
7.
Press the ON button to advance to the next screen. This screen
shows the summary of the ramp program you have just created.
8.
Press the ON button.
The disposable vest
will inflate.
9.
Press the ON button
again to begin the
therapy. The screen
will show the word
Ramping during the
ramp portion of the
program. The total
treatment Time shows
as it counts down to zero.
NOTE:
Therapy settings cannot be changed during Ramping stage.
10. If it is necessary to pause the treatment during a session, do as
follows:
a.
®
Press the OFF button or Remote Control once. The unit will
stop the pulsations, but the settings will continue to show on
the screen.
The Vest Airway Clearance System, Model 205
User Manual (140643 REV 2)
21
NOTE:
When the unit is paused, the disposable vest will deflate.
b.
To resume
treatment, press
the ON button or
the Remote
Control again.
11. If it is necessary to
end the treatment
session before it is complete, press the OFF button.
NOTE:
Pressing the OFF button does not turn off the screen.
12. When the OFF button
is pressed, the
disposable vest
deflates and the
“Incomplete X Min
Remain” message
shows on the screen.
You must press ON to
continue to the main screen.
13. When the treatment session is complete:
22
a.
The “Session
Complete”
message shows.
b.
The pulsations
stop.
c.
The disposable
vest deflates.
d.
Immediately unplug the system from its power source.
e.
Remove the Air Hoses from the Air Hose ports on the
disposable vest.
f.
Remove the disposable vest from the patient.
®
The Vest Airway Clearance System, Model 205
User Manual (140643 REV 2)
Using the Ramp Mode
Allows the caregiver to run a previously created Ramp Program, see
“Setting and Using a New Ramp Mode” on page 19.
1.
Press the Up arrow
above RAMP to run
the previously created
ramp program.
2.
The programmed
points will be shown.
Press the ON button
to advance to the next
screen.
3.
Press the ON button.
The disposable vest
will inflate.
4.
Press the ON button
again to begin the
program. The screen
will show the word
Ramping during the
ramp portion of the
program. The total
treatment Time shows
as it counts down to zero.
NOTE:
Therapy settings cannot be changed during Ramping stage.
5.
If it is necessary to pause the treatment during a session, do as
follows:
a.
Press the OFF button or Remote Control once. The unit will
stop the pulsations, but the settings will continue to show on
the screen.
NOTE:
When the unit is paused, the disposable vest will deflate.
®
The Vest Airway Clearance System, Model 205
User Manual (140643 REV 2)
23
b.
6.
To resume
treatment, press
the ON button or
the Remote
Control again.
If it is necessary to
end the treatment
session before it is complete, press the OFF button.
NOTE:
Pressing the OFF button does not turn off the screen.
7.
When the OFF button
is pressed, the
disposable vest
deflates and the
“Incomplete X Min
Remain” message
shows on the screen.
You must press the
ON button to continue to the main screen.
8.
When the treatment session is complete:
a.
The “Session
Complete”
message shows.
b.
The pulsations
stop.
c.
The disposable
vest deflates.
d.
Immediately unplug the system from its power source.
e.
Remove the Air Hoses from the Air Hose ports on the
disposable vest.
f.
Remove the disposable vest from the patient.
Change the Language
1.
24
Press the Up arrow button above NORMAL. The Normal mode
screen shows.
®
The Vest Airway Clearance System, Model 205
User Manual (140643 REV 2)
2.
Press the two outside
Down arrow buttons
for a minimum of 3
seconds (or until the
screen changes).
3.
Press the Down arrow
button below Spanish
(it will turn Spanish to
SPANISH).
4.
To accept the change,
press the Down arrow
button below
ACEPTAR
(ACCEPT in English).
5.
Once you have
accepted the change,
the system will automatically re-boot and go back to the main
screen in Spanish.
6.
Once the main screen is visible, unplug the unit and plug it back in.
The unit will automatically reconfigure in Spanish.
7.
To switch back to English, repeat the steps and choose ingles
instead of Spanish.
Disable the Program Modes (Program and Ramp)
1.
Press the left Up arrow button above NORMAL. The Normal
mode screen shows.
®
The Vest Airway Clearance System, Model 205
User Manual (140643 REV 2)
25
2.
Press the two outside
Down arrow buttons
for a minimum of 3
seconds, or until the
screen changes.
3.
Press the right Up
arrow button above
Programs.
4.
Press the right Up
arrow button above
pgm disable (It will
turn to PGM
DISABLE).
5.
To accept the change,
press the right Down
arrow below
ACCEPT.
6.
To accept all changes
and exit out of the
menu, press the right
Down arrow button
below the word
ACCEPT.
7.
Once you have
accepted the change, the system will automatically re-boot and go
to the main screen of NORMAL Mode. You will no longer be able
to see the Program or Ramp mode programs.
8.
To switch back to Program Mode, repeat the steps starting at step 2.
NOTE:
Press the Up arrow button above pgm enable at step 4 to enable the
Program Mode It will turn pgm enable to PGM ENABLE).
26
®
The Vest Airway Clearance System, Model 205
User Manual (140643 REV 2)
Set Facility Custom Default Settings
1.
Press the left Up arrow button above NORMAL.The Normal mode
screen shows.
2.
Press the two outside
Down arrows for a
minimum of
3 seconds, or until the
screen changes.
3.
Press the left Up
arrow button above
Defaults.
4.
Press the right Up
arrow button above
default (default will
change to
DEFAULT).
5.
To accept the change,
press the right Down
arrow button below
ACCEPT.
6.
To adjust the
Maximum Run Time
use the Up and Down
arrow buttons above
and below MIN and
press the ON button.
®
The Vest Airway Clearance System, Model 205
User Manual (140643 REV 2)
27
7.
To set default
Frequency, Pressure
and Time settings, for
Normal Mode, adjust
each by using the
respective the Up and
Down arrow buttons
and press the ON
button.
8.
To adjust the default settings for Program Mode, set each
Programming Point sequentially. Press the ON button to advance
to the next Programming Point.
9.
Adjust Frequency, Pressure and Time for each Program Point (1
thru 8) or change the time to zero, after Programming Point 3, to
make the previous point the last point.
10. Press the ON button
to advance to the next
default setting.
11. Adjust the Ramp
Time Percent for the
Default Ramp mode
using the right Up and
Down arrow buttons,
and press the ON
button.
12. Adjust the Ramp
Start, Frequency,
and Pressure settings
for default Ramp
Mode by using the
left and middle Up
and Down arrow
buttons, and press the
ON button.
28
®
The Vest Airway Clearance System, Model 205
User Manual (140643 REV 2)
13. Adjust the Ramp End
settings for default
Ramp Mode,
Frequency, Pressure
and Time using the
Up and Down arrow
buttons, and press the
ON button.
14. To accept all of the
changes, press the
right Down arrow
below ACCEPT.
15. Once you have
accepted the change, it
will automatically reboot the system and
go back to the main
screen.
16. To switch back to
previous patient default mode, repeat the steps and select prev pt
instead of default.
®
The Vest Airway Clearance System, Model 205
User Manual (140643 REV 2)
29
Move the Air Pulse Generator
1.
Unplug the Air Pulse Generator from
its power source.
2.
Stow the Power Cord on the holder on
the back of the stand.
CAUTION:
Failure to lower the Air Pulse Generator
to the lowest position could cause it to
tip over during transport.
30
3.
Lower the Air Pulse Generator to the
lowest position.
4.
Lift the brake release on all four
casters.
5.
Move the Air Pulse Generator to the
applicable location.
6.
Press down on the brake release to set
the brakes on all four casters.
7.
Adjust the height of the Air Pulse
Generator to the desired position.
8.
Plug the Air Pulse Generator into an
applicable power source.
®
Brake released
Brake set
The Vest Airway Clearance System, Model 205
User Manual (140643 REV 2)
Raise or Lower the Air Pulse
Generator
1.
Hold the Height Adjustment Release
Lever on the side of the stand.
2.
Pull the Height Adjustment Release
Lever upwards toward to the shelf.
3.
Push down, or pull up on the shelf, to
adjust the height.
4.
When the desired height is reached,
release the Height Adjustment
Release Lever.
®
The Vest Airway Clearance System, Model 205
User Manual (140643 REV 2)
31
Cleaning
WARNING:
Follow the product manufacturer’s instructions. Failure to do so
could cause personal injury or equipment damage.
SHOCK HAZARD:
Unplug the unit from its power source before you clean it. Failure
to do so could cause personal injury or equipment damage.
SHOCK HAZARD:
Do not expose the unit to excessive moisture. Personal injury or
equipment damage could occur.
CAUTION:
Do not use harsh cleansers, solvents, or detergents. Equipment
damage could occur.
®
The Vest Airway Clearance System, Model 205 has been tested for
compatibility with these detergents:
CAUTION:
Frequent exposure to Matar® germicidal detergent may discolor
the Air Pulse Generator.
• Matar® germicidal detergent
1
• Wex-Cide™ all-purpose germicidal detergent
2
• Viraguard® all-purpose anti-viral surface disinfectant
3
• 3M™ HB Quat disinfectant cleaner
4
• Virex® II 256 disinfectant
5
1. Matar® is a registered trademark of Huntington Laboratories, Inc.
2. Wex-Cide™ is a trademark of Wexford Labs, Inc.
3. Viraguard® is a registered trademark of Veridien Corp.
4. 3M® is a registered trademark of Minnesota Mining and Manufacturing Company.
5. Virex® is a registered trademark of S. C. Johnson & Son, Inc.
32
®
The Vest Airway Clearance System, Model 205
User Manual (140643 REV 2)
CAUTION:
When you use Dispatch® disinfectant, CSI disinfectant spray, or
Citrus II® hospital germicidal deodorizing cleaner make sure you
wipe the unit dry. Failure to do so could cause build-up of residue
or equipment damage.
• Dispatch® disinfectant
1
• CSI disinfectant spray
• Citrus II® hospital germicidal deodorizing cleaner
2
General Cleaning
WARNING:
To help prevent cross-contamination, replace the single-patient
use disposable vest between patients. Failure to do so could
cause patient injury or equipment damage.
NOTE:
The disposable vests are single-patient use, latex-free, inflatable
products for use on individual patients over multiple treatment sessions.
®
Clean The Vest Airway Clearance System between patients, or when
visibly soiled if used on the same patient. Replace the disposable vest
between patients or when it is damaged. Do not attempt to disinfect or
sterilize the disposable vest for reuse with more than one patient. We
recommend that you clean the Air Pulse Generator and Remote Control
with a soft cotton cleaning pad that is slightly moist with detergent and
warm water.
Do not use excessive liquid or harsh cleansers. Do not immerse The
®
Vest Airway Clearance System in water or let liquids enter the Air
Pulse Generator.
After you clean the system, wipe it dry.
Steam Cleaning
Do not use any steam cleaning device on the unit. Excessive moisture
can damage mechanisms in this unit.
1. Dispatch® is a registered trademark of Caltech Industries, Inc.
2. Cistrus II® is a registered trademark of Beaumont Products, Inc.
®
The Vest Airway Clearance System, Model 205
User Manual (140643 REV 2)
33
Cleaning Hard to Clean Spots
Air Pulse Generator—to remove difficult spots or stains, we
recommend that you use standard household cleansers and a soft bristle
brush. To loosen heavy, dried-on soil, you may first need to saturate the
spot.
®
Do not put any component of The Vest Airway Clearance System in
water.
Disinfecting
When there is visible soil and between patient use, we recommend that
you disinfect the unit with an intermediate level, tuberculocidal
disinfectant.
Use the disinfectant as specified in the disinfectant manufacturer's
instructions. Do not attempt to disinfect or sterilize the disposable vest
for reuse with more than one patient.
Maintenance
WARNING:
®
Only authorized persons should service The Vest Airway
Clearance System, Model 205. Service by unauthorized persons
could cause personal injury or equipment damage.
Minimal routine maintenance and periodic cleaning are necessary for
®
The Vest Airway Clearance System, Model 205.
Facilities should do these tests and examinations annually:
• Unplug the Air Pulse Generator from its power source.
• Examine the overall condition of the unit for damage or missing
parts.
• Examine the Power Cord and connector for cuts, scrapes, or other
damage.
• Do electrical safety tests in accordance with facility protocols.
• Clean and disinfect the unit (see “Cleaning” on page 32).
• Connect the Air Pulse Generator to a disposable vest and to an
appropriate power source. Make sure the unit is operational, and that
all functions operate correctly.
34
®
The Vest Airway Clearance System, Model 205
User Manual (140643 REV 2)
Disposable Vests and Replacement Parts
Single-Patient Use, Disposable Wrap SPU Vest
Part Number
P300630005
P300631005
P300632005
P300633005
P300600005
Description
Small package of 5
(23" to 33" (58 cm to 84 cm))
Medium package of 5
(>33" to 43" (84 cm to 109 cm))
Large package of 5
(>43" to 53" (109 cm to 135 cm))
Extra Large package of 5
(>53" to 67" (135 cm to 170 cm))
Starter Pack
(1 Small, 2 Medium, 1 Large, 1 Extra Large)
Single-Patient Use, Disposable Full SPU Vest
Part Number
P300200000
P300205000
P300210000
P300215000
P300220000
Description
Child Medium
(23" to 27" (58 cm to 69 cm))
Child Large
(>27" to 31" (69 cm to 79 cm))
Adult Small
(>31" to 36" (79 cm to 91 cm))
Adult Medium
(>36" to 45" (91 cm to 114 cm))
Adult Large
(>45" to 52" (114 cm to 132 cm))
Stand and Air Pulse Generator
Part Number
143512
142232
200495000
142200
142319
140660
205500
®
Description
Caster
Remote Control Assembly
Air Hose (1 hose)
Rubber Mount Pad
Power Cord
Screw Kit (mounting)
Stand Assembly
The Vest Airway Clearance System, Model 205
User Manual (140643 REV 2)
35
Part Number
143513
Description
Basket Assembly
Size the Disposable Vest
To size the disposable vest, do as follows:
1.
Have the patient take a deep breath and hold it.
2.
Using a tape measure, loosely measure around the patient at the
largest part of their chest. Women should be measured at the bust
line.
3.
Select the disposable vest size based on the measurements
provided.
4.
Disposable vests are designed for patients with a minimum thoracic
length (distance from the top of the shoulder to the waist) of 10"
(25 cm).
Service Calls
®
If service is necessary on The Vest Airway Clearance System,
Model 205, call Hill-Rom Technical Support at 800-445-3720. If
outside the US, refer to the back cover for contact information.
When you contact Hill-Rom, be prepared to give the serial number from
the product identification label. The product identification label is on
the rear panel of the Air Pulse Generator.
Troubleshooting
WARNING:
®
Only authorized persons should service The Vest Airway
Clearance System, Model 205. Service by unauthorized persons
could cause personal injury or equipment damage.
®
If service is necessary on The Vest Airway Clearance System,
Model 205, call Hill-Rom Technical Support. For contact information,
refer to the back cover.
Air Pulse Generator Does Not Power On
1.
36
Make sure the Power Cord is fully plugged into the electrical inlet
on the rear panel of the Air Pulse Generator. If necessary, unplug
®
The Vest Airway Clearance System, Model 205
User Manual (140643 REV 2)
the Power Cord from the Air Pulse Generator, and then plug it in
again.
2.
Make sure the Power Cord is fully plugged into a known-good
outlet.
3.
If the problem is not corrected, call Hill-Rom Technical Support.
For contact information, refer to the back cover.
No Air Pulses into the Disposable Vest
1.
If the Remote Control is in use, make sure it is firmly connected to
the Air Hose Connector Port on the front panel of the Air Pulse
Generator.
2.
Make sure the Air Hoses are connected to the disposable vest and
Air Pulse Generator.
3.
Make sure the ON button has been pressed.
4.
If the problem is not corrected, call Hill-Rom Technical Support.
For contact information, refer to the back cover.
Screen Shows “Please Call for Service” Message
The system has experienced an unexpected event. Do as follows:
1.
Unplug the Power Cord from the Air Pulse Generator, and then
plug it in again.
2.
If the problem is not corrected, call Hill-Rom Technical Support.
For contact information, refer to the back cover.
An Air Hose Comes out of the Air Pulse Generator or
Disposable Vest during Operation
1.
Fully disconnect the Air Hoses from the Air Pulse Generator and
the disposable vest.
2.
Clean the inside and outside of these (see “Cleaning” on page 32):
3.
•
Ends of the Air Hose
•
Connection Ports on the disposable vest
•
Air Hose Connector Ports outlets on the Air Pulse Generator
Connect the Air Hoses to the Air Pulse Generator and disposable
vest (see “Set Up the Air Pulse Generator” on page 12).
®
The Vest Airway Clearance System, Model 205
User Manual (140643 REV 2)
37
4.
If the problem is not corrected, call Hill-Rom Technical Support.
For contact information, refer to the back cover.
Screen Shows “RESTARTING”
38
1.
The system has experienced an unexpected event and is restarting.
2.
If the problem is not corrected, call Hill-Rom Technical Support.
For contact information, refer to the back cover.
®
The Vest Airway Clearance System, Model 205
User Manual (140643 REV 2)
Product Symbols
Symbol
Definition
Type B equipment with an F-type applied
part, according to EN 60601-1.
Dangerous voltage within the device may
constitute a risk of electrical shock.
ON
OFF
ON button—starts the Air Pulse Generator
(starts therapy, inflates the disposable vest,
moves to the next screen during programming, starts the unit after being paused)
OFF button—stops the Air Pulse Generator
(stops therapy, deflates the disposable vest,
pauses therapy, moves to previous screen
during programming)
Frequency setting
Pressure setting
Time setting
®
The Vest Airway Clearance System, Model 205
User Manual (140643 REV 2)
39
Symbol
Definition
Up arrow button—increases the Frequency,
Pressure, or Time setting
Down arrow button—decreases the
Frequency, Pressure, or Time setting
Remote Control Port
Attention: Consult accompanying
documents.
Class II equipment (double insulated),
according to EN 60601-1
IPX 0
Not protected against water ingress
a Medical Equipment with respect to electric
shock, fire, mechanical, and other specified
hazards only in accordance with
UL/EN/IEC 60601-1 and
CAN/CSA C22.2 No. 601.1
40
®
The Vest Airway Clearance System, Model 205
User Manual (140643 REV 2)
Symbol
Definition
Conforms to the European Medical Device
Directive 93/42/EEC
Identifies a replaceable fuse link in an electronic circuit.
Manufacturer or distributor complies with
the Waste Electric and Electronic Equipment
Directive 2002/96/EC
a. The UL logo is a registered trademark of Underwriters Laboratories Inc.
®
The Vest Airway Clearance System, Model 205
User Manual (140643 REV 2)
41
Specifications
Feature
Dimension
Air Pulse Generator weight
Air Pulse Generator height
Air Pulse Generator width
Air Pulse Generator depth
Stand weight
Stand height—lowest position
Stand height—highest position
Disposable vest material—
Wrap SPU Vest and Full SPU
Vest
Electrical requirements
Fuse requirement
17 lb (8 kg)
9.5" (24.1 cm)
13" (33 cm)
9.5" (24.1 cm)
65 lb (29 kg)
29" (73.6 cm)
39" (99.1 cm)
Polyurethane-coated nylon
100 V AC to 230 V AC, 50/60 Hz,
3.4 Amps @ 100 V AC,
2.0 Amps @ 230 V AC
2 each 4A, 5 x 20 mm (Littlefuse part
number F4AL250V)
Environmental Conditions for Transport and Storage
Condition
Range
Temperature
-40°F to 158°F (-40°C to 70°C)
Relative humidity
95% non-condensing
Pressure
500 hPa to 1060 hPa
Environmental Conditions for Use
Condition
Temperature
42
Range
50°F to 93°F (10°C to 34°C)
ambient temperature
Relative humidity range
30% to 75% non-condensing
Atmospheric Pressure
700 hPa to 1060 hPa
®
The Vest Airway Clearance System, Model 205
User Manual (140643 REV 2)
Classification and Standards
Technical and Quality Assurance
UL/EN/IEC 60601-1
CAN/CSA C22.2 No. 601.1
ISO 13485
Equipment Classification
Class II
Degree of Protection Against Electric Shock BF with type F applied part
Classification According to Directive
IIa
93/42/EEC
Degree of Protection Against Ingress of
IPX 0
Water
Degree of Protection Against the Presence of Not for use with flammable
Flammable Anaesthetic Mixtures
anaesthetics.
®
The Vest Airway Clearance System, Model 205 is a continuous
operation device classified with Underwriters Laboratories Inc.® (UL)
in the United States and licensed with Health Canada.
1
1. Underwriters Laboratories Inc.® is a registered trademark of Underwriters
Laboratories Inc.
®
The Vest Airway Clearance System, Model 205
User Manual (140643 REV 2)
43
Guidance and Manufacturer’s Declaration—
Electromagnetic Immunity
®
The Vest Airway Clearance System, Model 205 is intended for use in the electromagnetic
environment specified below. The customer or user of the Model 205 should make sure it is
used in such an environment.
Immunity
Test
IEC 60601
Test Level
Compliance
Level
Electromagnetic Environment—
Guidance
Electrostatic
discharge (ESD)
IEC 61000-4-2
± 6 kV
contact
± 8 kV air
± 6 kV
contact
± 8 kV air
Floors should be wood, concrete, or
ceramic tile. If floors are covered
with synthetic material, the relative
humidity should be at least 30%.
Electrical fast
transient/burst
IEC 61000-4-4
± 2 kV for
power supply
lines
1± kV for
input/output
lines
± 2 kV for
power supply
lines
1± kV for
input/output
lines
Mains power quality should be that
of a typical commercial or hospital
environment.
Surge
IEC 61000-4-5
± 1 kV
differential
mode
± 2 kV
common
mode
± 1 kV
differential
mode
± 2 kV
common
mode
Mains power quality should be that
of a typical commercial or hospital
environment.
Mains power quality should be that
of a typical commercial or hospital
environment. If it is necessary for
the user to have continued operation
of the Model 205 during power
mains interruptions, it is
recommended that the Model 205 be
powered from an uninterruptible
power supply or a battery.
Voltage dips, short
interruptions and
voltage variations
on power supply
input lines
IEC 61000-4-11
Power frequency
(50/60 Hz) magnetic
field
IEC 61000-4-8
<5% UT
<5% UT
(>95% dip in
UT) for 0,5
(>95% dip in
UT) for 0,5
cycle
40% UT
cycle
40% UT
(60% dip in
UT) for 5
(60% dip in
UT) for 5
cycles
70% UT
cycles
70% UT
(30% dip in
UT) for 25
(30% dip in
UT) for 25
cycles
<5% UT
cycles
<5% UT
(>95% dip in
UT) for 5
(>95% dip in
UT) for 5
seconds
seconds
3 A/m
3 A/m
Power frequency magnetic fields
should be at levels characteristic of a
typical location in a typical
commercial or hospital
environment.
NOTE: UT is the AC mains voltage prior to application of the test level.
44
®
The Vest Airway Clearance System, Model 205
User Manual (140643 REV 2)
Guidance and Manufacturer’s Declaration—
Electromagnetic Immunity
®
The Vest Airway Clearance System, Model 205 is intended for use in the electromagnetic
environment specified below. The customer or user of the Model 205 should make sure it is
used in such an environment.
Immunity
Test
IEC 60601 Compliance
Electromagnetic Environment—Guidance
Test Level
Level
Portable and mobile RF communications
equipment should be used no closer to any
part of the Model 205, including cables, than
the recommended separation distance
calculated from the equation applicable to the
frequency of the transmitter.
Recommended separation distance
Conducted RF
IEC 61000-4-6
3 Vrms
150 kHz to
80 MHz
3V
3.5
d = ------3
Radiated RF
IEC 61000-4-3
3 V/m
80 MHz to
2,5 GHz
3 V/m
80 MHz to
P
3.5
d = ------3
P
800 MHz
7
d = --3
P
800 MHz to
2,5 GHz
where P is the maximum output power rating
of the transmitter in watts (W) according to
the transmitter manufacturer and d is the
recommended separation distance in metres
(m).
Field strengths from fixed RF transmitters, as
found by an electromagnetic site survey ,
should be less than the compliance level in
each frequency range .
Interference may occur in the vicinity of
equipment marked with this symbol:
a
b
®
The Vest Airway Clearance System, Model 205
User Manual (140643 REV 2)
45
®
The Vest Airway Clearance System, Model 205 is intended for use in the electromagnetic
environment specified below. The customer or user of the Model 205 should make sure it is
used in such an environment.
Immunity
Test
IEC 60601 Compliance
Electromagnetic Environment—Guidance
Test Level
Level
NOTE: At 80 MHz and 800 MHz, the higher frequency range applies.
NOTE: These guidelines may not apply in all situations. Electromagnetic propagation is
affected by absorption and reflection from structures, objects, and people.
a. Field strengths from fixed transmitters, such as base stations for radio
(cellular/cordless) telephones and land mobile radios, amateur radio, AM and FM
radio broadcast, and TV broadcast can not be predicted theoretically with
accuracy. To assess the electromagnetic environment due to fixed RF transmitters,
the electromagnetic site used should be considered. If the measured field strength
in the location in which the Model 205 is used is more than the applicable RF
compliance level above, the Model 205 should be monitored to make sure it
operates correctly. If it operates incorrectly, additional measures may be
necessary, such as a change in the Model 205’s position or location.
b. Over the frequency range 150 kHz to 80 MHz, field strengths should be less than
3 V/m.
46
®
The Vest Airway Clearance System, Model 205
User Manual (140643 REV 2)
Recommended Separation Distances Between Portable and Mobile
RF Communications Equipment and the Model 205
®
The Vest Airway Clearance System, Model 205 is intended for use in an electromagnetic
environment in which radiated RF disturbances are controlled. The customer or user of the
Model 205 can help prevent electromagnetic interference if they maintain the minimum
distance between portable and mobile RF communications equipment (transmitters) and the
Model 205. The recommended distances, in accordance, are shown below:
Rated Maximum
Output Power of the
Transmitter
Separation Distance According to the
Frequency of the Transmitter
150 kHz to 80 MHz
3.5
d = ------V1
P
80 MHz to 800 MHz 800 MHz to 2,5 GHz
3.5
d = ------E1
P
7
d = -----E1
0,01 W
0,12 m
0,12 m
0,1 W
0,37 m
0,37 m
0,74 m
1W
1,2 m
1,2 m
2,3 m
10 W
3,7 m
3,7 m
7,4 m
100 W
12 m
12 m
23 m
P
0,23 m
For transmitters rated at a maximum output power not listed above, the recommended
separation distance d in metres (m) can be estimated with the use of the equation applicable to
the frequency of the transmitter, where P is the maximum output power rating of the
transmitter in watts (W) according to the transmitter manufacturer.
NOTE: At 80 MHz to 800 MHz, the separation distance for the higher frequency range
applies.
NOTE: These guidelines may not apply in all situations. Electromagnetic propagation is
affected by absorption and reflection from structures, objects, and people.
®
The Vest Airway Clearance System, Model 205
User Manual (140643 REV 2)
47
Frequently Asked Questions
®
• Is The Vest Airway Clearance System as effective as chest
physiotherapy (CPT)?
–
Research has shown that the system is nearly three times as
effective as the use of chest physiotherapy to move airway
secretions.
®
• Does The Vest Airway Clearance System effectively treat all areas
of the lungs?
–
Yes. Since the system oscillates the chest wall to create
airflow, it applies percussion to all lung areas to effectively
treat all lobes of the lung at once.
• How long should each Airway Clearance Therapy treatment session
last?
–
Common prescriptions specify a treatment session Time to be
between 10 and 30 minutes. Prescribed treatment session times
may be different. Refer to the physician’s orders or facility
protocol.
• How often should treatment sessions be given?
–
The Frequency of treatment sessions depends on the patient’s
underlying disease, age, and state of health. The patient’s
physician will prescribe a schedule for the individual patient.
• Is chest physiotherapy still necessary?
–
®
In a number of studies, The Vest Airway Clearance System
has been shown to supply more effective Airway Clearance
Therapy than conventional chest physiotherapy. Typically, it is
not necessary to do chest physiotherapy along with therapy
®
treatment sessions with The Vest Airway Clearance System.
Refer to the physician’s order.
• Is postural drainage still necessary?
–
48
®
The Vest Airway Clearance System moves mucus by
generating airflow within the lungs. It works in any position,
so generally it should not be necessary to do postural drainage.
Refer to the physician’s order.
®
The Vest Airway Clearance System, Model 205
User Manual (140643 REV 2)
• What will happen if a patient’s treatment session is skipped?
–
One missed treatment session of the system may or may not
immediately impact the patient’s health. However, the key to
help maintain the patient’s health is consistent, effective
therapy. Try to follow the patient’s care plan as closely as
possible. Consult the prescribing physician if a treatment
session is missed.
®
• Is there a best time to do a therapy with The Vest Airway Clearance
System?
–
Establish a schedule that is satisfactory for the patient and lets
you do the therapy consistently. Usually, it is best to do therapy
before meals.
®
• Do all patients receive the same benefits from The Vest Airway
Clearance System?
–
Almost all patients will experience an increase in the amount
of mucus that is moved. The overall benefit depends on many
factors, which include the underlying disease, patient’s age,
and his or her present state of health.
®
• Does The Vest Airway Clearance System make patients feel better?
–
®
Patients often report that they are able to breathe better and
have more energy after he or she receives therapy.
The Vest Airway Clearance System, Model 205
User Manual (140643 REV 2)
49
50
®
The Vest Airway Clearance System, Model 205
User Manual (140643 REV 2)
Global Headquarters US
Hill-Rom Company, Inc.
1069 State Route 46 E
Batesville, IN 47006-9167
Tel: 800-445-3720
www.hill-rom.com
US Rental Therapy
Hill-Rom Company, Inc.
Tel: 800-638-2546
St. Paul, MN
Hill-Rom Company, Inc.
Tel: 651-490-1648 or
800-426-4224
www.thevest.com
International
Hill-Rom Company, Inc.
International Department
Tel: +1 (0)812 934 8173
Fax: +1 (0)812 934 7191
www.hill-rom.com
[email protected]
Australia
Hill-Rom Australia Pty. Ltd.
Tel: +61 (0)2 8814 3000
Fax: +61 (0)2 8814 3030
Belgique/België
Hill-Rom Medical Services BV
Tel: +31 (0)347 / 32 35 32
Fax: +31 (0)347 / 32 35 00
Canada
Hill-Rom Canada
Tel: 800-267-2337
Hill-Rom Shanghai
Tel: +86 (0)21 5396 6933
Fax: +86 (0)21 5383 3136
Deutschland
Hill-Rom GmbH
Tel: +49 (0)211 16450 0
Fax: +49 (0)211 16450 182
España
Hill-Rom Iberia S.L.
Tel: +34 (0)93 685 6009
Fax: +34 (0)93 666 5570
Hong Kong
Hill-Rom Asia Ltd.
Tel: +852 (0)2297-2395
Fax: +852 (0)2297-0090
Ireland
Hill-Rom Ltd.
Tel: +353 (0)1 413 6005
Fax: +353 (0)1 413 6030
[email protected]
Italia
Hill-Rom S.p.A.
Tel: +39 (0)02 / 950541
Fax: +39 (0)02 / 95328578
Hill-Rom Japan
Tel: +81 (0)3 5715 3420
Fax: +81 (0)3 5715 3425
c/o Hill-Rom Japan
Tel: +81 (0)3 5715 3420
Fax: +81 (0)3 5715 3425
Nederland
Hill-Rom Medical Services BV
Tel: +31 (0)347 / 32 35 32
Fax: +31 (0)347 / 32 35 00
New Zealand
c/o Hill-Rom Australia Pty. Ltd.
Tel: 61 (0)2 8814 3000
Fax: 61 (0)2 8814 3030
Nordic Region:
Sverige, Denmark, Norge
Hill-Rom AB
Tel: +46 (0)8 564 353 60
Fax: +46 (0)8 564 353 61
[email protected]
Österreich
Hill-Rom Austria GmbH
Tel: +43 (0)2243 / 28550
Fax: +43 (0)2243 / 28550-19
[email protected]
Portugal
Hill-Rom Iberia S.L.
Tel: +34 (0)93 685 6009
Fax: +34 (0)93 666 5570
South East Asia
Hill-Rom Singapore
Tel: +65 (0)6391 1322
Fax: +65 (0)6391 1324
Suisse/Schweiz
Hill-Rom SA
Tel: +41 (0)21 / 706 21 30
Fax: +41 (0)21 / 706 21 33
hrch.info@hill-rom
United Kingdom
Hill-Rom Ltd.
Tel: +44 (0)1530 411000
Fax: +44 (0)1530 411555
France
Hill-Rom SAS
Tel: +33 (0)2 97 50 92 12
Service: +33 (0)820 01 23 45
Fax: +33 (0)2 97 50 92 00