1
Hierarchical Storage
Management for OpenVMS
Installation Guide
Order Number: AA-QUJ1P-TE
This manual contains installation information for HSM and
Media, Device and Management Services (MDMS).
Required Operating System OpenVMS V6.2 or higher
Required Software
Storage Library System for OpenVMS V2.9B
or higher, or Media, Device and Management
Services for OpenVMS Version V4.1
DECnet (Phase IV) or DECnet-Plus (Phase V)
TCP/IP Services for OpenVMS
Revision/Update
Information:
This manual replaces version AA-QUJ1N-TE.
Software Version: HSM Version V4.1
January 2003
© Hewlett-Packard Development Company, L.P. 2003.
Confidential computer software. Valid license from HP and/or its subsidiaries required for possession, use, or
copying.
Consistent with FAR 12.211 and 12.212, Commercial Computer Software, Computer Software Documentation,
and Technical Data for Commercial Items are licensed to the U.S. Government under vendor’s commercial license.
Neither HP nor any of its subsidiaries shall be liable for technical or editorial errors or omissions contained herein.
The information in this document is provided "as is" without warranty of any kind and is subject to change without
notice. The warranties for HP products are set forth in the express limited warranty statements accompanying such
products. Nothing herein should be construed as constituting an additional warranty.
Printed in the U.S.A.
Contents
Preface . . . . . . . . . . . . . . . . . . . . . . . . . . . . . . . . . . . . . . . . . . . . . . . . . . . . . . . . . . . . . . . . . . . vii
1 Welcome to HSM
1.1 What Do All Storage Environments Have In Common? . . . . . . . . . . . . . . . . . . . . . . . . . . . . . . . . . . . . . 1-1
1.2 What Makes a Storage Environment Unique? . . . . . . . . . . . . . . . . . . . . . . . . . . . . . . . . . . . . . . . . . . . . . . 1-1
1.3 How Does HSM Complement Your Storage Environment? . . . . . . . . . . . . . . . . . . . . . . . . . . . . . . . . . . 1-1
1.4 What is the Purpose of a Managed Media & Device Environment? . . . . . . . . . . . . . . . . . . . . . . . . . . . . 1-2
1.5 Differences - HSM Basic & Plus Mode . . . . . . . . . . . . . . . . . . . . . . . . . . . . . . . . . . . . . . . . . . . . . . . . . 1-3
1.5.1
HSM Basic Mode Functions . . . . . . . . . . . . . . . . . . . . . . . . . . . . . . . . . . . . . . . . . . . . . . . . . . . . . . . 1-3
1.5.2
HSM Plus Mode Functions . . . . . . . . . . . . . . . . . . . . . . . . . . . . . . . . . . . . . . . . . . . . . . . . . . . . . . . . 1-3
1.5.3
HSM Mode Comparison Table . . . . . . . . . . . . . . . . . . . . . . . . . . . . . . . . . . . . . . . . . . . . . . . . . . . . . 1-4
1.5.4
Choosing HSM Modes . . . . . . . . . . . . . . . . . . . . . . . . . . . . . . . . . . . . . . . . . . . . . . . . . . . . . . . . . . . . 1-4
1.5.5
HSM Mode Change Restrictions . . . . . . . . . . . . . . . . . . . . . . . . . . . . . . . . . . . . . . . . . . . . . . . . . . . . 1-5
1.6 HSM License Types . . . . . . . . . . . . . . . . . . . . . . . . . . . . . . . . . . . . . . . . . . . . . . . . . . . . . . . . . . . . . . . . . 1-5
1.6.1
HSM Base Licenses . . . . . . . . . . . . . . . . . . . . . . . . . . . . . . . . . . . . . . . . . . . . . . . . . . . . . . . . . . . . . . 1-5
1.6.2
HSM Capacity Licenses . . . . . . . . . . . . . . . . . . . . . . . . . . . . . . . . . . . . . . . . . . . . . . . . . . . . . . . . . . . 1-6
1.7 HSM Concurrent Use Licenses . . . . . . . . . . . . . . . . . . . . . . . . . . . . . . . . . . . . . . . . . . . . . . . . . . . . . . . . 1-6
1.8 Installation Changes when SLS is Present . . . . . . . . . . . . . . . . . . . . . . . . . . . . . . . . . . . . . . . . . . . . . . . . . 1-7
1.9 HSM Upgrade Considerations . . . . . . . . . . . . . . . . . . . . . . . . . . . . . . . . . . . . . . . . . . . . . . . . . . . . . . . . . . 1-7
1.10 Backing Up the HSM Catalog . . . . . . . . . . . . . . . . . . . . . . . . . . . . . . . . . . . . . . . . . . . . . . . . . . . . . . . . . . 1-8
1.11 Backing up Your System Disk . . . . . . . . . . . . . . . . . . . . . . . . . . . . . . . . . . . . . . . . . . . . . . . . . . . . . . . . . 1-8
1.12 VMScluster™ System Considerations . . . . . . . . . . . . . . . . . . . . . . . . . . . . . . . . . . . . . . . . . . . . . . . . . . . 1-8
1.13 Mixed Architecture Environments . . . . . . . . . . . . . . . . . . . . . . . . . . . . . . . . . . . . . . . . . . . . . . . . . . . . . . 1-8
1.13.1 Mixed Architecture Environments . . . . . . . . . . . . . . . . . . . . . . . . . . . . . . . . . . . . . . . . . . . . . . . . . . . 1-9
1.13.2 Principles Guiding Mixed Architecture Configuration . . . . . . . . . . . . . . . . . . . . . . . . . . . . . . . . . . . 1-9
1.13.3 Configuring Applications in a Mixed Architecture OpenVMS Cluster . . . . . . . . . . . . . . . . . . . . . . 1-10
1.13.3.1
Separate Disk Configuration . . . . . . . . . . . . . . . . . . . . . . . . . . . . . . . . . . . . . . . . . . . . . . . . . . . 1-10
1.13.3.2
Separate Root Configuration . . . . . . . . . . . . . . . . . . . . . . . . . . . . . . . . . . . . . . . . . . . . . . . . . . . 1-10
1.13.3.3
Separate Subdirectory Configuration . . . . . . . . . . . . . . . . . . . . . . . . . . . . . . . . . . . . . . . . . . . . . 1-11
1.13.4 Implementation Specific Approach . . . . . . . . . . . . . . . . . . . . . . . . . . . . . . . . . . . . . . . . . . . . . . . . . 1-11
1.14 Overview of the HSM Installation . . . . . . . . . . . . . . . . . . . . . . . . . . . . . . . . . . . . . . . . . . . . . . . . . . . . . . 1-11
1.15 Reboot Requirement . . . . . . . . . . . . . . . . . . . . . . . . . . . . . . . . . . . . . . . . . . . . . . . . . . . . . . . . . . . . . . . . 1-14
2 Installing MDMS Software
2.1 MDMS Pre-installation Tasks . . . . . . . . . . . . . . . . . . . . . . . . . . . . . . . . . . . . . . . . . . . . . . . . . . . . . . . . . .
2.1.1
Hardware and Software Requirements . . . . . . . . . . . . . . . . . . . . . . . . . . . . . . . . . . . . . . . . . . . . . . . .
2.1.2
Meet Patch Requirements . . . . . . . . . . . . . . . . . . . . . . . . . . . . . . . . . . . . . . . . . . . . . . . . . . . . . . . . . .
2.1.3
Install CMA Shareable Images . . . . . . . . . . . . . . . . . . . . . . . . . . . . . . . . . . . . . . . . . . . . . . . . . . . . . .
2.1.4
Shutdown Previous Version of MDMS . . . . . . . . . . . . . . . . . . . . . . . . . . . . . . . . . . . . . . . . . . . . . . .
2.1.5
Register the MDMS License . . . . . . . . . . . . . . . . . . . . . . . . . . . . . . . . . . . . . . . . . . . . . . . . . . . . . . .
2.1.6
Verify the Node is in the MDMS Database . . . . . . . . . . . . . . . . . . . . . . . . . . . . . . . . . . . . . . . . . . . .
2.1.7
Consider RDF Configuration . . . . . . . . . . . . . . . . . . . . . . . . . . . . . . . . . . . . . . . . . . . . . . . . . . . . . . .
2.2 Installing the MDMS Software . . . . . . . . . . . . . . . . . . . . . . . . . . . . . . . . . . . . . . . . . . . . . . . . . . . . . . . . .
2-1
2-2
2-3
2-4
2-5
2-5
2-5
2-6
2-6
iii
2.3 MDMS Post-installation Tasks . . . . . . . . . . . . . . . . . . . . . . . . . . . . . . . . . . . . . . . . . . . . . . . . . . . . . . . . . 2-7
2.3.1
Create a Node Object . . . . . . . . . . . . . . . . . . . . . . . . . . . . . . . . . . . . . . . . . . . . . . . . . . . . . . . . . . . . . 2-7
2.3.2
Provide Automatic Start Up and Shut Down . . . . . . . . . . . . . . . . . . . . . . . . . . . . . . . . . . . . . . . . . . . 2-8
2.3.3
Configure MDMS . . . . . . . . . . . . . . . . . . . . . . . . . . . . . . . . . . . . . . . . . . . . . . . . . . . . . . . . . . . . . . . . 2-8
2.3.4
Configure Remote Tape Drives . . . . . . . . . . . . . . . . . . . . . . . . . . . . . . . . . . . . . . . . . . . . . . . . . . . . . 2-8
2.3.5
Grant MDMS Rights to Users . . . . . . . . . . . . . . . . . . . . . . . . . . . . . . . . . . . . . . . . . . . . . . . . . . . . . . 2-9
2.3.6
Installing the DCL Tables on Nodes . . . . . . . . . . . . . . . . . . . . . . . . . . . . . . . . . . . . . . . . . . . . . . . . . 2-9
2.4 MDMS Graphical User Interface (GUI) Installation . . . . . . . . . . . . . . . . . . . . . . . . . . . . . . . . . . . . . . . . . 2-9
2.4.1
Installing the GUI on OpenVMS Alpha . . . . . . . . . . . . . . . . . . . . . . . . . . . . . . . . . . . . . . . . . . . . . . 2-10
2.4.2
Installing the GUI on Intel Windows NT/95/98 . . . . . . . . . . . . . . . . . . . . . . . . . . . . . . . . . . . . . . . . 2-10
2.5 Running the GUI . . . . . . . . . . . . . . . . . . . . . . . . . . . . . . . . . . . . . . . . . . . . . . . . . . . . . . . . . . . . . . . . . . . 2-11
2.5.1
Running the GUI on OpenVMS Alpha . . . . . . . . . . . . . . . . . . . . . . . . . . . . . . . . . . . . . . . . . . . . . . 2-11
2.5.1.1
Running the GUI on Windows NT/95/98 . . . . . . . . . . . . . . . . . . . . . . . . . . . . . . . . . . . . . . . . . 2-11
3 Meeting the HSM Installation Requirements
3.1 Read the Release Notes . . . . . . . . . . . . . . . . . . . . . . . . . . . . . . . . . . . . . . . . . . . . . . . . . . . . . . . . . . . . . .
3.2 Required Hardware Disk Space . . . . . . . . . . . . . . . . . . . . . . . . . . . . . . . . . . . . . . . . . . . . . . . . . . . . . . . .
3.3 Required Software . . . . . . . . . . . . . . . . . . . . . . . . . . . . . . . . . . . . . . . . . . . . . . . . . . . . . . . . . . . . . . . . . .
3.3.1
Required for HSM Basic Mode . . . . . . . . . . . . . . . . . . . . . . . . . . . . . . . . . . . . . . . . . . . . . . . . . . . . .
3.3.2
Required for HSM Plus Mode . . . . . . . . . . . . . . . . . . . . . . . . . . . . . . . . . . . . . . . . . . . . . . . . . . . . . .
3.3.3
Required for HSM Repack Function . . . . . . . . . . . . . . . . . . . . . . . . . . . . . . . . . . . . . . . . . . . . . . . . .
3.4 Required System Privileges . . . . . . . . . . . . . . . . . . . . . . . . . . . . . . . . . . . . . . . . . . . . . . . . . . . . . . . . . . .
3.5 Required System Parameters . . . . . . . . . . . . . . . . . . . . . . . . . . . . . . . . . . . . . . . . . . . . . . . . . . . . . . . . . .
3.6 Required for VMSINSTAL . . . . . . . . . . . . . . . . . . . . . . . . . . . . . . . . . . . . . . . . . . . . . . . . . . . . . . . . . . . .
3.7 Installing DECthreads™ Images . . . . . . . . . . . . . . . . . . . . . . . . . . . . . . . . . . . . . . . . . . . . . . . . . . . . . . . .
3.8 Registering Your HSM License . . . . . . . . . . . . . . . . . . . . . . . . . . . . . . . . . . . . . . . . . . . . . . . . . . . . . . . . .
3-1
3-2
3-2
3-2
3-2
3-3
3-3
3-3
3-3
3-4
3-5
4 Installing HSM Software
4.1 Installing the HSM Software . . . . . . . . . . . . . . . . . . . . . . . . . . . . . . . . . . . . . . . . . . . . . . . . . . . . . . . . . . .
4.1.1
The Installation Procedure . . . . . . . . . . . . . . . . . . . . . . . . . . . . . . . . . . . . . . . . . . . . . . . . . . . . . . . . .
4.1.2
Error Recovery . . . . . . . . . . . . . . . . . . . . . . . . . . . . . . . . . . . . . . . . . . . . . . . . . . . . . . . . . . . . . . . . . .
4.2 After Installing HSM Software . . . . . . . . . . . . . . . . . . . . . . . . . . . . . . . . . . . . . . . . . . . . . . . . . . . . . . . . .
4.3 Editing the System Startup and Shutdown Files . . . . . . . . . . . . . . . . . . . . . . . . . . . . . . . . . . . . . . . . . . . .
4.4 Creating an HSM Catalog . . . . . . . . . . . . . . . . . . . . . . . . . . . . . . . . . . . . . . . . . . . . . . . . . . . . . . . . . . . . .
4.5 Installation Verification Procedure . . . . . . . . . . . . . . . . . . . . . . . . . . . . . . . . . . . . . . . . . . . . . . . . . . . . . .
4-1
4-1
4-4
4-5
4-5
4-6
4-7
5 Getting Started with HSM
5.1 HSM’s Default Configuration . . . . . . . . . . . . . . . . . . . . . . . . . . . . . . . . . . . . . . . . . . . . . . . . . . . . . . . . .
5.1.1
The Default Facility . . . . . . . . . . . . . . . . . . . . . . . . . . . . . . . . . . . . . . . . . . . . . . . . . . . . . . . . . . . . . .
5.1.2
The Default Shelf . . . . . . . . . . . . . . . . . . . . . . . . . . . . . . . . . . . . . . . . . . . . . . . . . . . . . . . . . . . . . . . .
5.1.3
The Default Device . . . . . . . . . . . . . . . . . . . . . . . . . . . . . . . . . . . . . . . . . . . . . . . . . . . . . . . . . . . . . . .
5.1.4
The Default Volume . . . . . . . . . . . . . . . . . . . . . . . . . . . . . . . . . . . . . . . . . . . . . . . . . . . . . . . . . . . . . .
5.1.5
The Default Policies . . . . . . . . . . . . . . . . . . . . . . . . . . . . . . . . . . . . . . . . . . . . . . . . . . . . . . . . . . . . . .
5.2 Running HSM with Default Configuration . . . . . . . . . . . . . . . . . . . . . . . . . . . . . . . . . . . . . . . . . . . . . . .
5.2.1
Verifying the Facility Definition . . . . . . . . . . . . . . . . . . . . . . . . . . . . . . . . . . . . . . . . . . . . . . . . . . . .
5.2.2
Defining Archive Classes for Use . . . . . . . . . . . . . . . . . . . . . . . . . . . . . . . . . . . . . . . . . . . . . . . . . . .
5.2.3
Selecting Archive Classes for the Default Shelf . . . . . . . . . . . . . . . . . . . . . . . . . . . . . . . . . . . . . . . .
5.2.4
Defining Devices for the Archive Classes . . . . . . . . . . . . . . . . . . . . . . . . . . . . . . . . . . . . . . . . . . . . .
5.2.5
Initializing Tape Volumes for Each Archive Class . . . . . . . . . . . . . . . . . . . . . . . . . . . . . . . . . . . . . .
5.2.6
Set Volume Retention Times for Policy-Based Shelving . . . . . . . . . . . . . . . . . . . . . . . . . . . . . . . . .
iv
5-1
5-1
5-2
5-2
5-2
5-3
5-3
5-4
5-4
5-5
5-6
5-7
5-8
5.3 Additional Configuration Items . . . . . . . . . . . . . . . . . . . . . . . . . . . . . . . . . . . . . . . . . . . . . . . . . . . . . . . . 5-9
5.3.1
Authorizing Shelf Servers . . . . . . . . . . . . . . . . . . . . . . . . . . . . . . . . . . . . . . . . . . . . . . . . . . . . . . . . . 5-9
5.3.2
Working with a Cache . . . . . . . . . . . . . . . . . . . . . . . . . . . . . . . . . . . . . . . . . . . . . . . . . . . . . . . . . . . 5-10
5.3.3
An Example of Managing Online Disk Cache . . . . . . . . . . . . . . . . . . . . . . . . . . . . . . . . . . . . . . . . . 5-10
5.3.4
Running Default Policies . . . . . . . . . . . . . . . . . . . . . . . . . . . . . . . . . . . . . . . . . . . . . . . . . . . . . . . . . 5-10
5.3.5
Template Policy Definitions . . . . . . . . . . . . . . . . . . . . . . . . . . . . . . . . . . . . . . . . . . . . . . . . . . . . . . 5-11
5.3.5.1
Using a Template Policy Definition . . . . . . . . . . . . . . . . . . . . . . . . . . . . . . . . . . . . . . . . . . . . . . 5-11
5.3.5.2
Changing Default Policy Definitions . . . . . . . . . . . . . . . . . . . . . . . . . . . . . . . . . . . . . . . . . . . . . 5-12
5.4 Plus Mode Offline Environment . . . . . . . . . . . . . . . . . . . . . . . . . . . . . . . . . . . . . . . . . . . . . . . . . . . . . . . 5-12
5.4.1
How HSM Plus Mode and MDMS Work Together . . . . . . . . . . . . . . . . . . . . . . . . . . . . . . . . . . . . . 5-12
5.4.2
How MDMS Supports HSM . . . . . . . . . . . . . . . . . . . . . . . . . . . . . . . . . . . . . . . . . . . . . . . . . . . . . . 5-13
5.4.3
MDMS Commands for HSM Plus Mode Use . . . . . . . . . . . . . . . . . . . . . . . . . . . . . . . . . . . . . . . . . 5-13
5.4.4
MDMS Configuration Tasks Required to Support HSM Plus Mode . . . . . . . . . . . . . . . . . . . . . . . 5-14
5.4.4.1
Defining Media Triplets . . . . . . . . . . . . . . . . . . . . . . . . . . . . . . . . . . . . . . . . . . . . . . . . . . . . . . . 5-15
5.4.4.2
Defining Tape Jukeboxes . . . . . . . . . . . . . . . . . . . . . . . . . . . . . . . . . . . . . . . . . . . . . . . . . . . . . . 5-16
5.4.4.3
Adding Volumes to MDMS Database for HSM to Use . . . . . . . . . . . . . . . . . . . . . . . . . . . . . . . 5-17
5.4.4.4
Authorizing HSM Access to Volumes . . . . . . . . . . . . . . . . . . . . . . . . . . . . . . . . . . . . . . . . . . . . 5-17
5.4.4.5
Importing Volumes Into a Jukebox . . . . . . . . . . . . . . . . . . . . . . . . . . . . . . . . . . . . . . . . . . . . . . 5-18
5.4.4.6
Configuring Magazines . . . . . . . . . . . . . . . . . . . . . . . . . . . . . . . . . . . . . . . . . . . . . . . . . . . . . . . 5-18
5.4.4.7
Importing Magazines or Volumes Into the Jukebox . . . . . . . . . . . . . . . . . . . . . . . . . . . . . . . . 5-19
5.4.4.8
Working with RDF-served Devices in HSM Plus Mode . . . . . . . . . . . . . . . . . . . . . . . . . . . . . . 5-20
5.5 HSM Plus Mode Configuration Examples . . . . . . . . . . . . . . . . . . . . . . . . . . . . . . . . . . . . . . . . . . . . . . . 5-20
5.5.1
Sample TA90 Configuration . . . . . . . . . . . . . . . . . . . . . . . . . . . . . . . . . . . . . . . . . . . . . . . . . . . . . . 5-21
5.5.2
Sample TZ877 Configuration . . . . . . . . . . . . . . . . . . . . . . . . . . . . . . . . . . . . . . . . . . . . . . . . . . . . . 5-22
5.5.3
Sample TL820 Configuration . . . . . . . . . . . . . . . . . . . . . . . . . . . . . . . . . . . . . . . . . . . . . . . . . . . . . . 5-25
5.5.4
Sample RDF-served TL820 Configuration . . . . . . . . . . . . . . . . . . . . . . . . . . . . . . . . . . . . . . . . . . . 5-27
5.5.4.1
Definitions on Client Node . . . . . . . . . . . . . . . . . . . . . . . . . . . . . . . . . . . . . . . . . . . . . . . . . . . . 5-27
5.5.4.2
Definitions on the RDF-served Node . . . . . . . . . . . . . . . . . . . . . . . . . . . . . . . . . . . . . . . . . . . . . 5-29
5.6 HSM Basic Mode Configuration Examples . . . . . . . . . . . . . . . . . . . . . . . . . . . . . . . . . . . . . . . . . . . . . 5-30
5.6.1
TZ877 Sample Configuration . . . . . . . . . . . . . . . . . . . . . . . . . . . . . . . . . . . . . . . . . . . . . . . . . . . . . . 5-30
5.6.2
RW500 Example . . . . . . . . . . . . . . . . . . . . . . . . . . . . . . . . . . . . . . . . . . . . . . . . . . . . . . . . . . . . . . . 5-31
6 DFS, NFS, and PATHWORKS Access
6.1 DFS, NFS & PATHWORKS Access Support . . . . . . . . . . . . . . . . . . . . . . . . . . . . . . . . . . . . . . . . . . . . . .
6.1.1
DFS Access . . . . . . . . . . . . . . . . . . . . . . . . . . . . . . . . . . . . . . . . . . . . . . . . . . . . . . . . . . . . . . . . . . . .
6.1.2
NFS Access . . . . . . . . . . . . . . . . . . . . . . . . . . . . . . . . . . . . . . . . . . . . . . . . . . . . . . . . . . . . . . . . . . . .
6.1.3
PATHWORKS . . . . . . . . . . . . . . . . . . . . . . . . . . . . . . . . . . . . . . . . . . . . . . . . . . . . . . . . . . . . . . . . . .
6.1.4
New Logical Names for NFS and PATHWORKS Access . . . . . . . . . . . . . . . . . . . . . . . . . . . . . . . .
6-1
6-1
6-1
6-2
6-3
A HSM Basic Mode Installation Example
B HSM Plus Mode Installation Example
C HSM Logicals
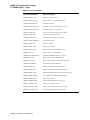
C.1 HSM Logical Names . . . . . . . . . . . . . . . . . . . . . . . . . . . . . . . . . . . . . . . . . . . . . . . . . . . . . . . . . . . . . . . . C-1
D HSM Files
D.1 HSM File Names . . . . . . . . . . . . . . . . . . . . . . . . . . . . . . . . . . . . . . . . . . . . . . . . . . . . . . . . . . . . . . . . . . . . D-1
E MDMS V4.1 Rights and Privileges
v
E.1 MDMS Rights - Types . . . . . . . . . . . . . . . . . . . . . . . . . . . . . . . . . . . . . . . . . . . . . . . . . . . . . . . . . . . . . . .
E.1.1
High Level Rights . . . . . . . . . . . . . . . . . . . . . . . . . . . . . . . . . . . . . . . . . . . . . . . . . . . . . . . . . . . . . . . .
E.1.2
Low-level rights . . . . . . . . . . . . . . . . . . . . . . . . . . . . . . . . . . . . . . . . . . . . . . . . . . . . . . . . . . . . . . . . .
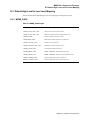
E.2 Default High-Level to Low-Level Mapping . . . . . . . . . . . . . . . . . . . . . . . . . . . . . . . . . . . . . . . . . . . . . . .
E.2.1
MDMS_USER: . . . . . . . . . . . . . . . . . . . . . . . . . . . . . . . . . . . . . . . . . . . . . . . . . . . . . . . . . . . . . . . . . .
E.2.2
MDMS_OPERATOR Rights: . . . . . . . . . . . . . . . . . . . . . . . . . . . . . . . . . . . . . . . . . . . . . . . . . . . . . .
E.2.2.1
Domain Commands for Mapping Privileges . . . . . . . . . . . . . . . . . . . . . . . . . . . . . . . . . . . . . . . .
E-1
E-1
E-3
E-5
E-5
E-6
E-6
F MDMS Files and Logical Names
F.1 MDMS File Names . . . . . . . . . . . . . . . . . . . . . . . . . . . . . . . . . . . . . . . . . . . . . . . . . . . . . . . . . . . . . . . . . . F-1
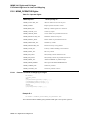
F.2 MDMS Logical Names . . . . . . . . . . . . . . . . . . . . . . . . . . . . . . . . . . . . . . . . . . . . . . . . . . . . . . . . . . . . . . . F-4
G Sample Configuration of MDMS
G.1 Configuration Order . . . . . . . . . . . . . . . . . . . . . . . . . . . . . . . . . . . . . . . . . . . . . . . . . . . . . . . . . . . . . . . . . . G-1
G.1.1
Configuration Step 1 Example - Defining Locations . . . . . . . . . . . . . . . . . . . . . . . . . . . . . . . . . . . . . G-2
G.1.2
Configuration Step 2 Example - Defining Media Type . . . . . . . . . . . . . . . . . . . . . . . . . . . . . . . . . . . G-2
G.1.3
Configuration Step 3 Example - Defining Domain Attributes . . . . . . . . . . . . . . . . . . . . . . . . . . . . . . G-2
G.1.4
Configuration Step 4 Example - Defining MDMS Database Nodes . . . . . . . . . . . . . . . . . . . . . . . . . G-4
G.1.5
Configuration Step 5 Example - Defining a Client Node . . . . . . . . . . . . . . . . . . . . . . . . . . . . . . . . . G-5
G.1.6
Configuration Step 6 Example - Creating a Jukebox . . . . . . . . . . . . . . . . . . . . . . . . . . . . . . . . . . . . G-5
G.1.7
Configuration Step 7 Example - Defining a Drive . . . . . . . . . . . . . . . . . . . . . . . . . . . . . . . . . . . . . . . G-5
G.1.8
Configuration Step 8 Example - Defining Pools . . . . . . . . . . . . . . . . . . . . . . . . . . . . . . . . . . . . . . . . G-7
G.1.9
Configuration Step 9 Example - Defining Volumes using the /VISION qualifier . . . . . . . . . . . . . . G-7
vi
Preface
This document contains installation and configuration information about HSM for OpenVMS
V4.1. Use this document to install, and configure your HSM environment.
Intended Audience
The audience for this document are persons who install HSM software. The users of this document should have some knowledge of the following:
•
OpenVMS system management
•
DCL commands and utilities
Document Structure
This document is organized in the following manner and includes the following information:
Chapter 1
Provides and introduction to the HSM environment and how it compliments your
storage environment.
Chapter 2
Describes the MDMS installation and configuration tasks.
Chapter 3
Describes the HSM software and hardware requirements.
Chapter 4
Describes the HSM installation tasks.
Chapter 5
Describes the HSM configuration tasks in preparation for use.
Chapter 6
Describes configuring the HSM environment for remote access through DFS, NFS,
or PATHWORKS.
Appendix A
Shows a sample HSM Basic mode installation.
Appendix B
Shows a sample HSM Plus mode installation.
Appendix C
Provides a list of the HSM Logicals used.
Appendix D
Provides a list of the HSM File names.
Appendix E
Provides a list of the MDMS Logicals used.
Appendix F
Provides a list of the MDMS File names.
Appendix G
Sample Configuration of MDMS.
vii
Related Documents
The following documents are related to this documentation set or are mentioned in this manual.
The lower case x in the part number indicates a variable revision letter.
Document
Order No
HSM for OpenVMS Installation and Configuration Guide
AA-QUJ1x-TE
HSM for OpenVMS Guide to Operations
AA-PWQ3x-TE
HSM for OpenVMS Command Reference Guide
AA-R8EXx-TE
HSM for OpenVMS Software Product Description
AE-PWNTx-TE
HSM Hard Copy Documentation Kit (Consist of the above HSM documents
and a cover letter)
QA-0NXAA-GZ
Storage Library System for OpenVMS Guide to Backup and Restore Operations
AA-QHLEx-TE
Storage Library System for OpenVMS Installation Guide
AA-KY16x-TE
OpenVMS System Management Utilities Reference Manual: A-L
AA-PV5Px-TK
OpenVMS DCL Dictionary: A-M
AA-PV5Kx-TK
OpenVMS DCL Dictionary: N-Z
AA-PV5Lx-TK
OpenVMS License Management Utility Manual
AA-PVXUx-TK
OpenVMS User’s Manual
AA-PV5Jx-TK
Related Products
The following related products are mentioned in this documentation.
viii
Product
Description
HSM
HSM refers to Hierarchical Storage Management for OpenVMS software.
MDMS
MDMS refers to Media, Device and Management Services for OpenVMS
software.
SLS
SLS refers to Storage Library System for OpenVMS software.
SSMgr
SSMgr refers to Save Set Manager for OpenVMS software.
Conventions
The following conventions are used in this document.
Convention
Description
{}
In format command descriptions, braces indicate required elements.
You must include one of the elements.
[]
Brackets show optional elements in a command syntax. You can omit these elements if you wish to use the default response.
:.
Horizontal ellipsis points indicate the omission of information from a
sentence or paragraph that is not important to the topic being discussed
...
Vertical ellipsis points indicate the omission of information from an example or
command format. The information has been omitted because it is not important
to the topic being discussed.
boldface
Boldface type in text indicates the first type instance of terms defined in the
Glossary or in text.
italic
Italic type emphasizes important information, type indicates variables, indicates complete titles of manuals, and indicates parameters for system information.
Starting
test . . .
This type font denotes system response, user input, and examples.
Ctrl/x
Hold down the key labeled Ctrl (Control) and the specified key simultaneously
(such as Ctrl /Z).
PF1 x
The key sequence PF1 x indicates that you press and release the PF1 key, and
then you press and release another key (indicated here by x).
n
A lowercase italic n indicates the generic use of a number. For example, 19nn
indicates a four-digit number in which the last two digits are unknown.
x
A lowercase italic x indicates the generic use of a letter. For example, xxx indicates any combination of three alphabetic characters.
OpenVMS Alpha
This term refers to the OpenVMS Alpha operating system.
OpenVMS VAX
This term refers to the OpenVMS VAX operating system.
Determining and Reporting Problems
If you encounter a problem while using HSM, report it to HP through your usual support channels.
Review the Software Product Description (SPD) and Warranty Addendum for an explanation of
warranty. If you encounter a problem during the warranty period, report the problem as indicated
previously or follow alternate instructions provided by HP for reporting SPD nonconformance
problems.
ix
1
Welcome to HSM
The information presented in this chapter is intended to give you an overall picture of a typical
storage environment, and to explain how HSM complements that environment.
1.1 What Do All Storage Environments Have In Common?
All storage environments that plan to implement HSM have the following common hardware
and software:
•
OpenVMS™, VAX™ or Alpha systems
•
OpenVMS software Version 6.2 or higher for VAX and Alpha systems
•
Disk devices for online storage/transactions
•
DECnet™ Phase IV or DECnet-Plus (Phase V)
•
Tape drives
•
Removable media that is compatible with the tape drives for storing shelved data
1.2 What Makes a Storage Environment Unique?
All storage environments have some or all of the following characteristics that make them
unique:
•
Mixed architecture (a combination of VAX and Alpha systems)
•
Heterogeneous client systems (OpenVMS, NT, UNIX)
•
Types of tape drives (TLZ06, TZ877, and so forth)
•
Types of robotic devices (stackers/loaders/libraries)
•
Types of tape drive connections (direct-connect SCSI or controller-connected)
•
Location of tape drives (remote or local)
•
Number of disks
•
Number of tape drives
•
Optical Devices
1.3 How Does HSM Complement Your Storage Environment?
On most storage systems, 80% of the I/O requests access only 20% of the stored data.
The remaining 80% of the data occupies expensive media (magnetic disks), but is used infrequently. HSM solves this problem by automatically and transparently moving data between
magnetic disk and low-cost shelf-storage (tapes or optical disks) according to file usage patterns
and policies that you specify. HSM is most suitable for large data-intensive storage operations
where the backup times become excessive. By moving infrequently used data to off-line storage,
HSM can greatly reduce the amount of backup time required. The benefits of using HSM are:
Welcome to HSM 1–1
Welcome to HSM
1.4 What is the Purpose of a Managed Media & Device Environment?
•
Limits on-line capacity to frequently used files, thus speeding access to current data.
•
Provides faster backups with less on-line data needing regular backup.
•
The backup-via-shelving capability reduces backup requirements up to 90%.
•
Storage administrators no longer need to manage disk capacity on a daily basis, since HSM
monitors this for them.
•
Production applications won’t fail due to "disk full" or "disk quota exceeded" exceptions
because HSM prevents disks from filling up.
•
Allows you to customize your storage hierarchy according to your requirements.
•
The tape re-packing feature recovers shelf space on tapes used for deleted files or obsolete
data.
•
The flexible management system lets you move files between disk volumes or systems
without any unshelving.
•
The multi-file savesets feature provides full use of tape capacity and greatly increased
shelving performance.
•
The multiple catalogs feature allows much larger HSM systems by not limiting the number
of shelved files.
1.4 What is the Purpose of a Managed Media & Device Environment?
HSM software is dependent on the Media, Device and Management Services (MDMS) software
to access storage devices. The purpose of a managed media and device environment is to maintain a logical view of the physical elements of your storage environment to serve your nearline
and offline data storage needs. A managed media and device environment defines the media and:
•
the drives that can use the media.
•
the locations where media is stored,
•
the locations of the drives that are compatible with the media,
•
and the policy that governs the use of media.
The following list summarizes the characteristics of the managed media and device environment:
•
Media - are defined media types in MDMS.
Media type definitions are stored in the MDMS volume configuration database.
All managed media are known in terms of type, location, capability, availability, and authorization (permitted users of these media). Before you can use media in your managed storage environment, you must add the media to the MDMS volume configuration database,
and initialize the media for use. Once this is done, the media start to be known as
"volumes." HSM recognizes these media type definitions, and depending upon which media
type your storage class uses, performs the shelving operation using the appropriate media
type and tape drives.
•
Tape drive definitions also are stored in MDMS.
Tape drives are used to serve the volumes known to MDMS. The MDMS software maintains a logical link between the volumes and the compatible tape drives, both in terms of
physical and logical boundaries. Volumes and tape drives can be managed logically from
locations miles away from where they are physically located. HSM depends upon MDMS to
select the appropriate tape drives determined by the media type. HSM storage classes associate these logical connections.
Welcome to HSM 1-2
Welcome to HSM
1.5 Differences - HSM Basic & Plus Mode
•
1.5
MDMS enables you to set the default criteria for moving and recycling volumes.
These criteria include rotation between onsite and offsite locations for safekeeping of the
volumes, and the schedule that moves the volume through its lifecycle (retention, use, and
reuse). HSM enables you to set the retention criteria for data saved on volumes, while
MDMS enables you to define when to move or recycle volumes.
Differences - HSM Basic & Plus Mode
HSM software operates in one of two modes:
•
HSM Basic mode
Provides shelving, preshelving, and unshelving functionality using simple devices, Digital
Linear Tape (DLT) magazine loaders, and 4mm DAT loaders.
•
HSM Plus mode
Provides shelving, preshelving, and unshelving functionality using the full suite of devices
supported through Media, Device and Management Services for OpenVMS (MDMS),
including robotically-controlled devices like TL820s and StorageTek™ silos.
Except for the media, device and management configuration and support, both modes operate
identically.
Note
If you don’t already have SLS installed on your system, then you must install MDMS
before you can use the HSM Plus Mode functionality. Don’t install MDMS if SLS is
already present.
1.5.1 HSM Basic Mode Functions
HSM Basic mode provides the following functionality and features:
1.5.2
•
Complete HSM functionality for small to medium customer environments that can use
smaller capacity tape loaders (for example, DLT loaders), standalone tape devices, and magneto-optical devices
•
A simple, integrated user interface provided completely by HSM
•
Limited media management that is not integrated with other storage management products
•
Support of up to 36 archive classes for data reliability
•
An HSM naming convention for tape volume labels
•
Local tape device support within the VMScluster™ environment: the shelf server nodes
must have visibility to all tape devices (this can include TMSCP-served devices)
HSM Plus Mode Functions
HSM Plus mode provides the following functionality and features:
•
Complete HSM functionality for medium to large customer environments that use large tape
jukeboxes and for locations that already have the MDMS or SLS software installed
•
Support for large capacity nearline devices that support multiple terabytes of data, such as
the TL820 and StorageTek™ silos
•
Common media management with other OpenVMS storage management products through
the MDMS software
•
Device and media management support provided through the MDMS command line and
menu interfaces; this requires a more complex configuration process than for HSM Basic
mode
Welcome to HSM 1–3
Welcome to HSM
1.5 Differences - HSM Basic & Plus Mode
•
Support of up to 9999 archive classes for data reliability
•
No fixed naming conventions for HSM tape volumes; the Storage Administrator controls
volume names through MDMS
•
Tape device support within the cluster: the shelf server nodes do not require direct visibility
to all tape devices within the cluster
•
Support for remote tape devices, those that are not directly connected within the cluster,
through the Remote Device Facility™ (RDF) portion of MDMS
1.5.3 HSM Mode Comparison Table
Table 1-1 identifies the functionality HSM for OpenVMS provides and which mode provides it.
Table 1–1 HSM Basic and Plus Functionality
Function
Basic
Plus
OpenVMS Versions
6.2 thru 7.2x
6.2 thru 7.3
Supported hardware platforms
VAX, Alpha
VAX, Alpha
Common media and device management with other HP
storage products
No
Yes, through
MDMS
Support for Digital Linear Tape (DLT) magazine loaders
as robotically-controlled devices
Yes
Yes
Support for TL81x, TL82x
No
Yes
Maximum number of archive classes
36
9999
Requires specific HSM volume names
Yes
No
Provides support for remote devices
No
Yes
Uses a single, integrated interface for configuration and
use
Yes
No
All other functions, including HSM policies and cache, are provided in both modes.
1.5.4 Choosing HSM Modes
One of the pivotal decisions you must make before starting HSM is which mode you wish to run
in - Plus or Basic.
Select Plus mode if:
•
You wish to have consolidated media management with other Storage Management products (e.g SLS, ABS...)
•
You are planning to use large multi-drive tape jukeboxes such as the TL81x, TL82x or StorageTek Silo
•
You are planning to use any kind of remote (RDF - accessed) tape drive
•
You wish to choose your tape volume labels, or use bar-coded volume labels
Welcome to HSM 1-4
Welcome to HSM
1.6 HSM License Types
Select Basic mode if:
•
You do not want consolidated media management, or are using an alternative media manager
•
You are not using large multi-drive tape jukeboxes (for example, you can use single-drive
TZ8xx loaders in either mode)
•
You are not planning to use tapes at all (for example, you might be using optical jukeboxes)
•
You should select the mode before continuing with any further HSM configuration.
1.5.5 HSM Mode Change Restrictions
You choose an HSM mode to operate when you install the HSM for OpenVMS software. However, you can change modes after you make the initial decision. The following restrictions apply
to changing modes after installation:
•
You can always change from Basic mode to Plus mode.
•
You can change from Plus mode to Basic mode only if you have not written any shelved file
information to a catalog in Plus mode. Once you write information to a catalog in Plus
mode, you cannot change back to Basic mode.
•
For a change in operating mode to have effect, you must restart HSM.
1.6 HSM License Types
HSM offers three kinds of license types:
•
HSM Base licenses
•
HSM Capacity licenses
•
HSM Concurrent Use licenses
1.6.1 HSM Base Licenses
A base HSM license is required to use HSM. This base license provides 20 GB of capacity.
Additional capacity licenses are available as is an unlimited capacity license. The capacity is calculated according to the online storage space freed up when files are shelved. The total capacity
is checked against the allowable capacity when a shelving operation occurs. If you exceed your
capacity license, users will be able to unshelve data, but will not be able to shelve data until the
license capacity is extended.
When you shelve a file, the amount of space freed up by the file’s truncation is subtracted from
the total capacity available. When you unshelve or delete the file, its allocated space is added to
the capacity available. Periodically, HSM scans the volumes in the VMScluster™ system and
compares the amount of storage space for the shelved files to the remaining capacity. The SMU
SHOW FACILITY command displays the license capacity remaining for the HSM facility
(VMScluster™ system).
Welcome to HSM 1–5
Welcome to HSM
1.7 HSM Concurrent Use Licenses
Base licenses are available for all-VAX clusters, all-Alpha clusters, and mixed architecture clusters. These base licenses are shown in Table 1-2.
Table 1–2 HSM Base Licenses
Base Licenses:
VAX only Cluster
QL-0NXA9-AA
Alpha only Cluster
QL-3J1A9-AA
Mixed Cluster
QP-03PAA-01
1.6.2 HSM Capacity Licenses
HSM uses an online capacity licensing strategy. Because HSM increases online capacity for
active data at low cost, the license strategy attempts to capitalize on this lower cost per megabyte. HSM reduces the cost of system management by providing this functionality with a
reduced amount of operator intervention.
You may increase your HSM storage capacity by purchasing additional capacity licenses. HP
makes it easy for you by combining a base license in the same capacity license package so only
one part number is needed. These licenses expand your shelving capacity by 140 GB, 280 GB,
500 GB, or 1000 GB increments of storage. Table 1-3 lists these licenses.
Table 1–3 HSM Additional Capacity Licenses
HSM Capacity Licenses:
140 GB Capacity License*
QP-03TAA-01
280 GB Capacity License*
QP-03TAA-02
500 GB Capacity License*
QP-03TAA-04
1000 GB Capacity License*
QP-03TAA-03
Note
The * in the above table means that these additional capacity licenses also include the
base license for VAX clusters, Alpha clusters, and mixed-architecture clusters.
1.7 HSM Concurrent Use Licenses
In addition to the HSM Capacity licenses, HP also has available some HSM Concurrent Use
Licenses. These concurrent use licenses are different from the above capacity licenses in that
they don’t include a base license in the same package. Obtaining a concurrent use license and a
base license requires two part numbers.
Welcome to HSM 1-6
Welcome to HSM
1.8 Installation Changes when SLS is Present
Table 1-4 lists these licenses.
Table 1–4 HSM Concurrent Use Licenses
Concurrent Use Licenses:
20 GB Concurrent Use License
QL-2AWAA-3B
500 GB Concurrent Use License
QL-2AWAA-3G
Unlimited Concurrent Use License
QL-2AWAA-3H
1.8 Installation Changes when SLS is Present
When the Storage Library System (SLS) product is already present on the system where you are
installing HSM, you must NOT install MDMS. The HSM Product will use the MDMS software
already running under SLS. If you reinstall MDMS again, it will override the MDMS software
running under SLS and cause SLS to lose some functionality. See the Caution note that follows.
Caution
If you currently use the Storage Library System for OpenVMS (SLS), do not install
MDMS. MDMS does not contain the backup and restore functionality of SLS. If you
install MDMS over SLS backup and restore functionality, you must reinstall your version of SLS. SLS includes the MDMS functionality.
1.9 HSM Upgrade Considerations
Note
If you are installing HSM V4.1 on an Alpha running OpenVMS 7.2-1 you will be
installing the latest HSDRIVER.
If you are upgrading from earlier versions of HSM (on Alpha/VAX systems running
Open VMS versions below 7.2), please note that the HSDRIVER provided in this kit,
is the latest image. Please refer table in Section 1.15 for reboot requirement.
Do not run HSM V4.1 with HSM V4.0A (BL42) and lower versions of driver Installed,
doing so may crash your system.
The additional tasks you must perform are described below:
1.
All HSM V2.x versions contain an HSDRIVER with a different interface than the HSM
V1.x versions. HSM V2.x version will not work with the V1.x version of HSDRIVER
installed. So, if you are upgrading from an HSM V1.x version to an HSM V2.x version, you
must reboot your system after the HSM installation or the system will crash. If you are operating in a VMScluster™, all nodes in the cluster using HSM must be rebooted to use the
new HSDRIVER.
2.
If you are upgrading from a lower HSM V2.x version to HSM V4.1, you have to reboot
your system right after HSM installation.
3.
The format of the HSM catalog and the SMU databases found in HSM$MANAGER have
changed for HSM Version 3.0 from V1.x. As a result, the installation procedure may convert the existing catalog and multifile save sets to the new format and you cannot downgrade to earlier versions.
Welcome to HSM 1–7
Welcome to HSM
1.10 Backing Up the HSM Catalog
In case something should happen during conversion, HP strongly recommends you back up
the existing catalog and SMU databases before you install HSM Version V4.1 software. The
catalog is located at: HSM$CATALOG:HSM$CATALOG.SYS and the SMU databases at:
HSM$MANAGER:*.SMU.
4.
You must shut down HSM before you perform the installation. If you do not, the installation
will fail. To shut down HSM, use the following command:
$ SMU SHUTDOWN/NOW
1.10 Backing Up the HSM Catalog
Because the HSM catalog is such a critical file for HSM, it is very important that it gets backed
up on a regular basis. The contents of shelved files are retrievable only through the catalog.
You should therefore plan for the catalog to be in a location where it will get backed up frequently.
1.11 Backing up Your System Disk
At the beginning of the installation, VMSINSTAL prompts you about the backup of your system
disk. HP recommends that you back up your system disk before installing any software.
Use the backup procedures that are established at your site. For details about performing a system disk backup, see the section on the Backup utility (BACKUP) in the OpenVMS System
Management Utilities Reference Manual: A-L.
1.12 VMScluster™ System Considerations
If you installed HSM on a VMScluster™ system, there are four things you may need to do:
•
Reinstall DCLTABLES on all nodes in the VMScluster™ system.
•
Make sure that SYS$STARTUP:HSM$LOGICALS.COM is the same across all nodes in
the VMScluster™ system and that all nodes can access any devices referenced in the logicals.
•
Because HSM creates new DCL command verbs, all system users need to log out and log in
again to see those verbs.
•
To ensure all logicals are correctly defined and that HSM functionality is fully available on
all devices in the VMScluster™ system, you may want to reboot all nodes in the VMScluster™ system.
1.13 Mixed Architecture Environments
Before You Install your Storage Management Software
Note
If you are planning to install HSM Plus software in a mixed architecture OpenVMS
Cluster, you should understand the configuration issues explained in this section.
If you do not consider these configuration issues, you could spend considerable time
deleting and editing files, and reinstalling the software.
This section addresses the characteristics of a mixed architecture environment and describes
some fundamental approaches to installing and configuring your software to run in it.
Welcome to HSM 1-8
Welcome to HSM
1.13 Mixed Architecture Environments
The following list identifies the topics and their purposes:
1.13.1 Mixed Architecture Environments defines the mixed architecture environment and discusses ways in which they can come about, change, then disappear. Each of these occurrences
requires some consideration about how to configure your software.
1.13.2 Principles Guiding Mixed Architecture Configuration lists the guiding principles that
require you to make special considerations for mixed architecture implementation, and what
these principles mean to you.
1.13.3 Configuring Applications in a Mixed Architecture OpenVMS Cluster describes three
possible approaches to implementing a mixed architecture environment.
1.13.4 Implementation Specific Approach explains why the documentation includes procedures for a specific approach. If you cannot use the documented procedures, you should decide
on an approach before you begin installation.
1.13.1 Mixed Architecture Environments
A mixed architecture OpenVMS Cluster includes at least one VAX system and at least one
Alpha system.
Creating a Mixed Architecture Configuration:
If you add an Alpha system to a homogenous VAX OpenVMS Cluster, or if you are currently
running a homogenous Alpha OpenVMS Cluster and inherit a VAX system, you will have a
mixed architecture environment.
Before you integrate the Alpha or VAX node into the system, you should decide an approach to
take for handling mixed architecture issues.
Operating a Mixed Architecture Configuration:
If you are currently operating a mixed architecture environment, and you want to add a VAX
system or an Alpha system you must integrate it into your current configuration consistently
with your other applications.
You should understand the particular requirements of any new application you introduce into a
mixed architecture OpenVMS Cluster.
Dissolving a Mixed Architecture Configuration:
If you remove the last VAX or Alpha system, leaving a homogenous OpenVMS Cluster, you
should remove any aspects of configuration that accounted for the heterogeneous nature of the
mixed architecture system. This includes (but is not limited to) removing startup files, duplicate
directory structures, and logical tables.
1.13.2 Principles Guiding Mixed Architecture Configuration
Hardware Limitations:
VAX systems cannot execute image files compiled on an Alpha system, and Alpha systems cannot execute image files compiled on a VAX system. Other types of files cannot be shared,
including object code files (.OBJ), and user interface description files (.UID). You must place
files that cannot be shared in different locations: VAX files accessible only to VAX OpenVMS
Cluster nodes, and Alpha files accessible only to Alpha OpenVMS Cluster nodes.
What it Means
Data files, in most cases, must be shared between OpenVMS Cluster nodes. You should place all
shared files in directories accessible by both VAX and Alpha OpenVMS Cluster nodes.
Welcome to HSM 1–9
Welcome to HSM
1.13 Mixed Architecture Environments
Logical names, that reference files which cannot be shared, or the directories in which they
reside, must be defined differently on VAX and Alpha systems.
Files that assign logical name values must therefore be architecture specific. Such files may
either reside on node-specific disks or shared only among OpenVMS Cluster nodes of the same
hardware architecture.
1.13.3 Configuring Applications in a Mixed Architecture OpenVMS Cluster
This section describes three approaches to configuring applications to run in a mixed architecture OpenVMS Cluster. The one you choose depends on your existing configuration, and the
needs of the particular application you are installing. These approaches are given as examples
only. You should decide which you want to implement based on your own situation and style of
system management.
All of these approaches have two aspects in common:
•
All shared files reside in one location
•
All files that cannot be shared reside in separate locations
1.13.3.1 Separate Disk Configuration
These characteristics describe the separate disk configuration:
•
Product directories are installed on two separate disks.
•
One of the product directories is a complete installation containing all data (and other
shared) files, and all executable (and other nonshared) files for either VAX or Alpha systems.
•
The other of the product directories is a partial product installation, with only those directories that contain either Alpha or VAX system executables and other nonshared files.
•
The systems using the disk with the complete installation uses logicals that normally reference the product executables and shared files.
•
The systems using the disk with only the nonshared files use normal product logical definitions to point to shared files and directories. System logicals that point to nonshared files are
assigned to the specific device, directory and/or file names.
1.13.3.2 Separate Root Configuration
These characteristics describe the separate root configuration:
•
Product directories are installed on the same disk, but at different root locations.
•
One of the product directories is a complete installation containing all data (and other shared
files), and all executable (and other nonshared) files for either VAX or Alpha systems.
•
The other of the product directories is a partial product installation, with only those subdirectories that contain either Alpha or VAX system executables and other nonshared files.
•
The systems using the directory with the complete installation uses logicals that normally
reference the product executables and shared files.
•
The systems using the directory with only the nonshared files use normal product logical
definitions to point to shared files and directories. System logicals that point to nonshared
files are assigned to the specific device, directory and/or file names.
Welcome to HSM 1-10
Welcome to HSM
1.14 Overview of the HSM Installation
1.13.3.3 Separate Subdirectory Configuration
These characteristics describe the separate directory configuration:
•
Product directories are installed on the same disk, and under the same root.
•
Any directory which would normally contain the nonshared files (under a single architecture installation) has two subdirectories: one for VAX system nonshared files, and one for
Alpha system nonshared files.
•
Logicals that reference nonshared files are assigned search list values that point to the directories which holds shared files, and to the architecture specific subdirectories holding nonshared files.
1.13.4 Implementation Specific Approach
This document includes specific procedures for a recommended approach based on current product configuration and the behavior of the installation process with respect to its use of logical
definitions during upgrades.
If the recommended approach is inconsistent with the way you currently manage your system,
you should decide on a different approach before you begin your installation procedures.
1.14 Overview of the HSM Installation
The following table provides an overview of the steps involved in the full HSM installation and
configuration process.To make sure you go through the installation process properly, you could
use the ‘Check-Off’ column in Table 1–5 HSM Installation and Configuration.
Table 1–5 HSM Installation and Configuration
Step
Task
Reference
Check-off
1.
Check for HSM - Required Software, Space and Privileges
“Required Software” on page 2
2.
Required for HSM Basic Mode
3.3.1 Required for
HSM Basic Mode
3.
Required for HSM Plus Mode
3.3.2 Required for
HSM Plus Mode
4.
Required for HSM Repack Function
3.3.3 Required for
HSM Repack
Function
5.
Required Hardware Disk Space
3.2 Required
Hardware Disk
Space
6.
Required System Privileges
3.4 Required System Privileges
7.
Required System Parameters
3.5 Required System Parameters
8.
Required for VMSINSTAL
3.6 Required for
VMSINSTAL
9.
Installing DECthreads Images
3.7 Installing
DECthreads
Images
Welcome to HSM 1–11
Welcome to HSM
1.14 Overview of the HSM Installation
Table 1–5 HSM Installation and Configuration
Step
Task
Reference
10.
Registering your HSM License
3.8 Registering
Your HSM
License
11.
Installing the HSM Software
4.1 Installing the
HSM Software
12.
Editing the System Startup and Shutdown Files
4.3 Editing the
System Startup
and Shutdown
Files
13.
Creating an HSM Catalog
4.4 Creating an
HSM Catalog
14.
Installation Verification Procedure
4.5 Installation
Verification Procedure
15.
Getting Started with HSM
Chapter 5
16.
MDMS Pre-installation Tasks
2.1 MDMS Preinstallation Tasks
17.
Installing the MDMS Software
2.2 Installing the
MDMS Software
18.
MDMS Post-installation Tasks
2.3 MDMS Postinstallation Tasks
19.
Graphical User Interface(GUI) Installation
2.4 Graphical User
Interface(GUI)
Installation
20.
Running the GUI
2.5 Running the
GUI
21.
Hardware and Software Requirements
2.1.1 Hardware
and Software
Requirements
22.
Meet Patch Requirements
2.1.2 Meet Patch
Requirements
23.
Install CMA Shareable Images
2.1.3 Install CMA
Shareable Images
24.
Shutdown Previous Version of MDMS
2.1.4 Shutdown
Previous Version
of MDMS
25.
Shutdown Previous Version of MDMS
2.1.5 Register the
MDMS License
26.
Register the MDMS License
2.1.5 Register the
MDMS License
27.
Verify the Node is in the MDMS Database
2.1.6 Verify the
Node is in the
MDMS Database
Welcome to HSM 1-12
Check-off
Welcome to HSM
1.14 Overview of the HSM Installation
Table 1–5 HSM Installation and Configuration
Step
Task
Reference
Check-off
28.
Consider RDF Configuration
2.1.7 Consider
RDF Configuration
29.
Create a Node Object
2.3.1 Create a
Node Object
30.
Provide Automatic Start Up and Shut Down
2.3.2 Provide
Automatic Start
Up and Shut Down
31.
Remove SLS/MDMS V2.x Automatic Startup
2.3.3 Remove
SLS/MDMS V2.x
Automatic Startup
32.
Configure MDMS
2.3.4 Configure
MDMS
33.
Configure Remote Tape Drives
2.3.5 Configure
Remote Tape
Drives
34.
Grant MDMS Rights to Users
2.3.6 Grant
MDMS Rights to
Users
35.
Installing the DCL tables on Nodes
2.3.7 Installing the
DCL tables on
Nodes
36.
Installation on OpenVMS Alpha V7.1-2 and 7.2-1
2.4.2 Installation
on OpenVMS
Alpha V7.1-2 and
V7.2-1
37.
Installation on Intel Windows NT/95/98
2.5.2 Running the
GUI on Intel Windows NT/95/98
38.
Installation on Alpha Windows NT
2.4.4 Installation
on Alpha Windows NT
39.
Running the GUI on OpenVMS Alpha
2.5.1 Running the
GUI on OpenVMS Alpha
40.
Running the GUI on Intel Windows NT/95/98
2.5.2 Running the
GUI on Intel Windows NT/95/98
41.
Running the GUI on Alpha Windows NT
2.5.3 Running the
GUI on Alpha
Windows NT
Welcome to HSM 1–13
Welcome to HSM
1.15 Reboot Requirement
1.15 Reboot Requirement
You need to reinstall HSM after you upgrade your OpenVMS Version.
Old Version
New Version
Reboot Requirement
2.2-1
3.0
No
2.2-1
3.0A and any higher
version of HSM
Yes
3.0
3.0A
Yes
3.0
3.1
Yes
3.0
4.0
Yes
3.0
4.0A
Yes
3.0
V4.1
Yes
3.0A
3.1
No
3.0A
4.0
Yes
3.0A
4.0A
Yes
3.0A
V4.1
Yes
3.1
3.1A
Yes
3.1
4.0
Yes
3.1
4.0A
Yes
3.1
V4.1
Yes
3.1A
4.0
Yes
3.1A
4.0A
Yes
3.1A
V4.1
Yes
3.2
4.0
No
3.2
4.0A
Yes
3.2
V4.1
Yes
3.2A
4.0
No
3.2A
4.0A
Yes
3.2A
V4.1
Yes
4.0
4.0A
Yes
4.0
V4.1
Yes
4.0A
V4.1
Yes
Welcome to HSM 1-14
2
Installing MDMS Software
This chapter explains how to install the Media, Device and Management Services (MDMS)
Version V4.1 software. The sections in this chapter cover the three procedures involved in
installing the software, namely:
•
pre-installation tasks
•
installation
•
post-installation tasks
If this is the initial installation of MDMS you should install MDMS on a node that is going to be
one of your MDMS database server nodes.
Note
You may want to read the MDMS configuration chapters in the Guide to Operations to
make better decisions when installing MDMS.
This version of MDMS installs the system executable files into system specific directories.
Because of this, there is no special consideration for mixed architecture OpenVMS cluster
system installations. At a minimum, you will install MDMS twice in a mixed architecture
OpenVMS Cluster system, once on an OpenVMS Alpha node and once on an OpenVMS VAX
node.
If you are installing MDMS with the ABS-OMT license, the following features of MDMS are
not available:
•
Support of remote devices through the Remote Device Facility (RDF)
•
Support of DCSC-controlled StorageTek silos
2.1 MDMS Pre-installation Tasks
The following table lists out exactly which section describes the particular pre-installation task,
to help you ensure that the installation takes place correctly
Installing MDMS Software 2–1
Installing MDMS Software
2.1 MDMS Pre-installation Tasks
.
Table 2–1 MDMS Pre-installation Tasks
Action
Section
Meet hardware and software requirements
Section 2.1.1 Hardware and Software Requirements
Meet prerequisite patches requirements
Section 2.1.2 Meet Patch Requirements
Install CMA shareable images
Section 2.1.3 Install CMA Shareable Images
Shutdown previous version of MDMS
Section 2.1.4 Shutdown Previous Version of MDMS
Register the MDMS License
Section 2.1.5 Register the MDMS License
Verify the Node is in the MDMS Database
Section 2.1.6 Verify the Node is in the MDMS Database
Consider RDF Configuration
Section 2.1.7 Consider RDF Configuration
2.1.1 Hardware and Software Requirements
MDMS’s free disk space requirements differ during installation (peak utilization) and after
installation (net utilization). As a pre-installation step please make sure that the required space is
available during and post-installation respectively. Table 2–2 shows the different space
requirements.
Table 2–2 Disk Space Requirements
If you are Installing the
Kit
You will need
MDMS
Complete Kit
102,000 (Alpha), 44,000 (VAX) peak blocks
during installation
90,000 (Alpha), 33,000 (VAX) net blocks after
installation (permanent)
Minimal Kit
11,000 (Alpha), 5,000 (VAX) peak blocks
during installation
3,000 net blocks after installation (permanent)
Installing MDMS Software 2-2
Installing MDMS Software
2.1 MDMS Pre-installation Tasks
The installation variants require disk space as follows:
Table 2–3 Installation Variants
Peak
Alpha
Net
Alpha
Peak
VAX
Net
VAX
MDMS Basic Kit (Minimal)
11,000
3,000
5,000
3,000
Remote Device Facility
11,000
7,000
11,000
2,000
OpenVMS GUI (Alpha only)
12,000
12,000
N/A
N/A
Intel NT/95/98 GUI
12,000
12,000
12,000
12,000
Alpha NT GUI
16,000
16,000
16,000
16,000
OpenVMS Java Kit (Alpha only)
40,000
40,000
N/A
N/A
Complete kit with all options selected
102,000
90,000
44,000
33,000
Variant
The files for MDMS are placed in two locations:
•
system disk: for executables
•
MDMS$ROOT: for
–
Command procedures
–
Log files
–
Database files
–
GUI files for all three platforms
Note
If disk space is an issue, it is advisable to place MDMS$ROOT: on a disk other than
your system disk because MDMS creates log files that can grow quite large.
OpenVMS V6.2 is the minimum version of software necessary to run MDMS. OpenVMS V7.12 Alpha is the minimum version of software on which to run the OpenVMS GUI. The GUI does
not run on VAX systems. The GUI requires the availability of TCP/IP on all platforms.
2.1.2 Meet Patch Requirements
Table 2–4 describes the patch requirements for MDMS:
Table 2–4 Prerequisite Patches
Component
Operating System
Version
Patch
MDMS$SERVER
OpenVMS Alpha
V6.2
ALPY2K_062
OpenVMS VAX
V6.2
VAXLIBR06_070
OpenVMS Alpha
V7.1 to V7.1-H2
ALPBASE02_071
V7.1 to V7.1-H2
ALPACRT06_071
GUI
Installing MDMS Software 2–3
Installing MDMS Software
2.1 MDMS Pre-installation Tasks
Table 2–4 Prerequisite Patches
V7.1 to V7.1-H2
ALPDCL01_071
V7.1 to V7.1-H2
ALPSYSA01_071
V7.1 to V7.1-H2
ALPSYSB02_071
V7.1 to V7.1-H2
ALPTHREADS_03071
V7.1-2 ONLY
VMS712_PTHREADS
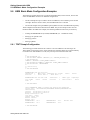
If the server patches are not installed, you will see the following error while trying to start the
server:
08-Jan-2003 10:38:16 %MDMS-I-TEXT, "10k Day" patch not installed!
Note
You can obtain these patches or the latest revision by contacting your HP reprsentative. If the patches for the MDMS$SERVER are not installed, the server will not start
but you can successfully install MDMS, then install the patches and start the server.
2.1.3 Install CMA Shareable Images
If you are installing MDMS on an OpenVMS V6.2 VAX system, you have to install the
following three files:
•
SYS$COMMON:[SYSLIB]CMA$RTL
•
SYS$COMMON:[SYSLIB]CMA$OPEN_RTL
•
SYS$COMMON:[SYSLIB]CMA$LIB_SHR
If these images are not installed by default, include the following lines in the
SYS$STARTUP:SYSTARTUP_VMS.COM:
$!
$! Install CMA stuff for MDMS
$!
$ INSTALL = "$INSTALL/COMMAND_MODE"
$ IF .NOT. F$FILE_ATTRIBUTES("SYS$COMMON:[SYSLIB]CMA$RTL.EXE", "KNOWN")
$ THEN $
INSTALL ADD SYS$COMMON:[SYSLIB]CMA$RTL
$ ENDIF
$ IF .NOT. F$FILE_ATTRIBUTES("SYS$COMMON:[SYSLIB]CMA$OPEN_RTL.EXE", "KNOWN")
$ THEN
$
INSTALL ADD SYS$COMMON:[SYSLIB]CMA$OPEN_RTL
$ ENDIF
$ IF .NOT. F$FILE_ATTRIBUTES("SYS$COMMON:[SYSLIB]CMA$LIB_SHR.EXE", "KNOWN")
$ THEN
$
INSTALL ADD SYS$COMMON:[SYSLIB]CMA$LIB_SHR
$ ENDIF
Installing MDMS Software 2-4
Installing MDMS Software
2.1 MDMS Pre-installation Tasks
2.1.4 Shutdown Previous Version of MDMS
If you have been running a version of MDMS prior to Version V4.1, you must shut it down
using the following command:
$ @SLS$SYSTEM:SLS$SHUTDOWN
If you are using MDMS V3.0 or later, use the following command to shut down MDMS:
$ @SYS$STARTUP:MDMS$SHUTDOWN
2.1.5 Register the MDMS License
As MDMS does not have a separate license, you need one of the following licenses to run
MDMS:
•
HSM-SERVER
•
SLS
•
SLS-MGR
•
SLS-REMOTE
•
SLS-REMOTE-MGR
If you do not have one of these licenses registered, please refer to the section on registering the
license for ABS or HSM whichever you are installing.
2.1.6 Verify the Node is in the MDMS Database
If this installation is not the initial installation of MDMS, you need to verify that the node you
are installing MDMS on is in the MDMS database. Enter the following command on a node that
has MDMS already installed on it and verify that the node you are installing MDMS on is in the
database:
$ MDMS SHOW NODE node_name_you_are_installing_on
%MDMS-E-NOSUCHOBJECT, specified object does not exist
If the node is not in the database, you receive the %MDMS-E-NOSUCHOBJECT error message
and you should create the node using the following command:
$ MDMS CREATE NODE node_name_you_are_installing_on
See the Command Reference Guide for the qualifiers to use.
If the node you are adding is an MDMS server node, the installation procedure will create the
node using the /DATABASE qualifier. In addition, you need to edit all
SYS$STARTUP:MDMS$SYSTARTUP.COM files in your domain and add this node to the
definition of MDMS$DATABASE_SERVERS.
Installing MDMS Software 2–5
Installing MDMS Software
2.2 Installing the MDMS Software
2.1.7 Consider RDF Configuration
MDMS provides RDF software to facilitate operations that require access to remote, network
connected tape drives. This allows you to copy data from a local site to a remote site, or copy
data from a remote site to a local site.
During the installation you will be asked questions on whether you want to install on this node,
the software that will allow it to act as a server and/or client for the RDF software. You need to
decide if you want the server and/or client installed on the node.
•
Install the RDF Server software on all nodes that are connected to the tape drives used for
remote operations.
•
Install the RDF Client software on all nodes that initiate remote operations to tape drives
on the RDF Server node.
Note
After installing RDF you may have to reboot your system. A new driver is included
with this kit. If you have never installed RDF before a reboot is not needed. If you
already have RDF installed, you do not need to reboot unless you need the new driver
installed. It will be installed on the next reboot.
2.2 Installing the MDMS Software
The MDMS installation procedure consists of a series of questions and informational messages.
Once you start the installation procedure, it presents you with a variety of questions that will
change depending on whether the installation is the first or a subsequent installation. The
installation procedure provides detailed information about the decisions you will make.
If for any reason you need to abort the installation procedure at any time, you can press CTRL/Y
and the installation procedure deletes all files it has created up to that point and exits. Note that
you can restart the installation procedure from this point, at any time.
Note
Be sure to read Section 2.4 MDMS Graphical User Interface (GUI) Installation for
information on selecting GUI kits to be extracted from the saveset during this installation.
To install MDMS:
1.
Load the distribution medium into a suitable device, and mount the volume
2.
Invoke the VMSINSTAL procedure using the following command:
$ @SYS$UPDATE:VMSINSTAL MDMSB030 location: OPTIONS N
Where:
location: is the device and directory that contains the software kit save set.
Installing MDMS Software 2-6
Installing MDMS Software
2.3 MDMS Post-installation Tasks
OPTIONS: N is an optional parameter that indicates you want to see the question on Release
Notes. If you do not include the OPTIONS:N parameter, VMSINSTAL does not ask you about
the Release Notes. You should review the Release Notes before proceeding with the installation
in case they contain additional information about the installation procedure.
Follow the instructions as you are prompted to complete the installation. Each question you are
asked is provided with alternatives for the decision you can take and an explanation for the
related decision.
Questions and decisions offered by the installation procedure vary. Subsequent installations will
not prompt you for information you provided during the first installation.
2.3 MDMS Post-installation Tasks
The following sections describe the post-installation tasks needed after installing the MDMS:
Table 2–5 Post-Installation Tasks
Action
Section
Create a Node Object
Section 2.3.1 Create a Node Object
Provide Automatic Start Up and Shut Down
Section 2.3.2 Provide Automatic Start Up and Shut
Down
Remove SLS/MDMS V2.x Automatic Startup
Section 2.3.2 Provide Automatic Start Up and Shut
Down
Configure MDMS
Section 2.3.3 Configure MDMS
Configure remote tape drives
Section 2.3.4 Configure Remote Tape Drives
Grant MDMS Rights to Users
Section 2.3.5 Grant MDMS Rights to Users
Installing the DCL tables on Nodes
Section 2.3.6 Installing the DCL Tables on Nodes
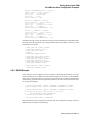
2.3.1 Create a Node Object
If this is the initial installation of MDMS, you may need to create the node object in the MDMS
node database for this node. Use the MDMS CREATE NODE command to create this initial
database node. Refer to the Command Reference Guide for the qualifiers for this command.
The following is an example:
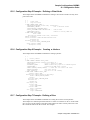
$ MDMS CREATE NODE NABORS ! NABORS is the DECnet Phase IV node name or a
! name you make up if you do not use DECnet
! Phase IV in your network
/DATABASE_SERVER ! a potential database node
! must also be defined in
! in SYS$STARTUP:MDMS$SYSTARTUP.COM
/TCPIP_FULLNAME=NABORS.SITE.INC.COM ! the TCP/IP full node name if you
! are using TCP/IP you need this if
! you are using the GUI
/DECNET_FULLNAME=INC:.SITE.NABORS ! this is the full DECnet Phase V node name
! do not define if you do not have DECnet Phase V on this node
! be sure to define if you have DECnet Phase V installed on this node
/TRANSPORT=(DECNET,TCPIP)
Installing MDMS Software 2–7
Installing MDMS Software
2.3 MDMS Post-installation Tasks
! describes the transports that listeners are
! started up on
2.3.2 Provide Automatic Start Up and Shut Down
To automatically start MDMS when you initiate a system start up, at a location after the DECnet
or TCP/IP start up command, add the following line in the system's start up file,
SYS$MANAGER:SYSTARTUP_VMS.COM:
$ @SYS$STARTUP:MDMS$STARTUP
To automatically stop MDMS when you initiate a system shut down, enter the following into the
system's shut down file:
$ @SYS$STARTUP:MDMS$SHUTDOWN
While using MDMS with HSM, make sure that MDMS startup is executed prior to HSM startup.
HSM needs a logical name that is defined by the MDMS startup.
2.3.3 Configure MDMS
Now that you have installed MDMS you need to configure MDMS by creating the following
objects:
•
Media types
•
Locations
•
Nodes
•
Groups
•
Jukeboxes
•
Tape Drives
•
Magazines
•
Pools
•
Volumes
Please refer to the MDMS section in the Guide to Operations for more information on
configuration and operation.
2.3.4 Configure Remote Tape Drives
If you installed the RDF software, you need to configure the remote tape drives.
For each tape drive served with RDF Server software, make sure there is a drive object record in
the MDMS database that describes it. Refer to the chapters on MDMS configuration in the
Guide to Operations and the MDMS CREATE DRIVE command in the Command Reference
Guide.
For each node connected to the tape drive, edit the file TTI_RDEV:CONFIG_node.DAT and
make sure that all tape drives are represented in the file. The syntax for representing tape drives
is given in the file.
Installing MDMS Software 2-8
Installing MDMS Software
2.4 MDMS Graphical User Interface (GUI) Installation
During startup of MDMS, the RDF client and server are also started. The RDF images are linked
on your system. If you see the following link errors on Alpha V6.2, this is not an RDF bug. The
problem is caused by installed VMS patches ALPCOMPAT_062 and ALPCLUSIO01_062.
%LINK-I-DATMISMCH, creation date of 08-Jan-2003 15:16 in
shareable image SYS$COMMON:[SYSLIB]DISMNTSHR.EXE;3
differs from date of 08-Jan-2003 22:33 in shareable image library
SYS$COMMON:[SYSLIB]IMAGELIB.OLB;1
.
.
.
This is a known problem and is documented in TIMA. To correct the problem, issue the
following DCL commands:
$ LIBRARY/REPLACE/SHARE SYS$LIBRARY:IMAGELIB.OLB SYS$SHARE:DISMNTSHR.EXE
$ LIBRARY/REPLACE/SHARE SYS$LIBRARY:IMAGELIB.OLB SYS$SHARE:INIT$SHR.EXE
$ LIBRARY/REPLACE/SHARE SYS$LIBRARY:IMAGELIB.OLB SYS$SHARE:MOUNTSHR.EXE
2.3.5 Grant MDMS Rights to Users
Before any user can use MDMS, you must grant MDMS rights to those users. Refer to the
MDMS Rights and Privileges Appendix in the HSM for OpenVMS Command Reference Guide
for explanation of MDMS rights and how to assign them.
2.3.6 Installing the DCL Tables on Nodes
To make MDMS commands available on all nodes of the cluster, you should ensure that all
nodes have the latest version of DCLTABLES.EXE installed. You can do this by using
SYSMAN or by logging into each node in the cluster and enter the following command:
$ INSTALL REPLACE SYS$COMMON:[SYSLIB]DCLTABLES.EXE
2.4 MDMS Graphical User Interface (GUI) Installation
This section describes how to install and run the Graphical User Interface (GUI) on various platforms.
As the GUI is based on Java, you must have the Java Runtime Environment (JRE) installed on
the system where you are running the GUI. If you do not have the JRE installed on your system,
these sections describe what is needed and where to get it.
The MDMS installation procedure extracts files from the kit and places them in
MDMS$ROOT:[GUI...]. You can then move the Windows files to a Windows system and install
them.
Note
For the GUI to communicate with the MDMS server, you must have TCP/IP services
on the node where you have the MDMS server running.
The GUI requires the following in order to run:
Installing MDMS Software 2–9
Installing MDMS Software
2.4 MDMS Graphical User Interface (GUI) Installation
Java Runtime Environment - Since the MDMS GUI is a Java application, it requires the platform
specific JRE. You can download the correct kit from the given URLs. For the OpenVMS installation, you may alternatively install the Standard Edition kit instead of the JRE kit. This is packaged as a PCSI kit, which is simpler to install. Issues concerning availability and installation can
be directed to:
http://java.sun.com/products (for Microsoft Windows)
http://www.compaq.com/java (for OpenVMS Alpha)
Memory - On Windows systems, the hard drive space requirement is 4 MB for the MDMS GUI.
The main memory space requirement for running the GUI is 10 MB.
2.4.1 Installing the GUI on OpenVMS Alpha
During the MDMS installation, the following question will be asked:
Do you want the MDMS GUI installed on OpenVMS Alpha [YES]?
Reply “Yes” to the question if you want to install the GUI on OpenVMS. Files will be moved to
MDMS$ROOT:[GUI.VMS] and the GUI installation will be complete.
If you have not already installed the JRE, you should install it by following the instructions provided at the download site, http://www.compaq.com/java. The version specific setup command
procedure provided by the Java installation will establish defaults for the logical names and symbols on the system. You should add a command line to the
SYS$COMMON:[SYSMGR]SYLOGIN.COM
command procedure to run this Java setup command procedure at login.
The JAVA$CLASSPATH is defined for the GUI in the
MDMS$SYSTEM:MDMS$START_GUI.COM
command procedure provided during the installation. The call to Java to invoke the GUI is also
included in this command procedure.
Note
Make sure that the logical JAVA$USER_DCL is not defined or the GUI will not work.
2.4.2 Installing the GUI on Intel Windows NT/95/98
During the MDMS installation, the following question will be asked:
Do you want files extracted for Microsoft Windows [YES]?
Reply “Yes” if you want to install the GUI on a Microsoft Windows platform. Files will be
moved to MDMS$ROOT:[GUI.WINTEL].
Move the file MDMS$ROOT:[GUI.WINTEL]SETUP.EXE to the Windows machine and run it
to install the GUI.
If you have not installed the JRE, you should install it by following the instructions at the download site: http://java.sun.com/products.
Installing MDMS Software 2-10
Installing MDMS Software
2.5 Running the GUI
2.5 Running the GUI
Now that you have installed the GUI, you have to make sure the server node is configured to
accept communications from the GUI. The server node for the GUI must have:
•
TCP/IP enabled
and
•
the MDMS rights enabled in the SYSUAF record for the user
To enable TCP/IP communications on the server, you have to set the TCP/IP Fullname attribute
and enable the TCPIP transport. See the Command Reference Guide for information about
setting these attributes in a node.
MDMS rights for the user must be enabled in the SYSUAF record to log into the server using the
GUI. Refer to the Command Reference Guide for information about MDMS rights.
The following sections describe how to run the GUI on various platforms.
2.5.1 Running the GUI on OpenVMS Alpha
To use the MDMS GUI on OpenVMS Alpha systems, use the following commands:
$ @SYS$STARTUP:JAVA$SETUP.COM
$ SET DISPLAY/CREATE/NODE=node_name/TRANSPORT=transport
$ MDMS/INTERFACE=GUI
For the SET DISPLAY command, the node_name is the name of the node on which the monitor
screen exists. This allows you to use the GUI on systems other than those running OpenVMS
Alpha V7.1 or higher. The transport must be a keyword of:
2.5.1.1
•
LOCAL – if you are running the GUI on the same node as the monitor
•
DECNET – if you are running the GUI on a monitor connected to another node and you
wish to use DECnet protocol between the monitor node and the GUI Java node.
•
TCPIP – if you are running the GUI on a monitor connected to another node and you wish to
use TCPIP protocol between the monitor node and the GUI Java node.
Running the GUI on Windows NT/95/98
To use the MDMS GUI on Microsoft Windows platforms, double click on the batch file named
MDMSView.bat in the MDMSView directory on the drive where you installed the GUI.
To view the MDMS GUI correctly, you must have the display property settings for the screen
area set to 1024 X 768 or higher.
If you have Java installed in a location other than the normal default location, you will need to
first edit the MDMSView.bat file to include the correct path. The default in this file is
3.
C:\Program Files\JavaSoft\JRE\1.2\bin\java.exe
Installing MDMS Software 2–11
3
Meeting the HSM Installation
Requirements
This chapter enlists requirements to be met before installing the HSM software. Go through the
following list before you begin installation.
Requirements List
The requirements list to meet before installing HSM software is as follows:
•
Read the HSM Software Release Notes
•
Required Software
•
Requirements for HSM Basic Mode
•
Requirements for HSM Plus Mode
•
Requirements for HSM Repack Function
•
Required Hardware Disk Space
•
Required System Privileges
•
Required System Parameters
•
Required for VMSINSTAL
•
Installing DECthreads™ Images
•
Registering your HSM Licence
3.1 Read the Release Notes
The HSM kit includes online release notes. HP strongly recommends that you read the release
notes before proceeding with the installation. The release notes are in a text file named
SYS$HELP:HSM041.RELEASE_NOTES and a Postscript ® file named
SYS$HELP:HSM041.RELEASE_NOTES.PS.
Meeting the HSM Installation Requirements 3–1
Meeting the HSM Installation Requirements
3.2 Required Hardware Disk Space
3.2 Required Hardware Disk Space
Table 3–1 summarizes the disk space requirements for installing and running HSM.
Table 3–1 Disk Space Requirements
Item
Blocks Needed
Description
Install
45,000
Temporary blocks for
HSM Software
35,000
Permanent blocks for software
Catalog
100,000
Catalog grows at the average rate of 1.25
blocks for each file copy shelved. HP recommends 100,000 blocks be set aside initially for
this catalog.
Kit
HSM requires 100,000 free disk blocks on the system disk. To determine the number of free disk
blocks on the current system disk, enter the following command at the DCL prompt:
$ SHOW DEVICE SYS$SYSDEVICE
3.3 Required Software
The software requirements list for HSM is as follows:
•
HSM V4.1 is supported on the OpenVMS Alpha V6.2, V7.1-2, V7.2-1, V7.2-2., V7.3 &
V7.3-1 and OpenVMS VAX Operating System V6.2, V7.1, V7.2 and V7.3. HSM V4.1 does
not support ODS5 disk volumes.
•
HSM Basic Mode does not require any software other than HSM and the OpenVMS Operating System.
•
HSM Plus Mode requires MDMS V4.1 or SLS V2.9G. A MDMS license is not required for
using HSM. An SLS license is required only if SLS is to be used with HSM.
Note
DECnet is a required software, if SLS is used as Media and Device management software. For MDMS, DECnet is an optional because it supports both TCPIP/DECnet.
3.3.1 Required for HSM Basic Mode
When HSM is used in Basic Mode, the only software required, in addition to HSM, is the OpenVMS Operating System Versions 6.2 through 7.2 - see above. Media, Device and Management
Services (MDMS) is required only if you wish to convert from HSM Basic Mode to HSM Plus
Mode.
3.3.2 Required for HSM Plus Mode
HSM Plus mode requires the use of Media, Device and Management Services for OpenVMS
(MDMS) Version V4.1 for managing media and devices. MDMS software comes packaged with
HSM and can be obtained from one of the following sources:
•
Off the HSM distribution kit
Meeting the HSM Installation Requirements 3-2
Meeting the HSM Installation Requirements
3.4 Required System Privileges
•
Included with Storage Management Library System for OpenVMS (SLS).
•
Included as a separate source with Archive/Backup System for OpenVMS (ABS)
or Sequential Media File system for OpenVMS (SMF) software
Note
MDMS software must be installed before you install HSM in Plus mode, unless SLS is
already present on the system. If SLS is present, HSM can use the SLS version of
MDMS. HSM V4.1 is compatible with SLS 2.9G only. MDMS is not required for operating HSM in Basic mode.
3.3.3 Required for HSM Repack Function
The HSM SMU REPACK Command allows you to do an analysis of valid and obsolete data on
shelf media and copy the valid data to other media, thus freeing up storage space. This Repack
functionality is found in HSM Plus Mode.
The HSM Repack function requires the use of two tape drives since this is a direct tape to tape
transfer process. One tape must match the media type of the source archive class and the other
tape must match the media type of the destination archive class.
3.4 Required System Privileges
To install HSM software, you must be logged into an account that has the SETPRV privilege.
Note that VMSINSTAL turns off the BYPASS privilege at the start of the installation.
3.5 Required System Parameters
The installation for HSM may require that you raise the values of the GBLSECTIONS and
GBLPAGES system parameters if they do not meet the minimum criteria shown in Table 3–2.
Table 3–2 System Parameters for VAX and ALPHA
System Parameters
VAX
ALPHA
Additional GBLPAGES
1783
2926
Additional GBLSECTIONS
6
36
To find your current system parameters, use the following command:
$ MCR SYSGEN
SYSGEN> SHOW GBLPAGES
SYSGEN> SHOW GBLSECTIONS
3.6 Required for VMSINSTAL
When you invoke VMSINSTAL, it checks for the following:
•
Whether you are logged into a privileged account
•
Whether you have adequate quotas for installation
•
Whether DECnet™ software is running
•
Whether any users are logged into the system
Meeting the HSM Installation Requirements 3–3
Meeting the HSM Installation Requirements
3.7 Installing DECthreads™ Images
Note that VMSINSTAL requires that the installation account have a minimum of the following
quotas:
ASTLM
BIOLM
BYTLM
DIOLM
ENQLM
FILLM
=
=
=
=
=
=
40 (AST Quota)
40 (Buffered I/O limit)
32,768 (Buffered I/O byte count quota)
40 (Direct I/O limit)
200 (Enqueue quota)
300 (Open file quota)
Type the following command to find out where your quotas are set.
$ show process/quota
If VMSINSTAL detects any problems during the installation, it notifies you and prompts you to
continue or stop the installation. In some instances, you can enter YES to continue. Enter NO to
stop the installation and correct the problem.
User account quotas are stored in the SYSUAF.DAT file. Use the OpenVMS Authorize Utility
(AUTHORIZE) to verify and change user account quotas.
First set your directory to SYS$SYSTEM, and then run AUTHORIZE, as shown in the following example:
$ SET DEFAULT SYS$SYSTEM
$ RUN AUTHORIZE UAF>
At the UAF> prompt, enter the SHOW command with an account name to check a particular
account. For example:
UAF> SHOW SMITH
To change a quota, enter the MODIFY command. The following example changes the FILLM
quota for the SMITH account and then exits from the utility:
UAF> MODIFY SMITH /FILLM=50
UAF> EXIT
After you exit from the utility, the system displays messages indicating whether changes were
made. Once the changes have been made, you must log out and log in again for the new quotas
to take effect.
3.7 Installing DECthreads™ Images
If DECthreads™ images are not installed, you must install them before you install HSM.
DECthreads™ consists of several images. To check for them, you will need to execute the following commands. These commands require CMKRNL privileges and will need to be executed
on all nodes in the cluster running HSM.
$
$
$
$
install
install
install
install
list
list
list
list
sys$library:cma$rtl.exe
sys$library:cma$lib_shr.exe
sys$library:cma$open_lib_shr.exe
sys$library:cma$open_rtl.exe
Meeting the HSM Installation Requirements 3-4
Meeting the HSM Installation Requirements
3.8 Registering Your HSM License
If any of these list commands fails, then the DECthreads™ images need to be installed.
To install them, execute the following commands.
$
$
$
$
install
install
install
install
add
add
add
add
sys$library:cma$rtl.exe/open/head/share
sys$library:cma$lib_shr.exe/open/head/share
sys$library:cma$open_lib_shr.exe.open/head/share
sys$library:cma$open_rtl.exe/open/head/share
3.8 Registering Your HSM License
To register your HSM license or to add additional capacity licenses, follow the steps in Table 3–
3. Before you attempt to register your PAK, be sure to have the PAK information in front of you.
Table 3–3 How to Register Your HSM License
Step
Action
1.
Enter the LICENSE REGISTER command with the product name and a dash.
$ LICENSE REGISTER HSM-SERVER -
Important:
Enter a dash at the end of each command in steps 1 through 8.
2.
Enter the /ISSUER qualifier information, assigning the value DEC between quotation marks.
_$ /ISSUER="DEC" -
3.
Enter the /AUTHORIZATION qualifier information, assigning it the value from the
AUTHORIZATION NUMBER entry of the PAK.
_$ /AUTHORIZATION=xxxxxxx -
4.
Enter the /PRODUCER qualifier information, assigning the value DEC in quotes.
_$ /PRODUCER="DEC" -
5.
Enter the /UNITS qualifier information, assigning the value from the UNITS entry of the
PAK. This is the value that determines your HSM online capacity.
_$ /UNITS=nn -
6.
Enter the /DATE qualifiers information, assigning the product’s release date value from the
PRODUCT RELEASE DATE entry of the PAK.
_$ /DATE=dd-mmm-yyyy -
7.
Enter the /AVAILABILITY qualifier information, assigning the value from the AVAILABILITY TABLE CODE entry of the PAK.
_$ /AVAILABILITY=x -
8.
Enter the / OPTIONS qualifier information, assigning the value from the KEY OPTIONS
entry of the PAK.
_$ /OPTIONS=xxxxxx -
9.
Enter the /CHECKSUM qualifier information, assigning the value from the CH entry of the
PAK. Important:Do NOT end the entry with a dash.
_$ /CHECKSUM=n-xxxx-xxxx-xxxx-xxxx
10.
Invoke the LICENSE LOAD command with the product name.
$_LICENSE_LOAD_HSM-SERVER
Meeting the HSM Installation Requirements 3–5
4
Installing HSM Software
This chapter contains instructions for installing HSM Version V4.1 software on the OpenVMS
operating system.
4.1 Installing the HSM Software
This section contains a step-by-step description of the installation procedure.
Installing HSM will take approximately 10 to 20 minutes, depending on your system configuration and media.
Running the Installation Verification Procedure (IVP) on a standalone system takes about 5 minutes.
4.1.1 The Installation Procedure
The HSM installation procedure consists of a series of questions and informational messages.
Table 4–1 shows the installation procedure. For a complete example of an HSM installation and
verification procedure for HSM Basic mode, see Appendix A; for HSM Plus mode, see Appendix B.
To abort the installation procedure at any time, enter Ctrl/Y. When you enter Ctrl/Y, the installation procedure deletes all files it has created up to that point and exits. You can then start the
installation again.
Table 4–1 How to Install the HSM Software
Step
Action
1
Load and mount the media that contains the software kit.
2
Invoke the VMSINSTAL procedure. Use the following command:
$@SYS$UPDATE:VMSINSTAL HSM041 location: OPTIONS N
Where:
location is the tape device (or directory) that contains the software kit save set.
OPTIONS N is an optional parameter that tells VMSINSTAL to ask you to choose
Release Notes options. The default behavior is to move the Release Notes to
SYS$HELP.
3
If you see the following message:
%VMSINSTAL-W- ACTIVE, The following processes are still
active* Do you want to continue anyway [NO]?
Enter Y and press <Return>, else go to step 4.
Installing HSM Software 4–1
Installing HSM Software
4.1 Installing the HSM Software
Table 4–1 How to Install the HSM Software
Step
Action
4
Confirm the state of the system backup.
* Are you satisfied with the backup of your system disk [Yes]?
Press <Return>.
5
Identify the location for the software to be mounted. * Where will the distribution volumes be mounted:
You may specify a tape drive, a local disk, or a remote disk. Enter the appropriate information and press <Return>.
6
If you entered OPTIONS N on the VMSINSTAL command line, respond to
the Release Notes option.
Release notes included with this kit are always copied to
SYS$HELP. Additional Release Notes Options:
1. Display release notes
2. Print release notes
3. Both 1 and 2
4. None of the above
* Select option [2]:
Enter the number of the desired option and press <Return>.
7
Answer if you want to purge old files.
* Do you want to purge files replaced by this installation
[YES]?
Enter Y and press <Return>.
8
Select to run the Installation Verification Procedure (IVP).
* Do you want to run the IVP after the installation [YES]?
Recommendation:
Running the IVP procedure is recommended. Press <Return> to run the IVP,
else enter No and press <Return>.
9
Confirm the PAK registration
. *** HSM License ***
Correct installation and operation of this software requires
that one of the following Product Authorization Keys (PAKs)
reflecting your software license be present on this system:
HSM-SERVER
HSM-USER
* Does this product have an authorization key registered and
loaded [Y]?
Enter Y and press <Return>
Installing HSM Software 4-2
Installing HSM Software
4.1 Installing the HSM Software
Table 4–1 How to Install the HSM Software
Step
Action
10
Determine whether to install HSM Basic or HSM Plus mode.
*** HSM Mode ***
With this version, HSM can operate in one of two possible
modes:
BASIC - The standalone HSM product which supports a limited
number of nearline and offline devices.
PLUS - The integrated HSM product, integrated with Media,
Device and Management Services (MDMS) which supports an
expanded number of nearline and offline devices.
NOTE: MDMS V4.1 or SLS V2.9G must be installed before installing HSM PLUS mode. Also, once files are shelved in PLUS mode,
you may *not* change back to BASIC mode.
Enter BASIC or PLUS to select the mode in which you want HSM to
operate.
* Enter the mode to install [PLUS]:
The default shown varies according to whether the HSM install detects the presence of
MDMS or SLS Version 2.9G or newer software on your system. If it does, the default is
Plus mode; if it does not, the default is Basic mode.
If you tell HSM to install HSM Plus mode, but MDMS or SLS software is not
installed on your system, the installation fails.
11
Identify the HSM manager account UIC.
If you see the following message:
*** HSM Account ***
A privileged account named HSM$SERVER will be created for use
by HSM processes. This account will not allow interactive logins and the password will be automatically generated.
The installation procedure will not proceed until you enter a
valid user identification code (UIC) for the HSM$SERVER
account.
The UIC must be unique and within the SYSTEM group.
* Enter the UIC to be used for HSM$SERVER account
[[1,22]]:
Press <Return>
Installing HSM Software 4–3
Installing HSM Software
4.1 Installing the HSM Software
Table 4–1 How to Install the HSM Software
Step
Action
12
Select a location for the HSM configuration databases and log files.
Restriction:
The location must have at least 100,000 (100K) free blocks and be available to
all nodes in the VMScluster™ system that will use HSM.
*** HSM Device ***
You will now be asked to enter a disk device specification to
be used as a repository for HSM configuration databases and log
files.
NOTE: *** This device must have at least 100000 free blocks and
be available to all nodes in the cluster that will be running
HSM ***
* Enter the disk device to use for HSM files [SYS$SYSDEVICE:]:
The default location for HSM files is:
SYS$SYSDVICE:[HSM$SERVER]
VMSINSTAL prompts you to verify the file location before continuing.
13
Set quotas and flags for the HSM account. VMSINSTAL will automatically set
quotas and flags for the account.
14
Create HSM catalog and databases. HSM requires a catalog and databases to run. The
VMSINSTAL can create them upon completion of the software installation for you.
Recommendation:
HP recommends you answer Y to the following question:
* Do you want to run the database creation procedure [YES]?
15
Set system disk files as not shelvable. VMSINSTAL can submit a command
file to set all system disk files as non-shelvable. This protects the integrity of
the system disk.
Recommendation:
HP recommends you answer Y to the following question:
* Do you want to submit SETFILENOSHELV.COM [YES]?
16
At this point, the installation proceeds without further operator intervention. If
you requested VMSINSTAL run the IVP, it runs it here.
Note
VMSINSTAL deletes or changes entries in the process symbol tables during the
installation. Therefore, if you are going to continue using the system manager’s
account and you want to restore these symbols, you should log out and log in again.
4.1.2 Error Recovery
If errors occur during the installation procedure, VMSINSTAL displays failure messages. If the
installation fails, you see the following message:
%VMSINSTAL-E-INSFAIL, The installation of HSM has failed
Installing HSM Software 4-4
Installing HSM Software
4.2 After Installing HSM Software
If the IVP fails, you see this message:
The HSM Installation Verification Procedure failed.
%VMSINSTAL-E-IVPFAIL, The IVP for HSM has failed.
Errors can occur during the installation if any of the following conditions exist:
•
The operating system version is incorrect.
•
Quotas necessary for successful installation are insufficient.
•
System parameter values for successful installation are insufficient.
•
The OpenVMS help library is currently in use.
•
The product license has not been registered and loaded.
For descriptions of the error messages generated by these conditions, see the OpenVMS documentation on
system messages, recovery procedures, and OpenVMS software installation. If you are notified that any of
these conditions exist, you should take the appropriate action as described in the message.
4.2 After Installing HSM Software
The following postinstallation tasks should be performed after installing HSM software:
•
Edit the system startup and shutdown files.
•
Modify system parameter settings.
•
Create an HSM catalog, if you did not have the installation do so.
•
Install special device drivers.
4.3 Editing the System Startup and Shutdown Files
You must edit the system startup and shutdown files to provide for automatic startup and shutdown.
Add the command line that starts HSM to the system startup file, called SYS$MANAGER:SYSTARTUP_VMS.COM.
HSM cannot start until after the network has started. You must place this new command line
after the line that executes the network startup command procedure.
The following example shows the network startup command line followed by the HSM startup
command line:
$ @SYS$MANAGER:STARTNET.COM
.
.
.
$ @SYS$STARTUP:HSM$STARTUP.COM
The HSM$STARTUP.COM procedure defines logicals required by the HSM software, connects
the HSDRIVER software for VAX or Alpha systems, and issues an SMU STARTUP command
to start the shelf handler process. The shelf handler process runs continuously and exits only
with the SMU SHUTDOWN command. You may restart the shelf handler manually by using the
SMU STARTUP command.
Installing HSM Software 4–5
Installing HSM Software
4.4 Creating an HSM Catalog
You also can connect the HSDRIVER software manually. To do this, use one of the following
commands:
•
For a VAX system:
$ MCR SYSGEN CONNECT HSA0:/NOADAPTER
•
For an Alpha system:
$ MCR SYSMAN IO CONNECT HSA0: /NOADAPTER
Add the following command line to the system shutdown file, called
SYS$MANAGER:SYSHUTDWN.COM:
$ SMU SHUTDOWN/NOW
4.4 Creating an HSM Catalog
The HSM catalog is the one and only authority containing information about shelved files. It
grows as files get shelved.
If you did not have the installation create an HSM catalog for you, you must create it manually
before you start HSM. To manually create the catalog, invoke SYS$STARTUP:HSM$CREATE_CATALOG.COM. This creates a single catalog for HSM to access.
When a catalog is created in this manner, it will be configured in Basic mode by default. SMU
SET FACILITY/MODE=PLUS should be executed after the catalog is created if Plus mode is
desired. Creating a new Basic mode catalog in an environment that was previously defined in
Plus mode can cause unpredictable results.
The HSM$STARTUP.COM file placed in SYS$STARTUP at installation time creates several
system wide logicals used by HSM. These logicals are stored in a file called HSM$LOGICALS.COM and includes the logical HSM$CATALOG. This logical points to the directory
where HSM should look for the shelving catalog. If you wish to change the location of the catalog, the line in
SYS$STARTUP:HSM$LOGICALS.COM that defines this logical should be changed.
Note
HSM does not automatically create a new catalog if it cannot find the catalog in the
location pointed to by HSM$CATALOG; this condition aborts HSM startup with an
error message.
The system logical HSM$CATALOG should be created ahead of time to specify the location for
the catalog. If you have not already created the logical, you are prompted to define it now and to
restart the procedure. You still must modify the line in HSM$LOGICALS.COM to reflect that
location if it is other than the default. The new catalog file is empty when created.
Installing HSM Software 4-6
Installing HSM Software
4.5 Installation Verification Procedure
4.5 Installation Verification Procedure
As mentioned in the installation procedure itself, VMSINSTAL can run an IVP upon completion
of the HSM installation. The IVP attempts to verify that HSM can shelve and unshelve files
using default configuration information. For a complete example of the HSM IVP, see Appendix
A for HSM Basic mode or Appendix B for HSM Plus mode.
Note
You can run the IVP by itself. If you do, it shuts down HSM.
Use SYS$STARTUP:HSM$STARTUP.COM to restart HSM after the IVP finishes.
Installing HSM Software 4–7
5
Getting Started with HSM
HSM comes with a set of default configuration definitions that enable you to get HSM up and
running quickly. This chapter explains how to use those definitions and perform other essential
configuration tasks to start using HSM. Once HSM is up and running, you can modify the configuration for optimal performance in your operational environment. Read the Customizing the
HSM Environment Chapter in the HSM Guide to Operations Manual for more information on
tuning.
This chapter includes the following topics:
•
A description of the default configuration installed with HSM
•
A discussion of how to make minimal adjustments to the default configuration
for HSM to function in your operational environment
•
A description of how to set up the near-line and off-line environments for both
Basic and Plus modes
•
Example off-line configurations for both Basic and Plus modes
5.1 HSM’s Default Configuration
After installation, HSM is configured with all the default definitions designed into the software.
This section explains in detail what the default configuration definitions are and how you need to
modify them to get HSM up and running. If you follow the steps in this section, you should be
able to shelve and unshelve data on your system. For more information on optimizing HSM
functions for your environment, read the Customizing the HSM Environment Chapter in the
HSM Guide to Operations Manual.
When you install HSM, it sets up several default elements you can use to run HSM with few
modifications. These default elements include the following:
5.1.1
•
A default facility definition
•
A default shelf definition
•
A default device definition
•
A default volume definition
•
Default policy definitions
The Default Facility
•
The facility is initially set up with the following attributes:
•
All HSM operations are enabled
•
All event logging is enabled
Getting Started with HSM 5–1
Getting Started with HSM
5.1 HSM’s Default Configuration
•
All nodes are authorized as shelf servers
•
Use of a catalog server is disabled
•
Default mode depends on whether MDMS/SLS is installed on your system
These operations and event logging defaults represent the behavior that is recommended and
expected to be used most of the time that HSM is in operation.
You should customize your shelf servers to be restricted to the larger systems in your cluster and
to those that have access to the desired near-line and off-line devices.
5.1.2 The Default Shelf
HSM provides a default shelf that supports all online disk volumes. The default shelf enables
HSM operations.
Note that no archive classes are set up for the default shelf at initialization. To enable HSM operations to near-line and off-line devices, you need to configure the default shelf to one or more
archive classes.
5.1.3 The Default Device
HSM provides a default device record, which applies when you create a device without specifying attributes for the device. The default attributes are:
•
The device is shared with other applications.
•
Shelving and unshelving operations are enabled.
•
No archive classes are associated with the device.
For the device to be used by HSM, you must at minimum associate one or more archive classes
with the device. You may also choose to dedicate any device for exclusive HSM use.
5.1.4 The Default Volume
HSM provides a default volume record, which applies to all online disk volumes in the system
unless a specific volume entity exists for them. The default volume contains the following
attributes:
•
Explicit HSM operations (preshelving, shelving, unshelving, file faults, unpreshelving) are
enabled.
•
Implicit HSM operations (policy-based operations) are disabled.
•
Contiguous files are ineligible for shelving
•
Placed files are eligible for shelving
•
The high water mark is 90 percent.
If these attributes are acceptable, no further configuration of volume records is needed.
Getting Started with HSM 5-2
Getting Started with HSM
5.2 Running HSM with Default Configuration
You may change the volume attributes in one of two ways:
•
Update the default volume record, which will affect all online disk volumes associated with
the default volume.
•
Create an individual volume entity for each online disk volume you want to change. This
is recommended if you turn on policy-based HSM operations.
HP recommends you examine disk usage before enabling implicit shelving operations on your
cluster. For example, enabling a high water mark criterion on the default volume could cause
immediate mass shelving on all volumes if the disk usage is already above the high water mark.
HP also recommends that you create an individual volume record for each system disk and disable all HSM operations on those volumes.
5.1.5 The Default Policies
HSM provides three default policies as follows:
•
HSM$DEFAULT_POLICY-This is used as a template for all policy definitions, including
the other two default policies.
•
HSM$DEFAULT_OCCUPANCY-This policy is used as the default reactive policy definition in the system for device full and high water mark triggers.
•
HSM$DEFAULT_QUOTA-This policy is used as the default reactive policy definition in
the system for exceeded quota triggers.
At installation time, all three default policies contain the same attributes:
•
The policy is enabled for shelving (rather than preshelving).
•
The comparison date used for file selection is the expiration date, which when used in conjunction with OpenVMS volume retention time, provides an effective date of last read or
write access.
•
The elapsed time is set to 180 days; This means that files that have been accessed within
180 days will not be selected for shelving.
•
The low water mark goal for the policy is 80 percent.
•
The primary policy file selection algorithm is space time working set (STWS).
•
The secondary policy file selection algorithm is least recently used (LRU).
These default policy definitions allow HSM to function effectively with the minimum of
advance configuration and can be used without any modifications or additional information.
By default, all volumes use the appropriate default policies without any further configuration
being required.
5.2 Running HSM with Default Configuration
Although HSM provides the default elements described above, you cannot simply try to run
HSM with these items. You must verify the facility definition and configure the following additional items for HSM to function:
•
Define archive classes for use.
Getting Started with HSM 5–3
Getting Started with HSM
5.2 Running HSM with Default Configuration
•
Select archive classes for the default shelf.
•
Define devices to support each archive class.
•
Initialize the tape volumes for each archive class.
•
Set volume retention times on all online disks on which you want policy-based shelving to
occur.
5.2.1 Verifying the Facility Definition
As mentioned earlier, HSM provides a default facility definition. Before you start using HSM,
however, you want to verify that the default facility definition is correct for your environment.
The following example shows how to view information about the facility:
$ SMU SHOW FACILITY
HSM is enabled for Shelving and Unshelving
Facility history: Created:
08-Jan-2003 12:10:37.13
Revised:
08-Jan-2003 12:10:37.13
Designated servers:
NODE1
NODE2
Current server:
NODE1
Catalog server:
Disabled
Event logging: Audit Error Exception
HSM mode:
Plus
Remaining license: 20 gigabytes
The information displayed indicates:
•
Whether the facility is enabled for shelving, unshelving, or both
•
Which nodes on the cluster are designated as shelf servers
•
The current shelf server node
–
An indication of whether all catalog writes and caching operations are performed by the
shelf server node
–
What log options are turned on
–
The HSM operational mode (Basic or Plus)
–
The remaining license space (in gigabytes) for the HSM facility
If any of these attributes are not correct for your facility, you need to modify them before continuing to configure HSM.
5.2.2
Defining Archive Classes for Use
To define an archive class for HSM to use, use one of the following commands depending on the
mode in use. For HSM Basic Mode use:
$ SMU SET ARCHIVE n ! for Basic Mode
For HSM Plus Mode use:
$ SMU SET ARCHIVE n - _$ /MEDIA_TYPE=string - _$ /DENSITY=string - _$ /
ADD_POOL=string
Getting Started with HSM 5-4
Getting Started with HSM
5.2 Running HSM with Default Configuration
Where n is a list of archive class numbers from 1 to 36 (Basic mode), or 1 to 9999 (Plus mode).
In Plus mode, the DENSITY and ADD_POOL qualifiers are optional. The MEDIA_TYPE and
DENSITY must exactly match the definitions in TAPESTART.COM (see Section 6.4).
If the media type associated with an archive class has some value for the density, then the
/Density qualifier for the archive class should also have the same value.
5.2.3 Selecting Archive Classes for the Default Shelf
During installation, HSM creates a default shelf named HSM$DEFAULT_SHELF. To allow
shelving operations, the shelf must be associated with one or more archive classes. When data is
copied to the shelf, it is copied to each of the archive classes specified. Having several archive
classes provides you additional safety for your shelved files. Each archive class is written to its
own set of media. HP recommends having at least two archive classes.
Archive classes are represented in HSM by both an archive name and an archive identifier. The
properties of archive classes depends on the selected HSM operational mode:
Basic Mode –Basic mode supports up to 36 archive classes named HSM$ARCHIVE01 to
HSM$ARCHIVE36, with associated archive identifiers of 1 to 36 respectively. The media type
for the archive class is determined by the devices associated with the archive class. It is not
specifically defined.
Plus Mode –Plus mode supports up to 9999 archive classes named HSM$ARCHIVE01 to
HSM$ARCHIVE9999, with associated archive identifiers of 1 to 9999 respectively. You specify
the media type and (optionally) density which must exactly agree with the corresponding fields
associated with off-line devices in the MDMS/SLS file TAPESTART.COM. Specifying a volume pool allows you to reserve specific volumes for HSM use.
Restore archive classes are the classes to be used when files are unshelved. HSM attempts to
unshelve files from the restore archive classes in the specified order until the operation succeeds.
To establish your restore archive classes, you use the /RESTORE qualifier.
The following command associates archive classes 1 and 2 with the default shelf. It also specifies that UNSHELVE operations use the restore archive classes 1 and 2. Each archive class has
an associated media type.
$ SMU SET SHELF/DEFAULT/ARCHIVE_ID=(1,2)/RESTORE_ARCHIVE=(1,2)
IF You Want to...
THEN Use . . .
Use one archive class
SMU SET SHELF/DEFAULT /ARCHIVE=1/RESTORE=1
Use two archive classes
SMU SET SHELF/DEFAULT /ARCHIVE=(1,2)
/RESTORE=(1,2)
Use three archive classes
SMU SET SHELF/DEFAULT/ARCHIVE=(1,2,3)
/RESTORE=(1,2,3)
Getting Started with HSM 5–5
Getting Started with HSM
5.2 Running HSM with Default Configuration
5.2.4 Defining Devices for the Archive Classes
Now you need to specify which near-line/off-line devices you want to use for copying shelved
file data to the archive classes. You must specify a minimum of one device to support near-line
or off-line shelving.
Dedicating Devices
In some circumstances, it is beneficial to dedicate a device for HSM operations. You may want
to dedicate a device if you expect a lot of HSM operations on that device and you do not want
those operations to be interrupted by another process.
For each device definition you create, you have the option of dedicating the device or sharing the
device. A dedicated device is allocated to the HSM process. A shared device is allocated to HSM
only in response to a request to read or write to the media. Once the operation completes, the
device is available to other applications.
Note
The device name that should be used with SMS Set Device command while using
MDMS V4.1 should be the MDMS drive name.
The SMU SET DEVICE/DEDICATE command is used to dedicate a device, the SMU SET
DEVICE/SHARE command is used to share a device. The following options are for dedicating
or sharing a device:
ALL (default)
Uses the device for shelve, preshelve, unshelve, and cache flush operations
SHELVE
Uses the device exclusively for shelve, preshelve, and cache flush operations
UNSHELVE
Uses the device exclusively for unshelve operations. When you dedicate a
device for HSM operations, you must make sure the archive classes you
assign to the device are compatible with the operations you want to perform.
IF You Want to . . .
THEN Use Command/Qualifier . . .
Specify a dedicated device:
SMU SET DEVICE /DEDICATE=ALL device
Specify a shared device:
SMU SET DEVICE /SHARE=ALL device
Support the device for one
archive class
SMU SET DEVICE device: /ARCHIVE=1
Support the device for two
archive classes
SMU SET DEVICE device:/ARCHIVE=(1,2)
Support the device for three
archive classes
SMU SET DEVICE device: /ARCHIVE=(1,2,3)
Getting Started with HSM 5-6
Getting Started with HSM
5.2 Running HSM with Default Configuration
Archive Class, Device, and Media Type
For HSM Basic mode, when you associate an archive class with a particular device, you implicitly define the media type for that archive class. HSM, in Basic mode, determines media type for
a given device based on the device type.
Robot Name
In Basic mode, you must associate a Robot Name with a tape magazine loader if you wish it to
be robotically controlled.
5.2.5 Initializing Tape Volumes for Each Archive Class
After setting up the devices, you must initialize each tape volume for the archive classes to be
used.
For Plus mode, the tape volumes are defined by using STORAGE ADD VOLUME commands
to MDMS/SLS. For jukebox loaders such as the TL81x and TL82x, it is important that the volumes names match the external volume label and bar code on the volume. You can use the OpenVMS INITIALIZE command to initialize volumes, or use the SLS Operator Menu (option 3) to
do this.
HSM Basic mode uses a different approach. There are fixed labels for use in each archive class
as shown in Table 5–1 :
Table 5–1 Archive Class Identifier/Label Reference for HSM Basic Mode Archive
Archive
Id
Archive Label
Volume Id
Volume Label
Volume Id
Label
1
HS0xxx
13
HSCxxx
25
HSOxxx
2
HS1xxx
14
HSDxxx
26
HSPxxx
3
HS2xxx
15
HSExxx
27
HSQxxx
4
HS3xxx
16
HSFxxx
28
HSRxxx
5
HS4xxx
17
HSGxxx
29
HSSxxx
6
HS5xxx
18
HSHxxx
30
HSTxxx
7
HS6xxx
19
HSIxxx
31
HSUxxx
8
HS7xxx
20
HSJxxx
32
HSVxxx
9
HS8xxx
21
HSKxxx
33
HSWxxx
10
HS9xxx
22
HSLxxx
34
HSXxxx
11
HSAxxx
23
HSMxxx
35
HSYxxx
12
HSBxxx
24
HSNxxx
HSZxxx
Getting Started with HSM 5–7
Getting Started with HSM
5.2 Running HSM with Default Configuration
In the table, the values for xxx are as follows:
001, 002, ..., 099, 101, 102, ..., 199, 201, 202, ..., 999, A01, A02, ..., A99, B01, B02, ..., Z99
This naming convention must be adhered to for Basic Mode, allowing up to 3564 volumes per
archive class. An archive class always starts with the "001" value and progresses up in order, as
shown.
Use the OpenVMS INITIALIZE command to initialize the physical tape volumes for each
archive class that you use.
The following examples show how to initialize two tape volumes each for archive class 1 and 2.
Archive Class ID
_ $ INITIALIZE $1$MUA100: HS0001
$ INITIALIZE $1$MUA200: HS0002 !
$ INITIALIZE $1$MUA100: HS1001 !
$ INITIALIZE $1$MUA200: HS1002 !
Tape volume
! tape 1 for archive class ID 1
tape 2 for archive class ID 1
tape 1 for archive class ID 2
tape 2 for archive class ID 2
Note
It is vital for correct use for all tape volumes to have different labels. If you initialize
multiple volumes with the same label, HSM will not be able to differentiate between
them and will not be able to unshelve files on the volumes.
5.2.6 Set Volume Retention Times for Policy-Based Shelving
Each template policy uses the expiration date as the basis for selecting files for shelving. This
default is intended to be used with the OpenVMS volume retention feature to provide an effective date of last access. The date of last access is the optimal way to select truly dormant files for
shelving by policy.
To use the default policy effectively, you must enable volume retention on each volume used for
shelving. If you do not specifically enable volume retention on a volume, expiration dates for
files on the volume usually will be zero. In this case, the default policy will not select any files
for shelving.
Verifying Privileges
To set volume retention, you must be allowed to enable the SYSPRV system privilege or have
write access to the disk volume index file.
Setting Volume Retention
To set volume retention dates, use the following procedure. For more information about the
OpenVMS command SET VOLUME/RETENTION, see the OpenVMS DCL Dictionary.
1.
Enable the system privilege for your process:
$ SET PROCESS/PRIVILEGE=SYSPRV
Getting Started with HSM 5-8
Getting Started with HSM
5.3 Additional Configuration Items
2.
Enable retention times for each disk volume on your
system:
$ SET VOLUME/RETENTION=(min,[max])
For min and max, specify the minimum and maximum periods of time you want the files
retained on the disk using delta time values. If you enter only one value, the system uses that
value for the minimum retention period and calculates the maximum retention period as either
twice the minimum or as the minimum plus seven days, whichever is less.
If you are not already using expiration dates, the following settings for retention times are suggested:
$ SET VOLUME/RETENTION=(1-, 0-00:00:00.01)
Initializing File Expiration Dates
Once you set volume retention on a volume and define a policy using expiration date as a file
selection criteria, the expiration dates on files on the volume must be initialized. HSM automatically initializes expiration dates the first time a policy runs on the volume. This initializes dates
for all files on the volume that do not already have an expiration date. The expiration date is set
to the current date and time, plus the maximum retention time as specified in the SET VOLUME/RETENTION command.
After the expiration date has been initialized, the OpenVMS file system automatically updates
the expiration date upon read or write access to the file, at a frequency based on the minimum
and maximum retention times.
5.3 Additional Configuration Items
There are three additional configuration tasks you may want to perform to use in connection with
HSM’s default configuration:
•
Authorize shelf servers
•
Specify a cache for HSM to use
•
Schedule default policy execution
5.3.1 Authorizing Shelf Servers
If your cluster contains a mixture of large nodes and smaller satellite workstations, you may
want to restrict shelf server operation to the larger nodes for better performance.
Use the SET FACILITY command to initially authorize your shelf server. See the SMU SET
FACILITY command in the HSM Guide to Operations for detailed information on this command. In the following example, two nodes (NODE1 and NODE2) are authorized as shelf servers. By default, all shelving operations and all event logging are enabled also.
$ SMU SET FACILITY/SERVER=(NODE1,NODE2)
Getting Started with HSM 5–9
Getting Started with HSM
5.3 Additional Configuration Items
If you omit the /SERVER qualifier, all nodes in the cluster are authorized as shelf servers.
IF You Want to ...
THEN Use...
Authorize one node for shelf server
operation
SMU SET FACILITY/SERVER=node
Authorize several nodes for shelf
server operation
SMU SET FACILITY/SERVER=(node,node,...)
Authorize all nodes for shelf server
operation
SMU SET FACILITY/NOSERVER (default)
5.3.2 Working with a Cache
A cache provides many performance benefits for HSM operations, for example, a significant
improvement in the response time during shelving operations.
If you would like to use a magneto-optical device as a shelf device instead of, or in addition to
near-line /off-line devices, define the magneto-optical device as a cache.
IF You Want to...
THEN Use Command/Qualifier . . .
Define a cache volume
SMU SET CACHE device:
Set the cache block
SMU SET CACHE device: /BLOCK=value size
Change the flush device:
SMU SET CACHE /INTERVAL=time interval
Specify the flush SMU SET
CACHE device:
/AFTER=time start_time
5.3.3 An Example of Managing Online Disk Cache
A system manager has decided that approximately 250,000 blocks of online disk cache will
improve application availability by reducing shelving time.
There are three user disks that contain various amounts of available storage capacity:
$1$DUA13, $1$DUA14, and $1$DUA15. The three disk volumes are defined as cache devices
with differing amounts of capacity:
$1$DUA13 is set to 100,000 blocks
$1$DUA14 is set to 50,000 blocks
$1$DUA15 is set to 100,000 blocks
5.3.4 Running Default Policies
HSM includes a set of default policy definitions to provide a working system upon installation.
These definitions are created during the installation procedure and are immediately implemented. The definitions also are used when creating additional definitions.
Although schedules are maintained in a database, there is no supplied schedule for the default
preventive policy HSM$DEFAULT_POLICY. If you want to implement a preventive policy,
you must use the SMU SET SCHEDULE command as shown in the HSM Guide to Operations.
Getting Started with HSM 5-10
Getting Started with HSM
5.3 Additional Configuration Items
Table 5–2 lists the supplied default policy definitions that are configured for operation upon
installing HSM.
Table 5–2 Supplied Default Policy Definitions
5.3.5
Definition
Name
Preventive policy
HSM$DEFAULT_POLICY +
Reactive policies
HSM$DEFAULT_OCCUPANCY, HSM$DEFAULT_QUOTA +
These default definitions cannot be deleted.
Template Policy Definitions
The default definitions for the disk volume, shelf, and preventive policy are also template definitions. When you create new disk volume, shelf, and policy definitions, any parameters not given
a value use the parameter value in the template definition.
5.3.5.1
Using a Template Policy Definition
The following steps show how the policy template definition HSM$DEFAULT_POLICY provides values for a newly created policy definition.
3.
Examine the template definition values. The policy template definition contains the default
values.
$ SMU SHOW POLICY/DEFAULT/FULL
Policy HSM$DEFAULT_POLICY is enabled for shelving
Policy History:
Created:
08-Jan-2003 12:39:32.34
Revised:
08-Jan-2003 12:39:32.34
Selection Criteria:
State:
Enabled
Action:
Shelving
File Event:
Expiration date
Elapsed time: 180 00:00:00
Before time: <none>
Since time:
<none>
Low Water Mark: 80 %
Primary Policy: Space Time Working Set (STWS)
Secondary Policy:
Least Recently Used (LRU)
Verification:
Mail notification: <none>
Output file: <none>
4.
Create a new policy in which the comparison date is based on the last backup date and the
low water mark is set to 40 percent.
$ SMU SET POLICY NEW_POLICY /BACKUP/LOWWATER_MARK=40
5.
Examine the newly created policy definition and compare the values with the default. In this
example:
The primary policy and secondary policy values are from the default policy definition.
The comparison date and the low water mark values have been changed.
Getting Started with HSM 5–11
Getting Started with HSM
5.4 Plus Mode Offline Environment
$ SMU SHOW POLICY/FULL NEW_POLICY
Policy NEW_POLICY is enabled for shelving
Policy History:
Created:
08-Jan-2003 13:49:26.64
Revised:
08-Jan-2003 13:49:26.64
Selection Criteria:
State:
Enabled
Action:
Shelving
File Event:
Backup date
Elapsed time: 180 00:00:00
Before time: <none>
Since time:
<none>
Low Water Mark: 40 %
Primary Policy: Space Time Working Set(STWS)
Secondary Policy:
Least Recently Used(LRU)
Verification:
Mail notification: <none>
Output file: <none>
5.3.5.2
Changing Default Policy Definitions
You may use the values supplied in the template definition or change them to suit your needs. To
change the values of a template definition, use the SMU SET POLICY command to change the
named default definition, or use the /DEFAULT qualifier to change the template itself.
Examples
Either of the following commands set the HSM$DEFAULT_POLICY secondary policy to
STWS:
SMU>
SMU SET POLICY /SECONDARY_POLICY=STWS/DEFAULT
SMU>
SMU SET POLICY HSM$DEFAULT_POLICY /SECONDARY_POLICY=STWS
5.4 Plus Mode Offline Environment
In Plus mode, you are using MDMS or SLS as your media manager. In addition to setting up the
HSM configuration as described above, you also need to set up the MDMS/SLS environment to
agree with the HSM definitions. This section discusses the minimum MDMS/SLS operations to
run HSM in Plus mode.
This section does not explain everything you need to do to first set up MDMS in an environment.
For detailed instructions on installing and configuring MDMS, see the Media, Device and Management Services for OpenVMS Guide to Operations.
5.4.1 How HSM Plus Mode and MDMS Work Together
By using Media, Device and Management Services for OpenVMS (MDMS) software, HSM Plus
mode uses common media, device and management capabilities. MDMS provides these common services for various storage management products, such as Archive Backup System (ABS)
and Storage Library System for OpenVMS (SLS), as well as HSM.
Getting Started with HSM 5-12
Getting Started with HSM
5.4 Plus Mode Offline Environment
5.4.2 How MDMS Supports HSM
MDMS provides the following services:
•
An integrated and shared approach to controlling access to devices
•
A shared database to media and device information
•
Common commands that allow you to manage media across storage management products
What this means for HSM is:
If you already use MDMS to support some other storage management product, you will need to
do little to add functionality for HSM.
If you do not use MDMS for other storage management products now, you can start using it for
HSM and add other products later without having to shift your media and device management
approach.
HSM can now support more devices, including TL820s as fully robotic devices.
HSM can support gravity-controlled loading in a Digital Linear Tape (DLT) magazine loader in
addition to robotically-controlled loading in a DLT.
5.4.3 MDMS Commands for HSM Plus Mode Use
For HSM to work with MDMS, there are various MDMS commands you may need to use.
Table 5–3 lists the MDMS commands you may need to use for HSM Plus mode and describes
what each one does. Later sections of this chapter describe how to use some of these commands.
For detailed information on working with MDMS, see the Media, Device and Management Services for OpenVMS Guide to Operations.
Table 5–3 MDMS Commands for HSM Plus Mode
MDMS 2.9x Command
MDMS 4.0 Command
Description
ADD DRIVE
CREATE DRIVE
Returns a drive to the pool of available drives for MDMS to use.
ADD MAGAZINE
CREATE MAGAZINE
Adds a magazine name to the magazine database.
ADD VOLUME
CREATE VOLUME
Adds a new volume record with
the specified attributes to the
volume database.
BIND
MOVE VOLUME MAGAZINE
Binds a volume to a slot in a magazine.
CREATE LABEL
-
Closes the current label file for
MDMS and opens a new one.
EXPORT CARTRIDGE
MOVE VOLUME
Exports a tape cartridge to the out
port of a tape jukebox, such as a
TL820.
EXPORT MAGAZINE
MOVE MAGAZINE
Requests that a specific magazine be removed from a tape
jukebox.
Getting Started with HSM 5–13
Getting Started with HSM
5.4 Plus Mode Offline Environment
Table 5–3 MDMS Commands for HSM Plus Mode
MDMS 2.9x Command
MDMS 4.0 Command
Description
IMPORT CARTRIDGE
MOVE VOLUME
Imports a single cartridge from
the in port of a tape jukebox to
a slot inside the jukebox.
IMPORT MAGAZINE
MOVE MAGAZINE
Imports a magazine into the jukebox.
INVENTORY JUKEBOX
INVENTORY
Performs a physical inventory of
the cartridges in a tape jukebox,
such as a TL820 or a DLT loader.
LABEL
5.4.4
-
Generates a printable label for a
volume or volume set.
REMOVE DRIVE
DELETE DRIVE
Removes a drive from the pool
of available drives for MDMS
to use.
REMOVE MAGAZINE
DELETE MAGAZINE
Removes a magazine name from
the magazine database.
REMOVE VOLUME
DELETE VOLUME
Removes a volume record from the
volume database.
SET VOLUME
SET
Modifies the attributes of a volume.
SHOW
SHOW
Various SHOW commands to display MDMS values and attributes.
UNBIND
MOVE VOLUME
Unbinds a volume from a magazine
and removes the volume name from
the magazine database.
MDMS Configuration Tasks Required to Support HSM Plus Mode
To enable HSM to work with MDMS, you must perform the following tasks:
For MDMS 2.9x:
1.
Define media triplets in SYS$MANAGER:TAPESTART.COM.
2.
Add volumes and volume pools to the MDMS database.
3.
Authorize HSM to access volumes in appropriate pools.
4.
If you are using magazines for HSM, add magazines to the magazine database and bind the
volumes to them.
5.
If you are using large tape jukeboxes, there are some special configuration items in TAPESTART.COM. Also, you will need to import the volumes into the jukebox.
For detailed instructions on performing MDMS tasks, refer to the MDMS Software Installation
and Configuration Chapter in this book. see the Media, Device and Management Services for
OpenVMS Guide to Operations.
Getting Started with HSM 5-14
Getting Started with HSM
5.4 Plus Mode Offline Environment
For MDMS 4.0:
1.
Define media types, drives, jukeboxes etc. in MDMS databases.
2.
Add volumes and volume pools to the MDMS database.
3.
Authorize HSM to access volumes in appropriate pools.
For detailed instructions on performing MDMS tasks, refer to the MDMS Software Installation
and Configuration Chapter in this book. see the Media, Device and Management Services for
OpenVMS Guide to Operations.
5.4.4.1
Defining Media Triplets
For MDMS 2.9x:
MDMS uses a concept called a media triplet to identify media types and drives the software is
allowed to use. The media triplet is comprised of the following symbols:
MTYPE_n
A name that identifies the media type, often related to the physical
media type, such as TK85K, TA90, or HSM_TK50. This is the item
you identify when you use the
SMU SET ARCHIVE /MEDIA_TYPE command in HSM.
DENS_n
The density for media of this type. If there is a value here, you also
must include it in the SMU SET ARCHIVE /DENSITY command in
HSM.
DRIVES_n
•
If the drives for this media type support tape data compaction,
set DENS_n to COMP.
•
For some types of media, such as 9-track, set DENS_n to the real
density of the media (for example, 800, 1600, or 6250 for 9
track)
•
Otherwise, leave DENS_n blank.
The tape drives that can support this type of media. Although a drive
is listed here, HSM only uses that drive if you enable it with the
SMU SET DEVICE command.
Some products that interact with MDMS use a fourth item,
CAPACITY_n, in their media definitions. For HSM, this symbol is
not needed, but can be defined in the media triplet.
Getting Started with HSM 5–15
Getting Started with HSM
5.4 Plus Mode Offline Environment
For MDMS 4.0:
Media triplets do not exist for MDMS 4.0. Following is the mapping information:
5.4.4.2
MTYPE_n
Maps to the media type object name
DENS_n
Maps to the density attribute of the media type object.
DRIVES_n
Maps to the drive object. To associate a drive object with a media
type object the media type attribute of the drive object should be set
to point to the appropriate media type object.
Defining Tape Jukeboxes
For MDMS 2.9x:
If you are going to use robotically-controlled tape jukeboxes, you need to define the jukeboxes
in TAPESTART.COM.
There are two symbols you must define in TAPESTART.COM to use any type of tape jukeboxes
with robotic loading. These symbols are:
TAPE_JUKEBOXES
A list of all tape jukebox names.
tape_jukebox_name
For each name in TAPE_JUKEBOXES,
identifies the robot device and tape drives
controlled by that device.
The following example shows a correctly-configured jukebox definition:
$!
$! -------------------------$! Node Name
$!
$NODE := ’F$TRNLNM ("SYS$NODE")’
$NODE = NODE - "::" - "_"
$!
$!--------------------------------------------------------------------$!
$! Jukebox definitions
$!
$!--------------------------------------------------------------------$
$TAPE_JUKEBOXES := "TL810_1"
$TL810_1 := "’’NODE’::$1$DUA810, ’’NODE’::$1$MUA43, ’’NODE’::$1$MUA44, ’’NODE’::$1$MUA45, ’’NODE’::$1$MUA46"
Notice that the node name is required in such definitions, and should reflect the node name on
which the command procedure is run. As such, the use of the variable ’’NODE’ parameter is recommended. The drives referenced in this definition must also appear in the media triplets.
For MDMS 4.0:
Use MDMS CREATE JUKEBOXES to define the jukeboxes in MDMS DATABASES.
Getting Started with HSM 5-16
Getting Started with HSM
5.4 Plus Mode Offline Environment
5.4.4.3
Adding Volumes to MDMS Database for HSM to Use
For MDMS 2.9x:
Once you have defined all the appropriate symbols in TAPESTART.COM, you need to make
MDMS aware of the volumes HSM will use. To do this, you use the STORAGE ADD VOLUME command. STORAGE ADD VOLUME has a number of possible qualifiers. For HSM’s
purposes, the only qualifiers that are essential are:
/MEDIA_TYPE-
Must identify the media type you defined in TAPESTART.COM for
this volume.
/POOL-
Identifies the volume pool to which the volume belongs.
/DENSITY-
Must identify the density defined in TAPESTART.COM for this
media type, if something is assigned to DENS_n.
HP recommends you put HSM volumes into volume pools. This prevents other applications
from using HSM volumes and vice-versa.
For MDMS 4.0:
Once you have defined all the appropriate objects in MDMS DATABASE, you need to make
MDMS aware of the volumes HSM will use. To do this, use the following qualifiers with
MDMS CREATE COMMAND:
/DENSITY
- Used with the MDMS CREATE MEDIA_TYPE identifies the
denisty of the media type.
/MEDIA
- Used with the MDMS CREATE VOLUME identifies the
media type the volume is associated with.
/POOL
- Used with the MDMS CREATE VOLUME identifies the
pool to which the volume belongs.
HP recommends you put HSM volumes into volume pools. This prevents other applications
from using HSM volumes and vice-versa.
5.4.4.4
Authorizing HSM Access to Volumes
For MDMS 2.9x:
If you decide to put HSM volumes into volume pools (as described above), then you need to
authorize HSM to access those pools. You authorize access to volume pools by using the Volume Pool Authorization function of the Administrator menu.
To access the Administrator menu, use one of the following commands:
$ RUN SLS$SYSTEM:SLS$SLSMGR
or
$ SLSMGR
Getting Started with HSM 5–17
Getting Started with HSM
5.4 Plus Mode Offline Environment
The second command works only if you have installed MDMS and run the SYS$MANAGER:SLS$TAPSYMBOL.COM procedure to define short commands for the MDMS menus.
To authorize HSM access to volume pools, use the user name HSM$SERVER.
For MDMS 4.0:
If you decide to put HSM volumes into volume pools (as described above), then you need to
authorize HSM to access those pools. To do this use the following command to create a volume
pool and authorize HSM to use it:
$ MDMS CREATE POOL <pool_name>/AUTHORIZED_USERS=NODE::HSM$SERVER
To authorize HSM access to volume pools, use the user name HSM$SERVER.
5.4.4.5
Importing Volumes Into a Jukebox
For MDMS 2.9x:
Unless you are configuring a magazine loader (see Section 5.4.4.6), you need to import volumes
into the jukebox. For this, use the STORAGE IMPORT CARTRIDGE command.
For MDMS 4.0:
Unless you are configuring a magazine loader (see Section 5.4.4.6), you need to import volumes
into the jukebox. For this, use the MDMS MOVE VOLUME command.
5.4.4.6
Configuring Magazines
For MDMS 2.9x:
If you are using magazines (a physical container with some number of slots that hold tape volumes) with magazine loaders in MDMS, you need to:
1.
Add the magazine names to the magazine database.
2.
Let MDMS know which volumes belong to which magazines.
To add magazines to the magazine database, you use the STORAGE ADD MAGAZINE command. This command adds a magazine name into the magazine database. This command does
not verify that this magazine exists or is available to any particular device for use. It simply adds
a record to the database to identify the magazine.
To manually associate volumes with a magazine, you use the STORAGE BIND command. This
command creates a link in the databases for the specified volume and magazine. Again, this does
not ensure the specified volume is in the specified magazine, it simply updates the database
entries. You must use the /SLOT qualifier to identify the slot in the magazine where the volume
resides (or will reside).
Getting Started with HSM 5-18
Getting Started with HSM
5.4 Plus Mode Offline Environment
If you prefer, you can automatically associate volumes with a magazine. To do this, you must
have physical access to the magazine and an appropriate device and the volumes to be associated
must be in the magazine. Then, you IMPORT the magazine into the device and use the STORAGE INVENTORY JUKEBOX command. STORAGE INVENTORY JUKEBOX reads the
labels of the volumes in the magazine, binds the volumes to the magazine, assigns the magazine
slot numbers to the volumes, and updates the magazine and volume databases. Note that the volumes need to be initialized before issuing the INVENTORY command.
For MDMS 4.0:
If you are using magazines (a physical container with some number of slots that hold tape volumes) with magazine loaders in MDMS, you need to:
1.
Add the magazine names to the MDMS database.
2.
Let MDMS know which volumes belong to which magazines.
To add magazines to the MDMS database, you use the MDMS CREATE MAGAZINE command. This command adds a magazine name into the MDMS database. This command does not
verify that this magazine exists or is available to any particular device for use. It simply adds a
record to the database to identify the magazine.
To manually associate volumes with a magazine, you use the MDMS MOVE command. This
command creates a link in the databases for the specified volume and magazine. Again, this does
not ensure the specified volume is in the specified magazine, it simply updates the database
entries. You must use the /SLOT qualifier to identify the slot in the magazine where the volume
resides (or will reside).
If you prefer, you can automatically associate volumes with a magazine. To do this, you must
have physical access to the magazine and an appropriate device and the volumes to be associated
must be in the magazine. Then, you MOVE the magazine into the device and use the MDMS
INVENTORY JUKEBOX command. MDMS INVENTORY JUKEBOX reads the labels of the
volumes in the magazine, binds the volumes to the magazine, assigns the magazine slot numbers
to the volumes, and updates the magazine and volume databases. Note that the volumes need to
be initialized before issuing the INVENTORY command.
5.4.4.7
Importing Magazines or Volumes Into the Jukebox
For MDMS 2.9x:
Once you have defined the volumes, and optionally magazines, to use in the jukebox, they need
to be imported into the jukebox. The command to use this depends on the actual hardware being
used.
For a large tape jukebox such as a TL81x or TL82x, you import volumes directly into the jukebox ports using the STORAGE IMPORT CARTRIDGE command.
For a magazine loader such as a TZ877, you import the entire magazine into the jukebox using
the STORAGE IMPORT MAGAZINE command.
To import volumes into a StorageTek silo, you use the STORAGE IMPORT ACS command.
Refer to the HSM Command Reference Guide for more detail on this command.
Getting Started with HSM 5–19
Getting Started with HSM
5.5 HSM Plus Mode Configuration Examples
For MDMS 4.0
Once you have defined the volumes, and optionally magazines, to use in the jukebox, they need
to be imported into the jukebox. The command to use this depends on the actual hardware being
used.
For a large tape jukebox such as a TL81x or TL82x, you import volumes directly into the jukebox ports using the MDMS MOVE VOLUME command.
For a magazine loader such as a TZ877, you import the entire magazine into the jukebox using
the MDMS MOVE MAGAZINE command.
To import volumes into a StorageTek silo, you use the MDMS MOVE VOLUMEcommand.
Refer to the HSM Command Reference Guide for more detail on this command.
5.4.4.8
Working with RDF-served Devices in HSM Plus Mode
HSM Plus mode supports the use of RDF-served devices for shelving and unshelving. This
means you can define devices that are physically separated from the cluster on which the shelving operations initiate. To do this, you must:
•
Install remote capability (RDF) through MDMS.
•
Define the device as a remote device in the MDMS
•
Use the /REMOTE qualifier on the SMU SET DEVICE command.
configuration
The following example shows how to set up the HSM device definition to work with a remote
device:
$ SMU SET DEVICE FARNODE::$2$MIA21 /REMOTE /SHARE=ALL /ARCHIVE=(3,4)
The following restrictions apply to working with remote devices:
•
The node name must be included in the SMU SET DEVICE /REMOTE command.
•
HSM does not have to exist on the remote server node, although RDF does.
•
The archive classes you define to work with the RDF-served devices are logically different
on each cluster.
•
RDF-served devices cannot be dedicated for HSM use.
5.5 HSM Plus Mode Configuration Examples
The following sections illustrate various sample configurations for HSM Plus mode:
The first example sets up four TA90E drives, which support a specific media type. Three of the
drives also support generic TA90 access from other applications besides HSM.
The second example shows how a TZ877 device can be configured with three magazines for
HSM use.
The third example shows how a local TL820 can be configured with 50 HSM volumes.
The fourth example shows how to set up a RDF-served TL820 for HSM operations.
Getting Started with HSM 5-20
Getting Started with HSM
5.5 HSM Plus Mode Configuration Examples
These examples show device and archive class configurations for HSM and MDMS. Other HSM
details, such as associating archive classes with shelves, are not shown, but are the same as for
HSM Basic mode.
These examples illustrate device definitions for HSM and MDMS. They do not attempt to show
all commands needed to use HSM. For example, the following additional actions may be necessary:
•
Loading the HSDRIVER and (if needed) GKDRIVER (see Installation Guide)
•
Setting up an optional cache
•
Setting up policies
•
Starting up MDMS and HSM
5.5.1 Sample TA90 Configuration
For MDMS 2.9x:
The following procedure defines a media type for a basic device (TA90), adds 50 volumes of
that media type to a particular pool, authorizes HSM only to access that pool, and defines the
appropriate archive classes and HSM devices for these volumes.
1.
Define the media triplet in TAPESTART.COM.
$ MTYPE_1 := TA90E
$ DENS_1
:= COMP
$ DRIVES_1 := $1$MUA20,
$1$MUA21, $1$MUA22,
$1$MUA23
2.
Define 50 volumes and add them to a volume pool called
HSM_POOL.
$ STORAGE ADD VOLUME AA0001/POOL=HSM_POOL/MEDIA_TYPE=TA90E/DENSITY=COMP
$ STORAGE ADD VOLUME AA0002/POOL=HSM_POOL/MEDIA_TYPE=TA90E/DENSITY=COMP
...
$ STORAGE ADD VOLUME AA0050/POOL=HSM_POOL/MEDIA_TYPE=TA90E/DENSITY=COMP
3.
Use the MDMS Administrator Menu to authorize user HSM$SERVER for access to volume
pool HSM_POOL on all nodes in the cluster. User HSM$SERVER is the only user allowed
to access volumes from this pool, thus the volumes are dedicated to HSM. If a pool is not
used, the default pool for HSM$SERVER is used (if any), or the MDMS default pool is
used.
$ SLSMGR
4.
Define two archive classes for HSM, both of which
media type TA90E with compaction.
use media from HSM_POOL, with
$ SMU SET ARCHIVE 1 /ADD_POOL=HSM_POOL /DENSITY=COMP /MEDIA_TYPE=TA90E
$ SMU SET ARCHIVE 2 /ADD_POOL=HSM_POOL /DENSITY=COMP /MEDIA_TYPE=TA90E
5.
Define the devices for HSM use, with $1$MUA23: being dedicated for HSM use.
$ SMU SET DEVICE $1$MUA20:, $1$MUA21:, $1$MUA22: /ARCHIVE=(1,2)
$ SMU SET DEVICE $1$MUA23: /DEDICATE=ALL /ARCHIVE=(1,2)
6.
Associate the default shelf with the archive classes.
$ SMU SET SHELF /DEFAULT /ARCHIVE=(1,2) /RESTORE=(1,2)
Getting Started with HSM 5–21
Getting Started with HSM
5.5 HSM Plus Mode Configuration Examples
For MDMS 4.0:
The following procedure defines a media type for a basic device (TA90), adds 50 volumes of
that media type to a particular pool, authorizes HSM only to access that pool, and defines the
appropriate archive classes and HSM devices for these volumes.
MDMS
MDMS
MDMS
MDMS
MDMS
1.
MEDIA_TYPE/COMP
DRIVE$1$MUA20/DEVICE=$1$MUA20/MEDIA_TYPE=TA90E
DRIVE$1$MUA21/DEVICE=$1$MUA21/MEDIA_TYPE=TA90E
DRIVE$1$MUA22/DEVICE=$1$MUA22/MEDIA_TYPE=TA90E
DRIVE$1$MUA23/DEVICE=$1$MUA23/MEDIA_TYPE=TA90E
Define 50 volumes and add them to a volume pool called
$
$
$
$
2.
CREATE
CREATE
CREATE
CREATE
CREATE
MDMS
MDMS
MDMS
MDMS
CREATE
CREATE
CREATE
CREATE
HSM_POOL.
POOL HSM_POOL/AUTHORIZED_USERS=NODE::HSM$SERVER
VOLUME AA0001/POOL=HSM_POOL/MEDIA_TYPE=TA90E/DENSITY=COMP
VOLUME AA0002/POOL=HSM_POOL/MEDIA_TYPE=TA90E/DENSITY=COMP
VOLUME AA0050/POOL=HSM_POOL/MEDIA_TYPE=TA90E/DENSITY=COMP
Define two archive classes for HSM, both of which
media type TA90E with compaction.
use media from HSM_POOL, with
$ SMU SET ARCHIVE 1 /ADD_POOL=HSM_POOL /DENSITY=COMP /MEDIA_TYPE=TA90E
$ SMU SET ARCHIVE 2 /ADD_POOL=HSM_POOL /DENSITY=COMP /MEDIA_TYPE=TA90E
3.
Define the devices for HSM use, with $1$MUA23: being dedicated for HSM use.
$ SMU SET DEVICE $1$MUA20:, $1$MUA21:, $1$MUA22: /ARCHIVE=(1,2)
$ SMU SET DEVICE $1$MUA23: /DEDICATE=ALL /ARCHIVE=(1,2)
4.
Associate the default shelf with the archive classes.
$ SMU SET SHELF /DEFAULT /ARCHIVE=(1,2) /RESTORE=(1,2)
5.5.2
Sample TZ877 Configuration
For MDMS 2.9x:
The following procedure defines a media type and two jukeboxes for TZ877 DLT loaders,
defines 14 volumes with two volume pools, authorizes HSM to access those volume pools, and
defines the appropriate archive classes and HSM devices for these volumes.
1.
Define the media type in TAPESTART.COM.
$ MTYPE_1 := TK85K
$ DENS_1
:=
$ DRIVES_1 :=
$1$MUA500:,
$1$MUA600:
2.
Define the jukebox devices in TAPESTART.COM. The TZ877s are connected through an
HSJ controller to give them cluster-wide access, where the robot names (command disk
names) are $1$DUA500: and $1$DUA600: for devices $1$MUA500: and $1$MUA600:
respectively.
$ NODE := ’F$TRNLNM ("SYS$NODE")’
$ NODE = NODE - "::" - "_"
$!
$ TAPE_JUKEBOXES := "JUKEBOX1, JUKEBOX2"
$ JUKEBOX1 := "’’NODE’::$1$DUA500:, ’’NODE’::$1$MUA500:"
$ JUKEBOX2 := "’’NODE’::$1$DUA600:, ’’NODE’::$1$MUA600:"
Getting Started with HSM 5-22
Getting Started with HSM
5.5 HSM Plus Mode Configuration Examples
3.
Define 14 volumes and add them to two volume pools called HSM_POOL1 and
HSM_POOL2. This allows the specification of a separate pool for each magazine resulting in optimal selection of volumes when shelving files.
$
$
$
$
4.
STORAGE ADD VOLUME TZ0001/POOL=HSM_POOL1/MEDIA_TYPE=TK85K
STORAGE ADD VOLUME TZ0007/POOL=HSM_POOL1/MEDIA_TYPE=TK85K
STORAGE ADD VOLUME TZ0008/POOL=HSM_POOL2/MEDIA_TYPE=TK85K
STORAGE ADD VOLUME TZ0014/POOL=HSM_POOL2/MEDIA_TYPE=TK85K
Use the MDMS Administrator Menu to authorize HSM$SERVER to access the volume
pools for all nodes in the cluster. User HSM$SERVER is the only user allowed to access
volumes from these pools, thus the volumes are dedicated to HSM.
$ SLSMGR
Required Privilege:
To access the Administrator Menu, you must have the OPER privilege.
5.
Define two magazines containing volumes for each archive
"named" HSM001 and HSM002.
class. The magazines are
$ STORAGE ADD MAGAZINE HSM001/SLOTS=7
$ STORAGE ADD MAGAZINE HSM002/SLOTS=7
6.
Bind the volumes to the magazines.
$ STORAGE
...
$ STORAGE
$ STORAGE
...
$ STORAGE
7.
BIND TZ0001 HSM001/SLOT=0
BIND TZ0007 HSM001/SLOT=6
BIND TZ0008 HSM002/SLOT=0
BIND TZ0014 HSM002/SLOT=6
IMPORT the magazines into the loaders as follows:
$ STORAGE IMPORT MAGAZINE HSM001 JUKEBOX1
$ STORAGE IMPORT MAGAZINE HSM002 JUKEBOX2
8.
Define two archive classes for HSM, using media from pools HSM_POOL1 and
HSM_POOL2, with media type TK85K. Note that in this configuration, each magazine contains volumes for a single archive class.
$ SMU SET ARCHIVE 1 /MEDIA_TYPE=TK85K /ADD_POOL=HSM_POOL1
$ SMU SET ARCHIVE 2 /MEDIA_TYPE=TK85K /ADD_POOL=HSM_POOL2
9.
Define the devices for shared use.
$ SMU SET DEVICE $1$MUA500:, $1$MUA600: /ARCHIVE=(1,2)
10. Associate the default shelf with the archive classes.
$ SMU SET SHELF /DEFAULT /ARCHIVE=(1,2) /RESTORE_ARCHIVE=(1,2)
For MDMS 4.0:
The following procedure defines a media type and two jukeboxes for TZ877 DLT loaders,
defines 14 volumes with two volume pools, authorizes HSM to access those volume pools, and
defines the appropriate archive classes and HSM devices for these volumes.
1.
Define the media type in MDMS DATABASE.
$ MDMS CREATE MEDIA_TYPE TK85K
Getting Started with HSM 5–23
Getting Started with HSM
5.5 HSM Plus Mode Configuration Examples
2.
Define the jukebox devices in the MDMS DATABASE. The TZ877s are connected
through an HSJ controller to give them cluster-wide access, where the robot names (command disk names) are $1$DUA500: and $1$DUA600: for devices $1$MUA500: and
$1$MUA600: respectively.
$ MDMS CREATE JUKEBOX JUKEBOX1/ROBOT=$1$DUA500:
$ MDMS CREATE JUKEBOX JUKEBOX2/ROBOT=$1$DUA600:
$ MDMS CREATE DRIVE $1$MUA500:/DEVICE=$1$MUA500:/JUKEBOX=JUKEBOX1/
MEDIA_TYPE=TK85K
$ MDMS CREATE DRIVE $1$MUA600:/DEVICE=$1$MUA600:/JUKEBOX=JUKEBOX2
/MEDIA_TYPE=TK85K
3.
Create a pool of volumes that HSM can access and authorize HSM to use it using the following command :
$ MDMS CREATE POOL HSM_POOL/AUTHORIZED_USERS=NODE::HSM$SERVER
4.
Define 14 volumes and add them to two volume pools called HSM_POOL1 and
HSM_POOL2. This allows the specification of a separate pool for each magazine resulting in optimal selection of volumes when shelving files.
$
$
$
$
MDMS CREATE VOLUME TZ0001/POOL=HSM_POOL1/MEDIA_TYPE=TK85K
MDMS CREATE VOLUME TZ0007/POOL=HSM_POOL1/MEDIA_TYPE=TK85K
MDMS CREATE VOLUME TZ0008/POOL=HSM_POOL2/MEDIA_TYPE=TK85K
MDMS CREATE VOLUME TZ0014/POOL=HSM_POOL2/MEDIA_TYPE=TK85K
UseMDMS init volume, volume label command if you need the volumes to be initialized.
If the volumes are already initialized, use the /Preinitialized qualifier with the MDMS Create
Volume command.
5.
Define two magazines containing volumes for each archive
"named" HSM001 and HSM002.
class. The magazines are
$ MDMS CREATE MAGAZINE HSM001/SLOTS=7
$ MDMS CREATE MAGAZINE HSM002/SLOTS=7
6.
Bind the volumes to the magazines.
$
$
$
$
7.
MDMS
MDMS
MDMS
MDMS
MOVE VOLUME TZ0001 HSM001/SLOT=0
MOVE VOLUME TZ0007 HSM001/SLOT=6
MOVE VOLUME TZ0008 HSM002/SLOT=0
MOVE VOLUME TZ0014 HSM002/SLOT=6
IMPORT the magazines into the loaders as follows:
$ MDMS MOVE MAGAZINE HSM001 JUKEBOX1
$ MDMS MOVE MAGAZINE HSM002 JUKEBOX2
8.
Define two archive classes for HSM, using media from pools HSM_POOL1 and
HSM_POOL2, with media type TK85K. Note that in this configuration, each magazine contains volumes for a single archive class.
$ SMU SET ARCHIVE 1 /MEDIA_TYPE=TK85K /ADD_POOL=HSM_POOL1
$ SMU SET ARCHIVE 2 /MEDIA_TYPE=TK85K /ADD_POOL=HSM_POOL2
9.
Define the devices for shared use.
$ SMU SET DEVICE $1$MUA500:, $1$MUA600: /ARCHIVE=(1,2)
10. Associate the default shelf with the archive classes.
$ SMU SET SHELF /DEFAULT /ARCHIVE=(1,2) /RESTORE_ARCHIVE=(1,2)
Getting Started with HSM 5-24
Getting Started with HSM
5.5 HSM Plus Mode Configuration Examples
5.5.3 Sample TL820 Configuration
For MDMS 2.9x:
The following procedure defines a media type and jukebox definition for a TL820 device on the
local cluster, defines 50 volumes and adds them to a pool, authorizes HSM and other applications to access the volumes in this pool, and defines appropriate archive classes and devices for
use. In this example, the TL820 is connected to an HSJ controller with a robot name (command
disk name) of $1$DUA820:.
1.
Define the media type in TAPESTART.COM.
$ MTYPE_1 := TK85K
$ DENS_1
:=
$ DRIVES_1 := $1$MUA100:, $1$MUA200:, $1$MUA300:
2.
Define the jukebox device in TAPESTART.COM.
$ NODE := ’F$TRNLNM ("SYS$NODE")’
$ NODE = NODE - "::" - "_"
$!
$ TAPE_JUKEBOXES := "TL820_1"
$ TL820_1 := "’’NODE’::$1$DUA820:, ’’NODE’::$1$MUA100:, ’’NODE’::$1$MUA200:, ’’NODE’::$1$MKU300:"
3.
Define 50 volumes and add them to a volume pool called
TL820_POOL.
$ STORAGE ADD VOLUME ACP001 /POOL=TL820_POOL /MEDIA_TYPE=TK85K
$ STORAGE ADD VOLUME ACP002 /POOL=TL820_POOL /MEDIA_TYPE=TK85K
...
$ STORAGE ADD VOLUME ACP050 /POOL=TL820_POOL
/MEDIA_TYPE=TK85K
4.
Using the MDMS Administrator Menu, authorize HSM, along with other applications such
as Sequential Media File System or Archive/Backup System to access this volume pool.
$ SLSMGR
Required Privilege:
To access the Administrator Menu, you must have the OPER privilege.
5.
The TL820 will be treated as a port loader, rather than a magazine loader. Import all 50 volumes into the loader. Note that MDMS and the TL820 hardware determine into which slot
the volumes are loaded. HSM needs no knowledge of this.
$ STORAGE IMPORT CARTRIDGE ACP001 TL820_1
$ STORAGE IMPORT CARTRIDGE ACP002 TL820_1
...
$ STORAGE IMPORT CARTRIDGE ACP050 TL820_1
6.
Define three archive classes for HSM, all of which use
media type TK85K
media from TL820_POOL, with
$ SMU SET ARCHIVE 1 /ADD_POOL=TL820_POOL /MEDIA_TYPE=TK85K
$ SMU SET ARCHIVE 2 /ADD_POOL=TL820_POOL /MEDIA_TYPE=TK85K
$ SMU SET ARCHIVE 3 /ADD_POOL=TL820_POOL /MEDIA_TYPE=TK85K
7.
Define the devices for HSM use. One device (drive in the TL820) is set up for dedicated
HSM use on archive class 1 only (the primary archive class).
$ SMU SET DEVICE $1$MUA100:, $1$MUA200: /ARCHIVE=(1,2,3)
$ SMU SET DEVICE $1$MUA300: /DEDICATE=ALL /ARCHIVE=1
Getting Started with HSM 5–25
Getting Started with HSM
5.5 HSM Plus Mode Configuration Examples
8.
Set the default shelf to utilize the archive classes:
$ SMU SET SHELF /DEFAULT /ARCHIVE=(1,2,3) /RESTORE=(1,2,3)
For MDMS 4.0:
The following procedure defines a media type and jukebox definition for a TL820 device on the
local cluster, defines 50 volumes and adds them to a pool, authorizes HSM and other applications to access the volumes in this pool, and defines appropriate archive classes and devices for
use. In this example, the TL820 is connected to an HSJ controller with a robot name (command
disk name) of $1$DUA820:.
1.
Define the media type in MDMS DATABASE.
$ MDMS CREATE MEDIA_TYPE TK85K
2.
Define the jukebox device in MDMS CREATE JUKEBOX.
$ MDMS CREATE JUKEBOX TL820_1/ROBOT=$1$DUA820
$ MDMS CREATE DRIVE $1$MUA100/DEVICE=$1$MUA100:/JUKEBOX=TL820_1
/MEDIA_TYPE=TK85K
$ MDMS CREATE DRIVE $1$MUA200/DEVICE=$1$MUA200:/JUKEBOX=TL820_1
/MEDIA_TYPE=TK85K
$ MDMS CREATE DRIVE $1$MUA300/DEVICE=$1$MUA300:/JUKEBOX=TL820_1
/MEDIA_TYPE=TK85K
3.
Create a volume pool called TL820_POOL using the MDMS CREATE POOL command
and authorize HSM$SERVER to acces it.
$ MDMS CREATE POOL TL820_POOL/AUTHORIZE=NODE::HSM$SERVER
4.
Define 50 volumes and add them to a volume pool called
TL820_POOL.
$ MDMS CREATE VOLUME ACP001 /POOL=TL820_POOL /MEDIA_TYPE=TK85K
$ MDMS CREATE VOLUME ACP002 /POOL=TL820_POOL /MEDIA_TYPE=TK85K
$ MDMS CREATE VOLUME ACP050 /POOL=TL820_POOL
/MEDIA_TYPE=TK85k
5.
The TL820 will be treated as a port loader, rather than a magazine loader. Import all 50 volumes into the loader. Note that MDMS and the TL820 hardware determine into which slot
the volumes are loaded. HSM needs no knowledge of this.
$ MDMS MOVE VOLUME ACP001 TL820_1/SLOT=0
$ MDMS MOVE VOLUME ACP002 TL820_1/SLOT=1
$ MDMS MOVE VOLUME ACP050 TL820_1/SLOT=49
6.
Define three archive classes for HSM, all of which use
media type TK85K
media from TL820_POOL, with
$ SMU SET ARCHIVE 1 /ADD_POOL=TL820_POOL /MEDIA_TYPE=TK85K
$ SMU SET ARCHIVE 2 /ADD_POOL=TL820_POOL /MEDIA_TYPE=TK85K
$ SMU SET ARCHIVE 3 /ADD_POOL=TL820_POOL
/MEDIA_TYPE=TK85K
7.
Define the devices for HSM use. One device (drive in the TL820) is set up for dedicated
HSM use on archive class 1 only (the primary archive class).
$ SMU SET DEVICE $1$MUA100:, $1$MUA200: /ARCHIVE=(1,2,3)
$ SMU SET DEVICE $1$MUA300: /DEDICATE=ALL /ARCHIVE=1
8.
Set the default shelf to utilize the archive classes:
$ SMU SET SHELF /DEFAULT /ARCHIVE=(1,2,3) /RESTORE=(1,2,3)
Getting Started with HSM 5-26
Getting Started with HSM
5.5 HSM Plus Mode Configuration Examples
5.5.4
Sample RDF-served TL820 Configuration
The following procedure defines a configuration for an RDF-served TL820 device that resides
on a remote node. This example also shows the client and server definitions for setting up both
nodes so that a client HSM system can access the TL820.
5.5.4.1
Definitions on Client Node
For MDMS 2.9x:
The configuration for TAPESTART.COM on the client node (the one running HSM) is as follows:
1.
Define the database node and media triplet in TAPESTART.COM. Because the drives are
on a RDF-served node, the node name must be specified in DRIVES_n. The RDF-served
node is named BOSTON.
$
$
$
$
$
2.
PRI
:=
DB_NODES
MTYPE_1
DENS_1
DRIVES_1
BOSTON
:= BOSTON
:= TK85K
:=
:= BOSTON::$1$MUA21:, BOSTON::$1$MUA22:, BOSTON::$1$MUA23:
Define the jukebox device in TAPESTART.COM. All device references must be prefaced
by the node name of the RDF-served node.
$ TAPE_JUKEBOXES := "JUKE_TL820"
$ JUKE_TL820 := "BOSTON::$1$DUA100:, BOSTON::$1$MUA21:, BOSTON::$1$MUA22:, BOSTON::$1$MUA23:"
3.
Define 20 volumes and add them to a volume pool called
TL820_POOL.
$ STORAGE ADD VOLUME APW201 /POOL=TL820_POOL /MEDIA_TYPE=TK85K
$ STORAGE ADD VOLUME APW202 /POOL=TL820_POOL /MEDIA_TYPE=TK85K
...
$ STORAGE ADD VOLUME APW220 /POOL=TL820_POOL /MEDIA_TYPE=TK85K
4.
Using the MDMS Administrator Menu, authorize HSM, along with other applications such
as Sequential Media File System or Archive/Backup System to access this volume pool.
$ SLSMGR
Required Privilege:
To access the Administrator Menu, you must have the OPER privilege.
5.
Define two archive classes for HSM, both of which use
media type TK85K
media from TL820_POOL, with
$ SMU SET ARCHIVE 1 /ADD_POOL=TL820_POOL /MEDIA_TYPE=TK85K
$ SMU SET ARCHIVE 2 /ADD_POOL=TL820_POOL /MEDIA_TYPE=TK85K
6.
Define the devices for HSM use. All remote devices must be set up for shared access.
The device names must match exactly those specified in DRIVES_n in TAPESTART.COM.
$ SMU SET DEVICE BOSTON::$1$MUA21: /REMOTE /ARCHIVE=(1,2)
$ SMU SET DEVICE BOSTON::$1$MUA22: /REMOTE /ARCHIVE=(1,2)
$ SMU SET DEVICE BOSTON:: $1$MUA23: /REMOTE /ARCHIVE=(1,2)
Getting Started with HSM 5–27
Getting Started with HSM
5.5 HSM Plus Mode Configuration Examples
7.
Associated the default shelf with the archive classes.
$ SMU SET SHELF /DEFAULT /ARCHIVE=(1,2) /RESTORE_ARCHIVE=(1,2)
For MDMS 4.0:
The configuration for MDMS DATABASE on the client node (the one running HSM) is as follows:
1.
Create the media type as follows:
$ MDMS CREATE MEDIA_TYPE TK85K
2.
Create the juke box object as follows:
$ MDMS CREATE JUKEBOX JUKE_TL820/ROBOT=BOSTON::$1$DUA100:/NODES=<list of
nodes that can access this jukebox>/SLOTS=<no of slots>
3.
Create the drive objects as follows:
$ MDMS CREATE DRIVE BOSTON::$1$MUA21/DEVICE=$1$MUA21/NODES=<list of nodes
that can physically acces this drive>/MEDIA_TYPE=TK85K/JUKEBOX=JUKE_TL820
$ MDMS CREATE DRIVE BOSTON::$1$MUA22/DEVICE=$1$MUA22/NODES=<list of nodes
that can physically acces this drive>/MEDIA_TYPE=TK85K/JUKEBOX=JUKE_TL820
$ MDMS CREATE DRIVE BOSTON::$1$MUA23/DEVICE=$1$MUA23/NODES=<list of nodes
that can physically acces this drive>/MEDIA_TYPE=TK85K/JUKEBOX=JUKE_TL820
4.
Create a volume pool called TL820_POOL using the MDMS CREATE POOL command
and authorize HSM$SERVER to use it.
$ MDMS CREATE POOL TL820_POOL/AUTHORIZE=NODE::HSM$SERVER
5.
Define 20 volumes and add them to a volume pool called
TL820_POOL.
$ MDMS CREATE VOLUME APW201 /POOL=TL820_POOL /MEDIA_TYPE=TK85K
$ MDMS CREATE VOLUME APW202 /POOL=TL820_POOL /MEDIA_TYPE=TK85K
$ MDMS CREATE VOLUME APW220 /POOL=TL820_POOL /MEDIA_TYPE=TK85K
6.
Define two archive classes for HSM, both of which use
media type TK85K
media from TL820_POOL, with
$ SMU SET ARCHIVE 1 /ADD_POOL=TL820_POOL /MEDIA_TYPE=TK85K
$ SMU SET ARCHIVE 2 /ADD_POOL=TL820_POOL /MEDIA_TYPE=TK85K
7.
Define the devices for HSM use. All remote devices must be set up for shared access.
The device names must match exactly those specified in DRIVES_n in TAPESTART.COM.
$ SMU SET DEVICE BOSTON::$1$MUA21: /REMOTE /ARCHIVE=(1,2)
$ SMU SET DEVICE BOSTON::$1$MUA22: /REMOTE /ARCHIVE=(1,2)
$ SMU SET DEVICE BOSTON:: $1$MUA23: /REMOTE /ARCHIVE=(1,2)
8.
Associated the default shelf with the archive classes.
$ SMU SET SHELF /DEFAULT /ARCHIVE=(1,2) /RESTORE_ARCHIVE=(1,2)
Getting Started with HSM 5-28
Getting Started with HSM
5.5 HSM Plus Mode Configuration Examples
5.5.4.2
Definitions on the RDF-served Node
For MDMS 2.9x:
The configuration for TAPESTART.COM on the RDF-served node (the one containing the
TL820 device). Note that HSM does not have to be running on the RDF-served node, but
MDMS or SLS must be installed and running. Also note that node BOSTON is the database
node for MDMS for the enterprise.
1.
Define the media type in TAPESTART.COM. Note that because the drives are local to this
system, no node name is specified.
$ PRI
:= BOSTON
$ MTYPE_1 := TK85K
$1$MUA23:
2.
$ DB_NODES := BOSTON
$ DENS_1
:=
$ DRIVES_1 := $1$MUA21:, $1$MUA22:,
Define the jukebox device in TAPESTART.COM.
$ NODE := ’F$TRNLNM ("SYS$NODE")’
$ NODE = NODE - "::" - "_"
$!
$ TAPE_JUKEBOXES := "JUKE_TL820"
$ JUKE_TL820 := "’’NODE’::$1$DUA100:, ’’NODE’::$1$MUA21:, ’’NODE’::$1$MUA22:, ’’NODE’::$1$MUA23:"
3.
The TL820 will be treated as a port loader, rather than a magazine loader. Import all 20 volumes into the loader. Note that MDMS and the TL820 hardware determine into which slot
the volumes are loaded. HSM needs no knowledge of this. This command must be entered
at the RDF-served node.
$ STORAGE IMPORT CARTRIDGE APW201 JUKE_TL820
$ STORAGE IMPORT CARTRIDGE APW202 JUKE_TL820
$ STORAGE IMPORT CARTRIDGE APW220 JUKE_TL820
Because node BOSTON is the database node, the volume and pool authorization entered on the
client node are also valid on the server node.
For MDMS 4.0:
1.
Define the Media Object
$ MDMS CREATE MEDIA TEST_MEDIA
2.
Define the Jukebox Object pointing to the Jukebox being used.
$ MDMS CREATE JUKE TL820_JUKE/SLOT=48/ROBOT=$1$DUA810/NODE=NODE1
(The node field should contain the names of nodes from which they are physically accessible)
3.
Define the Drive Object for the Jukebox drive to be used.
$ MDMS CREATE DRIVE/DEVICE=$1$MUA510/JUKE=TL810_JUKE/DRIVE=0/NODE=NODE1/
MEDIA=TEST_MEDIA
4.
The Node Field should contain the names of nodes from which the drive is physically accessible, here RDServer node.
$ MDMS CREATE DRIVE/DEVICE=$1$MUA510/JUKE=TL810_JUKE/DRIVE=0/NODE=NODE1/
MEDIA=TEST_MEDIA
Getting Started with HSM 5–29
Getting Started with HSM
5.6 HSM Basic Mode Configuration Examples
5.6 HSM Basic Mode Configuration Examples
The following example shows how to configure the default shelf, archive classes, devices and
caches in HSM Basic mode for two different configurations:
•
The first example sets up two TZ877 devices for HSM use, each containing seven 20 GB
cartridges. With two archive classes, the total HSM shelf size is 140 GB.
•
The second example sets up an RW500 optical jukebox for use as the HSM shelf repository.
These examples illustrate device definitions for HSM. They do not attempt to show all commands needed to use HSM. For example, the following additional actions may be necessary:
•
Loading the HSDRIVER and (if needed) GKDRIVER (see
•
Setting up an optional cache
•
Setting up policies
•
Starting up HSM
Installation Guide)
5.6.1 TZ877 Sample Configuration
The following procedure defines archive classes 1 and 2 for HSM use. We will assign one
TZ877 loader to each archive class. In this example, the magazine loaders are connected directly
to a SCSI bus on node OMEGA: as such, they can only be accessed from this node.
$!
$ SMU SET ARCHIVE 1,2
$ SMU SET SHELF /DEFAULT /ARCHIVE=(1,2) /RESTORE_ARCHIVE=(1,2)
$ SMU SET DEVICE $
1$MKA100: /ARCHIVE=1 /ROBOT_NAME=$1$GKA101:
$ SMU SET DEVICE $1$MKA200: /ARCHIVE=2 /ROBOT_NAME=$1$GKA201:
$ SMU SET FACILITY /SERVER=OMEGA
$!
$! Confirm Setup
$!
$ SMU SHOW ARCHIVE
HSM$ARCHIVE01 has not been used
Identifier: 1
Media type: CompacTape III, Loader
Position:
0
Device refs: 1
Shelf refs: 2
HSM$ARCHIVE02 has not been used
III, Loader
Label:
HS1001
refs: 2
Identifier:
Position:
1
0
Label:
HS0001
Media type: CompacTape
Device refs: 1
Shelf
$ SMU SHOW SHELF
Shelf HSM$DEFAULT_SHELF is enabled for Shelving and Unshelving
Catalog File:
SYS$SYSDEVICE:[HSM$SERVER.CATALOG]HSM$CATALOG.SYS
Shelf History:
Created:
08-Jan-2003 13:16:33.79
Revised:
08-Jan-2003 13:56:00.27
Backup Verification: Off
Save Time:
<none>
Updates Saved: All
Archive Classes:
Archive list:
HSM$ARCHIVE01
id: 1
HSM$ARCHIVE02
id: 2
Restore list:
HSM$ARCHIVE01
id: 1
HSM$ARCHIVE02
id: 2
$ SMU SHOW DEVICE
Getting Started with HSM 5-30
Getting Started with HSM
5.6 HSM Basic Mode Configuration Examples
HSM drive HSM$DEFAULT_DEVICE is enabled.
Shared access: < shelve, unshelve >
Drive status:
Not configured
Media type:
Unknown Type
Robot name:
<none>
Enabled archives: <none>
HSM drive _$1$MKA100: is enabled.
Dedicated access: < shelve, unshelve >
Drive status:
Configured
Media type:
CompacTape III, Loader
Robot name:
_$1$GKA101:
Enabled archives: HSM$ARCHIVE01
id: 1
HSM drive _$1$MKA200: is enabled.
Dedicated access: < shelve, unshelve >
Drive status:
Configured
Media type:
CompacTape III, Loader
Robot name:
_$1$GKA201:
Enabled archives: HSM$ARCHIVE02
id: 2
In addition, the tape volumes in each TZ877 loader must be initialized before using HSM. Either
manually (using the front panel), or by using the Media Robot Utility (MRU), load each volume
and initialize it as follows:
$ ROBOT LOAD
$ INITIALIZE
$ ROBOT LOAD
$1$GKA101
$ INITIALIZE
...
$ ROBOT LOAD
$ INITIALIZE
$ ROBOT LOAD
$ INITIALIZE
$ ROBOT LOAD
$ INITIALIZE
...
$ ROBOT LOAD
$ INITIALIZE
SLOT 0 ROBOT $1$GKA101
$1$MKA100: HS0001
SLOT 1 ROBOT
1$MKA100: HS0002
SLOT 6 ROBOT $1$GKA101
$1$MKA100: HS0007
SLOT 0 ROBOT $1$GKA201
$1$MKA200: HS1001
SLOT 1 ROBOT $1$GKA201
$1$MKA200: HS1002
SLOT 6 ROBOT $1$GKA201
$1$MKA200: HS1007
5.6.2 RW500 Example
In this example, we are configuring 8 out of 32 platters in an RW500 optical jukebox to be a permanent shelf repository for HSM. Note that the optical platters are set up as a permanent HSM
cache, with no cache flushing and no specific block size restrictions. In addition, HSM shelving
and unshelving operations must be specifically disabled on the cache devices and all other platters in the optical jukebox.
$ SMU SET CACHE $2$JBA0: /BLOCK=0 /NOINTERVAL /HIGHWATER=100 /NOHOLD
$ SMU SET CACHE $2$JBA1: /BLOCK=0 /NOINTERVAL /HIGHWATER=100 /NOHOLD
...
$ SMU SET CACHE $2$JBA7: /BLOCK=0 /NOINTERVAL /HIGHWATER=100 /NOHOLD
$!
$! Disable all shelving on ALL platters in the jukebox
$!
$ SMU SET VOLUME $2$JBA0: /DISABLE=ALL
$ SMU SET VOLUME $2$JBA1: /DISABLE=ALL
...
$ SMU SET VOLUME $2$JBA31: /DISABLE=ALL
Note that shelving must be disabled on all platters when any of the platters are being used as an
HSM cache to avoid platter load thrashing.
Getting Started with HSM 5–31
6
DFS, NFS, and PATHWORKS Access
This chapter describes the remote access features of HSM using DFS, NFS, or PATHWORKS.
6.1 DFS, NFS & PATHWORKS Access Support
HSM Version V4.1 supports file access to shelved files on client systems where access is
through DFS, NFS and PATHWORKS. At installation, HSM sets up such access by default.
However, you may want to review this access and change it as needed, because it can potentially
affect all accesses.
6.1.1 DFS Access
File faulting (and therefore file events) work as expected, with the exception of CTRL-Y/exit.
Typing CTRL-Y exit during a file fault has no effect. The client side process waits until the file
fault completes and the file fault is not canceled.
In addition, with DFS one can determine the shelving state of a file just as if the disk was local
(i.e. DIRECTORY/SHELVED and DIRECTORY/SELECT both work correctly).
The shelve and unshelve commands do not work on files on DFS-served devices. The commands do work on the VMScluster™ that has local access to the devices, however.
6.1.2 NFS Access
The normal default faulting mechanism (fault on data access), does not work for NFS-served
files. The behavior is as if the file is a zero-block sequential file. Performing "cat" (or similar
commands) results in no output.
However, at installation time, HSM Version V4.1 enables such access by defining a logical name
that allows file faults on an OPEN of a file by the NFS process. By default, the following system
and cluster wide logical name is defined:
$ DEFINE/SYSTEM HSM$FAULT_ON_OPEN "NFS$SERVER"
This definition supports access to NFS-served files upon an OPEN of a file. If you do not want
NFS access to shelved files, simply de-assign the logical name as follows:
$ DEASSIGN/SYSTEM HSM$FAULT_ON_OPEN
For a permanent change, this command should be placed in:
SYS$STARTUP:HSM$LOGICALS.COM
DFS, NFS, and PATHWORKS Access 6–1
DFS, NFS, and PATHWORKS Access
6.1 DFS, NFS & PATHWORKS Access Support
For NFS-served files, file events (device full and user quota exceeded) occur normally with the
triggering process being the NFS$SERVER process. The quota exceeded event occurs normally
because the any files extended by the client are charged to the client’s proxy not NFS$SERVER.
If the new logical is defined for the NFS$SERVER, the fault will occur on OPEN and appears
transparent to the client, with the possible exception of messages as follows:
% cat /usr/oreo/shelve_test.txt.2
NFS2 server oreo not responding still trying NFS2 server oreo ok
The first message appears when the open doesn’t complete immediately. The second message
(ok) occurs when the open completes. The file contents, in the above example, are then displayed.
Typing CTRL-C during the file fault returns the user to the shell. Since the NFS server does not
issue an IO$_CANCEL against the faulting I/O, the file fault is not canceled and the file will be
unshelved eventually.
It is not possible from the NFS client to determine whether a given file is shelved. Further, like
DFS devices, the shelve and unshelve commands are not available to NFS mounted devices.
6.1.3 PATHWORKS
Normal attempts to access a shelved file from a PATHWORKS client initiate a file fault on the
server node. If the file is unshelved quickly enough (e.g. from cache), the user sees only the
delay in accessing the file. If the unshelve is not quick enough, an application-defined timeout
occurs and a message window pops up indicating the served disk is not responding. The timeout
value varies on the application. No retry is attempted. However, this behavior can be modified
by changing HSM’s behavior to a file open by returning a file access conflict error, upon which
most PC applications retry (or allow the user to retry) the operation after a delay. After a few
retries, the file fault will succeed and the file can be accessed normally. To enable PATHWORKS
access to shelved files using the retry mechanism, HSM defines the following logical name on
installation:
$ DEFINE/SYSTEM HSM$FAULT_AFTER_OPEN "PCFS_SERVER, PWRK$LMSRV"
This definition supports access to PATHWORKS files upon an OPEN of a file. If you do not
want PATHWORKS to access shelved files via retries, simply de-assign the logical name as follows:
$ DEASSIGN/SYSTEM HSM$FAULT_AFTER_OPEN
For a permanent change, this command should be placed in:
SYS$STARTUP:HSM$LOGICALS.COM
The decision on which access method to use depends upon the typical response time to access
shelved files in your environment.
If the logical name is defined, HSM imposes a 3-second delay in responding to the OPEN
request for PATHWORKS accesses only. During this time, the file may be unshelved: otherwise,
a "background" unshelve is initiated which will result in a successful open after a delay and
retries.
DFS, NFS, and PATHWORKS Access 6-2
DFS, NFS, and PATHWORKS Access
6.1 DFS, NFS & PATHWORKS Access Support
At this point, the file fault on the server node is under way and cannot be canceled.
The affect of the access on the PC environment varies according to the PC operating system. For
windows 3.1 and DOS, the computer waits until the file is unshelved. For Windows NT and
Windows-95, only the windows application itself waits.
File events (device full and user quota exceeded) occur normally with the triggering process
being the PATHWORKS server process. The quota exceeded event occurs normally because the
any files extended by the client are charged to the client’s proxy not the PATHWORKS server.
It is not possible from a PATHWORKS client to determine whether a file is shelved. In addition,
there is no way to shelve or unshelve files explicitly (via shelve- or unshelve-like commands). There is also no way to cancel a file fault once it has been initiated.
Most PC applications are designed to handle "file sharing" conflicts. Thus, when HSM detects
the PATHWORKS server has made an access request, it can initiate unshelving action, but return
"file busy". The typical PC application will continue to retry the original open, or prompt the
user to retry or cancel. Once the file is unshelved, the next OPEN succeeds without shelving
interaction.
6.1.4 New Logical Names for NFS and PATHWORKS Access
As just discussed, HSM supports two logical names that alter the behavior of opening a shelved
file for NFS and PATHWORKS access support. These are:
•
HSM$FAULT_ON_OPEN - This logical name forces a file fault on an Open of a file for the
processes listed in the equivalence name, and the open waits until the file fault is complete.
Designed for use with the NFS server.
•
HSM$FAULT_AFTER_OPEN - This logical name forces a deferred file fault on the file
when it is opened. If the fault completes within three seconds, the open completes successfully, otherwise it fails with "file busy", but initiates a "background" file fault. Repeated
attempts to open the file will eventually succeed. Designed for use with the PATHWORKS
server.
The default behavior is to perform no file fault on Open; rather the file fault occurs upon a read
or write to the file.
Each logical name can take a list of process names to alter the behavior of file faults on open. For
example:
$ DEFINE/SYSTEM HSM$FAULT_ON_OPEN "NFS$SERVER, USER_SERVER, SMITH"
The HSM$FAULT_ON_OPEN can also be assigned to "HSM$ALL", which will cause a file
fault on open for all processes. This option is not allowed for HSM$FAULT_AFTER_OPEN.
As these logicals are defined to allow NFS and PATHWORKS access, they are not recommended for use with other processes, since they will cause many more file faults than are actually needed in a normal OpenVMS environment. When used, the logicals must be system-wide,
and should be defined identically on all nodes in the VMScluster™ environment.
These logical name assignments or lack thereof take effect immediately without the need to
restart HSM.
DFS, NFS, and PATHWORKS Access 6–3
A
HSM Basic Mode Installation Example
This appendix contains a sample HSM Basic mode installation on a VAX system. Upon completion of the actual installation, this example runs the IVP to determine whether the installation
was correct.
Note
HSM must be shut down using $ SMU SHUTDOWN on the installation system and all
VMScluster™ nodes that use the installation system’s system disk before you install
the new version of the HSM software, otherwise the installation fails.
@sys$update:vmsinstal
HSM041 DKA100:[PRAS.HSMKIT041]
OpenVMS VAX Software Product Installation Procedure V7.1
It is 08-Jan-2003 at 03:46.
Enter a question mark (?) at any time for help.
%VMSINSTAL-W-NOTSYSTEM, You are not logged in to the SYSTEM account.
%VMSINSTAL-W-ACTIVE, The following processes are still active:
DECW$TE_0119
* Do you want to continue anyway [NO]? yes
* Are you satisfied with the backup of your system disk [YES]?
The following products will be processed:
HSM V4.1
Beginning installation of HSM V4.1 at 03:46
%VMSINSTAL-I-RESTORE, Restoring product save set A ...
%VMSINSTAL-I-RELMOVED, Product's release notes have been moved to SYS$HELP.
****************************************************************
*
*
*
Hierarchical Storage Management (HSM)
for OpenVMS V4.1 Installation
© Hewlett-Packard Development Company, L.P. 2003.
*
*
*
****************************************************************
HSM Basic Mode Installation Example A–1
HSM Basic Mode Installation Example
Do you want to purge files replaced by this installation [YES]?
Do you want to run the IVP after the installation [YES]?
*** HSM License ***
Correct installation and operation of this software requires that one
of the following Product Authorization Keys (PAKs) reflecting your
software license be present on this system:
HSM-SERVER
HSM-USER
*** HSM License ***
Correct installation and operation of this software requires that one of
the following Product Authorization Keys (PAKs) reflecting your
software
license be present on this system:
HSM-SERVER
HSM-USER
* Does this product have an authorization key registered and loaded [YES]?
*** HSM Mode ***
With this version, HSM can operate in one of two possible modes:
BASIC - The standalone HSM product which supports a limited number of nearline and offline devices.
PLUS - The integrated HSM product, integrated with Media, Device and Management Services (MDMS) which supports an expanded number of nearline and
offline devices.
NOTE: MDMS or SLS V2.8A or newer must be installed before installing HSM PLUS
mode. Also, once files are shelved in PLUS mode, you may *not* change back to
BASIC mode.
Enter BASIC or PLUS to select the mode in which you want HSM to operate.
* Enter the mode to install [PLUS]:
%HSMA-I-MODE, Installing HSM V4.1 PLUS mode
%VMSINSTAL-I-ACCOUNT, This installation updates an ACCOUNT named HSM$SERVER.
%UAF-I-MDFYMSG, user record(s) updated
%VMSINSTAL-I-ACCOUNT, This installation updates an ACCOUNT named HSM$SERVER.
%UAF-I-MDFYMSG, user record(s) updated
%VMSINSTAL-I-ACCOUNT, This installation updates an ACCOUNT named HSM$SERVER.
%UAF-I-MDFYMSG, user record(s) updated
%HSMA-I-CHKQUO, Checking for DISKQUOTAs on device SYS$SYSDEVICE:
HSM Basic Mode Installation Example A-2
HSM Basic Mode Installation Example
%VMSINSTAL-I-RESTORE, Restoring product save set B ...
%HSMA-I-CHKMRU, Checking version of Media Robot Utility (MRD$SHR.EXE)
%HSMA-I-CHKHSD, Checking for updated version of HSDRIVER
This installation procedure will provide a newer HSDRIVER.EXE Compatible to
HSM V4.1 than the one that is currently loaded on your system. This driver is
not unloadable.
IMPORTANT!
------------------------------------------------------------------Do not run HSM V4.1 with HSM V4.0A (BL42) and lower versions of driver
Installed, doing so may crash your system.
-------------------------------------------------------------------To complete the installation of this product, you should reboot the system.
If it is not convenient to reboot at this time, then enter NO to the following
question.
If you enter NO, the installation procedure will continue.
* Will you allow a system shutdown after this product is installed [YES]?
* How many minutes for system shutdown [0]:
* Do you want to do an automatic system reboot [YES]? yes
HSMA-I-NOIVP, System reboot required, IVP will not be run
The file SYS$STARTUP:HSM$STARTUP.COM contains specific commands needed to
start the HSM Software. This file should not be modified.
To start the software at system startup time, add the line
$ @SYS$STARTUP:HSM$STARTUP.COM
to the system startup procedure SYS$MANAGER:SYSTARTUP_VMS.COM
The file SYS$SYSTEM:SETFILENOSHELV.COM should be executed to set all system
disk files as NON-SHELVABLE. This is important to preserve the integrity of
your system disk.
This procedure can submit SETFILENOSHELV.COM to a batch execution queue for
you as a post-installation task.
* Do you want to submit SETFILENOSHELV.COM [YES]?
*****************************************************************
*
IMPORTANT
*
*****************************************************************
* When you upgrade to a new version of VMS you should invoke
*
HSM Basic Mode Installation Example A–3
HSM Basic Mode Installation Example
* SYS$SYSTEM:SETFILENOSHELV.COM again. The installation of VMS
*
* does not and will not automatically set your system disk
*
* files to NON-SHELVABLE for you.
*
*****************************************************************
%HSMA-I-DONEASK, No further questions will be asked during this installation.
-HSMA-I-DONEASK, The installation should take less than 10 minutes to complete.
Consistent with FAR 12.211 and 12.212, Commercial Computer Software, Computer
Software Documentation, and Technical Data for Commercial Items are licensed
to the U.S. Government under vendor’s commercial license.
Neither HP nor any of its subsidiaries shall be liable for technical or editorial errors or omissions contained herein. The information in this document
is provided "as is" without warranty of any kind and is subject to change
without notice. The warranties for HP products are set forth in the express
limited warranty statements accompanying such products. Nothing herein should
be construed as constituting an additional warranty.
HSM Basic Mode Installation Example A-4
B
HSM Plus Mode Installation Example
This appendix contains a sample HSM Plus mode installation on a VAX system. In this instance,
HSM Version V4.1 is installed over an existing HSM environment. Upon completion of the
actual installation, this example runs the IVP to determine whether the installation was correct.
Note
HSM must be shut down using $ SMU SHUTDOWN on the installation system and all
VMScluster™ nodes that use the installation system’s system disk before you install
the new version of the HSM software, otherwise, the installation fails.
$ @SYS$UPDATE:VMSINSTAL HSM041 DISK$:[DIR]
OpenVMS VAX Software Product Installation Procedure V6.1
It is 08-Jan-2003 at 14:40.
Enter a question mark (?) at any time for help.
* Are you satisfied with the backup of your system disk [YES]?
The following products will be processed:
HSM V4.1
Beginning installation of HSM V4.1 at 14:40
%VMSINSTAL-I-RESTORE, Restoring product save set A ...
%VMSINSTAL-I-RELMOVED, Product's release notes have been moved to SYS$HELP.
Restoring product save set A ...
Product’srelease notes have been moved to SYS$HELP.
****************************************************************
*
Hierarchical Storage Management (HSM)
*
*
for OpenVMS V4.1 Installation
*
*
*
*
© Hewlett-Packard Development Company, L.P. 2003.
*
****************************************************************
* Do you want to purge files replaced by this installation [YES]?
* Do you want to run the IVP after the installation [YES]?
*** HSM License ***
Correct installation and operation of this software requires that one
of the following Product Authorization Keys (PAKs) reflecting your
software license be present on this system:
HSM-SERVER
HSM-USER
* Does this product have an authorization key registered and loaded [YES]?
*** HSM Mode ***
With this version, HSM can operate in one of two possible modes:
BASIC - The standalone HSM product which supports a limited number of nearline and offline devices.
PLUS - The integrated HSM product, integrated with Media, Device and Management Services (MDMS) which supports an expanded number of nearline and
offline devices.
NOTE: MDMS V4.1 or SLS V2.9G software must be installed before installing HSM
PLUS mode. Also, once files are shelvedin PLUS mode, you may *not* change
back to BASIC mode.
HSM Plus Mode Installation Example B–1
HSM Plus Mode Installation Example
Enter BASIC or PLUS to select the mode in which you want HSM to operate.
* Enter the mode to install [PLUS]:
%HSM-I-MODE, Installing HSM V4.1 PLUS mode
%VMSINSTAL-I-ACCOUNT, This installation updates an ACCOUNT named HSM$SERVER.
%UAF-I-MDFYMSG, user record(s) updated
%VMSINSTAL-I-ACCOUNT, This installation updates an ACCOUNT named HSM$SERVER.
%UAF-I-MDFYMSG, user record(s) updated
%VMSINSTAL-I-ACCOUNT, This installation updates an ACCOUNT named HSM$SERVER.
%UAF-I-MDFYMSG, user record(s) updated
%HSM-I-CHKQUO, Checking for DISKQUOTAs on device SYS$SYSDEVICE:
%VMSINSTAL-I-RESTORE, Restoring product save set B ...
%HSM-I-CHKMRU, Checking version of Media Robot Utility (MRD$SHR.EXE)
%HSM-I-CHKHSD, Checking for updated version of HSDRIVER
The file SYS$STARTUP:HSM$STARTUP.COM contains specific commands
needed to start the HSM Software. This file should not be modified.
To start the software at system startup time, add the line
$ @SYS$STARTUP:HSM$STARTUP.COM to the system startup procedure SYS$MANAGER:SYSTARTUP_VMS.COM
The file SYS$SYSTEM:SETFILENOSHELV.COM should be executed to set all system
disk files as NON-SHELVABLE. This is important to preserve the integrity of
your system disk. This procedure can submit SETFILENOSHELV.COM to a batch
execution queue for you as a post-installation task.
* Do you want to submit SETFILENOSHELV.COM [YES]? NO
*****************************************************************
*
IMPORTANT
*
*****************************************************************
* When you upgrade to a new version of VMS you should invoke
*
* SYS$SYSTEM:SETFILENOSHELV.COM again. The installation of VMS *
* does not and will not automatically set your system disk
*
* files to NON-SHELVABLE for you.
*
*****************************************************************
%HSM-I-DONEASK, No further questions will be asked during this installation.
-HSM-I-DONEASK, The installation should take less than 10 minutes to complete.
Confidential computer software. Valid license from HP and/or its subsidiaries
required for possession, use, or copying.
Consistent with FAR 12.211 and 12.212, Commercial Computer Software, Computer
Software Documentation, and Technical Data for Commercial Items are licensed
to the U.S. Government under vendor’s commercial license.
Neither HP nor any of its subsidiaries shall be liable for technical or editorial errors or omissions contained herein. The information in this document
is provided "as is" without warranty of any kind and is subject to change
without notice. The warranties for HP products are set forth in the express
limited warranty statements accompanying such products. Nothing herein should
be construed as constituting an additional warranty.
%VMSINSTAL-I-MOVEFILES, Files will now be moved to their target directories...
%HSMPOST-I-START, executing HSM Post-Installation procedure
%HSMPOST-I-SMUDBCONVERT, converting SMU databases
%SMUDBCONVERT-I-ARCHIVE, converting SMU archive database
%SMUDBCONVERT-I-CURRENT, SMU archive database conversion not required
%SMUDBCONVERT-I-CACHE, converting SMU cache database
%SMUDBCONVERT-I-CURRENT, SMU cache database conversion not required
%SMUDBCONVERT-I-CONFIG, converting SMU shelf database
%SMUDBCONVERT-S-CONFIG, SMU shelf database converted
%SMUDBCONVERT-I-DEVICE, converting SMU device database
%SMUDBCONVERT-S-DEVICE, SMU device database converted
%SMUDBCONVERT-I-POLICY, converting SMU policy database
%SMUDBCONVERT-S-POLICY, SMU policy database converted
%SMUDBCONVERT-I-VOLUME, converting SMU volume database
%SMUDBCONVERT-S-VOLUME, SMU volume database converted
%HSMPOST-S-SMUDBCONVERT, SMU databases successfully converted
%HSMPOST-I-CATCONVERT, converting default catalog
%HSMPOST-I-CATCURRENT, catalog conversion not required
%HSMPOST-I-CATATTRUPD, updating catalog file attributes
%HSMPOST-S-CATATTRUPD, catalog file attributes updated
HSM Plus Mode Installation Example B-2
HSM Plus Mode Installation Example
%HSMPOST-I-SETMODE, setting HSM mode to PLUS
%HSMPOST-I-DONE, HSM post-installation procedure complete
*** HSM for OpenVMS V4.1 Installation Verification Procedure (IVP) ***
© Hewlett-Packard Development Company, L.P. 2003.
%HSM-I-IVPSTART, starting HSM shelving facility on node NODE
%SMU-S-SHP_STARTED, shelf handler process started 000000C3
%SMU-S-PEP_STARTED, policy execution process started 000000C4
HSM Shelf Handler version
- V4.1 (BL44), Jan 08 2003
HSM Shelving Driver version - V4.1 (BL44), Jan 08 2003
HSM Policy Execution version - V4.1 (BL44), Jan 08 2003
HSM Shelf Management version - V4.1 (BL44), Jan 08 2003
HSM for OpenVMS is enabled for Shelving and Unshelving
Facility history:
Created:
08-Jan-2003 14:52:28.26
Revised:
08-Jan-2003 14:52:41.83
Designated servers:
Any cluster member
Current server:
NODE
Catalog server:
Disabled
Event logging:
Audit Error Exception
HSM mode:
Basic
Remaining license:
Unlimited
%SMU-I-CACHE_CREATED, cache device _NODE$DKB300: created
%SMU-I-SHELF_UPDATED, shelf HSM$DEFAULT_SHELF updated
%SMU-I-VOLUME_CREATED, volume _NODE$DKB300: created
%SHELVE-S-SHELVED, file SYS$COMMON:[SYSTEST.HSM]HSM_IVP1.TMP;1 shelved
%UNSHELVE-S-UNSHELVED, file SYS$COMMON:[SYSTEST.HSM]HSM_IVP1.TMP;1 unshelved
%SHELVE-S-SHELVED, file SYS$COMMON:[SYSTEST.HSM]HSM_IVP2.TMP;1 shelved
%HSM-I-UNSHLVPRG, unshelving file NODE$DKB300:[SYSCOMMON.SYSTEST.HSM]HSM_IVP2.TMP;1
%SMU-I-POLICY_CREATED, policy HSM$IVP_POLICY created
%SMU-I-SCHED_CREATED, scheduled policy HSM$IVP_POLICY for volume
_NODE$DKB300: was created on server NODE Job _NODE$DKB300: (queue
HSM$POLICY_NODE, entry 5) started on HSM$POLICY_NODE
%HSM-I-IVPWAIT, waiting for HSM$IVP_POLICY to execute...
%HSM-I-IVPWAIT, waiting for HSM$IVP_POLICY to execute...
%UNSHELVE-S-UNSHELVED, file SYS$COMMON:[SYSTEST.HSM]HSM_IVP3.TMP;1 unshelved
%HSM-I-IVPSHUT, shutting down HSM shelving facility on node NODE
%HSM-I-IVPSHUTWAIT, waiting for HSM to shutdown...
%HSM-I-IVPSHUTWAIT, waiting for HSM to shutdown...
*** The IVP for HSM V4.1 was successful! ***
Hierarchical Storage Management (HSM) for OpenVMS, Version V4.1
© Hewlett-Packard Development Company, L.P. 2003.
%SMU-S-SHP_STARTED, shelf handler process started 00000103
%SMU-S-PEP_STARTED, policy execution process started 00000104
HSM for OpenVMS is enabled for Shelving and Unshelving
Facility history:
Created:
08-Jan-2003 14:51:04.15
Revised:
08-Jan-2003 14:54:03.89
Designated servers:
Any cluster member
Current server:
NODE
Catalog server:
Disabled
Event logging:
Audit
Error Exception
HSM mode:
Basic
Remaining license:
Unlimited
HSM Software has been successfully started
Installation of HSM V4.1 completed at 14:55
VMSINSTAL procedure done at 14:55
HSM Plus Mode Installation Example B–3
C
HSM Logicals
C.1 HSM Logical Names
The following is the list of logical names entered into the logical name tables when HSM software is installed. These names are defined by the product’s startup file. They are automatically
entered into these logical name tables whenever the system reboots or whenever the software is
invoked.
(LNM$PROCESS_TABLE)
(LNM$JOB_8CE40840)
(LNM$GROUP_000107)
(LNM$SYSTEM_TABLE)
"HSM$CATALOG" = "DISK$USER1:[HSM$SERVER.CATALOG]"
"HSM$FAULT_AFTER_OPEN" = "PCFS_SERVER, PWRK$LMSRV"
"HSM$FAULT_ON_OPEN" = "NFS$SERVER"
“HSM$LOG” = "DISK$USER1:[HSM$SERVER.LOG]"
"HSM$MANAGER" = "DISK$USER1:[HSM$SERVER.MANAGER]"
"HSM$PEP_REQUEST" = "MBA454:"
"HSM$PEP_RESPONSE" = "MBA455:"
"HSM$PEP_TERMINATION" = "MBA427:"
"HSM$REPACK_DURATION" = "0"
"HSM$ROOT" = "DISK$AIM2:[HSM$ROOT.]"
"HSM$SHP_REQUEST" = "MBA451:"
"HSM$SHP_RESPONSE" = "MBA452:"
"HSM$SHP_URGENT" = "MBA450:"
(DECW$LOGICAL_NAMES)
HSM Logicals C–1
D
HSM Files
D.1 HSM File Names
The HSM installation procedure creates several files on your system. Table D–1 on page 1lists
and describes the files installed on server and client nodes. File names with an asterisk (*) preceding them are installed only on server nodes.
SYS$SYSDISK:[SYSHLP]HSM041_OPR_GD.PDF
- HSM Guides to Operations
SYS$SYSDISK:[SYSHLP] HSM041_CMD_GD.PDF
- HSM Command Reference Guide
SYS$SYSDISK:[SYSHLP] HSM041_INS_GD.PDF
- HSM Installation Guide
.
Table D–1 HSM Files Installed
Name
Description
HSM$SERVER:directory
CATALOG.DIR
Directory where the HSM catalog databases are kept
LOG.DIR
Directory where HSM audit and error logs are kept
MANAGER.DIR
Directory where the HSM management databases are
kept
SETFILENOSHELV.LOG
Shows which files were set non- shelvable directory
HSM$SERVER.CATALOG:directory
HSM$CATALOG.SYS
This is the default catalog database. The user may define
other catalogs that would be placed in this directory.
HSM$SERVER.MANAGER:_directory
HSM$ARCHIVE_DB.SMU
Contains the archive class database
HSM$CACHE_DB.SMU;1
Contains HSM cache database
HSM$CONFIG_DB.SMU;1
Contains system configuration database
HSM$DEVICE_DB.SMU;1
Contains HSM device database
HSM$POLICY_DB.SMU;1
Contains HSM policy database
HSM$SHELF_LOG_CONFIG.TXT;1
HSM Files D–1
HSM Files
D.1 HSM File Names
Table D–1 HSM Files Installed
Name
Description
HSM$SHP_REQUEST.SYS;1
Keeps a record of the shelf-handler requests for the cluster
HSM$SHP_REQUEST_SYS;1
Keeps a record of the shelf_handler requests for the node
HSM$VOLUME_DB.SMU;1
Contains HSM Volume database.
HSM$SERVER.LOG:_directory
HSM Files D-2
HSM$PEP_AUDIT.LOG
Event audit log of HSM policy execution
HSM$PEP_ERROR.LOG;1
Error log of HSM policy execution
HSM$SHELF_HANDLER.LOG;1
Log file of shelf handler process
HSM$SHELF_PEP.LOG;1
Log file of Policy execution process
HSM$SHP_AUDIT.LOG;1
Event audit log of shelf handler activity
HSM$SHP_ERROR.LOG;1
Error log of shelf handler activity
E
MDMS V4.1 Rights and Privileges
This appendix has explanation for MDMS user rights and privileges.
Every MDMS user/potential user will be assigned zero or more rights in their SYSUAF file.
These rights will be examined on a per-command basis to determine whether a user has sufficient privilege to issue a command. The command is accepted for processing only if the user has
sufficient privilege. In case the user has no rights the entire command is rejected.
Each right has a name in the following format:
MDMS_rightname.
Rights are looked-up on the client OpenVMS node that receives the request, as such each user
must have an account on the client node.
•
in the case of DCL commands and applications, this would be the node at which the request
is issued.
•
from the GUI, it is the node whose MDMS$SERVER process receives the request.
The rights are translated into a bitmap and passed to the database server for validation.
E.1 MDMS Rights - Types
MDMS has the following rights:
•
High-level rights
•
Low level rights
E.1.1 High Level Rights
These rights are designed for a specific kind of user, to support a typical MDMS installation, and
make the assignments of rights to users easy. The three high-level MDMS rights, the default
right, administrator right and the additional right are described in Table E–1
MDMS V4.1 Rights and Privileges E–1
MDMS V4.1 Rights and Privileges
E.1 MDMS Rights - Types
Table E–1
High Level Rights
High level right
Allows Privileges for...
MDMS_USER
A non-privileged MDMS user who wants to use MDMS to manage tape
volumes for BACKUP, ABS or HSM purposes
MDMS_APPLICATION
Main applications that MDMS supports - ABS and HSM server processes
MDMS_OPERATOR
The user responsible for day-to-day operations in the MDMS environment.
Default Right
A hidden high-level right
The low level rights contained in it, for users with no MDMS rights.
They are additional to any specific rights a user may have been granted.
It is the default right. By default, there are no low-level rights assigned
to the default right. If rights are assigned to the default right, they apply
to all users in the system, since every user is effectively granted the
default right. The default right can be disabled with the
MDMS_NO_DEFAULT identifier in a user’s UAF file.
MDMS_ALL_RIGHTS
A system administrator to perform any operation.
MDMS_ALL_RIGHTS can be enabled with the OpenVMS
SYSPRV privilege.
Administrator Right
Additional Right
All operations.
MDMS_USER
A non-privileged MDMS user who wants to use MDMS to manage tape
volumes for BACKUP, ABS or HSM purposes
MDMS_APPLICATION
Main applications MDMS supports - ABS and HSM server processes
MDMS_OPERATOR
User responsible for day-to-day operations in the MDMS environment.
Default Right
A hidden high-level right
The low level rights contained in it, for users with no MDMS rights.
They are additional to any specific rights a user may have been granted.
It is the default right. By default, there are no low-level rights assigned
to the default right. If rights are assigned to the default right, they apply
to all users in the system, since every user is effectively granted the
default right. The default right can be disabled with the
MDMS_NO_DEFAULT identifier in a user’s UAF file.
MDMS_ALL_RIGHTS
A system administrator to perform any operation.
MDMS_ALL_RIGHTS can be enabled with the OpenVMS
SYSPRV privilege.
Administrator Right
Additional Right
All operations.
You can disable the mapping of SYSPRV to MDMS_ALL_RIGHTS using a SET DOMAIN
command
MDMS V4.1 Rights and Privileges E-2
MDMS V4.1 Rights and Privileges
E.1 MDMS Rights - Types
E.1.2 Low-level rights
Each command or command option will be tagged with one or more low-level rights that are
needed to perform the operation. Where more than one right is specified, the command indicates
the appropriate combination of rights needed. The MDMS administrator can assign a set of lowlevel rights to each high-level right. The administrator can then simply assign the high-level
right to the user.
MDMS translates the high-level right to respective low-level rights while processing a command. For additional flexibility, the user can be assigned a combination of high-level and lowlevel rights. The result will be a sum of all rights defined.
The default set of mapping of high-level to low-level rights will be assigned at installation (by
default) and stored in the domain record. However, the MDMS administrator can change these
assignments by using the SET DOMAIN command.
Note
By default a user has no rights and cannot use MDMS. The system administrator can
change the ‘rightless’ user’s rights using a SET DOMAIN command. These rights can
again be disabled on a per-user basis as needed.
The low-level rights are designed to be applied to operations. A given command, with a given set
of qualifiers or options, requires the sum of the rights needed for the command and all supplied
options. In many cases some options require more privilege than the command, and that higher
privilege will be applied to the entire command if those options are specified.
The following are usable low level rights:
Table E–2 Low Level Rights
Low Level Right Name
Allows Privilege to:
MDMS_ALL_RIGHTS
Enable all operations
(This right is for the system administrator,)
MDMS_ALLOCATE_ALL
Allocate volumes or drives for any user
MDMS_ALLOCATE_OWN
Allocate a drive and become “owner”
MDMS_ALLOCATE_POOL
Allocate a volume from an authorized pool
MDMS_ASSIST
Request operator assistance on calls
MDMS_BIND_ALL
Bind any volumes together in a volume set
MDMS_BIND_OWN
Bind owned volumes together in a volume set
MDMS_CANCEL_ALL
Cancel any request
MDMS_CANCEL_OWN
Cancel one’s own requests
MDMS_CANCEL_POOL
Cancel a request of a member of the same pool
MDMS_CREATE_ALL
Create any database object
MDMS_CREATE_POOL
Create volumes in a pool authorized to user
MDMS_DEALLOCATE_ALL
Deallocate volumes for any user
MDMS_DEALLOCATE_OWN
Deallocate an owned volume or drive
MDMS V4.1 Rights and Privileges E–3
MDMS V4.1 Rights and Privileges
E.1 MDMS Rights - Types
Table E–2 Low Level Rights
Low Level Right Name
Allows Privilege to:
MDMS_DELETE_ALL
Delete any database object
MDMS_DELETE_POOL
Delete volumes in pool authorized to user
MDMS_INITIALIZE_ALL
Initialize any volume
MDMS_INITIALIZE_POOL
Initialize a volume in pool authorized to user
MDMS_INVENTORY_ALL
Perform inventory on any jukebox
MDMS_LOAD_ALL
Load any volumes including scratch volumes
MDMS_LOAD_OWN
Load owned volumes into drives
MDMS_LOAD_POOL
Load volumes in pool authorized to user
MDMS_LOAD_SCRATCH
Load scratch volumes
MDMS_MOVE_ALL
Move any volume
MDMS_MOVE_OWN
Move owned volumes
MDMS_MOVE_POOL
Move volumes in pool authorized to user
MDMS_SET_ALL
SET (modify) any database object
MDMS_SET_PROTECTED
SET internal MDMS attributes in an object
MDMS_SET_OWN
SET (modify) volumes allocated to user
MDMS_SET_POOL
SET (modify) volumes in pool authorized to user
MDMS_SET_RIGHTS
SET (modify) rights in the domain
MDMS_SHOW_ALL
SHOW or REPORT any database object
MDMS_SHOW_OWN
SHOW or REPORT volumes allocated to user
MDMS_SHOW_POOL
SHOW or REPORT volumes in pool authorized to user
MDMS_SHOW_RIGHTS
Show rights with a SHOW DOMAIN/FULL
MDMS_UNBIND_ALL
Unbind any volumes
MDMS_UNBIND_OWN
Unbind owned objects from a volume set
MDMS_UNLOAD_ALL
Unload any volumes or drives
MDMS_UNLOAD_OWN
Unload volumes allocated to user from a drive
MDMS_UNLOAD_POOL
Unload volumes in pool authorized to user
MDMS V4.1 Rights and Privileges E-4
MDMS V4.1 Rights and Privileges
E.2 Default High-Level to Low-Level Mapping
E.2 Default High-Level to Low-Level Mapping
This section defines the default high to low-level mapping for each high-level right.
E.2.1 MDMS_USER:
Table E–3 MDMS_USER Rights
MDMS User...
Allows privilege to...
MDMS_ALLOCATE_OWN
Allocate a drive and become “owner”
MDMS_ALLOCATE_POOL
Allocate a volume from a pool authorized to user
MDMS_ASSIST
Request operator assistance on calls
MDMS_BIND_OWN
Bind owned volumes together in a volume set
MDMS_CANCEL_OWN
Cancel one’s own requests
MDMS_DEALLOCATE_OWN
Deallocate an owned volume or drive
MDMS_LOAD_OWN
Load owned volumes into drives
MDMS_SHOW_OWN
SHOW or REPORT volumes allocated to user
MDMS_SHOW_POOL
SHOW or REPORT volumes in pool authorized to user
MDMS_UNBIND_OWN
Unbind owned objects from a volume set
MDMS_UNLOAD_OWN
Unload volumes allocated to user from a drive
MDMS V4.1 Rights and Privileges E–5
MDMS V4.1 Rights and Privileges
E.2 Default High-Level to Low-Level Mapping
E.2.2 MDMS_OPERATOR Rights:
Table E–4 Operator Rights
MDMS Operator...
E.2.2.1
Allows privilege to...
MDMS_ALLOCATE_ALL
Allocate volumes or drives for any user
MDMS_ASSIST
Request operator assistance on calls
MDMS_BIND_ALL
Bind any volumes together in a volume set
MDMS_CANCEL_ALL
Cancel any request
MDMS_CREATE_POOL
Create volumes in a pool authorized to user
MDMS_DEALLOCATE_ALL
Deallocate volumes for any user
MDMS_DELETE_POOL
Delete volumes in pool authorized to user
MDMS_INITIALIZE_ALL
Initialize any volume
MDMS_INVENTORY_ALL
Perform inventory on any jukebox
MDMS_LOAD_ALL
Load any volumes including scratch volumes
MDMS_MOVE_ALL
Move any volume
MDMS_SET_OWN
SET (modify) volumes allocated to user
MDMS_SET_POOL
SET (modify) volumes in pool authorized to user
MDMS_SHOW_ALL
SHOW or REPORT any database object
MDMS_SHOW_RIGHTS
Show rights with SHOW DOMAIN/FULL
MDMS_UNBIND_ALL
Unbind any volumes
MDMS_UNLOAD_ALL
Unload any volumes or drives
Domain Commands for Mapping Privileges
SET DOMAIN
/[NO]ABS_RIGHTS
/ADD
/[NO]APPLICATION_RIGHTS[=(right[,…])]
/[NO]DEFAULT_RIGHTS[=(right[,…])]
/[NO]OPERATOR_RIGHTS[=(right[,…])]
/REMOVE
/[NO]SYSPRV
/[NO]USER_RIGHTS[=(right[,…])]
Example E–1
SET DOMAIN /OPERATOR_RIGHTS=MDMS_SET_PROTECTED /ADD
This command adds the MDMS_SET_PROTECTED right to the operator rights list.
MDMS V4.1 Rights and Privileges E-6
F
MDMS Files and Logical Names
The MDMS installation procedure installs files and defines logical names on your system. This
appendix lists the names of the files installed and logical names that are added to the system logical name -table. Section F.1 lists names of the files installed and Section F.2 lists the logical
names that are added to the system logical names table.
Note
They are automatically entered into these logical name tables whenever the system
reboots or whenever the software is invoked. The LNM$JOB table also contains logical names that are defined when a user logs in to a system running MDMS software.
F.1
MDMS File Names
Table F–1 contains the names of all MDMS files created on the system after MDMS V4.1 is successfully installed.
Note
Some files may not be installed depending on the options you select.
Table F–1 MDMS Installed Files
File Name
File Name
SYS$HELP
MDMS.HLP
MDMS041.RELEASE_NOTES.PS
MDMS041.RELEASE_NOTES
SYS$LIBRARY
MDMS$SHR.EXE
SYS$MESSAGE
MDMS$MSG.EXE
RDF$MSG.EXE
SYS$MANAGER
MDMS$SYSTARTUP.COM
MDMS$SYSTARTUP.TEMPLATE
SYS$SHARE
MDMS$SHR.EXE
MRD$RTL.EXE
MDMS Files and Logical Names F–1
MDMS Files and Logical Names
F.1 MDMS File Names
Table F–1 MDMS Installed Files
File Name
File Name
SYS$STARTUP
MDMS$SHUTDOWN.COM
MDMS$UNINSTALL.COM
MDMS$STARTUP.COM
SYS$SYSTEM
MDMS$SERVER.EXE,
MDMS$CONVERT_V3_TO_V2.EXE,
MDMS$CONVERT_V2_TO_V3.EXE
MDMS$DCL.EXE
MDMS$SERVER.EXE
SYS$TEST
MDMS$IVP.COM
MDMS$ROOT:[DATABASE]
MDMS$DRIVE_DB.DAT
MDMS$JUKEBOX_DB.DAT
MDMS$MAGAZINE_DB.DAT
MDMS$NODE_DB.DAT
MDMS$VOLUME_DB.DAT
MDMS$DOMAIN_DB.DAT
MDMS$GROUP_DB.DAT
MDMS$LOCATION_DB.DAT
MDMS$MEDIA_DB.DAT
MDMS$POOL_DB.DAT
MDMS$ROOT:[GUI.VMS]
ALPDCL01_071.A-DCX_AXPEXE
ALPACRT08_071.A-DCX_AXPEXE
ALPSYSB02_071.A-DCX_AXPEXE
DEC-AXPVMS-JAVA-V0101-61.PCSI_DCX_AXPEXE
MDMS.INI
MDMS_GUI_HELP.HTML
ALPBASE02_071.A-DCX_AXPEXE
ALPSYSA02_071.A-DCX_AXPEXE
ALPTHREADS_03071.A-DCX_AXPEXE
DEC-AXPVMS-VMS712_PTHREADS-V0100-4.PCSI-DCX_AXPEXE
MDMS.ZIP
SYMANTEC.ZIP
MDMS$ROOT:[GUI.VMS.GRAPHICS]
CONFWIZ4.GIF
DOMAIN2.GIF
GROUP.GIF
LOCATION.GIF
MEDIATYPE.GIF
POOL.GIF
SERVJUKE.GIF
VOLROT.GIF
CONFWIZ5.GIF
DRIVE.GIF
JUKEBOX.GIF
MAGAZINE.GIF
NODE.GIF
REQUESTS.GIF
SPLASH.GIF
VOLUME.GIF
MDMS$ROOT:[GUI.WINTEL]
JRE117WINTEL.EXE
SETUP.EXE
MDMS$ROOT:[PATCHES.ALPHA]
ALPY2K02_062.A
ALPY2K02_062.CVRLET_TXT
MDMS$ROOT:[PATCHES.VAX]
MDMS Files and Logical Names F-2
MDMS Files and Logical Names
F.1 MDMS File Names
Table F–1 MDMS Installed Files
File Name
File Name
VAXLIBR06_070.A
VAXLIBR06_070.C
VAXLIBR06_070.D
VAXLIBR06_070.F
VAXLIBR06_070.B
VAXLIBR06_070.CVRLET_TXT
VAXLIBR06_070.E
VAXLIBR06_070.G
MDMS$ROOT:[SYSTEM]
MDMS$ALL_OTHER_DB.FDL
MDMS$CONVERT_V2_TO_V3.COM
MDMS$CREATE_DB_FILES.COM
MDMS$START_GUI.COM
MDMS$CONVERT_V3_TO_V2.COM
MDMS$COPY_DB_FILES.COM
MDMS$REPLACE_SLS_LOADER.COM
MDMS$VOLUME_DB.FDL
MDMS$ROOT:[TTI_RDEV.ALPHA]
CONFIG_EXAMPLE.DAT
RDCDRIVER_AXP.OPT
RDCDRIVER_AXP70.OPT
RDCLIENT_STARTUP.COM
RDEV_AXP70.OLB
RDDEALLOCATE.COM
RDEV_CHECK_STATE.COM
RDEV_CONFIGURE.COM
RDEV_GATHER.COM
RDEV_RMT_SHUTDOWN.COM
RDEV_SERVER.COM
RDEV_UCXSTUB_AXP70.OLB
RDF_UCX_RSHD_STARTUP.COM
RDRMT_STARTUP.COM
RDSERVER_STARTUP.COM
RLINK_AXP.OPT
SHRLINK_AXP.OPT
RDALLOCATE.COM
RDCDRIVER_AXP61.OPT
RDCLIENT_SHUTDOWN.COM
RDCTL_EXE.OPT
RDEV_AXP61.OLB
RDEV_BUILD.COM
RDEV_CLIENT.COM
RDEV_COPYRIGHT.COM
RDEV_LOGICALS.COM
RDEV_RMT_STARTUP.COM
RDEV_UCXSTUB_AXP61.OLB
RDFREE.COM
RDLOG.COM
RDSERVER_SHUTDOWN.COM
RDSHOW.COM
RMTSRV_AXP.OPT
MDMS$ROOT:[TTI_RDEV.VAX]
CONFIG_EXAMPLE.DAT
DRVRDEFS_V62.STB
DRVRDEFS_V62.STB
DRVRDEFS_V62.STB
RDALLOCATE.COM
RDCDRIVER_V62.STB
RDCDRIVER_V62.STB
RDCDRIVER_V62.STB
RDCDRIVER_V62.STB
RDCLIENT_SHUTDOWN.COM
RDCLIENT_V62.EXE
RDCTL_EXE.OPT
RDEV_BUILD.COM
RDEV_CLIENT.COM
RDEV_CONTROL_SHR_V62.EXE
RDEV_GATHER.COM
RDEV_RMT_SHUTDOWN.COM
RDEV_SERVER.COM
DRVRDEFS_V62.STB
DRVRDEFS_V62.STB
DRVRDEFS_V62.STB
DRVRDEFS_V62.STB
RDCDRIVER_V62.EXE
RDCDRIVER_V62.STB
RDCDRIVER_V62.STB
RDCDRIVER_V62.STB
RDCDRIVER_VAX.OPT
RDCLIENT_STARTUP.COM
RDCONTROL_V62.EXE
RDDEALLOCATE.COM
RDEV_CHECK_STATE.COM
RDEV_CONFIGURE.COM
RDEV_COPYRIGHT.COM
RDEV_LOGICALS.COM
RDEV_RMT_STARTUP.COM
RDEV_UCXSTUB_VAX.OLB
RDEV_VAX.OLB
RDF_UCX_RSHD_STARTUP.COM
RDLOG.COM
RDRMT_STARTUP.COM
RDSERVER_STARTUP.COM
RDSHOW.COM
RMTSRV_V62.EXE
SHRLINK_VAX.OPT
RDFREE.COM
RDLOG.COM
RDSERVER_SHUTDOWN.COM
RDSERVER_V62.EXE
RLINK_VAX.OPT
RMTSRV_VAX.OPT
MDMS Files and Logical Names F–3
MDMS Files and Logical Names
F.2 MDMS Logical Names
F.2 MDMS Logical Names
When the MDMS installation procedure is complete, logical names are entered into the system
logical name table and stored in the startup file, SYS$STARTUP:MDMS$SYSTARTUP.COM.
They are automatically entered into the system logical name table whenever the system reboots
or whenever MDMS is started with this command:
SYS$STARTUP:MDMS$STARTUP.COM.
Table F–2 describes the logical names in the system table
Table F–2 MDMS Logical Names
Logical Name
Definition and Description
MDMS$DATABASE_LOCATION
MDMS$DB
These logical names point to the location of the
MDMS database files.
MDMS$DATABASE_SERVERS
This logical name is a comma separated list of full node
names of potential database servers. When a server starts
up, it uses this logical to see if it may be a database
server. If the server finds its node name in the list, it tries
to become the database server. If the server does not
find itself in the list, it then knows that it is not a database server but it then tries to communicate with the
node in the list to find the database server. The name of
the node defines how the two server communicate with
each other.
This list of names must be DECnet, DECnet-Plus, or
TCP/IP node names.
They can be a mix of different protocols or the same. For
example the node list could look like this:
NODE1,NODE2.SITE.INC.COM, INC:.SITE.NODE3
The above example shows that to communicate with:
MDMS$LOGFILE_LOCATION
MDMS$LOG
•
NODE1 - use DECnet
•
NODE2 - use DECnet-Plus
•
NODE3 - use TCP/IP
These logical names point to the location of the
MDMS log files.
MDMS$LOGFILTER
Bitmask that defines the level of logging to be performed by
the MDMS$SERVER process. If not defined, the default value is 15, which turns
on completion audit logging of requests that change the
database, and event and serious error logging. See
MDMS$SYSTARTUP.COM for bitmask definitions.
MDMS$MAILBOX
This logical name is the name of the mailbox used by the
MDMS$SERVER process.
MDMS$ROOT
This logical name points to the device and directory of the root for the MDMS files.
MDMS Files and Logical Names F-4
MDMS Files and Logical Names
F.2 MDMS Logical Names
Table F–2 MDMS Logical Names
Logical Name
Definition and Description
MDMS$SBT_TRACE_LEVEL
This logical name is used by the System Backup to Tape
module. It controls what is written to the Oracle trace
file for SBT.
MDMS$STARTUP_QUEUE
This logical name should point to the
name of the batch queue to be used for
MDMS$STARTUP.COM.
MDMS$SUPPORT_PRE_V3
This logical name enables or disables support of
SLS/MDMS V2.9x remote servers.
When this logical is TRUE, an SLS/MDMS V2.9x
client can communicate with an MDMS V3.0
server. If you do not have any SLS/MDMS V2.9x
clients, define this logical as FALSE.
MDMS$SYSTEM
Thislogicalname points to thelocation of MDMS
utilities.
MDMS Files and Logical Names F–5
G
Sample Configuration of MDMS
This appendix shows a sample configuration of Media, Device and Management Services
(MDMS) including examples for the steps involved.
MDMS V4.1 comes with a file called MDMS$SYSTEM:MDMS$CONFIGURE.COM that
can assist users in configuring MDMS V4.1.
MDMS V4.1 does not require you to define MDMS magazines. Doing so adds complexity to
your MDMS configuration. We encourage you to eliminate the use of MDMS magazine, if
they are not needed at your site.
G.1 Configuration Order
Configuration - which involves the creation or definition of MDMS objects, should take place in
the following order:
1.
Location
2.
Media type
3.
Node
4.
Jukebox
5.
Drives
6.
Pools
7.
Volumes
Creating these objects in the above order ensures that the following informational message, does
not appear:
%MDMS-I-UNDEFINEDREFS, object contains undefined referenced objects
This message appears if an attribute of the object is not defined in the database. The object is created even though the attribute is not defined. The sample configuration consists of the following:
•
Four nodes
SMITH1 - ACCOUN cluster node
SMITH2 - ACCOUN cluster node
SMITH3 - ACCOUN cluster node
JONES - a client node
Sample Configuration of MDMS G–1
Sample Configuration of MDMS
G.1 Configuration Order
•
TL826 Jukebox with robot $1$DUA560 and the following six drives:
$1$MUA560
$1$MUA561
$1$MUA562
$1$MUA563
$1$MUA564
$1$MUA565
The following examples illustrate each step in the order of configuration.
G.1.1 Configuration Step 1 Example - Defining Locations
This example lists the MDMS commands to define an offsite and onsite location for this domain.
$
$
$
$
!
!
create onsite location
!
MDMS CREATE LOCATION BLD1_COMPUTER_ROOM /DESCRIPTION="Building 1 Computer Room"
$ MDMS SHOW LOCATION BLD1_COMPUTER_ROOM
Location: BLD1_COMPUTER_ROOM
Description: Building 1 Computer Room
Spaces:
In Location:
$ !
$ ! create offsite location
$ !
$ MDMS CREATE LOCATION ANDYS_STORAGE /DESCRIPTION="Andy's Offsite Storage, corner of 5th and Main"
$ MDMS SHOW LOCATION ANDYS_STORAGE
Location: ANDYS_STORAGE
Description: Andy's Offsite Storage, corner of 5th and Main
Spaces:
In Location:
G.1.2 Configuration Step 2 Example - Defining Media Type
This example shows the MDMS command to define the media type used in the TL826.
!
$ ! create the media type
$ !
$ MDMS CREATE MEDIA_TYPE TK88K /DESCRIPTION="Media type for volumes in TL826 with TK88 drives" /COMPACTION
! volumes are written in compaction mode
$ MDMS SHOW MEDIA_TYPE TK88K
Media type: TK88K
Description: Media type for volumes in TL826 with TK88 drives
Density:
Compaction: YES
Capacity: 0
Length: 0
G.1.3 Configuration Step 3 Example - Defining Domain Attributes
This example shows the MDMS command to set the domain attributes. The reason this command is not run until after the locations and media type are defined, is because they are default
attributes for the domain object. Note that the deallocation state (transition) is taken as the
default. All of the rights are taken as default also.
$ !
$ !
set up defaults in the domain record
Sample Configuration of MDMS G–2
Sample Configuration of MDMS
G.1 Configuration Order
$ !
$ MDMS SET DOMAIN /DESCRIPTION="Smiths Accounting Domain" - ! domain name
/MEDIA_TYPE=TK88K ! default media type
/OFFSITE_LOCATION=ANDYS_STORAGE ! default offsite location
/ONSITE_LOCATION=BLD1_COMPUTER_ROOM - ! default onsite location
/PROTECTION=(S:RW,O:RW,G:RW,W)
! default protection for volumes
$ MDMS SHOW DOMAIN/FULL
Description: Smiths Accounting Domain
Mail: SYSTEM
Offsite Location: ANDYS_STORAGE
Onsite Location: BLD1_COMPUTER_ROOM
Def. Media Type: TK88K
Deallocate State: TRANSITION
Opcom Class: TAPES
Priority: 1536
Request ID: 2576
Protection: S:RW,O:RW,G:RW,W
DB Server Node: SPIELN
DB Server Date: 08-Jan-2003 08:18:20
Max Scratch Time: NONE
Scratch Time: 365 00:00:00
Transition Time:
14 00:00:00
Network Timeout:
0 00:02:00
ABS Rights: NO
SYSPRIV Rights: YES
Application Rights: MDMS_ASSIST
MDMS_LOAD_SCRATCH
MDMS_ALLOCATE_OWN
MDMS_ALLOCATE_POOL
MDMS_BIND_OWN
MDMS_CANCEL_OWN
MDMS_CREATE_POOL
MDMS_DEALLOCATE_OWN
MDMS_DELETE_POOL
MDMS_LOAD_OWN
MDMS_MOVE_OWN
MDMS_SET_OWN
MDMS_SHOW_OWN
MDMS_SHOW_POOL
MDMS_UNBIND_OWN
MDMS_UNLOAD_OWN
Default Rights:
Operator Rights: MDMS_ALLOCATE_ALL
MDMS_ASSIST
MDMS_BIND_ALL
MDMS_CANCEL_ALL
MDMS_DEALLOCATE_ALL
MDMS_INITIALIZE_ALL
MDMS_INVENTORY_ALL
MDMS_LOAD_ALL
MDMS_MOVE_ALL
MDMS_SHOW_ALL
MDMS_SHOW_RIGHTS
MDMS_UNBIND_ALL
MDMS_UNLOAD_ALL
MDMS_CREATE_POOL
MDMS_DELETE_POOL
MDMS_SET_OWN
MDMS_SET_POOL
User Rights: MDMS_ASSIST
MDMS_ALLOCATE_OWN
MDMS_ALLOCATE_POOL
MDMS_BIND_OWN
MDMS_CANCEL_OWN
MDMS_DEALLOCATE_OWN
MDMS_LOAD_OWN
MDMS_SHOW_OWN
MDMS_SHOW_POOL
MDMS_UNBIND_OWN
MDMS_UNLOAD_OWN
Sample Configuration of MDMS G–3
Sample Configuration of MDMS
G.1 Configuration Order
G.1.4 Configuration Step 4 Example - Defining MDMS Database Nodes
This example shows the MDMS commands for defining the three MDMS database nodes of the
cluster ACCOUN. This cluster is configured to use DECnet-PLUS.
Note that a node is defined using the DECnet node name as the name of the node.
•
If the node has DECnet-PLUS installed, the DECnet Fullname attribute must be the DECnet-PLUS full name.
•
If the node uses TCP/IP, the TCP/IP attribute should be defined.
•
If you use the GUI, you must define the TCP/IP attribute and include TCPIP in the Transports attribute.
$
$
$
$
!
!
create nodes
!
database node
MDMS CREATE NODE SMITH1 ! DECnet node name
/DESCRIPTION="ALPHA node on cluster ACCOUN" /DATABASE_SERVER ! this node is a database server
/DECNET_FULLNAME=SMI:.BLD.SMITH1 ! DECnet-Plus name
/LOCATION=BLD1_COMPUTER_ROOM /TCPIP_FULLNAME=SMITH1.SMI.BLD.COM - ! TCP/IP name
$ MDMS SHOW NODE SMITH1
Node: SMITH1
Description: ALPHA node on cluster ACCOUN
DECnet Fullname: SMI:.BLD.SMITH1
TCP/IP Fullname: SMITH1.SMI.BLD.COM:2501-2510
Disabled: NO
Database Server: YES
Location: BLD1_COMPUTER_ROOM
Opcom Classes: TAPES
Transports: DECNET,TCPIP
$ MDMS CREATE NODE SMITH2 ! DECnet node name
/DESCRIPTION="ALPHA node on cluster ACCOUN" /DATABASE_SERVER ! this node is a database server
/DECNET_FULLNAME=SMI:.BLD.SMITH2 ! DECnet-Plus name
/LOCATION=BLD1_COMPUTER_ROOM /TCPIP_FULLNAME=SMITH2.SMI.BLD.COM - ! TCP/IP name
/TRANSPORT=(DECNET,TCPIP)
! TCPIP used by JAVA GUI and JONES
$ MDMS SHOW NODE SMITH2
Node: SMITH2
Description: ALPHA node on cluster ACCOUN
DECnet Fullname: SMI:.BLD.SMITH2
TCP/IP Fullname: SMITH2.SMI.BLD.COM:2501-2510
Disabled: NO
Database Server: YES
Location: BLD1_COMPUTER_ROOM
Opcom Classes: TAPES
Transports: DECNET,TCPIP
$ MDMS CREATE NODE SMITH3 ! DECnet node name
/DESCRIPTION="VAX node on cluster ACCOUN" /DATABASE_SERVER ! this node is a database server
/DECNET_FULLNAME=SMI:.BLD.SMITH3 ! DECnet-Plus name
/LOCATION=BLD1_COMPUTER_ROOM /TCPIP_FULLNAME=CROP.SMI.BLD.COM ! TCP/IP name
/TRANSPORT=(DECNET,TCPIP)
! TCPIP used by JAVA GUI and JONES
$ MDMS SHOW NODE SMITH3
Node: SMITH3
Description: VAX node on cluster ACCOUN
DECnet Fullname: SMI:.BLD.SMITH3
TCP/IP Fullname: CROP.SMI.BLD.COM:2501-2510
Disabled: NO
Database Server: YES
Location: BLD1_COMPUTER_ROOM
Opcom Classes: TAPES
Transports: DECNET,TCPIP
Sample Configuration of MDMS G–4
Sample Configuration of MDMS
G.1 Configuration Order
G.1.5 Configuration Step 5 Example - Defining a Client Node
This example shows the MDMS command for creating a client node. TCP/IP is the only transport on this node.
$
$
$
$
!
!
client node
!
only has TCP/IP
MDMS CREATE NODE JONES /DESCRIPTION="ALPHA client node, standalone" /NODATABASE_SERVER ! not a database server
/LOCATION=BLD1_COMPUTER_ROOM /TCPIP_FULLNAME=JONES.SMI.BLD.COM - ! TCP/IP name
/TRANSPORT=(TCPIP)
! TCPIP is used by JAVA GUI
$ MDMS SHOW NODE JONES
Node: JONES
Description: ALPHA client node, standalone
DECnet Fullname:
TCP/IP Fullname: JONES.SMI.BLD.COM:2501-2510
Disabled: NO
Database Server: NO
Location: BLD1_COMPUTER_ROOM
Opcom Classes: TAPES
Transports: TCPIP
G.1.6 Configuration Step 6 Example - Creating a Jukebox
This example shows the MDMS command for creating a jukebox
$
$
$
$
!
!
create jukebox
!
MDMS CREATE JUKEBOX TL826_JUKE /DESCRIPTION="TL826 Jukebox in Building 1" /ACCESS=ALL ! local + remote for JONES
/AUTOMATIC_REPLY ! MDMS automatically replies to OPCOM requests
/CONTROL=MRD ! controled by MRD robot control
/NODES=(SMITH1,SMITH2,SMITH3) - ! nodes the can control the robot
/ROBOT=$1$DUA560 ! the robot device
/SLOT_COUNT=176
! 176 slots in the library
$ MDMS SHOW JUKEBOX TL826_JUKE
Jukebox: TL826_JUKE
Description: TL826 Jukebox in Building 1
Nodes: SMITH1,SMITH2,SMITH3
Groups:
Location: BLD1_COMPUTER_ROOM
Disabled: NO
Shared: NO
Auto Reply: YES
Access: ALL
State: AVAILABLE
Control: MRD
Robot: $1$DUA560
Slot Count: 176
Usage: NOMAGAZINE
G.1.7 Configuration Step 7 Example - Defining a Drive
This example shows the MDMS commands for creating the six drives for the jukebox.
This example is a command procedure that uses a counter to create the six drives. In this example it is easy to do this because of the drive name and device name. You may want to have the
drive name the same as the device name. For example:
Sample Configuration of MDMS G–5
Sample Configuration of MDMS
G.1 Configuration Order
$ MDMS CREATE DRIVE $1$MUA560/DEVICE=$1$MUA560
This works fine if you do not have two devices in your domain with the same name.
$ COUNT = COUNT + 1
$ IF COUNT .LT. 6 THEN GOTO DRIVE_LOOP
$DRIVE_LOOP:
$ MDMS CREATE DRIVE TL826_D1 /DESCRIPTION="Drive 1 in the TL826 JUKEBOX" /ACCESS=ALL ! local + remote for JONES
/AUTOMATIC_REPLY ! MDMS automatically replies to OPCOM requests
/DEVICE=$1$MUA561 - ! physical device
/DRIVE_NUMBER=1 - ! the drive number according to the robot
/JUKEBOX=TL826_JUKE ! jukebox the drives are in
/MEDIA_TYPE=TK88K ! media type to allocate drive and volume for
/NODES=(SMITH1,SMITH2,SMITH3)! nodes that have access to drive
$ MDMS SHOW DRIVE TL826_D1
Drive: TL826_D1
Description: Drive 1 in the TL826 JUKEBOX
Device: $1$MUA561
Nodes: SMITH1,SMITH2,SMITH3
Groups:
Volume:
Disabled: NO
Shared: NO
Available: NO
State: EMPTY
Stacker: NO
Automatic Reply: YES
RW Media Types: TK88K
RO Media Types:
Access: ALL
Jukebox: TL826_JUKE
Drive Number: 1
Allocated: NO
:
:
:
$ MDMS CREATE DRIVE TL826_D5 /DESCRIPTION="Drive 5 in the TL826 JUKEBOX" /ACCESS=ALL ! local + remote for JONES
/AUTOMATIC_REPLY ! MDMS automatically replies to OPCOM requests
/DEVICE=$1$MUA565 - ! physical device
/DRIVE_NUMBER=5 - ! the drive number according to the robot
/JUKEBOX=TL826_JUKE ! jukebox the drives are in
/MEDIA_TYPE=TK88K ! media type to allocate drive and volume for
/NODES=(SMITH1,SMITH2,SMITH3)! nodes that have access to drive
$ MDMS SHOW DRIVE TL826_D5
Drive: TL826_D5
Description: Drive 5 in the TL826 JUKEBOX
Device: $1$MUA565
Nodes: SMITH1,SMITH2,SMITH3
Groups:
Volume:
Disabled: NO
Shared: NO
Available: NO
State: EMPTY
Stacker: NO
Automatic Reply: YES
RW Media Types: TK88K
RO Media Types:
Access: ALL
Jukebox: TL826_JUKE
Drive Number: 5
Allocated: NO
$ COUNT = COUNT + 1
$ IF COUNT .LT. 6 THEN GOTO DRIVE_LOOP
Sample Configuration of MDMS G–6
Sample Configuration of MDMS
G.1 Configuration Order
G.1.8 Configuration Step 8 Example - Defining Pools
This example shows the MDMS commands to define two pools: ABS and HSM. The pools need
to have the authorized users defined.
$
$
$
$
$
!
!
create pools
!
mdms del pool abs
MDMS CREATE POOL ABS /DESCRIPTION="Pool for ABS" /AUTHORIZED=(SMITH1::ABS,SMITH2::ABS,SMITH3::ABS,JONES::ABS)
$ MDMS SHOW POOL ABS
Pool: ABS
Description: Pool for ABS
Authorized Users: SMITH1::ABS,SMITH2::ABS,SMITH3::ABS,JONES::ABS
Default Users:
$ mdms del pool hsm
$ MDMS CREATE POOL HSM /DESCRIPTION="Pool for HSM" /AUTHORIZED=(SMITH1::HSM$SERVER,SMITH2::HSM$SERVER,SMITH3::HSM$SERVER)
$ MDMS SHOW POOL HSM
Pool: HSM
Description: Pool for HSM
Authorized Users: SMITH1::HSM$SERVER,SMITH2::HSM$SERVER,SMITH3::HSM$SERVER
Default Users:
G.1.9 Configuration Step 9 Example - Defining Volumes using the /VISION
qualifier
This example shows the MDMS commands to define the 176 volumes in the TL826 using the
/VISION qualifier. The volumes have the BARCODES on them and have been placed in the
jukebox. Notice that the volumes are created in the UNINITIALIZED state. The last command
in the example initializes the volumes and changes the state to FREE.
$
$
$
$
$
$
$
$
!
! create volumes
!
! create 120 volumeS for ABS
!
the media type, offsite location, and onsite location
!
values are taken from the DOMAIN object
!
MDMS CREATE VOLUME /DESCRIPTION="Volumes for ABS" /JUKEBOX=TL826_JUKE /POOL=ABS /SLOTS=(0-119) /VISION
$ MDMS SHOW VOLUME BEB000
Volume: BEB000
Description: Volumes for ABS
Placement: ONSITE BLD1_COMPUTER_ROOM
Media Types: TK88K
Username:
Pool: ABS
Owner UIC: NONE
Error Count:
0
Account:
Mount Count:
0
Job Name:
State: UNINITIALIZED
Magazine:
Avail State: UNINITIALIZED
Jukebox: TL826_JUKE
Previous Vol:
Slot: 0
Next Vol:
Drive:
Format: NONE
Offsite Loc: ANDYS_STORAGE
Protection: S:RW,O:RW,G:RW,W
Offsite Date: NONE
Purchase: 08-Jan-2003 08:19:00
Onsite Loc: BLD1_COMPUTER_ROOM
Creation: 08-Jan-2003 08:19:00
Space:
Init: 08-Jan-2003 08:19:00
Onsite Date: NONE
Sample Configuration of MDMS G–7
Sample Configuration of MDMS
G.1 Configuration Order
Allocation: NONE
Scratch: NONE
Deallocation: NONE
Trans Time:
14 00:00:00
Freed: NONE
Last Access: NONE
$ !
$ ! create 56 volumes for HSM
$ !
$ MDMS CREATE VOLUME /DESCRIPTION="Volumes for HSM" /JUKEBOX=TL826_JUKE /POOL=HSM /SLOTS=(120-175) /VISION
$ MDMS SHOW VOL BEB120
Volume: BEB120
Description: Volumes for HSM
Placement: ONSITE BLD1_COMPUTER_ROOM
Media Types: TK88K
Pool: HSM
Error Count:
0
Mount Count:
0
State: UNINITIALIZED
Avail State: UNINITIALIZED
Previous Vol:
Next Vol:
Format: NONE
Protection: S:RW,O:RW,G:RW,W
Purchase: 08-Jan-2003 08:22:16
Creation: 08-Jan-2003 08:22:16
Init: 08-Jan-2003 08:22:16
Allocation: NONE
Scratch: NONE
Deallocation: NONE
Trans Time:
14 00:00:00
Freed: NONE
Last Access: NONE
$ !
$ ! initialize all of the volumes
$ !
$ MDMS INITIALIZE VOLUME /JUKEBOX=TL826_JUKE /SLOTS=(0-175)
$ MDMS SHOW VOL BEB000
Volume: BEB000
Description: Volumes for ABS
Placement: ONSITE BLD1_COMPUTER_ROOM
Media Types: TK88K
Pool: ABS
Error Count:
0
Mount Count:
0
State: FREE
Avail State: FREE
Previous Vol:
Next Vol:
Format: NONE
Protection: S:RW,O:RW,G:RW,W
Purchase: 08-Jan-2003 08:19:00
Creation: 08-Jan-2003 08:19:00
Init: 08-Jan-2003 08:19:00
Allocation: NONE
Scratch: NONE
Deallocation: NONE
Trans Time:
14 00:00:00
Freed: NONE
Last Access: NONE
Sample Configuration of MDMS G–8
Brand:
Last Cleaned: 08-Jan-2003 08:19:00
Times Cleaned: 0
Rec Length: 0
Block Factor: 0
Username:
Owner UIC: NONE
Account:
Job Name:
Magazine:
Jukebox: TL826_JUKE
Slot: 120
Drive:
Offsite Loc: ANDYS_STORAGE
Offsite Date: NONE
Onsite Loc: BLD1_COMPUTER_ROOM
Space:
Onsite Date: NONE
Brand:
Last Cleaned: 08-Jan-2003 08:22:16
Times Cleaned: 0
Rec Length: 0
Block Factor: 0
Username:
Owner UIC: NONE
Account:
Job Name:
Magazine:
Jukebox: TL826_JUKE
Slot: 0
Drive:
Offsite Loc: ANDYS_STORAGE
Offsite Date: NONE
Onsite Loc: BLD1_COMPUTER_ROOM
Space:
Onsite Date: NONE
Brand:
Last Cleaned: 08-Jan-2003 08:19:00
Times Cleaned: 0
Rec Length: 0
Block Factor: 0
Index
A
Archive Class
default shelf 5-4
defining 5-4
Defining devices 5-4
identifier 5-4
initializing tape media 5-4
label reference table 5-4
Authorizing shelf servers 5-4
Overview 1-11
HSM Plus
Functions 1-3
HSM041.RELEASE_NOTES 3-1
HSM041_RELEASE_NOTES.PS. 3-1
I
Installation
account quotas 3-4
disk space 3-2
System Parameters 3-1
time taken 4-1
Installing
privileges 3-4
B
Basic Mode 1-3
see HSM Basic 1-3
C
Classes 5-5
correct installation problems 3-4
F
Files
HSM$STARTUP.COM 4-5
SYSTARTUP_VMS.COM. 4-5
G
GBLPAGES 3-3
GBLSECTIONS 3-3
L
Licences
Capacity 1-5
License
How to register 3-5
Licenses
Base 1-5
Concurrent Use 1-5
types 1-7
P
PAK
Product Authorization Key 3-5
register 3-5
PATHWORKS 6-1
Logical Names 6-3
Plus Mode
See HSM Plus 1-3
H
How to
Register HSM License 3-5
register PAK 3-5
HSDRIVER
connecting 4-5
HSM
abort 4-6
Disk Space 3-2
Installing 4-1
Privileges 3-3
restart 4-6
start 4-5
HSM Basic
Functions 1-3
R
Release Notes 3-1
S
shelf handler
starting 4-5
System Parameters 3-1
U
User account
quota 3-3, 3-4
Index–1
V
VMSINSTAL 3-1
Index–2