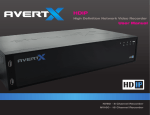
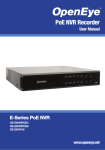
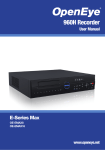
Download User Manual
Transcript
User Manual OE-EASYNVR4 OE-EASYNVR8 OE-EASYNVR16 www.openeye.net ® OpenEye EasyNVR Operations Manual Manual Edition 32896AC – APRIL 2015 ©2000-2015, OPENEYE All Rights Reserved No part of this document may be reproduced by any means, electronic or mechanical, for any purpose, except as expressed in the Software License Agreement. OPENEYE shall not be liable for technical or editorial errors or omissions contained herein. The information in this document is subject to change without notice. The information in this publication is provided “as is” without warranty of any kind. The entire risk arising out of the use of this information remains with recipient. In no event shall OPENEYE be liable for any direct, consequential, incidental, special, punitive, or other damages whatsoever (including without limitation, damages for loss of business profits, business interruption or loss of business information), even if OPENEYE has been advised of the possibility of such damages or whether in an action, contract or tort, including negligence. This software and documentation are copyrighted. All other rights, including ownership of the software, are reserved to OPENEYE. OPENEYE, OpenEye, HDDR, and High Definition Digital Recorder are registered trademarks of OPENEYE in the United States and elsewhere; Windows, and Windows XP Embedded are registered trademarks of Microsoft Corporation. All other brand and product names are trademarks or registered trademarks of the respective owners. The following words and symbols mark special messages throughout this guide: WARNING: Text set off in this manner indicates that failure to follow directions could result in bodily harm or loss of life. CAUTION: Text set off in this manner indicates that failure to follow directions could result in damage to equipment or loss of information. OPENEYE Liberty Lake, WA 2 U.S.A. IMPORTANT SAFEGUARDS 1. Read Owner’s Manual – After unpacking this product, read the owner’s manual carefully, and follow all the operating and other instruction 2. Power Sources – This product should be operated only from the type of power source indicated on the label. If not sure of the type of power supply to your home or business, consult product dealer or local power company 3. Ventilation – Slots and openings in the cabinet are provided for ventilation and to ensure reliable operation of the product and to protect it from overheating, and these openings must not be blocked or covered. The product should not be placed in a built-in installation such as a bookcase or rack unless proper ventilation is provided or the manufacturer’s instructions have been adhered to. 4. Heat – The product should be situated away from heat sources such as radiators, heat registers, stoves, or other products that produce heat. 5. Water and Moisture – Do not use this product near water. 6. Cleaning – Unplug this product from the wall outlet before cleaning. Do not use liquid cleaners or aerosol cleaners. Use a damp cloth for cleaning. 7. Power Cord Protection – Power-supply cords should be routed so that they are not likely to be walked on or pinched by items placed against them, paying particular attention to cords at plugs, convenience receptacles, and the point where they exit from the product. 8. Overloading – Do not overload wall outlets, extension cords, or integral convenience receptacles as this can result in a risk of fire or electrical shock. 9. Lightning – For added protection for this product during storm, or when it is left unattended and unused for long periods, unplug it from the wall outlet. This will prevent damage to the product due to lightning and power line surges. 10. Object and Liquid Entry Points – Never insert foreign objects into the NVR, other than the media types approved by OpenEye, as they may touch dangerous voltage points or short-out parts that could result in a fire or electrical shock. Never spill liquid of any kind on the product. 11. Accessories – Do not place this product on an unstable cart, stand, tripod, bracket, or table. The product may fall, causing serious personal injury and serious damage to the product. 12. Burden – Do not place a heavy object on or step on the product. The object may fall, causing serious personal injury and serious damage to the product. 13. Disc – Do not use a cracked, deformed, or repaired disc. These discs are easily broken and may cause serious personal injury and product malfunction. 14. Damage Requiring Service – Unplug the unit from the outlet and refer servicing to qualified service personnel under the following conditions: When the power-supply cord or plug is damaged. If liquid has been spilled, or objects have fallen into the unit. If the unit has been exposed to rain or water. If the unit does not operate normally by following the operating instructions. Adjust only those controls that are covered by the operating instructions as an improper adjustment of other controls may result in damage and will often require extensive work by a qualified technician to restore the unit to its normal operation. If the unit has been dropped or the enclosure has been damaged. When the unit exhibits a distinct change in performance – this indicates a need for service. 15. Servicing – Do not attempt to service this product as opening or removing covers may expose the user to dangerous voltage or other hazards. Refer all servicing to qualified personnel. 16. Replacement Parts – When replacement parts are required, be sure the service technician has used replacement parts specified by the manufacturer or have the same characteristics as the original part. Unauthorized substitutions may result in fire, electric shock or other hazards. 17. Safety Check – Upon completion of any service or repairs to this unit, ask the service technician to perform safety checks to determine that the unit is in proper operating condition. 32896AC 3 BATTERY EXPLOSION CAUTION STATEMENT CAUTION: Risk of Explosion if Battery is replaced by an Incorrect Type. Dispose of Used Batteries According to the Instructions. NOTES ON HANDLING Please retain the original shipping carton and/or packing materials supplied with this product. To ensure the integrity of this product when shipping or moving, repackage the unit as it was originally received from the manufacturer. Do not use volatile liquids, such as aerosol spray, near this product. Do not leave rubber or plastic objects in contact with this product for extended periods of time. Rubber or plastic objects left in contact with this product for extended periods of time will leave marks on the finish. The top and rear panels of the unit may become warm after long periods of use. This is not a malfunction. NOTES ON LOCATING Place this unit on a level surface. Do not use it on a shaky or unstable surface such as a wobbling table or inclined stand. If this unit is placed next to a TV, radio, or VCR, the playback picture may become poor and the sound may be distorted. If this happens, place the NVR away from the TV, radio, or VCR. NOTES ON CLEANING Use a soft dry cloth for cleaning. For stubborn dirt, soak the cloth in a weak detergent solution, wring well and wipe. Use a dry cloth to wipe it dry. Do not use any type of solvent, such as thinner and benzene, as they may damage the surface of the NVR. If using a chemical saturated cloth to clean the unit, follow that product’s instructions. NOTES ON MAINTENANCE This NVR is designed to last for long periods of time. To keep the NVR always operational we recommend regular inspection maintenance (cleaning parts or replacement). For details, contact the nearest dealer. NOTES ON MOISTURE CONDENSATION Moisture condensation damages the NVR. Read the following information carefully. Moisture condensation occurs during the following cases: When this product is brought directly from a cool location to a warm location. When this product is moved to a hot and humid location from a cool location. When this product is moved to a cool and humid location from a warm location. When this product is used in a room where the temperature fluctuates. When this product is used near an air-conditioning unit vent When this product is used in a humid location. Do not use the NVR when moisture condensation may occur. If the NVR is used in such a situation, it may damage discs and internal parts. Remove any CD discs, connect the power cord of the NVR to the wall outlet, turn on the NVR, and leave it for two to three hours. After two to three hours, the NVR will warm up and evaporate any moisture. Keep the NVR connected to the wall and moisture will seldom occur. 4 TECHNICAL NOTES OpenEye cameras and recorders must be connected to networks that do not have routing to outside plants. OpenEye cameras must be connected to PoE output equipment that is UL listed I.T.E only. WARNING TO REDUCE THE RISK OF ELECTRICAL SHOCK, DO NOT EXPOSE THIS APPLIANCE TO RAIN OR MOISTURE. DANGEROUS HIGH VOLTAGES ARE PRESENT INSIDE THE ENCLOSURE. DO NOT OPEN THE CABINET. REFER SERVICING TO QUALIFIED PERSONNEL ONLY. CAUTION CAUTION RISK OF ELECTRIC SHOCK DO NOT OPEN CAUTION: TO REDUCE THE RISK OF ELECTRIC SHOCK, DO NOT REMOVE COVER (OR BACK). NO USER-SERVICEABLE PARTS INSIDE. REFER SERVICING TO QUALIFIED SERVICE PERSONNEL. RACK MOUNT INSTRUCTIONS Elevated Operating Ambient – If installed in a closed or multi-unit rack assembly, the operating ambient temperature of the rack environment may be greater than room ambient. Therefore, consideration should be given to installing the equipment in an environment compatible with the maximum ambient temperature (Tma) specified by the manufacturer. Reduced Air Flow – Installation of the equipment in a rack should be such that the amount of airflow required for safe operation of the equipment is not compromised. Mechanical Loading – Mounting of the equipment in the rack should be such that a hazardous condition is not achieved due to uneven mechanical loading. Circuit Overloading – Consideration should be given to the connection of the equipment to the supply circuit and the effect that overloading of the circuits might have on over current protection and supply wiring. Appropriate consideration of equipment nameplate ratings should be used when addressing this concern. Grounding – Grounding of rack-mounted equipment should be maintained. Particular attention should be given to supply connections other than direct connections to the branch circuit (e.g. use of power strips). 32896AC 5 FCC STATEMENT INFORMATION TO THE USER: THIS EQUIPMENT HAS BEEN TESTED AND FOUND TO COMPLY WITH THE LIMITS FOR A CLASS A DIGITAL DEVICE, PERSUANT TO PART 15 OF THE FCC RULES. THESE LIMITS ARE DESIGNED TO PROVIDE REASONABLE PROTECTION AGAINST HARMFUL INTERFERENCE IN A RESIDENTIAL INSTALLATION. THIS EQUIPMENT GENERATES, USES AND CAN RADIATE RADIO FREQUENCY ENERGY AND, IF NOT INSTALLED AND USED IN ACCORDANCE WITH THE INSTRUCTIONS, MAY CAUSE HARMFUL INTERFEENCE TO RADIO COMMUNICATIONS. HOWEVER THERE IS NO GUARANTEE THAT INTERFERENCE WILL NOT OCCUR IN A PARTICULAR INSTALLATION. IF THIS EQUIPMENT DOES CAUSE HARMFUL INTERFERENCE TO RADIO OR TELEVISION RECEPTION, WHICH CAN BE DETERMINED BY TURNING THE EQUIPMENT OFF AND ON, THE USER IS ENCOURAGED TO TRY TO CORRECT THE INTERFERENCE BY ONE OR MORE OF THE FOLLOWING MEASURES: REORIENT OR RELOCATE THE RECEIVING ANTENNA. INCREASE THE SEPARATION BETWEEN THE EQUIPMENT AND RECEIVER. CONNECT THE EQUIPMENT TO AN OUTLET ON A CIRCUIT DIFFERENT FROM THAT TO WHICH THE RECEIVER IS CONNECTED. CONSULT THE DEALER OR AN EXPERIENCED RADIO/TV TECHNICIAN FOR HELP. CAUTION: CHANGES OR MODIFICATIONS NOT EXPRESSLY APPROVED BY THE PARTY RESPONSIBLE FOR COMPLIANCE COULD VOID THE USER’S AUTHORITY TO OPERATE THE EQUIPMENT. THIS CLASS A DIGITAL APPARATUS COMPLIES WITH CANADIAN ICES-003. CET APPAREIL NUMÉRIQUE DE LA CLASSE B EST CONFORME À LA NORME NMB-003 DU CANADA. OPERATION OF THIS DEVICE IS SUBJECT TO THE FOLLOWING CONDITIONS: THIS DEVICE MAY NOT CAUSE HARMFUL INTERFERENCE. THIS DEVICE MUST ACCEPT INTERFERENCE RECEIVED, INCLUDING INTERFERENCE THAT MAY CAUSE UNDESIRABLE OPERATION. CABLES USED WITH THIS DEVICE MUST BE PROPERLY SHIELDED TO COMPLY WITH THE REQUIREMENTS OF THE FCC. ANY CHANGES OR MODIFICATIONS NOT EXPRESSLY APPROVED IN THIS MANUAL COULD VOID YOUR AUTHORITY TO OPERATE THIS EQUIPMENT. USERS OF THE PRODUCT ARE RESPONSIBLE FOR CHECKING AND COMPLYING WITH ALL FEDERAL, STATE, AND LOCAL LAWS AND STATUTES CONCERNING THE MONITORING AND RECORDING OF VIDEO AND AUDIO SIGNALS. OPENEYE SHALL NOT BE HELD RESPONSIBLE FOR THE USE OF THIS PRODUCT IN VIOLATION OF CURRENT LAWS AND STATUTES. 6 TABLE OF CONTENTS............................................................................................................................................7 TABLE OF CONTENTS............................................................................................................................................7 PREFACE ............................................................................................................................................................... 12 About this Guide .............................................................................................................................. 12 Technician Notes ............................................................................................................................. 12 INTRODUCTION ..................................................................................................................................................... 13 Product Description ......................................................................................................................... 13 Features .......................................................................................................................................... 14 USB Flash Drive Approved List ....................................................................................................... 14 Quick Start Instructions ................................................................................................................... 15 Logging In for the First Time ............................................................................................................ 15 INSTALLATION ...................................................................................................................................................... 16 Front Panel ...................................................................................................................................... 16 4 Channel ................................................................................................................................. 16 8/16 Channel ............................................................................................................................ 16 Front Panel LED Indicators ...................................................................................................... 17 Rear Panel Connectors ................................................................................................................... 18 4 Channel ................................................................................................................................. 18 8 Channel ................................................................................................................................. 18 16 Channel ............................................................................................................................... 19 USB Mouse ..................................................................................................................................... 20 On-screen Hover Menu Bar...................................................................................................... 20 Live Screen Hover Menu Bar ............................................................................................ 20 Search Screen Hover Menu .............................................................................................. 21 Connection Guide ............................................................................................................................ 22 Power Setup ............................................................................................................................. 22 Monitor Setup ........................................................................................................................... 22 Connecting a Camera .............................................................................................................. 23 Connecting to a Network .......................................................................................................... 23 Connecting to a Sensor Input ................................................................................................... 23 Connecting to a Relay Output .................................................................................................. 23 Turning on the NVR ......................................................................................................................... 24 First Time Power On ................................................................................................................ 24 Normal Power On ..................................................................................................................... 24 Turning off the NVR ......................................................................................................................... 24 DISPLAY ................................................................................................................................................................. 25 Channel Details ............................................................................................................................... 25 Connection Icons ...................................................................................................................... 25 Notification Icons ...................................................................................................................... 26 32896AC 7 Live Video Details ............................................................................................................................ 26 Live Display ..................................................................................................................................... 27 Mode List .................................................................................................................................. 27 Freeze ...................................................................................................................................... 27 Sequence ................................................................................................................................. 27 PLAYBACK ............................................................................................................................................................ 28 Instant playback............................................................................................................................... 28 Search ............................................................................................................................................. 29 Calendar Search ...................................................................................................................... 29 Preview Search ................................................................................................................. 30 Panorama Search ............................................................................................................. 30 Event Search ............................................................................................................................ 30 Preview ............................................................................................................................. 30 Filter .................................................................................................................................. 30 Playback Controls ............................................................................................................. 31 Zoom During Playback ...................................................................................................... 31 Backup from Search ........................................................................................................................ 32 Backup a Selection of Video during Playback .......................................................................... 32 Backup Video from Event Search ............................................................................................. 32 Backup Video from Calendar Search ....................................................................................... 32 EXPORT ................................................................................................................................................................. 33 Instant export ................................................................................................................................... 34 Export .............................................................................................................................................. 34 Snapshot ......................................................................................................................................... 35 Backup Viewer................................................................................................................................. 35 PTZ CONTROLS .................................................................................................................................................... 36 PTZ Preset ...................................................................................................................................... 37 Set Preset Positions ................................................................................................................. 37 Go to a Preset Position............................................................................................................. 37 Run a Preset Tour .................................................................................................................... 37 SETUP .................................................................................................................................................................... 38 System setup ................................................................................................................................... 38 System Info .............................................................................................................................. 38 Display Setup ........................................................................................................................... 38 Sequence Setup ....................................................................................................................... 38 Date/Time ................................................................................................................................. 38 Network Setup .......................................................................................................................... 39 DDNS Setup ...................................................................................................................... 40 ReportStar Setup .............................................................................................................. 40 OpenEye Web Connect Setup .......................................................................................... 41 Add a Recorder to your OpenEye Web Services Account ....................................................... 41 Camera Info.............................................................................................................................. 42 PoE Status ............................................................................................................................... 42 8 Camera Setup ................................................................................................................................. 43 Device Search .......................................................................................................................... 43 Connection ............................................................................................................................... 43 Camera Name ................................................................................................................... 43 Hidden ............................................................................................................................... 43 PnP Enabled ..................................................................................................................... 43 Management Port .............................................................................................................. 44 Account and Password...................................................................................................... 44 Activated ........................................................................................................................... 44 Main and Dual Stream Options ......................................................................................... 44 Streaming ................................................................................................................................. 44 Picture Adjustment ................................................................................................................... 45 Exposure Settings ............................................................................................................. 45 White Balance ................................................................................................................... 45 IR Function ........................................................................................................................ 45 WDR.................................................................................................................................. 45 Noise Reduction ................................................................................................................ 45 Copy Settings ........................................................................................................................... 46 Schedule setup ................................................................................................................................ 47 General Settings ....................................................................................................................... 47 Global Configuration.......................................................................................................... 47 Audio Recording ................................................................................................................ 47 Circular Recording............................................................................................................. 47 Data Lifetime ..................................................................................................................... 47 Date Purge ........................................................................................................................ 47 Schedule .................................................................................................................................. 48 Schedule Table ................................................................................................................. 48 Profiles .............................................................................................................................. 48 Holiday List........................................................................................................................ 49 Setup a Recording Schedule ............................................................................................. 49 Alarm Setup ..................................................................................................................................... 50 General Settings ....................................................................................................................... 50 Internal Buzzer .................................................................................................................. 50 Event Icon ......................................................................................................................... 50 Event Duration .................................................................................................................. 50 Event Full Screen .............................................................................................................. 50 Per Channel Configuration ....................................................................................................... 50 Channel Select .................................................................................................................. 50 Video Loss Detection ........................................................................................................ 50 Motion Detection ............................................................................................................... 50 Alarm In ............................................................................................................................. 51 Alarm Out .......................................................................................................................... 51 Motion Detection Configuration ................................................................................................ 52 Enable Motion Detection ................................................................................................... 52 Creating a Detection Area ................................................................................................. 52 32896AC 9 Copy Motion Recording Settings to other Camera Channels ................................................... 53 E-mail Management ................................................................................................................. 53 Configuring E-mail Addresses to Receive Event Notifications .......................................... 53 Hard Drive setup.............................................................................................................................. 54 General Settings....................................................................................................................... 54 Repair on Power Loss ....................................................................................................... 54 Internal Disks............................................................................................................................ 54 Data Protection......................................................................................................................... 54 Configuration ................................................................................................................................... 55 General Settings ....................................................................................................................... 55 Load Factory Default ......................................................................................................... 55 Operations Log .................................................................................................................. 55 Export Configuration ................................................................................................................. 55 Import Configuration ................................................................................................................. 55 Management.................................................................................................................................... 56 Account Setup .......................................................................................................................... 56 Creating and Modifying a User Account ............................................................................ 56 Permissions Setup ................................................................................................................... 57 Firmware Upgrade .................................................................................................................... 57 Updating the Firmware on Your EasyNVR Recorder ........................................................ 57 Remotely Updating the Firmware on Your EasyNVR Recorder ........................................ 58 System Log .............................................................................................................................. 59 Maintenance ............................................................................................................................. 59 Password Protection ......................................................................................................... 59 Auto Logout ....................................................................................................................... 59 Account/Permission Reset ................................................................................................ 59 PoE Power Limitation ........................................................................................................ 60 INFORMATION ....................................................................................................................................................... 61 System ............................................................................................................................................ 61 Camera ............................................................................................................................................ 61 EXIT ........................................................................................................................................................................ 62 Logout ............................................................................................................................................. 62 Switch User ..................................................................................................................................... 62 Restart ............................................................................................................................................. 62 Shutdown ........................................................................................................................................ 62 Remote Connection ......................................................................................................................... 63 Remote Connection Setup .............................................................................................................. 63 Configure the Recorder for Remote Access ............................................................................. 63 Dynamic IP Address (DHCP) ............................................................................................ 63 Static IP Address ............................................................................................................... 63 Configure Port Forwarding ....................................................................................................... 64 Establishing a Connection on the Remote Workstation ............................................................ 64 Connecting to the Recorder on a Local Area Network ...................................................... 64 Connecting to the Recorder from a Remote Location ....................................................... 64 10 Remote Interface ............................................................................................................................. 65 Remote Playback ..................................................................................................................... 65 Save as AVI or DRV .......................................................................................................... 65 Event List.................................................................................................................................. 66 32896AC 11 This manual is a setup and maintenance guide that can be used for reference when setting up the EasyNVR and for troubleshooting when a problem occurs. Only authorized personnel should attempt to repair this unit. OpenEye reserves the right to make changes to the products represented by this manual without notice. The following text and symbols mark special messages throughout this guide: Note Text set off in this manner indicates topics of interests that can help the user understand the product better. Tip Text set off in this manner indicates topics and points of interests that can be helpful when using or setting up the recorder. Warning: Only authorized technicians trained by OpenEye should attempt to repair this recorder. All troubleshooting and repair procedures that may be shown are for reference and minor repair only. Because of the complexity of the individual components and subassemblies, no one should attempt to make repairs at the component level or to make modifications to any printed wiring board. Improper repairs can create a safety hazard. And any indications of component replacement or printed wiring board modifications may void any warranty. WARNING: To reduce the risk of electrical shock or damage to the equipment: Do not disable the power grounding plug. The grounding plug is an important safety feature. Plug the power cord into a grounded (earthed) electrical outlet that is easily accessible at all times. Disconnect the power from the computer by unplugging the power cord either from the electrical outlet or the computer. CAUTION: 12 To properly ventilate your system, you must provide at least 3 inches (7.8 cm) of clearance at the front and back of the recorder. OpenEye’s EasyNVR is an affordable video management solution designed for easy installation and operation. Configured for motion and event recording right out of the box, the EasyNVR offers easy to use search, setup, and backup features. Installing new cameras on the EasyNVR is easier than ever with Plug N’ Play. With Plug N’ Play support for OpenEye PoE IP cameras, EasyNVR automatically recognizes the new hardware and will have your channel up and running within a few minutes. The OpenEye EasyNVR is ready for fast and seamless integration within your existing IT infrastructure. It offers unparalleled stability, security, and ease of use, meaning that your security investment has never been easier to maintain. Multiple users may connect through any network for simultaneous live viewing, digital search, and use PTZ controls on available attached video input devices. With the latest advancements in the EasyNVR software, searching and indexing your video archive has never been easier. The OpenEye EasyNVR comes pre-installed with remote viewing and configuration software that allows users to view live or recorded video images and enables remote configuration. EasyNVR remote software is stored in the recorder and deployed over a network connection to an internet browser, simplifying the installation and maintenance of the OpenEye EasyNVR. 32896AC 13 The EasyNVR by OpenEye includes the following features: 4/8/16 PoE IP Video Input Connectors Plug N’ Play ability with OpenEye PoE cameras 8/16 Alarm Sensor Inputs (8/16 channel models only) Recording Resolutions up to 1080p Multiple Search Methods (Calendar, Event) H.264 Compression VGA and HDMI Monitor Output Multiple Levels of Security Access Internal Storage of up to 4TB (depending on model) Remote System Operation & Configuration Digital Signature Support Schedule Recording for Day, Night, or Weekend Continuous, motion activated, and sensor (8/16 channel models only) activated recording Alarm outputs for activating external alarms (8/16 channel models only) PTZ (pan, tilt, zoom) compatibility with OpenEye IP PTZ cameras Free DDNS for the life of the product ReportStar cloud-based monitoring for system health Compatible with OpenEye Web Connect, using OpenEye Web Services for account management and easy remote access These USB flash drives have been tested and approved to work with the EasyNVR. Other USB flash drives may also work with the EasyNVR, but have not yet been tested. 14 Manufacturer Model SanDisk Cruzer Talent Flash Corsair Voyager Lexar JumpDrive Kingston Traveler These are instructions that will allow you to operate the basic features of the EasyNVR. Use these to record to your EasyNVR, allow remote access over a local network, and set up passwords for authorized users. For further instructions, setup details, and configuration tools, please see the information presented in the rest of this manual. 1. Establish necessary cable connections and power on the recorder. 2. When prompted for the admin user password, use the on-screen keyboard to type 1234, then click the OK key. 3. On the Hover menu, click Setup. 4. In the System Setup tab, click Date/Time, then verify or modify the correct date and time. 5. Click Network Setup and configure network settings. DHCP is enabled by default. 6. If the IP address needs to be static, turn off DHCP by clicking the toggle button and enter the IP, Netmask, Gateway, and DNS for the network. 7. In the Management tab, click Account Setup, and then change the admin password or create new users. 8. Click Close at the bottom right of the screen to return to Live view. Default administrative log in information: Username: admin Password: 1234 32896AC 15 4 Channel USB port LED indictors 8/16 Channel LED indicators Power button USB ports 16 Front Panel LED Indicators Power: When the recorder is powered on, the power indicator (on 8/16 channel models only) is blue. Record: The LED blinks when the recorder is recording (on 4/8/16 channel models). Alarm: The LED blinks when an alarm is triggered (on 4 channel model only). Network: The LED is lit when the recorder is connected to a network, and blinks when data is being transferred (on 4 channel model only). 32896AC 17 The rear panel of the recorder contains the connectors used to attach cameras, sensors, relay, network, and monitor to the recorder. 4 Channel Network camera input LAN VGA 1 Power ON / OFF switch 3 ON LAN VGA DC50 IN HD OUT USB 2 HDMI output OFF 4 USB ports Power input 8 Channel Alarm I/O Network camera input 18 HDMI output VGA LAN USB ports Power input 16 Channel VGA USB ports USB LAN Alarm / IO USB Network camera input HDMI output Power input The Mighty Squirrel Contr oller 32896AC 19 A USB mouse can be connected to the USB port on either the front panel or the rear panel of the recorder. Having a USB mouse connected will allow you to use the mouse pointer to select and click menu items. In most scenarios the left mouse button will act Select and Control action, the right mouse button will act as an EXIT button, and the mouse scroll wheel can be used to adjust values. On-screen Hover Menu Bar The On-screen Hover Menu Bar will display buttons when you move the mouse to the top of the screen. Left-clicking the mouse will make drop down menus specific to each button appear. Display Export Playback Setup PTZ Exit Info Display - View display options for the Live view screen, initiate the Freeze and Sequence features. Playback - Search recorded video. Export - Export AVI or JPG files with a variety of export options or take a Snapshot of the current frame. PTZ - Setup and manage the PTZ controls for connected cameras. Setup - Configure settings for the recorder, network, cameras, and user accounts. Info - View system and camera information. Exit - Logout, switch user, restart, or shutdown the recorder. 20 Search Zoom Display Snapshot Export Display - Return to the live view display. Snapshot - Take a Snapshot of the current frame, saved as a JPG to the connected USB device. Zoom - Zoom into the frame. A designation square will appear in the lower right corner of the screen and can be moved to represent the zoomed in area of the frame. Export - Start and end an export that will save to the connected USB device. Search - Return to the search window to modify your search. 32896AC 21 Power Setup WARNING: To reduce the risk of electrical shock or damage to the equipment: Do not disable the power grounding plug. The grounding plug is an important safety feature. If the electrical plug you are using does not have a ground plug receptacle contact a licensed electrician to have it replaced with a grounded electrical outlet. Plug the power cord into a grounded (earthed) electrical outlet that is easily accessible at all times. Disconnect the power from the recorder by unplugging the power cord either from the electrical outlet or the recorder. Monitor Setup The recorder has the following connections available to attach a monitor. HD OUT Output To TV / Digital Display VGA Connect to an analog VGA Monitor Attach the monitor to the rear of the recorder using the cable supplied by the monitor manufacturer. Refer to the monitor manual for detailed information on how to setup and use it. Note 22 The monitor must be capable of having a minimum screen resolution of 1024 x 768 and display colors of at least 32 Bit. Connecting a Camera The EasyNVR is equipped with Plug N’ Play (PnP) ports that support Power over Ethernet (PoE) capabilities for IP cameras. PnP enabled cameras can be connected to the recorder and begin displaying video immediately with no manual configuration required. From the EasyNVR, you can configure the camera channel individually; see the Camera Setup section of this manual. To connect IP cameras without PnP enabled, see the Device Search section of this manual. Connecting to a Network Use the RJ45 jack on the rear of the recorder when connecting to a network. Connecting to a Sensor Input To make input connections on the Alarm Connector Strip: Plug the device I/O block into the Alarm Sensor Input on the recorder. Ensure the wire is screwed securely in the device I/O block. To disconnect the wire: Unplug the device I/O block from the recorder. Sensor In Use external devices to send a signal to the recorder when an event occurs. Mechanical or electrical switches can be wired to the Sensor In and Ground (G) connectors. All connectors marked G are common. Connect the ground side of the sensor input and/or alarm output to the G connector. Connecting to a Relay Output To make output connections on the Alarm Connector Strip: Plug the device I/O block into the Alarm Sensor Input on the recorder. Ensure the wire is screwed securely in the device I/O block. To disconnect the wire: Unplug the device I/O block from the recorder. Alarm Out The recorder can activate external devices such as buzzers or lights. Connect the external device to the Alarm Out and Ground (G) connectors. See Sensor Setup in the manual for more details. 32896AC 23 First Time Power On 1. Connect camera cables. 2. Connect monitor cable. 3. If remote access is necessary, connect network cable. 4. Connect alarm inputs or relay output wires (if needed). 5. Connect the power cable to the recorder and wait until the main screen is displayed on the connected monitor; this process will take approximately 90 seconds. Normal Power On 1. Press the power button on the front or back panel. The location of the power button depends on the model of your recorder. 24 1. On the Hover menu, click Exit, and then click Shutdown. 2. Confirm that you want to power off the recorder, and click OK. 3. After the screen turns blank, it is safe to unplug the power cable from the recorder. Channel Details CH1 Live Video Details Channel details will be displayed constantly in Live view. This group of icons includes the camera channel name, the connection status, and any notifications if applicable. Note Mouse over or double-click the Connection or Notification bar to get more detailed connection information. Connection Icons Connection Failed: The camera failed to connect and does not display live video. Connection Successful: The camera connected successfully and will display live video. Connecting: The camera is attempting to connect. 32896AC 25 Notification Icons Note When a notification is active, the icon will be red. Video Loss: The camera has been disconnected from the recorder or the video stream has been disrupted. Motion: The camera detects motion. Alarm In: The alarm in has been triggered. Video Oversize: The resolution set for the camera is over the recorders accepted range. Live Status User Level Date and Time Date and Time - The current date and time of recording video Live Status - This will display the current status of the Live Display. For example: Record, Event Record, Sequence, or Freeze. User Level - This will display the current user indicated by a user level. 26 Live Display is the default mode of the recorder. After startup the recorder will load to the Live Display. After being left idle on any menu, the recorder will return to the Live Display. Mode List The mode list allows you to set the screen division for the camera channel displays. Note Double-clicking the camera feed of a specific channel when in screen division will open the channel in full-screen. Double-clicking in full-screen will revert back to the previously selected screen division. Freeze The Freeze feature instantly pauses the current camera frame. This is used to temporarily maintain a frame of interest on the screen for review. To freeze the camera feed: 1. On the Hover menu, click Display. 2. Select Freeze. The camera feed image is now frozen. 3. To unfreeze, click Display on the hover menu, and then select Freeze again. The screen will refresh and return to Live view. Note While the Live view is frozen, the recorder is still recording video. Functions are locked while freeze is enabled. Sequence Once any display mode has been selected, click Sequence on the Display dropdown menu. The recorder will then begin sequencing through the camera cannels based upon the display mode at the time the sequence is started. Note 32896AC While the Live view is sequencing, the recorder is still recording video. Functions are locked while sequence is enabled. Single Channel – The recorder will sequence through each camera channel individually. This sequencing mode can be customized using Sequence Setup in the System Setup menu. 4 Channel (2x2) – The recorder will sequence through channels 1 ~ 4 in the first view, then channels 5 ~ 8, then 9 ~ 12, then 13 ~ 16. This sequence mode is only available on the 8 and 16 channels models; and the 8 channel will only sequence through channels 1 ~ 4 and 5 ~ 8. 9 Channel (3x3) – The recorder will sequence through channels 1 ~ 9 in the first view, then channels 8 ~ 16. This sequence mode is only available on 16 channel models. 27 Instant playback provides options for playback from 30 minutes, 1 hour, 3 hours, or 1 day ago. This will begin a playback immediately, starting at the selected interval and playing forward. To view an Instant Playback: 28 1. On the Hover menu, click Playback. 1. Select Instant PB. 2. Choose a time interval to begin playing recorded video. 3. Use the on-screen controls to manipulate the playback video. 4. Click the Live Display button to return to Live view. Calendar Search Calendar search allows you to search recorded video by day, and then designate the start time for playback by hour. Search Tabs Calendar Event Tabs Hour Camera Channels Play 1. On the Hover menu, click Playback and then select Search. 2. In the Search menu, click the Calendar Search tab. 3. Use the Calendar to select the appropriate date. Note 4. Close Dates with recorded video will be underlined. Dates that are not underlined (signifying that they have no recorded video) cannot be selected for a search. Use the Select field, or click on the time line to designate a video start time. Note 32896AC Instant Export When using a calendar search, you can search time lines for specific events during the selected date. These events, each with their own separate tab, include Overall, Motion, Alarm, and Vloss (video loss). 5. Click Play. 6. Use the playback controls to control the video while it is played back. 7. Click Search in the Search hover menu to return to the Search screen, or click Live to return to the Live screen. 29 Preview Search will show video from the selected time for all channels and skip forward or backwards at the selected interval. 1. Select a starting date and time. 2. Select the interval Preview Search will use to skip forward or backwards (10 minutes, 30 minutes, 1 hour, or 12 hours). 3. Click Start to begin playback. 4. Use the arrows on the Left or Right of the Preview Search screen to skip forward or backwards. Panorama Search will show still images from the selected channel at the selected interval. This allows you to skip forward or backward from the selected time. 1. Select a starting date and time. 2. Select the Channel to view. 3. Select the interval Panorama Search will use to display the still images (1 second, 10 seconds, 1 minute, 10 minutes, 30 minutes, or 1 hour). 4. Click Start to show the first set of images. 5. Click the arrows on the Left or Right of the Panorama Search screen to skip forward or backwards. Event Search 1. In the Search menu, click on an event from the Event List. 2. Click Start to preview the recorded video for the event. —OR— Click Play to view recorded video beginning at the event. 30 3. During the playback, use the search control bar to pause, rewind, or fast forward the recorded video. 4. Click Search in the hover menu to return to the Search screen, or click Live to return to the Live screen. 1. Select an event from the Event List. 2. Click Start to preview. 1. Select a Start and End time. 2. Select the event type. 3. Select the channel(s). 4. Click Apply to filter. Day Back – Move playback video backward 24 hours. Fast Rewind – Move backward by a specified interval. Pause/Play – Pause video playback / Play video playback. Fast Forward – Move forward by a specified interval. Day Forward – Move playback video forward 24 hours. Live – Return to the Live screen display. Time Line – Hour selection buttons to narrow the viewable recorded video from 24hrs to 1hr. The zoom feature allows you to zoom in on live or playback video. You can navigate the camera frame to focus on a specific area. To zoom in live or during playback: 32896AC 1. While viewing recorded video in a search or instant playback, click Zoom in the hover menu. 2. Move the focus square around the screen to isolate the zoomed area. 3. Use the scroll on the mouse to zoom in or out. 4. Click Zoom in the hover menu again to return to normal Search controls. 31 There are multiple ways to select and export video footage while searching. Backup a Selection of Video during Playback 1. Connect a USB thumb drive or external hard drive to the front or rear panel of the recorder. 2. Search your video using Calendar Search or Event Search. 3. During playback, at the point you want the backup segment to begin, click EXPORT on the hover menu and select Start. 4. As playback continues, at the point you want the backup segment to end, click EXPORT on the hover menu and select End. 5. The Quick Backup Confirmation screen will appear; this screen will display the required space to complete the backup as well as the date and time range of the backup. Click Yes. 6. When completion message appears, click Close and remove the USB drive. Backup Video from Event Search 1. Connect a USB thumb drive or external hard drive to the front or rear panel of the recorder. 2. Start an Event Search (reference the previous section Event Search). 3. Once you have selected an event, select Export. 4. The Video Export Confirmation screen will appear; this screen will display the required space to complete the backup as well as the date and time range of the backup. Click Yes. 5. When completion message appears, click Close and remove the USB drive. Backup Video from Calendar Search 32 1. Connect a USB thumb drive or external hard drive to the front or rear panel of the recorder. 2. Start a Calendar Search (reference the previous section Calendar Search). 3. Once you have selected a time and date, select Instant Export. This will automatically choose a backup time 1 minute from the selected time. 4. The Video Export Confirmation screen will appear; this screen will display the required space to complete the backup as well as the date and time range of the backup. Click Yes. 5. When completion message appears, click Close and remove the USB drive. Recorded Video Time Calendar Export start time Export end time USB target device Channel Data Type Export Format Begin Export Close Calendar: Calendar to select export date. Dates with recorded video will be underlined. Select Device: USB device plugged in to the recorder that will be the location of exported data. Select Channel: Which channels are displayed with recorded video. Data Type: Designates which type of recorded video is displayed, continuous recording, motion/event recording or both. Export Format: Designates the format of the exported video, Original or AVI. Export Start Time: Left-click to place the red line representing the beginning of the recorded video to be exported Export End Time: Right-click to place the blue line representing the end of the recorded video to be exported. Erase Device: Designate whether or not to erase the USB device before exporting data to it. Begin Export: Begin to export data to the selected USB device. 32896AC 33 Note Before performing an Instant Export, you MUST have an external USB device plugged into the front or rear panel of the recorder. 1. Connect a USB device to the front or rear panel of the recorder. 2. Select Instant Export, and then choose a time interval to begin exporting recorded video. Export displays the Video Export tab with detailed options for exporting video. This window displays the recorded video for all camera channels by date. 1. Connect a USB thumb drive or external hard drive to the front or rear panel of the recorder. 2. On the Hover menu, click Export. 3. In the Video Export tab, select a date from the calendar. Note Dates with recorded video will be underlined on the calendar. 4. Select a USB device from the drop-down menu. 5. Using the Time & Channel table, left-click to place the orange line indicating the start time for video export, and right-click to place the red line, indicating the end time for video export. 6. Click a Select Channel check box. 7. Click an Export Format check box. 8. AVI provides a compressed video file viewable in most media player applications. b. ORIGINAL provides a raw (uncompressed) video file viewable only with the included proprietary player software. Check the box to Erase Device to format the selected USB device before Export begins. Note 9. a. Checking the Yes box will erase the USB device before adding the exported file to the device. Click Begin Export. 10. When completion message appears, click Close. 34 Note A USB device must be plugged in to the recorder in order to use the Snapshot feature. Snapshot instantaneously saves the camera frame as a JPEG to the connected USB device. If displaying more than 1 channel in Live or a Search display, Snapshot will save a JPEG for each channel. 1. Connect the USB thumb drive or external hard drive containing backup video to your PC. 2. Browse to the USB drive and open the Player folder. 3. Double-click NVR_Player. 4. Click Search. a. 32896AC Available video backups located on the USB drive will be displayed. 5. Select the desired video timeframe and click Playback. 6. Select the camera channels you want to display in playback and click PLAY. 35 You can control PTZ cameras from the PTZ window. This window allows you to access features including zoom, focus, iris control, and the speed and direction of the PTZ controls. All camera channels are available in this window for fast and easy control. Zoom Controls Manual Focus Iris Controls PTZ Presets PTZ Directional Controls Auto-focus PTZ Speed Camera Channel To use the PTZ camera controls: 1. On the Hover menu, click PTZ. 2. Select a camera channel. 3. Use the Direction Keys to control the movement of the camera. 4. Zoom In or Zoom Out. a. 5. 36 Use the + or – magnifying glass buttons to increase or decrease the zoom. Focus the camera. Autofocus: The camera will determine the appropriate focus length. Manual Focus: Use the MF+ and MF- buttons to manually adjust the focus length. 6. Adjust the Iris Control. 7. Adjust the PTZ speed using the speed percentage bar. 8. When you are satisfied with the PTZ controls, click Exit to return to the Live view. Exit If your PTZ camera has already been designated preset positions, you can use the Preset button in the PTZ controls to manage those positions. Go to preset point Run a preset tour Set a preset point Set Preset Positions 1. On the Hover menu, click PTZ. 2. Use the PTZ Directional Controls to position the camera to the desired location. 3. Click the Preset button. 4. Use the Preset popup menu number pad to give the position a numerical ID, and then click Set. 5. Repeat steps as desired for additional camera positions. Go to a Preset Position 1. Click the Preset button. 2. Use the Preset popup menu number pad to select a preset position, and then click Go. Run a Preset Tour Note 32896AC To establish a tour, you must configure the tour using the IP camera configuration. Read your IP camera manual for instructions. Once you have setup a tour, you can then run the tour from the PTZ menu using the EasyNVR. 1. Click the Preset button. 2. Use the Preset popup menu number pad to select a tour ID, and then click Run. 37 Use the System Setup menu to configure the monitor and sequencing setup, set the date and time, setup the network, and view camera information. Access the System Setup menu in the SETUP menu. System Info System information shows the recorder model name, hardware, software version and network specifications. Display Setup Display Setup allows you to select a language and configure other monitor settings, including displaying the camera name, mouse sensitivity, and the monitor resolution. Monitor brightness, contrast, and chrominance can all be adjusted also. Sequence Setup Sequence setup allows you to modify the Sequence display feature. You can modify the sequence duration and the order. Date/Time To configure the Date and Time: 1. On the Hover menu, click Setup. 2. In the System Setup menu, click Date/Time. 3. Use the dropdown menu to choose a calendar date. 4. Change the time to ensure accuracy. Note 38 A Time Zone discrepancy can be designated using the Time Zone dropdown menu. 5. Select a Date Display Mode and Time Display Mode. 6. Select another tab or click Close. Network Setup Setup tabs DHCP on/off Static IP address configuration Web Port Network Restart Close To configure network settings: 32896AC 1. On the Hover menu, click Setup. 2. In the System Setup menu, click Network Setup. 3. Click Enable Network and select On. 4. To use Dynamic Host Configuration Protocol (DHCP), click DHCP and select On. If DHCP is set to Off, you must enter information into the following fields: IP – Specify the IP address of your recorder Netmask – Specify the subnet mask of your network Gateway – Specify the default gateway DNS – Specify the DNS of your network 5. Web Port allows you to specify the port used to connect to the recorder remotely. Click Web Port and enter your desired port number. The default port is 80. 6. Close LAN Setup. 39 DDNS Setup allows you to configure a static name to correspond to your dynamic public IP address using the Dynamic Domain Name System (DDNS). 1. On the Hover menu, click Setup. 2. In the Network Setup menu, click the DDNS Setup tab. 3. Set Enable DDNS to On. 4. Refer to the DNS Installation document that came with the recorder for the Host and Account information. Fill in the details for Host and Account into the required fields. 5. Click Submit/Update to send submit the account information. 6. Once the update is complete, the Host Name field will automatically complete the full host name. Note Port forwarding also needs to be configured on the router to allow remote access to the recorder from an offsite location. For further instruction on this process, visit http://openeye.net and search for “Port Forwarding.” ReportStar Setup allows you to configure the ReportStar settings for the recorder. Note 1. On the Hover menu, click Setup. 2. In the Network menu, click the ReportStar Setup tab. 3. Set Enable ReportStar to On. 4. Click Send Update to ReportStar. Note 5. If you receive an error message it is likely that the internet connection is not set up correctly. Double-check all equipment and settings related to the connection and send the update again. Write down the MAC ADDRESS. The MAC Address is required to add the device to ReportStar. Note The Serial Number and MAC Address of your recorder are required to add your device to ReportStar. The Serial Number and MAC Address are noted at the bottom of the ReportStar document that came with your recorder for later reference. 6. Click Set Daily Update and use the Up and Down arrows to set a time of day for the recorder to send information updates to ReportStar. 7. Set Day and Night Image Times to set the time when the recorder will collect the Day/Night images that are sent to ReportStar. 8. Set Send Alarm Events Instantly to On to enable the immediate transmission of alarm events to ReportStar. Note 40 A network connection with a connection to the internet is needed for ReportStar to function. A ReportStar account is required to view ReportStar information. Send to Custom URL and Custom URL are for troubleshooting purposes, and should only be modified when instructed by an OpenEye representative. OpenEye Web Connect eliminates port forwarding with no need to write, remember, or type IP addresses or other network information for remote connections. Simply navigate to ows.openeye.net on your computer or mobile device and create an account. Any users added to the account can access video from a remote workstation or mobile device with a username and password. To add your recorder to your OpenEye Web Services account, type the appropriate information on your recorder using these instructions. Add a Recorder to your OpenEye Web Services Account After you have created an OpenEye Web Services account, add your recorder to your account. 1. On the Hover menu, click Setup. 2. In the System Setup menu, click Network Setup, and then select the Web Connect Setup tab. 3. Type the System Name, Web Connect Email, and Web Connect Password. Note 4. Use your OpenEye Web Services credentials as the Web Connect Email and Password. Click Connect. Now that your recorder is connected you can access your recorder from a web browser or mobile app. 32896AC 41 Camera Info 1. On the Hover menu, click Setup. 2. In the System Setup menu, click Camera Info. Camera information displays the format, resolution, FPS, and bandwidth of each of your camera channels. PoE Status PoE status displays the link status, power consumption, and the MAC address of each PoE connection. The maximum wattage for each recorder model is spread between each PoE connection port. EasyNVR Model Maximum Wattage and Division 4CH Maximum 60W = 30W to PoE ports (30W per port max), 30W to recorder * If fully populated, 7.5W available per port 8CH Maximum 300W = 175W to PoE ports (30W per port max), 125W to recorder * If fully populated, 21.8W available per port 16CH Maximum 300W = 175W to PoE ports (30W per port max), 125W to recorder * If fully populated, 10.9W available per port 42 Use the Camera Setup menu to configure camera channel settings; including searching for devices, managing individual channels, and camera names. Access the Camera Setup menu in the SETUP menu. For each set of instructions in this section, you will need to have a specific camera channel selected. To select a channel, click CH01, CH02, etc. Device Search Device Search is used to locate IP cameras connected to your network not plugged directly into the recorder. You can connect these cameras and select a display channel from the Device Search also. 1. On the Hover menu, click Setup. 2. In the Camera Setup menu, click Device Search. 3. Use the Model Name drop-down menu to select the camera model category to search. 4. Click Search. 5. Select a camera model. When selected the model will be highlighted in the list. 6. Click the red PnP box next to the desired channel to turn off PnP, this will turn the PnP function off for that port. 7. Check the box next to the desired channel for the camera to display. Connection Camera Name allows you to create a custom name for each camera channel that will be displayed in live view. By default each camera channel is simply named with its channel number. OpenEye recommends assigning a name that is descriptive of the location of the camera, such as “Parking Lot,” or “Lobby.” 1. In the Camera Setup menu, select a camera channel. 2. Use the on-screen keyboard to enter your desired camera name (up to 11 characters). You can prevent selected camera channels from being viewed unless an authorized user is logged in using the Hidden function. To enable this function: 1. In the Camera Setup menu, select a camera channel. 2. Switch the IP Camera Hidden button in the Connections tab to ON. Use this option to turn ON or OFF the ability for the recorder to use PnP per channel. This option is used when manually connecting to a camera that is not plugged into the recorder. 32896AC 43 Select the network port for the camera. The default port for OpenEye cameras is 80. Enter the login information for the camera. The default login information for OpenEye cameras is: Account: admin, Password: 1234. Set Activated to ON after entering all the manual camera connection information to connect the camera. Use the Main and Dual stream options to configure the camera streams that the recorder should connect to and their connection method. Streaming This tab allows you to modify the camera video streaming options. 44 Video Resolution: Define the resolution per stream channel. Video Rotation: Rotate the video if the orientation is incorrect for optimal viewing. Bit Rate: Set the data transition speed for your camera. A lower bit rate will result in higher compression and lower image quality but a small file size and more bandwidth availability. A higher bit rate will also result in less available storage space. FPS: Adjust the frame rate for your camera. A higher frame rate results in more images per second recorded and less available storage space. Stream GOP Length: GOP Length will adjust how many pictures are grouped to create the GOP (Group of Pictures). GOP Length is for advanced users. Picture Adjustment You can adjust the brightness, contrast, saturation, and hue of each camera channel, along with more advanced camera settings that affect the picture quality of recorded video. 1. On the Hover menu, click Setup. 2. In the Camera Setup menu, click the Picture Adjustment tab. 3. Set the desired values in the Brightness, Sharpness, Contrast, Saturation, and Hue fields. 4. Select a new channel or click Close to apply changes. This tab also allows you to modify the camera Exposure Settings, White Balance, IR Function, WDR, and Noise Reduction. Exposure Settings controls how much light enters your camera. It is necessary to change the Exposure Settings if you are working in a low light area or a very bright area. By default, the Exposure Settings are set to Auto Shutter. Select the appropriate Mode for your camera (Auto Shutter or Fixed Shutter), and then set the appropriate Auto Shutter Speed or Fixed Shutter Speed. Different light sources produce different colors of light, which can affect your image and make it seem too orange, too green, or too blue. Use the White Balance Settings to adjust the color temperature of your camera. 1. Click White Balance and select Auto, Auto-Tracking White Balance (ATW), or Manual. 2. If you select Manual, adjust your Red (Rgain) and Blue (Bgain) levels. IR Function is enabled when using a camera equipped with IR Illuminators. IR Illuminators enable the camera to see in very low light situations, and are set to Smart by default. When a camera is aimed at a door, window, or shaded area where there is a lot of light in the background, details of the objects and people in the shade can be lost. Wide Dynamic Range (WDR) corrects for this and makes it possible to see all the detail in the shaded area while keeping the definition of the objects in the bright area. Set WDR to Low, Mid, or High depending on the amount of difference between the light and dark areas of the image. Different exposure settings and lighting conditions can result in digital interference in your image, referred to as Noise, which looks like static on old televisions. To reduce noise, select the appropriate Noise Reduction level. 32896AC 45 Copy Settings Copy Settings allows you to copy the current channel confirmation to other channels. 46 1. On the Hover menu, click Setup. 2. In the Camera Setup menu, click the Copy Settings. 3. Select the channels you want to copy the settings of the current camera channel to, or Select All. 4. Click Confirm to save the settings to your chosen camera channels. The Schedule Setup allows you to configure schedule settings and the recording schedule for all camera channels. You can also purge (remove) event data from the Schedule Setup. General Settings Continuous: Cameras will record continuously without requiring a manual trigger, such as motion or an event. Motion/Event: recording will only occur when motion or an event is triggered. Schedule: recording will only occur on a predetermined schedule. If the IP camera is enabled for audio, you can toggle this feature on and off. Circular recording will write over the oldest recorded data when the hard drive reaches capacity. Data lifetime allows you to set a specific number of days that recorded data is stored. Once the lifetime threshold is reached, the hard drive will begin to write over the old data with new data. Data Purge is used to manage stored data. Recorded data can be purged as ALL or ALL EVENT and a date can be designated as a restriction to the data purge to preserve desired recorded data. Purge ALL data: this will designate all recorded data as rewritable. Purge ALL EVENT data: this will designate all recorded event data as rewritable. To purge recorded data: 1. On the Hover menu, click Setup. 2. In the Schedule Setup menu, click General Settings. 3. Toggle the Purge All Data or Purge All Event Data button to the ON position, —OR— Designate a Purge Event Before date. 32896AC 4. Toggle the Start Purge button to the ON position. 5. After reading the warning that all data will be erased, click Yes and the data purge will begin. 47 Schedule The recording schedule allows you to configure specific days, times, and conditions for recording. Up to three separate Profiles can be configured for situational recording, and you can also designate the quality of recorded data. The Schedule Table shows the hours and days that can be scheduled. You see each day of the week, a special Holiday day, and 24 hours in 1 hour intervals. Schedule Table Profile tabs Holiday List Hour Interval Recording days Holiday Recording Recording Type Confirm There are three pre-configured profiles (Best, Standard, and Extended) with their own quality settings. Best – Highest quality, capable of recording the least number of days (4096 kbps bit rate) Standard – Standard quality, capable of recording an average number of days (2560 kbps bit rate) Extended – Lowest quality, capable of recording the longest amount of days (1024 kbps bit rate) There are three custom profiles available, each with the ability to configure the Normal FPS and Quality and the Event FPS and Quality for each channel. To configure a custom profile, use the drop-down menus to select the desired values per channel. 48 The holiday lists allows you to build a list of dates that will be categorized as Holidays, which can then be given a custom recording schedule. To add dates to the Holiday list, open the Holiday List tab and double-click the desired dates. Those dates will then appear in the Date column on the right side of the screen. Double-click a date on the Date list to remove it from the list. For ease of use, the recording types are color coordinated. 32896AC 1. On the Hover menu, click Setup. 2. In the Schedule Setup menu, click General Settings. 3. Click a Recording Type. 4. Click the boxes on the Schedule Table to set recording days and times for that Recording Type. 5. Once the desired days and times have been selected, signified by the boxes being the Recording Type color, click Confirm. 6. Repeat steps 1-3 as needed for different Recording Types. 49 Use the Event Setup menu to configure events per channel, alarm notifications, and manage e-mail notifications. Access the Event Setup menu in the SETUP menu. General Settings Internal Buzzer allows you to enable or disable the audible beep from the recorder when alarm events occur. Set to On to enable the beep; set to Off to disable the beep. This option will show an icon on the Live screen when an event is triggered (motion or sensor). This option will determine how long an event will be recorded after an event is triggered (motion or sensor). This option will cause the recorder to display the channel full screen when an event has been triggered (motion or event). Per Channel Configuration Per Channel Configuration allows you to configure alarm events for video loss, motion detection, and alarm inputs and outputs. For each item in this section, select a specific camera channel to configure. Set this option to On to trigger an alarm when the video feed from a camera is lost. This can occur if the camera loses power, breaks, or if it is vandalized or tampered with. Use this item to enable motion detection for the camera you have selected. When Motion Detection is enabled, the recorder will request motion detection information from the camera. All OpenEye cameras have motion detection enabled by default, and the motion detection function on the camera can be configured using your EasyNVR recorder. 50 Use the wired alarm input to enable your recorder to detect alarm inputs. Select Normally Closed (N/C) if the circuit should be completed in normal circumstances. The alarm will be trigger when the circuit is open in this situation. If the circuit should be open in normal situations, select Normally Open (N/O). Example: Using a Sensor to Trigger Video Recording These steps outline the process of installing a sensor for a door that should normally be closed. In this scenario, your recorder will log Sensor events. To enable your recorder to record when the door is opened, you must also configure the recording Schedule to Motion/Event. Refer to the Schedule section of this manual for more information. Note For more details about setting up your door contacts, please refer to documentation from your alarm manufacturer. Door sensor hardware can be purchased at many home improvement stores. 1. Follow the manufacturer instructions to attach your sensor hardware to the door. There should be two parts for each door sensor contact, one attached to the door itself, and the other attached to the door frame. 2. Connect the wire from one side of the door sensor contact to AI 1 on the Alarm I/O connection block on the rear of your recorder (see illustration).Connect the wire from the other side of the door sensor contact to GROUND on the Alarm I/O connection block on the rear of your recorder (see illustration). 3. Log in to your recorder as an administrator, go to Setup and navigate to the Alarms Setup menu, and then click Per Channel Configuration. 4. Set Alarm In to Normally Closed (N/C). 5. Close Setup, and then return to the Live screen. 6. Your recorder will log this Sensor event each time the door is opened. Use this to enable the alarm outputs on the recorder. Select the Alarm Out option that works best for the situation. Note 32896AC For more information about wiring an external alarm, please refer to the documentation for your alarm from your alarm manufacturer. 51 Motion Detection Configuration Detection configuration allows you to designate an area in the camera view that will trigger motion detection. 1. On the Hover menu, click Setup. 2. Click Schedule Setup, and then click General Settings. 3. Set Global Configuration to Motion / Event. 4. Click Alarms Setup, and then click Per Channel Config. 5. Ensure that Motion Detect is set to On. 1. On the Hover menu, click Setup. 2. Click Alarms Setup, and then click Motion Detection. 3. Click a Camera Channel. 4. Click and drag your mouse pointer to create a new detection square. Note 5. The size of the detection square can be modified by dragging the lower right corner of the square to the desired size. Modify the Detection Level as desired. Detection Level – controls the amount of motion required for an alarm to be triggered. The default setting is 10. This sets the detection level for each sampling pixel; the smaller the value, the more sensitive it is. a) 6. Modify the Sensitivity Level as desired. Sensitivity Level – defines how much of an area must change before a motion event is triggered. The default setting is 80. Setting the Sensitivity Level to a higher value will make it easier for motion detection to trigger a motion event. a) 7. 52 Use the slider bar to adjust the detection setting. Use the slider bar to adjust the sensitivity setting. Click Close. Copy Motion Recording Settings to other Camera Channels 1. On the Hover menu, click Setup. 2. In the Alarm Setup menu, click Per Channel Config. 3. To use these settings on other camera channels, click Copy Event Settings. 4. Select the camera channels to copy these settings to, and then click Confirm. 5. Close Per Channel Configuration. E-mail Management E-mail Management allows you to configure the recorder to send email messages. 1. On the Hover menu, click Setup. 2. In the Alarm Setup menu, click Email Management. 3. Start with E-mail Activate set to OFF. 4. Click E-mail Address and use the on-screen keyboard to type the e-mail address you want to receive alarm event information. 5. Set E-mail Video Attachment to ON to enable the notification email to include AVI video files of the event as email attachments. 6. Click SMTP Server Setup to configure SMTP Email server settings. 7. Set Email Via SMTP to ON to enable SMTP server settings. 8. Set the appropriate information for your SMTP server in the following fields: 9. 32896AC SMTP Server – Use either mail server name (maximum of 47 characters), or an IP address. SMTP Port – The default port is 25. SMTP Account – Type the account name used on the specified SMTP server. SMTP Password – Type the password for the specified SMTP account. Set Use SSL Connection to On to enable the Secure Sockets Layer (SSL). This setting should correspond with the server specified in the SMTP Server field. If you are unsure of this setting, contact your system administrator. 53 General Settings The General Settings section includes information about your hard drive, such as available space and available recording time. This option will designate if the recorder will attempt to repair data on the hard drive upon power loss. The repair process can take up to an hour depending on how much data is on the hard drive. Internal Disks Internal Disks allows you to examine the state and details of internal hard drives; as well as add new drives to data rotation, remove drives from data rotation, format drives, and repair data on drives. Check Drive Status and Details 1. On the Hover menu, click Setup. 2. In the Hard Drive Setup menu, click Internal Disks. 3. The Active status of the hard drives will be displayed under the Active column. a. 4. An Active option of Yes indicates the drive is currently included in data rotation. Yes indicates the drive is being used for recorded data. No indicates the drive is not being used for recorded data. To see Details, click Detail in the Device you want to view, and then click Yes. Internal Disk Action Options The Action column contains a number of options for configuring your hard drives. Add – Add a drive to data rotation. Remove – Remove a drive from data rotation. Format – Format/erase a drive for use with the EasyNVR. Repair – Repair a drive. This process can take up to an hour depending on how much data is on the drive. Data Protection This option allows you to lock the data of specified alarm events. Event video protected here will not be deleted or overwritten. 1. 2. 3. 54 Click Data Protection. Select your desired alarm events, listed by date and time, and click Lock, and then select Yes to lock the events. Close Data Protection. The Configuration menu allows you to export and import your recorder settings, and reset the recorder back to factory defaults. General Settings Load Factory Default allows you to reset all settings and configuration to the default state. Click Load Factory Default, and then click Yes. Click Yes again to continue. The recorder will immediately pause and begin loading defaults; there is no way to stop or undo this process. After approximately 60 seconds the recorder will restart. Note This does not affect the recorded data on the internal hard drive (which can be done via the Internal Disks menu). The operations log can be toggled ON or OFF to designate if the operations log is viewable in the Management tab. Export Configuration You can export the recorder settings to backup in case your settings need to be restored. 1. Connect a USB storage device to the recorder, and then click Export Configuration. 2. Click Destination. 3. Choose the USB drive you want to export your configuration to and select Yes. 4. Click File Name. 5. Use the on-screen keyboard to enter the desired file name (up to 15 characters). 6. Click OK. 7. Click Export, and then click Confirm. 8. Click Close or press any key to finish. Import Configuration You can import recorder settings from a backup of your configuration. 1. Connect a USB storage device to the recorder, and then click Import Configuration. 2. Click configuration file you want to import and then select Yes. 3. Click Yes again to Continue. 4. Click Close or press any key to confirm the configuration load and restart your recorder. Note 32896AC This load and restart may take up to 5 minutes and cannot be aborted or interrupted. 55 The Management menu allows you to manage usernames, passwords, and privileges. The EasyNVR provides eight built-in user accounts. Seven of these accounts can have the username, password, and privilege customized. The preconfigured admin account has a permanently set username and privilege, but you can customize the password. Access the Management menu in the SETUP menu. Account Setup Account Setup allows you to setup or modify user accounts, including customizing the username, password, and privilege level, or even disable an account. 1. On the Hover menu, click Setup. 2. In the Management menu, click Account Setup. 3. Click Account, and select the user account you want to configure (user ~ user 7). 4. To change the name of the User account, click Edit and use the on-screen keyboard to type a new user name. Note The username is case sensitive. 5. Click the OK key. 6. Click in the Password field and use the on-screen keyboard to type a new password 7. Click in the Confirm Password field and re-type the password. Note Passwords require a minimum of four characters; maximum of eight characters. 8. Click the OK key. 9. Click the Privilege field and select the privilege level for this user (Level 1 ~ Level 8). Level 1 has the lowest authority, Level 8 has full administrative authority. 10. Click Confirm. 11. Repeat as necessary, selecting user2 through user7. 56 Permissions Setup Permissions Setup allows you to modify the privilege level required to access menu options and features of the recorder. To enable privilege requirements for any option, set it to a selected level: 1 through 8. Users will be able to access functions that are equal to or less than (numerically) their set privilege level. No username will be required to access any function set to Disable. These functions can be configured for privilege requirements: Playback/Search Hidden Camera PTZ Control Live Operation Export Data Menu Access System Setup Camera Setup Schedule Setup Alarms Setup Management Note The Menu Access option cannot be set to Disable. Firmware Upgrade Note OpenEye recommends that you properly restart the recorder before performing a software upgrade. This will ensure that the recorder will complete all necessary processes to prevent data loss or recorded video loss. CAUTION: DO NOT remove the USB while the recorder is upgrading. To perform a software upgrade: 1. On a computer, open your browser and go to http://openeye.net and browse to the EasyNVR product page. In the Software section there will be a download link for the latest available version of Firmware. Download the update zip file to your computer. 2. Locate and open the update zip file on your computer. It will contain three folders: upd_900s, upd_900g2s and upd_tseries. 3. Connect a USB drive to your computer, copy all the firmware folders to your USB drive, and then remove the drive from your computer. 4. Plug in the USB with the firmware upgrade file to the recorder. 5. On the Hover menu, click Setup. 6. In the Management menu, click the Firmware Upgrade. 7. A popup window will advise you to properly shut down, unplug, and restart the recorder before performing the software upgrade. If you have not already, do so. 8. Return to the Firmware Upgrade screen and click Upgrade. Once the upgrade is complete, the recorder will restart automatically. 32896AC 57 Note OpenEye recommends that you properly restart the recorder before performing a software upgrade. This will ensure that the recorder will complete all necessary processes to prevent data loss or recorded video loss. CAUTION: DO NOT close the browser window on your PC while the recorder is upgrading. To perform a software upgrade: 1. On a computer, open your browser and go to http://openeye.net and browse to the EasyNVR product page. In the Software section there will be a download link for the latest available version of Firmware. Download the update zip file to your computer. 2. Locate and open the update zip file on your computer. It will contain three folders: upd_900s, upd_900g2s and upd_tseries. 3. Copy all the firmware folders to you a folder on your computer. 4. Open Internet Explorer and browse to the IP Address or DDNS Address of the recorder in the address bar to open the remote viewer. 5. Click Settings. 6. Click Management. 7. Click Firmware Update Via Internet. 8. Click Execute and locate the firmware update files folder. 9. Select the firmware file and click Open to start the upgrade process. 10. The recorder will restart itself during the upgrade process. Once it is restarted, the firmware update is complete. Note 58 The firmware files contain firmware for all the EasyNVR recorder models. You must select the appropriate version to install based on the model of your recorder. The model number of your recorder is indicated in Settings > System Setup > System Info. Firmware Version Recorder Model upd_tseries OE-EASYNVR4 upd_900s OE-EASYNVR8 upd_900g2s OE-EASYNVR16 System Log System Log allows you to review and export the system log. To export the system log, connect a USB device and then click System Log. Click Export to complete this action. Note The system log will automatically be exported to the connect USB device as a text file. Note The system log text file will be located in subfolders designating the time and date of the export. In the root of the USB device will be a folder labeled in the format YYYMMDD; within this folder will be a subfolder labeled in the format HHMMSS; and with this will be the log file export in the format LOG_HHMMSS.TXT. Maintenance Password Protection allows you to require username and password authentication to access menu functions. The option is set to On by default, meaning username and password are required to access any menu functions or to shutdown the recorder. Change this setting to Off to allow uninhibited access to the recorder. Auto Logout will log off a user after the selected amount of time. To set an auto logout time, click Auto Logout and select the number of seconds of inactivity to elapse before the recorder logs out the user. You may also Disable this function. Account/Permission Reset allows you to reset all Account Setup and Permissions Setup menu settings back to factory defaults. 1. On the Hover menu, click Setup. 2. In the Management menu, click Maintenance. 3. Toggle the Account/Permission Reset button to ON. 4. A popup will appear notifying you of the loaded factory default. To continue, press any key. Note ALL customized usernames and configurations will be lost, and cannot be recovered unless you have a saved configuration with those settings. Note This reset only affects options customized within the Account Setup and Permissions Setup menus. CAUTION: 32896AC There is no confirmation message; selecting Yes will instantly reset Account Setup and Permissions Setup menu settings. 59 This option allows you to limit the amount of power sent to your camera over the Ethernet connection. The default setting is 30W. CAUTION: 60 Do not change this setting unless instructed to do so by OpenEye technical support. 1. On the Hover menu, click Setup. 2. In the Management menu, click Maintenance. 3. Slide the red indicator across the PoE Power Limitation bar or click the keyboard icon to open the on-screen keyboard and enter a value. The black value in the middle of the bar indicates the current limitation. 4. Click Close to continue. Use the Info menu to view system information such as hardware and software version, and network address information. Model Name – Displays the model identifier of the recorder. MAC Address – Displays the Media Access Control (MAC) of the recorder. IP Address – Displays the IP Address of the recorder. This can be customized via the Network Setup menu. Firmware Version – Displays the software version of the recorder. This can be upgraded via the Software Upgrade menu. Note The items displayed in this menu cannot be changed on this screen (Firmware Version can change via upgrade on the Firmware Upgrade menu, and IP Address can be customized via the Network Setup menu). Use the info menu to view information such as camera model, resolution, and IP address. 32896AC Camera Title – Displays the camera name. Model – Displays the model to identify the camera. Streaming Support – Displays whether or not Main or Dual streams are used. Streaming Index – Displays the stream titles for each stream used. Format – Displays the codec of each stream. FPS – Displays the frames per second on each stream. Loss Rate – Displays the level of packet loss for each stream. Camera Firmware – Displays the current camera firmware. Hidden Camera – Displays whether or not the camera is hidden from users, excluding admin. RTSP Port – Displays the RTSP port. Streaming Recording – Displays if the camera streams are recording. Protocol – Displays the connection protocol for each stream. Resolution – Displays the resolution for both the recording and the live stream. Bandwidth – Displays the bandwidth size used for each stream. IP Address – Displays the IP address for the camera. 61 Logout will logout the current user. New user credentials will be required to access any functions designated as higher than Level 0 by the Administrator. Switch User will logout of the current user and allow the selection of a new user. Restart will restart the recorder. Shutdown will power off the recorder. 62 The recorder has built-in web-based remote software that can be accessed if the recorder has a network connection. This web-based remote software requires Microsoft® Internet Explorer®. The EasyNVR also has mobile applications for iPhone, iPad, Android, and Android Tablet under the name EasyMobile. Note Mozilla ® Firefox ®, Google™ Chrome™, or Apple® Safari® cannot be used to connect to the recorder. These browsers do not use ActiveX. Configure the Recorder for Remote Access Configure the recorder for DHCP or static IP address. 32896AC 1. Connect a RJ45 Ethernet cable with an active network connection to the recorder. 2. Access the Setup menu and click System Setup then click Network Setup. 3. Click General Settings. 4. By default the DHCP function on your recorder is set to On, and the IP address will be displayed. Make a note of this IP address. 5. Select a Web Port. By default this is port 80. 6. Close Setup. 1. Connect a RJ45 Ethernet cable with an active network connection to the recorder. 2. Access the Setup menu and click System Setup then click Network Setup. 3. Click General Settings. 4. Set DHCP to Off. 5. Type the IP address, Netmask, Gateway, and DNS for the network you will connect to into the appropriate fields. 6. Select a Web Port. By default this is port 80. 7. Close Setup. 63 Configure Port Forwarding To connect to the recorder with the remote software from an offsite location, the router or firewall device will need to be configured for port forwarding to the recorder. 1. Access the Setup menu and click System Setup then click Network Setup. 2. Click General Settings. 3. Make a note of the Web Port; or you can customize the Web Port. a. Note 4. To customize the Web Port, use the slider or click Keyboard icon and use the on-screen keyboard to type your desired port number. By default the port is set to 80. Although ports 1 through 65535 are valid, to avoid possible conflicts we recommend using port 80, or ports 1025 through 65535. Reference the manufacturer’s website or manual for your router or firewall to complete the port forwarding configuration. Or reference a site like portforward.com that contains instructions for most router models. a. Configure the router to forward the Web Port to the IP address of the recorder. Establishing a Connection on the Remote Workstation 1. Launch Internet Explorer. 2. In the address bar type in the IP address of the recorder and press ENTER. 3. When prompted to allow/run/install the ActiveX component, choose the affirming option. 4. When prompted to login, provide an authorized username and password, and click OK. 1. Launch Internet Explorer. 2. In the address bar type in the public IP address location of the recorder and press ENTER. a. 64 To find the public IP address, visit a website like ipchicken.com or whatsmyip.org from a computer on the same local area network as the recorder. 3. When prompted to allow/run/install the ActiveX component, choose the affirming option. 4. When prompted to login, provide an authorized username and password, and click OK. Access the recorder from the remote interface using Microsoft® Internet Explorer®. The remote interface allows up to 3 users to log in and view live video, search recorded video and export video clips. To log into the recorder from the remote interface, a user account must be made for the user. This ensures that only authorized users are allowed to log in. In addition, each user can be assigned different privileges that allow or deny access to different functions. Camera Channels Display Mode PTZ Controls Zoom Viewing Options Backup Viewer Log Out Remote Playback 1. Click the desired date on the Calendar. Note 32896AC Calendar dates with recorded video will be green. 2. Use the dropdown menu to select the types of event shown in the timeline view. 3. Click on the timeline to designate a start time. 4. Select Playback. 5. Click Play. 1. Select Save (AVI) or Save (DRV). 2. In the Save As window, select a location to save the file. 3. Click OK. 65 Event List The Events List displays the Date and Time of an event, the type of event, and the camera channel where the event took place. To view an event on the Event List: 1. Click the Event icon. 2. Scroll through the list of events to find the desired event. —AND / OR— Click the Search by Date/Time checkbox and then designate a Start Time and End Time to search events. —AND / OR— Click the Search by Channel checkbox and then use the dropdown menu to select a channel to search the event list specific to that channel. —AND / OR— Check the Search by Type checkbox and then use the dropdown menu to select an event type to search the event list specific to that event type. Note 66 The Search by Type dropdown includes the following event types: A=Alarm, M=Motion Detection, L=Video Loss, S=Over Speed. 3. Click Search. 4. Double-click the desired event to begin playback. 5. Click the Event icon to return to the Event List. www.openeye.net 509-232-5261 © 2015 OpenEye All rights reserved. No part of this publication may be reproduced by any means without written permission from OpenEye. The information in this publication is believed to be accurate in all respects. However, OpenEye cannot assume responsibility for any consequences resulting from the use thereof. The information contained herein is subject to change without notice. Revisions or new editions to this publication may be issued to incorporate such changes. 32896AC 67


