1
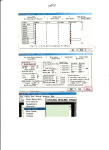
Rollover Calendar Items
The calendar rollover feature allows you to reuse your existing calendar items with any
materials that was associated with the event. This can be especially useful if you teach
the same class the following semester or year or need to change/adjust the calendar.
! Details
o~
Neme
CategoryiFolder
SQ_l.Isp£Iills#1
.':'.ssignm~nts
H'/'i - Define uap Terrrunotcg,
o~
09"2ff09Fri
UnC3tegori!~d
~
E.':~nts
Giorgi; wasmnton s ucunt Vernon Home
Manage
I
I
Selected
Ccpy Tc
,
'2' J.QJ1
Items
1M",. Tc.
,
I Approve' I Rejec'
,
I Oele.e'
Change Visibility
Recategorize
Selected
Items
Change Categoryirolderto. GS~_.c_t> __
__ ...;IiW'i-------....wa-.
~
o
Racateccrtae
Rollal€f
dccumerns
cccnneote
in amccaucns
in autccancns
Recategcrize Now
ilie-*~ca::t.~gc'rynameIn the
Contents Sox..
1he, are displaied
they are diSplayed
Done
From the List View from your selected calendar, you can select which calendar items
you wish to rollover. Once you have selected them, you can rollover those entries any
number of days, weeks, months, or years. To complete the process, click Rollover
Now.
Recategorizing Items
All documents in Edline can now appear in the calendar by simply adding a date to
them. Based on where this document is created, it can be added to the calendar with an
associated category.
If you wish to change a document's category, simply select it from the calendar's List
View, select the desired category, and click Recategorize Now.
39
10/30/2009
Edline LLC, © 2009, Chicago, IL, All Rights Reserved. [S-09]
10/30/2009
Edline LLC, © 2009, Chicago, IL, All Rights Reserved. [S-09]
40
Using News
The News is the place to put important announcements and other information you
want students and parents to see when they visit a class horne page. Entries in the
News box are listed by the date they were added or modified, with the most recent
items at the top.
Adding a News Item
1. Select a class from My Classes.
2. Click the Edit icon at the top of the News section.
LL~N~e~v,~JS~
~:=~E5d_~~V~iew~co~n~~~n~~_~in.li~st~V:~~~
3. With News showing in the pull down menu, click Add.
Show Standard Vie'H
News
r.ianage News..
Done
1
f-. 0 items found
Done
4. Enter a Title and Summary Information for the News item. The summary will
appear under the title in News. You can also enter a date for the item, and it will
display automatically on the Calendar page.
41
10/30/2009
Edline LLC, © 2009, Chicago, IL, All Rights Reserved. [S-09]
create
Save & Return
bocument
J I
Save & Add Another
Summary Infonnation
This document is in Jews
last
Modified:
02f19l09
Document Title
;County
Document Summary:
ICongratulaticns.
V~!ide GeograJ:::hy Bee VYtnnsr
Emmy larl€ng~
-----;
(This is oispl3:ied in the News 80x on tile home page.;
I ~I
Calendar Date:
'------'
Event Recurrence.
Enter date if iOU wamtc also displa;'
thiS on the calendar
_
Add Content
Click one of the options below to add content:
• Enter el<i B' Hanrl (with cpnonal unk and image;
• Im·o
existin file (e.Q. I.IS ';\I"ro. PDF. Excel;
• Ucload a v."eb document (a .zip file containing ...
·veb pages;
Multiple Posting
Select one or more groups and use the Add" and " ernove buttons.
Available Groups:
Additional
Posted Groups:
I
I
5. Enter or upload the main text of the document by clicking the appropriate link in
the Add Content section.
6. Click Save & Add Another if you have additional News items or Save & Return
if you have added all your News items. Remember to consider posting your
News items to other classes.
Removing a News Item
1. Click the Edit icon at the top of the News section.
2. Select each item you want to delete by clicking the checkbox next to it. If you
want to delete everything on this page, click Select All.
3. Click Delete.
I
I
News
(1-1 of 1 items)
ShOllY
Standard
Manage News ..
\.-'iev-!
I
I
INews
Selec! the type to add.
S~lect ~ll I Unseled All
~-~
ccunt, \'~"'ideGe'JQraph.,;8ee lP/inner
Today
conorannancns - EOlOl; Zarlenga
iCetails
Manage Selected Items
I
50
Modified"
I
3
Done
~il.~·I[Shc;·;
Name
Select "JI I Unselec! All
LCopyTo
I
vJ!~
I
[
~.iove To ...
Change Visibility ..
I
vl~5Ovj
~IQg
I I As:prave
~
Delete documents in 31110C3tiOns
.••••••••••
I~
[
.-.-/
Done
I
10/30/2009
42
Edline LLC, © 2009, Chicago, IL, All Rights Reserved. [S-09]
Note: If there are copies of this document in other classes/groups, Edline defaults to
automatically deleting all copies of the document in all locations. If you do not wish to
delete all copies, uncheck the box at the bottom of the page that reads Delete
documents in all locations.
Modifying a News Item
1. Click the Edit icon at the top of the News section.
2. Click Edit next to the item you want to modify.
3. Make changes and be sure to click Save & Return.
Note: If there are copies of this document in other classes/groups, Edline defaults to
automatically applying changes to all copies of the document. If you do not wish to
apply the changes to all copies, uncheck the box at the bottom/top of the page Apply
changes (update or delete) in all locations.
Modify
Document
This document is in ews
t.ast Modfied: 02119109
_ ocument Title:
COL~ntyVVide Gecgra~h)f Bee VVinn~r
_
43
10/30/2009
Edline LLC, © 2009, Chicago, IL, All Rights Reserved. [5-09]
10/30/2009
44
Edline LLC, © 2009, Chicago, IL, All Rights Reserved. [S-09]
Using Links
The Links section is the place to put links to websites outside Edline that would be
helpful to the students and parents in your class. Entries for Links are always listed in
alphabetical order.
Adding a Link.
1. Choose a class from My Classes.
2. Click the Edit icon at top of the Links section.
Links
Edit/view contents in list view
3. Select Link from the pull down menu. Click Add.
Show Standard View
links
Hanage Links. ~~
·Joitems found
Done
4. Enter a descriptive name for the link (Document Title) and Document Summary
(optional).
10/30/2009
45
Edline LLC, © 2009, Chicago, IL, All Rights Reserved. [S-09]
Create
Document
Save & Return
I I
Save & Add .A.nother
I I Cancel I
Summary Information
This document is in Links
last
lV1odified- 02i19i09
Document
Title:
@lIick George Washington Facts
ocurnent Summary
;Lsam more about our country's first F_rs_si_ds_nt
__
-,
{This is displ3/ed whsn the mouse is ptacec overthe it€I11.:
Calendar
. ~J
!
ate:
------',
-
E~€r Gate if vou want to also display
thIS on the .:algodsl'
Event Recurrencs __
link to the following
IJR
(enter full tcrmat Iif:e http:!t,;w;v,edline,netoruse
the Link to...
button to select a resource on Edlille;
lfu!pJl'h'i-fW
~
~residents-{jayigeorge-washingtonifacts
html
I
VI6,,: Link In A Ne",' WiM.:!w When Clicked
5. Enter the web address of the website you want to link. Or click Link to.". to link
to an existing resource on Edline. Note: Leave the check-mark for the View in a New
Window so that a new web browser opens so that users won't have to log back into Edline.
6. Select additional classes to post this Link.
7. Click Save & Return.
Removing an Item from Links
1. Click the Edit icon at the top of the Links section.
2. Select each Link you want to delete by clicking the checkbox next to it. If you
want to delete everything on this page, click the Select All link.
3. Click Delete at the bottom of the page.
Note: If there are copies of this link in other groups, Edline defaults to automatically
deleting all copies of the Link. If you do not wish to delete all copies, uncheck the box at
the bottom/top of the page that reads Delete documents in all locations.
Modifying an Item from Links
1. Click the Edit icon at the top of the Links section.
2. Click Edit next to the link you want to modify.
3. Click Save & Return at the bottom of the page to save your changes.
Note: If there are copies of this link in other groups, Edline defaults to automatically
applying changes to all copies of the event. If you do not wish to apply the changes or
delete all copies, uncheck the box at the bottom/top of the page that reads Apply
changes (update or delete) in all locations.
46
10/30/2009
Edline LLC, © 2009, Chicago, IL, All Rights Reserved. [S-09]
[
links
I
(1-3 of 3 items)
She N Standard
r',lanage Links.
SelselF.1I I Unselect All
o
\;16\"1
I
I
Select the type to add.
-Ill [ Add I
[link
; Details
Name"
,vJII Show
Done]
50
L'1
Modified
Quick GeoJrge Washinqt'Jn
Edil
[
Facts
Yesterday
Learn more about our countrv s first president.
0 ~
0 Edit I
sccai
snnnes tor Kids
Today
Siate Facts
T·)day
Clicl( hers for lntorrnattcn
on states
Select.i>J/ I unseisct "J/
i
Details
I
all
Manage Selected Items
I
I
Copy To ..
I
[
Change Visihility
rvlove To ..
.
JI
Show 50 t...••
~IQQ
I
-
[ Acprove
I I Rejectl"'"
I
!
Done
-
I Delete I o De/ete
documents
in all/ocati~
I
47
10/30/2009
Edline LLC, © 2009, Chicago, IL, All Rights Reserved. [S-09]
10/30/2009
48
Edline LLC, © 2009, Chicago, IL, All Rights Reserved. [8-09J
Sending Email to Your Class
You can send an email message to all of your students and/or their parents or selected
students and/or their parents from your class home page.
To Send Email
1. Choose a class from My Classes.
2. Click Send Email from the Command Center.
V.S. HISTORY (681_1 SiJ
Herne
I:li Classes & shcrtcuts
[:ly Content
Account
Command
Center
Gradebook
Manage Class
~
Manaqs Design
~
-
-
-
Send Emall
3. Be sure to View All to include all students. Click the checkbox next to each
student you want to send email to or to email everyone in the clasa click Select
All at the top or bottom of the list.
~
~
~
~
~
0
Y6S
Adler. Erica
Yes
Yes
..t..tN·)tJd. Tracey'
Y6S
Yes
Baier. Annie
Yes
Yes
Bertrand. Benjamin
Yes
Yes
Boy·laml. PatricK
Yes
.~NDRE'NS. r,lR.
Yes
~
~ Ves
~ Yes
~ Yes
~ Yes
~ Y6S
~ 'Yes
~ Yes
~ Yes
Yes
Yes cnnton,
Brittne'i
Ves
Crepeau.
Ves
Davis, Amanda
Lauren
Yes
Fontneau. Justin
Yes
Frig')n. 'IVallace
Yes
Gaumond.
Yes
GDldberg. Lauren
Yes
Ha,j,jigan.
Yes
Harding.
Jarred
Laura
Charles
0
Yes
Yes
Haughton.
~
Yes
Yes
Henriques.
0
Yes
Yes
tmpey. Joshua
,- _ .....
I
[.litchell
Eric
•• _' ••
49
10/30/2009
Edline
LLC,
© 2009,
Chicago,
IL, All Rights
Reserved.
[S-09]
4. Click Compose Message.
n=====~~==================~==~==~
o
o
Yes
Yes
Sarazin, Carissa
Yes
Yes
St.Pierre, Nicl1Dlas
JUMP TO: 6
Sele,:t ,All
Send:
I
90776
a .Q
.Q E E ~ !:::!! J K 1. M t!
Unselect.AJI
I Email viii
I '" Prev
First
I
Compo"se Ivlessage
--::-c---:=---=------,~
Change Permissions
I
t
Ne 1>
Remove Selected
Done
Search Within Existing Members
5. Choose whether to send the message to just the selected students, to their
parents, or to both. Click Continue.
Who should
be sent this message?
o Parents
and students
only
o Parents
only
o Students
I
Continue ~
I
Cancel
I
6. Enter a subject and type your message.
7. Click Send the Message to Recipent(s) when you are ready to send the message.
EmaiJ Delivery Options
o Allow email replies to be sent to me at: ;tandrews@>hn1s,ccm
o Send me a copy of the email at the email address shown above
Compose Email
To
From.
Subject-
[iTsiiiSTciRY
'Ivl
I
=:1
AHDR~WS
,Field Trip Reminder
I
13-~"e" :.;:.~~ lea,e
(L
",,-e 3cloo::.
.,a:::k:'1:<;::'0" at. 5:~J
a.n:. Do:;'"
,,'= ~a""'!1
Send the l\ilessage to Reci~ient(s}
50
10/30/2009
Edline LLC,
© 2009, Chicago, IL, All Rights Reserved.
[8-09]
Posting Grade Reports and Other Class Reports
Many gradebook packages allow you to create student grade reports and to display
these reports in Edline. Most of them allow you to post reports for one class at a time or
for several classes at once. Please refer to your gradebook software user's manual for
details.
Where Do the Reports Go?
When you post reports from your gradebook, Edline creates a folder on the class home
page to hold the reports.
You choose the name of this folder (Report Description) each time you post reports.
The name you choose determines whether you will keep the previously posted reports
or replace them with the new reports .
• To keep only the new reports, use the same folder name every time you upload
these reports .
• To keep the old reports, use a different folder name each time you upload these
reports.
Contents
"Gradsb'Joks
Assicnntents
~
Current proarss~
Rep'Jrt
>-J
Lasson
\¢
Local Historic Places
U
Special Project about
'i{asllingtol1. D.C.
U
Plan
-l
Tests
~
V',iashington. DC Field Trip
B
V'ielcome to 1:1:,Glass
-Rscycle
Bin
51
10/30/2009
Edline LLC, © 2009, Chicago. IL. All Rights Reserved. [S-09]
What Will a Teacher See?
When you click the report folder name, you will see a list of all the reports you just
posted. There will be one report for each student in your gradebook. Click any student
to view their report.
Current Progress Term 1 Report
Home
Adler. Erica
r..li
Atwood. Casey
Classes & Shortcuts
My' Content
At>uood. Trace\'
Account
Command Center
Baver. Annie
Beals. Terrv
Bernier. Stepl1en
Bertrand. Benjamin
- - Bovland. Patrick
Briggs. Aaron
Clinton. Brittney
I
52
10/30/2009
Edline LLC, © 2009, Chicago, IL, All Rights ReselVed. [S-09]
What Do Students and Parents See?
When students or parents view the class home page, they will see the report folder
under Contents. When a student clicks this folder, his or her report is displayed. When
a parent clicks this folder, his or her child's report is displayed. Students and parents
do not see other student's grade reports.
Hc.3::'':''':.!;':.O~
~·!..:.:::id.':':~ 3c~cc:
Ad:~=! ~=~ca
J. 3. :::3=O~Y
F""':": i::.3s.:...g!:!r.'=r;c;s a=,= ~C'3t:~d. o=.:. =::d.::.:::.~.
:f yO''':'
:.:.fo~r:c'C:"'J::' c:. !:.a~<e.-·;.t:'
Hc=k.
~=C~==3S
~e;o~~ fo=
J!.!iD::.3:W5
r
!£..
F....:.33
'::"a33~
;;c''':' rr:..:.,Sc ':;::-.eck !:i:".:.r.-::
3cc::e :~fo~t.:...or.
CaceqC::r
5cc::e Hax ~
::::a~:
Pa~e=
:::: ':'-5
~9 Q'.:.:.z
93/J2/"J9 ;{-=I:c::-:
':J9/,:""'7/:,9Q-.:..:.z
Pap'.::::-
J9/3:1/J9
C::: 6-9
::1/01/J9 =e.st
:""'9
0=/25,/
:i·:
2']
:))
95
tsx:
G-:::::d
;CCtr_ct~
A
...,...F
93 :'0J 95 ~
:'J:O
:{"'=pc::c
9.5 :.~')
7::.6
J..J~
,....., f
95
A
::
C
y
I)
Don"
I ~
53
10/30/2009
Edline LLC, © 2009, Chicago, IL, All Rights Reserved. [5-09]
Private Reports Link
A report posted from a gradebook is private. Only the student and his or her parents
can see it (in addition to the teacher who posted it).
Students and parents go to the class home page to see their class reports; however,
Edline also gives them a shortcut for viewing these reports by using the Private Reports
link under My Contents.
Forms
School Supply List
I School
Info
IS
Washington Middle Sc
8e sure your child is
prepared 10;3 learn ';vitll all
the necessary toots.
Home
Erica s Classes
& ShoJliclits
r~tContent
Account
Command
Center
When you post a report for a student, it is stored on the class home page. Edline also
puts a link to this report in the student's Private Reports list. This list is just a shortcut.
You cannot add items directly to it. Links to reports are added when you post new
reports to your class and are removed when you delete old reports.
10/30/2009
54
Edline LLC, © 2009, Chicago, IL, All Rights Reserved. [S-09]
Re-using Old Class Materials
At the start of a new term, your school may delete last term's classes and create new
classes for the current term. When your old classes are deleted, Edline automatically
saves the materials from those classes into your Old Class Materials folder so you can
easily reuse those materials in your new classes.
Home
Mr Classes & Shortcuts
r,•l. Content
..Account
Command Center
Private Reports
School Construction
Update
Combined Calendar
h;ly Submitted Forms
Copying Materials from Old Class Material
Tip: You won't see this link until one of your classes has been deleted.
1. Click Old Class Materials under My Contents.
2. Select a class.
Old Class Materials
(1-7 of 7 items)
Done
[Details
Name"
Modified
SOCI"L STUDIES 1667 ~ YR:
Jul1. 08
SOCI".L STUDIES 1667 3 YR'
Apr 27.08
St)d:31Studies· 3rd Peri'Jd 1'667 3 S2~
Ju12.08
stud~'Hall Period3 667 "VR)
Hday
U.S. HISTORY {!381 1 YR'
U.S. History
Today
U.S. HISTORY 1681 2 YR:
U.S. Hlstorv is all about learning aoout the past
Ju11.08
U.S. HISTORY HONOR 1681 7 YRl
U.S. History is au about learning about the past.
Ju11.08
Done
55
10(30(2009
Edline LLC, © 2009, Chicago, IL, All Rights Reserved. [S-09]
3. Select items you want to copy by clicking the checkbox next to each item.
Note: If you select a folder, the folder and the contents will be copied. If you want to copy an
item that is inside a folder, first click the folder name to open it, and then select the item to be
copied.
SOCIAL STUDIES
I
(1-20 of 2Q items)
Select ~.I1
I
~.
Un select ,"JI
ICstails
v II
Done
I
50
vi
Show
Modified
~
?nswsr Ke·:s for Parents
~
A.ssianments
~.pr3D
~
Calendar
"pr 17
Feo 20
o
Class Information
"pr 17
~
Class Objecti':es
Feb 20
~
Essay i':lsas
Feb20
o
Flag Protocol
Feb20
Feb20
Gmup Inf':I: social studies.
Imoartanc€
iRe & group desaiptiDn
of 1.13pS
Jun
4
Fsb20
are maps irnportantto ~OU?
~Itlf
0~
J.::::umal \i'>/ritina
Fe020
o
Links
FeD 20
~
f.l3Q S~iII Pract1':e Shssts
o
o
o
o
~,'apSkills
i=~b20
Feb 20
to Song
~
Feb27
State Facts
FeD 20
stud .•.Groups
Feb 20
Supplies Nsede.j
Feb 20
o
lli.§.
A.pr15
o
-R~'-yde Bin
Jun 11
~
Manage Selected Items
I
Change Visibility
McvsTc. __
.. _
Dcne
4. Click Copy To ... at the bottom of the page to go to the Copy Page.
56
10/30/2009
Edline LLC, © 2009, Chicago, IL, All Rights Reserved. [S-09)
5. Use the Copy To Groups section to select the class(es) to which you want to copy
the items. Click the Copy button.
Note: To select more than one class, press the CTRL key while clicking the class
names.
Copy Selected
Copy To Groups
Ite s
Choose the group(s} ,yhere ~fOU want to copy these items.
(Use Ctrl+Cllck tc select more than one group.:
SOCIAL STUDIES (£67_3 S1)
SOCIAL STUDIES 667 4 S1)
STUDY (567_4 S1}
U.S. HISTORY (681_1 S1:
US. HISTORY (:381_2 81)
US. HISTORY HONOR (631 7 S1}
I
Copy
Cancel
Note: The copied items will be placed in the same location on each destination class
home page.
Copying Items from One Class to Another
If you post an item to a class home page and later decide to use it in other classes as
well, you don't need to recreate the item. Simply copy the one you already have. Copy
individual documents or whole folders following the steps below:
1. Go to the home page of the class containing the item to be copied by clicking the
class name under My Classes.
2. Open the folder containing the item you want to copy:
Note: If you want to copy a folder and everything in it, just select the folder.
3. If the item is inside a folder in Contents, click the name of the folder to open it.
4. If the item is in the News or Links section, or directly in Contents (not in a
folder) click the Edit icon. If the item is in the Calendar section, click the Edit
icon on Calendar, click Manage Items.
10/30/2009
57
Edline LLC, © 2009. Chicago,
IL, All Rights Reserved.
[S-09]
5. Select the items you want to copy by clicking the checkbox next to each item.
I
SOCIAL STUDIES
[
(1-4 of 4 items)
8electAil
She'}.' Standard View
rVlanage Class.
I
I
I Felder
Select the t';pe to add.
v11
I Unselect pJI
Name
[DEtails
Edit]
Assicnments
Today
E.5t,
Essav Ideas
TodaY'
Em.
Journal Prompts
Today
Tests
T;),j3Y
Select pJI I Unselsct All
; Details
~alected Items
COJ:yTe .~)
I
"'1I She';.; 503]
~
o
MevE
Change \nsihility ..
[fuiiQ
Modified
v
o
[~l Em)
(~
GD
re. I
vliShew50
~
~'IQQ
I Approve I I Reject I
[ Delete
I
I
[
Delle
I
6. Click Copy To ... at the bottom of the page to go to the Copy Page.
7. Use the Copy To Group(s) section to select the class(es) to which you want to
copy the items.
Note: To select more than one class, press the CTRL key while clicking the class
name.
8. Click Copy at the bottom of the page. The selected items will remain where they
are and copies of these items will be placed in the selected classes.
58
10/3012009
Edline LLC, © 2009, Chicago, IL, All Rights Reserved. [S-09]
Using My File Locker
My File Locker is a place for you to store documents/files that you want to save for
later use and possibly for use on a different computer than the one you are currently
using. Great way to work on files at school and then at home.
Uploading Materials into My File Locker
1. Click My File Locker.
2. Choose to add Document.
3. Click Add.
Select the type to add.
Felder
My File locker
v
111
?,dd
I ~~
Jo items found
Done
4.
5.
6.
7.
Enter information about the file you are uploading.
Select Import an existing file.
Use Browse to locate your file.
Click Open.
Create
Document
I, Sa\'s "" Return l I
I I Cancel I
Sa',. "" A.dd "nether
Summary Information,
This document is in '1\'File Locker
Last Modified, 02i20i09
Document Titte
r------ ~-
Document Summary"
I
:
-=--=.J~
(This is displayed wnen the mouse is placed cver tne item.)
Calendar
I
r
ate:
Entl1'rdataifyou1r-anttoalsodispla::,
this on the calendar
E/em Recurrence
Add Content
Click one of the options below to add content
•
Enter Te>..1 8.,.. Hand (•."tth cpncnatnnk and image)
•
Imccrt an existing file (e.g. f.lS ~·-/iJrd. PDF. E1:C€j)
• Ur;Jcad a web document (a .zip file containing '.!':'eb pages)
I
Sa'/e & Return
I I
So'," ""A.dd Anoth«
I I Cancel I
For complete information about My File Locker, please click Help at the top of the
school or any class home page.
59
10/30/2009
Edline LLC, © 2009, Chicago. IL, All Rights Reserved, [S-09)
10/30/2009
60
Edline LLC, © 2009, Chicago, IL, All Rights Reserved. [S-09]
Appendix
10/30/2009
61
Edline LLC, © 2009, Chicago, IL, All Rights Reserved. [8-09]
10/30/2009
62
Edline LLC, © 2009, Chicago, IL, All Rights Reserved. [S-09)
Five Easy Steps to Create a Homework Assignment in Edline
Step 1: Click on the class where you want to add the homework assignment (found in My
Classes and Shortcuts).
Step 2: Click on the Assignments folder icon (found in the Contents section).
Note: Clicking the folder icon (and not the word Assignments)
creation process.
will save you a step in the document
Step 3: Click the Add button (Document should be selected as the default in the pull down
menu).
Show Standard View
Assignments
(1-9 of9 ilems)
Select.AlI
Manage Assignments.
Select the iype to add.
IDecument
I~
! Details
I UoseleClPll
Appears On
Calendar
v
Name
~
v
Ii Shew ~
Modified
Step 4: The Create Document page is now displayed. Enter a title in the Document Title fieldEdline recommends that you use a three or four letter subject identifier before the
document title, so that students and parents can easily identify items on the calendar.
Add a document summary (which will display when a user hovers (with their mouse)
over the calendar item, giving them additional information) if you wish, but it its
optional. The summary appears in full in the 'weekly' calendar view, which is
convenient for families to print for home use.
Next, add a date in the Calendar Date field - when you add a date to a document,
Edline automatically adds that document to the calendar. It then appears on the personal
Combined Calendar for every student in your class.
Summary Information
This document is in Assignments
ast Modified; 09i25i09
ocument
Title:
ocument
Summary:
ILS_OC_H_I.!_'V
----'
Read pages 80 - 33 . .A.ns'h'er the ReviEW,.Questions
'~I
(This is ,jisplayed '1'ihenthe mouse is placed
Calendar ate:
109/23/09
____
....J
.J
on I
',l[ the ltem.)
Enter date if Y'JUwantto also display'
this on the calendar (recommended)
Event Recurrence ..
63
10/30/2009
Edline LLC. © 2009. Chicago. IL. All Rights Reserved. [S-09]
Step 5: Determine the type of content you would like to add.
Add Content
Click one of the options below to add content
• Enter Text
By Hand (with optional link and image)
• Import an existing file (e.q. MSWord, PDF, Excel)
• Upload a web document (a .zip file containing web pages)
o
If you wish to enter text only, or just include a picture at the top of a document, select
Enter Text By Hand. You can also copy and paste text from your word processing
software if you wish.
o
If you have existing documents created that you would like to reuse, and they have
multiple graphics, upload these documents to Edline using the Import an existing file
option. Remember, if you upload a document, your users will need to have the necessary
software to view it. For example, if you upload a Microsoft Word document, they will
need either Word installed on their machines or they will have to download Microsoft's
free Word Viewer (available from www.microsoft.com - search for Word viewer).
o
If you have a self contained web page/website (or an htrnl document with multiple
images) that you would like to upload, zip it up, and then upload it to Edline using the
Upload a web document option.
Note: To quickly add multiple documents, click Save & Add Another, and repeat the process. [fyou wish
to post the same document in multiple classes at once, simply select the classes in the Available Groups
box, and click the Add.
64
10/30/2009
Edline LLC, © 2009, Chicago, IL, All Rights Reserved. [S-09]