1
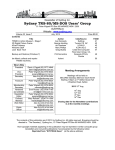
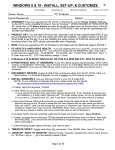
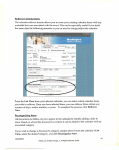
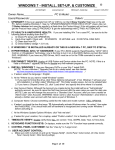
Contents Do’s and Don’ts ............................................................................................................................................. 2 Work Orders & Trouble Tickets .................................................................................................................... 3 School Server IP Addresses ........................................................................................................................... 5 For School Year 2014-2015 ........................................................................................................................... 6 Microsoft ....................................................................................................................................................... 7 Working with Office 365 ............................................................................................................................... 8 Forward Email from Convergence to Outlook 365 ....................................................................................... 9 Moving Contacts from Convergence to Office 365..................................................................................... 11 Sending Email .............................................................................................................................................. 15 Adding an Email Account to Outlook 2013 ................................................................................................. 17 Setting up k12 Email Account on iPhone .................................................................................................... 20 Set up Exchange email on an Apple iPhone, iPad, or iPod Touch............................................................... 20 E-Mail .......................................................................................................................................................... 21 A Word About Compromised Accounts ...................................................................................................... 22 Change Password for Computer Log-On..................................................................................................... 25 Call the Technology Department When ..................................................................................................... 29 Wireless Problems ...................................................................................................................................... 29 Workstation Imaging................................................................................................................................... 30 Installing Software ...................................................................................................................................... 34 Netsweeper ................................................................................................................................................. 34 How to do a Virus Scan ............................................................................................................................... 37 Spyware, Malware, and Adware ................................................................................................................. 45 Malwarebytes ............................................................................................................................................. 46 Run Malwarebytes ...................................................................................................................................... 50 Smart Education Software Install................................................................................................................ 53 How to Change the Data Projector Lamp ................................................................................................ 54 How to Reset the Lamp Time ...................................................................................................................... 54 Shutting down the projector....................................................................................................................... 54 Working with Edline .................................................................................................................................... 55 Using ELMO ................................................................................................................................................. 59 Maintain Your Inventory ............................................................................................................................. 61 1 Do’s and Don’ts DO: Keep an up-to-date LOG BOOK for any shared computer lab. It should have the teacher’s name, grade, and what was done in the lab (Compass, Google Earth, etc.). Some schools were heavily criticized by the OEPA teams for not showing evidence of technology use. Remind teachers to note technology use in their lesson plans. Keep electronic copies if teachers sign up electronically. Keep an up-to-date LOG BOOK for your server. It should include the date, what was done to the server, and who did it. A brief explanation of why it was done and if it worked is useful. Make sure each student and teacher logs in and out using their own userid… Screen trouble tickets before sending in…. If your server is in a locked cabinet, be sure someone at the school has the keys when you are not there. Keep your technology inventory accurate. We use it to determine our replacement cycle. Keep your password private. Contact the Technology Office if you have any questions. DON’T: Install software for which you don’t have licenses… Allow anyone to sit at a computer at which you are logged in… Allow teachers to move technology equipment from room to room or take it home. Allow teachers or students to attach networking devices such as wireless routers etc. to our school network. Allow teachers to install software. Reimage computers for principals, secretaries, counselors or any “administrative” computer. Go to bed with gum in your mouth... 2 Work Orders & Trouble Tickets When you have computer problems in your school, the quickest way to get repairs is to send a Trouble Ticket to Brian. The fields for "Serial Number" and "Machine Type/Model" really are important, especially for computers and/or monitors. We use this information to determine whether the equipment is under warranty. You can use the paper one (copy included on next page), or the online one (shown here). Either way, we’ll send a technician to your school, usually the next day. The technicians and Brian meet every workday at 2:30 pm to plan the following day. Work orders received after 2:30 do not make this meeting until the following day. Please try to screen the work orders you receive from teachers. You can help make our department more efficient by discovering that occasional “unplugged monitor” complaint. It is important that you maintain contact with all the teachers in your building so we can keep all our equipment working. If you have an emergency, such as a server down and no one can log in, don’t send a trouble ticket, CALL Brian! If Brian isn’t available, call Dennis Adkins, Larry Oyster or Karen Crespo. Phone numbers: FAX for trouble tickets: Brian’s office: Dennis’ office: Larry’s office: Karen’s office: 528-5264 528-5092 528-5087 528-5192 528-5011 (Prefer emails) 3 Computer/Technology Trouble Ticket Cabell County Schools Date: Caller: Location/School: Location/Room Number: Phone Number: Equipment Description/Serial Number: Serial Number: Machine Type: Problem Description: Resolution Description: Date Resolved: Technician: Instructions for use: Fill out form COMPLETELY. Incomplete information will delay repair of equipment. Only one piece of equipment per work order. Fax to 528-5264. 4 School Server IP Addresses For all schools, you may occasionally need to give certain information about addressing to a RESA technician or nCompass technician. Here are your answers… Gateway or router address: (same as your server number, except that the last number is a 1. Subnet mask: 255.255.252.0 DNS: 10.32.0.5 and 10.29.0.17 School Altizer Central City Cox Landing Culloden Davis Creek Geneva Kent Guyandotte Highlawn Hite Saunders Martha Meadows Milton Nichols Ona Peyton Salt Rock Southside Spring Hill Village of B’Ville Barboursville Huntington Huntington East Milton Cabell Midland Huntington Alternative Career Tech Center IP Address Elementary Schools URL 10.32.178.6 10.32.224.6 10.33.34.6 10.33.42.6 10.33.90.6 10.33.50.6 10.33.58.6 10.33.64.6 10.33.82.6 10.33.114.6 10.33.122.6 10.33.130.6 10.33.170.6 10.33.178.6 10.33.208.6 10.33.218.6 10.33.154.6 10.33.224.6 10.32.194.10 altizer.cabe.k12.wv.us centralcity.cabe.k12.wv.us coxlanding.cabe.k12.wv.us culloden.cabe.k12.wv.us daviscreek.cabe.k12.wv.us genevakent.cabe.k12.wv.us guyandotte.cabe.k12.wv.us highlawn.cabe.k12.wv.us hitesaunders.cabe.k12.wv.us martha.cabe.k12.wv.us meadows.cabe.k12.wv.us milton.cabe.k12.wv.us nichols.cabe.k12.wv.us ona.cabe.k12.wv.us peyton.cabe.k12.wv.us saltrock.cabe.k12.wv.us southside.cabe.k12.wv.us springhill.cabe.k12.wv.us villageofbarboursville.cabe.k12.wv.us Middle Schools 10.34.34.5 bms.cabe.k12.wv.us 10.34.194.5 hms.cabe.k12.wv.us 10.34.98.6 10.34.160.6 mms.cabe.k12.wv.us High Schools 10.35.82.10 cmhs.cabe.k12.wv.us 10.35.82.11 10.35.147.10 hhs.cabe.k12.wv.us 10.35.147.11 10.32.2.6 ccalt.cabe.k12.wv.us 10.35.193.5 ccctc.cabe.tec.wv.us As of 6/3/14 5 For School Year 2014-2015 Grade Level: Year Chart School Year Graduation Year 12 2015 11 2016 10 2017 9 2018 8 2019 7 2020 6 2021 5 2022 4 2023 3 2024 2 2025 1 2026 Kindergarten 2027 Pre-K 2028 6 Microsoft 7 Working with Office 365 Log in to Office 365. URL: https://portal.microsoftonline.com/ to reach the log-in screen: Organizational account is your email address: [email protected] and the password is your WebTop password unless you have already logged in and changed your password. Change your email password by changing it in Webtop ONLY. Choose Outlook from the options bar. Chances are you won’t have much email here just yet, since no one knows your new email address. However, you now have 50 GB of email storage space along with an additional 25 GB of online document storage space. Folders and subfolders Email Inbox We do not yet have access to the other Office 365 products. That comes on July 1. There will be one morning of training on Monday, July 28 if you are available. 8 Forward Email from Convergence to Outlook 365 The access server will continue to function through late fall. In the meantime, to have all emails come to one account, you can forward access email to your new Office 365 account. Log in to your WebMail account (http://access.k12.wv.us:1081) Select Options at the bottom left. Select Forwarding option. Select Enable automatic forwarding and type in your “k12” email address. Deselect Keep a copy of the message” and Save Preferences in the lower right. Log out of Convergence. 9 You will now receive all your professional email in Outlook 365. All professional email should be addressed from your “k12” professional account. Please do not use Gmail or Yahoo! or other general accounts for professional email. To move your mail in Convergence to Office 365, move (if necessary) the emails to your Convergence inbox. Check your email in Office 365 and they will all be pulled in. Remember, you deselected the option to keep emails on the server, so once you move the emails to Office 365 they will no longer be available in Convergence. However, they will be available in Office 365. 10 Moving Contacts from Convergence to Office 365 Log in to Convergence and open your Address Book. From the drop down option, choose Export. From the options window that opens, select Microsoft Outlook CSV Choose Export Contacts. 11 Choose Save As from the Windows Internet Explorer window. Choose Save As and save it to the desktop or other easily accessible location as a Microsoft Excel Comma Separated Values File (*.csv). You will probably be given the option open, open folder etc. Just ignore that for now. 12 From your Office 365 page, Choose People from the bar. Select the Settings option (it looks like a gear) and from the drop down list, select Import Contacts. From the import contacts – Windows Internet Explorer page, browse to the folder where you contacts are and select the file. Select Next. 13 It will run for a couple seconds and import your contacts. Select finish on the congratulatory message: Your contacts will now show up in your contacts folder. Remember, these folks will still have the email address [email protected]. I would urge you to continue to use that email address unless you specifically have been told by that person they changed their email address. Also available is the list of ALL k12.wv.us email users. Right now it is available under All Users and also under Offline Global Address List. You will need to know the user’s first and last name until all the other information gets imported. 14 Sending Email From Outlook, select new mail. The Outlook Web App will open, then A blank email message appears. 15 Type in the Subject and the body of the message. Select Insert to attach a file. Start typing the name of the person you want to send the email to. The more you type the shorter the list. You can type the full name, or just click on the name once it appears. Then click on the send icon in the top right. There are quite a few editing options with Outlook 365. It is not as full featured as Outlook 2013, but is nonetheless a powerful tool. 16 Adding an Email Account to Outlook 2013 Your screen may be slightly different in the beginning if this is the first account. The wizard that opens will be very similar to what is below. If the wizard doesn’t open, follow the directions below. Open Outlook and select File--+ Add Account Complete the Account Setup page with your information and select Next. It will search online for the correct Exchange server. This will take a minute or two. You will get a congratulatory screen. Select Finish. 17 You will be prompted to restart Outlook. Do so now. Takes a while to find the server and set everything up. You will be asked to add your email address and password. Select OK. Outlook will then open and update all your folders. This may take a while, depending on how many folders and how much email is in them. It will tell you at the bottom when all folders are up to date. 18 Outlook 2013 which will be available to you from the state site sometime after July 1, as will the entire Office 2013 Professional Suite. We have not yet received any information about how the downloads will take place. The web apps may become more available as the month of June progresses. As more information becomes available, there will be additional information on using Office 365 and associated web apps emailed to your new accounts. In the meantime, the state has made available an excellent page with information and vidoes on what is available and how to use Office 365. Please look through these pages at your leisure. http://wvde.state.wv.us/office365/ 19 Setting up k12 Email Account on iPhone Set up Exchange email on an Apple iPhone, iPad, or iPod Touch 1. If this is the first email account on your iPhone, tap Mail. Otherwise, tap Settings > Mail, Contacts, Calendars > Add Account. 2. Tap Settings > Mail, Contacts, Calendars > Add Account. 3. Tap Microsoft Exchange. 4. You don’t need to type anything in the Domain box. Type the information requested in the Email, Username, and Password boxes. You need to type your full email address in the Email and Username boxes (for example, [email protected]). 5. Tap Next on the upper-right corner of the screen. Your mail program will try to find the settings it needs to set up your account. Go to step 8 if your mail program finds your settings. 6. If your iPhone can’t find your settings, you’ll need to use outlook.office365.com for your server name. 7. Choose the type of information you want to synchronize between your account and your device, and then touch Save. By default, Mail, Contacts, and Calendar information are synchronized. 8. If you're prompted to create a passcode, tap Continue and type a numeric passcode if desired. 9. 20 E-Mail Below is an example of a legitimate email from the state department. Notice that you are not asked for ANY information. It is an informative email. The WVDE Division of Technology is pleased to announce the transition from the Access email platform to Microsoft Office 365. Office 365 is a robust and fully encrypted e-mail program and offers a unified communications platform that includes live-chat and full featured video conferencing with screen sharing and audio. It also includes access to the full Microsoft Office productivity suite of applications including Word, PowerPoint, Excel, OneNote and Share Point. Additionally, it includes OneDrive which is a secure online document storage system. This personal storage space allows each user to easily transfer work from computer to computer or from home to school. Additional features will be rolled out as they become available. A statewide Identity Management and Active Directory utilizing the Webtop User Management system has been implemented to facilitate account management. Staff accounts are available immediately. If you have a Webtop Account that is associated with an Access email click here for instructions on how to access your Office 365 account. If you have a Webtop Account that is not associated with an Access email address click here for instructions on connecting your Webtop to your access email address. This must be established to provide users with an Office 365 account. If you have an Access email but do not have a Webtop account click here to create one. Users must register in Webtop with their Access email address to connect with Office 365. Student accounts will be added Fall 2014. Additional notes: The Access email system will be maintained and supported for the foreseeable future. Current plans are to keep the Access email system running through at least October 2014 and this could be extended if the need exists. Running both systems in parallel for some time will provide users with adequate time to transition. For assistance in recovering a forgotten WebTop account password, please go to https://webtop.k12.wv.us/password/ and complete the Request Password Reset form. For information on how to setup email forwarding from your Access email account to your new Office 365 email account, please reference this document. For Information regarding current progress of the Office 365 deployment as well as training videos and tutorials can be found at http://wvde.state.wv.us/office365. 21 There will be a helpdesk support path with WVNET. Information on how to seek support will be provided soon. For immediate support needs, users may contact the WVDE at [email protected]. Please understand that we currently do not have a robust helpdesk solution and we ask users to be patient when seeking support for this new system. Bob McCoy Coordinator, Instructional Technology West Virginia Department of Education 1900 Kanawha Blvd East, Building 6, Room 346 Charleston, WV 25305-0330 304.558.7880 Voice 304.558.2584 Fax A Word About Compromised Accounts Should one of your staff compromise their email account, they will have to be retrained on Policy 2460 and also security issues must be reviewed with them. To do this you will need to give them an updated copy of Policy 2460 and ask them to read it, you will also need to reiterate the importance of never giving their username and password out in any message, no matter how authentic it looks. Also, they should never set their password to automatically save or let the browser remember it. When you have done that, give them an email application to fill out. Mark on the top of the application RETRAINED and add the DATE. When they complete the application, you need to sign and date it, however, DO NOT send this new application to Charleston, keep it on file in the school office. Then you will need to contact the Web Mail Administrator ([email protected]) and ask them to please reinstate the compromised accounts for (name, userid, school, Cabell County) as you have retrained them on Policy 2460 and Security Issues. They should reinstate the account within a day or two and you will need to then request a new password for the account. When the user changes the password to something they will remember, it is imperative that they do not set it back to the previous password that was hacked. The officials at the state level in charge of email have stated that a person gets only one opportunity to be retrained, any future requests will be denied. Because we rely so heavily on email, this will make communication very difficult and burdensome for a lot of people. In addition, the Superintendent has directed all county employees to use only our access email accounts for all professional correspondence with staff and parents, therefore, please stress the importance of email security. You will know a staff member has compromised their account because they will not be able to send or receive email and they will no longer appear in your school list on the 1026 Site. When you do a Search for their name they will show up with Compromised beside their account information. Contact Karen 304.528.5011 if you need additional information about this subject. Below are sample E-Mails that are not legitimate. 22 Notice the email address. Do you really suppose this is legitimate? If it is too good to be true…. No it isn’t. This whole email sounds like a shady deal. Don’t respond. Just delete the email. 23 NO!!! This should just scream VIRUS to you. Do not open the attachment. Just delete the email. This isn’t even a WV email address! How would they know anything? The state will upgrade this program for you automatically. You would never be asked to do something like this. Notice some of the information on this screen. First, no legitimate user will EVER request your password and second, e-mails left in the “Inbox” folder of your old access account will be automatically deleted after 1 year from receipt. The maximum size for the total number of your emails in all the folders together (including the deleted folder) is 200 MB in your old account. Your new k12 account is something like 50 GB of space…you probably won’t fill it up unless you try. ALWAYS SELECT NO WHEN INTERNET EXPLORER ASKS TO REMEMBER PASSWORDS! 24 Change Password for Computer Log-On Log on to a machine and select the Password Management icon The program opens to the following screen: 25 The student should show some form of identification so you know he is giving you a correct name, and then type in the student’s username or last name or student number in the username blank. Depending on what was typed in the username, you may get only that student or a list of students that match that information from Active Directory, which includes names from all schools. Choose the correct user by clicking on their username. 26 This is the Password Control screen to change a student password. You now have the option of typing in a password for the user. Depending on your situation, you may either select or deselect “Force Password Change at Logon” option. You can also leave the password blank and keep “Force Password Change at Logon” option checked. The user is asked to change his password at logon, but is immediately logged off and asked to log back on with the new password. 27 In order to disable a student account, select the student account by typing in the username and select the Disable Account button. The information in the right screen will turn reddish. To turn on the account, select the Enable Account button. The reddish information in the right screen will turn green. 28 Call the Technology Department When No one can log in to the network on any machine Wireless devices do not connect to the network Printing is not working Principals, Secretaries, Counselors and others in administrative offices can reach the Internet, but NO CLASSROOM computers can reach the Internet You feel the issue is significant The problem effects a large population in your school Wireless Problems If users are experiencing issues with the wireless network, call the technology department. If one user cannot connect a laptop to the wireless network, verify wireless is turned on and correct password entered. 29 Workstation Imaging By Kevin McCaffrey (Microsoft server 2008) IMPORTANT: All Microsoft schools…Before you begin reimaging, email either Brian or Larry (but not both) with the Computer Name you plan to reimage. Do not start reimaging until you get a reply email from one of us that says you are ready to go. In the meanwhile, do not let anyone turn that workstation on until after you reimage it. For laptops and netbooks, set the computer to boot from the network before trying to reimage. Start by turning on the computer, When you see the “Client IP” on the monitor press Ctrl + Alt at the same time on the keyboard. Continue to hold the Ctrl +Alt until this blue screen appears. Select the second option “Start ZENworks Imaging Maintenance” 30 Wait …………………. When You see this command prompt you can proceed. 31 You will enter “win732.s” or “win764.s” or ” xp.s” This will depend on the model of computer and the building you are in. If you do not know if the model you are imaging has 32 or 64 bit Windows installed you will need to check a computer of the same model that is working to find this information. (After finding this information, make a note of it, all computers with that model in your building should be the same. Making note of this can save a lot of time on future reimaging) At this screen do not enter a name unless the computer has been moved from a different room. If you change the name it must use the exact naming convention or printing will no longer function. It is best to just hit enter at this screen. 32 Imaging should complete in 1-1 ½ hours. (Note: if this is a teacher’s computer other items may need installed or configured after reimaging) Note: DO NOT attempt to reimage an office computer (secretary, counselor, principal, etc. However, imaging will solve most problems with teacher or student machines. It is best to try to start the reimage process in the afternoon when the machine has overnight to finish and get all its updates without someone logging in before completion. 33 Installing Software Sysops have the ability to install software on local machines. With that ability sysops also have the responsibility to check for a valid end users license agreement (EULA). It is required that ALL software installed on school computers have a valid license. If you install the software, you are responsible for checking the license. A single user license is just that—a license for one user. Do NOT install a program with a single user license on more than one machine unless the license specifically states that you can. If you have any questions about licensing, you can sometimes check the company web site for FAQ’s or call the technology department. Do NOT install software at the request of a TIS or Coach. Refer them to Brian. Better yet, always check with Brian before installing any software on any machine. Netsweeper Netsweeper Client Filter is an Internet filter that is to be installed on all computers that are taken out of the school building. This filter is designed to route Internet traffic through the state servers, applying those filters. Therefore YouTube, Facebook, etc. will be blocked. It is critical that ALL laptops and netbooks that students might take home have this filter installed in order to meet state and federal mandates. Install configuser first. This is just a little DOS program and runs VERY quickly. Just double click it, and if you aren’t paying attention, you will miss the whole process. Once it finishes, double click the Netsweeper Client Filter. The language pop up box appears. Select English (if necessary, then OK). 34 Select Next Agree to the License Agreement. Choose the Default location and select Install. 35 This address appears automatically. Do not change the Policy Server information. Select Save. After the reboot, the machine can be used anywhere and will still use the state filter system. This protects us legally when we permit students or teachers to take devices home. The programs are available on the Sysop thumb drive. Please remember to install Netsweeper on all machines that might leave the building. 36 How to do a Virus Scan All schools have Symantec (Norton) anti-virus software installed on the school server. Our current version is 12.1.4xxx.xx. This software constantly monitors files that are transmitted back and forth between the server and workstations. This is called real time protection. Each workstation should also have the software loaded and running, protecting the workstation in the same manner. Viruses are actually computer programs. They are undesirable programs, but programs nonetheless. A computer program is, in its most basic form, a series of zeros and ones that the processor interprets into actions for the various parts of the computer to take. Since a virus is a program, anti-virus programs can detect viruses by looking for a specific pattern of these zeros and ones that will uniquely identify a virus. These unique patterns are called a virus’ signature or definition. Since new viruses are released almost daily by nefarious hackers, the companies who sell anti-virus software are regularly updating the signature lists or definition lists that the anti-virus software uses to detect the viruses. Note that the terms virus signature and virus definition are used interchangeably here. Our servers download updated lists every weekend from the Symantec Corporate site on the Internet. Classroom computers should be getting their updated lists from the school server. Periodically, a computer needs to have a full system virus scan. Again, our servers are scanned on weekends after downloading new definitions. The full system scan process will typically slow down computer operations while it is running, and generally takes a fair amount of time, depending on how many files are on the computer’s hard drive. Essentially, every file on the computer is opened and its zeros and ones are compared to the thousands of zero/one patterns in the virus signature lists (which is why we do servers only on weekends). Why do a full system scan when real time protection is already running? The answer is that viruses often slip by real time protection because at the time a new virus enters the computer, the virus protection software doesn’t know the signature of the new virus. The virus may sit dormant on the computer for a while, awakening at some pre-determined date, or triggered by some routine action, to do its damage. We can force workstations to do a full system scan when someone logs in, but since it takes a while and slows down the computer, we have elected not to subject users to this aggravation. However, the need for an occasional full system scan still exists at the administrative workstation level; once a week would be ideal, but impractical. Once a semester would probably be more reasonable, and would go a long way in keeping trouble away from your network. There is no need to do a virus scan on a local workstation. Just reimage it. But for administrator machines, a virus scan is a good place to start. 37 Here’s how… From the Start Button, select the Symantec Endpoint Protection folder, then Symantec Endpoint Protection. If it isn’t there, send me an email including what machine(s) it isn’t on. When the program opens, you should see the date of the definition file in the lower right of the window. Look for date. This date should be within a week prior to the current date. If the date is way in the past, I need to know! In the left window pane, you’ll see several options. One is “Scan For Threats”. Click it once to select. 38 For the current computer, select Run Full Scan. Let it finish and follow the instructions. If you want to scan a thumb drive or a student’s home directory, continue with the directions below. There are two ways to scan these drives. Try this one first: Plug the device in (if necessary) and Explore to the device, right click on it, and select Scan for Viruses. It will do a quick scan. You can do a full scan on the device with the directions below. 39 The Quick Scan will run through its process. 40 Symantec will let you know when it is finished. If there are any viruses found, it will tell you what it found, and what was done with the virus (Deleted, Quarantined, etc.) Follow any directions if any are given. If you would rather run a full scan, you can do so following these directions. 41 Start by opening Symantec, but instead of selecting to run a full scan, do the following: Single click on Create a New Scan. When the new box appears, select the Custom Scan option, then select Next. Select the drives to scan (select any external drives but not network drives) and Next. 42 Select the drive where you want to run the full scan. This is an external drive. On the next box, select All types, and Next. Select On demand, then Next. Can give it any name you want, or don’t change it at all. 43 The scan is now listed as an option under the Scan Name list. Single click on it to select it, then select Run Full Scan. Viruses identified here The window will change, and you’ll see the software looking all through the computer, checking for viruses. When it’s finished, it will say “Completed”. If it finds any viruses, you’ll see a report in the white space of the window. You can close the anti-virus program, confident that you’ve done a great service and won another battle in the never-ending struggle to keep your network running smoothly! 44 Spyware, Malware, and Adware Recently we have been having problems with computers running with a degraded performance. Almost every incident has been due to Malware/Spyware/Popup programs that are installed and running on the computer. No one ever seems to know how they got them or is aware that they installed them. This message is to inform and raise awareness for everyone to be on alert for these types of intrusive programs. Software of this sort is commonly known as “Malware” and “Spyware”. They are not “Viruses”. Nearly all of these programs are set up to be “stealthy” and difficult to remove. Many are designed to deliver “targeted advertising” by placing banners or popups on your screen. Some make claims to perform certain convenient tasks while performing hidden tasks such as tracking your web surfing habits and email address to their headquarters. Accumulating one or more of these types of programs will degrade your computer's performance, and in some cases to the point where certain programs like “Internet Explorer” ceases to run properly at all. Most of these programs are installed in one of three ways: 1. Bundled with “free” programs such as Java, screensavers, file sharing programs and utilities. 2. Clicking “Yes” on certain web sites that want to download “additional content”. 3. Visiting less-than-reputable web sites that take advantage of computers with low/out-of-date Internet security settings. FOLLOW THESE GUIDELINES TO HELP SAFEGUARD YOURSELF: 1. As a rule, when you are surfing on the net and are asked if you want to download something... DO NOT ACCEPT IT. They will always assert that their software contents are safe - don't be fooled. Most of the time software such as this is NOT required to properly view a web page. 2. Look for mysterious Search Bars at the top or bottom of your Internet Explorer program that were not there before. 3. Don’t click on ads! 4. There are programs available that are designed to clean Spyware from your computer. These programs are fairly easy to download, install, and use. We recommend and use these free programs: Adaware – http://www.lavasoft.de Malwarebytes – http://www.malwarebytes.org Spybot Search and Destroy - http://spybot.safer-networking.de Spyware Blaster - http://www.javacoolsoftware.com SuperAntiSpyware - http://www.superantispyware.com 5. Check your own computer for suspicious software. Click Start -> Settings -> Control Panel ---> Add/Remove Programs. In there you will see a list of most of your installed programs. If you see something on that list that you KNOW is bad, then you should attempt to uninstall it. 6. DON'T PANIC!! Unless your computer stops functioning, finding malware on your computer does not constitute an emergency situation. Our technicians and sysops regularly “clean” computers as we encounter them. 7. If a teacher or student machine has malware on it, or just seems sluggish or otherwise “odd” to the user, just reimage. Be sure to contact Brian or Larry first with the machine name so it can be removed from the domain prior to reimaging. 45 Malwarebytes Go to http://www.malwarebytes.org/ and select Download Now for the free version at the bottom of the page. You may have to enter your name and email address to download the most recent version. 46 Choose the drop down option beside Save and select the Save As option and put it on a thumb drive or something for future use. Once it downloads, the pop up at the bottom provides the option to run the program. Select Run and OK to the English language. Select Next. Accept the agreement and select Next. 47 They provide a little information on program changes and updates. Accept the defaults on the Destination Screen and the Start Menu Folder 48 Allow the program to create a desktop icon if you want one on that computer. (I usually accept this.) There is a verification screen. When you select Install, the program installs. Disable the free trial of Malwarebytes Premium and select Finish. 49 Run Malwarebytes Before running antimalware or antispyware, open Symantec, select options and Disable this program (or right click the Symantec icon on the toolbar and select Disable) until you finish. Remember to turn Symantec back on when finished. Open Malwarebytes and select the Scan option at the top. For most scans, a Threat Scan is all you need to run. If it finds anything, you can always run a deeper (and longer) scan. Select Scan Now. 50 The program will run through the entire scan and let you know what it is finished. If it finds anything, follow the onscreen instructions. It may require a reboot of the machine. Otherwise, you can close the program and go on with life. This particular scan was clean. The log file will also pop up (or you can hit the Alt key for access). If you have lots of malware on the machine, you can save the file somewhere in case we need to know what all was on the machine. 51 Remember to turn Symantec back on by opening Symantec and selecting the Fix All button. Or Right click the icon in the toolbar and select Enable. Turn On/Off Compatibility Mode If a web page just doesn’t look quite right, or won’t load at all, it may be incompatible with the current settings on your browser. There are two ways to fix the problem. First, if the address bar has a little doodad in it that looks kind of like a piece of cake, you can select it. You can toggle compatibility mode on/off by selecting it over and over. Or, the second method, select Tools—Compatibility Mode. If the toolbar is not visible, tap the Alt key. 52 Smart Education Software Install After imaging a machine or reinstalling Smart products on a computer it is important to run the SMART program install available in the teachers Application launcher. This Application is to be used for installing all the Smart products i.e. Smart notebook, Smart responder, Smart Image mate and their drivers. The install will take approximately 30 minutes. This only installs the applications. Smart applications do not run from this icon. The Smart applications can be found under Start Programs. The Install is named “Smart Education Software Install”. 53 Dealing with Data Projectors How to Change the Data Projector Lamp Order bulbs through John Dillon at the board office (till his money runs out). Title I schools order bulbs through Allyson Shoenlein’s office. If the projector is on the ceiling or permanently mounted and needs a new bulb—order a bulb, but when it comes in, send in a work order for the technicians to replace it. Use gloves or a cloth when touching new bulbs to keep it free of oils Make sure projector is cool Find access to the bulb—usually on the bottom or side of the projector Remove necessary screws with proper screwdriver Unhook the claws of the lamp cover and remove the lamp cover Remove the bulb using caution to not break it Insert the new lamp, and retighten any loosened screws Reposition the lamp cover, retighten the Phillips head screw Turn the projector on and reset the lamp time. How to Reset the Lamp Time Press MENU button to open the menu Using the /button, and the left/right buttons, enter the Advanced Menu—Option—Lamp Time and hold the reset button for 3 seconds Choose the “RESET” using the button. NOTE: Sysops or teachers can clean filters on floor or cart mounted projectors. For permanently mounted projectors send a work order when appropriate. Schools are responsible for purchasing replacement bulbs for their projectors. Sysops should plan to keep a couple spare bulbs on hand for emergencies. (See note above.) Shutting down the projector Press the “Standby/on” button on the projector (or the remote) TWICE. After pressing the button one time, you will see the message “Power off? Yes, press again. No, please wait.” Press the button again. The light on top of the projector should turn red. Wait until the fan stops running (this may take 5 minutes) before unplugging the projector or otherwise turning off the power (like a wall switch). 54 Working with Edline Gradebook will not Open If the grade book doesn’t open and there is no reason indicated, delete the GradeQuick Web Plug-In by going to Add/Remove Programs. Once the Plug-In is removed, log back in to Edline and download the Plug In from Edline’s website. Gradebook will not Print When a teacher reports that a gradebook will not print, use the following method: Open the gradebook and select File—Print Gradebook. From the Tests options, select Test Info and deselect “Print test names key.” Edline Doesn’t Open First option is to restart the web browser. If that doesn’t work, delete the cookies and temporary files from the machine. If that doesn’t work, delete the GradeQuick Web Plug-In using Add/Remove programs. If that doesn’t work, call Larry. Create a Column for a Book Number Log in and go to teacher gradebooks. Open the gradebook for the teacher in question. You can also do this on the school template, or the individual teacher can do it themselves. Select Edit—Student Information. The following box pops up. 55 Select “Add New Field At End” The box will remain, and will go to the first open line. Type in the words “Book Number” without the quotes, and select OK. It will ask if you are sure you want to do this. Say yes. (If book number is already there, don’t add another one.) 56 Now from the main grade book screen, select View—Student Information. The following box appears. Scroll to the bottom on the right, select Book Number then OK. The column then appears in the teacher’s gradebook. The teacher can add whatever information they want to add in this manner. Most WVEIS info is already available using the Data Fields already there. Included on your Sysop thumb drive are some other Edline help files. Feel free to edit, print or distribute these as you see fit. 57 Recording Attendance in Gradebook This can be done by all teachers, regardless of whether their school collects attendance through GradeQuick or not. Attendance records are important aspects of a teacher’s record keeping. As a default, Edline/GradeQuick will no longer send attendance; it will be picked up by a school superuser if your school sends attendance to WVEIS. Open your gradebook and select the attendance icon. 1st and 2nd grade teachers select the class that prints first on the gradecard. The attendance window will open. Record the absences using the drop down options. Teachers may record absences for as many days as necessary. If a teacher completes more than five class days of attendance, the school superuser must be told so the greater number of days can be picked up and sent to WVEIS if your school uses this feature to record attendance. That is all teachers have to do from now on. The attendance will be picked up from the gradebook by a superuser in your school. 58 Using ELMO ELMO is a powerful classroom tool that is primarily used as a document camera. Teachers may also directly connect computers, cameras, or SD cards to the device. In order to connect ELMO as a document camera, connect the RGB Output Terminal directly to the projector. (See Figures 1 and 2. Cable connected to RGB OUT terminal. Other end connected to projector. Figure 1 Camera function selected on Operating Panel. Figure 2 59 In order to project from your laptop or desktop computer connect the RGB IN terminal on ELMO directly to the RGB OUT terminal of you r laptop. It may be necessary to turn on the external monitor switch with FN+F7 on your computer keyboard. See Figures 3 and 4. RGB IN connected to laptop. Figure 3 Computer function selected on Operating Panel. Figure 4 For additional information, read the user manual. Feel free to use your iPad or Android tablet as a document camera. 60 Maintain Your Inventory Keeping your inventory up to date is essential for the replacement cycles. When a vendor is told to replace the computers in room XYZ, they are required to replace those exact computers. The vendors are told which machines to replace based on YOUR inventory. If you switched the computers from Room ABC (which are brand new computers) into room XYZ because that teacher uses the computers more (or whatever your reason happens to be), and the vendor has orders to replace the computers in Room XYZ…. The new computers are now replaced with new computers and the old ones stay exactly where they are. Unfortunately this scenario happens all too often in our schools because the equipment is moved from room to room. Please do NOT allow computers to move from one room to another. If they are moved, move them back. If a teacher moves a computer, that computer prints and otherwise functions as if it is in its original classroom—where it belongs. You will not have to rename any computer since the computers should not be moved. While it is critical to keep the entire inventory up to date, it is mandatory to keep the minimum information up to date: Room number; Item; Model; Machine type; and Serial Number. Please update your inventory as changes occur. You may keep your inventory in an Excel Spreadsheet, an Access database, or a Word table, but please have one complete list of all your equipment in one file. Add all new equipment in a timely fashion, but within a month of receiving it. An Excel template is available on the thumb drive for your inventory. All inventory should be maintained electronically. 61