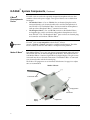
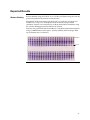
1
E-PAGE Technical Guide General information and protocols for using E-PAGE Gels Rev. date: 9 December 2010 Manual part number 25-0644 MAN0000374 User Manual INV-081 INVIT MAN 8.5x11 1color bylife 26May2010.indd 1 10/21/2010 10:04:35 AM Contents Product Contents........................................................................................................................................ iv Introduction .................................................................................................................................1 E-PAGE™ Protein Electrophoresis System ................................................................................................1 E-PAGE™ System Components ..................................................................................................................4 Methods .......................................................................................................................................9 Electrophoresis of E-PAGE™ Gels.........................................................................................9 Guidelines for Sample Preparation............................................................................................................9 Guidelines for Loading E-PAGE™ Gels by Automated Liquid Handling ..........................................14 Loading E-PAGE™ Gels .............................................................................................................................16 Using E-Holder™ Platform ........................................................................................................................20 Running E-PAGE™ Gels.............................................................................................................................21 Opening the E-PAGE™ Cassette ...............................................................................................................25 Blotting E-PAGE™ Gels.........................................................................................................26 Blotting E-PAGE™ Gels with the iBlot® Device ......................................................................................26 Semi-Dry Blotting of E-PAGE™ Gels........................................................................................................32 Semi-Wet Blotting of E-PAGE™ Gels .......................................................................................................36 Visualizing and Staining of E-PAGE™ Gels ........................................................................39 Visualizing Lumio Fusion Proteins .......................................................................................................39 SYPRO® Ruby Staining Protocol ..............................................................................................................40 Coomassie® Staining ..................................................................................................................................41 SimplyBlue™ SafeStain ...............................................................................................................................43 Silver Staining Methods.............................................................................................................................45 InVision™ His-tag Protein Gel Stain.........................................................................................................48 Drying of E-PAGE™ Gels ......................................................................................................49 Gel Drying ...................................................................................................................................................49 Analysis and Troubleshooting ............................................................................................51 Molecular Weight Calibration ..................................................................................................................51 Expected Results.........................................................................................................................................53 Using E-Editor™ 2.02 Software..................................................................................................................60 Troubleshooting..........................................................................................................................................61 Appendix....................................................................................................................................63 Additional Staining Protocols...................................................................................................................63 Product Specifications................................................................................................................................67 Accessory Products ....................................................................................................................................70 Technical Support.......................................................................................................................................72 Purchaser Notification ............................................................................. Error! Bookmark not defined. iii Product Contents Purpose of the Guide The E-PAGE™ Technical Guide contains information about E-PAGE™ Gels and is intended to supplement the manuals supplied with E-PAGE™ Gels. Details for sample preparation, electrophoresis conditions, blotting, and staining are included in this guide. Types of Kits E-PAGE™ gels are designed for use with the E-Base™ Electrophoresis Device, and are available in 48-well or 96-well formats. See pages 4–5 for further specifications. See page 71 for ordering information. Product E-PAGE™ 48 8% Gels ™ E-PAGE 96 6% Gels Kit Contents Catalog no. 8-pack EP048-08 8-pack EP096-06 Each pack of E-PAGE™ Gels contain the following contents: E-PAGE™ Gel 8-Pack Contents E-PAGE Gels E-PAGE Loading Buffer 1 (4X) Butterfly Opener E-PAGE Blotting Pad Shipping and Storage Quantity Quantity 8 gels 4.5 mL 1 1 The E-PAGE™ 48 and 96 Gels, E-PAGE Blotting Pad and Mother E-Base™ are shipped and stored at room temperature. Do not allow the temperature to drop below 4C or rise above 40C when storing the gels. The E-PAGE Loading Buffer is shipped at room temperature. Store the E-PAGE™ Loading Buffer 1 (4X) at room temperature or at 4C. Intended Use iv For research use only. Not intended for any human or animal diagnostic or therapeutic uses. Introduction E-PAGE™ Protein Electrophoresis System About the E-PAGE™ Protein Electrophoresis System The E-PAGE™ Protein Electrophoresis System is designed for fast, medium-tohigh-throughput protein electrophoresis in a horizontal format. The self-contained E-PAGE™ 48 or 96 Pre-cast Gels consist of a buffered gel matrix and electrodes packaged inside a disposable, UV-transparent cassette. The gels can be loaded by multichannel pipetter or automated loading system. Electrophoresis of the samples is performed with the E-Base™ Electrophoresis Device. The E-Base™ Electrophoresis Device consists of a base for electrophoresis, and an integral power supply. After electrophoresis is completed, the cassette can be opened with the Butterfly Opener to perform downstream applications such as western blotting or staining. The E-Editor™ 2.02 software allows digital images of the E-PAGE™ Gels to be reconfigured into a side-by-side format for easy comparison and analysis. Applications Advantages The E-PAGE™ Protein Electrophoresis System is ideal for screening protein samples using the following applications: In-gel staining with Lumio™ Green Reagent Western blotting Staining (Coomassie®, silver, or fluorescent stains) Functional assays Using E-PAGE™ Gels for protein analysis offers the following advantages: Produces fast, safe, and consistent electrophoresis Eliminates the need to prepare gels and buffers Compatible with most commercially available automated liquid handling systems for high-throughput electrophoresis Available in two well formats to suit your applications Easy to open gel cassettes facilitate downstream staining and blotting applications Ability to track samples during electrophoresis of multiple gels using an individual barcode on each gel cassette Continued on next page 1 E-PAGE™ Protein Electrophoresis System, Continued Choosing a Gel for your Application To obtain the best results for your application it is important to choose the correct E-PAGE™ Gel. The table below describes the major features of each format. For specifications and separation range of each gel type, see page 67–68. E-PAGE™ Gel No. Rows No. Wells Well Volume Run Length Run Time 48 Gel 2* 48 sample 4 marker 15 μL 15 μL 3.2 cm 27 min. 96 Gel 8* 96 sample 8 marker 25 μL 25 μL 1.6 cm 14 min. *Wells compatible for loading with a multichannel pipetter or with an automated liquid handling system. Western Blotting of E-PAGE™ Gels E-PAGE™ Gels are suitable for western blotting. The iBlot® Gel Transfer Device is recommended method for blotting E-PAGE™ Gels (page 26). Semi-dry blotting (page 26), and semi-wet blotting may also be performed (page 36). Tank blotting is not recommended, but can be performed if even pressure is maintained between the gel and the membrane, and cooling is provided. Staining E-PAGE™ Gels E-PAGE™ Gels are compatible with many standard Coomassie®, silver, or fluorescent staining protocols. E-PAGE™ Gels are thicker than most SDS-PAGE mini-gels, so additional time may be required for staining and destaining steps. We recommend the following stains for E-PAGE™ Gels. Detailed staining protocols are described on pages 39–48. Total Protein Stains: SYPRO® Ruby Protein Gel Stain (page 39) Coomassie® Stain (page 41) SimplyBlue™ SafeStain (page 43) SilverQuest™ Silver Staining Kit (page 46) SilverXpress® Silver Staining Kit (page 47) Specific Protein Stains: Lumio™ Green Detection Reagent for detecting Lumio fusion proteins (page 39) In Vision™ His-tag In-Gel Stain for detecting 6X His-tagged proteins (blotting recommended first, page 48) Continued on next page 2 E-PAGE™ Protein Electrophoresis System, Continued Choosing a Staining Protocol A summary of the time needed and sensitivity obtained with E-PAGE™ gels using various staining protocols is described below. Based on the starting material and your requirements for sensitivity and background, choose an appropriate staining protocol. For background: ++++ (very low background) +++ (low background) ++ (moderate background). Protocol ™ Time Sensitivity Background Lumio Green Detection Reagent Pre-label proteins 1–5 pmole during sample preparation, run the gel, and visualize (total time: ~1 hour). ++++ SYPRO® Ruby Protein Gel Stain Fix: 0.5 h Stain: 1.5 h Destain: 2 h-overnight 1–2.5 ng ++++ Coomassie® R-250 Stain Stain: 1.5 h Destain: overnight 20 ng +++ Coomassie® R-250 Stain Microwave Protocol Stain: 0.5 h Destain: overnight 20 ng +++ SimplyBlue™ SafeStain Fix: 0.5 h Stain: 0.5 h–2 h Destain: 3 h-overnight 20 ng +++ SilverQuest™ Silver Stain Total: 4.5 h 10 ng ++++ SilverXpress® Silver Stain Total: 6.5 h 1 ng ++ InVision™ His-tag In-Gel Stain Blot: 7–8 min Rinse: 2 min Stain: 20 min 40 ng His-tagged protein +++ 3 E-PAGE™ System Components Introduction The E-PAGE™ Protein Electrophoresis System consists of the following components: E-PAGE™ 48 or 96 Pre-cast Gels E-Base™ Electrophoresis Device E-Holder™ Platform E-PAGE™ Loading Buffer 1 (4X) E-PAGE™ Blotting Pad Butterfly Opener E-Editor™ 2.02 Software Details on each system component are described in this section. E-PAGE 48 Gels E-PAGE™ 48 Gels are self-contained, pre-cast gels that include a buffered gel matrix and electrodes packaged inside a disposable, UV-transparent cassette. Each E-PAGE™ 48 Gel contains 48 sample lanes and 4 marker lanes. This configuration provides a 3.2 cm run length. The wells of E-PAGE™ 48 Gels are compatible for loading with a multichannel pipetter in alternating lanes or with an automated liquid handling system (see page 14 for automation specifications). After electrophoresis, the E-PAGE™ 48 cassette is easily opened with the included Butterfly Opener to remove the gel for staining or blotting applications. Each E-PAGE™ 48 cassette is labeled with an individual barcode to facilitate identification of the gel using commercial barcode readers (page 16). See page 67 for E-PAGE™ 48 8% Gel specifications. Diagram of an E-PAGE 48 Cassette A diagram of the E-PAGE™ 48 Gel cassette is shown below. copper electrode (-) Tabs for opening gel cassette barcode copper electrode (+) Continued on next page 4 E-PAGE™ System Components, Continued E-PAGE 96 Gels E-PAGE™ 96 Gels are self-contained, pre-cast gels that include a buffered gel matrix and electrodes packaged inside a disposable, UV-transparent cassette. Each E-PAGE™ 96 Gel contains 96 sample lanes and 8 marker lanes in a patented staggered well format that provides a 1.6 cm run length. The wells of the E-PAGE™ 96 gels are compatible for loading with a multichannel pipetter or with an automated liquid handling system (See page 14 for automation specifications). After electrophoresis, the E-PAGE™ cassette is easily opened with the included Butterfly Opener to remove the gel from the cassette for staining or blotting applications. Each E-PAGE™ 96 cassette is labeled with an individual barcode to facilitate identification of the gel using commercial barcode readers (page 16). See page 67 for E-PAGE™ 96 6% Gel specifications Diagram of an E-PAGE™ 96 Cassette A diagram of the E-PAGE™ 96 Gel cassette is shown below. copper electrode (-) staggered well-format tabs for opening gel cassette barcode copper electrode (+) Continued on next page 5 E-PAGE™ System Components, Continued E-Base Electrophoresis Device Important Mother E-Base™ E-PAGE™ Gels are used with a specially designed electrophoresis device that combines a base and a power supply. Two types of devices are available from Invitrogen: The Mother E-Base™ (Cat. no. EB-M03) has an electrical plug that can be connected directly to an electrical outlet and is used for electrophoresis of one E-PAGE™ Gel. The Mother E-Base™ has been tested for electrophoresis with up to three Daughter E-Bases™ connected at one time. The Daughter E-Base™ (Cat. no. EB-D03) connects to the Mother E-Base™, and together they can be used for the independent electrophoresis of 2 or more E-PAGE™ Gels. The Daughter E-Base™ does not have an electrical plug and cannot be used without a Mother E-Base™. E-PAGE™ Gels are not compatible with the E-Gel® 96 bases (cat nos. G7100-01/G7200-01) previously available from Invitrogen. The older E-Gel® 96 bases do not have the ‘E-Base™’ inscription on the platform. Each Mother E-Base™ has a pwr/prg (power/program) button (right side) and a time button (left side) on the lower right side of the base. The lower left side of each Mother E-Base™ contains a light LED and a digital display. The gel cassette is inserted into the two electrode connections. The Mother E-Base™ is connected to an electrical outlet with the electrical plug. The E-Base™ EP program is set to 14 minutes default time. See page 18 to adjust time as recommended. Mother E-Base (–) to electrical outlet (+) pwr/prg button time button digital display light LED Continued on next page 6 E-PAGE™ System Components, Continued Daughter E-Base™ The Daughter E-Base™ is similar to the Mother E-Base™ except the Daughter E-Base™ does not have an electrical cord and cannot be connected to an electrical outlet. The Daughter E-Base™ is connected to a Mother E-Base™ or to another Daughter E-Base™ (already connected to a Mother E-Base™). Once connected to a Mother E-Base™, each Daughter E-Base™ is designed to function independently of the Mother E-Base™ or other Daughter E-Bases™ Mother E-Base™/Daughter E-Base™ Mother E-Base™ Daughter ™ E-Base Continued on next page 7 E-PAGE™ System Components, Continued E-PAGE™ Loading Buffer E-PAGE™ Gels are supplied with E-PAGE™ Loading Buffer 1 (4X), which is optimized for E-PAGE™ Gels, and is recommended for routine SDS-PAGE and staining or blotting applications. It is not recommended to use any other SDS-PAGE sample buffer. See page 11 for more information about loading buffers. E-Holder™ Platform The E-Holder™ Platform is designed to hold E-PAGE™ Gels during loading. Use the E-Holder™ when you need to load multiple gels while other gels are running on the E-Base™. Note: The E-Holder™ is not a power supply unit, cannot be connected to an electrical outlet, and cannot be used to run gels. See page 20 for more information about the E-Holder™ Platform. E-PAGE™ Blotting Pad The E-PAGE™ Blotting Pad is supplied with the E-PAGE™ Gels and E-PAGE™ Starter Kits. It is necessary to use the pad during semi-dry blotting to ensure a good transfer. The pad is reusable as long as the pad retains porosity and liquid retaining capacity. E-PAGE™ Butterfly Opener The red plastic Butterfly Opener is used to open the E-PAGE™ Gel cassette, and trim the gel after electrophoresis. E-Editor™ 2.02 Software The E-Editor™ 2.02 software allows you to quickly reconfigure digital images of E-PAGE Gel results for analysis and documentation. Capture an image of the gel and use the E-Editor™ 2.02 software to: Align and arrange the lanes in the image Save the reconfigured image for further analysis Copy and paste selected lanes or the entire image into other applications for printing, saving, emailing, and/or publishing. The E-Editor™ 2.02 software can be downloaded FREE at www.invitrogen/epage. Follow the instructions to download the software and user manual. 8 Methods Electrophoresis of E-PAGE™ Gels Guidelines for Sample Preparation MEND ION AT RECOM Introduction Materials Needed For optimal results using the E-PAGE™ System, follow the guidelines for preparing your protein samples as described in this section. We recommend that you read this section before preparing your samples. Use the sample preparation method and loading buffer appropriate for your detection method: Application Method Loading Buffer Routine staining and western blotting 1 (page 12) Loading Buffer 1 Lumio Green Detection 2 (page 13) Lumio™ Gel Sample Buffer The following items are needed for sample preparation. See page 71 for ordering information. Protein sample NuPAGE® Sample Reducing Agent (10X) E-PAGE™ Loading Buffer 1 (4X) included in the kit Deionized water Heating block set at 70C Molecular weight markers (page 11) (Optional) Lumio™ Green Detection Kit for detection of Lumio™ fusion proteins (page 13) E-PAGE™ Gels contain SDS and are designed for performing electrophoresis under denaturing conditions. To obtain the best results, we recommend performing SDS-PAGE under reducing conditions. If you need to perform SDS-PAGE under non-reducing conditions, do not add NuPAGE® Sample Reducing Agent (10X) during sample preparation. Continued on next page 9 Guidelines for Sample Preparation, Continued Total Sample Volume For best results, avoid loading less than 5 μL of sample in wells, and maintain a uniform loading volume. If you do not have enough samples to load all the wells of the gel, load an equal volume of deionized water into any empty wells. E-PAGE™ Gel Type Recommended Loading Volume MEND ION AT RECOM ™ Amount of Protein E-PAGE 96 6% Gel 15 μL E-PAGE™ 48 8% Gel 20 μL We recommend loading 5–10 μL of deionized water into all wells of the E-PAGE™ Gel prior to loading samples or molecular weight markers. Load up to 20 μg of protein per well of the E-PAGE™ Gel. The amount of protein required depends on the staining or western detection method used for visualization. If you are unsure of how much protein to use, test a range of concentrations to determine the optimal concentration for your sample. Note: To ensure a proper LDS (lithium dodecyl sulfate from Loading Buffer 1) to protein ratio, limit sample protein or lipid (from the sample) amount to 2 μg/μL of the final sample volume. Excess protein will cause poor resolution. High Salt or Detergent Samples Samples containing high salt or detergents result in loss of resolution on E-PAGE™ Gels. Dilute the samples such that the final concentration of the salt or detergent in the sample is as described below. NT= not tested. Detergent or Salt Final Concentration for E-PAGE™ 48 Final Concentration for E-PAGE 96 Triton® X-100 <0.3% <0.5% ® Tween 20 <0.3% <0.5% CHAPS <0.3% NT NP-40 <0.3% NT RIPA <0.25X NT SDS <2% (already in loading buffer) <4% Tris <300 mM <200 mM NaCl <300 mM <250 mM Ammonium sulfate <100 mM NT Sodium acetate <200 mM NT EDTA <20 mM NT MES Not recommended NT DTT, Glycine, Urea, Imidazole No effect seen up to 500 mM NT Continued on next page 10 Guidelines for Sample Preparation, Continued Loading Buffer Molecular Weight Standards Based on your application, use the appropriate loading buffer as described below: SDS-PAGE and routine staining (Method 1, page 12) For SDS-PAGE and routine staining or blotting, use the E-PAGE™ Loading Buffer 1 (4X) included in the kit for preparing samples. The E-PAGE™ Loading Buffer 1 (4X) is optimized for E-PAGE™ Gels. Do not use any other types of SDS-PAGE sample buffer. SDS-PAGE and detection of Lumio™ Fusion Proteins (Method 2, page 13) For in-gel detection of Lumio™ fusion proteins with the Lumio™ Green Detection Kit, use the Lumio™ Gel Sample Buffer (4X) included with the Lumio™ Green Detection Kit. This buffer is specifically formulated to provide optimal results with the Lumio™ Green Detection Reagent. Do not use the E-PAGE™ Loading Buffer 1 (4X) or any other type of SDS-PAGE buffer to prepare samples for Lumio™ Green detection. The following protein molecular weight standards and loading volumes are recommended for E-PAGE™ Gels. Because molecular weight standards have different migration patterns in different gel systems, see page 51 for apparent molecular weight calibration on E-PAGE™ Gels. See page 71 for ordering information. Gel Type ™ E-PAGE 48 8% Gel E-PAGE™ 96 6% Gel Standard Amount Application ® SeeBlue Plus2 Prestained Standard 5 μL Electrophoresis MagicMark™ XP Western Protein Standard 10 μL Electrophoresis, followed by staining MagicMark™ XP Western Protein Standard 5 μL Western blotting BenchMark™ Fluorescent Protein Standard 5 μL Fluorescent Detection E-PAGE™ SeeBlue® Pre-stained Protein Standard 10 μL Electrophoresis E-PAGE™ MagicMark™ Unstained Protein Standard 10 μL Electrophoresis, followed by staining E-PAGE™ MagicMark™ Unstained Protein Standard 5 μL Western blotting BenchMark™ Fluorescent Protein Standard 5 μL Fluorescent Detection Continued on next page 11 Guidelines for Sample Preparation, Continued Method 1: Routine Use this protocol if you are performing SDS-PAGE followed by routine staining or blotting. Staining and Blotting If the E-PAGE™ Loading Buffer 1 (4X) is stored at 4C, bring the buffer to room temperature and mix briefly prior to use. 1. Prepare your samples in a total volume of 10 μL in the E-PAGE™ Loading Buffer 1 (4X) as described below. If you need to prepare samples in a volume of 5–15 μL, adjust the volumes accordingly. Reagent Protein Sample Reduced Non-reduced x μL x μL 2.5 μL 2.5 μL 1 μL — to 10 μL to 10 μL ™ E-PAGE Loading Buffer 1 (4X) NuPAGE® Sample Reducing Agent (10X) Deionized Water 2. Incubate the samples at 70C for 10 minutes. 3. Proceed to Loading E-PAGE™ Gels, page 19. Continued on next page 12 Guidelines for Sample Preparation, Continued Method 2: Lumio™ Detection A brief protocol to prepare samples for specific detection of Lumio™ fusion proteins using the Lumio™ Green Detection Kit is described below. For details on the Lumio™ Green Detection Kit, refer to the manual available at www.invitrogen.com or contact Technical Support (page 72). 1. Refer to the Lumio Detection manual for details on each type of protein. Prepare protein samples as follows: Protein Sample Sample Volume Lumio™ Gel Sample Buffer (4X) Volume Bacterial samples 7.5 μL 2.5 μL Mammalian lysate 7.5 μL 2.5 μL Partially purified sample 7.5 μL 2.5 μL Purified sample 7.5 μL 2.5 μL In vitro expressed 10 μL Not needed* *There is no need to add Lumio™ Gel Sample Buffer (4X), as the sample is already prepared in this buffer. 2. Thaw the Lumio™ Green Detection Reagent and mix well. 3. Add 0.1 μL Lumio™ Green Detection Reagent to the protein samples from Step 1 in a fume hood. Mix well. Return the Lumio™ Green Detection Reagent to –20C immediately after use. 4. Incubate the samples at 70C for 10 minutes. 5. Allow samples to cool for 1–2 minutes and centrifuge briefly at maximum speed in a microcentrifuge. 6. Thaw the Lumio™ In-Gel Detection Enhancer and mix well. Add 1 μL of Lumio™ In-Gel Detection Enhancer to the samples. 7. Mix well and incubate the samples at room temperature for 5 minutes. Return the Lumio™ In-Gel Detection Enhancer to –20C immediately after use. 8. Proceed to Loading E-PAGE Gels, page 16. When performing electrophoresis of Lumio™ fusion proteins, we recommend extending the run time of the gel for an additional 2 minutes to prevent the formation of a fluorescent dye front. 13 Guidelines for Loading E-PAGE™ Gels by Automated Liquid Handling Introduction E-PAGE 48 and 96 Gels are designed for automated loading using standard SBS (Society for Biomolecular Screening)-compatible liquid handling systems with an 8, 12, or 96-tip robotic loading apparatus. In general, follow the manufacturer instructions for your automated loading system. Specific guidelines for loading each gel format are described in the section below. To download programming scripts for your automated liquid handling system, go to www.invitrogen.com/epage. Automated Loading of E-PAGE™ 96 Gels The wells of the E-PAGE™ 96 Gel are staggered to provide maximum run length (see Figure 1, below). For proper loading of samples, it is important to program your automated liquid handling system to set the A1 tip of the 8, 12 or 96-tip robotic head over the E-PAGE™ 96 Gel cassette as described below. Set the position of the first tip approximately 1 mm above the slope of the A1 well (see Figure 2, below). This ensures that the remaining tips are aligned above the slopes of the remaining wells. Refer to the manufacturer’s manual of your automated liquid handling system to program this setting. After programming the setting, load your samples. During loading, the samples drop onto the slopes of the wells and are drawn into the wells by capillary force. Figure 1 1 2 3 4 5 6 7 8 9 10 11 12 M A B C D E F G H Figure 2 1 A B 2 Well Well 1 mm Well Well Continued on next page 14 Guidelines for Loading E-PAGE™ Gels by Automated Liquid Handling, Continued Automated Loading of E-PAGE™ 48 Gels E-PAGE 48 Gels are compatible with any automated liquid handling system that has an 8-span loading head with either fixed (9mm) or variable distance between the loading heads. These loading patterns are described below. To download programming scripts for your automated liquid handling system, go to www.invitrogen.com/epage. Important For automated loading of E-PAGE™ 48 Gels, position the plate in the “Portrait” orientation rather than the “Landscape” position, as shown below: “Portrait” “Landscape” This orientation is available for some automation systems with the use of a 90° adapter. If your system does not have an adapter that allows the “Portrait” configuration, please contact Technical Support (page 72) to obtain a 90° adapter. Loading Patterns for E-PAGE 48 Loading E-PAGE 48 Gels requires one of the following loading patterns, depending on your machine: Fixed Tip (4 movements per row: 8+8+4+4) Variable Tip (3 movements per row: 8+8+8) 15 Loading E-PAGE™ Gels Introduction After preparing your samples, you are ready to load E-PAGE™ Gels. This section describes the procedure for loading protein samples and molecular weight standards. The Mother E-Base™ and Daughter E-Base™ Electrophoresis Devices are designed to fit most robotic platforms allowing you to load and run E-PAGE™ Gels directly on the automated liquid handling system. If you need to load multiple gels on a robotic platform while other gels are running on the E-Base™ Electrophoresis Devices, use an E-Holder™ Platform (page 20). If you are using an automated liquid handling device, it is important to align the robotic tip loading assembly to the proper setting prior to loading samples on the E-PAGE™ 48 or 96 Gels. This ensures proper loading of samples into the wells. See page 14 for automation guidelines. Dispose of gels as hazardous waste. Avoid touching the gel while the gel is running. Using the Barcode Each E-PAGE™ 48 and 96 Gel cassette is labeled with an individual barcode. The barcode facilitates the identification of each gel cassette during electrophoresis of multiple gels. Each E-PAGE™ cassette contains an EAN 39 type of barcode, which is recognized by the majority of commercially available barcode readers. Refer to the manufacturer’s instructions to set up the barcode reader. Note: When capturing an image of an E-PAGE™ Gel, note that the barcode label is easily overexposed. To ensure that the barcode label is distinct and readable in the image, experiment with different shutter settings for your particular camera. Continued on next page 16 Loading E-PAGE™ Gels, Continued Important Method of Loading Samples E-PAGE™ Gels can only be used once. Do not re-use. To obtain the best results, run the E-PAGE™ Gel immediately after removal from the pouch and loading. Store and run E-PAGE™ Gels at room temperature. Always load 5–10 μL deionized water first into all wells prior to loading sample or molecular weight standard. For optimal results, we do not recommend running reduced and non-reduced samples on the same gel. If you do choose to run these samples on the same gel, avoid running reduced and non-reduced samples in adjacent lanes as the reducing agent may have a carry-over effect on the non-reduced samples. Avoid running samples containing different salt or protein concentrations in adjacent lanes. E-PAGE™ 48 and 96 Gels are not compatible with the E-Gel® 96 Mother and Daughter Bases (cat nos. G7100-01/G7200-01) available previously from Invitrogen. The older E-Gel® 96 bases do not have the ‘E-Base™’ inscription on the platform. We recommend the following methods of sample loading based on the gel type. Use short, rigid tips for loading E-PAGE™ Gels. Gel Type E-PAGE™ 48 Method of Loading Manual pipetter, multichannel pipetter (load samples into alternate wells of the gel followed by a second round of loading into the remaining wells), or automated liquid handling devices (8- or 12-tip). See page 14 for automated liquid handling system guidelines. E-PAGE™ 96 Manual pipetter, multichannel pipetter, or automated liquid handling devices (8-, 12-, or 96-tip). See page 14 for automated liquid handling system guidelines. Continued on next page 17 Loading E-PAGE™ Gels, Continued Selecting a Program on the E-Base™ Device The recommended program for E-PAGE™ Gels is EP. Select program EP prior to inserting a gel into the base. Brief instructions for using the E-Base™ Device are included in this manual. For details, refer to the E-Base™ manual. 1. Plug Mother E-Base™ Device into an electrical outlet using the electrical plug on the base. Connect the Daughter E-Base™ Device to a Mother EBase™ Device or another Daughter E-Base™ Device connected to a Mother E-Base™ Device. 2. The display shows EP or last program used (EG or EP). 3. Press and release the pwr/prg (power/program) button to select the program EP. The default run time for program EP is 14 minutes. 4. To manually change the default run time, press and release the time button located on the lower right corner of the base to view the time setting. 5. Press and hold the time button to increase the time to the desired run time. If the time button is not released, the time setting increases until it reaches 00. To begin cycling through the numbers again, starting from 00, press the time button again. Gel Type E-PAGE™ 48 8% Time in Minutes 27 minutes E-PAGE™ 96 6% 14 minutes (default run time for program EP) Do not run an E-PAGE 96 Gel for more than 25 minutes, or an E-PAGE 48 Gel for more than 30 minutes. When performing electrophoresis of Lumio™ fusion proteins, we recommend extending the run time of the gel for an additional 2 minutes to prevent the formation of a fluorescent dye front. If your sample contains high salt or detergent concentrations, you may need to manually increase the run time. To increase the run time when a cassette is inserted, press and release the time button to increase the time setting by 1-minute intervals or press and hold the time button to increase the time continuously. To increase the run time while a run is in progress, see next page. To manually interrupt or stop a run, see page 22. Continued on next page 18 Loading E-PAGE™ Gels, Continued Loading Gels Each E-PAGE™ Gel is individually wrapped and ready for use. Refer to pages 14–15 for automated liquid handling system guidelines for loading E-PAGE™ Gels. To load your samples on the gels using the E-Holder™ Platform, refer to page 20 for detailed instructions. To load E-PAGE™ Gels on the E-Base Device: 1. Open the package and remove the gel. 2. Remove the plastic comb from the gel. 3. Slide the gel into the two electrode connections on the Mother E-Base™ Device or Daughter E-Base™ Device. The two copper electrodes on the right side of the gel cassette must be in contact with the two electrode connections on the base, as shown below. When the gel is properly inserted into the base, a fan in the base begins running, and a red light illuminates at the lower left corner of the base. The digital display shows the appropriate time for a selected program or the last time setting (Ready Mode). Note: If a cassette is inserted into the base before selecting program EP, remove the cassette, select program EP, and reinsert the cassette. 4. Load deionized water to each well of the E-PAGE™ Gel prior to loading your samples or protein molecular weight standard. There should be a uniform volume of liquid in each well. Load samples into the gels using a multichannel pipetter or an automated liquid handling system as described below: E-PAGE™ Gel Type E-PAGE™ 48 Gel ™ E-PAGE 96 Gel Deionized Water Sample in Loading Buffer 5–10 μL 10–5 μL 10–20 μL 15–5 μL 5. Load the appropriate protein molecular weight standards in the marker wells of the gel. See page 11 for recommended molecular weight standards. 6. Proceed immediately to Running E-PAGE Gels, page 21. 19 Using E-Holder™ Platform The E-Holder™ Platform is designed to hold E-PAGE™ Gels during loading. You can use the E-Holder™ Platform when you need to load multiple gels while other gels are running on the E-Base™ Introduction Note: The E-Holder™ Platform is not a power supply unit, cannot be connected to an electrical outlet, and cannot be used to run E-PAGE™ 48 or 96 Gels. To obtain the best results, run E-PAGE™ Gels on the Mother E-Base™ Device or Daughter E-Base™ Device within 15 minutes after loading on E-Holder™ Platform. The E-PAGE Gels will not fit on the E-Gel 96 Holder previously available from Invitrogen. Important Using E-Holder 1. Open the package and remove the E-PAGE™ Gel. 2. Remove comb from the E-PAGE™ cassette. 3. Place the E-PAGE™ cassette in the E-Holder™ Platform. Align the bottom left end of the cassette in the lower left alignment corner of the E-Holder™ Platform as shown in the figure below. Proceed to loading the gel or to Step 4 below for automated liquid handling system loading. E-PAGE™ 96 Gel Alignment corner 4. 20 E-Holder Platform ™ Optional: Set up your automated liquid handling system to load samples into the E-PAGE™ 48 or 96 Gel placed on an E-Holder™ Platform. Program your automated liquid handling system to load the samples approximately 5 minutes before the previous electrophoresis run is complete. This ensures that the loaded gel from the E-Holder™ Platform is placed onto an E-Base™ Device within the recommended time of 15 minutes. Running E-PAGE™ Gels Introduction After loading your protein samples on the E-PAGE™ Gels, proceed immediately to electrophoresis using the E-Base™ Device. Refer to page 23 for the E-Base™ Quick Reference Guide. Using E-Base™ Instructions for running E-PAGE™ Gels on the Mother E-Base™ Device or Daughter E-Base™ Device are provided below. Note: It is not necessary to have a gel in the Mother E-Base™ Device if you are using a Daughter E-Base™ Device. However, the Mother E-Base™ Device must be plugged into an electrical outlet. 1. To begin electrophoresis, press and release the pwr/prg button located on the lower right corner of the Mother E-Base™ Device. The red light changes to a green light and the digital display shows the count down time while the run is in progress. ™ E-PAGE 96 Gel Mother E-Base™ Digital display 2. Time button If you are using a Daughter E-Base™ Device, press and release the pwr/prg button located on the lower right corner of the Daughter E-Base™ Device. Mother E-Base™ Daughter E-Base™ To add to the run time while the run is in progress, press the time button to select the desired time and then release the time button. Do not run an E-PAGE™ 96 Gel for more than 25 minutes or an E-PAGE™ 48 Gel for more than 30 minutes. To interrupt or stop a run in progress, see page 22. Continued on next page 21 Running E-PAGE™ Gels, Continued Using E-Base™, Continued 3. The Mother E-Base™ Device or Daughter E-Base™ Device signals the end of the run with a flashing red light and rapid beeping for 2 minutes followed by a single beep every minute. At the end of the run, the digital display shows the original time setting (not any time change that was made during the electrophoresis). The digital display also shows the elapsed time (up to 19 minutes with a negative sign) since the end of the run. 4. Press and release the pwr/prg button to stop the beeping. The light turns to a steady red and the digital display shows the last time setting. 5. Remove the gel cassette from the Mother E-Base™ Device or Daughter E-Base™ Device. 6. For visualizing Lumio™ fusion proteins, see page 39. For opening the E-PAGE™ cassette, see page 25. Note: The bands in the gel will diffuse within 40 minutes. Interrupting an Electrophoresis Run You can interrupt an electrophoresis run at any time by pressing and releasing the pwr/prg button to stop the current. The stopped current is indicated by a steady red light and the digital display will flash to indicate that the run was interrupted. You can remove the gel from the E-Base™ Device to check the progress of the run. Then: To continue the run from the point at which it was stopped, reinsert the gel and press and release the pwr/prg button. The light changes to steady green and the digital display shows the count down time. To cancel the rest of the interrupted run, press and hold the pwr/prg button for a few seconds. The digital display will reset and the base will return to Ready Mode. If desired, you can then program a new run time as described on page 18 and rerun the gel. In case of an external power failure (loss of electricity or the electrical cord is accidentally removed from the outlet), the run will continue when the power resumes. The Mother E-Base™ Device or Daughter E-Base™ Device signals the end of the run as described on the previous page, except the light will be an alternating red/green to indicate that an external power failure had occurred during the run. We recommend that you disconnect the Mother E-Base™ Device from the electrical outlet when not in use for a prolonged period of time. Maintaining E-Base™ 22 Keep the surfaces of the Mother E-Base™ Device and Daughter E-Base™ Device free of contaminants. To clean, disconnect bases from power source and wipe with a dry cloth. Do not attempt to open or service the bases. To honor the warranty, bases should only be opened and serviced by Invitrogen. E-Base™ Quick Reference Guide Introduction Mode A quick reference guide for operating the Mother E-Base™ Device and Daughter E-Base™ Device is provided below. Operating modes and electrophoresis runs are described. Action Sound Light Digital Display No light if a cassette is not inserted, or red light if a cassette is inserted Without gel cassette last program used (EP or EG) With gel cassette in last time setting Base plugged in Mother E-Base™ connected to an electrical outlet Ready (with no current flowing through gel) Gel cassette inserted into a base — Steady red Default time setting (12 minutes for EG, 14 minutes for EP, or last time setting) Run Press and release the pwr/prg button — Steady green Count down time Automatic Continuous beeping for 2 minutes followed by a single beep every minute Flashing red until the time button is pressed Negative time display (00 to -19 minutes) Run ends after an external power failure Automatic Continuous beeping for 2 minutes followed by a single beep every minute Alternating red and green Negative time display (00 to -19 minutes) Pause (manually end the run) Press and release the pwr/prg button during the run With gel cassette in - steady red Without gel cassette - no light Flashing time display End of run 1 beep — Continued on next page 23 E-Base™ Quick Reference Guide, Continued Mode Action Sound Light Digital Display Return to Ready mode after an automatic stop Press and release the pwr/prg button — Steady red Last time setting Restart after a manual stop Press and release the pwr/prg button — Steady green Count down time — With gel cassette in – steady red Without gel cassette – no light With gel cassette in – last time setting Without gel cassette - last program setting Return to Ready mode after a manual stop Press and hold the pwr/prg button Failure Press and hold pwr/prg button for 2 seconds and remove gel from the base No cassette Continuous loud beeping — With gel cassette in - Press and release the time button Time setting Program setting 24 With and without gel cassette - Press and hold the time button Press and release the pwr/prg button when no cassette is inserted into the E-Base™ to select the desired program 1 beep — Flashing “ER” — — EP, last program used (EP or EG) — With gel cassette – steady red Time increases by 1 minute increments — With gel cassette in – steady red Without gel cassette – no light Time increases continuously and automatically stops at 00 No light Selected program EP or EG Opening the E-PAGE™ Cassette Opening the Cassette To remove the E-PAGE™ Gel from the cassette for blotting or staining, use the red plastic Butterfly Opener to open the cassette. 1. Insert the wide side of the red Butterfly Opener (included in the kit) between the tabs at the edge of the E-PAGE™ cassette and twist to separate the two halves of the cassette. 2. Gently pull apart the cassette halves with your hands until the cassette halves are completely separated and the gel is exposed. 3. Carefully remove the gel from the cassette. 4. Using the wide side of the Butterfly Opener or a gel knife, trim the top and bottom electrode areas of the gel. 5. Proceed to blotting (pages 26–38) or staining (pages 39–48). Small pieces of gel material may remain in the wells of an E-PAGE™ Gel after removal of the gel from the cassette. To obtain the best staining or blotting results, remove any small pieces of gel material in the wells of the gel by gently rubbing a gloved hand over the well side of the gel. 25 Blotting E-PAGE™ Gels Blotting E-PAGE™ Gels with the iBlot® Device Introduction Instructions are provided in this section to assemble the iBlot® Gel Transfer Device with the De-Bubbling Roller for blotting E-PAGE™ Gels. The recommended program for blotting E-PAGE™ Gels is Program P3 at 20 volts for 7–8 minutes. Materials Needed You will need the following items: Removing the Gel Pre-run E-PAGE™ gel containing your protein samples and standards iBlot® Gel Transfer Stack, Regular (page 70) Remove the gel from the cassette for transfer after completion of electrophoresis as described on page 26. There is no need for any pretreatment of the gel after electrophoresis. Wash the E-PAGE™ gel briefly in deionized water to remove any small gel pieces attached to the gel. The transfer membrane is supplied in a ready-to-use format in the stacks without any need for pretreatment. Do not treat the PVDF membrane with methanol as the PVDF membrane is preactivated prior to assembly with the transfer stack. To obtain the best blotting results with the E-PAGE™ gels, we recommend that you use the De-bubbling Roller. For an alternative protocol using the Blotting Roller, refer to the manual for the iBlot® Dry Blotting System. Continued on next page 26 Using the iBlot® Device with the De-Bubbling Roller, Continued Assembling the iBlot® Device 1. Open the lid of the device and pull up the Metal Spacers 1 and 2. If you have attached the De-bubbling Roller to the device, then remove the roller as shown in the figure below. Spacer 2 Roller 2. Remove the package labeled iBlot® Anode Stack, Bottom from the iBlot® Gel Transfer Stacks Box. Remove the laminated sealing of the iBlot® Anode Stack, Bottom and keep the stack in the transparent plastic tray. Tab 3. Place the iBlot® Anode Stack, Bottom stack with the tray to the left of the blotting surface area such that the tab on the tray is on the right side of the De-bubbling Roller, as shown below. Slide the bottom stack to the left until the stack is blocked by the Gel Barriers present on the left side of the device. Note: Handle the iBlot® Anode Stack, Bottom using the plastic tray to avoid disturbing the gel and membrane layers in the stack. Do not touch the transfer membrane on the stack. Tab Continued on next page 27 Using the iBlot® Device with the De-Bubbling Roller, Continued Assembling the iBlot® Device, continued 4. Clean the Metal Spacer 1 with a damp cloth or tissue and place the spacer on the membrane as shown below. Spacer 1 5. Place the prerun gel containing your protein samples on Metal Spacer 1 such that the gel is aligned to the lower right corner of the bottom stack with the wells of the E-PAGE™ gel facing up. 6. Clean the Metal Spacer 2 with a damp cloth or tissue and place the spacer over the gel as shown below. Spacer 2 7. Remove the package labeled iBlot® Cathode Stack, Top from the iBlot® Gel Transfer Stacks Box. Remove the iBlot® Cathode Stack, Top from the package. Continued on next page 28 Using the iBlot® Device with the De-Bubbling Roller, Continued Assembling the iBlot® Device, continued 8. Insert the steel iBlot® E-PAGE™ Tab in the plastic tray groove with the tab teeth facing up (figure A). Gently press the iBlot® Cathode Stack over the teeth to allow the teeth to penetrate into the copper electrode (figure B). Remove the iBlot® Cathode Stack, Top from the red plastic tray using the iBlot® E-PAGE™ Tab (figure C). A B C 9. Place the iBlot® Cathode Stack, Top without the tray on top of Metal Spacer 2 with the copper electrode side facing up (and agarose side facing down). Ensure that all layers are aligned to the right to perform efficient de-bubbling. 10. Insert the De-bubbling Roller into the two grooves and lower the roller to its lowest location while holding the pull tab. The resulting assembly consists of the gel, and cathode and anode stacks placed between two Metal Spacers 1 and 2 with the De-bubbling Roller on top of the assembly as shown below. Continued on next page 29 Using the iBlot® Device with the De-Bubbling Roller, Continued Assembling the iBlot® Device, continued 11. Hold the iBlot® E-PAGE™ Tab and plastic tab on the iBlot® Anode Stack, Bottom together and pull the assembly (anode and cathode stacks, and gel) together through the De-bubbling Roller towards the blotting surface, in one smooth, uninterrupted movement until the assembly reaches the Gel Barriers on the blotting surface (figure A). At the end of de-bubbling, all layers are aligned to the right as shown below (figure B). A B 12. Place the iBlot® Disposable Sponge on the inner side of the lid (between the small protrusions on the lid that hold the sponge in its place) such that the metal contact is to the top right. Contact The sponge absorbs any excess liquid generated during blotting and exerts an even pressure on the stack surface. Performing Blotting After assembling the iBlot® Gel Transfer Device, perform blotting within 15 minutes of assembling the stacks with the gel as described below. 1. Close the iBlot® Lid and secure the latch. The red light is on indicating a closed circuit. Ensure the correct program is selected (Program P3 at 20 volts for 7–8 minutes). 2. Press the Start/Stop button to start the transfer. The red status light changes to green. The transfer continues using the programmed parameters. 3. At the end of the transfer, current automatically shuts off and the iBlot® Gel Transfer Device signals the end of transfer with repeated beeping sounds, and flashing red light and digital display. Note: Previous versions of the iBlot® Gel Transfer Device (firmware versions prior to 2.7.9), signaled the end of transfer with repeated beeping sounds, and flashing green light (instead of red light) and digital display. 4. Press and release the Start/Stop button to stop the beeping. The light turns to a steady red light. Continued on next page 30 Using the iBlot® Device with the De-Bubbling Roller, Continued Disassembling the iBlot® Gel Transfer Device To obtain good transfer and detection results, disassemble the device and stacks within 30 minutes of ending the blotting procedure. 1. Open the lid of the iBlot® Device. 2. Remove the iBlot® E-PAGE™ Tab (used for blotting E-PAGE™ gels only). Rinse the tab with deionized water and store in a dry place for future use. Do not discard the iBlot® E-PAGE™ Tab. 3. Discard the iBlot® Disposable Sponge and iBlot® Cathode Stack, Top. 4. Carefully remove and discard the gel and filter paper (if used) as shown below. Remove the transfer membrane from the stack and proceed with the blocking procedure or stain the membrane (see next page for details). Note: If you are using PVDF membranes, place the membrane immediately into water, as PVDF membranes dry quickly. If the PVDF membrane is dried, re-wet the membrane with methanol and rinse with deionized water a few times before use. Transfer the membrane to your blocking or staining solution only after you are sure that is completely wet, because reactivating after the membrane is exposed to the blocking solution may be problematic. Important 5. Discard the iBlot® Anode stack, Bottom. 6. At this point, the iBlot® Gel Transfer Device is ready for another run (no cooling period is required). If you are not using the device, turn off the power switch located on the back of the iBlot® Gel Transfer Device. Do not reuse the iBlot® Disposable Sponge, iBlot® Filter Paper, and iBlot® Cathode and Anode Stacks after blotting. Discard after each use. 31 Semi-Dry Blotting of E-PAGE™ Gels Introduction A semi-dry blotting procedure for blotting E-PAGE™ Gels is described in this section. You will need a semi-dry transfer apparatus that is capable of accommodating the dimensions of an E-PAGE™ Gel (8.6 cm x 13.5 cm) and a power supply. Materials Needed You will need the following items. See page 71 for ordering information. Semi-dry blotter Methanol (for transfer of E-PAGE™ 48 Gels) NuPAGE® Transfer Buffer (20X) NuPAGE® Antioxidant Blotting membranes: Invitrolon™/Filter Paper Sandwiches or Nitrocellulose Membrane/Filter Paper Sandwiches E-PAGE™ Blotting Pad (supplied with E-PAGE™ Gels or available separately) 4 pieces of 2.5 mm Blotting Filter Paper Blotting Roller Incubation Tray Continued on next page 32 Semi-Dry Blotting of E-PAGE Gels, Continued E-PAGE 48 Transfer Buffer We recommend using 2X NuPAGE® Transfer Buffer with 15% methanol and NuPAGE® Antioxidant for the transfer of most proteins from E-PAGE™ 48 Gels. When the complete transfer of higher molecular weight proteins (>150 kDa) is desired, reduce methanol to 10%. For one gel, prepare 500 mL of 2X NuPAGE® Transfer Buffer as follows: E-PAGE 96 Transfer Buffer Buffer Component Transfer Buffer with 15% Methanol Transfer Buffer with 10% Methanol NuPAGE® Transfer Buffer (20X) 50 mL 50 mL NuPAGE® Antioxidant 0.5 mL 0.5 mL Methanol 75 mL 50 mL Deionized Water to 500 mL to 500 mL We recommend using 2X NuPAGE® Transfer Buffer with NuPAGE® Antioxidant without methanol for the transfer of most proteins from E-PAGE™ 96 Gels. For one gel, prepare 500 mL of 2X NuPAGE® Transfer Buffer as follows: Buffer Component Transfer Buffer without Methanol NuPAGE® Transfer Buffer (20X) 50 mL NuPAGE® Antioxidant 0.5 mL Deionized Water to 500 mL 33 Semi-Dry Blotting of E-PAGE™ Gels, Continued Equilibrating the Gel Preparing Blotting Membrane Equilibration of the gel in 2X Transfer Buffer results in removal of salts that may increase conductivity and heat during transfer. Perform equilibration for the recommended time, as longer equilibration results in protein diffusion. 1. After electrophoresis, remove the gel from the cassette as described on page 25. 2. Using the Butterfly Opener or a gel knife, trim off the top and bottom electrode areas of the gel. 3. Equilibrate the E-PAGE™ gel in 200 mL 2X NuPAGE® Transfer Buffer (see previous page) for 30 minutes. Perform this equilibration on a shaker. Nitrocellulose 1. Use pre-cut Nitrocellulose/Filter Paper Sandwich or cut nitrocellulose membrane to the appropriate size (8.6 cm x 13.5 cm). 2. Soak the membrane in 2X NuPAGE® Transfer Buffer (see previous page) for several minutes in the Incubation Tray. PVDF 1. Use pre-cut Invitrolon™/Filter Paper Sandwich or cut PVDF membrane to the appropriate size (8.6 cm x 13.5 cm). Guidelines for Semi-Dry Blotting 2. Pre-wet the membrane for 30 seconds in methanol, ethanol, or isopropanol. Briefly rinse in deionized water. 3. Soak the membrane in 2X NuPAGE® Transfer Buffer (see previous page) for several minutes in the Incubation Tray. Use the correct 2X NuPAGE® Transfer Buffer as described on the previous page based on the E-PAGE™ Gel type. Equilibrate the gel as described above. To ensure a good transfer, it is necessary to use the E-PAGE™ Blotting Pad and 2.5 mm Blotting Filter Paper. Remove any trapped bubbles by using the Blotting Roller at each step of creating the blot sandwich. Since the E-PAGE™ Gel is thick and easily compressed, avoid applying any off-center pressure that may deform the blot sandwich, cause bubble formation, or break the contact between the gel and membrane resulting in poor transfer. If the blot sandwich is disturbed during assembly, we recommend disassembling the sandwich and re-assembling it again. Continued on next page 34 Semi-Dry Blotting of E-PAGE™ Gels, Continued Semi-Dry Blotting Protocol 1. In a clean container or Incubation Tray, soak 4 pieces of 2.5 mm Blotting Filter Paper (8.6 cm x 13.5 cm) in 2X NuPAGE® Transfer Buffer (see page 33). Remove any air bubbles trapped between filter paper sheets using the Blotting Roller while the paper is still submerged in buffer. 2. In a clean container or Incubation Tray, soak the E-PAGE™ Blotting Pad in 2X NuPAGE® Transfer Buffer (see page 33). Inspect both sides of the pad for air bubbles. Press the pad to ensure the elimination of any visible air bubbles. Note: The Blotting Pad has no specific orientation (either side may be facing toward the gel). 3. Place 2 pieces of pre-soaked 2.5 mm Blotting Filter Paper from Step 1 on the anode plate of a semi-dry blotting apparatus. Ensure that all filter paper sheets are aligned properly and remove any air bubbles with the Blotting Roller. 4. Place the pre-soaked blotting membrane (see page 33) on top of the filter paper stack and remove any air bubbles with the Blotting Roller. 5. Remove the gel from the transfer buffer. Gently rub a gloved finger over the well side of the gel to remove small gel pieces from the gel surface. Resubmerge the gel in transfer buffer to remove any gel pieces from the gel, as they can cause air bubbles and field distortion during transfer. 6. Place the flat side of the gel on top of the blotting membrane (well side up), and remove any air bubbles with the Blotting Roller. Fill the wells of the gel with 2X NuPAGE® Transfer Buffer (see page 33). 7. Place the pre-soaked E-PAGE™ Blotting Pad on the gel and gently roll out air bubbles with the Blotting Roller. 8. Place 2 pieces of pre-soaked 2.5 mm Blotting Filter Paper from Step 1 on top of the Blotting Pad. Ensure that all filter paper sheets are aligned properly and flush with the gel/membrane sandwich. Remove any air bubbles trapped between filter paper sheets using the Blotting Roller. 9. Place the cathode plate on the stack without disturbing the blot sandwich. Follow the manufacturer’s instructions to further assemble the semi-dry blotting apparatus. 10. Transfer at 25 V for 1 h (~19 V/cm). You may need to optimize the transfer conditions for your specific proteins or semi-dry blot apparatus. See page 53 for results obtained with semi-dry blotting of E-PAGE™ Gels. 35 Semi-Wet Blotting of E-PAGE™ Gels Introduction Semi-Wet Transfer Apparatus Important A semi-wet blotting procedure using an XCell II™ Blot Module for transfer of proteins from E-PAGE™ Gels is described below. Two XCell II™ Blot Module units are required to transfer one E-PAGE™ Gel. To obtain the best transfer, we recommend transferring only one half of an E-PAGE™ Gel in one XCell II™ Blot Module. Inefficient transfer may occur if you transfer 2 halves of the E-PAGE™ Gel in one blot module at the same time, as the E-PAGE™ Gel is thicker than regular mini-gels. If you are using the XCell II™ Blot Module for transferring one E-PAGE™ Gel, we recommend that you have two XCell II™ Blot Modules on hand before proceeding for transfer. Other semi-wet transfer apparatus that can accommodate an E-PAGE™ Gel (8.6 cm x 13.5 cm) may be used. However you may get sub-optimal results if your blotting apparatus is prone to transfer distortion when accommodating thick gels. It may be necessary to optimize your semi-wet blotting procedure based on the protocol below, or it may be necessary to use a semi-dry blotting apparatus to obtain optimal results. Note: Using the Criterion Blotter module from BioRad (BioRad Cat. no. 170-4070) is not recommended. Materials Needed You will need the following items. Ordering information is on page 71. XCell II™ Blot Module (2 units required for transfer of 1 E-PAGE™ Gel) XCell SureLock™ Mini-Cell Power supply (1–2 amps) Methanol NuPAGE® Transfer Buffer (20X) NuPAGE® Antioxidant Invitrolon™ or Nitrocellulose Membrane/Filter Paper Sandwiches Blotting Roller Incubation Tray Note: Use the blotting pads that fit the XCell II™ Blot Module. Do not use the E-PAGE Blotting Pads for semi-wet transfer. Continued on next page 36 Semi-Wet Blotting of E-PAGE™ Gels, Continued Preparing 1X Transfer Buffer We recommend using 1X NuPAGE® Transfer Buffer with NuPAGE® Antioxidant and 10% methanol for semi-wet transfer of proteins from the E-PAGE™ Gel. Note: If a large amount of heat is produced during the transfer, use a cooling unit or perform transfer with cold buffer. For one blot module, prepare 1000 mL of 1X NuPAGE® Transfer Buffer as follows: Buffer Component 50 mL ® NuPAGE Antioxidant 1 mL Methanol 100 mL Deionized Water 849 mL NuPAGE Transfer Buffer (20X) Preparing Blotting Pads, Membrane, and Gel Transfer Buffer with 10% Methanol ® 1. 2. 3. Use ~ 700 mL 1X NuPAGE® Transfer Buffer (see previous page) to soak the blotting pads of the blot module until saturated. Remove air bubbles by squeezing the blotting pads while they are submerged in buffer. Note: Use the blotting pads that fit the XCell II™ Blot Module. Do not use the E-PAGE Blotting Pads for semi-wet transfer. Prepare pre-cut membrane/filter paper sandwiches as described below. PVDF membrane: Pre-wet the PVDF membrane for 30 seconds in methanol, ethanol, or isopropanol. Briefly rinse in deionized water and place the membrane in a shallow dish containing 50–100 mL 1X NuPAGE® Transfer Buffer (see previous page) for several minutes. Nitrocellulose membrane: Place the membrane directly into a tray containing 1X NuPAGE® Transfer Buffer (see previous page) for several minutes. Filter paper: Soak briefly in 1X NuPAGE® Transfer Buffer (see previous page) before using. Transfer the E-PAGE™ Gel immediately following electrophoresis. You will need to cut the gel in half so it can fit into the XCell II Blot Module. Do not soak the E-PAGE™ Gel in transfer buffer. Continued on next page 37 Semi-Wet Blotting of E-PAGE™ Gels, Continued Semi-Wet Blotting Procedure 1. Remove any small pieces of gel from the well areas by gently rubbing a gloved finger over the well side of the gel. The gel pieces on the gel may cause air bubbles and field distortion during transfer. 2. Lay the gel on a flat surface, well side up, in a suitable container and pour sufficient 1X NuPAGE® Transfer Buffer (see previous page) over the gel to fill all wells. 3. Place a piece of pre-soaked filter paper on top of the gel and remove any trapped air bubbles by gently rolling the Blotting Roller over the filter paper. Turn the gel over so the filter paper and gel and are facing downwards over a gloved hand or clean flat surface 4. Place a pre-soaked membrane on the gel and remove any trapped air bubbles with the Blotting Roller. 5. Place another pre-soaked filter paper on top of the membrane and remove any trapped air bubbles with the Blotting Roller. 6. Place two pre-soaked blotting pads into the cathode core of the blot module. Note: Use the blotting pads that fit the XCell II™ Blot Module. Do not use the E-PAGE Blotting Pads for semi-wet transfer. 7. Place the gel/membrane assembly on the blotting pads, such that the gel is closest to the cathode core. 8. Add another pre-soaked blotting pad on top of the membrane assembly. Remove air bubbles with the Blotting Roller. 9. Add enough pre-soaked blotting pads to rise to 0.5 cm over the rim of the cathode core. Place the anode (+) core on top of the pads. 10. Hold the blot module together firmly and slide it into the guide rails on the lower buffer chamber. 11. Insert the gel tension wedge into the lower buffer chamber and lock the wedge into position. 12. Fill the blot module with 1X NuPAGE® Transfer Buffer (see previous page) until the gel/membrane assembly is just covered. 13. Fill the outer buffer chamber with 650 mL deionized water. 14. Place the lid on the unit and connect electrical leads to the power supply. 15. Perform transfer for nitrocellulose or PVDF membranes using 35 V constant for 1 hour. The expected starting current is about 170 mA. 38 Visualizing and Staining of E-PAGE™ Gels Visualizing Lumio Fusion Proteins Introduction The steps involved in detecting Lumio™ fusion proteins run on an E-PAGE™ Gel are described below. To visualize Lumio™ fusion protein bands after electrophoresis, you will need a UV transilluminator or a laser-based scanner (see below). For further details on imaging Lumio™ fusion proteins, refer to the product manual available at www.invitrogen.com or contact Technical Support (page 72) Visualizing Lumio™ Fusion Proteins After electrophoresis is complete, immediately visualize and image the gel as described below. There is no need to remove the E-PAGE™ Gel from the cassette to visualize Lumio™ fusion proteins. 1. Place the gel cassette on a UV transilluminator equipped with a camera and select the ethidium bromide or SYBR® Green filter on the camera. You may also use a laser-based scanner with a laser line that falls within the excitation maxima of the stain (500 nm), and a 535 nm long pass filter or a band pass filter centered near the emission maxima of 535 nm. Note: Adjust the settings on the camera prior to turning on the UV transilluminator. Avoid exposing the gel to UV light for long periods of time. 2. Image the gel with a suitable camera with the appropriate filters using a 4– 10 second exposure. You may need to adjust the brightness and contrast to reduce any faint non-specific bands. You should see fluorescent bands of Lumio™ fusion proteins and the gel should have minimal background, as shown on page 54. 39 SYPRO® Ruby Staining Protocol Introduction Materials Needed Instructions for staining E-PAGE™ Gels using SYPRO® Ruby Protein Gel Stain is described in this section. To visualize protein bands after electrophoresis using SYPRO® Ruby, you will need a UV transilluminator or a laser-based scanner (see below). For further details on imaging SYPRO® Ruby proteins, refer to the product manual available at www.invitrogen.com or contact Technical Support (page 72). Total staining time is 4 hours, with optional destaining overnight. You will need the following items for staining one E-PAGE Gel. See page 71 for ordering information. SYPRO® Ruby Protein Gel Stain (see note below) Fixing solution (20% acetic acid, see note below) Destaining solution (10% methanol, 7% acetic acid, see note below) Incubation Trays Rotary shaker UV transilluminator equipped with a standard camera or an appropriate laser scanner (see note below) The volume of fixing, staining and destaining solutions will depend on the volume of your staining container. To obtain good results, the volume of solution must be sufficient to cover the gel completely and to allow the gel to move freely during all of the steps. Staining Protocol 1. After electrophoresis, remove the gel from the cassette (page 25) and place the gel in a clean Incubation Tray. 2. Fix the gel in 20% acetic acid for 30 minutes on an orbital shaker. 3. Stain the gel in undiluted SYPRO® Ruby Protein Gel Stain for 1.5 hours on an orbital shaker. 4. Transfer the gel to a clean Incubation Tray and destain in 10% methanol, 7% acetic acid for 2 hours. If complete removal of background is desired, perform the destaining step overnight. 5. Place the gel on a UV transilluminator equipped with a standard camera and select the ethidium bromide filter on the camera. You may also use a laser-based scanner with a laser line that falls within the excitation maxima of the stain (610 nm). 6. Image the gel with a suitable camera with the appropriate filters using a 1–4 second exposure. You may need to adjust the brightness and contrast to reduce any faint non-specific bands. You should see fluorescent protein bands and the gel should have minimal background as shown on page 55. 40 Coomassie® Staining Introduction Instructions for staining E-PAGE™ Gels using Coomassie® R-250 are described in this section. To obtain maximum sensitivity, the total staining time for Coomassie® R-250 staining is 1.5 h plus overnight destaining. The use of the Coomassie® R-250 microwave protocol reduces the amount of time needed for staining and destaining, however for minimal background, overnight destaining is recommended. Materials Needed You will need the following items for staining one E-PAGE™ Gel: Clean staining containers or incubation trays (if using the Coomassie® R-250 microwave protocol, make sure the container is microwave safe. Do NOT use the Incubation Tray cat no. LC2102) Rotary shaker For Coomassie® R-250 Staining Coomassie® R-250 Stain (see note below) Destaining solution (8% acetic acid in deionized water, see note below) Methanol (regular protocol only) Ethanol (microwave protocol only) 2 pieces of nylon membrane (microwave protocol only) The volume of fixing, staining and destaining solutions will depend on the volume of your staining container. To obtain good results, the volume of solution must be sufficient to cover the gel completely and to allow the gel to move freely during all of the steps. Important When using the Coomassie® R-250 microwave staining protocol, warm the Coomassie® R-250 stain and destaining solution to 50°C without boiling. It is important NOT to boil the solutions. Since microwave ovens differ significantly, we recommend testing various times (10 second intervals) and power settings of your microwave oven to achieve a temperature of 50°C in the volume of solution required for your particular staining container. Perform these steps without the gel. Once you have optimized the time and settings for your microwave, use these settings for staining. Continued on next page 41 Coomassie® Staining, Continued The staining solutions for the Coomassie R-250 staining protocol and the microwave staining protocol are different. Be sure to use the correct stain for the correct protocol. Coomassie® R-250 Staining Protocol Coomassie® R-250 Staining Microwave Protocol For all staining and destaining steps described below, be sure to use sufficient reagents to completely cover the gel using a suitable container such that the gel moves freely during the staining and destaining steps. 1. After electrophoresis, remove the gel from the cassette (page 25) and place the gel in a clean incubation tray. 2. Prepare Coomassie® stain (0.03% Coomassie® R-250 in 30% methanol and 10% acetic acid). See note on previous page. 3. Stain the gel in the prepared stain for 1.5 hours at room temperature with gentle shaking. 4. Destain the gel in destaining solution (see previous page) at room temperature with gentle shaking with intermittent changes of solution until the bands are visible or overnight for maximum sensitivity and clear background. For all staining and destaining steps described below, be sure to use sufficient reagents to completely cover the gel in a microwave safe container such that the gel moves freely during the staining and destaining steps. 1. After electrophoresis, remove the gel from the cassette (page 25) and place the gel in a clean microwave safe container. 2. Prepare Coomassie® stain (0.015% Coomassie® R-250 in 30% ethanol and 10% acetic acid). See note on previous page. 3. Add enough stain to completely cover the gel in the microwave safe container. 4. Warm the gel and solution to about 50°C in a microwave oven (see previous page). Note: Do NOT boil the solution. 5. Incubate the gel in the warmed staining solution for 30 minutes on an orbital shaker at room temperature. 6. Discard the stain, rinse the gel briefly with water and discard the water. 7. Add enough destaining solution (see previous page) to cover the gel during incubation 8. Place two pieces of positively charged nylon membrane on top of the destaining solution to speed up the destaining process. 9. Warm the destaining solution, gel and nylon membrane to 50°C in a microwave oven (see previous page). Note: Do NOT boil the solution. 10. Incubate the gel in the warm destaining solution on an orbital shaker at room temperature until the desired background is achieved. Note: To obtain a clear background, perform destaining overnight. Results obtained with Coomassie® stain are shown on page 56. 42 SimplyBlue™ SafeStain Introduction Instructions for staining E-PAGE™ Gels using SimplyBlue™ SafeStain are described in this section. For further details, refer to the product manual available at www.invitrogen.com or contact Technical Support (page 72). The total staining time for SimplyBlue™ SafeStain is 0.5–3 h plus overnight destaining. Results obtained with SimplyBlue™ SafeStain are shown on page 57. Materials Needed You will need the following items for staining one E-PAGE™ Gel: Clean Incubation Tray Rotary shaker SimplyBlue™ SafeStain (see note below) Fixing solution: (see note below) For E-PAGE 48: 10% acetic acid/30% methanol in deionized water For E-PAGE 96: 20% acetic acid in deionized water Wash solution: (see note below) For E-PAGE 48: 2% NaCl in deionized water For E-PAGE 96: Deionized water The volume of fixing, staining and destaining solutions will depend on the volume of your staining container. To obtain good results, the volume of solution must be sufficient to cover the gel completely and to allow the gel to move freely during all of the steps. E-PAGE 48 and E-PAGE 96 Gels require different staining protocols. Be sure to use the correct protocol for your gel. E-PAGE 48 Gels E-PAGE 48 Gel Staining Protocol: 1. After electrophoresis, remove the gel from the cassette (page 25) and place the gel in a clean incubation tray. 2. Fix the gel in fixing solution (10% acetic acid/30% methanol in deionized water) for 1 hour with gentle shaking at room temperature. Decant the fixing solution. 3. Stain the gel with sufficient SimplyBlue™ SafeStain to cover the gel. Incubate at room temperature for 2 h with gentle shaking. Decant the stain. 4. Wash the gel briefly with deionized water. 5. Wash the gel with 2% NaCl solution with gentle shaking at room temperature with intermittent changes of wash solution until the bands are visible or overnight for maximum sensitivity and clear background. Continued on next page 43 SimplyBlue™ SafeStain, Continued E-PAGE 96 Gels For routine staining of E-PAGE 96 Gels, use Protocol A. To obtain the clearest background for imaging, use Protocol B, which includes a 12–24 h washing step to improve the background. Protocol A 1. After electrophoresis, remove the gel from the cassette (page 25) and place the gel in a clean incubation tray. 2. Rinse the gel 3 times for 5 minutes each with deionized water to remove SDS and buffer salts. 3. Stain the gel with sufficient SimplyBlueSafeStain to cover the gel. Incubate at room temperature for 1.5 h with gentle shaking. Decant the stain. 4. Wash the gel with deionized water for 3 h with intermittent water changes. Protocol B 1. After electrophoresis, remove the gel from the cassette (page 25) and place the gel in a clean incubation tray. 44 2. Fix the gel in 20% acetic acid for 30 minutes at room temperature. Decant the solution. 3. Stain the gel with sufficient SimplyBlueSafeStain to cover the gel. Incubate at room temperature for 30 minutes with gentle shaking. Decant the stain. 4. Rinse the gel briefly with deionized water. Wash the gel in deionized water for 12–24 h at room temperature, changing the water at least once. Silver Staining Methods Introduction Instructions for staining E-PAGE™ Gels using SilverQuest™ Silver Staining Kit or SilverXpress® Silver Staining Kit are described in this section. Total staining time with SilverQuest™ Silver Staining Kit is 4.5 h and SilverXpress® Silver Staining Kit is 6.5 h. Materials Needed You will need the following items for staining one E-PAGE Gel. See page 71 for ordering information. Ultrapure water (>18 megohm/cm resistance recommended, see below) Clean staining containers (if using the SilverQuest™ Silver Staining Kit, make sure the container is microwave safe. Do NOT use the Incubation Tray cat no. LC2102 for this purpose) Rotary shaker Clean glass bottles for reagent preparation For SilverQuest™ Silver Staining SilverQuest™ Silver Staining Kit Microwave oven (700–1000 watts) 30% ethanol (made with ultrapure water) 100% ethanol Fixative (40% ethanol, 10% acetic acid, made with ultrapure water) For SilverXpress® Silver Staining SilverXpress® Silver Staining Kit Methanol Acetic acid Always use ultrapure water of >18 megohm/cm resistance for preparing all solutions and rinsing gels and containers. Poor water quality may increase the background or impair band development. To achieve best results, be sure to keep the volume of all solutions and incubation time of all steps exactly as given in the protocol. Changes in the protocol can result in high background or poor band development. When using a microwave oven for staining E-PAGE™ Gels with the SilverQuest™ Silver Staining Kit, always use the microwave oven at full power setting. Always use a large volume of buffer (2-fold) and a microwave safe container. Avoid microwaving the E-PAGE™ Gel for more than 45 seconds because gel decomposition can occur. Important Continued on next page 45 Silver Staining Methods, Continued SilverQuest™ Silver Staining Protocol A brief protocol for staining one E-PAGE™ Gel with the SilverQuest™ Silver Staining Kit is described below. For details, refer to the product manual available at www.invitrogen.com or contact Technical Support (page 72). After electrophoresis, remove the gel from the cassette (page 25). For all staining and washing steps described below, be sure to use sufficient volume of reagent to completely cover the gel in a microwave safe container such that the gel moves freely during all staining and washing steps. Results obtained with SilverQuest™ Silver Staining Kit are shown on page 58. Step Reagent Fast Procedure Fix Ethanol Acetic Acid Ultrapure water Final Volume 80 mL 20 mL 100 mL 200 mL Add 150 mL, microwave for 45 seconds. Agitate the gel for 1.5 hours. Wash Ethanol Ultrapure water Final Volume 60 mL 140 mL 200 mL Add 150 mL, microwave for 45 seconds. Agitate the gel for 10 minutes. Sensitize Ethanol Sensitizer Ultrapure water Final Volume 30 mL 10 mL 60 mL 100 mL Add 100 mL, microwave for 30 seconds. Agitate the gel for 15 minutes. First Wash Ultrapure water 150 mL Add 150 mL, microwave for 45 seconds. Agitate the gel for 10 minutes. Second Wash Ultrapure water 150 mL Add 150 mL, microwave for 45 seconds. Agitate the gel for 10 minutes. Stain Stainer Ultrapure water Final Volume 1 mL 99 mL 100 mL Add 100 mL, microwave for 30 seconds. Agitate the gel for 1.5 hours. Wash Ultrapure water 100 mL Add 100 mL, 1 minute. Develop Developer 10 mL Developer Enhancer 1 drop Ultrapure water 90 mL Final Volume 100 mL Add 100 mL, 8–10 minutes. Stop Stopper Add 10 mL directly to Developing solution, 10 minutes. Wash Ultrapure water 10 mL 100 mL Add 100 mL, 10 minutes. Continued on next page 46 Silver Staining Methods, Continued SilverXpress® Silver Staining Protocol A brief protocol for staining one E-PAGE™ Gel with the SilverXpress® Silver Staining Kit is described below. For details, refer to the product manual available at www.invitrogen.com or contact Technical Support (page 72). After electrophoresis, remove the gel from the cassette (page 25). For all staining and washing steps described below, be sure to use sufficient volume of reagent to completely cover the gel in a suitable container such that the gel moves freely during all staining and washing steps. Results obtained with SilverXpress® Silver Staining Kit are shown on page 59. Note: The final volumes of solutions containing both methanol and water reflect a volume shrinkage that occurs when these two reagents are mixed. Do not adjust volumes of components or final volume. Step Reagent Procedure Fix Ultrapure water Methanol Acetic Acid Final Volume (see note above) 270 mL 300 mL 60 mL 600 mL Fix the gel in 3 changes (~200 mL each) of fixing solution for 90 minutes. Change the fixing solution every 30 minutes. Sensitize Ultrapure water Methanol Sensitizer Final Volume (see note above) 105 mL 100 mL 5 mL 200 mL Incubate the gel in 2 changes of Sensitizing Solution for 1 h, each. Decant the solution. Wash Ultrapure water 200 mL Wash the gel twice with ultrapure water for 15 minutes each. Stain Stainer A Stainer B Ultrapure water Final Volume 5 mL 5 mL 90 mL 100 mL Incubate the gel in Staining Solution for 30 minutes. Decant the solution. Wash Ultrapure water 200 mL Wash the gel twice with ultrapure water for 10 minutes each. Develop Developer Ultrapure water Final Volume 5 mL 95 mL 100 mL Incubate the gel in Developing Solution for 1–5 minutes. Stop Stopping Solution 5 mL Add the Stopping Solution directly to the Developing Solution when the desired staining intensity is reached. Incubate the gel in Stopping solution for 20 minutes. Decant the solution. Wash Ultrapure water Wash the gel three times with ultrapure water for 20 minutes each. 200 mL 47 InVision™ His-tag Protein Gel Stain Introduction Foe detection of His-tagged proteins, use the following protocol. Due to the thickness of E-PAGE Gels, we recommend transferring proteins onto nitrocellulose membrane (see pages 26-38) and then detecting them using InVision™ His-tag In-Gel Stain. For details, refer to the product manual available at www.invitrogen.com or contact Technical Support (page 72) Note: This procedure is not recommended for staining PVDF membranes. Materials Needed Staining Procedure You will need the following items for staining one E-PAGE Gel. See page 71 for ordering information. InVision™ His-tag In-gel Stain Ultrapure water (>18 megohm/cm resistance recommended) Incubation Tray Rotary shaker UV transilluminator equipped with a standard camera, or laser-based scanner. 1. After electrophoresis, remove the gel from the cassette (page 25) and blot proteins onto nitrocellulose membrane (page 26). 2. Rinse the nitrocellulose membrane (containing the transferred proteins) with deionized water for 2 minutes. 3. Stain the nitrocellulose membrane with 20 mL of ready-to-use InVision™ His-tag In-gel Stain for 20 minutes at room temperature. 4. Rinse the membrane briefly with ultrapure water. 5. Place the membrane on a UV transilluminator equipped with a camera. Visualize and image the membrane by exposing the membrane to UV light form the bottom or from the top (you may place the UV transilluminator on its side to illuminate the blot or use epi-illumination) for 4–8 seconds. You may also use a laser-based scanner with the appropriate filters to visualize and image the membrane. 48 Drying of E-PAGE™ Gels Gel Drying Introduction We recommend drying E-PAGE™ Gels using passive air-drying methods such as the Large Gel Drying Kit. Due to the thickness of E-PAGE™ Gels, vacuum drying is not recommended and may cause the gel to crack. Materials Needed You will need the following items for drying one E-PAGE Gel. See page 71 for ordering information. Gel Drying Protocol Large Gel Drying Kit Gel-Dry™ Drying Solution (or prepare your own gel drying solution containing 30% methanol and 5% glycerol) Rotary shaker Staining Tray A brief gel drying protocol using the Large Gel Drying Kit is provided below. For more details on this system, refer to the Large Gel Drying Kit manual available at www.invitrogen.com or contact Technical Support (page 72). 1. At the end of all staining and destaining steps, wash the E-PAGE™ Gel three times for two minutes each time in deionized water (100 mL) on a rotary shaker. 2. Decant the water and add fresh Gel-Dry™ Drying Solution (100 mL per E-PAGE™ gel). 3. Equilibrate the gel in the Gel-Dry™ Drying Solution by shaking the gel for 15–20 minutes in the staining container. Note: Do not equilibrate gels stained with Coomassie® R-250 in the Gel-Dry™ Drying Solution for more than 5 minutes to avoid losing band intensity. 4. Cut any rough edges off the gel (including the wells and the gel foot) using the Butterfly Opener or a gel knife. 5. Remove 2 pieces (per gel) of cellophane from the package. 6. Immerse one sheet at a time in the Gel-Dry™ Drying Solution. Allow 10 seconds for complete wetting before adding additional sheets. Do not soak the cellophane for more than 2 minutes. Continued on next page 49 Gel Drying, Continued Gel Drying Protocol, continued 7. Place the solid square of the Large Gel Drying Frame on a paper towel with the corner pins facing up. 8. Lay a piece of pre-wetted cellophane from Step 5 over the frame carefully without trapping any air bubbles. 9. Lay the E-PAGE™ Gel on the center of the cellophane sheet making sure no bubbles are trapped between the gel and the cellophane. Add some Gel-Dry™ Drying Solution to the surface of the cellophane, if necessary. 10. Carefully lay the second sheet of cellophane over the gel so that no bubbles are trapped between the cellophane and the gel. Add some Gel-Dry™ Drying Solution if necessary. Gently smooth out any wrinkles in the assembly with a gloved hand or pipette. 11. Place the plastic frame, beveled side up, on top of the cellophane. Push the plastic clamps onto three edges of the frame. Tilt the frame up on the remaining unclamped edge to drain excess solution, and then install the final clamp. 12. Lay the gel dryer assembly flat on a bench top where it will be undisturbed. Be careful to avoid drafts as they can cause an uneven rate of dying which leads to cracking. Drying will take between 4–5 days. 13. When the cellophane covering the gel is dry to the touch, remove the gel/cellophane sandwich from the drying frame. Trim off the excess cellophane. 14. Press the dried gel(s) between the pages of a notebook under light pressure for approximately 2 days. Gels will then remain flat for scanning, photography, display, and overhead projection. 50 Analysis and Troubleshooting Molecular Weight Calibration Molecular Weight Calibration The molecular weight of a protein can be determined based upon its relative mobility by constructing a standard curve with protein standards of known molecular weights. The protein mobility in SDS gels is dependent on: Length of the protein in its fully denatured state Secondary structure of the protein Buffer system used An identical molecular weight standard may have slightly different mobility resulting in different apparent molecular weight when run in different gel buffer systems. If you are using molecular weight standards from Invitrogen, see the apparent molecular weights of these standards on E-PAGE™ Gels listed below and on the following page to determine the apparent molecular weight of your protein. You may need to generate calibration curves in your lab with any other manufacturer’s standards. Assigned Apparent Molecular Weights The apparent molecular weight values shown below are derived from the construction of a calibration curve in the E-PAGE™ 48 and 96 buffer systems. Use the values listed in the tables below and on the next page for the most accurate calibration of your protein on an E-PAGE Gel. SeeBlue® Plus2 Pre-stained Standard Molecular Weight on E-PAGE™ 48 8% Gel 1 2 3 4 1. 2. 3. 4. 5. 6. 7. 8. Myosin (215 kDa) Phosphorylase (146 kDa) BSA (78 kDa) Glutamic Dehydrogenase (56 kDa) Alcohol Dehydrogenase (39 kDa) Carbonic Anhydrase (25 kDa) Myoglobin Red (19 kDa) Lysozyme (16 kDa) 5 6 7 8 Continued on next page 51 Molecular Weight Calibration, Continued Assigned Apparent Molecular Weights, Continued MagicMark™XP Western Protein Standard Molecular Weight on E-PAGE™ 48 8% Gel 1 1. 2. 3. 4. 5. 6. 7. 8. 9. 2 3 4 5 6 7 209 kDa 130 kDa 114 kDa 84 kDa 64 kDa 51 kDa 39 kDa 28 kDa 19 kDa 8 9 E-PAGE™ SeeBlue® Pre-stained Protein Standard Molecular Weight on E-PAGE™ 96 6% Gel 1 2 3 4 5 52 1. 2. 3. 4. 5. 261 kDa 173 kDa 97 kDa 42 kDa 21 kDa E-PAGE™ MagicMark™ Western Protein Standard Molecular Weight on E-PAGE™ 96 6% Gel 1 2 3 4 5 1. 2. 3. 4. 5. 220 kDa 120 kDa 60 kDa 40 kDa 20 kDa Expected Results Western Blotting Results obtained using an E-PAGE™ 48 8% Gel that was blotted using the semi-dry protocol described in this manual are shown below. MagicMark™XP Western Protein Standard (5 μL) was loaded in all sample and marker wells. The gel was electrophoresed for 23 minutes using standard conditions. Proteins were transferred to a 0.45 μm nitrocellulose membrane using the semi-dry blotting protocol described in the manual. Detection was performed with WesternBreeze® Anti-Mouse Immunodetection Kit using a 1:1000 dilution of Anti-Xpress primary antibody from Invitrogen. Both top and bottom rows are identical. 209 kDa 19 kDa Continued on next page 53 Expected Results, Continued Lumio™ Green Detection Results obtained with an E-PAGE™ 48 8% Gel using the Lumio™ Green Detection Kit are shown below. Various concentrations of a Lumio™ fusion protein were labeled with Lumio™ Green Detection Kit and run on an E-PAGE™ 48 8% Gel as described in this manual. The gel contains the following samples (lanes not indicated are blank): Lane Sample M BenchMark Fluorescent Marker (5 μL) 2, 8, 13, 19, 26, 32, 37, 43 Human kinase Lumio™ fusion protein (10 μL) 3, 9, 14, 20, 27, 33, 38, 44 E. coli CAT Lumio™ fusion protein (10 μL) 4, 10, 15, 21, 28, 34, 39, 45 E. coli GUS Lumio™ fusion protein (10 μL) 5, 11, 16, 22, 29, 35, 40, 46 E. coli calmodulin Lumio™ fusion protein (10 μL) 6, 12, 17, 23, 30, 36, 41, 47 E. coli kinase D Lumio™ fusion protein (10 μL) Continued on next page 54 Expected Results, Continued SYPRO® Ruby Protein Gel Stain Results obtained using an E-PAGE™ 48 8% Gel stained with SYPRO® Ruby are shown below. BSA (2.5 - 1000 ng) was run on an E-PAGE™ 48 8% Gel and stained with SYPRO® Ruby Protein Gel Stain as described in this manual. 1 2 3 4 5 6 7 8 9 10 11 12 13 14 15 16 17 18 M The gel contains the following samples: (lanes not indicated are blank) Lane 1, 2 Amount of BSA 2.5 ng 3, 4 5.0 ng 5, 6 10 ng 7, 8 25 ng 9, 10 50 ng 11, 12 100 ng 13, 14 250 ng 15, 16 500 ng 17, 18 1000 ng M BenchMark Fluorescent Marker (5 μL) Continued on next page 55 Expected Results, Continued Coomassie® R-250 Stain Results obtained using an E-PAGE™ 48 8% Gel stained with Coomassie® R-250 Stain are shown below. Samples were run on an E-PAGE™ 48 8% Gel and stained with Coomassie® R-250 Stain using the microwave protocol as described in this manual. M 1 2 3 4 5 6 7 8 9 10 11 12 13 14 15 16 17 18 19 20 21 22 23 24 M M 25 26 27 28 29 30 31 32 33 34 35 36 37 38 39 40 41 42 43 44 45 46 47 48 M The gel contains the following samples: (lanes not indicated are blank) Lane M Sample SeeBlue® Plus2 Pre-stained Standard (5 μL) 2, 4, 21, 23 26, 28, 45, 47 MagicMark™ XP Western Protein Standard (10 μL) 6, 19, 30, 45 BenchMark™ His-tagged Protein Standard (10 μL, diluted 1:5) 8, 32 Lysozyme (200 ng) 10, 34 Carbonic anhydrase (200 ng) 12, 36 BSA (100 ng) 15, 17, 39, 41 E. coli lysate (5 μL) Continued on next page 56 Expected Results, Continued SimplyBlue™ SafeStain Results obtained using an E-PAGE™ 48 8% Gel stained with SimplyBlue™ SafeStain are shown below. Samples were run on an E-PAGE™ 48 8% Gel and stained with SimplyBlue™ SafeStain as described in this manual. M 1 2 3 4 5 6 7 8 9 10 11 12 13 14 15 16 17 18 19 20 21 22 23 24 M M 25 26 27 28 29 30 31 32 33 34 35 36 37 38 39 40 41 42 43 44 45 46 47 48 M The gel contains the following samples: (lanes not indicated are blank) Lane M Sample SeeBlue® Plus2 Pre-stained Standard (5 μL) 2, 4, 21, 23 26, 28, 45, 47 MagicMark™ XP Western Protein Standard (10 μL) 6, 19, 30, 45 BenchMark™ His-tagged Protein Standard (10 μL, diluted 1:5) 8, 32 Lysozyme (200 ng) 10, 34 Carbonic anhydrase (200 ng) 12, 36 BSA (100 ng) 15, 17, 39, 41 E. coli lysate (5 μL) Continued on next page 57 Expected Results, Continued SilverQuest™ Silver Staining Kit Results obtained using an E-PAGE™ 48 8% Gel stained with the SilverQuest™ Silver Staining Kit with are shown below. BSA (0.5 - 1000 ng) was run on an E-PAGE™ 48 8% Gel and stained with the SilverQuest™ Silver Staining Kit as described in this manual. 1 2 3 4 5 6 7 8 9 10 11 The gel contains the following samples: Lane 1 Amount of BSA 5 ng 2 5 ng 3 10 ng 4 10ng 5 20 ng 6 20 ng 7 50 ng 8 50 ng 9 100 ng 10 100 ng 11 200 ng Continued on next page 58 Expected Results, Continued SilverXpress™ Silver Staining Kit Results obtained using an E-PAGE™ 48 8% Gel stained with the SilverXpress™ Silver Staining Kit with are shown below. Samples were run on an E-PAGE™ 48 8% Gel and stained with the SilverXpress™ Silver Staining Kit as described in this manual. M 1 2 3 4 5 6 7 8 9 10 11 12 13 14 15 16 17 18 19 20 21 22 23 24 M M 25 26 27 28 29 30 31 32 33 34 35 36 37 38 39 40 41 42 43 44 45 46 47 48 M The gel contains the following samples: (lanes not indicated are blank) Lane M Sample SeeBlue® Plus2 Pre-stained Standard (5 μL) 2, 4, 21, 23 26, 28, 45, 47 MagicMark™ XP Western Protein Standard (10 μL) 6, 19, 30, 43 BenchMark™ His-tagged Protein Standard (10 μL, diluted 1:5) 8, 32 Lysozyme (200 ng) 10, 34 Carbonic anhydrase (200 ng) 12, 36 BSA (100 ng) 15, 17, 38, 40 E. coli lysate (5 μL) 59 Using E-Editor™ 2.02 Software Introduction The E-Editor™ 2.02 software for Windows® allows you to reconfigure digital images of E-PAGE Gels for analysis and documentation. E-Editor™ 2.02 software reconfigures the wells of the E-PAGE Gels into a side-by-side format for easy comparison and analysis. You can reconfigure gels that were scanned in the original gel cassette, or gels that were removed from the cassette. You can also group the images of multiple gels loaded from a 384-well microtiter plate into a single image with a layout corresponding to that of the original plate. Capture an image of the gel as described below and then use the E-Editor™ 2.02 software to: Align and arrange the lanes in the image Save the reconfigured image for further analysis Copy and paste selected lanes or the entire reconfigured image into other applications for printing, saving, emailing, and/or publishing Imaging the Gel Use an appropriate gel documentation system to capture a digital image of the gel. When imaging, the gel should be properly aligned (i.e., not at an angle) and gel features should be clear and distinct. Proceed to Downloading Software. Downloading Software E-Editor™ 2.02 software can be downloaded FREE from our website. Go to www.invitrogen.com/epage and follow the instructions to download the software and user manual. 60 Troubleshooting Troubleshooting Observation The table below provides some solutions to possible problems you might encounter during the electrophoresis of E-PAGE™ Gels. For issues with protein transfer, refer to the manual for the iBlot® Gel Transfer Device. Cause ™ Solution No current Daughter E-Base Device used without a Mother E-Base™ Device Do not use the Daughter E-Base™ Device without a Mother E-Base™ Device. The Daughter E-Base™ Device does not have an electrical plug to connect to an electrical outlet. No electric contact (no red light when cassette is inserted) or run does not start (no green light) Copper contacts in the base are damaged due to improper use Make sure that the copper contacts in the base are intact. Expired or defective gel cassette used Use properly stored gels before the specified expiration date. E-PAGE™ cassette is not correctly inserted into base Remove cassette and reinsert. When the cassette is correctly inserted and power is on, a fan in the base begins to run and a steady red light illuminates on the base (page 21) Sample leaking from the wells Sample is overloaded or wells are damaged Be sure to load the recommended volume of sample per well (page 19). Remove the comb carefully without damaging the wells. Poor resolution or smearing of bands Sample is overloaded Do not load more than 20 μg of protein sample per well. Very low volumes of sample were loaded Do not load less than 5 μL of sample. Always load 10–20 μL deionized water in all wells prior to sample loading. For proper band separation, we recommend keeping sample volumes uniform and loading deionized water into empty wells. Incorrect loading buffer used Make sure that protein sample is in one of Use the recommended loading buffers as described on page 11. Electrophoresis was not started immediately after sample loading For best results, the gel should be run within 15 minutes of sample loading. Continued on next page 61 Troubleshooting, Continued Observation Poor resolution or smearing of bands Cause Solution High salt or detergent concentration in samples Be sure the final concentration of salt or detergent in the sample is as described on page 10. You may need to manually increase the run time for high salt or detergent samples to obtain optimal results. A1 tip not aligned Be sure to align the A1 tip properly prior to automated loading of E-PAGE™ 96 Gel (page 14). Expired gel used Use properly stored gels before the specified expiration date. Over-run the gel or need more time to run gel Accidentally selected an incorrect program Select program EP for E-PAGE™ Gels. If you accidentally selected an incorrect program and are at the beginning of the run, stop the run and select the desired program. If you are well into the run, check the gel to see where the loading dye is running. Estimate the amount of time remaining and then manually stop the run. Protein bands distorted on membrane after semidry blotting Non-uniform electric field created around wells Be sure that the E-PAGE™ Blotting Pad is used correctly. Incorrect gel orientation Be sure that the well side of the gel is not facing the membrane. Weak transfer of high molecular weight samples during semidry blotting Not enough SDS in sample Reduce methanol concentration in transfer buffer from 15% to 10% if transferring E-PAGE 48. Make sure transfer buffer contains no methanol if transferring E-PAGE 96. Weak transfer of low molecular weight samples Use of large pore membranes allow small proteins to “blow through” Use 0.2 μm nitrocellulose membrane for optimal capture of small proteins. Uneven transfer of proteins and edge lanes during semi-dry blotting of E-PAGE 48 Gel No methanol in transfer buffer Use 10–15% methanol in the transfer buffer. Weak transfer of proteins during semiwet blotting No methanol in transfer buffer Use 10% methanol in the transfer buffer. 62 Appendix Additional Staining Protocols Pro-Q® Diamond Phosphoprotein Gel Stain Instructions for specific staining of phosphoproteins on E-PAGE™ Gels using Pro-Q® Diamond Phosphoprotein Gel Stain is described in this section. The total staining time is ~5 h. Due to the thickness of E-PAGE™ Gels, the Pro-Q® Diamond Phosphoprotein Gel Stain may not be optimally sensitive for your particular staining application. Materials Needed You will need the following items for staining one E-PAGE Gel: Pro-Q® Diamond Phosphoprotein Gel Stain Fixing solution (50% methanol, 10% acetic acid, made with deionized water) Pro-Q® Diamond Phosphoprotein Gel Destaining solution (or use 50 mM sodium acetate pH 4.0 containing 20% acetonitrile as destaining solution) Deionized water Microwave safe staining tray Rotary shaker Microwave oven (700–1000 watts) UV transilluminator equipped with a standard camera or laser scanners See page 71 for ordering information. Phosphoprotein Staining Protocol For all steps described below, be sure to use sufficient volume of reagent to completely cover the gel using a suitable container such that the gel moves freely. 1. After electrophoresis, remove gel from the cassette (page 25) and place the gel in a clean microwave safe staining container. 2. Fix the gel in fixing solution (50% methanol, 10% acetic acid in deionized water) for 45 minutes at room temperature with gentle shaking. Decant the fixing solution and add fresh fixing solution to the container and repeat the fixing step again for 45 minutes at room temperature. Decant the fixing solution. 3. Add deionized water to the gel and microwave at high power for 45 seconds. Remove the gel from the microwave and wash the gel for 10 minutes at room temperature with gentle shaking. Decant the water and repeat the wash step again with deionized water. Decant the water. 4. Stain the gel with Pro-Q® Diamond Phosphoprotein Gel Stain. Incubate the gel in the DARK for 1–2 h at room temperature with gentle shaking. Decant the stain. Continued on next page 63 Additional Staining Protocols, Continued Phosphoprotein Staining Protocol, Continued 5. Destain the gel with Pro-Q® Diamond Phosphoprotein Gel destaining solution twice for 30 minutes each time at room temperature with gentle shaking. You may wash the gel overnight to improve sensitivity and obtain clear background. 6. Place the gel on a UV transilluminator equipped with a standard camera and select an appropriate filter on the camera (stain emission maxima is 555–580 nm). You may also use a laser-based scanner with a laser line that falls within the excitation maxima of the stain (580 nm). 7. Results Image the gel with a suitable camera with the appropriate filters using a 3–4 second exposure. Results obtained using an E-PAGE™ 48 8% Gel stained with Pro-Q® Diamond Phosphoprotein Gel Stain are shown below. 1 2 3 4 5 6 7 8 9 10 11 12 13 14 15 The gel contains the following samples: (lanes not indicated are blank) Lane 1 Sample SeeBlue® Plus2 Pre-stained Standard (5 μL) 2, 3, 4, 5 1, 2.5, 5, and 10 μL, respectively, of BenchMark™ Fluorescent Protein Standard 6, 7, 8, 9, 10 E. coli lysate containing His-tagged urate oxidase protein, 35 kDa (0.05, 0.1, 0.25, 0.5, and 1 μg) Negative control (E. coli lysate with non-His-tagged urate oxidase 0.05, 0.1, 0.25, 0.5, and 1 μg) 11, 12, 13, 14, 15 Continued on next page 64 Additional Staining Protocols, Continued Pro-Q® Sapphire 532 Oligohistidine Gel Stain Instructions for specific staining His-tagged proteins on E-PAGE™ Gels using Pro-Q® Sapphire 532 Oligohistidine Gel Stain is described in this section. The total staining time is ~5 h. Due to the thickness of E-PAGE™ Gels, the Pro-Q® Sapphire 532 Oligohistidine Gel Stain may not be optimally sensitive for your particular staining application. To visualize His-tagged proteins on E-PAGE Gels, we recommend the InVision™ His-tag In-Gel Stain (page 48). Materials Needed Oligohistidine Staining Procedure You will need the following items for staining one E-PAGE Gel: Pro-Q® Sapphire 532 Oligohistidine Gel Stain Fixing solution (50% ethanol, 10% acetic acid, made with deionized water) Deionized water Microwave safe staining tray Rotary shaker Microwave oven (700–1000 watts) UV transilluminator equipped with a standard camera or laser scanners For all steps described below, be sure to use sufficient volume of reagent to completely cover the gel using a suitable container such that the gel moves freely 1. After electrophoresis, remove the gel from the cassette (page 25) and place the gel in a clean microwave safe staining container. 2. Fix the gel in fixing solution (50% ethanol, 10% acetic acid in deionized water) for 45 minutes at room temperature with gentle shaking. Decant the fixing solution and add fresh fixing solution to the container and repeat the fixing step again for 45 minutes at room temperature. Decant the fixing solution. 3. Add deionized water to the gel and microwave at high power for 45 seconds. Remove the gel from the microwave and wash the gel for 10 minutes at room temperature with gentle shaking. Decant the water and repeat the wash step for another 10 minutes again with deionized water. Decant the water. 4. Stain the gel with Pro-Q® Sapphire 532 Oligohistidine Gel Stain. Incubate the gel in the DARK for 30–60 minutes at room temperature with gentle shaking. Decant the stain. 5. Wash the gel with deionized water twice for 1 hour each time at room temperature with gentle shaking. You may wash the gel overnight to improve sensitivity and to obtain clear background. Continued on next page 65 Additional Staining Protocols, Continued Oligohistidine Staining Procedure, Continued 7. Place the gel on a UV transilluminator equipped with a standard camera and select an appropriate filter on the camera (stain emission maxima is 572 nm). You may also use a laser-based scanner with a laser line that falls within the excitation maxima of the stain (532 nm). 8. Image the gel with a suitable camera with the appropriate filters using a 1–4 second exposure. Results Results obtained using an E-PAGE™ 48 8% Gel stained with Pro-Q® Sapphire 532 Oligohistidine Gel Stain are shown below. 1 2 3 4 5 6 7 8 9 10 11 12 13 14 15 16 17 The gel contains the following samples: (lanes not indicated are blank) 66 Lane 1 Sample SeeBlue®Plus2 Pre-stained Standard (10 μL) 2, 3, 4, 5, 6, 7, 8, 9 Purified ovalbumin phosphoprotein, 35 kDa (5, 10, 25, 50, 100, 250, 500, 1000 ng) 10, 11, 12, 13, 14, 15, 16, 17 Negative control, lysozyme (5, 10, 25, 50, 100, 250, 500, 1000 ng) Product Specifications E-PAGE™ 48 Gel Specifications Each E-PAGE™ 48 gel contains 48 sample wells and 4 marker wells (M). Cassette Size: 13.5 cm (l) 10.8 cm (w) 0.67 cm (thick) Gel Thickness: 3.7 mm Gel Volume: 50 mL Gel Formulation: Proprietary, operating at a neutral pH Well Depth: 3 mm Well Volume: 15 μL Well Opening: 3.6 mm (l) x 2.2 mm (w) Running Distance: (one well to the next) 3.2 cm Space between Wells: 4.5 mm Note: E-PAGE 48 8% Gels have a unique separation profile, which gives protein resolution similar to that of a 4–12% Tris-Glycine gel. E-PAGE™ 96 Gel Specifications Each E-PAGE™ 96 gel contains 96 sample wells and 8 marker wells (M). Cassette Size: 13.5 cm (l) 10.8 cm (w) 0.67 cm (thick) Gel Thickness: 3.7 mm Gel Volume: 50 mL Gel Formulation: Proprietary, operating at a neutral pH Well Depth: 3 mm Well Volume: 25 μL Well Opening: 3.8 mm x 1.8 mm Running Distance: (one well to the next) 1.6 cm Space between Wells: 9 mm Continued on next page 67 Product Specifications, Continued E-PAGE™ Gel Separation Range E-Base™ Specifications The migration and resolution range of proteins run on E-PAGE 48 8% Gels and E-PAGE 96 6% Gels are shown. The specifications for the Mother E-Base™ and Daughter E-Base™ are listed below. Dimensions: 14.6 cm (l) x 15 cm (w) x 5.3 cm (h) Weight: Mother E-Base™- 370 g Daughter E-Base™- 271 g Safety: Double Insulation, UL listed, and CE certified Temperature: Ambient 15C to 40°C Built-in Features: Digital time display (00–99 minutes), alarm, light LED The SBS (Society for Biomolecular Screening) standard 96-well plate format of the E-Base™ fits on most robotic platforms allowing the loading and electrophoresis of gels on the E-Base™ directly on the automated liquid handling system. See page 67 for an explanation of symbols and warnings used on the E-Base™. 68 Explanation of Symbols and Warnings E-Base™ E189045 The Mother E-Base™ and Daughter E-Base™ comply with the Underwriters Laboratories Inc. regulation and the European Community Safety requirements. Operation of the E-PAGE bases is subject to the following conditions: Indoor use. Altitude below 2,000 meters. Temperature range: 5 to 40 C. Maximum relative humidity: 80%. Installation categories (over voltage categories) II; Pollution degree 2 Mains supply voltage fluctuations not to exceed 10% of the nominal voltage (100–240V, 50/60Hz, 1500 mA). The Mother E-Base™ has been tested with up to 3 Daughter E-Bases™ connected at one time. Main plug is a disconnect device and must be easily accessible. Do not attempt to open E-Base™ devices. To honor the warranty, E-Base™ can only be opened and serviced by Invitrogen. The protection provided by the equipment may be impaired if the equipment is used in a manner not specified by Invitrogen. Life Technologies Israel Ltd.., is the manufacturer and owner of the UL file. For more information, contact: Life Technologies Israel Ltd. 12 Hamada St. P.O. Box 4035 Rehovot, Israel 74103 Caution Double Insulation The Caution symbol denotes a risk of safety hazard. Refer to accompanying documentation. Class II product 69 Accessory Products E-PAGE™ Gels The following E-PAGE™ Gel kits are available from Invitrogen. Product Quantity Catalog no. E-PAGE 48 8% Gels 8-pack EP048-08 E-PAGE™ 96 6% Gels 8-pack EP096-06 ™ Electrophoresis Bases The following electrophoresis bases are available from Invitrogen for running E-PAGE™ gels. The Mother E-Base™ (Cat. no. EB-M03) is used for electrophoresis of one E-PAGE™ Gel The Daughter E-Base™ (Cat. no. EB-D03) attaches to the Mother E-Base™ and together are used for the independent electrophoresis of two or more E-PAGE™ Gels. E-Holder™ The E-Holder™ Platform is used to hold an E-PAGE™ Gel in place while loading. Ordering information can be found on the following page. E-Editor™ 2.02 Software The E-Editor™ 2.02 software is available FREE with the purchase of any E-PAGE™ Gels or related equipment. The software may be downloaded from www.invitrogen.com/epage. iBlot® Gel Transfer Device The iBlot® Gel Transfer Device is available from Invitrogen for transfer of proteins from E-PAGE™ gels to nitrocellulose or PVDF membranes. Product Quantity Catalog no. iBlot Gel Transfer Device 1 unit IB1001, IB1001UK, IB1001EU iBlot® Gel Transfer Stack, Nitrocellulose, Regular 10-pack IB3010-01 10-pack IB4010-01 ® ® iBlot Gel Transfer Stack, PVDF, Regular Continued on next page 70 Accessory Products, Continued The following products for use with E-PAGE™ gels are available separately from Invitrogen: Additional Products Product Quantity Catalog no. SeeBlue® Plus2 Pre-Stained Standard 500 μL LC5925 E-PAGE™ SeeBlue® Pre-stained Protein Standard 500 μL LC5700 250 μL LC5602 250 μL LC5701 125 μL LC5928 1 kit LC6090 SYPRO Ruby Protein Gel Stain 1L S-12000 SimplyBlue™ SafeStain 1L LC6060 SilverQuest™ Silver Staining Kit 1 kit LC6070 1 kit LC6100 ™ MagicMark XP Western Standard ™ ™ E-PAGE MagicMark Unstained Protein Standard ™ BenchMark Fluorescent Protein Standard ™ Lumio Green Detection Kit ® ® SilverXpress Silver Staining Kit ™ InVision His-tag In-gel Stain 500 mL LC6030 ® 125 mL NP0006 ® NuPAGE Antioxidant 15 mL NP0005 NuPAGE® Sample Reducing Agent (10X) 10 mL NP0009 Nitrocellulose/Filter Paper Sandwich 0.45 μm 16/pk LC2006 Nitrocellulose/Filter Paper Sandwich 0.2 μm 16/pk LC2009 Invitrolon PVDF/Filter Paper Sandwich 0.45 μm 16/pk LC2007 Blotting Filter Paper (2.5 mm) 50/pk LC2008 E-PAGE Blotting Pad 4/pk LC2101 Blotting Roller 1 LC2100 Incubation Tray 8/pk LC2102 Large Gel Drying Kit 1 kit NI2207 500 mL LC4025 WesternBreeze Chromogenic Kit Anti-Mouse Anti-Rabbit Anti-Goat 1 kit 1 kit 1 kit WB7103 WB7105 WB7107 WesternBreeze® Chemiluminescent Kit Anti-Mouse Anti-Rabbit Anti-Goat 1 kit 1 kit 1 kit WB7104 WB7106 WB7108 Pro-Q® Diamond Phosphoprotein Gel Stain 1L P-33300 Pro-Q® Diamond Phosphoprotein Gel Destain Solution 1L P-33310 Pro-Q® Sapphire 532 Oligohistidine Gel Stain 500 mL P-33354 NuPAGE Transfer Buffer (20X) ™ ™ ™ Gel-Dry Drying Solution (1X) ® 71 Technical Support Web Resources Contact Us Visit the Invitrogen website at www.invitrogen.com for: Technical resources, including manuals, vector maps and sequences, application notes, SDSs, FAQs, formulations, citations, handbooks, etc. Complete technical support contact information Access to the Invitrogen Online Catalog Additional product information and special offers For more information or technical assistance, call, write, fax, or email. Additional international offices are listed on our website (www.invitrogen.com). Corporate Headquarters: 5791 Van Allen Way Carlsbad, CA 92008 USA Tel: 1 760 603 7200 Tel (Toll Free): 1 800 955 6288 Fax: 1 760 602 6500 E-mail: [email protected] Japanese Headquarters: LOOP-X Bldg. 6F 3-9-15, Kaigan Minato-ku, Tokyo 108-0022 Tel: 81 3 5730 6509 Fax: 81 3 5730 6519 E-mail: [email protected] European Headquarters: Inchinnan Business Park 3 Fountain Drive Paisley PA4 9RF, UK Tel: +44 (0) 141 814 6100 Tech Fax: +44 (0) 141 814 6117 E-mail: [email protected] SDS Safety Data Sheets (SDSs) are available at www.invitrogen.com/sds. Certificate of Analysis The Certificate of Analysis provides detailed quality control and product qualification information for each product. Certificates of Analysis are available on our website. Go to www.invitrogen.com/support and search for the Certificate of Analysis by product lot number, which is printed on the box. Product Qualification E-PAGE™ 96 Gels are qualified by running E-PAGE™ SeeBlue® Pre-Stained Protein, SeeBlue® Plus2 Pre-Stained Standard, or BSA under standard running conditions as described in this manual. Gels are visualized for proper resolution and migration of bands. Visual inspection is also performed to ensure that the gels are free from bubbles, spots, and any gel residues. E-PAGE™ 48 Gels are qualified by running SeeBlue® Plus2 Pre-stained Standard and BSA under standard running conditions as described in this manual. Gels are visualized for proper resolution and migration of bands. Visual inspection is also performed to ensure that the gels are free from bubbles, spots, and any gel residues. The E-PAGE SeeBlue® Pre-Stained Standard must show 5 distinct bands when separated by electrophoresis on an E-PAGE 96 Gel. Continued on next page 72 Technical Support, Continued Limited Warranty Invitrogen (a part of Life Technologies Corporation) is committed to providing our customers with high-quality goods and services. Our goal is to ensure that every customer is 100% satisfied with our products and our service. If you should have any questions or concerns about an Invitrogen product or service, contact our Technical Support Representatives. All Invitrogen products are warranted to perform according to specifications stated on the certificate of analysis. The Company will replace, free of charge, any product that does not meet those specifications. This warranty limits the Company’s liability to only the price of the product. No warranty is granted for products beyond their listed expiration date. No warranty is applicable unless all product components are stored in accordance with instructions. The Company reserves the right to select the method(s) used to analyze a product unless the Company agrees to a specified method in writing prior to acceptance of the order. Invitrogen makes every effort to ensure the accuracy of its publications, but realizes that the occasional typographical or other error is inevitable. Therefore the Company makes no warranty of any kind regarding the contents of any publications or documentation. If you discover an error in any of our publications, report it to our Technical Support Representatives. Life Technologies Corporation shall have no responsibility or liability for any special, incidental, indirect or consequential loss or damage whatsoever. The above limited warranty is sole and exclusive. No other warranty is made, whether expressed or implied, including any warranty of merchantability or fitness for a particular purpose. 73 Purchaser Notification E-PAGE Equipment Warranty Invitrogen warrants that Mother E-Base™, Daughter E-Base™, and E-Holder™ will be free from defects in material and workmanship for a period of one (1) year from date of purchase. If a defect is present, Invitrogen will, at its option, repair, replace, or refund the purchase price of this product at no charge to you, provided it is returned during the warranty period. This warranty does not apply if the product has been damaged by accident, abuse, misuse or misapplication, or from ordinary wear and tear. This warranty shall be limited to the replacement of defective products. It is expressly agreed that this warranty will be in lieu of all warranties of fitness and in lieu of the warranty of merchantability. Limited Use Label License No. 358: Research Use Only The purchase of this product conveys to the purchaser the limited, nontransferable right to use the purchased amount of the product only to perform internal research for the sole benefit of the purchaser. No right to resell this product or any of its components is conveyed expressly, by implication, or by estoppel. This product is for internal research purposes only and is not for use in commercial services of any kind, including, without limitation, reporting the results of purchaser’s activities for a fee or other form of consideration. For information on obtaining additional rights, please contact [email protected] or Out Licensing, Life Technologies, 5791 Van Allen Way, Carlsbad, California 92008. ©2010 Life Technologies Corporation. All rights reserved. The trademarks mentioned herein are the property of Life Technologies Corporation or their respective owners. Coomassie® is a registered trademark of Imperial Chemical Industries, PLC. Triton® X-100 is a registered trademark of Rohm & Haas, Co. Tween® 20 is a registered trademark of Atlas Chemical Co. Windows® is a registered trademark of Microsoft Corporation. 74 Corporate Headquarters 5791 Van Allen Way Carlsbad, CA 92008 T: 1 760 603 7200 F: 1 760 602 6500 E: [email protected] For country-specific contact information, visit our web site at www.invitrogen.com INV-081 INVIT MAN 8.5x11 1color bylife 26May2010.indd 2 10/21/2010 10:04:35 AM