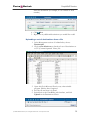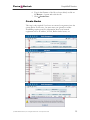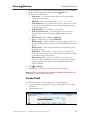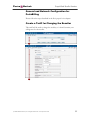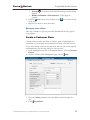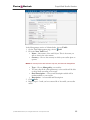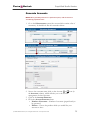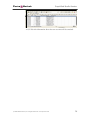
1
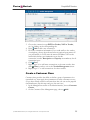
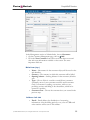
Porta
Switch
Prepaid VoIP Services
3. Choose the connection type PSTN to Vendor, VoIP to Vendor,
etc., by clicking on the corresponding tab.
4. Press Add to add a new connection.
5. Fill in the connection information. If you send traffic to the vendor
via telephony, choose the node and enter an optional port pattern. If
you send traffic via VoIP, enter the remote IP address. Choose the
tariff which defines your termination costs for this
connection/vendor. Description and Capacity are mandatory for all
connection types.
6. Click Save.
7. Repeat steps 3-6 to add more connections to the same vendor, then
click Close in order to exit to the Vendor Management screen.
8. Repeat steps 2-7 to add connections for other vendors.
Create a Customer Class
Customer class provides the ability to define a group of parameters in a
centralized way, then apply those parameters to many customers at once.
(If you have already created a customer class that you can use for prepaid
card distributors, skip this step and go to the next one.)
1. In the Management section of the Admin interface, choose Customer
Classes.
2. On the Customer Class Management page, choose Add.
© 2000-2006 PortaOne, Inc. All rights Reserved. www.portaone.com
28