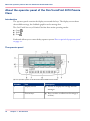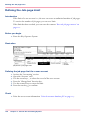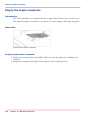
1
Océ User manual
Océ VarioPrint 2070 Prémia Class
Configuration and maintenance tasks
© 2009 Océ
All rights reserved. No part of this work may be reproduced, copied, adapted, or transmitted
in any form or by any means without written permission from Océ.
Océ makes no representation or warranties with respect to the contents hereof and specifically disclaims any implied warranties of merchantability or fitness for any particular purpose.
Furthermore, Océ reserves the right to revise this publication and to make changes from
time to time in the content hereof without obligation to notify any person of such revision
or changes.
Edition: 2009-04
Notes for the reader
Notes for the reader
Introduction
This manual helps you to use the Océ VarioPrint 2070 Prémia Class. The manual contains
a description of the Océ VarioPrint 2070 Prémia Class and guidelines to use and operate
the Océ VarioPrint 2070 Prémia Class. There are also tips to increase your knowledge
of the Océ VarioPrint 2070 Prémia Class and to help you manage the workflow even
better.
Definition
Attention Getters
Parts of this manual require your special attention. These parts provide important, additional information or are about the prevention of damage to your properties.
Note, Attention and Caution
The words Note, Attention and Caution indicate these important parts.
■
■
■
The word Note comes before additional information about the correct operation of
the Océ VarioPrint 2070 Prémia Class or a tip.
A part marked with Attention contains information used to prevent damage to items,
for example the Océ VarioPrint 2070 Prémia Class, or a file.
A part marked with Caution contains information to prevent personal injury. Caution
is found only in manuals that describe physical products.
Safety information
You can find the safety information for this product in the Instructions for safe use and
the Safety Data Sheets. The instructions for safe use and the Safety Data Sheets are included in the appendices of this manual.
3
Trademarks
Trademarks
List of trademarks
Océ, Océ VarioPrint 2070 Prémia Class are registered trademarks of Océ-Technologies
B.V..
Adobe®, Acrobat®, Reader® and Distiller® are registered trademarks of Adobe® Systems
Incorporated.
PostScript® 3™ is a registered trademark of Adobe® Systems Incorporated.
Apple®, Mac® , Mac OS® and Macintosh® are registered trademarks of Apple® Computer,
Inc.
InstallShield® is a registered trademark of InstallShield® Software Corporation.
FLEXlm™ is a trademark of Macrovision™ Corporation.
Microsoft®, Windows® , Windows NT®, Windows 98®, Windows 2000®, Windows
XP®, Windows Server 2003® are either registered trademarks or trademarks of Microsoft®
Corporation in the United States and/or other countries.
Products in this publication are referred to by their general trade names. In most, if not
all cases, these designations are claimed as trademarks or registered trademarks of their
respective companies.
4
Contents
Contents
Chapter 1
Introduction.........................................................................................................9
General Information.................................................................................10
About the Configuration and Maintenance Manual........................10
About Océ VarioPrint 2070 Prémia Class Users...............................11
About the Océ VarioPrint 2070 Prémia Class...................................12
About the configuration of the Océ VarioPrint 2070 Prémia Class.15
About the operator panel of the Océ VarioPrint 2070 Prémia
Class....................................................................................................18
Access the System...................................................................................21
Enter or quit the key operator system..............................................21
Changing the Default PIN of the Key Operator ...............................23
Switching the DAC On or Off.............................................................24
Switch the Océ VarioPrint 2070 Prémia Class off or on..................26
Chapter 2
Set the Defaults................................................................................................29
Define the Default Job Settings..............................................................30
Define the IP address information....................................................30
Define the default operating mode...................................................33
Change or restore the default job settings.......................................34
Changing the Default Reset Time.....................................................36
Change the display language............................................................38
Define the end-of-job confirmation...................................................39
Enter the telephone number of the key operator............................40
Define the Access Control.......................................................................41
About the access-secured system.....................................................41
Enable the copy control device.........................................................43
Secure the access to the machine.....................................................45
Secure automatic printing.................................................................47
Define the job charges.......................................................................49
Control Access to the Machine Components.........................................51
Control the access to the paper trays...............................................51
Control the access to the special feeder...........................................53
Chapter 3
Control Input.....................................................................................................55
Define the paper trays for the report jobs..............................................56
Define the folio size..................................................................................58
Link the paper trays..................................................................................60
5
Contents
Chapter 4
Control Output..................................................................................................63
Define the banner pages..........................................................................64
Control the finisher bins..........................................................................66
Change the default margin shift.............................................................68
Chapter 5
Control the Print Mode.....................................................................................69
Defining Mailbox Input............................................................................70
About the mailbox..............................................................................70
Controlling the Automatic Print Jobs...............................................71
Suspending Automatic Printing........................................................73
Controlling Jobs Without an Océ Job Ticket...................................75
Control the Time Delay for Print Jobs....................................................77
About the printing delay....................................................................77
Define the printing delay for the automatic print jobs....................78
Chapter 6
Control the Interrupt Mode..............................................................................81
Disable the Interrupt mode......................................................................82
Chapter 7
Obtain System Information.............................................................................85
Print the DAC reports...............................................................................86
Reading Job-page Counters....................................................................87
Check the machine memory....................................................................89
Check the machine number.....................................................................90
Chapter 8
Define the Energy Saving Timers....................................................................91
About the Energy Saving Modes............................................................92
Set the energy save timers......................................................................93
Disabling the Sleep Mode Timer............................................................95
Chapter 9
Control the Accounting System......................................................................97
About the accounting system.................................................................98
Determine User Accounts......................................................................100
About the System Accounts............................................................100
Create a valid user account.............................................................101
Create a new user-account record..................................................102
Maintain the Accounts Database..........................................................104
Change the account number...........................................................104
Assign or change a PIN....................................................................105
Changing the Status.........................................................................107
Defining the Job-page Limit............................................................108
Change the sequence of the user accounts...................................109
6
Contents
Reset the job-page counters............................................................111
Delete the user accounts..................................................................113
Obtain Accounts Database Information...............................................115
Print the accounts-database file......................................................115
Download or upload the accounts-database file...........................116
Chapter 10
Maintain the System......................................................................................119
Add the toner..........................................................................................120
Add the staples.......................................................................................124
Empty the staple receptacle..................................................................128
Clean the Océ VarioPrint 2070 Prémia Class........................................129
Chapter 11
Correct Errors..................................................................................................131
Change the account-log mode..............................................................132
Restart the DAC......................................................................................134
Delete the jobs........................................................................................136
Restoring the Network Settings............................................................138
Disable the side correction....................................................................139
Informing the Users about the Océ Service Request..........................141
Clear the paper jams..............................................................................143
Clear the staple jams..............................................................................145
Appendix A
Overview and Tables......................................................................................147
Product Specifications...........................................................................148
Originals to use......................................................................................149
Input Trays and Output Bins.................................................................150
Media ......................................................................................................153
Appendix B
Safety Information..........................................................................................155
Instructions for safe use........................................................................156
Safety Data Sheets.................................................................................158
Appendix C
Miscellaneous..................................................................................................165
Reader's comment sheet.......................................................................166
Addresses of local Océ organisations .................................................168
7
Contents
8
Chapter 1
Introduction
About the Configuration and Maintenance Manual
General Information
About the Configuration and Maintenance Manual
The Configuration and Maintenance Manual describes the tasks that the Key Operator
can perform using the key operator system of the Océ VarioPrint 2070 Prémia Class.
The user CD-rom, delivered with the Océ VarioPrint 2070 Prémia Class, provides you
with the user manuals in digital format. You can also find Quick Reference Cards on this
CD-rom.
The Key Operator can configure or maintain the Océ VarioPrint 2070 Prémia Class
system from a computer that runs an Océ application to control the system. The on-line
help of this application provides information on how to control the system remotely.
The Océ web site www.oce.com facilitates free user-manual download.
10
Chapter 1 - Introduction
About Océ VarioPrint 2070 Prémia Class Users
About Océ VarioPrint 2070 Prémia Class Users
Introduction
The Océ VarioPrint 2070 Prémia Class documentation addresses three types of users.
Each type of user has defined tasks, related to the Océ VarioPrint 2070 Prémia Class
system.
This Configuration and Maintenance Manual describes the tasks of the Key Operator
‘About the Configuration and Maintenance Manual’ on page 10.
Types of users and their tasks
#
Types of users
Tasks
End user
■
■
■
■
■
■
Key Operator
■
■
■
■
■
■
■
■
■
■
System Administrator
■
■
■
■
■
■
Print digital documents.
Copy paper documents.
Scan paper documents.
Control document flow.
Load paper in the trays.
Clear paper jams.
Define access-security to machine and the machine's components.
Define default job settings.
Control paper trays.
Control output.
Control the print mode.
Obtain system information.
Set energy save timers.
Maintain the accounting system.
Maintain machine supplies.
Solve easy machine problems.
Control the connection of the system to the network.
Configure the scan server.
Configure the print server.
Configure the web server.
Configure protocols.
Maintain and install the drivers.
Chapter 1 - Introduction
11
About the Océ VarioPrint 2070 Prémia Class
About the Océ VarioPrint 2070 Prémia Class
Introduction
The Océ VarioPrint 2070 Prémia Class has been developed from a proven system to
create, print, copy and scan high-quality jobs. The productivity and the print speed of
the Océ VarioPrint 2070 Prémia Class benefit office and central reproduction departments.
The new technologies and features developed for this release provide an improved workflow
to execute jobs, in combination with the Océ Intra Logic application. In addition, the
Océ System configuration provides a new method for configuring and maintaining the
system.
Features of the Océ VarioPrint 2070 Prémia Class
The Océ VarioPrint 2070 Prémia Class system combines previously tested technologies
with new features.
#
Features
The Mailbox: for last-minute print job control.
The Smart mailbox: used to print jobs stored in remote mailboxes.
The Combine key : used to copy or scan separate job parts.
The Interrupt key : used to suspend a job, start a high-priority job and resume the
suspended job.
Scan-to-email: used to scan a document and send it as an attachment to your e-mail
address.
The Océ Finisher control technology: to direct the output of the copy and print jobs.
The bin capacity has been increased.
The Océ Image Logic technology: used to detect and optimize light sections, lines
and photos in the originals in order to get the best image quality possible.
The Paper Positioning Module: to increase the accuracy of the image position on the
sheet.
The automatic 90° image-rotation technology: used to match the feed direction of
the originals and the orientation of the paper in the paper trays.
Off-line stapling: to staple manually, during job processing.
A5/Us Std 5.5x8.5 copying: used to copy A5/Us Std 5.5x8.5 originals to A5/Us Std
5.5x8.5 paper.
Adobe® PostScript® 3™ and direct PDF printing.
12
Chapter 1 - Introduction
About the Océ VarioPrint 2070 Prémia Class
Features
Improved network connectivity features: Apple Macintosh®, Microsoft Windows®,
NetWare Novell® and UNIX environments.
Control the print and scan jobs by using the Océ Intra Logic application.
Display the Océ VarioPrint 2070 Prémia Class information by using the Océ Intra
Logic application.
Control the jobs in a central reproduction environment by using Océ Job SubmitIT.
Integrated controller (DAC).
An up-to-date design and improved ergonomics.
Applications and methods to configure and maintain the Océ VarioPrint 2070
Prémia Class system
#
Method
Description
Key operator System on the Océ
VarioPrint 2070 Prémia Class
The display screen on the machine provides the
settings for the system and machine configuration.
Océ System configuration application
The web based Océ System configuration provides the settings for the system, machine and
network configuration.
Océ VarioPrint 2070 Prémia Class documentation
#
Types of users
Documentation
End user
■
■
■
■
The Océ VarioPrint 2070 Prémia Class Job
Manual.
Quick Reference Card for referring to the
settings and the main jobs.
Instruction Cards to explain easy copy, print
and scan jobs.
The online help of the applications, to manage the Océ VarioPrint 2070 Prémia Class
document flow.
Chapter 1 - Introduction
13
About the Océ VarioPrint 2070 Prémia Class
Types of users
Documentation
Key Operator
■
■
System Administrator
14
Chapter 1 - Introduction
■
The Océ VarioPrint 2070 Prémia Class
Configuration and Maintenance Manual.
Maintenance Card for reference to the maintenance of the Océ VarioPrint 2070 Prémia
Class.
The online help of the applications, to
maintain and configure the Océ VarioPrint
2070 Prémia Class system.
About the configuration of the Océ VarioPrint 2070 Prémia Class
About the configuration of the Océ VarioPrint 2070 Prémia
Class
Introduction
The main components of the Océ VarioPrint 2070 Prémia Class are the following.
1. The operator panel.
2. The Océ VarioPrint 2070 Prémia Class machine.
3. The controller (DAC), extended with a Web server.
To finish the print and scan jobs, the system is connected to a print server, a scan server,
and the workstations.
The Océ VarioPrint 2070 Prémia Class machine
[1] The Parts of the Océ VarioPrint 2070 Prémia Class
#
Number
Part
Function
1
Access to platen
Equipment, to copy or scan the nonstandard originals.
One side of the original is scanned at
a time.
Chapter 1 - Introduction
15
About the configuration of the Océ VarioPrint 2070 Prémia Class
Number
Part
Function
2
Automatic document feeder
Equipment, to copy or scan a set of
one-sided or two-sided standard originals.
3
Original receiving bin
Equipment, to collect the originals,
processed by the automatic document
feeder.
4
Multi-size bin
Equipment, to collect the completed
sets with a special paper size or paper
weight.
The sets cannot be stapled internally.
5
Finisher bins
Equipment, to collect the completed
A4/Letter 8.5x11 sets with a standard
paper weight.
The sets can be stapled internally.
6
Special feeder
Equipment, to insert a sheet of special
material to copy or print on.
7
Paper compartment
Equipment, to hold the paper stocks.
8
Error bin
Equipment, to collect the sheets that
are processed incorrectly.
9
Off-line stapler
Equipment, to staple a set manually.
10
Operator panel
Equipment, to enter the settings.
11
Front door
Door to access the toner reservoir and
the machine counter.
The integrated DAC
The DAC is built into the machine.
16
Chapter 1 - Introduction
About the configuration of the Océ VarioPrint 2070 Prémia Class
[2] The integrated DAC
The finisher
The finisher has two bins to collect the printed sets.
The output of the jobs are collected in one of the bins. The key operator defines the
destination of the job output.
Chapter 1 - Introduction
17
About the operator panel of the Océ VarioPrint 2070 Prémia Class
About the operator panel of the Océ VarioPrint 2070 Prémia
Class
Introduction
The operator panel contains the display screen and the keys. The display screen shows
the available settings, the feedback graphics and a message box.
The Océ VarioPrint 2070 Prémia Class has three main operating modes.
■ Copy
.
■ Print
.
■ Scan
.
Each mode allows you to enter the key operator system ‘Enter or quit the key operator system’
on page 21.
The operator panel
[3] The operator panel of the Océ VarioPrint 2070 Prémia Class
#
18
Number
Part
Description
1
Display screen
■
Screen, to display the settings and the
messages.
2
Section keys
■
Keys, to select a collection of settings (a
section).
Chapter 1 - Introduction
About the operator panel of the Océ VarioPrint 2070 Prémia Class
Number
Part
Description
3
Arrow keys
Keys, to:
■ Change the value in small steps (arrowup key and arrow-down key ).
■ Change the value to preset values (arrowleft key and arrow-right key ).
■ Select a value or a name in a displayed
list.
■ Select a digit in a displayed value.
4
Stop key
■
Key, to stop or abort the jobs.
5
Correction key
■
Key, to reset or cancel the settings.
6
numeric keys
■
Keys, to enter the numeric values.
7
Copies counter
■
Counter, to display the number of prints
or copies.
8
Start key
Key, to:
■ Start a job.
■ Confirm the settings.
9
Function keys
■
Keys, to select a collection of settings (a
function).
10
Combine key
■
Key, to scan or copy the separate job
parts.
11
Interrupt key
■
Key, to activate or quit the interrupt
mode.
The display screen
[4] The display screen of the Océ VarioPrint 2070 Prémia Class
Chapter 1 - Introduction
19
About the operator panel of the Océ VarioPrint 2070 Prémia Class
#
20
Number
Part
Description
1
Message box
Area on the display screen for displaying:
■ General job information.
■ Interactive requests for continuing a
process.
■ The processing phase of a job.
■ Error messages.
■ The activity states of the Océ VarioPrint
2070 Prémia Class.
2
Section
■
A section represents a pre-set collection
of settings. The name box of the activated section is aligned lower than the
other sections. The section box can
contain symbols to indicate some settings.
3
Card
■
A card represents a pre-set collection of
settings of a section.
4
Function
■
A function represents a setting. The activated function is black.
5
Function box
■
The function box contains the values of
a function.
6
Not available function
■
If the function is not available, the
function and values names are grayed.
Chapter 1 - Introduction
Enter or quit the key operator system
Access the System
Enter or quit the key operator system
Introduction
The key operator system contains the settings to change, or restore, the default configuration of the Océ VarioPrint 2070 Prémia Class.
You can enter the key operator system if the Océ VarioPrint 2070 Prémia Class is not
processing a job. A PIN is required to make the settings available. Only Océ Service can
change the Key Operator PIN.
The changes made in the Key Operator System are applied after you have left the Key
Operator System.
Before you begin
Make sure that the Océ VarioPrint 2070 Prémia Class does not process or announce a
job.
Illustration
[5] Enter the Key Operator System with a PIN
[6] Quitting the Key Operator System
Entering the Key Operator System
1.
2.
3.
4.
Select the 'Copy' mode.
Activate the 'Extra' section.
Open the 'Special settings' card.
Press the 'System management' function key.
Chapter 1 - Introduction
21
Enter or quit the key operator system
5. Select 'Key operator' .
6. Press the Start key .
7. Enter the Key Operator PIN.
Quitting the key operator system
1. Activate the 'Basic settings' section.
2. Press the 'Quit Key Operator System' function key.
3. Press the Start key .
22
Chapter 1 - Introduction
Changing the Default PIN of the Key Operator
Changing the Default PIN of the Key Operator
Introduction
The Key Operator has a default PIN to access the Key Operator System on the machine.
You can change the default PIN if you want to use a different PIN.
Before you begin
Enter the Key operator system .
Illustration
[7] Changing the PIN of the Key Operator
Changing the PIN of the Key Operator
1.
2.
3.
4.
Activate the 'Basic settings' section.
Press the 'Change Key Operator PIN' function key.
Enter a unique 5-digit PIN.
Press the start key to confirm.
Check
1. Print the accounts-database file ‘Print the accounts-database file’ on page 115 and make
sure that you remember or find the PIN to re-open the Key Operator System.
Chapter 1 - Introduction
23
Switching the DAC On or Off
Switching the DAC On or Off
Introduction
Use the Key Operator System to switch the DAC off. When you stop the DAC, the
machine continues the print process until the current job is completed. The jobs in the
print queue are continued when the DAC is switched on again.
Switch the DAC on with the ON / OFF switch.
You can restart the DAC to solve errors and problems. Use the key operator system to
restart the DAC ‘Restart the DAC’ on page 134.
Attention:
When restarting the DAC, do not use the ON / OFF or the Reset button. You must use
the key operator system setting.
Note:
You can also use the Océ System configuration to stop the DAC.
Illustration
[8] Switch the DAC off
Switching the DAC off
1.
2.
3.
4.
5.
24
Enter the key operator system.
Activate the 'Print settings' section.
Open the 'DAC control' card.
Press the 'DAC' function key to select 'Stop' .
Quit the key operator system.
Chapter 1 - Introduction
Switching the DAC On or Off
Switching the DAC on
1. Press the ON / OFF switch on the DAC.
Chapter 1 - Introduction
25
Switch the Océ VarioPrint 2070 Prémia Class off or on
Switch the Océ VarioPrint 2070 Prémia Class off or on
Introduction
Switch the Océ VarioPrint 2070 Prémia Class on when any user jobs are planned.
You can switch off and then back on in particular circumstances. To correct an error,
press the ON / OFF button.
Before you begin
The Océ VarioPrint 2070 Prémia Class can have a key switch to protect access. If there
is a lock available, check to see if key is available.
Note:
The system requires eight minutes to reach the operating temperature. When the machine
is ready, a message is displayed.
Illustration
[9] The ON / OFF button and the key switch on the machine
Switching the Océ VarioPrint 2070 Prémia Class off
1.
2.
3.
4.
26
Make sure that no job is announced or in progress.
Turn the key to the left in the vertical position, if a key switch is available.
Press the green ON / OFF button.
Remove the key, if applicable.
Chapter 1 - Introduction
Switch the Océ VarioPrint 2070 Prémia Class off or on
Switching the Océ VarioPrint 2070 Prémia Class on
1. Turn the key to the right in the horizontal position, if a key switch is available.
2. Press the green ON / OFF button.
Chapter 1 - Introduction
27
Switch the Océ VarioPrint 2070 Prémia Class off or on
28
Chapter 1 - Introduction
Chapter 2
Set the Defaults
Define the IP address information
Define the Default Job Settings
Define the IP address information
Introduction
To configure the IP address information, you can use the Key Operator System and the
Océ System Configuration.
You can configure the IP address statically or dynamically through BootP or DHCP.
When selecting the address assignment, use one of the following settings:
#
Address assignment
Result
'Manual'
The IP address must be manually entered in the 'IP
address' function box. 'Manual' is the default setting.
'Use DHCP'
DHCP is used to obtain the IP address.
'Use BootP'
BootP is used to obtain the IP address.
Before you begin
1. Enter the Key Operator System.
Illustration
[10] Obtain the IP address
Entering the IP address information
1. Activate the 'Print settings' section.
2. Open the 'Network' card.
3. Press the 'Obtain IP address' function key to select the address assignment.
30
Chapter 2 - Set the Defaults
Define the IP address information
Illustration
[11] Enter the IP address
Manually defining the IP address
1.
2.
3.
4.
5.
6.
Activate the 'Print settings' section.
Open the 'Network' card.
Check to see that 'Manual' is selected in the 'Obtain IP address' function box.
Press the IP address function key.
Use the numeric keys to enter the IP address. You can use the arrow keys to navigate.
Press the start key to confirm the IP address.
Illustration
[12] Enter the subnet mask
Defining the subnet mask
1.
2.
3.
4.
5.
6.
Activate the 'Print settings' section.
Open the 'Network' card.
Check to see that 'Manual' is selected in the 'Obtain IP address' function box.
Press the 'Subnet mask' function key.
Use the numeric keys to enter the subnet mask. You can use the arrow keys to navigate.
Press the start key to confirm the subnet mask.
Chapter 2 - Set the Defaults
31
Define the IP address information
Illustration
[13] Enter the default gateway
Defining the default gateway
Activate the 'Print settings' section.
Open the 'Network' card.
Check to see that 'Manual' is selected in the 'Obtain IP address' function box.
Press the 'Default gateway' function key.
Use the numeric keys to enter the default gateway. You can use the arrow keys to navigate.
6. Press the start key to confirm the default gateway.
1.
2.
3.
4.
5.
32
Chapter 2 - Set the Defaults
Define the default operating mode
Define the default operating mode
Introduction
You can define the default operating mode. The selected operating mode must match
the most started jobs.
Before you begin
1. Enter the Key Operator System.
Illustration
[14] Define the default operating mode
Defining the default operating mode
1. Activate the 'Machine' section.
2. Open the 'Console defaults' card.
3. Press the 'Default usage' function key to select the operating mode.
Check
1. Exit the key operator system.
2. Check to insure that the default operating mode is set for your needs.
Chapter 2 - Set the Defaults
33
Change or restore the default job settings
Change or restore the default job settings
Introduction
The Océ VarioPrint 2070 Prémia Class has a collection of job settings, defined by Océ.
You can change the Océ settings, according to the requirements of your company or department. The Océ VarioPrint 2070 Prémia Class allows you to recover the Océ defined
settings, at your convenience.
Before you begin
1. When defining the company or department settings, first define the required job settings
in the available operating modes.
2. Enter the Key operator system .
Illustration
[15] Save the current job settings
[16] Restore the default Océ settings
Changing the default job settings
1. Activate the 'Machine' section.
2. Open the 'Console defaults' card.
3. Press the 'Use job settings' function key to select 'Current' .
34
Chapter 2 - Set the Defaults
Change or restore the default job settings
4. Press the start key
to confirm.
Restoring the default job settings
1.
2.
3.
4.
Activate the 'Machine' section.
Open the 'Console defaults' card.
Press the 'Use job settings' function key to select 'Defined by Océ' .
Press the start key to confirm.
Check
1. Exit the key operator system.
2. Check to insure that the default job settings are set for your needs.
Chapter 2 - Set the Defaults
35
Changing the Default Reset Time
Changing the Default Reset Time
Introduction
The reset time is the delay period between the last user operation and the return to the
default job settings ‘Change or restore the default job settings’ on page 34.
A timer starts if the user presses a key, opens a door or places the originals. When the reset
time has expired, the Océ VarioPrint 2070 Prémia Class returns to the default operating
mode and the default job settings are displayed. The user loses the changed settings.
The default reset time is 60 seconds, but you can set any other time from 10 seconds up
to 5 minutes. If no reset time is defined, the user can restore the default settings using
the correction key .
Before you begin
1. Enter the Key Operator System.
Illustration
[17] Define the reset time
Changing the reset time
1. Activate the 'Machine' section.
2. Open the 'Basic settings' card.
3. Press the 'Reset time' function key.
Press the arrow keys to adjust the reset time. Use the left arrow key
key to decrease or increase in 10 second steps.
Disabling the reset time
1. Activate the 'Machine' section.
36
Chapter 2 - Set the Defaults
or the right arrow
Changing the Default Reset Time
2. Open the 'Basic settings' card.
3. Press the 'Reset time' function key to select 'No reset' .
Check
1. Exit the key operator system.
2. Check to insure that the reset time is set for your needs.
The Océ VarioPrint 2070 Prémia Class must return to the default operating mode after
the reset time has expired.
If 'No reset' is selected, the default operating mode will not be restored.
Chapter 2 - Set the Defaults
37
Change the display language
Change the display language
Introduction
The Océ VarioPrint 2070 Prémia Class allows you to select one of the 17 display languages.
Before you begin
1. Enter the Key Operator System.
Illustration
[18] Change the display language
Changing the display language
1. Activate the 'Basic settings' section.
2. Press the 'Language' function key.
Select the language with the arrow keys .
Check
1. After the display language is changed, the display language will be immediately displayed
in the key operator system.
38
Chapter 2 - Set the Defaults
Define the end-of-job confirmation
Define the end-of-job confirmation
Introduction
To help the non-experienced user, you can define a supplementary user request to finish
the jobs with different job parts. To assemble the job parts, the user must press the combine
key and confirm the end of the job with the start key . If you enable the end-of-job
confirmation, the user gets a second request to press the start Key .
Note:
You can also use the Océ System configuration to define the end-of-job confirmation.
Before you begin
1. Enter the Key Operator System.
Illustration
[19] Enable the end-of-job confirmation
Defining the end-of-job confirmation
1. Activate the 'Machine' section.
2. Open the 'Error information' card.
3. Press the 'End-of-job confirmation' function key to select 'Enabled' or 'Disabled' .
Check
1. Exit the key operator system.
2. To check the entered selection, make a copy job with different job parts.
Chapter 2 - Set the Defaults
39
Enter the telephone number of the key operator
Enter the telephone number of the key operator
Introduction
If an error is reported, the Océ VarioPrint 2070 Prémia Class asks the user to call the
Key Operator. A telephone number can be a part of the message.
You can change or ignore the telephone number.
Before you begin
1. Enter the Key Operator System.
Illustration
[20] Enter the key operator telephone number
Entering a key operator telephone number
Activate the 'Machine' section.
Open the 'Error information' card.
Press the 'Change phone number' function key.
Use the numeric keys to enter a telephone number with a maximum of 13 digits. You
can use the arrow keys for the dash sign (-).
5. Press the start key to confirm the new number.
1.
2.
3.
4.
Ignoring a telephone number
1.
2.
3.
4.
40
Activate the 'Machine' section.
Open the 'Error information' card.
Press the 'Change phone number' function key.
Press the start key to ignore the telephone number.
Chapter 2 - Set the Defaults
About the access-secured system
Define the Access Control
About the access-secured system
Introduction
An access-secured system allows you to perform the following tasks:
■ Define which users can access the machine to start mailbox, copy and scan jobs.
■ Define which user can perform automatic print jobs.
■ Define the job-page limit for each user.
■ Follow the number of job-page clicks the users have done.
To create an access-secured system, proceed as follows:
1. Secure access to the machine ‘Secure the access to the machine’ on page 45.
When the access to the machine is secured, all authorized users need a unique PIN to enter
the display menu. If the PIN is correct, the user can start mailbox, copy and scan jobs.
2. Secure automatic printing ‘Secure automatic printing’ on page 47.
3. Enter the accounting system. Define the authorization for each user or each user group ‘About
the accounting system’ on page 98.
To accept external users, a copy control device can be a part of the system.
Access-secured system
An access-secured system has the following properties:
#
Properties
The 'Access to machine' is 'Secured' (key operator system).
The authorized users have a PIN (accounting system).
The authorized users have a valid user account (accounting system).
The authorized users can use the machine until the job-page limit of the user account is
reached (accounting system).
Secured automatic printing
Secured automatic printing has the following properties .
Chapter 2 - Set the Defaults
41
About the access-secured system
#
Properties
A user can only print automatic jobs when you change the status of the automatically
created user account to '+' (Accounting system).
This means that you need to authorize the user account manually in the Accounting
system, so that you can check the user.
Automatic print jobs come into the mailbox of the owner when the user account
record has the status '-'.
Security through the copy control device
Security through the copy control device has the following properties:
#
Properties
Océ Service must install and configure the Copy control device.
The access control for the copy control device is set to 'Enabled' (key operator system).
The 'Access to machine' can be secured, so that the authorized, internal users can use
a PIN instead of using coins or a credit card.
When automatic printing is not secured, each user with a network user name can print
the automatic print jobs, without a charge.
42
Chapter 2 - Set the Defaults
Enable the copy control device
Enable the copy control device
Introduction
The copy control device is connected externally to the machine. The system gives access
to external users who are not authorized in the accounts database. The external user must
insert coins or a credit card to gain access to the machine.
Océ Service must install and configure the Copy control device.
You can enable or disable an installed and configured copy control device.
An enabled copy control device and an access-secured system can be combined to enable
use by internal and external user groups ‘About the access-secured system’ on page 41.
[21] Entry screen for external users
[22] Entry screen for external and internal users
The following table displays the requirements for the external users when the copy control
device is enabled:
#
Job
Requirement
Charges
Copy job
The user must insert coins or
a credit card, to access the
machine.
Jobs are charged to the
'Copy control device' system account.
Chapter 2 - Set the Defaults
43
Enable the copy control device
Job
Requirement
Charges
Automatic print job
The user can perform an automatic print job if automatic
print jobs are permitted.
Jobs are not charged to
any account.
Mailbox job
The user must enter coins or
a credit card, to access the
mailbox.
Jobs are charged on the
'Copy control device' system account.
Scan job
The user must enter coins or
a credit card, to access the
machine.
Jobs are charged on the
'Copy control device' system account.
Before you begin
1. Enter the Key Operator System.
Illustration
[23] Enable the copy control device
Configuring the copy control device
1. Activate the 'Accounting' section.
2. Open the 'General' card.
3. Press the 'Copy control device' function key to select 'Enabled' .
Check
1. Quit the key operator system.
2. To check the selection, make a test job.
Open the Accounting system, to see if the test job is charged to the Copy control device
account ‘Print the accounts-database file’ on page 115.
44
Chapter 2 - Set the Defaults
Secure the access to the machine
Secure the access to the machine
Introduction
The Océ VarioPrint 2070 Prémia Class allows you to secure access to the machine ‘About
the access-secured system’ on page 41. If the machine is secured, the user must enter a
unique PIN, to enter the display screen menu and to start the jobs.
[24] Entry screen, when the access is secured
In order to define machine-security, proceed as follows:
#
Access to machine
Result
Secured
■
■
■
Unsecured
■
■
The user must have a PIN to access the machine ‘About
the accounting system’ on page 98.
The user account must be valid.
You can secure automatic printing by using the 'Authorize print account' function ‘Secure automatic printing’
on page 47.
Any user can access the machine.
You can secure automatic printing by using the 'Authorize print account' function ‘Secure automatic printing’
on page 47.
Before you begin
1. Enter the key operator system.
2. Check to insure that the authorized users have valid user accounts ‘About the accounting
system’ on page 98.
Chapter 2 - Set the Defaults
45
Secure the access to the machine
Illustration
[25] Secure the machine-access
Defining machine security
1. Activate the 'Accounting' section.
2. Open the 'General' card.
3. Press the 'Access to machine' function key to select 'Secured' or 'Unsecured' .
Check
1. Exit the key operator system.
2. Check to insure that the access is controlled according to your needs.
46
Chapter 2 - Set the Defaults
Secure automatic printing
Secure automatic printing
Introduction
If the access to the machine is secured, the user must use a PIN to enter the display screen
menu ‘About the access-secured system’ on page 41. In order to print a job that is stored in
the mailbox, the user needs a PIN to enter the mailbox. When a user sends an automatic
print job, the operator panel is not necessary to print the job. You can secure the automatic
printing so that new users cannot print, unless you manually change the status of the user
account ‘Changing the Status’ on page 107.
In order to define the automatic printing security, proceed as follows:
#
Authorize print
account
Result
'Manual'
■
■
'Automatic'
■
■
When a user sends an automatic print job to the machine, a
record is automatically added to the accounts database. To
prevent unlimited printing, use the setting 'Manual'.
Then, newly created user account records get the status '-', which
means that the user accounts are not valid. The refused automatic print job is not printed and stored in the mailbox of the
document owner. You must change the status of the user account
to allow the user to print automatic print jobs in the future.
When a user sends a mailbox job to the machine, a record is
automatically added to the accounts database. To enable the
user to enter the mailbox, you must define a PIN, if the machine
access is secured, and change the status to '+'.
When a user sends an automatic print job to the machine, a
user account record is automatically added to the accounts
database. The status of the user account is '+', which means that
the user can start unlimited automatic print jobs.
When a user sends a mailbox job to the machine, a user account
record is automatically added to the accounts database. To enable the user to enter the mailbox, you must define a PIN, if
the machine access is secured.
Before you begin
1. Enter the key operator system.
2. Check to insure that the access-security has been defined ‘Secure the access to the machine’
on page 45.
Chapter 2 - Set the Defaults
47
Secure automatic printing
Illustration
[26] Secure automatic printing
Defining the automatic printing security
1. Activate the 'Accounting' section.
2. Open the 'General' card.
3. Press the 'Authorize print account' function key to select 'Manual' or 'Automatic' .
Check
1. Quit the key operator system.
2. Check to insure that the status of new user accounts have the correct status ‘Print the accounts-database file’ on page 115.
48
Chapter 2 - Set the Defaults
Define the job charges
Define the job charges
Introduction
The Océ VarioPrint 2070 Prémia Class default charge is one click for each job page side
that is copied or printed. You can define the charge for the following output.
■ 2-sided output. Select a factor.
■ A3/Tabloid 11x17 output. Select a factor.
■ Blank page. Select 'Yes' or 'No'.
The default setting is no charge for blank pages of any size. The user must identify the
blank pages in the display screen menu.
The charges for scan jobs depend on the number of page sides scanned. You can define
a factor for charging. If required, you can ignore the charges of scan jobs. Then, select
'0'.
The charges are passed on to the Accounting system and the Copy control device.
Before you begin
1. Enter the Key Operator System.
Illustration
[27] Define the job charges
Defining the job charge for 2-sided output
1. Activate the 'Accounting' section.
2. Open the 'Charges' card.
3. Press the '2-sided output' function key to select '1' or '2'.
How to define the job charge for A3/Tabloid 11x17 output
1. Activate the 'Accounting' section.
Chapter 2 - Set the Defaults
49
Define the job charges
2. Open the 'Charges' card.
3. Press the '11x17 output' function key to select '1' or '2'.
Defining the job charge for a blank page
1. Activate the 'Accounting' section.
2. Open the 'Charges' card.
3. Press the 'Charge blank page' function key to select 'Yes' or 'No' .
Defining the job charge for a scanned page
1. Activate the 'Accounting' section.
2. Open the 'Charges' card.
3. Press the 'Scanned page' function key to select '0', '1' or '2'.
Check
1. Quit the key operator system.
2. To check the selection, make a test job.
Check to insure that the job is charged correctly ‘Print the accounts-database file’ on page
115.
50
Chapter 2 - Set the Defaults
Control the access to the paper trays
Control Access to the Machine Components
Control the access to the paper trays
Introduction
You can follow two procedures to control the user access to the paper trays.
First, you can lock the paper-compartment to prevent users from entering the paper
compartment. The Océ VarioPrint 2070 Prémia Class can have a key switch on the papercompartment door. If the door of the paper-compartment door is open, the users can
perform the following tasks.
■ Refill the stocks of paper in the trays.
■ Place sheets of special material in the paper tray for a particular job.
■ Clear the paper jams in the paper-compartment unit.
Secondly, you can instruct the users to call the Key Operator. The Océ VarioPrint 2070
Prémia Class instructs the users to call the Key Operator if a paper tray is empty or a paper
jam occurs. The request is not related to the lock on the door. So, although the door is
open, the display can still ask the users to call the Key Operator.
[28] User screen when paper tray is empty
Before you begin
1. Enter the Key Operator System.
Chapter 2 - Set the Defaults
51
Control the access to the paper trays
Illustration
[29] Permit the users to access the paper trays
Preventing access to the paper trays
1. Activate the 'Machine' section.
2. Open the 'Error information' card.
3. Press the 'Access to trays' function key to select 'Key operator' .
Permitting the user to access the paper trays
1. Activate the 'Machine' section.
2. Open the 'Error information' card.
3. Press the 'Access to trays' function key to select 'User' .
Check
1. Exit the key operator system.
2. To check the selection, remove the stock of paper from one of the trays.
Then, start a copy job that uses the empty paper tray.
52
Chapter 2 - Set the Defaults
Control the access to the special feeder
Control the access to the special feeder
Introduction
The users can use the special feeder to feed the special material that is not available or
allowed in the paper trays ‘About the configuration of the Océ VarioPrint 2070 Prémia
Class’ on page 15. If you disable the special feeder, the special feeder function is not selectable on the display screen menu.
[30] The user cannot select the special feeder
[31] The user can select the special feeder
Before you begin
1. Enter the Key Operator System.
Illustration
[32] Permit the users to access the special feeder
Chapter 2 - Set the Defaults
53
Control the access to the special feeder
Preventing access to the special feeder
1. Activate the 'Machine' section.
2. Open the 'Basic settings' card.
3. Press the 'Special feeder' function key to select 'Disabled' .
Permitting the users the access to the special feeder
1. Activate the 'Machine' section.
2. Open the 'Basic settings' card.
3. Press the 'Special feeder' function key to select 'Enabled' .
Check
1. Exit the key operator system.
2. To check the selection, start a test job that requires the special feeder.
54
Chapter 2 - Set the Defaults
Chapter 3
Control Input
Define the paper trays for the report jobs
Define the paper trays for the report jobs
Introduction
The Océ VarioPrint 2070 Prémia Class has four paper trays located in the paper compartment.
The size, orientation and supply of any paper, placed in the trays, is displayed in the userdisplay screen.
The user can make reports with paper from several paper trays.
In addition to the standard sheets, a report can contain:
■ Covers.
■ Separation sheets.
■ Appendix sheets.
You can allocate the paper trays that contain the material for covers, separation sheets
and appendix sheets.
Before you begin
1. Enter the Key Operator System.
Illustration
[33] Allocate the paper trays for the report jobs
Allocating the paper trays for the report jobs
1. Activate the 'Machine' section.
2. Open the 'Paper trays' card.
3. Press the 'Covers' , 'Separation sheets' and 'Appendix' function key to select a tray.
56
Chapter 3 - Control Input
Define the paper trays for the report jobs
Check
1. Exit the key operator system.
2. To check the selection, make a test report job.
Place the necessary materials in the paper trays.
Check to insure that the material is set for your needs.
Chapter 3 - Control Input
57
Define the folio size
Define the folio size
Introduction
Paper tray 1, which is adjustable for different paper sizes, can detect the dimensions of
the paper with the exception of Folio and Foolscap folio. The difference between the two
folio sizes is not be detected. Therefore, you must indicate which type is placed in tray
1. The automatic document feeder can detect the different folio sizes.
The Océ VarioPrint 2070 Prémia Class supports the following folio sizes:
■ 'Folio' (12.4 x 8.4 inches).
■ 'Foolscap folio' (13.2 x 8.12 inches).
'Folio' is the default setting. If the users require jobs on Foolscap folio paper, change the
setting for these jobs.
Before you begin
1. Enter the Key Operator System.
Illustration
[34] Change the folio size
Changing the folio size
1. Activate the 'Machine' section.
2. Open the 'Special' card.
3. Press the 'Folio type' function key to select 'Folio' or 'Foolscap folio' .
Check
1. Exit the key operator system.
58
Chapter 3 - Control Input
Define the folio size
2. To check the selection, make a test copy job. Use an original of the selected Folio size.
The original information must fit correctly on the copy page.
Chapter 3 - Control Input
59
Link the paper trays
Link the paper trays
Introduction
To increase the available paper stock for the jobs, you can link one or more paper trays.
When a tray gets empty during a job, paper will be used from the linked paper tray or
trays. The paper trays that are linked must contain paper with the same size and orientation.
You can link the following trays.
■ 'Trays 4, 1'
■ 'Trays 4, 2'
■ 'Trays 4, 3'
■ 'Trays 4, 1, 2'
■ 'Trays 4, 1, 3'
■ 'Trays 1, 2'
■ 'Trays 1, 3'
For example: 'Trays 4, 2' means that the job will first use paper from tray 4. When tray
4 is empty, the job will continue and will use paper from tray 2.
Before you begin
1. Enter the Key Operator System.
Illustration
[35] Link the paper trays
Linking the paper trays
1. Activate the 'Machine' section.
2. Open the 'Paper trays' card.
3. Press the 'Link paper trays' function key.
Use the arrow keys to select the tray or trays.
60
Chapter 3 - Control Input
Link the paper trays
Canceling the link between paper trays
1. Activate the 'Machine' section.
2. Open the 'Paper trays' card.
3. Press the 'Link paper trays' function key to select 'None' .
Check
1. Quit the Key operator system.
2. To check the selection, make a test copy job.
Fill the main paper tray with a few sheets.
Fill the linked paper trays with the same sized paper.
The linked paper trays are used when the paper tray 4 is empty.
Chapter 3 - Control Input
61
Link the paper trays
62
Chapter 3 - Control Input
Chapter 4
Control Output
Define the banner pages
Define the banner pages
Introduction
The first page of a printed set can be a banner page. A banner page contains information
about the print job: such as the user name, the name of the document, the date and the
printer name.
You can allocate the paper tray for the banner pages.
To define the banner page configuration, proceed as follows:
#
Setting
Result
'Never'
A banner page is never printed.
'Selectable'
A banner page is printed if the user has specified the banner
page in the printer driver.
'Always'
A banner page is always printed.
Before you begin
1. Enter the Key Operator System.
Note:
You can also use the Océ System Configuration to configure the banner pages.
Illustration
[36] Enter the banner page settings
Defining the banner pages
1. Activate the 'Print settings' section.
64
Chapter 4 - Control Output
Define the banner pages
2. Open the 'Banner pages' card.
3. Press the 'Banner page Mailbox jobs' or 'Banner page automatic jobs' function key to
enter the selection.
Allocating the paper tray for banner pages
1. Activate the 'Print settings' section.
2. Open the 'Banner pages' card.
3. Press the 'Tray for banner pages' function key to select the required paper tray.
Check
1. Exit the key operator system.
2. To check the selection, make a test print job.
Place the necessary material in the paper tray.
Check to insure that the banner page configuration is set for your needs.
Chapter 4 - Control Output
65
Control the finisher bins
Control the finisher bins
Introduction
You can direct the output of a mailbox job, an automatic print job and a copy job to a
indicated bin of the finisher.
The output will be sent to the selected bin. If there is not enough capacity to complete
the job, a message is displayed to explain the problem. The user must remove the paper
stacks to resume the job.
To define the finisher bin configuration, proceed as follows:
#
Configuration
mode
Result
'Separation'
The lower finisher bin collects the output of the mailbox jobs
and copy jobs.
The upper finisher bin collects the output of the automatic
print jobs.
'Production'
The upper and the lower bins are linked.
First, the output of all jobs is sent to the upper bin. Then, when
the upper bin is full, the lower bin is filled.
Before you begin
1. Enter the Key Operator System.
Note:
You can also use the Océ System Configuration to configure the banner pages.
Illustration
[37] Change the finisher bin configuration
66
Chapter 4 - Control Output
Control the finisher bins
Controlling the finisher bins
1. Activate the 'Machine' section.
2. Open the 'Special' card.
3. Press the 'Finisher control' function key to select 'Separation' or 'Production'.
Check
1. Quit the key operator system.
2. Check to see that both finisher bins are empty.
3. Create a copy job to check the selection.
If 'Production' is selected, the copy job is directed to the upper finisher bin.
If 'Separation' is selected, the copy job is directed to the lower finisher bin.
Chapter 4 - Control Output
67
Change the default margin shift
Change the default margin shift
Introduction
The margin shift is the distance that the margin is moved to the right or to the left of the
page.
The default margin shift is .48 inches. To change the default value, enter a value from +
1 inch (left direction) down to - 1 inch (right direction).
Before you begin
1. Enter the Key Operator System.
Illustration
[38] Define the default margin shift
Changing the default margin shift
1. Activate the 'Machine' section.
2. Open the 'Console defaults' card.
3. Adjust the margin shift with the arrow keys .
Check
1. Exit the key operator system.
2. To check the selection, make a test copy job.
Check that the default margin shift is set for your needs.
68
Chapter 4 - Control Output
Chapter 5
Control the Print Mode
About the mailbox
Defining Mailbox Input
About the mailbox
Definition
The mailbox is a personal storage area on the DAC. The users can change the settings of
the jobs in their mailbox.
The Smart mailbox adds new functionality to use the mailbox. The Smart mailbox
function can be used when the user can print to more than one printer that belong to
the Océ VarioPrint® 2045-65, Océ VarioPrint® 2050-70, Océ 31x5E product range.
The mailbox jobs sent to other printers become local mailbox jobs.
The Smart mailbox configuration must be done with the Océ System Configuration.
Attributes
#
A print job becomes a mailbox print job, in the following circumstances:
The user selects 'To mailbox', 'Security' or 'Special feeder' in the Océ printer driver.
The user, who sends a print job, is not authorized to use the printer.
Someone cancels an automatic print job.
The DAC moves all new jobs to the mailbox, following a configuration setting.
The DAC moves the jobs without an Océ job ticket to the mailbox, following a
configuration setting.
The DAC receives jobs from other controllers (Smart mailbox members) after that
the user asks to fetch Smart mailbox jobs.
Note:
You can use the Océ System configuration to define the automatic clean-up for all jobs
and the printed mailbox jobs.
70
Chapter 5 - Control the Print Mode
Controlling the Automatic Print Jobs
Controlling the Automatic Print Jobs
Introduction
The users can instruct the Océ VarioPrint 2070 Prémia Class, through the printer driver,
that the print job must be stored in the mailbox. If the job is not a mailbox job, the job
is sent to the print queue.
You can restrict the automatic print jobs so that all print jobs are stored in the mailbox.
Check to insure that the users are authorized to open their mailbox ‘Secure the access to
the machine’ on page 45.
Before you begin
1. Enter the Key Operator System.
Note:
You can suspend automatic printing so that the print jobs remain in the print queue.
The user can still initiate the automatic print jobs, but the jobs are not printed ‘Suspending
Automatic Printing’ on page 73.
Note:
You can also use the Océ System Configuration, to enable or disable the automatic print
jobs.
Illustration
[39] Disable the automatic print jobs
Controlling the automatic print jobs
1. Activate the 'Print settings' section.
2. Open the 'Job processing' card.
Chapter 5 - Control the Print Mode
71
Controlling the Automatic Print Jobs
3. Press the 'Send to mailbox' function key to select 'All new jobs' or 'Mailbox jobs' .
Check
1. Exit the key operator system.
2. To check the selection, make a test print job.
Check that the print operation on the Océ VarioPrint 2070 Prémia Class is according to
your purposes.
72
Chapter 5 - Control the Print Mode
Suspending Automatic Printing
Suspending Automatic Printing
Introduction
You can suspend automatic printing, to allow the processing of copy, mailbox or scan
jobs. The automatic print jobs remain in the print queue. To resume the printing of the
automatic print jobs, restore the setting in the key operator system.
The users can still initiate automatic print jobs even though automatic printing has been
suspended.
Before you begin
1. Enter the Key Operator System.
Note:
The Océ VarioPrint 2070 Prémia Class allows you to restrict the automatic print jobs
so that all print jobs are stored in the mailbox ‘Controlling the Automatic Print Jobs’ on
page 71.
Note:
You can also use the Océ System Configuration to stop or continue automatic printing.
Controlling automatic printing
1. Activate the 'Print settings' section.
2. Press the 'Automatic printing' function key to select 'Stop' or 'Continue'.
Illustration
[40] Suspending Automatic Printing
Chapter 5 - Control the Print Mode
73
Suspending Automatic Printing
Check
1. Exit the key operator system.
2. To check the selection, start a print job.
Enter the settings for an automatic print job in the Océ VarioPrint 2070 Prémia Class
printer driver.
The automatic print job is not printed until you again change the setting to continue the
automatic printing.
74
Chapter 5 - Control the Print Mode
Controlling Jobs Without an Océ Job Ticket
Controlling Jobs Without an Océ Job Ticket
Introduction
If a user does not have a printer driver that is supported by Océ, the special Océ print
features are not displayed. The generated print file does not include an Océ job ticket.
The Océ VarioPrint 2070 Prémia Class allows the user to control the Océ job features
through the operator panel. Therefore, the print job must become a mailbox job.
You can instruct the Océ VarioPrint 2070 Prémia Class to send all jobs without an Océ
job ticket to the mailbox.
Before you begin
1. Enter the Key Operator System.
Note:
You can also use the Océ System Configuration to control the jobs without an Océ job
ticket.
Illustration
[41] Sending All Jobs Without an Océ Ticket to the Mailbox
Controlling jobs without an Océ ticket
1. Activate the 'Print settings' section.
2. Open the 'Job processing' card.
3. Press the 'Jobs without Océ ticket' function key to select 'Mailbox' or 'Automatic'.
Chapter 5 - Control the Print Mode
75
Controlling Jobs Without an Océ Job Ticket
Check
1. Quit the key operator system.
2. To check the selection: start a print job with a generic printer driver.
76
Chapter 5 - Control the Print Mode
About the printing delay
Control the Time Delay for Print Jobs
About the printing delay
Definition
The printing delay is the minimum interval between the printing of two automatic print
jobs that originate from the print queue.
Illustration
[42] User screen. An automatic print job is announced
The timers
The period of the printing interval is derived from the following two timers:
■ Print job delay timer.
The print job delay timer starts when an automatic print job is complete. During the
delay, the users can use the Océ VarioPrint 2070 Prémia Class for other work.
■ Announced delay timer.
The announced delay timer starts before the end of the print job delay. During the
announced delay time, a message informs the user that a new automatic print job will
be printed within 'xx' seconds.
Note:
The user can start any job if an automatic print job is announced.
Chapter 5 - Control the Print Mode
77
Define the printing delay for the automatic print jobs
Define the printing delay for the automatic print jobs
Introduction
The printing delay is determined by the following two items ‘About the printing delay’ on
page 77.
■ Print job delay (10 - 300 seconds).
■ Announced delay (10 - 100 seconds).
You can change the default values of the print job delay (120 seconds) and announced
delay (20 seconds).
If the machine is mainly used for copy, scan or mailbox jobs, you can increase the print
job delay. The longer interval, between two automatic print jobs, allows the users to start
the jobs on an idle machine.
If the machine is mainly used for automatic printing, you can shorten the print job delay.
The shorter interval between two automatic jobs prevents an accumulation of automatic
print jobs in the print queue.
Before you begin
1. Enter the Key Operator System.
Illustration
[43] Define the printing delay timers
Changing the print job delay
1. Activate the 'Print settings' section.
2. Open the 'Job processing' card.
3. Press the 'Printing delay' function key to select 'Print job delay' .
Use the arrow keys to define the print job delay.
78
Chapter 5 - Control the Print Mode
Define the printing delay for the automatic print jobs
Use the left arrow key
and right arrow key
to decrease or increase in 10 second steps.
Changing the announced delay
1. Activate the 'Print settings' section.
2. Open the 'Job processing' card.
3. Press the 'Printing delay' function key to select 'Announced delay' .
Use the arrow keys to define the announced delay.
Use the left arrow key and right arrow key to decrease or increase in 10 second steps.
Check
1. Exit the key operator system.
2. To check the selection, send a series of automatic print jobs to the machine.
Check that the timers work according to your purposes.
Chapter 5 - Control the Print Mode
79
Define the printing delay for the automatic print jobs
80
Chapter 5 - Control the Print Mode
Chapter 6
Control the Interrupt
Mode
Disable the Interrupt mode
Disable the Interrupt mode
Introduction
The interrupt mode allows users to suspend a large job so that a new job can be started.
The suspended job continues after the new jobs are completed and the user exits the interrupt mode.
You can disable the interrupt mode if the interrupt mode proves to be unacceptable to
the users.
Before you begin
1. Enter the Key Operator System.
Note:
If a copy control device or an external finisher is installed, the interrupt mode does not
work.
Illustration
[44] Disable the interrupt mode
Disabling the interrupt mode
1. Activate the 'Machine' section.
2. Open the 'Console defaults' card.
3. Press the 'Interrupt mode' function key to select 'Disabled' .
82
Chapter 6 - Control the Interrupt Mode
Disable the Interrupt mode
Check
1. Exit the key operator system.
2. To check the selection, make a test copy job.
Press the interrupt key after the first set has been printed. The interrupt mode is not
entered.
Chapter 6 - Control the Interrupt Mode
83
Disable the Interrupt mode
84
Chapter 6 - Control the Interrupt Mode
Chapter 7
Obtain System Information
Print the DAC reports
Print the DAC reports
Introduction
The DAC reports list the configuration or system logs.
You can print these reports.
Before you begin
1. Enter the Key Operator System.
Note:
You can also use the Océ System Configuration to print the DAC reports.
Illustration
[45] Print the DAC report
Printing the DAC reports
1.
2.
3.
4.
Activate the 'Print settings' section.
Open the 'Reports' card.
Press the 'Configuration report' or the 'System log report' function key.
Press the start key to confirm.
Check
1. Exit the key operator system.
2. The selected report will be printed after you have left the key operator system.
86
Chapter 7 - Obtain System Information
Reading Job-page Counters
Reading Job-page Counters
Introduction
The Océ VarioPrint 2070 Prémia Class records the number of job-page clicks and page
charges.
The Océ VarioPrint 2070 Prémia Class provides the following procedures for retrieving
the job counters:
■ The key operator system records the number of job-page clicks for each operating
mode as stored since the last installation.
The copy count includes all clicks made during the copy mode.
The print count includes all clicks made during the print mode.
The scan count includes all clicks made during the scan mode.
■ A total counter, behind the front main door of the machine, displays the total number
of job-page clicks that the machine has made.
Océ Service configures the charges for scan jobs. The configuration report records the
configured charge for scan job pages ‘Print the DAC reports’ on page 86.
Before you begin
1. Enter the Key Operator System.
Note:
The accounting system records the job pages made by each user ‘About the accounting
system’ on page 98.
Illustration
[46] Read the job page counters
Reading the job page counters in the key operator system
1. Activate the 'Basic settings' section.
2. The 'Copy/Print counters' and 'Scan counter' function box show the number of completed
pages, handled during copy, print and scan jobs.
Chapter 7 - Obtain System Information
87
Reading Job-page Counters
Illustration
[47] Open the front door
[48] Read the total counter
Reading the total counter
1. Open the front door.
2. Read the total counter.
88
Chapter 7 - Obtain System Information
Check the machine memory
Check the machine memory
Introduction
The default size of the machine memory is 128 Mb, but this can be extended.
You can check the machine memory in the configuration report ‘Print the DAC reports’
on page 86. If the scan module is not installed, check the machine memory in the key
operator system.
Before you begin
1. Enter the Key Operator System.
Checking the machine memory in the key operator system
1. Activate the 'Basic settings' section.
2. The 'Memory' function box shows the machine memory.
Chapter 7 - Obtain System Information
89
Check the machine number
Check the machine number
Introduction
When you call Océ Service, you may be asked to give the machine number of your Océ
VarioPrint 2070 Prémia Class.
Before you begin
1. Enter the Key Operator System.
Illustration
[49] Check the machine number
Checking the machine number
1. Activate the 'Basic settings' section.
2. The 'Scan counter' function box shows the machine number.
Note:
If the scan module is not installed, the function is called 'Memory' .
90
Chapter 7 - Obtain System Information
Chapter 8
Define the Energy Saving
Timers
About the Energy Saving Modes
About the Energy Saving Modes
Definition
The Océ VarioPrint 2070 Prémia Class includes two energy saving modes: low-power
mode and sleep mode. These modes, among others, allow efficient and economical energy
consumption.
Océ Service can reconfigure the energy saving modes when the default settings are unsuitable.
Low power mode
The Océ VarioPrint 2070 Prémia Class switches to the low power mode after the expiration of the low power time.
The Océ VarioPrint 2070 Prémia Class switches from the low power mode in the following
circumstances.
■ The start of an automatic print job.
■ The user presses a key.
■ The user places the originals.
Sleep mode
The Océ VarioPrint 2070 Prémia Class switches to the sleep mode after the expiration
of the sleep power time.
The Océ VarioPrint 2070 Prémia Class switches from the sleep mode in the following
circumstances:
■ The start of an automatic print job.
■ The user presses a key.
■ The user places the originals.
92
Chapter 8 - Define the Energy Saving Timers
Set the energy save timers
Set the energy save timers
Introduction
You can set the following energy saving timers:
■ Low-power timer (1 to 15 minutes)
■ Sleep-mode timer (1 to 90 minutes)
You can change the default values of the low-power timer (15 minutes) and sleep-mode
timer (90 minutes).
If the default values result in problems caused by the usage pattern, you can request that
Océ Service increase the limits of both timers to a maximum of 240 minutes.
The machine requires eight seconds to switch back from low-power mode.
The machine requires eight minutes to switch back from sleep mode.
Before you begin
1. Enter the key operator system.
Illustration
[50] Define the energy save timers on the Océ VarioPrint 2070 Prémia Class
Defining the low power timer
1. Activate the 'Machine' section.
2. Open the 'Basic settings' card.
3. Press the 'Energy save timers' function key to select 'Low power after' .
Use the left arrow key and right arrow key to increase or decrease in 10 second steps.
Chapter 8 - Define the Energy Saving Timers
93
Set the energy save timers
Defining the sleep mode timer
1. Activate the 'Machine' section.
2. Open the 'Basic settings' card.
3. Press the 'Energy save timers' function key to select 'Sleep mode after' .
Use the left arrow key and right arrow key to increase or decrease in 10 second steps.
Check
1. Exit the key operator system.
2. Check to see if the timers work according to your needs.
94
Chapter 8 - Define the Energy Saving Timers
Disabling the Sleep Mode Timer
Disabling the Sleep Mode Timer
Introduction
You can disable the sleep mode timer if the maximum settings prove to be unacceptable
to the users.
Océ Service must reconfigure the system so that you can disable the sleep mode.
Before you begin
1. Enter the key operator system.
Illustration
[51] Disabling the Sleep Mode Timer
Disabling the sleep mode
1. Activate the 'Machine' section.
2. Open the 'Special' card.
3. Press the 'Sleep mode timer' function key to select 'Disabled' .
Check
1. Exit the Key Operator system.
2. Check to see if the timer is disabled.
The sleep mode will not be switched after the expiration of the sleep mode time.
Chapter 8 - Define the Energy Saving Timers
95
Disabling the Sleep Mode Timer
96
Chapter 8 - Define the Energy Saving Timers
Chapter 9
Control the Accounting
System
About the accounting system
About the accounting system
Introduction
The accounting system supports the access-secured system. If you have activated the accesssecurity, you must also apply the accounting system, to define the authorization for each
user or each group of users ‘Secure the access to the machine’ on page 45.
The accounting system stores information about the user accounts.
The accounting system has the following features:
■ Maintains up to 2000 user accounts.
■ Defines the authorization of each user.
■ Records the number of job pages that each user has made.
The Océ VarioPrint 2070 Prémia Class allows you to maintain the accounts database in
the key operator system.
Note:
You can also use the Océ System Configuration to maintain the accounts database.
Accounts database
The accounts database contains the user and system accounts. The following information
is stored in the user account records.
#
98
Information
Description
User
Network user name.
Account number
Number identifying the user or group account.
PIN
Password to access the machine and mailbox.
Status
Status of the user account.
The status can be open (valid) or closed (invalid): the status
determines access to the machine.
Limit
Maximum number of job pages allowed.
Copies
Number of copy job pages completed. Job page multipliers are
used to calculate the total.
Prints
Number of print job pages completed. Job page multipliers are
used to calculate the total.
Chapter 9 - Control the Accounting System
About the accounting system
Information
Description
Scans
Number of scan job pages completed. Job page multipliers are
used to calculate the total.
Chapter 9 - Control the Accounting System
99
About the System Accounts
Determine User Accounts
About the System Accounts
Introduction
The accounts database contains the following system accounts:
■ Key operator account.
■ Copy control device account.
■ Copier user account.
You cannot delete the system accounts.
System accounts
#
100
System account
Account
number
Description
Key Operator
99997
The job pages, generated by the system, such as
the DAC reports and the error pages, are charged
to the key operator account.
You can create any jobs on the key operator account if you use the key operator PIN.
You can change the default PIN of the Key Operator .
Copy control device
99998
The job pages are charged to this system account
if the copy control device is enabled.
Copier user account
99999
The job pages are charged to the user account
only if the access-security is disabled.
Chapter 9 - Control the Accounting System
Create a valid user account
Create a valid user account
Introduction
If you have secured the access to the machine, create valid user accounts to allow the users
to enter the display screen menu ‘About the access-secured system’ on page 41.
Before you begin
1. Check to insure that access to the machine has been secured ‘Secure the access to the machine’
on page 45.
Illustration
[52] A valid user account
Creating a valid user account
1. Create a new user-account record or retrieve the record that has been added automatically
‘Create a new user-account record’ on page 102.
2. Check to insure that an account number has been assigned ‘Change the account number’
on page 104.
3. Check to insure that a PIN has been assigned ‘Assign or change a PIN’ on page 105.
4. Check to insure that the status of the user account is open (+) ‘Changing the Status’ on
page 107.
5. Define the job-page limit for the user account ‘Defining the Job-page Limit’ on page 108.
Check
1. Print the user-account information ‘Print the accounts-database file’ on page 115.
Chapter 9 - Control the Accounting System
101
Create a new user-account record
Create a new user-account record
Introduction
There are four procedures for creating a new record in the accounts database.
1. Create new user-account records using the key operator system. See the instructions below
for creating this user account.
2. A user prints to the machine for the first time. A record with the network-user name of the
user is automatically added to the accounts database if the mailbox of the user is opened.
3. Use the file transfer feature in the Key Operator System ‘Print the accounts-database file’ on
page 115.
4. Use the file-transfer feature in the Océ System Configuration.
The operator panel on the Océ VarioPrint 2070 Prémia Class does not provide the alphanumeric keys to add the network-user name to the records. Therefore, to create a user
account permitting at least the print mode, use procedure 2, 3 or 4.
To create a user account that is authorized only the copy and scan modes, apply any of
the following procedures:
Before you begin
1. Enter the Key Operator System.
Illustration
[53] The new user account added to the list
Creating a user account using the key operator system
1.
2.
3.
4.
102
Activate the 'Accounting' section.
Open the 'List of accounts' card.
Press the 'Create account' function key.
Enter a unique 5-digit account number ‘Change the account number’ on page 104.
Chapter 9 - Control the Accounting System
Create a new user-account record
Create a user account with a network user name
1. Ask the user to print to the Océ VarioPrint 2070 Prémia Class.
2. If the user has printed to the mailbox, open it.
If the job was automatically printed, the record is directly added.
3. Select the record and edit the record, if required.
Check
1. Print the user-account information ‘Print the accounts-database file’ on page 115.
Chapter 9 - Control the Accounting System
103
Change the account number
Maintain the Accounts Database
Change the account number
Introduction
The user account must have a unique user account number ‘About the access-secured system’
on page 41. You can use sequential numbers or numbers assembled from the department
or the group identifiers.
If required, you can change the account number.
Before you begin
1. Enter the Key Operator System.
Illustration
[54] Change the account number
Changing an account number
1.
2.
3.
4.
5.
Activate the 'Accounting' section.
Open the 'List of accounts' card.
Press the 'Change account number' function key.
Enter a unique 5-digit account number in the 'Number' function box.
Press the start key to confirm.
Check
1. Print the user-account information ‘Print the accounts-database file’ on page 115.
104
Chapter 9 - Control the Accounting System
Assign or change a PIN
Assign or change a PIN
Introduction
To create a valid user account, the user account must have a PIN ‘About the access-secured
system’ on page 41.
If the machine is secured, a PIN is required to access the display screen menu ‘Create a
valid user account’ on page 101.
If the machine is not secured, a PIN can be used to secure a mailbox.
Before you begin
1. Enter the Key Operator System.
Note:
You cannot change the PIN of a system account.
Note:
If required, you can change the PIN of the Key Operator through a function in the
'Basic settings' section ‘Changing the Default PIN of the Key Operator ’ on page 23.
Note:
The PIN is not valid if the PIN is 00000.
Illustration
[55] Change the PIN
Chapter 9 - Control the Accounting System
105
Assign or change a PIN
Assigning or changing a PIN
1.
2.
3.
4.
5.
6.
Activate the 'Accounting' section.
Open the 'List of accounts' card.
Use the arrow keys to select the record of the user account.
Press the 'Change PIN' function key.
Enter a unique 5-digit PIN.
Press the start key to confirm.
Check
1. Print the user-account information ‘Print the accounts-database file’ on page 115.
106
Chapter 9 - Control the Accounting System
Changing the Status
Changing the Status
Introduction
You can change the status of the user account to enable or disable access to the machine
if access is secured ‘About the access-secured system’ on page 41.
If the status is closed (-), the user account is invalid.
If the status is open (+), the user account is valid.
You must change the status of a user account when the user account automatically added
has the '-' ‘Secure automatic printing’ on page 47 status.
Before you begin
1. Enter the Key Operator System.
Illustration
[56] Change the status
Changing the status of a user account
1.
2.
3.
4.
Activate the 'Accounting' section.
Open the 'Account' card.
Use the arrow keys to select the record of the user account.
Press the 'Change status' function key to change the status.
Check
1. Print the user-account information ‘Print the accounts-database file’ on page 115.
Chapter 9 - Control the Accounting System
107
Defining the Job-page Limit
Defining the Job-page Limit
Introduction
If the limit of a user account is 0, the user can create an unlimited number of job pages.
To restrict the number of job pages, you can set a limit.
If the limit has been reached, you can reset the counters ‘Reset the job-page counters’ on
page 111.
Before you begin
1. Enter the Key Operator System.
Illustration
[57] Enter a job-page limit
Defining the job-page limit for a user account
1.
2.
3.
4.
5.
6.
Activate the 'Accounting' section.
Open the 'Account' card.
Use the arrow keys to select the record of the user account.
Press the 'Change limit' function key.
Use the numeric keys to enter the limit.
Press the start key to confirm.
Check
1. Print the user-account information ‘Print the accounts-database file’ on page 115.
108
Chapter 9 - Control the Accounting System
Change the sequence of the user accounts
Change the sequence of the user accounts
Introduction
The user accounts in the accounts database are displayed in account-number sequence.
You can change the sequence and arrange the user accounts in alphabetical sequence
based on user name. The user accounts that have no user name are placed at the end of
the list.
Before you begin
1. Enter the Key Operator System.
Illustration
[58] The sequence of the user accounts based on number
[59] Change the sequence of the user accounts
Changing the sequence of the user accounts
1. Activate the 'Accounting' section.
2. Open the 'General' card.
3. Press the 'Sort accounts by' function key to select 'User' or 'Number' .
Chapter 9 - Control the Accounting System
109
Change the sequence of the user accounts
Check
1. Print the user-account information ‘Print the accounts-database file’ on page 115.
110
Chapter 9 - Control the Accounting System
Reset the job-page counters
Reset the job-page counters
Introduction
You can reset the job-page counters to allow the users to start jobs when the limit has
been reached.
If necessary, you can simultaneously reset the job page counters of all users.
Before you begin
1. Enter the Key Operator System.
Attention:
You cannot reverse the reset action.
Illustration
[60] Reset the job-page counters of a user account
Resetting the job-page counters of a user account
1.
2.
3.
4.
5.
Activate the 'Accounting' section.
Open the 'Account' card.
Use the arrow keys to select the record of the user account.
Press the 'Reset counters' function key.
Press the start key to confirm.
Chapter 9 - Control the Accounting System
111
Reset the job-page counters
Illustration
[61] Reset the job-page counters of all user accounts
Resetting the job-page counters of all user accounts
1.
2.
3.
4.
Activate the 'Accounting' section.
Open the 'Database' card.
Press the 'Reset all counters' function key.
Press the start key to confirm.
Check
1. Print the user-account information ‘Print the accounts-database file’ on page 115.
112
Chapter 9 - Control the Accounting System
Delete the user accounts
Delete the user accounts
Introduction
If a user account is no longer required, delete the record from the accounts database.
If necessary, simultaneously delete all user accounts.
The deleted account numbers are available for new user accounts.
Before you begin
1. Enter the Key Operator System.
Attention:
You cannot undo the delete action.
Note:
You cannot delete the system accounts.
Illustration
[62] Delete a user account
Deleting a user account
1.
2.
3.
4.
5.
Activate the 'Accounting' section.
Open the 'Account' card.
Use the arrow keys to select the record of the user account.
Press the 'Delete account' function key.
Press the start key to confirm the action.
Chapter 9 - Control the Accounting System
113
Delete the user accounts
Illustration
[63] Delete all user accounts
Deleting all user accounts
1.
2.
3.
4.
Activate the 'Accounting' section.
Open the 'Database' card.
Press the 'Accounts' function key to select 'Delete' .
Press the start key to confirm the action.
Check
1. Print the user-account information ‘Print the accounts-database file’ on page 115.
114
Chapter 9 - Control the Accounting System
Print the accounts-database file
Obtain Accounts Database Information
Print the accounts-database file
Introduction
You can print the accounts-database file stored on the DAC.
Before you begin
1. Enter the Key Operator System.
Note:
You can also use the Océ System Configuration to print the accounts-database file.
Illustration
[64] Print the accounts-database file
Printing the accounts-database file
1.
2.
3.
4.
Activate the 'Accounting' section.
Open the 'Database' card.
Press the 'Accounts' function key to select 'Print' .
Press the start key to confirm.
Check
1. Exit the key operator system.
2. The report will be printed after you have left the key operator system.
Chapter 9 - Control the Accounting System
115
Download or upload the accounts-database file
Download or upload the accounts-database file
Introduction
You can download or upload the user-account information stored on the DAC.
To remotely add or to edit the user-account information, download the accounts-database
file to a diskette, edit the fields in the opened document and upload the file to the DAC
again. The accounts-database file has the CSV (Comma Separated Value) format. Open
the accounts-database file in a spreadsheet or database program. The file-transfer feature
allows you to simultaneously add a large number of user accounts.
Before you begin
1. Enter the key operator system.
2. Insert a 3.5 inch diskette in the disk drive of the DAC.
Note:
You can also use the Océ System Configuration to transfer the accounts database file.
Illustration
[65] Download the accounts-database file
Downloading the user-account information
1.
2.
3.
4.
116
Activate the 'Accounting' section.
Open the 'Database' card.
Press the 'Disk' function key to select 'Save to' .
Press the start key to confirm.
Chapter 9 - Control the Accounting System
Download or upload the accounts-database file
Illustration
[66] Upload the accounts-database file
Uploading the user-account information
1.
2.
3.
4.
Activate the 'Accounting' section.
Open the 'Database' card.
Press the 'Disk' function key to select 'Read from' .
Press the start key to confirm.
Check
1. If you have added new user-account information to the database, print the user-account
information to check the record fields ‘Print the accounts-database file’ on page 115.
Chapter 9 - Control the Accounting System
117
Download or upload the accounts-database file
118
Chapter 9 - Control the Accounting System
Chapter 10
Maintain the System
Add the toner
Add the toner
Introduction
The Océ VarioPrint 2070 Prémia Class reports when the toner level is low
.
[67] The toner level is low
Make sure that you correctly follow the steps of the instruction.
If the toner reservoir has been filled, indicate that you have added a new bottle of toner
in the key operator system.
Before you begin
1. Enter the Key Operator System.
Attention:
Do not add the toner unless the machine requests.
Attention:
Only use F11 toner.
Attention:
Do not use more than one bottle of toner at a time.
120
Chapter 10 - Maintain the System
Add the toner
Attention:
Keep the Océ VarioPrint 2070 Prémia Class switched on while you add the toner.
Attention:
If you spill any toner, read the Safety Data Sheets for instructions on how to remove the
toner.
Illustration
[68] Prepare the new bottle of toner
Preparing the new bottle of toner
1. Tap five times on the bottle and rotate the bottle twenty times.
2. Remove the lid from the bottle.
Do not break the seal.
Chapter 10 - Maintain the System
121
Add the toner
Illustration
[69] Open the front door
[70] Open the cover of the toner reservoir
[71] Insert the bottle into the toner reservoir and press down
122
Chapter 10 - Maintain the System
Add the toner
Filling the toner reservoir
1.
2.
3.
4.
5.
6.
Open the front door.
Use a coin or screwdriver to open the cover of the toner reservoir.
Open the black lid of the reservoir.
Insert the toner bottle into the toner reservoir.
Remove the bottle when the bottle is empty.
Place the lid on the empty bottle.
Close the toner reservoir
1. Close the cover of the toner reservoir.
2. Close the front door.
Illustration
[72] Register the added toner
Registering the added toner
1. Activate the 'Machine' section.
2. Open the 'Basic settings' card.
3. Press the 'Toner registration' function key.
Use the arrow keys to indicate that you have added one bottle of toner.
4. Press the start key to confirm.
Check
1. Exit the key operator system.
2. Check to see that the low-toner symbol is no longer displayed.
Chapter 10 - Maintain the System
123
Add the staples
Add the staples
Introduction
The Océ VarioPrint 2070 Prémia Class has two staplers, an off-line stapler and an internal
stapler.
The Océ VarioPrint 2070 Prémia Class reports if the stapler is empty.
The new staples are available in a cartridge.
Use S2 staples for both staplers.
Illustration
[73] Open the paper-compartment door
[74] Slide the frame of the paper-compartment door to the right
124
Chapter 10 - Maintain the System
Add the staples
[75] Raise the top cover of the finisher
Accessing the stapler
1. Open the paper-compartment door.
2. Slide the frame of the paper-compartment door to the right.
3. Raise the top cover of the finisher.
Illustration
[76] Loosen the screw and lift out the internal stapler unit
Chapter 10 - Maintain the System
125
Add the staples
[77] Remove the empty staple cartridge from the internal stapler
[78] Remove the empty staple cartridge from the off-line stapler
Accessing the staple cartridge
1. Loosen the screw of the latch on the stapler unit.
2. Move the latch backwards.
3. Pull the lever backwards and lift out the stapler unit.
The stapler unit turns over.
4. Remove the empty staple cartridge.
Adding the new staple cartridge
1. Remove any individual staples that have remained in the staple path and on the anvil.
2. Slide a new staple cartridge in the stapler unit until the cartridge clicks into place.
126
Chapter 10 - Maintain the System
Add the staples
Closing the internal stapler unit
1. Turn over the stapler unit.
2. Pull the lever of the stapler unit backwards and push the stapler down as far as it goes.
Release the lever.
3. Move the latch forwards and tighten the screw.
Closing the covers and doors
1. Lower the top cover.
2. Slide the frame to the left until the frame locks in position.
3. Close the paper-compartment door.
Check
1. To test the new internal staple cartridge, start stapled copy jobs until the first staple is
inserted.
To test the new off-line staple cartridge, staple a set until the first staple is inserted.
Chapter 10 - Maintain the System
127
Empty the staple receptacle
Empty the staple receptacle
Introduction
The Océ VarioPrint 2070 Prémia Class has a staple removal unit on the top left cover.
The removed staples are stored in a receptacle. You must empty a full staple receptacle.
Illustration
[79] Empty the staple receptacle
Emptying the staple receptacle
1. Remove the receptacle from the holder. Take care that the staples do not fall into the
machine.
2. Empty the receptacle and replace the receptacle in the original position.
128
Chapter 10 - Maintain the System
Clean the Océ VarioPrint 2070 Prémia Class
Clean the Océ VarioPrint 2070 Prémia Class
Introduction
You must keep the glass platen clean. If the glass platen is dirty, the quality of the output
and the process of original transport decreases.
If necessary, clean the outside of the machine with a damp cloth. You can use a solution
of soap.
Attention:
Do not use a solution that contains alcohol to clean the operator panel. You can damage
the materials of the Océ VarioPrint 2070 Prémia Class.
Attention:
If you spill any toner, read the Safety Data Sheets for instructions on how to remove the
toner.
Cleaning the platen of the Océ VarioPrint 2070 Prémia Class
1. Make a solution of soap and warm water.
You can also use Océ Cleaner O to clean the platen.
2. Use a cloth, moistened with the soapy water or the Océ Cleaner O solution, to clean the
platen.
3. Dry the platen with a dry clean cloth.
Make sure the platen is dry before a job is started.
Cleaning the outside and operating panel of the Océ VarioPrint 2070 Prémia Class
1. Make a solution of soap and warm water.
2. Use a cloth, moistened with the soapy water, to clean the outside and operating panel.
3. Dry the Océ VarioPrint 2070 Prémia Class with a dry clean cloth.
Make sure the parts of the Océ VarioPrint 2070 Prémia Class are dry before a job is
started
Chapter 10 - Maintain the System
129
Clean the Océ VarioPrint 2070 Prémia Class
130
Chapter 10 - Maintain the System
Chapter 11
Correct Errors
Change the account-log mode
Change the account-log mode
Introduction
The account-log feature traces and records the job information. The account-log feature
is job-based and does not require any access control. When a job is ready, the information
about the job is sent from the machine memory to the DAC. The information is stored
and can be downloaded when you run the Océ System Configuration.
The account-log system has two modes for managing the job information transfer if the
connection with the DAC has been lost. You can change the default setting to protect
the job processing of the machine.
Print the System log file to refer to information about any errors that have occurred ‘Print
the DAC reports’ on page 86.
To change the account-log mode, proceed as follows:
#
Account-log mode
Result
'Hold jobs'
The default setting. If the connection with the DAC is lost,
recording of the job information continues until 25 jobs are
completed. Any subsequent jobs are prevented and a message
is displayed. To enable new jobs, change the mode to 'Ignore
error'
'Ignore error'
If the connection with the DAC is lost, recording of the job
information continues until 25 jobs are completed. Any subsequent jobs result in replacing the earliest of the 25 stored jobs
with the new job information.
If the connection with the DAC is restored, the machine automatically sets the mode to
'Hold jobs' .
The mode 'Hold jobs' is also selected when the machine is switched off and on again.
Before you begin
1. Enter the Key Operator System.
132
Chapter 11 - Correct Errors
Change the account-log mode
Illustration
[80] Change the account-log mode
Changing the account-log mode
1. Activate the 'Accounting' section.
2. Open the 'Database' card.
3. Press the 'Account log error' function key to select 'Ignore error' .
Check
1. Exit the key operator system.
2. Check to see that the machine behaves according to your needs.
Chapter 11 - Correct Errors
133
Restart the DAC
Restart the DAC
Introduction
To solve some errors, you are requested to restart the DAC. If an error occurs, the Océ
VarioPrint 2070 Prémia Class reports that a restart of the DAC is necessary.
Before you begin
1. Enter the Key Operator System.
Attention:
When restarting the DAC do not use the ON / OFF or the Reset button on the DAC.
The restart must be performed using the key operator system.
Note:
You can also use the Océ System Configuration to stop or restart the DAC.
Illustration
[81] Restart the DAC
Restarting the DAC
1. Activate the 'Print settings' section.
2. Open the 'DAC control' card.
3. Press the 'DAC' function key to select 'Restart' .
134
Chapter 11 - Correct Errors
Restart the DAC
Check
1. Quit the key operator system.
2. To check, make sure that the problems have been solved.
Chapter 11 - Correct Errors
135
Delete the jobs
Delete the jobs
Introduction
If there are problems with the job transfer, an excessive load can be placed on the DAC.
You can delete the jobs to regain space.
If you delete the print jobs, all the print jobs will be deleted.
If you delete the scan jobs, all the scan jobs, which are not yet transferred to the DAC,
will be deleted.
Before you begin
1. Enter the Key Operator System.
Attention:
You cannot reverse the delete actions.
Note:
You can also use the Océ System Configuration to delete one or more jobs.
Illustration
[82] Delete the scan jobs
Deleting the jobs
1. Activate the 'Print settings' section.
2. Open the 'DAC control' card.
3. Press the 'Delete jobs' function key to select 'Print jobs' or 'Scan jobs' .
136
Chapter 11 - Correct Errors
Delete the jobs
4. Press the start key
to confirm.
Check
1. Exit the key operator system.
2. Check to insure that the problems have been solved.
Chapter 11 - Correct Errors
137
Restoring the Network Settings
Restoring the Network Settings
Introduction
The connection from a remote workstation to the DAC can be lost because the changed
DAC network configuration does not work. The former network settings are retained in
the DAC memory. You can restore the former network settings on the DAC using the
key operator system.
Before you begin
1. Enter the Key Operator System.
Illustration
[83] Restore the network settings
Restoring the network settings
1.
2.
3.
4.
Activate the 'Print settings' section.
Open the 'DAC control' card.
Press the 'Network settings' function key.
Press the start key to confirm.
Check
1. Exit the key operator system.
2. Check to insure that the problems have been solved.
138
Chapter 11 - Correct Errors
Disable the side correction
Disable the side correction
Introduction
The side correction feature of the Océ VarioPrint 2070 Prémia Class Paper Positioning
Module controls the exact positioning of the material from the paper trays to the printing
unit.
You must disable the side correction in the following circumstances:
■ The paper trays are filled with unbacked overhead sheets.
The use of unbacked overhead sheets in the paper trays can result in a side-correction
error. The use of overhead sheets in the special tray cannot result in side-correction
errors.
■ The Océ VarioPrint 2070 Prémia Class reports when the side correction has failed.
You are requested to switch the machine off and then back on. If the problem reoccurs,
disable the side correction. Inform Océ Service about the side-correction failure during
the next visit of the service technician. You can still use the machine for the jobs after
you have disabled the side correction.
Before you begin
1. Enter the Key Operator System.
Illustration
[84] Disable the side correction
Disabling the side correction
1. Activate the 'Machine' section.
2. Open the 'Special' card.
3. Press the 'Side correction' function key to select the 'Disabled'.
Chapter 11 - Correct Errors
139
Disable the side correction
Result
1. Quit the key operator system.
2. Create a test job to check whether the problems have been solved.
140
Chapter 11 - Correct Errors
Informing the Users about the Océ Service Request
Informing the Users about the Océ Service Request
Introduction
When an important error has occurred, the Océ VarioPrint 2070 Prémia Class reports
that Océ Service must be called.
You can inform the users through a message that Océ Service has been called. The setting
in the key operator system is available only when an error occurs.
[85] User Screen Océ Service has been called
Before you begin
1. Enter the Key Operator System.
Note:
When the display has turned gray and the Key Operator system is not available, keep the
'1' and '0' keys pressed until you can enter the Key Operator System.
Illustration
[86] Informing users About an Océ Service Request
Chapter 11 - Correct Errors
141
Informing the Users about the Océ Service Request
Informing users about an Océ Service request
1. Activate the 'Machine' section.
2. Open the 'Error information' card.
3. Press the 'Service called' function key.
Check
1. Exit the key operator system.
2. Make sure that the message appears on the display screen.
142
Chapter 11 - Correct Errors
Clear the paper jams
Clear the paper jams
Introduction
If a paper jam occurs, the Océ VarioPrint 2070 Prémia Class reports the problem. You
can instruct the user what to do.
■ Give instructions for clearing the paper jam; or
■ call the key operator.
If the paper-compartment door is locked, the user must call the key operator. If the papercompartment door is not locked, you can decide whether the Key Operator must be called
if a paper jam occurs ‘Control the access to the paper trays’ on page 51.
The Océ VarioPrint 2070 Prémia Class gives the users instructions on how to clear the
paper jam. The graphics indicate in which part of the Océ VarioPrint 2070 Prémia Class
the paper has stopped.
The instruction shows the grips, the covers and the doors of the Océ VarioPrint 2070
Prémia Class. You must lift, press or open these parts to move the units and to reach the
jammed paper.
The instructions guide you through a sequence of steps to correct the problem. If the
jams occur in more than one location, the message box continues to give instructions
until all paper jams have been cleared.
When the paper jam has been cleared, new instructions follow for continuing the job.
Illustration
[87] User Screen Instructions for clearing a paper jam
Clearing a paper jam
1. Read the instructions on the display screen.
2. Follow the instructions.
Chapter 11 - Correct Errors
143
Clear the paper jams
Check
1. Check to see that the paper jam has been cleared.
144
Chapter 11 - Correct Errors
Clear the staple jams
Clear the staple jams
Introduction
If a staple jam occurs, the stapler does not work correctly.
Follow the instructions on how to add the staples ‘Add the staples’ on page 124. First, access
the stapler unit. Then, remove the staples from the unit and check the staple cartridge.
If the staple cartridge caused the problem, keep the cartridge. Give the cartridge to Océ
Service during the the service technician's next visit. Finally, replace the staple cartridge
and close the stapler unit.
Illustration
[88] Instructions for Clearing a Staple Jam
Removing jammed staples
1.
2.
3.
4.
5.
At the right, push the green lever backwards.
At the left, raise the green lever and lift the stapler strip.
Remove any jammed staples.
Lower the stapler strip.
Slide the staple cartridge in the stapler unit until the cartridge clicks into place.
Check
1. Make sure that the stapler works correctly.
Chapter 11 - Correct Errors
145
Clear the staple jams
146
Chapter 11 - Correct Errors
Appendix A
Overview and Tables
Product Specifications
Product Specifications
#
148
Feature
Specification
Process
Organic photo conductor
Océ Copy Press technology
Océ Image Logic
Océ Finisher control
600-dpi LED digital copying
Scan Speed
54 pages/minute
Print Speed
62 A4/Letter 8.5x11 pages/minute, single-sided or double-sided
Resolution
Scan:
300 x 400 dpi
Print:
600 x 600 dpi
Warm-up Time
8 minutes
Machine Memory
128 MB minimum
Zoom
25% minimum
400% maximum
Appendix A - Overview and Tables
Originals to use
Originals to use
#
Originals
Input
Specifications
Sizes
Platen
11.69 x 17" maximum
Automatic document
feeder
5 x 8" minimum
11.69 x 17" maximum
Platen
22 lb. maximum
Automatic document
feeder
75 8.5 x 11" or 5.5 x 8.5" sheets (20 lb. bond)
50 8.5 x 11" or 5.5 x 8.5" sheets (32 lb. bond)
35 11 x 17" sheets (20 lb. bond)
Platen
Any type of original
Automatic document
feeder
Slightly curled
Not damaged originals
1-sided or 2-sided
Perforated 2 or 4 holes
Weights
Types
Note:
Do not use transparent originals in the automatic document feeder.
Appendix A - Overview and Tables
149
Input Trays and Output Bins
Input Trays and Output Bins
Specifications for paper tray 1, 2 and 3
#
Sheet capacity
(80
2
g/m )
Media sizes
Europe
Media sizes
USA
Weight
500
A3 (Only for paper tray
1 and 2)
A4
A5
Commercial
Folio
Foolscap
Quarto
Tabloid 11x17 (Only for paper tray 1 and 2)
Legal 8.5x13
Legal 8.5x14
Legal Gov 8.5x12
Letter Gov 8.5x10
Letter 8.5x11
US-Gov 8x10.5
US-Std 5.5x8.5
60 - 170 g/m2
Remember that:
■ You can use perforated paper in the trays, with a maximum of 5 holes.
■ You can use the 120 - 170 g/m² paper as covers or as a single sheet for a job with only
1 set.
■ The machine is configured for Europe or USA paper sizes.
■ Paper tray 1 is adjustable by the user.
Paper tray 2 and 3 are adjustable by Océ Service.
■ Refer to the media specifications for more information about media formats and sizes
‘Media ’ on page 153.
Specifications for tray 4
#
Sheet capacity
2
(80 g/m )
Media sizes
Europe
Media sizes
USA
Weight
2200
A4
Letter 8.5x11
60 -120 g/m2
Remember that:
■ You can use perforated paper in the tray, with a maximum of 5 holes.
■ The machine is configured for Europe or USA paper sizes.
■ Refer to the media specifications for more information about media formats and sizes
‘Media ’ on page 153.
150
Appendix A - Overview and Tables
Input Trays and Output Bins
Specifications for special feeder
#
Sheet capacity
Media sizes
Europe
Media sizes
USA
Weight
1
A4 (SEF and LEF)
Folio
Foolscap
A3
Letter 8.5x11 (SEF
and LEF)
Legal 8.5x13
Legal 8.5x14
Tabloid 11x17
50 -200 g/m2
Remember that:
■ You can use perforated paper in the special feeder.
■ The machine is configured for Europe or USA paper sizes.
■ You can use printed paper in the special feeder if the correct ink is used. Contact your
local Océ organization for the ink specifications.
Specifications for the output bin
#
Output
Capacity (80
2
g/m )
Media sizes
Europe
Media sizes
USA
Weight
Upper
finisher
bin
850
no staple
A4
Letter 8.5x11
75 - 170 g/m2
Lower
finisher
bin
1150
no staple
A4
Letter 8.5x11
75 - 170 g/m2
Multisize bin
450 minimum
A5 minimum
A3 maximum
US Std 5.5x8.5
minimum
Tabloid 11x17
maximum
75 - 170 g/m2
120
stapled, 2
sheets / set
120
stapled, 2
sheets /
set
Appendix A - Overview and Tables
151
Input Trays and Output Bins
Output
Capacity (80
2
g/m )
Media sizes
Europe
Media sizes
USA
Weight
A5 minimum
A3 maximum
US Std 5.5x8.5
minimum
Tabloid 11x17
maximum
75 - 170 g/m2
50 sheets
A4
Letter 8.5x11
80 g/m2 maximum
35 sheets
A4
Letter 8.5x11
80 -120 g/m2
Error
bin
Stapler
Remember that:
■ The recommended capacity, size and weight specifications enable a paper process
without problems. Do not exceed the recommended ranges and limits.
■ Refer to the media specifications for more information about media formats and sizes
‘Media ’ on page 153
152
Appendix A - Overview and Tables
Media
Media
Media sizes for the European configured Océ VarioPrint 2070 Prémia Class
European media sizes#
Size (mm)
Media name
Orientation
Use in tray
Use in special
feeder
148.5 * 210
A5
SEF
1, 2 and 3
No
203.2 * 254
Quarto
SEF
1, 2 and 3
No
203 * 330
Foolscap
SEF
1, 2 and 3
Yes
210 * 270
Commercial
SEF
1, 2 and 3
No
210 * 297
A4
LEF
1, 2, 3 and 4
Yes
SEF
1, 2 and 3
Yes
210 * 330
Folio
SEF
1, 2 and 3
Yes
297 * 420
A3
SEF
1 and 2
Yes
Media sizes for the US configured Océ VarioPrint 2070 Prémia Class
US media sizes#
Size (inch)
Media name
Orientation
Use in tray
Use in special
feeder
5.5 * 8.5
US Std 5.5x8.5
SEF
1, 2 and 3
No
8 * 10.5
US Gov 8x10.5
SEF
1, 2 and 3
No
8.5 * 10
Letter Gov
8.5x10
SEF
1, 2 and 3
No
8.5 * 11
Letter 8.5x11
LEF
1, 2, 3 and 4
Yes
SEF
1, 2 and 3
Yes
8.5 * 13
Legal 8.5x13
SEF
1, 2 and 3
Yes
8.5 * 14
Legal 8.5x14
SEF
1, 2 and 3
Yes
11 * 17
Tabloid 11x17
SEF
1 and 2
Yes
Océ materials for the paper trays
■
■
■
■
Océ Red Label Paper
Océ Office Standard Paper
Océ Recycled Label Paper.
Océ Top Labels.
Appendix A - Overview and Tables
153
Media
■
■
■
■
Océ Coloured Labels.
Océ Parchment Paper.
Océ Top Coated Paper.
Océ Embossed Coloured Paper.
Note:
Refer to the Océ web site www.oce.com for the complete overview of supplies.
Note:
Make sure that you select the paper weight recommended for the paper trays. If the paper
weight is more than 170 g/m2, use the special feeder.
Materials for the special tray
■
■
■
Océ Top Labels CD White Opaque 2/A4.
Océ Clear Film Self-adhesive.
Océ Overhead Film B&W MC 110/111//210.
Note:
Refer to the Océ web site www.oce.com for the complete overview of supplies.
154
Appendix A - Overview and Tables
Appendix B
Safety Information
Instructions for safe use
Instructions for safe use
Introduction
Océ designed products have been tested in accordance with the strictest international
safety standards. To help assure safe working with these products, it is important that
you observe the following safety rules.
Maintenance
#
Instructions
Do not remove any screws from fixed panels.
Do not carry out maintenance activities except for the parts and maintenance materials
mentioned in this manual.
Do not place any liquids on the machine.
Use maintenance materials or other materials for their original purpose only.
Keep maintenance materials away from children.
Do not mix cleaning fluids or other substances.
To avoid the risk of introducing hazards, all modifications to Océ equipment are
strictly reserved to properly qualified and trained service technicians.
Connection
#
Instructions
Do not move the machine yourself, but contact your local Océ organization.
If for some reason you have to move the machine yourself, please make sure that the
mains power point has the right fuse capacity. See the safety data sheet in this information set for information about maximum current.
Do not bridge any mechanical or electrical circuit breakers.
It is recommended connect only those copy-control products (or other products)
which meet the (inter)national product safety and radio frequency interference standards, and to use an attachment cable as specified by Océ.
Do not use an extension lead to connect the machine.
This machine is not designed for connection to an IT power system. An IT power
system is a voltage network in which the neutral wire is not connected to earth.
156
Appendix B - Safety Information
Instructions for safe use
Instructions
For the equipment connected via a wall socket: locate the machine close to a wall
socket that is easily accessible.
For the equipment connected via a fixed connection to the electricity grid: the disconnect device in the fixed connection should be easily accessible.
Never connect the machine to a mains voltage deviating from the value as defined
on the power-marking label. If connection to a different mains voltage is required,
contact your local Océ organization.
Do not use another mains connection cable than the one supplied with the machine.
When replacement of the main connection cable is required, because the cable is
damaged or defect, contact your local Océ organization for a correct replacement of
the mains connection cable.
Surroundings
#
Instructions
Do not block the ventilation openings of the machine.
Ensure that the machine is placed on a level, horizontal surface of sufficient strength.
See the Océ VarioPrint 2070 Prémia Class Product safety data sheets in this appendix
for information about the weight of the equipment.
Ensure there is sufficient space around the machine. This facilitates reloading materials
as well as maintenance.
Do not place the machine in rooms which are too small or insufficiently ventilated.
See the Océ VarioPrint 2070 Prémia Class Product safety data sheets in this appendix
for information about the recommended room volume and ventilation.
General
#
Instructions
Always use materials recommended by Océ and developed for this Océ machine.
Materials not approved by Océ may result in faults in your machine.
Do not use the machine when it is emitting unusual sounds. Remove the plug from
the power socket or turn off the fixed connection to the electricity grid and contact
your local Océ organization.
Appendix B - Safety Information
157
Safety Data Sheets
Safety Data Sheets
Introduction
The disclaimer below is valid for all safety data sheets in this manual. For questions about
Océ products regarding health, safety and environment, please contact your Océ organization; you can find the address in the last appendix of this manual.
Disclaimer
The safety data sheets in this manual have been compiled to the best of our knowledge
as a compact guide to safe handling of this product. We reserve the right to revise safety
data sheets as new information becomes available. It is the user's responsibility to determine
the suitability of this information for the adoption of safety precautions as may be necessary
and to contact the company to make sure that the sheet is the latest one issued. If and in
so far as limitation of liability is permitted under the applicable laws, we do not accept
liability for any inaccuracy that may occur in this information.
158
Appendix B - Safety Information
Safety Data Sheets
Océ VarioPrint 2070 Prémia Class Safety Data Sheet
PRODUCT SAFETY DATA SHEET
Number
E-759-a-US
Date
November 2002
Model
Océ VarioPrint 2070
Description
Electrostatic digital copier/printer, console model, plain paper, organic photoconductive belt,
powder toner, automatic duplexing
62 A4 prints/min or 31 A3 prints/min
Process speed
Dimensions
Width
Depth
Height
Weight
Voltage
Frequency
Current-rated
Building fuse
Power consumption, stand by
Power consumption, operation
EPA ENERGY STAR ¨
* Power consumption,sleep mode
* Power consumption, low-power
Mains connection
Safety class
Protection class
1720
900
1386
415
120
60
15
20
405
1,8
Digital
Acccess
Controller
mm
mm (incl. spacers)
mm
kg
V
208 V
Hz
60 Hz
A
9 A
A
16 A
W (total system)
kW (total system)
240
60
8
16
V
Hz
A
A
390
432
108
11
mm
mm
mm
kg
240
60
0,5
3
V
Hz
A
A
75 W (total system)
235 W (total system; recovery time <10 s)
Cable with plug
I
(IEC 536) Protective earth connection
IP 20
(IEC 529)
Standby
Lp(A) = 35 dB(A)
In operation
mainbody Lp(A) = 59 dB(A);
incl. optionals Lp(A) = 64 dB(A);
impulse ∆ Li = 4 dB(A)
Lw(A) = 48 dB(A)
mainbody as Lw(AI) = 78 dB(A);
Complies with Directive 89/336/EEC and FCC rules and regulations, part 15 Class A.
Below the Threshold Limit Values for UV, Visible and IR radiation (TLV list of ACGIH)
Standby 405 W; in operation 1,8 kW
0,01 mg/min at continuous operation
Sound pressure level
(at operator position)
Sound power level
Radio interference
Radiation
Heat emission
Ozone emission
Room volume
Room ventilation
Recommendation: min. 30 m 3
Recommendation: min. 15 m 3/h (natural ventilation)
For heat evacuation extra ventilation may be necessary.
Room volume and ventilation as recommended
Daily copy volume (much more than average)
11250
Total worktime
8
Ozone concentrations:
- Time weighted average
0,001
- Peak
0,003
Threshold Limit Value/Occupational Exposure Limit
(Time Weighted Average) for ozone
0,2
Odour Perception Limit for ozone
0,04
Use simulation at random
operation
A4
h
mg/m3
mg/m3
(0.0005 ppm)
(0.0015 ppm)
mg/m3
mg/m3
(0,1 ppm)
(0,02 ppm)
Consumables
Océ Master (Oc Mater ial Safety Data Sheet E-193)
Océ F11 Toner (Océ Material Safety Data Sheet E-212)
Océ Copying Materials
This apparatus is suitable for processing recycling paper which complies with the
requirements of DIN 19309.
Additional safety information
The ozone filter does not have to be replaced for keeping the ozone concentration in the
workplace below 0,04 mg/m3 (the life of the filter equals that of the apparatus).
Listed according to standard UL 1950 and CAN/CSA-C22.2 No.950
EPA ENERGY STA R ¨
LISTED 927F
INFORMATION
TECHNOLOGY
EQUIPMENT
E 69871
Copyright © 2002 Océ-Technologies B.V., Venlo, NL
The content of this safety data sheet is subject to the disclaimer of liability (see 'Disclaimer')
of this manual.
Appendix B - Safety Information
159
Safety Data Sheets
Safety data sheet Océ F11 toner
MATERIAL SAFETY DATA SHEET
Number
Date
Page
2001/58/EC and ISO 11014-1)
E-212-b-UK
July 2002
1 of 2
Océ F11 Toner
1. Product and company identification
Product name
Packing
Use of product
Company
Address
Telephone
Telefax
Océ F11 Toner
Polyethylene bottle, contents 0,80 kg
Ink powder for copiers/printers
Océ (UK) Ltd.
Langston Road, Loughton, Essex IG10 3SL
0870 600 5544 (contact product safety coordinator)
0870 600 1133
2. Composition / information on ingredients
Ingredients-Name
CAS No./EC No.
EC-Symbol, R-Phrases
Weight %
Amorphous silica
Carbon black
Phenoxy resin
Iron oxide
Polyester resins
68611-44-9/271-893-4
1333-86-4 / 215-609-9
PMN P-95-461
1317-61-9/215-277-5
170831-75-1/ polymer
none
none
none
none
none
<1
1-5
10-25
25-50
25-50
3. Hazards identification
The product is not classified as a dangerous preparation according to Directive 1999/45/EC for the classification, packaging and labelling of
dangerous substances and preparations. To our knowledge, with due observance of the recommended exposure limits and of normal hygiene
these products present no health hazard in normal use.
In a toner dust cloud the formation of an explosive dust-air mixture is possible. Toner dust may cause discomfort for the eyes and respiratory
tract, in the same manner as inert nuisance dust.
4. First aid measures
Eyes contact
Skin contact
Inhalation
Ingestion
Rinse with plenty of water.
Wash with cold water and soap.
Clean nose, mouth, throat. Cough up. Fresh air.
Rinse mouth with water. If large quantity swallowed seek medical advice.
For any medical advice take along this material safety data sheet.
5. Fire fighting measures
Extinguishing media
Special fire fighting protective equipment
Combustion products
Dry chemical, carbon dioxide, water spray (fog), foam.
N.A. (= Not Applicable)
Carbon dioxide, carbon monoxide
6. Accidental release measures
Avoid breathing dust. Do not wash away into sewer. Spills can be cleaned with a vacuum cleaner or a damp rag. Avoid formation of dust.
7. Handling and storage
Keep bottle tightly closed to prevent dust formation. Handle carefully. Avoid breathing dust.
Room ventilation: see operator manual or safety data sheet for the copier/printer.
No special technical measures for storage.
Directions for use: see toner label and operator manual of the copier/printer.
8. Exposure controls / personal protection
No special technical measures. No personal protective equipment needed.
Industrial hygiene: after skin contact wash with cold water and soap.
ACGIH Threshold Limit Value are 10 mg/m3 for inhalable particulate and 3 mg/m 3 for respirable particulate.
TLV for * amorphous silicon dioxide
10 mg/m3
* carbon black
3,5 mg/m3
160
Appendix B - Safety Information
Safety Data Sheets
MATERIAL SAFETY DATA SHEET
(2001/58/EC and ISO 11014-1)
Number
Date
Page
E-212-b-UK
July 2002
2 of 2
Océ F11 Toner
9. Physical and chemical properties
Explosion limits (dust explosion) LEL approx. 60 g/m3 UEL U
Appearance and odour
black powder, faint odour
N.A.
Boiling point (oC)
Solubility in water
Insoluble
Vapour pressure
N.A.
Other characteristics
N.A.
Bulk density (kg/m3)
Ignition temperature (oC)
Softening point (oC)
Evaporation rate (butyl acetate = 1)
% Volatile
pH (solution)
approx. 1000
U (= unknown)
approx. 50
N.A.
0
N.A.
10. Stability and reactivity
Stability
Conditions to avoid
Materials to avoid
Hazardous decomposition products
Stable
None known
None known
Hazardous decomposition does not occur under normal conditions.
11. Toxicological information
Inhalation
Skin
Eyes
Ingestion
Mutagenicity
* At high concentration in air the powder may cause discomfort of upper respiratory system.
* No adverse health effects are expected.
* Dust may cause discomfort in the same manner as nuisance dust.
* Considered relatively harmless.
No mutagenicity detected in Ames test.
* These statements are based on toxicological literature on the ingredients of this product and test results of similar
products.
12. Ecological information
This product is not biodegradable.
The ingredients are not classified as ecologically hazardous. No adverse environmental effects are expected.
13. Disposal considerations
Pack waste dustproof to prevent dusting. With due observance of local laws and regulations, dispose of by burial in a sanitary landfill or
incineration. Do not throw in open fire, in order to prevent the risk of a dust explosion.
Waste code according to Decision 2001/118/EC: 080318 (= toner waste not classified as hazardous waste).
14. Transport information
This product is not classified as dangerous substance according to the international transport regulations: IMDG (sea), ADR (road), RID (rail),
ICAO/IAT A (air).
15. Regulatory information
None
16. Other information
Complete revision of E-212-a dated September 1997, in accordance with Directive 2001/58/EC.
Copyright © 1994 Océ-Technologies B.V. Venlo, NL
The content of this safety data sheet is subject to the disclaimer of liability (see 'Disclaimer')
of this manual.
Appendix B - Safety Information
161
Safety Data Sheets
Safety data sheet Océ Master
MATERIAL SAFETY DATA SHEET
Number
Date
Page
(2001/58/EC and ISO 11014-1)
E-236-b-UK
May 2004
1 of 2
Océ Master, Part Nos. 7133927/1060012192
1. Product and company identification
Product name
Packing
Use
Company
Company
Compan
Compan
Compan
y yy
Address
Address
Address
Address
Address
Telephone
Telephone
Telephon
Telephon
Telephon
e ee
Telefax
Telefax
Telefa
Telefax
Telefa
x x
Océ Master, Part Nos. 7133927/1060012192
Cardboard box
Photoconductor for copiers/printers
Océ
Océ
(UK)
(UK)
(UK)
Limited.
Limited
Limited.
Limited.
Océ
(UK)
Limited.
Océ
Océ
Océ
Océ
House,
House,
House,
Chatham
Chatham
Chatham
Way,
Way,
Way,
Brentwood,
Brentwood,
Brentwood,
Essex
Essex
Essex
CM14
CM14
CM14
4D
4D
4D
Océ
House,
Chatham
Way,
Brentwood,
Essex
CM14
4D
0870
0870
0870
600
600
600
5544
5544
5544
(contact
(contact
(contact
product
product
product
safety
safety
safety
coordinator)
coordinator)
coordinator)
0870
600
5544
(contact
product
safety
coordinator)
0870
0870
0870
600
600
600
1113
1113
1113
0870
600
1113
2. Composition / information on ingredients
Ingredients-Name
CAS No./EC No.
EC-Symbol, R-Phrases
Weight %
Poly ester film
Resins
Pigments
Aluminium
25038-59-9
proprietary
proprietary
7429-90-5
none
none
none
none
90-100
1-5
1-5
<1
3. Hazards identification
To our knowledge, with due observance of normal hygiene. the product presents no health hazard in normal use.
4. First aid measures
Eyes contact
Skin contact
Inhalation
Ingestion
Not Applicable (= N.A.)
N.A.
N.A.
N.A.
For any medical advice take along this material safety data sheet.
5. Fire fighting measures
Extinguishing media
Special fire fighting precautions
Hazardous products of decomposition
Dry chemical, carbon dioxide, water spray (fog), foam
N.A.
N.A.
6. Accidental release measures
N.A.
7. Handling and storage
No special technical measures for storage.
8. Exposure controls / personal protection
Room ventilation: see operator manual or safety data sheet for the copier/printer.
No special technical measures for storage. No personal protective equipment needed.
No special work hygiene practices needed.
162
Appendix B - Safety Information
Safety Data Sheets
MATERIAL SAFETY DATA SHEET
Number
Date
Page
(2001/58/EC and ISO 11014-1)
E-236-b-UK
May 2004
2 of 2
Océ Master, Part Nos. 7133927/1060012192
9. Physical and chemical properties
Appearance and odour
Boiling point (oC)
Vapour density (air = 1)
Solubility in water
Vapour pressure
Other characteristics
dark purple odourless belt
N.A
N.A.
Insoluble
N.A.
N.A.
Density (g/cm3)
Melting point (oC)
Evaporation rate (butyl acetate = 1)
% Volatile
pH (solution)
approx. 1,4
N.A.
N.A.
0
N.A.
10. Stability and reactivity
Stability
Conditions to avoid
Materials to avoid
Hazardous decomposition product s
Stable
None known
None known
Hazardous decomposition does not occur under normal use conditions.
11. Toxicological information
Inhalation
Skin
Eyes
Ingestion
Mutagenicity
N.A.
No adverse health effects are expected. (Based on toxicological literature on the ingredients of this product)
N.A.
N.A.
No mutagenicity detected in Ames test of similar product. None of the ingredients is listed as mutagenic or
carcinogenic.
12. Ecological information
This product is not biodegradable.
The ingredients are not classified as ecologically hazardous. No adverse environmental effects are expected.
13. Disposal considerations
With due observance of local laws and regulations, dispose of by burial in a sanitary landfill or incineration.
14. Transport information
This product is not classified as dangerous substance according to the international transport regulations: IMDG (sea), ADR (road), RID (rail),
ICAO/IATA (air) .
15. Regulatory information
This product is an article and contains no hazardous substances. Therefore, indications of special risks or safety advice on th e packing are
not prescribed for this product.
16. Other information
Revision of E-236-a dated August 2003, Part No. 1060012192 added in section 1.
Copyright © 2003 Océ-Technologies B.V. Venlo, NL
The content of this safety data sheet is subject to the disclaimer of liability (see 'Disclaimer')
of this manual.
Appendix B - Safety Information
163
Safety Data Sheets
164
Appendix B - Safety Information
Appendix C
Miscellaneous
Reader's comment sheet
Reader's comment sheet
Questions
Have you found this manual to be accurate?
O Yes
O No
Were you able to operate the product, after reading this manual?
O Yes
O No
Does this manual provide sufficient background information?
O Yes
O No
Is the format of this manual convenient in size, readability and arrangement (page layout,
chapter order, etc.)?
O Yes
O No
Could you find the information you were looking for?
O Always
O Most of the times
O Sometimes
O Not at all
What did you use to find the required information?
O Table of contents
O Index
Are you satisfied with this manual?
O Yes
O No
Thank you for evaluating this manual.
If you have other comments or concerns, please explain or suggest improvements overleaf
or on a separate sheet.
Comments:
-------------------------------------------------------------------------------------------------------------------------------------------------------------------------------------------------------------------------------------------------------------------------------------------------------------------------------------------------------------------------------------------------------------------------------------
166
Appendix C - Miscellaneous
Reader's comment sheet
------------------------------------------------------------------------------------------------------------------------------Date:
This reader's comment sheet is completed by:
(If you prefer to remain unknown, please do fill in your occupation)
Name:
Occupation:
Company:
Phone:
Address:
City:
Country:
Please return this sheet to:
Océ-Technologies B.V.
For the attention of ITC User Documentation.
P.O. Box 101,
5900 MA Venlo
The Netherlands
Send your comments by E-mail to: [email protected]
For the addresses of local Océ organisations see: http://www.oce.com
Appendix C - Miscellaneous
167
Addresses of local Océ organisations
Addresses of local Océ organisations
#
168
Océ-Australia Ltd.
P.O. Box 363
Ferntree Gully MDC
Vic 3165
Australia
http://www.oce.com.au/
Océ-Österreich GmbH
Postfach 95
1233 Vienna
Wienerbergstrasse 11
Vienna Twin Tower
1100 Vienna
Austria
http://www.oce.at/
Océ-Belgium N.V./S.A.
J. Bordetlaan 32
1140 Brussel
Belgium
http://www.oce.be/
Océ-Brasil Comércio e Indústria Ltda.
Av. das Nações Unidas, 11.857
Brooklin Novo
São Paulo-SP 04578-000
Brasil
http://www.oce-brasil.com.br/
Océ-Canada Inc.
4711 Yonge Street, Suite 1100
Toronto, Ontario M2N 6K8
Canada
http://www.oce.ca/
Océ Office Equipment (Beijing) Co., Ltd.
Xu Mu Cheng
Chaoyang District
Beijing 100028
China
http://www.oce.com.cn/
Océ-Czech Republic ltd.
Hanusova 18
140 21 Praha 4
Czech Republic
http://www.oce.cz/
Océ-Danmark a/s
Vallensbækvej 45
2605 Brøndby
Denmark
http://www.oce.dk/
Océ Finland OY
Valkjärventie 7 D, PL 3
02130 Espoo
Finland
http://www.oce.fi/
Océ-France S.A.
32, Avenue du Pavé Neuf
93161 Noisy-le-grand, Cedex
France
http://www.oce.fr/
Océ-Deutschland GmbH
Solinger Straße 5-7
45481 Mülheim/Ruhr
Germany
http://www.oce.de/
Océ-Hong Kong and China head office
12/F 1202 The Lee Gardens
33 Hysan Avenue
Causeway Bay
Hong Kong
http://www.oce.com.hk/
Appendix C - Miscellaneous
Addresses of local Océ organisations
Océ-Hungaria Kft.
1241 Budapest
Pf.: 237
Hungary
http://www.oce.hu/
Océ-Ireland Ltd.
3006 Lake Drive
Citywest Business Campus
Saggart
Co. Dublin
Ireland
http://www.oce.ie/
Océ-Italia S.p.A.
Strada Padana Superiore 2/B
20063 Cernusco sul Naviglio (MI)
Italia
http://www.oce.it/
Océ Japan Corporation
3-25-1, Nishi Shinbashi
Minato-Ku
Tokyo 105-0003
Japan
http://www.ocejapan.co.jp/
Océ-Belgium S.A.
Rue Astrid 2/A
1143 Luxembourg-Belair
http://www.oce.lu/
Océ Malaysia Sdn. Bhd.
#3.01, Level 3, Wisma Academy
Lot 4A, Jalan 19/1
46300 Petalig Jaya
Selangor Darul Ehsan
Malaysia
http://www.ocemal.com.my/
Océ-Mexico S.A. de C.V.
Prolongación Reforma 1236,
4to Piso
Col. Santa Fé, Del. Cuajimalpa
C.P. 05348
México, D.F.
México
http://www.oceusa.com/
Océ-Norge A.S.
Postboks 4434 Nydalen
Gjerdrums vei 8
0403 Oslo
Norway
http://www.oce.no/
Océ-Poland Ltd. Sp.z o.o.
ul. Bitwy Warszawskiej 1920 r. nr. 7
02-366 Warszawa
Poland
http://www.oce.com.pl/
Océ-Lima Mayer, S.A.
Av. José Gomes Ferreira, 11 Piso 2 - Miraflores
1497-139 Algés
Portugal
http://www.oce.pt/
Océ Singapore Pte Ltd.
P.O. Box 1024
MacPherson Road
Singapore913410
Océ Printing Systems (PTY) Ltd.
P.O.Box 629
Rivonia 2128
South Africa
Appendix C - Miscellaneous
169
Addresses of local Océ organisations
Océ España SA
Business Park Mas Blau
Osona, 2 08820 El Prat de Llobregat
Barcelona
Spain
http://www.oce.es/
Océ-Svenska AB
Sollentunavägen 84
191 27 Sollentuna
Sweden
http://www.oce.se/
Océ-Schweiz AG
Sägereistrasse 10
CH8152 Glattbrugg
Schweiz
http://www.oce.ch/
Océ (Thailand) Ltd.
B.B. Building 16/Floor
54 Asoke Road
Sukhumvit 21
Bangkok 10110
Thailand
Océ-Nederland B.V.
P.O.Box 800
5201 AV 's-Hertogenbosch
The Netherlands
http://www.oce.nl/
Océ (UK) Limited
Océ House
Chatham Way
Brentwood, Essex CM14 4DZ
United Kingdom
http://www.oce.co.uk/
Océ North America Inc.
100 Oakview Drive
Trumbull, CT 06611
USA
http://www.oceusa.com/
Note:
The web site http://www.oce.com gives the current addresses of the local Océ organisations and distributors.
Note:
The addresses of local Océ organisations for information about the Wide Format
Printing Systems and the Production Printing Systems can be different from the addresses
above. Refer to the web site http://www.oce.com for the addresses you need.
170
Appendix C - Miscellaneous
Index
Index
+ status
+ status ............................................41, 47, 107
- status
- status ..........................................................107
2-sided output
2-sided output ................................................49
A
A3/Tabloid 11x17 output
A3/Tabloid 11x17 output ...............................49
access
stapler ...........................................................126
to machine ......................................................46
to paper trays ..................................................51
to trays ............................................................52
access-secured
automatic printing ..........................................41
machine ..........................................................45
system ....................................................41, 101
Account log
Account log ..................................................132
account number
description ....................................................104
in accounts database .......................................98
Accounting system
description ......................................................98
related to access control ..................................41
related to security ............................................45
to support access control .................................98
accounts database
description ......................................................98
file .......................................................115, 116
new record .............................................47, 102
sequence of records .......................................109
add
staple cartridge .............................................126
toner .............................................................120
allocate
paper tray for banner pages .............................65
paper trays for report jobs ...............................56
announced delay
description ......................................................77
timer ...............................................................78
appendix sheets
appendix sheets ...............................................56
applications to configure the system
applications to configure the system ................13
Arrow keys
Arrow keys ......................................................18
assign PIN
assign PIN ....................................................106
authorization
in accounting system ......................................98
to access the Océ VarioPrint 2070 Prémia Class
........................................................................41
to enter mailbox .............................................71
Authorize print account
Authorize print account ..................................48
automatic document feeder
description ......................................................15
automatic print job
canceled ..........................................................70
define the printing delay for ............................78
delete ............................................................136
in mailbox ......................................................71
on finisher bin ................................................66
send to mailbox ..............................................70
timers to print ................................................77
automatic printing
Copy control device ........................................42
secured ...................................................47, 107
suspend or continue ........................................73
B
banner page
automatic jobs ................................................64
description ......................................................64
mailbox jobs ...................................................64
bins
description ......................................................15
finisher ...........................................................17
Blank page
Blank page ......................................................49
BootP
BootP .............................................................30
C
card
card ................................................................19
CD-rom
CD-rom .........................................................10
change
171
Index
account number ...........................................104
Account-log mode ........................................133
announced delay .............................................79
default job settings ..........................................34
default margin shift .........................................68
display language ..............................................38
finisher bin configuration ...............................67
folio size .........................................................58
job-page limit ...............................................108
Key operator PIN ...........................................23
PIN ..............................................................106
print job delay ................................................78
reset time ........................................................36
sequence order of user accounts ....................109
status of a user account .................................107
charge special pages
charge special pages .........................................49
charges
Copy control device ........................................43
for job pages ...................................................87
check
machine memory ............................................89
machine number .............................................90
clean the
clear
paper jam .....................................................143
staple jam .....................................................145
close stapler unit
close stapler unit ...........................................127
closed status
closed status ..................................................107
Combine key
Combine key ..................................................18
Configuration
and Maintenance Manual ...............................10
and maintenance manual .........................11, 13
diagnostics ......................................................86
methods ..........................................................13
Configuration Report
description ......................................................86
machine memory information ........................89
configuration report
print ...............................................................86
connection
DAC to machine ..........................................132
restore network settings ................................138
continue automatic printing
continue automatic printing ...........................73
control
access to special feeder ....................................54
172
access to the paper trays ..................................52
automatic print jobs ........................................71
finisher bins ....................................................67
jobs without an Océ ticket ..............................75
controller
controller ........................................................15
copier user account
copier user account .......................................100
copies in accounts database
copies in accounts database .............................98
Copy / Print counters
Copy / Print counters .....................................87
Copy control device
access security .................................................42
enable .............................................................43
interrupt mode ...............................................82
copy control device
account .........................................................100
copy job
Copy control device ........................................43
on finisher bin ................................................66
Correction key
Correction key ................................................18
counter on machine
counter on machine ........................................87
covers
covers .............................................................56
create
new user-account record ...............................102
CSV format
CSV format ..................................................116
D
DAC
description ......................................................15
lost connection .............................................132
mailbox ..........................................................70
reports ............................................................86
restart ...........................................................134
restore network settings ................................138
send jobs to mailbox .......................................70
transfer problem ...........................................136
default
Account log setting .......................................132
energy save timers ...........................................93
job settings ...............................................34, 36
Key operator PIN ...........................................23
margin shift ....................................................68
memory size ....................................................89
Index
operating mode ........................................33, 36
printing delay times ........................................78
reset time ........................................................36
default gateway
default gateway ...............................................30
Default usage
Default usage ..................................................33
define
access to machine ............................................41
announced delay .............................................79
banner pages ...................................................64
default operating mode ...................................33
IP address information ....................................30
job-page limit ...............................................108
low power timer ..............................................93
print job delay ................................................78
sleep mode timer ............................................94
delete
all user accounts ...........................................114
print jobs ......................................................136
scan jobs .......................................................136
user account .................................................113
DHCP
DHCP ............................................................30
disable
automatic print jobs ........................................71
Copy control device ........................................44
end-of-job confirmation .................................39
interrupt mode ...............................................82
side correction ..............................................139
sleep mode ......................................................95
special feeder ...................................................54
diskette
diskette .........................................................116
display language
display language ..............................................38
display screen
display screen ...........................................18, 19
download
accounts-database file ...................................102
user account information ..............................116
E
empty staple receptacle
empty staple receptacle .................................128
enable
automatic print jobs ........................................71
Copy control device ........................................44
end-of-job confirmation .................................39
special feeder ...................................................54
end user documentation
end user documentation .................................13
End-of-job confirmation
End-of-job confirmation .................................39
energy consumption
energy consumption .......................................92
energy save
timer ...............................................................93
energy saving
mode ..............................................................92
enter
Key Operator System ......................................21
key operator telephone number ......................40
error
bin ..................................................................15
call key operator .............................................40
database ........................................................107
lost connection ....................................132, 138
restart DAC ..................................................134
side correction ..............................................139
System Log Report .........................................86
to solve by Océ Service .................................141
F
F11
F11 ...............................................................120
fault diagnostics
fault diagnostics ..............................................86
features
Océ VarioPrint 2070 Prémia Class .................12
finisher
bin ..................................................................15
configuration modes .......................................66
description ......................................................17
folio size
folio size .........................................................58
foolscap folio
foolscap folio ..................................................58
front door
front door .......................................................15
function
box .................................................................19
keys ................................................................18
not available ...................................................19
H
Hold jobs
173
Index
Hold jobs .....................................................133
K
I
ignore
error .............................................................133
telephone number ...........................................40
information
about safe use ...............................................156
ink specifications
ink specifications ..........................................150
input tray specifications
input tray specifications ................................150
instruction about paper jam
instruction about paper jam ..........................143
internal stapler
description ......................................................15
replace cartridge ...........................................124
Interrupt
key ..................................................................18
mode ..............................................................82
Intra Logic
invalid user account
invalid user account ......................................107
IP address
assignment ......................................................30
default gateway ...............................................30
of system .........................................................30
subnet mask ....................................................30
J
job
charges ............................................................49
default settings .........................................34, 36
in interrupt mode ...........................................82
information in account log ...........................132
Manual ...........................................................13
output ............................................................17
pages ...............................................................87
parts ...............................................................39
transfer problem ...........................................136
job page
counter ..................................................87, 111
limit .............................................................108
job pages
define charges of .............................................49
of system accounts ........................................100
Jobs without an ticket
174
Key Operator
access to paper tray .........................................52
account .........................................................100
account number ...........................................100
call to clear paper jam ...................................143
clear the paper jams ........................................51
documentation ...............................................13
PIN .......................................................23, 100
refill the paper trays ........................................51
system .............................................................21
tasks .........................................................10, 11
telephone number ...........................................40
Key Operator System
enter ...............................................................21
quit .................................................................22
Key operator system
define print jobs .............................................70
key operator system
enter or quit ....................................................21
Océ VarioPrint 2070 Prémia Class .................13
key switch
machine ..........................................................26
paper compartment ........................................51
L
language in display
language in display ..........................................38
limit
energy save mode ............................................95
energy save timer ............................................93
in accounts database .......................................98
job pages ................................................41, 111
number of job pages .....................................108
link the paper trays
link the paper trays .........................................60
low power
mode ..............................................................92
timer ...............................................................93
M
machine
access-secured .................................................41
memory ..........................................................89
number ...........................................................90
mailbox
Index
automatic print jobs in ...................................71
delete jobs in ................................................136
description ......................................................70
job ..................................................................70
protect ..........................................................105
protection .......................................................41
to store jobs without Océ ticket ......................75
mailbox job
on finisher bin ................................................66
margin shift
margin shift ....................................................68
material
in paper tray .................................................150
sizes and formats ...........................................153
specifications ................................................150
media
in paper tray .................................................150
sizes ..............................................................153
sizes and formats ...........................................153
specifications ................................................150
memory
DAC ............................................................138
machine ..........................................................89
message
announce automatic print job .........................77
box .................................................................19
Call key operator ............................................40
call key operator .............................................51
finisher bin full ...............................................66
Océ Service is called .....................................141
restart DAC ..................................................134
side correction fails .......................................139
to call Océ Service ........................................141
to clear paper jam .........................................143
multi-size bin
multi-size bin ..................................................15
N
Network settings
Network settings ..........................................138
No reset
No reset ..........................................................36
Numeric keys
Numeric keys ..................................................18
configuration methods ....................................13
job settings .....................................................34
job ticket ..................................................70, 75
print features ..................................................75
printer driver ..................................................75
website ............................................................10
Océ Service
change energy save timer .................................93
change the PIN ...............................................21
charges for scan jobs .......................................87
configure copy control device .........................42
configure energy saving mode .........................92
disable sleep mode ..........................................95
install and configure copy control device ........43
is called message ...........................................141
machine number request .................................90
request ..........................................................142
side correction fails .......................................139
wrong staple cartridge ...................................145
Océ system configuration
add records to accounts database ..................102
off-line stapler
description .............................................15, 124
replace cartridge ...........................................124
ON / OFF button
DAC ...............................................................25
machine ..........................................................26
On-line help
Océ applications .............................................10
Online help applications
open status
open status ...................................................107
operating mode
change default .................................................33
default ......................................................33, 36
operating temperature
operating temperature .....................................26
operator panel
description ...............................................15, 18
original
specifications ................................................149
original receiving bin
original receiving bin ......................................15
output bin specifications
output bin specifications ...............................151
overhead sheets
overhead sheets .............................................139
O
Océ
cleaner O ......................................................129
175
Index
P
page
2-sided ............................................................49
A3/Tabloid 11x17 ..........................................49
blank ..............................................................49
scanned ...........................................................49
paper
compartment ..................................................15
jam ...............................................................143
specifications ................................................150
paper compartment
access to ..........................................................51
description ......................................................15
paper output
finisher bins ....................................................17
multi-size bin ..................................................15
paper tray
access to ..........................................................51
banner pages ...................................................64
for folio paper .................................................58
linking ............................................................60
paper specifications .......................................150
report jobs ......................................................56
specifications ................................................150
supply .............................................................56
parts of
perforated paper
perforated paper ...........................................150
PIN
accounts database ............................................98
change ..........................................................106
to enter the machine .......................................41
user account .................................................105
pin
Key Operator .........................................23, 100
platen
cleaning ........................................................129
description ......................................................15
print
accounts-database file ...................................115
configuration report ........................................86
file ..................................................................75
queue ................................................71, 73, 78
system log report ............................................86
user accounts ................................................115
print job
Copy control device ........................................43
in mailbox ......................................................70
176
permission ......................................................70
print job delay
description ......................................................77
timer ...............................................................78
printer driver
printer driver ..................................................70
printing delay
change ............................................................78
description ......................................................77
Prints / copies counter
Prints / copies counter ....................................18
prints in accounts database
prints in accounts database .............................98
product specifications
product specifications ...................................148
production mode
production mode ............................................66
Q
Quick Reference Card
Quick Reference Card ..............................10, 13
Quitting the Key Operator System
Quitting the Key Operator System .................22
R
read
copy and print counter ...................................87
scan counter ...................................................87
total counter ...................................................88
register added toner
register added toner ......................................123
remove jammed staples
remove jammed staples .................................145
reset
job-page counters of a user account ..............111
job-page counters of all user accounts ...........112
time ................................................................36
restart DAC
restart DAC ..................................................134
restore
default job settings ..........................................35
network settings ...........................................138
S
S2 staples
S2 staples ......................................................124
safety data sheets
Index
safety data sheets ...........................................158
safety information
safety information ........................................156
Save current settings
Save current settings .......................................34
scan
counter ...........................................................87
module .....................................................89, 90
scan counter
scan counter ...................................................90
scan job
Copy control device ........................................43
delete ............................................................136
Scanned page
Scanned page ..................................................49
scans in accounts database
scans in accounts database ...............................98
section
description ......................................................19
keys ................................................................18
secure
access to machine ..............................41, 45, 46
automatic printing ..........................................47
mailbox ........................................................105
separation
mode ..............................................................66
sheets ..............................................................56
sequence of user accounts
sequence of user accounts .............................109
Service
service called
service called .................................................142
side correction
side correction ..............................................139
size of media
size of media .................................................153
sleep mode
disable ............................................................95
timer ........................................................92, 93
Smart mailbox
about ..............................................................70
member ..........................................................70
sort accounts by
sort accounts by ............................................109
special feeder
description ......................................................15
materials for .................................................154
paper specifications for .................................151
special tray
access ..............................................................53
selection in display screen ...............................53
specifications
input ............................................................150
material ........................................................150
originals ........................................................149
output ..........................................................150
standard margin shift
standard margin shift ......................................68
staple
cartridge .......................................................124
jam ...............................................................145
receptacle ......................................................128
storage ..........................................................128
stapler
internal .........................................................124
off-line .........................................................124
Start key
Start key .........................................................18
status
for automatic printing ....................................47
in accounts database .......................................98
user account .................................................107
stop
automatic printing ..........................................73
DAC ...............................................................24
key ..................................................................18
subnet mask
subnet mask ....................................................30
suspend automatic printing
suspend automatic printing .............................73
switch off
DAC ...............................................................24
machine ..........................................................26
switch on
DAC ...............................................................24
machine ..........................................................26
system
account ...........................................................98
accounts .......................................................100
System Administrator
documentation ...............................................13
tasks ................................................................11
System administrator system
Océ System configuration ...............................13
System configuration
System Log Report
description ......................................................86
system log report
print ...............................................................86
177
Index
for printing .....................................................41
information ..................................................115
job page limit ...............................................108
new record ....................................................102
number ........................................................104
PIN ..............................................................105
sequence .......................................................109
valid .......................................................41, 107
validate .........................................................101
T
task
end user ..........................................................11
Key Operator ..................................................11
System Administrator .....................................11
telephone number of key operator
telephone number of key operator ..................40
timer
energy saving ..................................................92
printing delay .................................................77
reset ................................................................36
toner
add ...............................................................123
F11 ...............................................................120
level ..............................................................120
prepare .........................................................121
registration ...................................................123
specification .................................................120
total counter
total counter ...................................................88
tray
1 ..............................................................58, 60
2 .....................................................................60
3 .....................................................................60
4 .....................................................................60
for appendix sheets .........................................56
for banner pages .............................................65
for covers ........................................................56
for separation sheets ........................................56
materials for .................................................153
specifications ................................................150
types
of users ...........................................................11
U
upload user-account information
upload user-account information ..................117
user
access the paper compartment .........................51
account ...........................................................98
documentation ...............................................13
external ...........................................................43
in accounts database .......................................98
internal ...........................................................43
report jobs ......................................................56
user account
delete ............................................................113
178
V
valid user account
valid user account .........................................107
validate user account
validate user account .....................................101
W
www.oce.com
www.oce.com .................................................10