1
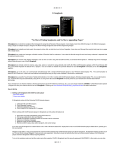
Ole Box User Manual
Model: Box6
1
Content
1. Start phone charging station
2. Shut down phone charging station
3. Charge cell phone
4. Retrieve cell phone
5. Purchase Wifi
6. Get Free Wifi
7. Admin interface
8. Collect coins
9. Open locker door manually
2
1. Start phone charging station
Please prepare a power cable (see Pic. 1) by yourself, which is the same as power cable of
your desktop computer, plug one end at the bottom of phone charging station (see Pic. 2),
plug another end to wall jack.
Pic. 1
Pic. 2
2. Shut down phone charging station
2.1 Use left finger to press position A one time, then use right finger to press position B one
time to enter admin password input interface (see Pic 3 & 4). Be sure to press inside the
correct small square area.
Pic 3
Pic 4
3
2.2 Input admin password (see Pic. 5). Default admin password is 589188.
Pic 5
2.3 Press “PC Control” tab (see Pic. 6).
Pic 6
4
2.4 Press “Shutdown” button (see Pic. 7).
Pic. 7
2.5 Unplug charging machine power cable.
3. Charge cell phone
3.1
3.2
3.3
3.4
3.5
Press “Touch here to charge” on screen.
Choose locker.
Set your own pincode.
Connect cell phone and close door.
Pay enough coins.
Note:
Homepage shows each locker’s status at its left side,
“Empty” --- no cell phone is charged in this locker, orange color locker
Numerical --- time (second) left for charging, red color locker
“OK” --- charging time ends, green color locker
4. Retrieve cell phone
4.1
4.2
4.3
4.4
Press “Touch here to retrieve” on screen.
Choose locker.
Input your pincode.
Retrieve cell phone and close door.
5
5. Purchase Wifi
5.1
5.2
5.3
Press “Purchase Wifi” on screen.
Input last 4 digits of your cell phone number.
Pay coins, get Wifi ID and password.
6. Get Free Wifi
6.1
6.2
6.3
Press “Get Free Wifi” on screen.
Input last 4 digits of your cell phone number.
Get Wifi ID and password.
7. Admin interface
7.1 Use left finger to press position A one time, then use right finger to press position B one
time to enter admin password input interface (see Pic 8 & 9). Be sure to press inside the
correct small square area.
Pic 8
Pic 9
6
Input admin password (see Pic. 10). Default admin password is 589188.
Pic 10
7.2 Touch “Locker Control” tab at top (default is “Locker Control” tab once you enter admin
interface, see Pic.11).
1) In case customer could not open door, you can touch “Open Lock” to open for them. For
example, if you choose “Open Lock” after No. 1, locker 1 will open. After you open locker
for customer, you need to press “Reset Status” to reset locker status to “Empty”.
2) “Power On” and “Power Off” stand for if there is electricity in locker. You could connect cell
phone in locker 1 to test charge for certain purpose.
3) “Error Count” means system counts times of locker “error” status. Error status will not
show at homepage to get customers confused. Once you see certain locker “Error Count”
is more than 0, please operate on that locker to test if it works well.
Pic. 11
7
7.3 Touch “Rate Setting” tab at top (see Pic.12), you can set charging rate.
1) 0.50 Euro is minimal payment required per charge.
2) 00:15:00 is time 0.50 Euro could charge, you can adjust time to adjust price.
Pic. 12
7.4 Touch “PC Control” tab at top, you can control system (see Pic.13).
Close App:
close charging station software and enter Windows interface
Reboot:
reboot pc of charging station
Shutdown:
shutdown machine
System time:
the time displayed on homepage
Enable time to reboot: machine needs to reboot one time per day if it runs 24 hours, you
can set reboot time here.
Pic. 13
8
7.5 Touch “Admin Password” tab at top to change admin password. Admin password could
be numerical number and English characters but except “a”, “A”, “b” and “B” (see Pic.14).
Pic. 14
7.6 Touch “Contact Phone” tab at top, you can set contact phone number which will appear
on screen in case customer could not open locker, so they can call this phone number for
assistance (see Pic.15).
Pic. 15
9
7.7 Touch “Wifi Rate” tab at top, you can set Wifi ID and Wifi rate (see Pic.16). If you click
“Set to Free Mode”, station will offer free Wifi.
Pic. 16
7.8 Touch “Income View” tab at top, you can see income status (see Pic.17). You can
choose locker ID, Date to view Daily Report or Monthly Report.
Pic. 17
10
7.9 Touch “Income Report” tab at top, you can see income report (see Pic. 18). You can
choose different locker ID, different period, and export report to USB drive.
If you tick “Send by Dropbox”, report will be sent to Dropbox.
If you tick “Send by Email”, report will be sent to your specified email address.
Pic.18
Tick “Send by Dropbox” or “Send by Email”, you will see following functions (see Pic. 19):
Send Now:
Click “Send Now” button, report will be sent right away.
Auto send Interval: It is time interval for sending report. For example, if you set it as 00:05,
means report will be sent every 5 minutes. If you set it as 00:00, means auto send function is
closed.
Receiver Email Addr: It only appears when you tick “Send by Email”, input Email address
that you want to receive the report.
11
Pic.19
7.10 Touch “Operation log” tab at top, you can see operation log files. In case you come
across problem and phone charging station does not work, please send us log files for our
troubleshooting purpose (see Pic. 20).
Pic.20
12
7.11 Touch “Version Control” tab at top, you can see version info and machine SN, you can
also set machine Name here (see Pic. 21).
Pic. 21
7.12
Touch “Exit Admin” tab at top, you can exit admin interface.
8. Collect coins
Use key to open lock below coin acceptor, you can take out coin box to collect coins (see Pic.
22).
Note: Do not touch the power button without instruction, it is only used when computer could
not start after power cable connected.
Pic. 22
13
9. Open locker manually
In case you can not open locker for client on admin interface, please open locker for customer
manually. Please follow the steps below,
7.11
Use key to open lock at top of machine (see Pic. 23).
7.12
Pull out machine main body forwards (see Pic. 24), note you need to stop pulling out
once machine is at the lowest position (see Pic. 25 & 26).
7.13
Locate this customer’s locker position, use screwdriver to push the hook screw
towards top (see Pic.27), locker will open.
7.14
Push machine back to post, use key to lock machine top.
7.15
Take out cell phone for customer and close door, enter admin interface, reset status
of this locker to “Empty”.
Pic. 23
Pic. 24
Pic. 25
Pic. 27
Pic. 26
14