1
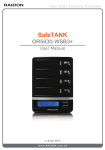
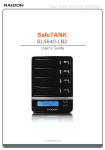
SafeTANK
SL3650-LB2(NAS)
User Manual
v.1.2 (November, 2011)
About this Manual
Thank you for purchasing RAIDON products.
This manual will introduce the RAIDON SafeTANK SL3650 and before using it, please read this
manual thoroughly.
Although all information contained in this user manual has been carefully verified before publishing,
however, the actual product specifications or relevant information may be found on
www.RAIDON.com.tw. Products are subject to change without prior notifications. If you have any
questions regarding the products of RAIDON, or you would like to know the latest product information,
user manual update, or firmware update, please contact your local supplier or visit
www.RAIDON.com.tw for further information.
Copyright © RAIDON TECHNOLOGY, INC. All rights reserved.
Index
Chapter 1 RAID introduction....................................................................... 4
1.1
1.2
1.3
What is RAID?................................................................................. 4
RAID Features................................................................................. 4
RAID 0 /RAID 1 /JBOD.................................................................... 4
Chapter 2 Installation.................................................................................... 7
2.1
Product Diagram and Accessories.................................................. 7
2.2
Hardware Installation....................................................................... 9
2.3
Initial Setup...................................................................................... 10
Chapter 3 User Interface Introduction...................................................... 14
3.1
User Interface Layers...................................................................... 14
3.2
Status.............................................................................................. 15
3.3
Setup............................................................................................... 15
3.4
Hard Drive....................................................................................... 18
3.5
Log File............................................................................................ 20
3.6
User................................................................................................. 21
3.7
Default Value................................................................................... 22
3.8
Sharing File..................................................................................... 22
3.9
FTP Server....................................................................................... 22
3.10
Media Server................................................................................... 23
3.11
BT Downloading.............................................................................. 24
Appendix FAQ................................................................................................. 25
Chapter 1 RAID introduction
1.1 What is RAID?
RAID (redundant array of independent disks or redundant array of inexpensive disks)
Hard drive is well known as a basic requirement for storing data and widely use on daily basis.
From such frequent usage, the incidences of slower accessing speed, abnormal accessing result or
malfunction of the drive due to the life cycle can be expected. Most importantly, there are possibilities
when these situations occurred may seriously cause a permanent loss to the data stored within, and
the technology of RAID is to prevent you from these disasters or threats of loosing your valuable data!
RAID (redundant array of independent disks or redundant array of inexpensive disks) technology
automatically divides and replicates your storing data among multiple drives, providing data
redundancy by creating a fault-tolerant environment to data storage. It combines multiple drives
(at least 2) into an array of disk drive which yields performance exceeding a single drive and can offer
in a larger capacity to data storage. The technology of RAID gives you a significant protection to the
data and eases you from the worries of data loss caused by the drive failures.
1.2 RAID Features
•
•
•
•
•
•
•
•
Expanding storage capacity
Increasing data transfer speed
Saving cost
Inherent fault tolerance
Hot Swap capability
Auto-Rebuild of data
Hot Spare drive
On-line capacity expansion
1.3 RAID 0 /RAID 1 /JBOD
SL3650 provides RAID 0, RAID 1 and JBOD functions described as followings:
RAID 0 : Striping (fast, has no fault tolerance; requires at least two hard disks)
4
RAID introduction
RAID 0 simply data striped over several disks and gives a performance advantage, as it is possible to
read parts of a file in parallel, but comes with no parity information for redundancy, if either one of the
array disks fails will cause the failure to entire array, thus the fault-tolerance of RAID 0 is even lower
than any single hard disk. Although it should not consider as one of the RAID applications, but the term
of RAID 0 is still widely used in these arrays because of the fundamental principle of RAID structures.
Note : 1. We strongly suggest you to use two hard disks with the same model and brand for the best compatibility.
2. When creating RAID 0 with two different sizes of hard disks, the total disk volume will be restricted and
calculated from the least capacity hard disk as example shown below:
Ex: 1×320GB HDD + 1×500GB HDD Total Capacity=320GB×2=640GB
RAID 1 : Mirroring (High security; at least 2 hard disks required)
RAID 1 (commonly referred to as mirroring array) creates from hard disks in pairs with an exact copy
of a set of data inputted simultaneously and each disk can be addressed independently. Mirroring array
provides high reliability to redundancy, because the array does not fail unless the paired up hard disks
fails at the same time. For instance, in a mirroring array of five-paired hard disks, even as many as five
hard disks failed at once, the array still exists as long as each pair remains with one working hard disk.
Note : We strongly suggest you to use two hard disks with the same model and brand for the best compatibility.
If there are differences in capacity from two hard drives, the total disk volume will be calculated from the
least capacity hard disk as shown below: Ex: 1×320GB HDD + 1×500GB Total Capacity=320GB
Below is the comparison between 2 RAID levels:
RAID Level
Basic Operation Hard Disk Available
Method
Capacity
Data Reliability
Minimum
Data Transfer
Number of Hard
Speed
Disks
0
Striping data
across each
drive
Total capacity of all
the hard disks
Low
Highest
2
1
Mirroring
Half of total capacity
of all the hard disks
High
Lower
2
RAID introduction
5
JBOD : Just a Bunch of Disks (Two Individual HDDs)
JBOD mode offers the access to each installed hard disk individually, SL3650 creates individual folders
correspond directly to each hard disks for the network accessing.
6
RAID introduction
Chapter 2 Installation
2.1 Product Diagrams and Accessories
After you open the outer package, please make sure the following items are included from the package:
•
•
•
•
•
•
•
SL3650-LB2
AC power cable
Adapter
Internet cable
Quick installation guide
CD (user manual)
Accessory Kit
Please verify the above package contents are properly included and without damages.
For any questions, please contact RAIDON local distributor or retailer you purchased from for an
immediate assistance.
Front view
Installation
7
Indications of LED
LED
Power LED
Failed LED
HDD LED
Status
LED Status
Power On
Blue / Lights On
Power Off
Blue / Blinks
Fan Failed or Overheat (over 55℃)
RAID Failed
Red / Lighs On
Red / Blinks
No HDD
--
HDD Idle
Blue / Lights On
HDD Failed
Red / Lights On
Data Access
Blue / Blinks
Rebuilding (Source)
Blue / Blinks
Rebuilding (Target)
Blue & Red / Alternately Blinks
During data auto-rebuilding, LED light may seem idle due to continuous short progressing period of
the files.
Rear view
Note : 1. SL3650 shuts down automatically when press and hold the power button for 5 seconds while the
Power LED blinks (Blue).
2. When SL3650 is booted, press and hold the “Reset” button for 5 seconds to restore system default
value.
3. Before completing the HDD configuration, the “Failed LED” and the “HDD LED” will blinks (Red) and
lights on (Red) respectively. The related LED turns to normal after the HDD configuration is completed.
8
Installation
2.2 Hardware Installation
Please follow the procedure below to complete the hardware installation of SL3650:
1. Open the outer package and take out the product body. (Make sure the related accessories and
the product body is not damaged or missing. If you have any questions, please contact RAIDON
local distributor or retailer for an immediate assistance.)
2. Place the product to a stable surface with appropriate surroundings for heat dissipation and make
sure the cooling fan of product is not blocked. (Do not place the product nearby liquids in any forms
or any environments which may cause damages to the product)
3. Take out the tray and install your hard disk in it. Make sure the hard disk is properly secured with the
given screws to prevent damages from any unexpected movements.
4. Once the installation is completed, insert the tray back and place it where desires for operation from
an appropriate surroundings.
Installation
9
5. Please connect LAN Cable to the Gigabit LAN Port and then connect the power cable.
6. Hardware installation is completed. You may power on the system to setup for applications.
7. A Network Diagram of Related Devices
You may refer to Chapter 3 for the system management console to setup related configurations.
2.3 Initial Setup
SL3650 configures the system settings via the Web Browser, and it can be instantly connected through
the Finder software when under Windows O.S
10
Installation
1. Search and connect to SL3650 through Finder software. (Only available for Windows O.S.)
Execute the RAIDON-NAS Finder software from the product CD to search for SL3650.
When SL3650 is found, please click “Admin” to enter the configuration of management console.
Note : 1. The IP of connecting computer must be within the same network of SL3650.
2. DHCP is the default setting of SL3650 and when IP is unable to acquire from the DHCP server or IP Find
Tool through Mac/Linux, SL3650 still can be connected from IP192.168.1.10 for configuration.
Please modify the IP of connecting computer within the same network of SL3650 (192.168.1.xxx) and
open the browser to input the default IP (192.168.1.10), which is capable of accessing web-based
GUI for the first configuration. After completing the configuration, please change the IP of SL3650 to the
static IP mode and enter a new one which is same network as SL3650. Also, please remember this IP
address for the further maintenance.
For example, if the original network is 10.1.2.xxx and users are unable to know the DHCP allotment
of IP, please manually configure the IP address of computer to 192.168.1.XXX, then enter the IP
address of SL3650 (192.168.1.10) to the browser and change 10.1.2.xxx for the Static IP.
3. SL3650 takes approximately 2 minutes to startup after power on, and it is unable to be detected during
this time.
2. Login management console
Default account and password: admin / admin
Installation
11
If you are using O.S. other than Windows, you would need to set up the static IP address to login the
management interface. Please manually configure the IP address of computer to 192.168.1.XXX, then
enter the IP address of SL3650 (192.168.1.10) to the browser for login into management console.
3. HDD Configuration
Please click “Disk” option to begin HDD configurations after login.
Note : This configuration must be completed to set SL3650 ready for applications.
Information of installed HDD will automatically display after entering “Disk” option under “Setup” tab.
Then select a desire RAID mode from “Disk Utility” section and click “Create” to complete the HDD
configuration. For JBOD mode, simply click “Format” corresponding to each installed HDD from
“Current Disk Volume Configuration” section to complete HDD configuration.
After HDD configuration completed, SL3650 automatically creates five user accounts/passwords as
user1~user5 (passwords are the same as user accounts).
12
Installation
When accessing under Windows O.S., users may instantly connect to the individual folders with
“Finder” software by clicking “Connect” to login with user name and passwords.
Note : 1. For any kind of necessary changes of installed HDD, please backup all stored data to another device
before proceeding.
2. If there will be two of SL3650 connecting to the same network, please modify each device name with
differences and configure with static IP addresses.
3. Before completing the HDD configuration, the “Failed LED” and the “HDD LED” will blinks (Red) and
lights on (Red) respectively. The related LED turns to normal after the HDD configuration is completed.
Installation
13
Chapter 3 User Interface Introduction
3.1 User Interface Layers
System Menu
Status → Status
System Information
Network Information
Service Information
Setup → System
System Information
Administrator Settings
Fan Option
Back Options
Power Management
Network
Network Interface
IP Address
DHCP
DHCP service configuration
DHCP Client List
Date / Time
Manually
Auto
Notification
Configure SMTP Server
SMTP Authentication
E-mail Notification Settings
Upgrade
Disk → Setup
Current Disk Volume Configuration
Disk Utility
HDD Power Management
S.M.A.R.T
S.M.A.R.T Utility
Current Disk S.M.A.R.T Configuration
S.M.A.R.T Testing Crontable
USB Port
Log → System
Current USB Volume Configuration
System Log
Connection
Connection Log
Event
Event Log
User → User
Folder Manager
User Account
Default →
14
User Interface Introduction
Service Menu
Share Folder → Share
FTP Server → FTP
Samba Service
FTP Setup
Anonymous Configuration
Media Server → UPnP
UPnP Setup
Current Folder
iTunes
iTunes Setup
Current Folder
BT Download →
3.2 Status
The “Status” option indicates “System Information”, “Network Information” and “Service Information”,
also available with selection of language preference.
Note : All status to “Service Information” will display “OFF” before HDD configuration is completed.
3.3 Setup
The “Setup” option allows the configuration of the following settings: System, Network, DHCP,
Date/Time, Notification and Upgrade.
1. System
The “System” tab allows the modifications of names, password and more, also allows the SL3650 to
reboot or shut down via browser.
Under “Fan Option”, the default is set to “Auto”, and it can be easily adjust with appropriate fan speed
for the environment. However, once the fan speed is set manually, it will only maintain as desired even
from arising temperatures.
User Interface Introduction
15
Avoiding the reset problem, the related configuration can be inputted and outputted into the “Backup
Option”.
2. Network
The “Network” tab indicates the speed of existing network connection and allows the IP address
configuration of SL3650.
Note : We suggest using the static IP address to the convenience of management.
3. DHCP
The “DHCP” tab allows the configuration enabling SL3650 as a DHCP server.
16
User Interface Introduction
4. Date/Time
The “Date/Time” tab allows the settings of date and time to SL3650, and we suggest choosing from a
“NTP Server” for the accuracy.
5. Notification
The “Notification” tab allows the configuration of automated email notices reporting occurred incidents
to the appointed email address. You may specify the email accounts for receiving notices when the
SL3650 operate in abnormal.
User Interface Introduction
17
Note : 1. Please make sure with your SMTP ISP for a correct connected port.
2. Please confirm whether the SMTP server requires for the authentication, some of the SMTP does not
requiring authentication for access.
6. Upgrade
The “Upgrade” tab allows the upgrades to SL3650 firmware. Please save the firmware for upgrade to
the Admin folder, and then proceed the upgrade under this option.
Note : 1. If SL3650 operates normally, we strong suggest you not to upgrade the existing firmware.
2. During firmware upgrades in progress, please do not shut down the power to avoid upgrade failure or
system malfunction.
3.4 Disk
The “Disk” option allows the configuration of RAID modes and indicates the information of S.M.A.R.T
for confirmation, also enables the management to external thumb drives via “USB port” tab.
18
User Interface Introduction
1. Setup
The “Setup” tab displays the information of installed HDD (brand and model), and allows the
configuration to desire RAID modes, also enables the energy saving from HDD suspension according
to the configured idle period via “HDD power management” section.
Note : 1. Related settings must be configured under “Setup” tab for the initial use of SL3650.
2. For the use of SL3650 in JBOD mode, simply click “Format” corresponding to each installed HDD from
“Current Disk Volume Configuration” section.
3. Please do NOT change the HDD placement while the formation or RAID configuration is completed.
4. While SL3650 is powered on and then take out the HDD, it may cause the HDD failure.
Please shut down the power for modifying or removing the HDD.
5. When withdrew a HDD during power off and reinsert it back into SL3650 at the power on state, system
will request for the confirmation as “Rebuild” to proceed with data rebuilding instead of data being
auto-rebuild.
6. The HDD will be automatically formatted in XFS format.
7. The HDD power management may not be utilized due to the different brand, model and capacity of
HDD. If you cannot access this function, please contact us at [email protected] .
2. S.M.A.R.T
The “S.M.A.R.T” tab indicates the operating status to the HDD such as the temperatures which may
assist determining whether the disk should be replaced to avoid incidents of HDD failure.
User Interface Introduction
19
3. USB Port
The external thumb drives can be instantly shared via the USB port, and the shared folder is
automatically created as the device name to the network.
Note : 1. This feature is not available for managing the access authorities.
2. Only support in formats of EXT3/EXT2/NTFS/FAT/VFAT/HFS+.
3.5 Log
SL3650 automatically keeps the logs of “System”, “Connection” and “Event”, and this may assist
monitoring and managing the use of the system, also the logs can be converted into word files as
backup for records.
Note : While converting the log into a word file, the browser may active the security block due to the browser
settings, simply unlock the block and click “Save” again to continue.
1. System Log
The System Log records the system statuses after power on.
20
User Interface Introduction
2. Connection Log
The Connection Log records the connecting events.
3. Event Log
The Event log gives the information to the events occurred.
3.6 User
The “User” option allows the modifications to sharing folders and user accounts, also enables the
configurations to access authorities.
User Interface Introduction
21
When the HDD setting is completed, SL3650 automatically creates five user accounts/passwords as
user1~user5 (passwords are the same as user accounts) with configured authorities and individual
folders ready for access without additional configurations, and it is also manually modifiable upon
demands under “User” option.
Note : 1. The accessing authorities will correspond directly to the authorities of FTP in these settings.
2. Three default folders as Public, Media and BitTorrent are automatically created from the initial setup, and
Media and BitTorrent folders will only grant access to Admin account from the default settings.
3. Ensuring the high performance, we suggest the limitation of log in user are not exceeding 8 people at
the same time.
3.7 Default Value
Click “Default” option to proceed with restoring factory default value. This option is the same as the
“Reset” button from the back panel of SL3650.
3.8 Sharing File
The “Share Folder” option allows sharing alternative from enable/disable settings of Samba Service
(Service Status, Master browser, Oplocks option and Archive option) for the authorized accounts/users.
(Maintaining the default value is highly recommended.)
3.9 FTP Server
The “FTP Server” option allows enable/disable FTP software connection and the access of anonymous
accounts, also available for managing restriction to the transfer rates of upload and download.
22
User Interface Introduction
Note : 1. The default setting of transfer rate will be restricted, users may fill “0” in the transfer rate column to
revoke the limitation.
2. According to the existing environment and status, we suggest to restrict the transfer rate for avoiding the
over usage.
3. You are unable to see the USB folder through the FTP server.
3.10 Media Server
The “Media Server” option allows the configurations of “UPnP” and “iTunes” functions.
1. UPnP Server
Enabling “UPnP” function allows network media players (Ex: PS3 and Xbox 360 etc.) locating and
executing the media files of designated folder from SL3650.
Note : 1. Media players must support UPnP function to connect to SL3650 and access the media files within.
2. If media players do not support the format of selected media files, the media files will not be properly
displayed. Please refer to the official website of media player manufacturer for supporting media formats.
3. The share folder name should be combined the letter and number.
2. iTunes Server
Enabling “iTunes” function allows iTunes program from computers to access the audio/video files of
SL3650 directly.
User Interface Introduction
23
Note : 1. The name of stored files must be in UTF-8 format; otherwise, the file names may displays in scrambled
codes from iTunes program.
2. The share folder name should be combined the letter and number.
3.11 BT Downloading
The “BT Download” option enables the continuous downloads with instant sharing without computers.
Note : 1. You can restrict the uploaded and downloaded transfer rate via the configuration at the left down corner
of the screen.
2. Maintaining the transfer efficiency, we suggest the downloaded seeds are not exceeding 5 seeds.
3. The BT download will influence the system performance, thus, we suggest limiting the transfer rate and
controlling the downloaded seeds at the same time.
24
User Interface Introduction
Appendix FAQ
Q: Unable to detect SL3650 from RAIDON-NAS Finder software?
A: 1. Please make sure the RJ-45 network cables of SL3650 and computer are properly connected to
the switch, and all related power has been turned on.
2. SL3650 takes approximately 2 minutes to startup after power on, and it is unable to be detected
during this time.
3. Verify whether the IP addresses are in conflicts, if conflicts does exist please modify to the proper
IP addresses.
Q: Unable accessing SL3650?
A: 1. Verify whether the network connections are properly connected and LED indicators of connection
blinks normally.
2. Verify whether the LED indicators of SL3650 appears in an abnormal state.
3. Restart SL3650 after power off for 2 minutes.
Q: Unable to access the folders?
A: 1. Verify whether the account and password are correct.
2. When a user account already accessed the folders, users must re-login from the operating
system to access folders with another user account.
Q: How to verify the IP address of SL3650 upon initial installation under the Mac or Linux System?
A: Since Mac and Linux does not supports “.exe” file, “RAIDON-NAS Finder” software cannot be
executed to locate the IP address. Users may manually login to management console of SL3650
from browser with IP address 192.168.1.10 via the independent network mode.
Appendix FAQ
25