1
OPERATION:
CALIBRATION PROCEDURE:
•
•
•
•
•
•
•
•
•
•
Connect the supplied 12VDC
power adapter to the meter and
to the mains line.
Connect the pH-electrode to the
BNC socket on the bottom of
the meter.
Always remove the electrode
protective cap before taking any
measurement. If the electrode
has been left dry, soak the tip
(bottom 2.5 cm) in M10000B
rinse solution for a few minutes
to reactivate it.
Make sure that the meter has
been calibrated before taking
any measurements (see Calibration Procedure).
Immerse the tip (2.5 cm) of the pH-electrode into the sample.
Turn the instrument on by pressing the ON/OFF key.
Allow the reading to stabilize and the meter will start continuous
monitoring.
A blinking alarm will indicate when the measured pH value is
higher than selected setpoint.
NOTE: The output power contact (SMS122 only) has no protection
fuse inside the meter. It is recommended to protected it outside,
against failure.
SETPOINT:
•
•
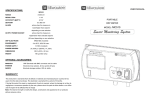
The setpoint can be selected by adjusting the central front knob to the desired
value.
The selectable range is from 3.5 to 7.5
pH for SMS110; from 5.5 to 9.5 pH for
SMS120 and SMS122.
•
•
•
•
•
•
Remove the protective cap from the electrode.
Immerse the electrode tip into a new sachet of pH 7
calibration solution and allow the reading to stabilize.
Adjust the OFFSET calibration trimmer (on the front)
to display "7.0 pH".
Open a new sachet of pH 4 calibration solution and
use a small quantity to rinse the electrode.
Immerse the electrode tip into the pH 4 sachet and
allow the reading to stabilize.
Adjust the SLOPE calibration trimmer (on the rear)
to display "4.0 pH".
The calibration is now complete and the meter is
ready to take measurements.
It is suggested to recalibrate the meter at least
once a month, after a prolonged stocking time
and after pH-electrode replacement.
INSTALLATION PROCEDURE:
(for SMS122 only)