1
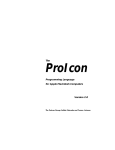
Dr Doc
Document Editor
Program by
Andrew Morton
Applix pty ltd.
Version 1.321
March, 1999
1616 Document Editor
Even though Applix has tested the document editor and reviewed the documentation, Applix makes no warranty or representation, either express or implied, with respect to software, its quality, performance, merchantability, or fitness for a particular
purpose. As a result this software is sold "as is," and you the purchaser are assuming the entire risk as to its quality and
performance.
In no event will Applix be liable for direct, indirect, special, incidental, or consequential damages resulting from any defect
in the software or its documentation.
Welcome to the growing family of 1616 software buyers. Don’t forget to keep in touch with Applix, as we are very interested
in getting to know you, and what you are doing with your 1616. Apart from our Sydney User Group, the main way to get to
know other 1616 users (and for them to know you) is through µPeripheral - the 1616 newsletter, and through the 1616 BBS.
So please join in and enjoy!
This program is available from Applix for $29.95. Updates to your original disk are available for $5.00, plus postage. Printed
manual updates are available for $10.00, or as a Postscript file on disk for $5.
Comments about this manual or the document editor it describes should be sent to:
Applix Pty Limited
Lot 1, Kent Street,
Yerrinbool, 2575
N.S.W. Australia
(048) 839 372
Private BBS systems (ringback) on (02) 554 3114 and (02) 540 3595
Program Copyright 1989, 1992 Andrew Morton and Applix Pty Ltd. All Rights Reserved.
Original manual Copyright 1986, 1989, 1990 by Andrew Morton and Applix Pty Ltd.
Additional introductory and tutorial material by Eric Lindsay, based on the edit description by Andrew Morton.
Revised manual edited and pretty printed by Eric Lindsay
ISBN 0 947341 ?? ?
MC68000 is a trademark of Motorola Inc.
WordStar is a trademark of MicroPro.
Overview of the Document Editor
Andrew Morton
You write a program, design a computer, start a company or have a child and the hardest part is thinking of a name for the
darned thing. The thing in question here is the 1616 editor, variously known as ‘e’ (my name), ‘wp’ (my earlier name - too
long) or ‘Dr. Doc’ (Kathy’s name).
The editor is a much reworked version of the 1616 program editor edit and is upwardly compatible with edit. The editor
has a non-document (or program) mode which is superior to edit for program development.
The major attention and differences are in the area of document preparation. The editor can reformat text to various specifications, display bold, underlined, italicised, subscripted and superscripted text on screen (requires 1616/OS V4), has on-screen help and
much more. Features not present in edit are marked in the manual with a ‡.
A companion program, wprint.xrel is used for printing DrDoc documents. It basically performs all the vertical formatting
tasks: pagination, headers, footers, page numbers, file inclusion, etc. Printer installation is performed by including a file which
specifies the escape code sequences for your printer.
Also supplied is the code for the editor in Hitech C linkable form, along with one C source file, term.c, which can be used
to create a version of DrDoc customised to suit external terminals.
To get started, clone the document files on disk and use the DrDoc on screen help commands (^QH, ^K?, ^Q? and ^O?) to
remind you what goes on.
Please send bug reports, preferably with a means of reproducing them, to Applix.
1
The Document Editor
The document editor is a simple, but general, word processor. The 1616/OS full screen document editor is designed for editing
disk-based text files. Its commands and actions are similar to those of MicroPro’s WordStar word processing program in both
‘document’ and ‘non-document’ mode. The commands are a superset of those in the 1616/OS inbuilt edit command, thus
easing the task of learning to use it. It includes a number of ‘help’ screens, which can be viewed at any time, for those who
don’t want to read the manual.
Although some WordStar word processing facilities are not included, many DrDoc commands are more powerful than their
equivalent WordStar feature; this applies particularly to search and replace commands, which include many grep style regular
expression facilities, and the tag features, for C programming. Even experienced WordStar users should read the manual to
check these extra features.
Introduction
The document editor DrDoc is a more advanced, disk based, version of the familiar built-in Applix edit command. While
its commands are identical to those in edit, it adds many additional facilities. It includes control of formatting, page lengths,
margin settings, justification, headers, footers, page numbers, and page sizes. Text can be in bold, underline, italics, subscript
and superscript, and up to three user defined styles limited only by the printer you are using.
A considerable amount of thought has gone into many of the features, particularly with program editing in mind. A number
of DrDoc’s editing features are quite subtle and require careful reading of this documentation, as well as some experimentation.
However the time taken for this will be well rewarded!
An associated program wprint, is used to actually print the file to either the display, or to any style of printer. Additional files
with the extension .codes are used to configure the wprint program to the printer (or display and terminals) you are currently
The Document Editor
Dr Doc 1-1
using. You can have an unlimited number of these printer driver files, and can easily edit them to suit any printer you own.
Using standard HP style laser printers is easy, however additional downloaded programs (Don Lancaster’s gonzo justify) are
required for Postscript laser printer output.
The actual dde.xrel and wprint.xrel should normally be included in a directory such as /f0/bin that is in your usual
xpath. This ensures they can be run from any other sub-directory.
DrDoc can also be run remotely from terminals connected to the Applix serial ports, and formatted text displayed on these
terminals, by using an appropriate screen display driver file.
A special version of DrDoc, known as me.xrel, will run under the Applix version of the Bellcore mgr window manager for
Sun workstations on the main Applix display. This provides windows, scroll bars, mouse support, and a very fine definition
display, showing three times the resolution of a standard Macintosh on a multisync monitor.
Starting the document editor
You start the document editor, like any other program, by typing its name, without the .xrel extension. You must also provide
the name of the file (or, optionally, several files) you wish to edit. The editor is named dde.xrel, so you start using it by
typing
dde [flags] filename [filename ... ]
There are a number of optional additional flags which modify the behaviour of the document editor.
The editor can be started in either document mode (-d) for word processing, or non-document mode (-n) for writing programs
or data files. If editing an existing file, the document editor will attempt to guess whether the file should be opened in document
or non-document mode.
You can set the justification for ragged right (-jrr), even or right margin justified (-jrj), or for center justify (-jcj).
The complete list of start up options are
dde [-aidn] [-T tab] [-t tag] [-jrr] [-jrj] [-jcj] [-lnn] [-rnn]
filename
The allowable flags are as follows:
1-2 Dr Doc
The Document Editor
-a
-d
Start DrDoc with autoindenting ON‡
Start DrDoc in document mode‡
-i
-jrr
Start DrDoc in overstrike mode‡
Start DrDoc in ragged-right justification mode
-jrj
-jcj
Start DrDoc in smooth-right justification mode‡
Start DrDoc in centre-justify mode‡
-lNN
-rNN
Start DrDoc with the left margin set at NN‡
Start DrDoc with the right margin set at NN‡
-n
-TNN
Start DrDoc in non-document mode
Start DrDoc with tabs set at NN columns
*** This has changed! It was a lowercase ‘t’ in V1.2.
Start DrDoc up at tag ‘tag’‡
-t tag
If more than one filename is given, DrDoc edits each file in the order supplied. Quitting DrDoc with the ^KQ command, where
the ’Q’ is upper case will cause an immediate exit: the remaining files will not be edited.
The new ’-t’ option is for tag file support. See Index Tags at the end of Chapter 2 below for details. Note that ‡ indicates an
option in Dr Doc, not present in edit.
The cursor
Throughout the description of the document editor, the term ‘the current line’ refers to the line which the 1616’s cursor is upon.
The location of this line is displayed on the editor status line, at the top of the display.
The Document Editor
Dr Doc 1-3
The flashing cursor represents your current working position within the file, and almost all commands are effective at the
cursor’s position. In the case of text insertion (single character, block move or copy and file read) the current position may be
thought of as being in between the character under the cursor and the one preceding it.
The cursor can be moved by using the arrow keys. It can be moved more effectively by a number of other commands described
later.
The status line
Once within the document editor, a status line appears at the very top of the screen. It is in a distinctive colour (which can be
changed). From left to right, the status line consists of:
•
A general message display area for status information and command echoing.
•
The cursor position within the file, measured in characters from the start of the file
•
The current line number
•
The current character number within the current line (the column)
•
The location within the file, expressed as a percentage of the full size.
•
Special field information.
•
The name of the file which is being edited
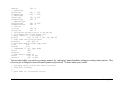
A typical status line is shown below.
^KD
char=365
line=41
column=13
75%_<IN><RJ><DM>
’filename’
The information shown includes the previous command, the number of characters in the file prior to the cursor position, the
line number the cursor is on, the column, how far into the file the cursor is, as a percentage.
If an underline character appears after the % sign, the file has not changed since it was last saved.
In addition, the status line includes the following three fields.
Insert mode: (toggled with Ins or Ctrl
<OS>
Overstrike mode
<IN>
Insert mode
1-4 Dr Doc
\
or ALT-28)‡
The Document Editor
Justification mode (toggled with ^OJ)‡
<RJ>
Right justify
<RR>
Ragged right
<CJ>
Centre justify
Document mode (toggled with ^ON)‡
<DM>
Document mode
<ND>
Non-document mode
An underscore between the file position indication and the "<IN>"/"<OS>" field indicates that the file is unmodified since
being read from or written to disk.
Toggles the enabling of the status line at the top of the screen. The continual updating of the status line slows the
editor down, particularly over a low speed serial link. Turning off the status line improves things considerably and also gives
another displayed line of text.‡
Ctrl K S
File sizes
When the editor is started, it determines the size of the file and allocates for itself sufficient memory space for the file, plus
32k (kilobyte, enough for about an extra 32,000 characters of text). The size of the edit buffer is displayed as the file to be
edited is read in.
Because of this memory allocation scheme, you cannot increase the size of the file by more than 32,000 characters during a
single edit session; if you get the ‘file too large’ message on the status line, you will have to write the file out (using the Ctrl K X
command) and re-edit it. This seemed a reasonable compromise between efficiency, and ease of use.
General operation
In document mode‡, a line is effectively the length of a paragraph, or from one explicit Enter to the next. The paragraph break
is indicated visibly at the right hand side of the display. Document files are simply wrapped round to the next screen line, so
that the entire line is always seen. This is more effective for letter writing and general text, since a paragraph can be reformed
at any time to show how much space it will occupy when printed.
The Document Editor
Dr Doc 1-5
The formatting is accomplished by adding ‘invisible’ characters into the file. These are simply the normal ASCII characters
used for text formatting, but with their high bit set. That is, an extra space (used say to justify a line) is simply the space
character with the high bit set. The end of each line within a paragraph is done with the usual Applix carriage return and line
feed pair, however again the high bit on each is set. If you were to view a ‘document’ mode file using normal Applix utilities,
such as type you will notice these additional characters. This is perfectly normal, and they will print correctly when printed
using the wprint program that comes with the document editor.
Non-document mode is used for writing line oriented material, such as programs, or data base text. Each line is normally
terminated by an explicit Enter . Since non-document file lines can be longer than the 80 characters the display can show,
partial lines are displayed. If the cursor is moved to a line which is not fully on the screen, then the display is scrolled to bring
the line into view.
A ‘marker’ is a position within your text file. You indicate what to mark to the editor, and it remembers the position. The
markers are used for remembering positions in the file. If text is added or deleted before, between or after markers, they stay
at the same position in the text. This means that if you place a marker at the start of a particular word, then the marker will
stay at the start of the word, if text is inserted or deleted before it. The positions of markers are lost if you quit from the editor
(using the Ctrl K Q or Ctrl K X commands). Markers are inserted using the Ctrl K key, followed by a single digit. Markers
are found using the Ctrl Q key, followed by a single digit.
Whenever the editor reads or writes a disk file, the user is first prompted to enter the filename. The editor makes a guess at
the name of the file (based on the last name used) and if it is correct, you need only press the Enter key; otherwise you may
edit the filename using the editor commands before pressing Enter .
Whenever dde prompts for an output filename, placing a > character at the front of the filename results in the text to be written
being appended to that file, rather than overwriting it as is normal. This feature is only available from 1616/OS Version 4 and
up.
Document and non-document mode
In non-document mode the paragraph reformatting commands are disabled and the display of ‘<’ characters in the rightmost
column which indicate hard carriage-returns is disabled.
1-6 Dr Doc
The Document Editor
DrDoc uses a heuristic (this is a computer slang word for ’kludge’) to determine whether or not to start up in document mode.
If neither of the -n or -d flags are given at the command line AND the tabwidth is either four or eight (it is eight if the -T flag
is not given) then the loaded file is scanned for TAB characters (ASCII code $08). If any are found then the file is assumed
to be a non-document.
If the mode comes out wrong it is probably due to hard tabs being in a document file: search for them and fix them up. The
^ON command toggles between document and non-document modes.
In document mode the TAB key causes insertion of spaces, out to the next column which is a multiple of the current tabwidth.
The default tabwidth in document mode is 5 spaces.
In document mode the characters whose ASCII codes are $8A, $8D and $A0 cannot be entered, as these are soft newlines,
soft carriage-returns and soft spaces which DrDoc inserts in the text during paragraph reformatting. These characters correspond
to the foreign letters è, ì and à, with grave above them.
First line override settings
Each text file you create may itself define certain Dr Doc settings when that file is edited. This is done by placing special
character sequences in the very first line of the file. These settings will override command line settings, as well as inbuilt
default settings.
One precaution. You must also isolate the first line from the normal purpose of the document, by commenting it out. For
example, use a first character of ; for an assembler file, by first characters of .; for a wprint document file, or by surrounding
the line with /* ... */ characters for a C source code file. This ensures that the settings do not get mistaken for normal text by
any programs that use it after the editor finishes.
The settings available are:
TABSnn
tab spacing to (decimal value) nn.
LMnn
left margin to (decimal value) nn.
RMnn
right margin to nn.
NONDOC
non-document mode, for programs.
DOC
document mode, for .d text.
The Document Editor
Dr Doc 1-7
JRJ
JRR
JCJ
justify even right margin.
justify ragged right margin.
justify centre all text.
For example, putting TABS12 in a comment in the first line of the file ensures that it is always edited with a tabwidth of 12.
This overrides all other tab setting operations.
To do a wprint document with a left magin of 1, right margin 50, and right justified text, with the first line commented out
so it isn’t printed:
.; DOC LM1 RM50 JRJ
For a C source code file, a typical first line would be:
/* TABS4 NONDOC */
We recommend that you decide which settings you like to use, write a small shell file which invokes DrDoc as you like it, and
then stick with it. For example, the following is the shell file used by Andrew for editing this document. It sets document
mode, left margin in column 1 (default), right margin at column 70, smooth right justification (default) tabwidth 5 (default):
; Start dde for document processing
dde -d -jrj -r70 $*
Even better, write a little shell script for each style of item you normally write. For example, one for writing C programs,
another for writing letters home, another for requesting 1616/OS updates, etc.
Entering text
Enter text into the file by positioning the cursor at the desired place and simply typing.
Text is entered in paragraphs. Paragraphs are terminated with carriage returns (hitting the Enter key). These are referred to
as ‘hard newlines’. A hard newline is indicated by a ‘<’ symbol in the rightmost screen column on the relevant line.
1-8 Dr Doc
The Document Editor
Insert and overstrike
There is an ‘insert’ mode, wherein everything you type is inserted into the file. There is also an ‘overstrike’ mode‡, which
replaces existing text by overwriting them. You can toggle between these modes using the Ctrl O I key sequence. You can
also toggle the overwrite mode by using the Ins key.
Control characters in text
You may insert any control character except a Ctrl M into the text by preceding it with a Ctrl P , as with the line editor. Control
characters must have the Ctrl key used when inserting them. This is useful for inserting special escape sequences such as those
which start boldfacing and underlining on your printer when the file is printed.
Text reformat
The ^OO command reformats the text from the cursor to the end of the current paragraph according to the current justification
mode‡. It is important to note that text in the current paragraph to the left of the cursor is not affected. This permits left or
right margin extensions. For example, the following paragraph is formatted by setting the left margin to 10, the right margin
to 50 and placing the cursor on the ‘T’ of ‘This’ before the reformat.
This is a paragraph of text formatted with the left margin at 10 and the right margin at 50, to demonstrate
left margin extension.
The same paragraph may be formatted with extra indentation at the start by simply inserting spaces at the start. Again, place
the cursor at the ‘T’.
This is a paragraph of text formatted with the left margin
at 10 and the right margin at 50, to demonstrate margin indentation.
The ^KO command causes all the text in the currently marked block (marked with ^KB and ^KK, as in edit) to be reformatted
to the current justification mode and margin settings.
The Document Editor
Dr Doc 1-9
Autoindent mode
Useful in non-document mode for editing program files, autoindent mode is toggled with the ^OT command.‡
When you press Enter the editor inserts sufficient TAB characters in the resulting new line to bring the cursor up to the first
non-TAB character in the previous line.
The left and right margins
The left and right margin settings are used in reformatting text with the ^OO command. Spaces are inserted in columns to the
left of the left margin. Lines are terminated at or before the right margin. The margin settings are set using the -l and -r flags
at the command line level, or by using the ^OL and ^OR commands.‡
The ^OL and ^OR commands prompt you to enter a decimal number specifying the left (or right) margin column number. The
columns start from 1 on the far left. Pressing Enter at the prompt sets the selected margin to the current cursor column.
The ^OM command is handy for setting margins: it scans the line on which the cursor is currently positioned and reads off its
left and right extremes. This tends to be useful only if you use smooth right justification, where all lines are of a consistent
width.
The margin settings are not stored in the document, so when you move between document sections which need different margin
settings, the settings will have to be altered before reformat commands are used.
1-10 Dr Doc
The Document Editor
2
Editing commands
All of the editor’s commands are either a single control character or a single character preceded by a control-K, control-0,
control-P or a control-Q. The 1616’s numeric keypad cursor control keys are programmed to generate codes which are suitable
for use with the editor. The editor commands can be broken up into the following groups:
Cursor
The cursor movement commands allow you to display and/or alter different parts of the
text file by moving to different positions within it.
Scrolling
The scroll commands move the screen display without altering the relative cursor position.
Handy when you are used to them.
Deletion
Undo
Blocks
Format
Attribute
File
Miscellaneous
Search and replace.
Editing commands
There are a number of commands for deleting ranges of text before or after the cursor.
The action of many commands can be reversed, and the previous version restored, by
using the ten undo buffers.
Blocks of text may be marked and manipulated, moved, copied, reformatted, moved to
other files.
Set margins, reformat paragraphs, centre lines, etc.
Insert text attribute commands, such as bold, italics, etc., into the text. Done by preceding
the command with Ctrl P followed by Ctrl whatever.
Various file I/O commands and system access commands are available from within the
editor.
The miscellaneous commands include setting and moving to file markers, merging files,
partial screen freezing, etc.
Searching for text patterns, replacing text, etc. Powerful grep style regular expression
commands are available.
Dr Doc 2-1
Editor commands are described in detail below; for quick reference, use the chart provided in the User Manual for the inbuilt
edit command. The document editor includes several help screens, described below.
The Control-Q, Control-P, Control-O and Control-K commands are two distinct keystrokes. You must first type the Ctrl Q
or Ctrl P or Ctrl O or Ctrl K by holding down the Ctrl key, and while holding it down, press the K or O or P or Q key.
The top line of the display will indicate which control key you have currently selected. Release these keys, and then type the
selected final letter. Note that to insert a control character after a Ctrl P , you must use the Ctrl key in association with the
selected key. You may also see additional prompts or error messages in the same area of the top line of the display.
For example, the command Ctrl Q C is entered by holding down the
manner. Release both, then type a c or a C or even a Ctrl C .
Ctrl
key, and while holding it down press
Q
in the normal
Help screens
There are a number of help screens available within the document editor. These are produced by means of control key
combinations. These help screens are not present in edit.
produces a general help screen of all the single control character commands, as well as the special attribute control
characters.
Ctrl Q H
Ctrl Q
?
lists all the
Ctrl K
?
lists all the
Ctrl K
commands, which generally mark, move and copy blocks of text.
Ctrl O
?
lists all the
Ctrl O
commands, which generally set margins, and text formats.
Ctrl Q
key commands, which include many large cursor movements, and text search and replace routines.
Cursor movement commands
The cursor movement commands are based upon file lines (groups of text separated by Enter or Return characters) rather than
display lines, which means that a movement from one line to the next may involve the cursor moving vertically by more than
2-2 Dr Doc
Editing commands
one display line to preserve its relative horizontal offset.
The editor attempts to keep the cursor at the same horizontal position during vertical moves. This is good for program files
because they have short lines, the length of which tends to vary considerably. If you are editing files which have lines which
extend over several display lines (ie., normal text, not programs) you will find that the line up and line down commands, Ctrl E
and Ctrl X are not all that you might want. Use the Ctrl Q S and Ctrl Q D commands instead.
Note that some of the block and marker commands (see below) are also used to alter the cursor position.
Ctrl J
Ctrl E
Ctrl X
,↑
,↓
Ctrl Q E
Ctrl Q X
Ctrl R
Ctrl C
Ctrl Q R
Ctrl Q C
Ctrl D
Ctrl S
,→
,←
Ctrl F
Ctrl A
Ctrl Q D
Ctrl Q S
Ctrl B
Ctrl J
Ctrl O X
Ctrl O E
Editing commands
Moves the cursor to the start of the next line.
Moves the cursor to the same column in the preceding line.
Moves the cursor to the same column in the next line.
Moves the cursor to the top of the screen.
Moves the cursor to the bottom of the screen.
Moves up the file about 2/3 of a screen.
Moves down the file about 2/3 of a screen.
Go to the first line in the file.
Go to the last line in the file.
Go forward one character.
Go backward one character.
Go to the start of the next word.
Go to the start of the previous word.
Go forward 80 characters within the current line.
Go backward 80 characters within the current line.
Go to the start of the current line. If at the start, go to the end.
Go to the start of the next line.
Go to the start of the next paragraph.
Go to the start of the previous paragraph.
Dr Doc 2-3
Ctrl Q G
Go to a particular line within the file. You are prompted to enter a line number. Pressing Enter immediately
is equivalent to entering the number 0, and sends you to the start of the file. Entering an impossibly large
number (or -1) sends you to the end of the file.‡
Ctrl Q P
Goto previous place. Whenever a cursor motion command results in a cursor position change of over
100 characters the editor remembers where the cursor was before the move. Typing ^QP places you back
at that place.‡
This can be helpful when the wrong cursor motion key is hit, or if you want to go to a different part of
the file, then return to the old place. The ^QP entries are placed in a 20 deep stack, so typing ^QP repeatedly
will go back to places where you were in the file longer and longer ago. Kind of hard to describe, but
just what you want sometimes.
Ctrl K T
Goto a tag, see the description of index tags.‡
The Ctrl A and Ctrl F commands make assumptions about which characters are used to separate words. The separators at
which these commands stop are a space, a tab, a newline or one of the following characters:
. !,:;?()[]{}
A good way to help memorise these commands is to think of the ‘e’ key as the top of a diamond pattern that includes the ‘s’
(left), ‘d’ (right), and ‘x’ (down). The ‘a’ key moves left a word at a time, and the ‘f’ key to the right, a word at a time.
You can redraw the display at any time by pressing Esc . This is provided because other programs running simultaneously in
background may put output on the display when it is not wanted.
Scrolling commands
The scrolling commands roll the screen up or down by one display line. The cursor is left in the same position within the file,
so it will move within the display. If the cursor is pushed off the screen by the scroll command then it is moved back into view
in an appropriate manner. The scroll commands are useful for displaying a line which is just beyond the screen limits with
few keystrokes.
2-4 Dr Doc
Editing commands
Scroll the display up a line.
Scroll the display down a line.
Ctrl Z
Ctrl W
Text deleting commands
The text deleting commands remove text from your file. You cannot ‘undo’ a delete command as you can with the line editor.
Note that the block command Ctrl K Y also deletes text.
Ctrl G
Ctrl H
, Del
, Bs
Grab, or delete one character forward.
Delete one character backward (the last character typed).
Delete from the cursor to the start of the next word.
Delete (yank) the entire current line.
Delete from the cursor to the end of the current line.
Delete from the start of the current line to the cursor.
Ctrl T
Ctrl Y
Ctrl Q Y
Ctrl V
The
Ctrl T
command uses the same word terminators as the
Ctrl A
and
Ctrl F
cursor movement commands above.
Undo commands
The editor undo commands are the same as those found in edit in version 4.0 of 1616/OS. For the sake of those readers who
do not have that version of the OS, the undo commands are described here:
Whenever any text is deleted, it is placed in one of ten undo buffers. The undo buffers can be reviewed with Ctrl Q U . Newlines
are displayed as ’/’ characters and the line is truncated to the width of the display. This command enables you to see where
the recent deletions are stored in the undo buffers. The numbers in the left column represent the number needed in the ^U0 ^U9 command to insert the corresponding text back at the cursor position.
Editing commands
Dr Doc 2-5
Typing Ctrl U 0 to Ctrl U 9 inserts the contents of an undo buffer at the cursor. Ctrl U U is shorthand for Ctrl U 0 . The
undo buffers are a convenient way of moving things around in a document or program. Simply delete the lines, move to where
they are to be placed and reinsert them.
Typing Ctrl K P puts the currently marked block (marked with ^KB and ^KK) into the head of the undo buffers.
The undo buffers work on a last-in first-out basis; when some text is deleted from the file, the oldest entry in the undo buffer
is removed to make space for the new entry.
Block commands
With the block commands you mark out a block of text and then move it, delete it, copy it or write it out to disk. The block
is marked out by putting the cursor onto the first character of the block and entering Ctrl K B ; the cursor is then put at the next
character beyond the end of the block and Ctrl K K is entered. These two operations may be reversed, but the beginning
marker ( Ctrl K B ) must always be closer to the front of the file than the end marker ( Ctrl K K ). When both markers are
correctly entered the marked block is redisplayed in a different colour, or with a different brightness on a monochrome monitor.
You may move the beginning or end marker simply by repositioning the cursor and placing the marker again; the screen will
be updated appropriately.
If you make an error in using the block commands a message is printed on the status line. Common errors are attempting to
move a block to some position within itself and making an error setting the markers.
It may be a good idea to use the
they can be destructive!
Ctrl K B
Ctrl K K
Ctrl K Y
Ctrl K V
2-6 Dr Doc
Ctrl K D
command to write the current file out to disk before using some of the block commands:
A beginning marker is put at the current cursor position.
Put the end marker at the current cursor position.
Delete (yank) all the text between the beginning and end markers.
Move the marked text to the current cursor position. The marked block is removed from its original
position and placed in the new one.
Editing commands
Ctrl K C
Ctrl K O
Ctrl K P
Ctrl K W
Ctrl K H
Copy marked block to the current cursor position. The marked text is left where it is and it is also copied
to the new position.
Reformat the paragraphs within the marked blocks to the current margin settings.‡
All paragraphs which start within the currently selected block of text are put in the head of the undo
buffer.‡
Writes the marked text out to a disk file. The user is prompted to enter the filename.
Hides the marked block. The block becomes inaccessible and the highlighting is removed. Typing
Ctrl K H again restores the block.
Format commands
These are commands that assist in controlling the margins of the page, whether the text is justified, centering text, and the like.
All these commands are new to Dr Doc, and not present in edit.
The ^O commands are obtained by typing Ctrl O followed by one key, which may be in upper or lower case, or may be a
control character. Short help for the ^O commands may be obtained by typing Ctrl O ?
Ctrl O C
Centres the current line according to the current left and right margin settings: handy for headings.
Ctrl O D
Toggle attribute mode display. Normally attribute display is disabled. Control characters are displayed
in the up-arrow format. If attribute display is enabled control characters become invisible and attributes
are displayed, if supported by the OS.
Ctrl O E
Moves the cursor to the start of the current paragraph. If the cursor is currently at the start of the paragraph
it is moved to the start of the previous one. This is a very useful motion command because it moves the
cursor to the paragraph formatting point.
Ctrl O
Toggles overstrike/insert mode. In overstrike mode characters under the cursor are deleted as you type,
so they replace the characters which are currently in the text.
I
Editing commands
Dr Doc 2-7
Ctrl O
J
Toggle between smooth right, ragged right and centred text justification modes, as displayed on the status
line.
Ctrl O L
Set the left margin for text formatting
Ctrl O M
Read the left and right margin settings from the current line.
Ctrl O N
Toggle between document and non-document modes.
Ctrl O O
Reformat the current paragraph from the cursor forwards, and move to the next paragraph.
Ctrl O R
Set the right margin for text formatting.
Ctrl O T
Ctrl O X
Toggle the autoindent mode, for programming in non-document mode.
Go to the start of the next paragraph. Useful because it moves to the indenting position for that paragraph.
Ctrl K O
Reformat the paragraphs within the marked blocks.
Attributes
DrDoc and its companion printing program wprint understand a range of printing attributes, some of which can be displayed
on screen, if you are running 1616/OS version 4.0 or higher. These commands are new to Dr Doc, not present in edit (although
you can incorporate their effects in edit files).
A section of text is given certain printing attributes by embedding a special control character in front of it. The attribute is
turned off by repeating the same control character. All printing attributes are terminated at the end of the paragraph (hard
newline).
The special control characters are entered in the text by preceding them with a ^P. A reminder of their use may be displayed
using the ^QH command. They are as follows:
Ctrl P Ctrl B
2-8 Dr Doc
Toggle bold mode
Editing commands
Ctrl P Ctrl E
Toggle User code 1
Ctrl P Ctrl Q
Toggle User code 2
Ctrl P Ctrl R
Toggle User code 3
Ctrl P Ctrl T
Toggle superscript mode
Ctrl P Ctrl S
Toggle underline mode
Ctrl P Ctrl V
Toggle subscript mode
Ctrl P Ctrl W
Toggle wide mode
Toggle italics mode
When wprint comes upon one of these characters during printing it emits to the output device (screen or printer) the appropriate
escape code to turn on or off that attribute.
The User codes are undefined by Applix and may be used for any special attributes which you want to get out of your printer.
Ctrl P Ctrl Y
On-screen attribute display (with version 4.0 1616/OS) is enabled/disabled with the ^OD command. While this is very pretty,
it can make text deletion awkward: there are hidden characters in the document. The cursor appears to stop when it moves
over such a character and it can be deleted even though it is not visible. Toggling between the attribute display and the normal
up-arrow (^X) type display enables you to see what is going on in there.
This version of the editor does not display a correct representation of the attributes during text insertion and deletion. When
the attribute display becomes confused, pressing the Esc key causes the screen to be correctly redrawn.
The special attribute control characters are inserted by preceding them with a Ctrl P . The commands are toggles: after inserting
one, you remove that mode by repeating the command where you want it to end. You can have multiple attributes working at
once (provided your printer can handle the combination you select - selecting both subscript and superscript won’t work, for
example).
Editing commands
Dr Doc 2-9
File commands
Ctrl K A
Ctrl K N
Edit another file.‡
This command is provided to switch from editing one file to editing another. You are prompted for the
new file name. If the current file has been modified the ^KN command will fail. Typing ^KN a second
time causes the current file to be discarded and editing of the new file proceeds.‡
The current editing state is retained on the new file, including the contents of the undo buffers, the
tabstops, insert mode, etc.
Entering a ‘#’ in response to the request for the new filename will result in a switch to the previously
edited file, if any.
If a block of text is currently marked in the old file it is put into the head of the undo buffers before the file switch. This permits
you to select a block (with the mouse if running under MGR), switch files and paste it back in.
Ctrl K R
Ctrl K D
Ctrl K W
Ctrl K X
Ctrl K E
Ctrl K
I
2-10 Dr Doc
Reads an entire disk file into the file which you are editing. The new text is placed immediately in front
of the current cursor position. You are prompted to enter the name of the file to be read.
Disk write. Writes the current file out to disk and resumes editing at the previous position. All markers
and the search and substitute patterns (see below) are preserved. This is a useful command for making
a periodic backup of a file. You are prompted for the name of the output file.
Marked block is written to disk.
Exit. The normal way of quitting from the editor. You are prompted for a filename, the edited text is
saved and you are returned to the 1616/OS command level.
Execute one 1616/OS inbuilt or transient command. A prompt is displayed and you can type the command.
Upon completion of the command you are prompted to press the Enter key and then editing is resumed
as before.
Temporarily escape from the editor and execute 1616/OS inbuilt and transient commands. The 1616/OS
command line prompt gets another ‘>’ character to remind you that you are still within the editor. To
return to your file, use the 1616/OS ‘quit’ command, or type the end-of-file character (usually Ctrl D ).
Editing commands
Both the Ctrl K D and the Ctrl K X commands preserve the file in its original form (before editing) in a .bak file. This is for
safety purposes: if something went wrong with your last edit then you still have the original file.
Whenever DrDoc prompts for an output filename, placing a ’>’ character at the front of the filename results in the text to be
written being appended to that file, rather than overwriting.
Miscellaneous commands
The miscellaneous commands cover various odds and ends which you expect to have in a text editor, and then some.
Ctrl K Q
Quit from the editor without saving the file to disk. You would do this if you had made some changes
which you later decided to reverse, or if you made a serious editing mistake, or if you were simply using
the editor to browse through a file. If the file has been altered since it was last written to or read from
disk then the message ‘Not saved yet’ appears on the status line and you must enter the Ctrl K Q command
a second time to quit. This is a safety feature which prevents you from accidently quitting before saving
your work.
Ctrl K E
Execute one 1616/OS inbuilt or transient command. A prompt is displayed and you can type the command.
Upon completion of the command you are prompted to press the Enter key and then editing is resumed
as before.
Ctrl K
Temporarily escape from the editor and execute 1616/OS inbuilt and transient commands. The 1616/OS
command line prompt gets another ‘>’ character to remind you that you are still within the editor. To
return to your file, use the 1616/OS ‘quit’ command, or type the end-of-file character (usually Ctrl D ).
I
The Ctrl K E and Ctrl K I commands are temporary escapes from the editor. When you return to the editor all the block
markers, the sustitute pattern and the search pattern are undisturbed.
Ctrl Q G
Editing commands
Go to a particular line within the file. You are prompted to enter a line number. Pressing Enter immediately
is equivalent to entering the number 0, and sends you to the start of the file. Entering an impossibly large
number (or -1) sends you to the end of the file.
Dr Doc 2-11
Freeze part of the screen function. Often when editing a file (particularly with program source code)
you wish to look at two parts of the file at once. This may be done with the screen freeze function in the
following manner:
Ctrl K F
1)
Use the cursor positioning commands to position one of the sections of the file which you
wish to see towards the top of the screen.
2)
Position the cursor under the text in which you are interested, so that the text lies between the
top of the screen and the cursor row.
3)
Type Ctrl K F . This freezes the screen above the cursor. All editing now occurs under the
divider line which is drawn. You may now move about the file within this smaller screen
window.
When you no longer require the frozen display, restore the normal display by typing Ctrl K F again. The editor will not allow
you to freeze too closely to the bottom of the display, as there must be sufficient active screen area left for the editor to work
in.
Ctrl K 0
Places a marker within the file for you to return to later. Type Ctrl K followed by a single digit number
(0 - 9). When moving about a large file it is often convenient to place a marker at your current position,
move somewhere else for a while and then jump back to your original place. You may place up to 10
markers within a file; the markers are lost when you quit from the editor - they are not actually part of
the file.
Ctrl Q 0
Moves the current position to the marker corresponding to that digit (see Ctrl K 0 - Ctrl K 9 , above),
used by typing Ctrl Q followed by a single digit number. An error message is displayed if the place
marker has never been set.
Ctrl K S
Toggles the enabling of the status line at the top of the screen. The continual updating of the status line slows the
editor down, particularly over a low speed serial link. Turning off the status line improves things considerably and also gives another displayed line of text.
2-12 Dr Doc
Editing commands
Search and replace
The document editor includes powerful text search and replace routines.
The search and replace commands have been augmented in a number of ways, beyond those found in standard word processors.
Powerful wildcard matching using Unix-style regular expressions have been added.
If a block is currently marked (using ^KB and ^KK) then search and replace commands only work within the selected block.
Listed below are the simple text string oriented search and replace commands.
Ctrl Q F
Find text, or search. You are prompted to enter a pattern which the editor is to find in the file. The editor
also asks for the number of repetitions of the search: if you ask for 10 repetitions then the cursor will be
moved to the tenth occurrence of the pattern within your file. If you simply press the Enter key when
asked for the number of repetitions the editor will find the next occurrence of the pattern. The search
starts from the current position and proceeds forwards. The number of occurrences actually found is
displayed on the status line; the cursor is left on the last found occurrence.
Ctrl L
Last search repeat. Finds the next occurrence of the pattern which was searched for in the most recent
Ctrl Q F pattern search command.
Ctrl Q A
Replace (substitute or alter) text. The editor asks for a pattern for which to search; when this has been
entered the editor asks for the characters which must replace the original pattern; it then asks for the
number of times which the replacement must be performed. If you press the Enter key in response to
the ‘Repetitions?’ question then the replacement is done only once. Entering an impossibly large number
in response to this question makes the replacement effective through to the end of the file. The replacing
is done from the current position forwards.
Ctrl N
Next replacement. Provides a single repetition of the previous
formed from the current position.
Editing commands
Ctrl Q A
command. The search is per-
Dr Doc 2-13
When entering the search and substitute character strings for the Ctrl Q F and Ctrl Q A commands the control-N character
( Ctrl N ) may be used to match with the new-line character in a file. If, for example, you wished to find the next line which
started with the letter ‘T’ then you would search for the pattern ‘ Ctrl N T ’, which represents a new-line followed by a ‘T’;
this search would not match with ‘T’s which are not the first letter on the line.
The substitute command Ctrl Q A may be used to remove selected patterns from the file by immediately pressing Enter in
response to the ‘With?’question; the selected pattern is searched for and is replaced with an empty character string, effectively
deleting it.
Regular expression searches
Some simple UNIX style regular expressions (similar to those used in the grep utility) can be used when creating search
patterns. These are very much more powerful than the simple string searches found in most word processors, but are correspondingly more difficult to understand. A regular expression is a string of characters which represent a pattern. During
searching, DrDoc attempts to match text within your document with the given expression.‡
To tell DrDoc that a string in the normal search/replace commands is a regular expression it must be preceded by a \ (backslash)
character. The backslash is ignored and all characters after it are treated as a regular expression.
As well as matching any string of characters, you can accept any arbitrary character by using . to stand for any number of
characters.
By using the [ ] surrounding characters, you can search for any of the bracketed characters at that position. Including ^ as the
first character within the bracket means to exclude the other characters within it. Pattern matching understands ASCII sequence,
so you can group characters using -, so A-N means the range of characters from A up to N.
A regular expression consists of special characters and classes of characters described in brackets ([ ]). The special characters
normally available are as follows
.
Group a sequence of characters.
Matches any character.
2-14 Dr Doc
Editing commands
Examples:
A..b Matches all 4 character strings which start with ‘A’ and end with ‘b’.
[]
Matches a class of characters.
Matches any character in a set. Sets may be entered individually or in a range with a hyphen. Ranges such as [a-z] or
[1-9] are allowed. Thus [aeiou] matches any vowel.
Putting a ’^’ character in front of a range indicates exclusion: all characters are matched EXCEPT those described by
the range, so [^aeiou] would match any consonant.
Examples:
[a-z] Matches all lower case letters
[0-9] Matches all decimal numbers
[1-3][09] Matches all numbers that start with 1, 2 or 3, and have 0 or 9 as the next digit.
[A-Z0-9 ] Matches all upper case letters, digits and the space character
[^aeiou] Matches all characters except lower case vowels.
[A-Z][a-z]. Matches all words starting with a capital letter, followed by lower case letters.
[A-Z][A-Z][A-Z] Match any set of three capital letters.
During search and replace all occurrences of control-O’s (^O) in the replacement string will be replaced with the text that is
being deleted as part of the replace. For example, replacing all occurrences of the string ‘John’ with the string ‘^O Smith’ will
turn all occurrences of ‘John’ into ‘John Smith’. This feature comes into its own when the string being searched for is a
wildcard regular expression.
Editor hints
•
If you are altering a file and find yourself typing a sequence of characters and/or commands over and again, escape
to the 1616/OS shell and program the characters and commands into a function key and use it instead. See the
Editing commands
Dr Doc 2-15
fkey inbuilt command in the User Manual for a description of programming function keys. You can put any
character into a function key definition, including the control characters which the editor uses for commands. You
can also use keyboard programming via the Alt Ctrl function key method.
•
Occasionally write your file out to disk with the
least have a recent copy.
•
Learn all the features of the editor at an early stage. If you limp along using only half of the available commands
you will regret the wasted time when you finally come to learning all of them.
•
Use the Ctrl K 0 - Ctrl K 9 place markers and the partial screen freeze feature, particularly if you are editing program
source code. They’re great.
•
The Ctrl Q F search command can be used for counting the number of occurrences of a pattern within a file: position
the cursor at the start of the file and search for an enormous number of occurrences; the editor will display the actual
count on the status line when it has finished. Search for spaces for a rough word count.
Ctrl K D
command; if something regrettable occurs you will at
The MGR version of DrDoc
The MGR windows version of DrDoc (me.xrel) supports the following enhancements:
* Positioning the cursor with the middle mouse button.‡
* Sweeping out text with the right mouse button (equivalent to ^KB, ^KK).‡
* A vertical scroll bar which provides indication of the position in the file. Clicking on the scroll bar with the middle mouse
button permits movement about the file.‡
* Detects window resizing and redraw events.‡
* Pull down menus with commonly used functions.‡
2-16 Dr Doc
Editing commands
Index Tags
DrDoc now supports the ‘ctags’ idea, lifted from the Unix editor vi.‡
Suppose you are working on a programming project which involves a large number of files. You are looking at a piece of
code which calls a function called ‘fred’. You wish to have a look at ‘fred’, but you can’t remember what file it is in. The
usual practice is to escape from the editor, run grep across all the source files and sift through the output until you find the
name of the file which contains ‘fred’. You then edit this file.
The tagged approach is to have a file in the current directory (called edit_index) which consists of a list of all the functions,
labels, headings, etc in which you are interested. These are called ‘tags’. Each tag has associated with it the name of the file
which it lives in, along with a pattern which DrDoc can use to find the tag in that file.
The building of the tag file from C source code is performed by the mkindex program. The usage is
mkindex filename1.c filename2.c ...
This command scans all the named C files, creating an appropriate edit_index file. Once you have the index file there are
two ways to use it. One is with the ^KT command. You are prompted to enter the name of a tag. DrDoc searches for that tag
in the edit_index file and, if found, switches to the appropriate file and searches for the tag within that file.
The second way of using the tag index file is to place the cursor at the name of the tag which you wish to locate and type ^]
(control-right square bracket). DrDoc reads the word out from the cursor position and searches for it in the index file.
The mkindex program is rather crude at this stage, as it only understands C functions whose identifiers start in column zero:
other indenting/layout styles are not supported. Assembly language labels should also be supported.
You can start DrDoc up in tag search mode. For example, suppose you have a number of C files in a directory. These have
previously been tag indexed. You wish to edit the function ‘main’ but you don’t know what file it is in. Typing
dde -t main
starts up DrDoc, which then searches the index file for the tag ‘main’ and then loads up the relevant file.
Editing commands
Dr Doc 2-17
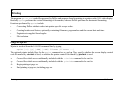
3
Printing
The program wprint.xrel reads files prepared by DrDoc and prepares them for printing to a printer or the 1616 video display.
Basically wprint performs the vertical formatting of documents, whereas DrDoc performs the horizontal formatting.
Functions performed by wprint include
•
Converting DrDoc attribute codes into printer specific escape codes.
•
•
Creating headers and footers, optionally containing filenames, pagenumbers and the current date and time.
Pagination to supplied form lengths.
•
File inclusion.
Usage of wprint
Wprint is invoked from the 1616/OS command line by typing
wprint [-s] [-p] [-bNN] [-eNN] filename [filename ...]
The optional printer include flags for the wprint command are -s, and -p. They specify whether the screen display control
code file named by .sinclude is used, or whether the printer control file named by .pinclude is used.
-s
-p
Causes files which were conditionally included with the .sinclude command to be read in.
Causes files which were conditionally included with the .pinclude command to be read in.
-b
-e
Begin printing at page nn.
End printing at page nn, including page nn.
Printing
Dr Doc 3-1
All the supplied files are read in the order given and the prepared output is directed onto standard output, so this must be
redirected to a file or character device to which a printer is connected. Multiple files are treated as if they were all contained
within one file.
If the text file contains the dot command .sinclude 1616.codes, then text attributes such as bold, italics, underline, subscript
and superscript will appear on screen if you use the -s flag when starting wprint.
The -p flag indicates that the dot command .pinclude will be used. This names a printer control file that should contain
appropriate escape and control codes for your particular printer. The name can include a complete directory path.
The output should be redirected to a suitable output port, either a Centronics printer port, or one of the serial ports, by means
of the > redirection. This can be done in background (to provide printer spooling) by adding a & after the command line. A
typical whole command:
wprint -p filename > cent: &
Dot commands
Wprint treats lines in your file which start with a ‘.’ as special commands. Such lines are directives to wprint and do not cause
any output.
A dot command consists of a line starting with a ‘.’ and then a command type. Some dot commands require additional arguments,
either numeric or text. These are supplied on the same line as the dot command, using white space as separators. Numeric
input can be in one of three forms.
Decimal :.pagelength 70
Hex :.bold $27 $45
Ascii :.underline $27 ’K
3-2 Dr Doc
Printing
Where a dot command needs additional numeric or string arguments, using that command with NO arguments turns off the
availability of the command’s functions, making it appear that the command was never given.
File inclusion
Files may be included within other files at print time by using the .include, .pinclude and .sinclude commands. The
usual use for this is for including files of dot commands. If you have a number of different document files which all relate to
the one subject, set up one file containing all the dot commands relevant to the subject and use .include to ensure all the printed
files use the same formatting.
The .sinclude and .pinclude commands are provided so that you can print a file out to the 1616 video display OR to your
printer without having to alter the file. A .sinclude file is only included if the -s option was given to wprint. A .pinclude
file is included if the -p flag was given.
It is recommended that you use the following scheme:
•
Place all dot commands which are specific to a printer in a file called myprinter.codes and use .pinclude
myprinter.codes
•
•
Place all video display specific dot commands in a file called 1616.codes and use .sinclude 1616.codes
Place all other dot commands in another file called common.dh and use
.include common.dh so that it is always included. Documentation in .dfiles for Applix programs almost invariably
contains an .include doc.dh, and searches for this file in /usr/lib.
Use the directory /usr/lib as the location of your .codes and .dh files. Use assign /usr/lib /h0/usr/lib or
some similar variation to ensure that Dr Doc can find the include files.
Please keep with these file naming conventions:
.codes for escape codes,
.dh for formatting include files and, if possible,
.d for the actual documents. Thank you.
•
Printing
Dr Doc 3-3
When printing to the screen, (assuming your file is called myfile.d) use
wprint -s myfile.d
(1)
When printing to the printer, use
wprint -p myfile.d >cent:
(2)
If the above scheme is followed, the command
wprint myfile.d
(3)
will cause the document to be correctly printed, except that no 1616 or printer escape codes will be emitted because wprint
will not include any .codes files and hence does not know any escape codes. In addition all of the soft spaces which DrDoc
inserts in its documents will be converted into normal spaces.
File inclusion is not strictly necessary: the same effect can be obtained by simply naming the files to be included in order at
the wprint command. So the above printing examples could be done with the following commands:
wprint myprinter.codes common.dh myfile.d >cent:
(1)
(2)
wprint common.dh myfile.d
(3)
wprint 1616.codes common.dh myfile.d
Headers and footers
Optional headers and footers may be placed at the top and bottom of each page. The dot commands for headers and footers
are very similar, so only headers will be described. Substitute ‘f’ for ‘h’ and ‘footer’ for ‘header’ and you’ve got it.
A header is defined with the dot command
.header "This is a header"
The string must be quoted if it contains any spaces. Headers are placed on the line given by the .headerline command,
described below.
3-4 Dr Doc
Printing
Header justification
Headers may be justified in a number of ways. These are set using the .hjust command. Used thus:
.hjust lole
.hjust lelo
Left justify headers on both odd and even numbered pages.
.hjust rore
.hjust rero
Right justify headers on both odd and even pages
.hjust lore
.hjust relo
Left justify headers on odd pages, right justify them on even pages.
.hjust role
.hjust lero
Right justify on odd pages, left justify on even pages.
.hjust centre
.hjust center (export market!)
Centre headers.
To perform the centring of headers wprint must know how wide the paper is, so the .margins command allows you to set
this.
The use is:
.margins 1 70
Printing
Dr Doc 3-5
Note that there is no relationship between these margins and those used in DrDoc. These margins allow you to move the
headers outside the body of the main text. If, for example, you prepare a document within DrDoc with left margins of 10 and
right margins of 50, the above wprint margin settings will result in the headers being placed 10 columns to the left or right
of the main text.
Special header sequences
If one of the following special sequences is embedded in a header it is expanded at print time:
$#f is converted into the basename of the disk file currently being printed.
$#p is converted into the current page number.
$#t is converted into the time of day in the format HH:MM:SS
$#d is converted into the current date in the format DD MMM YY
Vertical formatting
The vertical formatting commands position the headers, footers and text according to the requirements of the printer. All of
these commands should be placed in your common.dh file.
.headerline NN
Sets the line number at which the header is placed. Newlines are inserted up to this line.
.textstart NN
Sets the first line at which printing of the main text commences. This must be greater than the header line.
.textend NN
Sets line number at which the main text stops being printed. No text is printed on that line. The total number
of lines printed per page is (textend - textstart).
3-6 Dr Doc
Printing
.footerline NN
Sets the line at which the footer is printed. This must be greater than or equal to the text end line.
.pagelength NN
Tells wprint how many lines there are per page, from perforation to perforation. If the .formfeed sequence
has not been supplied, and wprint does not know how send a formfeed command to the printer then linefeeds
are sent to bring the printer to the top of the next page. If .formfeed has been given then wprint emits the
formfeed sequence as soon as the last text has been printed, so in this case the supplied page length need only
be greater than the footer line number.
Page breaks
The dot command .cp conditionally causes a page break, depending upon the number of lines left to print on the current page.
.cp NN
Tells wprint to go to the top of the next page if there are less than NN lines to go on this page. This command is usually
placed at the start of section headings, etcetera to prevent headings from appearing at or very near to the bottom of the page,
which looks rather silly.
The .eject command unconditionally causes a page break.
Output device control strings
Each printer has its own set of special escape sequences which alter its printing mode. Every printing program needs to know
how to place the printer in the mode which it desires. This is the dreaded ‘printer installation’. Rather than going through an
installation procedure DrDoc and wprint are designed to simplify printing to different output devices. All the printer codes
are in an include file, in human readable form.
Device independent control codes embedded in DrDoc files (such as a control-S to start/stop underlining) is translated into the
desired printer sequence, depending upon the relevant dot command which is interpreted at the time of printing.
Printing
Dr Doc 3-7
If a dot command for a particular attribute has not been defined then wprint assumes that the attribute is not available and
control codes in the DrDoc file which call for that attribute are ignored.
Wprint turns off all printing attributes at the end of each paragraph, so the printer cannot run away printing the entire document
in bold, underlined, italicised Kanji subscripts.
When wprint turns off any printer modes it turns off all modes, and then turns on those which are still active. This gets around
problems with some printers which use a common code to turn off several attributes at once.
See the file epson_fx-80+.codes for an example of entering these dot commands.
Dot commands
The document editor responds to a large number of commands designed to help you control the both the format and the attributes
of your text.
Format controls includes the left and right margins, the page length, the start and end line on the page, producing blank pages,
and indenting whole paragraphs. Line spacing can be single spaced for ordinary text, double spaced for producing manuscript,
triple spaced for poetry, or indeed, any line spacing you prefer. You can also produce both headers and footers, position them
at any line, control their width, and alternate their position from page to page. They can automatically include page numbers
(which can be reset at any time), and the date the file was produced.
Attributes are the appearance of your actual characters. You can make characters bold, italic, underlined, produce subscript
and superscript text. These will appear when your file is displayed on your video monitor. You can also include up to three
attributes of your own choice, although these do not appear on the display.
The quality of the actual printed output depends upon the characteristics of your printer. Each printer requires you to have a
file which describes how your particular brand of printer produces each text attribute. Obviously, if you don’t have a file
describing your printer (or if your printer can’t produce some particular attribute), then you will not get correct results. The
printer code file can be easily written for any printer, using the document editor, provided you have a manual for the printer
in question. The document editor comes complete with printer code files for a number of common (and uncommon) printers.
3-8 Dr Doc
Printing
Dot commands simply consist of a list starting with a full stop, followed by a code word, and sometimes by additional text, or
a number. They are simply typed into your document as required. The dot commands are listed below.
.;
The ; indicates a comment. It has no effect upon your printed output.
.*
The .* is also a comment separator, the same as .;. When wprint encounters this sequence, it ignores the entire line. Note
that there must be a space after the comment character.
.bold n1 n2 ...
Adds a sequence of escape and/or control characters intended to produce a bold typeface from display and printer, in response
to a DrDoc ^B command.
.cp n
Conditional page break. The number n is the distance from the bottom of the page. If a paragraph break appears within that
number of lines from the bottom of the page, the page is ejected, and the next paragraph starts on a new page.
.eject
Eject the page, and move paper to the next top of page.
.fjust setting
Footer justify (see also the header justify .hjust, the header and footer margin settings command .margins, and the .header
and .footer commands). Sets the horizontal position of the footer. There are five possible settings.
Printing
Dr Doc 3-9
centre
center
Footer text is centered.
Footer text is still centered.
lole
lore
Footers on both odd and even pages printed on left of page.
Footers on odd pages are printed on left. On even pages, are printed on the right.
role
The setting you will normally choose, as it put the footers on the outside edge of each page. Right on
odd pages, left on even pages.
rore
Footers on the right on both odd and even pages.
.hjust setting
Sets the header justify position, in exactly the same manner as .fjust.
centre
Header text is centered.
center
lole
Header text is still centered.
Headers on both odd and even pages printed on left of page.
lore
role
Headers on odd pages are printed on left. On even pages, are printed on the right.
The setting you will normally choose, as it put the headers on the outside edge of each page. Right on
odd pages, left on even pages.
rore
Headers on the right on both odd and even pages.
.footer n "string for footer"
The text to be used as the footer on each page. The line on which the footer is to appear is given by n. The text string can
include printer control characters (see the Ctrl P details in a latter section).
3-10 Dr Doc
Printing
Two additional commands are available within header and footer strings. These print the page number, and the date the file
was created.
$#d
$#p
Date the file was created is printed in day, month, year format.
The page number is printed (the page number can be reset using .pageno).
.formfeed n1 n2 ..
Print a form feed character (usually control-L), which on most printers will eject a page. If this is not supplied, wprint uses
newlines to go to the next page, the number of newlines being based on the pagelength, as set by .pagelength.
.header n "string for header"
The text to be used as the header on each page. The line on which the header is to appear is given by n. The text string can
include printer control characters (see the Ctrl P details in a latter section).
Two additional commands are available within header and footer strings. These print the page number, and the date the file
was created.
$#d
$#p
Date the file was created is printed in day, month, year format.
The page number is printed (the page number can be reset using .pageno).
.italics n1 n2 ..
Adds a sequence of escape and/or control characters intended to produce an italics typeface from display and printer, in response
to a DrDoc ^Y command.
Printing
Dr Doc 3-11
.linestart n1 n2 ..
A sequence sent to the printer at the start of every line printed. If, for example, you want to print every line of the document
in bold mode, set .linestart to the printer’s bold sequence. Use .linestart with no arguments to turn this off.
.lineend n1 n2 ..
A sequence sent to the printer at the end of every line.
.margins n n
Sets the left and right margins for the header and footer only. Does not affect the normal page margin (which are set using
Ctrl O L and Ctrl O R ).
.newline n1 n2 ..
Sets the sequence to be sent to the printer to instruct it to performa a carriage return and linefeed. If this sequence is not set,
wprint sends a carriage return (ASCII code $0D) followed by a linefeed (ASCII code $0A).
.pageno n
Reset the default page number, so that page numbers can start again, or restart at an arbitrary number given by n.
.pagelength n
The physical page length, in lines, from page break to page break.
.pagepause
When this is set, wprint will prompt you to press a key at the end of each page, for manually feeding sheet paper to the printer.
3-12 Dr Doc
Printing
.pinclude filename.codes
The name (and pathname if appropriate) of the text file which contains the intructions on how to drive your particular printer.
Printer driver files provided by Applix usually have the extension .codes, however any name can in fact be used. There are
a number of sample printer driver files on the document editor disk, and it is easy to modify these for other printers.
.pushright n
Add spaces to the left of the text. Used to indent an entire paragraph or block of text. You can use this to correct the centring
of an entire document.
.prinit n1 n2 ..
Send a printer initialise sequence to the printer. This is used to set the printer up the way you require it. This is usually done
at the start of a document, but can actually be sent at any time within a document (it only takes effect when the printer gets to
that part of the document however).
The .prinit sequence can be anything that you like. It is part of a printer driver file, with the .codes extension. Normally it
will be a sequence of escape and control characters that will reset the printer, force it to go to the top of the next page, and set
the default printer typeface to the typeface you normally use.
You can use the .prinit command to set up the printer in any arbitrary fashion. If you make several differently named .codes
printer driver files for a single printer, you can set each up for a different purpose. For example, one could set up the printer
to print on aerograms in Near Letter Quality typeface for overseas letters. Another could print in condensed typeface on tractor
feed paper, with closer than normal line spacing, for program listings. You then put .pinclude aero.codes at the top of your
letters when you type them, and .pinclude prog.codes at the top of programs done using the document editor.
Printing
Dr Doc 3-13
.prdeinit n1 n2 ..
This is used to remove any special commands sent to the printer using .prinit. As before, any arbitrary set of escape and/or
control sequences can be used, so you can adapt it to any purpose you like. The .prdeinit command would normally be at the
end of your document.
.spacing n
Set the line spacing to n. Default is 1, double spacing is 2, and so on.
.sinclude
This is the equivalent of .pinclude, but is for the screen driver. The Applix 1616 emulates the Televideo 950 terminal, and
the document editor disk includes a printer command file, 1616.codes which provides the correct commands. This allows
bold, italics, underline, subscript and superscript on screen. It does not provide wide text, or user defined attributes (although
you could make these change, say, the colours on screen, if you added them to the 1616.codes file).
.subscript n1 n2 ..
Adds a sequence of escape and/or control characters intended to produce a subscript typeface from display and printer, in response
to a DrDoc ^V command.
.superscript n1 n2 ..
Adds a sequence of escape and/or control characters intended to produce a superscript typeface from display and printer, in response
to a DrDoc ^T command.
3-14 Dr Doc
Printing
.textstart n
The line number at which the body of the text should begin, counted from the top of form. Obviously, the header must appear
above this line.
.textend n
The line number at which the body of the text is to end, counted from the top of form. The footer must appear below this line.
.underline n1 n2 ..
Adds a sequence of escape and/or control characters intended to produce an underlined typeface from display and printer, in
response to a DrDoc ^S command.
.user1 n1 n2 ..
Adds a sequence of escape and/or control characters intended to produce a user selected typeface from display and printer, in
response to a DrDoc ^E command.
.user2 n1 n2 ..
Adds a sequence of escape and/or control characters intended to produce a user selected typeface from display and printer, in
response to a DrDoc ^Q command.
.user3 n1 n2 ..
Adds a sequence of escape and/or control characters intended to produce a user selected typeface from display and printer, in
response to a DrDoc ^R command.
Printing
Dr Doc 3-15
.wide n1 n2 ..
Adds a sequence of escape and/or control characters intended to produce a wide typeface from display and printer, in response
to a DrDoc ^W command.
.unbold
.unitalics
.unsubscript
.unsuperscript
.ununderline
.unuser1
.unuser2
.unuser3
.unwide
Obviously, these produce an escape and/or control code sequence that reverses the effect of a previous command. When setting
up these sequences in your printer driver file, try to actually reverse the effects of a previous command, rather than simply
return the printer to its default settings
wprint dot commands: a short form list
.;
.*
.bold
.cp
.eject
.fjust
.footer
.footerline
3-16 Dr Doc
Comment separator
Comment separator
Define printer bold sequence
Conditional page break
Go to top of next page
Set footer justifiation
Define footer text
Line at which to print footer
Printing
.formfeed
.hjust
.header
.headerline
.include
.italics
.margins
.newline
.pageno
.pagelength
.pagepause
.lineend
.linestart
.pinclude
.pushright
.prdeinit
.prinit
.sinclude
.spacing
.subscript
.superscript
.textstart
.textend
.unbold
.underline
.unitalics
.unsubscript
.unsuperscript
.ununderline
.unwide
Printing
Define printer formfeed sequence
Set header justification
Define header text
Line at which to print header
Include a file
Define printer italics sequence
Set margins for header/footer justification
Define printer newline sequence
Set the current page number
Define the page length
Pause after each page for paper change
Sequence to send at end of every line
Sequence to send at start of every line
Include a file if -p option given
Move whole document right
Sequence to send to printer at finish
Sequence to send to printer at start
Include a file if -s option given
Set the line spacing
Define printer subscript sequence
Define printer superscript sequence
Define line where printing starts
Define line where printing ends
Define printer bold termination sequence
Define printer underline sequence
Define printer italics termination sequence
Define printer subscript termination sequence
Define printer superscript termination sequence
Define printer underline termination sequence
Define printer wide termination sequence
Dr Doc 3-17
.unuser1
.unuser2
.unuser3
.user1
.user2
.user3
.wide
3-18 Dr Doc
Define printer user1 mode termination sequence
Define printer user2 mode termination sequence
Define printer user3 mode termination sequence
Define printer user1 sequence
Define printer user2 sequence
Define printer user3 sequence
Define printer wide sequence
Printing
4
Example files
Some examples of Dr Doc .dh and .codes files are listed below. These can easily be modified to conform to your own
preferences and printers. These files should generally be placed in a directory /usr/lib, and an assign used to ensure this
directory can be located on yout hard disk, floppy disk, or wherever you store these files. Use the full pathname
/usr/lib/doc.dh or /usr/lib/1616.codes in your documentation files. This will conform to common usage by others.
Common include files
This is the doc.dh file Andrew Morton used in some of his early documents on the Applix. It simply sets margins, pagelength,
positions of headers and footers on each page, and the justification of the headers and footers. It should be easy to work out
.margins
.pushright
.headerline
.textstart
.textend
.footerline
.pagelength
.hjust
.fjust
0
67
4
1
4
61
63
66
centre
role
Screen include file
This is Andrew’s .sinclude file /usr/lib/1616.codes for the Applix 1616 video drivers, basically emulating a Televideo
925 terminal. If, for example, you were going to view a wprinted file on a remote terminal, say via modem, you could provide
a different file to suit that terminal.
Example files
Dr Doc 4-1
.; Escape codes for the 1616 screen
.;
.; Bold mode
.bold
$1b ’G ’4
.unbold
$1b ’G ’0
.; Underline
.underline
$1b ’G ’8
.ununderline
$1b ’G ’0
.; Subscript
.subscript
$1b ’G ’1
.unsubscript
$1b ’G ’0
.; Superscript
.superscript
$1b ’G ’2
.unsuperscript
$1b ’G ’0
.; Italics
.italics
$1b ’G $40
.unitalics
$1b ’G ’0
Printer include files
These files are used to customise the wprint commands so that the correct control sequences are sent to your printer. As each
printer can be very different, allowing the user to customise a simple text file to suit themselves is better than trying to configure
the actual code to handle all printers.
The first file is Andrew’s version for the very common Epsom FX-80 dot matrix printer. Note that the file comments which
printer it suits; it is a real smart move to include copious comments.
.; Escape codes for my Epson FX-80+
.; Andrew Morton
.;
.; Reset the printer modes
.; reset it and turn off compressed chars
.; Disable paper out sensor
.prinit
$1b ’@ 18 $1b ’8 $1b ’E
4-2 Dr Doc
Example files
.;
.italics
$1b ’4
.unitalics
$1b ’5
.;
.underline
$1b ’- $01
.ununderline
$1b ’- $00
.;
.; Use emphasised mode for bold
.bold
$1b ’G
.unbold
$1b ’H
.;
.; Note that ESC-T resets super, sub and unidirectional,
.; but the printing formatter resets all modes
.; after clearing any, so it should go OK
.subscript
$1b ’S $01
.unsubscript
$1b ’T
.;
.superscript
$1b ’S $00
.unsuperscript
$1b ’T
.;
.; How to formfeed
.formfeed
12
.;
.; User 1 code: unidirectional print
.user1
$1b ’U
.unuser1
$1b ’T
A similar style of dot matrix printer is the Brother M1109. One common problem with recent dot matrix printers is that they
are ‘smart’, and attempt to do their own page breaks after 66 or so lines. This usually stuffs up your own format, so this action
must be disabled. Note that this file is basically a variation on the one above.
.; Escape codes for the Brother M1109 dot matrix printer in Mode 1
.; from Eric Lindsay
.;
.; Bold mode
.bold
$1b ’E
Example files
Dr Doc 4-3
.unbold
$1b ’F
.; Underline
.underline
$1b ’- $01
.ununderline
$1b ’- $00
.; Subscript
.subscript
$1b ’S $01
.unsubscript
$1b ’T
.; Superscript
.superscript
$1b ’S $00
.unsuperscript
$1b ’T
.; Italics
.italics
$1b ’4
.unitalics
$1b ’5
.; Initialise printer prior to printing
.; to disable auto form feeds, etc
.; page length 1, left margin 5
.prinit
$1b ’@ $1b ’C $01 $1b $6C $5
.; Form feed and reset printer
.prdeinit
$0c $1b ’@
.; Enlarged double width type mode
.wide
$0e
.unwide
$14
.; Condensed 17 cpi type mode
.user2
$0f
.unuser2
$12
.; Near Letter Quality
.user3
$1b ’x $01
.unuser3
$1b ’x $00
You can also readily cope with very strange printers, by ‘subverting’ unused attribute settings to control printer options. Here
is how to get an Integrex colour dot matrix printer to provide all 7 colours under your control.
.; Integrex CX-80 colour dot matrix printer
.; from Eric Lindsay
.;
.; Bold mode do in Reverse colour
4-4 Dr Doc
Example files
.bold
$1c
.unbold
$1d
.; Underline use Magenta colour
.underline
$5
.ununderline
$6
.; Print in red
.subscript
$1
.unsubscript
$6
.; Print in black
.superscript
$7
.unsuperscript $6
.; Italics
Yellow colour
.italics
$3
.unitalics
$6
.; Initialise printer prior to printing
.prinit
$1b ’0
.; Form feed and reset printer
.prdeinit
$0c $1b ’0
.; Enlarged double width type mode
.wide
$18
.unwide
$19
.; Print in red
.user1
$1
.unuser1
$6
.; Print in blue
.user2
$4
.unuser2
$6
.; Print in green
.user3
$2
.unuser3
$6
You don’t require an elaborate printer for these printer files to be of use. Here is an example of how to control a Brother daisy
wheel typewriter, set up as a printer.
Example files
Dr Doc 4-5
.; Brother CE60 style typewriter printer
.; from Eric Lindsay.
.; Note not all codes will work will all models
.;
.; Bold mode
.bold
$1b ’O
.unbold
$1b ’&
.; Underline
.underline
$1b ’E
.ununderline
$1b ’R
.; Subscript
.subscript
$1b ’U
.unsubscript
$1b ’D
.; Superscript
.superscript
$1b ’D
.unsuperscript
$1b ’U
.; Pica print pitch
.user1
$1b ’Q
.; Proportional print mode
.user3
$1b ’P
4-6 Dr Doc
Example files
Index
# previous file edit, 2-10
& background, 3-2
* or ; comment, 3-9
.bak files, 2-11
.pinclude files, 3-1
.sinclude files, 3-1
abandon without save ^KQ, 2-11
another file to edit ^KA, 2-10
append to file >, 2-11
appending files with >, 1-6
attribute, 2-8
Attribute display toggle ^OD, 2-7
attributes, 3-8
autoindent, 1-3
autoindent mode, 1-10
autoindent toggle ^OT, 2-8
; or * comment, 3-9
< character in text, 1-6
<CJ> centre justify, 1-5
<DM> document mode, 1-5
<IN> insert, 1-4
<ND> non-document mode, 1-5
<OS> overstrike, 1-4
<RJ> right justify, 1-5
<RR> ragged right margin, 1-5
> appending files, 1-6
> redirection, 3-2
> to append to file, 2-11
^] ctags search, 2-17
^P escape characters, 1-9
_ save indicator status line, 1-5
1616.codes, 3-2
1616/OS command ^KE, 2-10
1616/OS escape ^KI, 2-10
Dr Doc
background printing, 3-2
backspace ^H, 2-5
backup file, 2-11
backward ^S, 2-3
bak files, 2-11
Begin block ^KB, 2-6
begin printing -b, 3-1
block commands, editor, 2-6
block to disk ^KW, 2-10
bold, 3-9
bold mode ^PB, 2-8
bottom of screen ^QX, 2-3
Centre a line ^OC, 2-7
centre justify flag, 1-2
codes extension, 3-3
codes files, 1-1
comment ; or *, 3-9
common.dh, 3-3
conditional page break, 3-9
conditional page break .cp, 3-7
consonants, match only, 2-15
Applix
i
control characters in text, 1-9
control keys, using them, 2-2
Copy bloxk ^KC, 2-7
correct display with Esc, 2-4
cp conditional page break, 3-7
ctags support, 2-17
Ctrl P, 2-9
current line, 1-3
cursor, 1-3, 2-2
d extension, 3-3
date in header, 3-6
date included, 3-11
decimal numbers, match, 2-15
default settings, 1-7
default tab width 8 or 5, 1-7
Delete ^G, 2-5
Delete block ^KY, 2-6
delete line ^Y, 2-5
delete text, 2-5
delete word ^T, 2-5
dh extension, 3-3
disk write ^KD, 2-10
document mode, 1-6
document mode flag, 1-2
document mode toggle ^ON, 2-8
dot commands, 3-8
e, the document editor, 1-2
edit_index file in ctags, 2-17
edit previous file #, 2-10
editor, full screen, 1-2
editor commands, 2-1
eject page, 3-9
eject page break, 3-7
Dr Doc
End block ^KK, 2-6
end of line characters, 1-6
end of text, 3-15
end printing -e, 3-1
end without save ^KQ, 2-11
entering text, 1-8
escape from editor ^KI, 2-10
exit from edit, no save ^KQ, 2-11
exit from edit ^KX, 2-10
expanded text, 3-16
fields in status line, 1-4
file commands, editor, 2-10
file inclusion, 3-4
file read ^KR, 2-10
file saved indicator, 1-4
file sizes, 1-5
file to disk ^KD, 2-10
filename as header item, 3-6
find text ^QF, 2-13
first line, 3-15
first line ^QR, 2-3
first line settings, 1-7
fix display with Esc, 2-4
flags, 1-2
flags optional, 1-2
footer, 3-10
footer justify, 3-9
footerline, 3-7
footers and headers, 3-4
form feed, 3-11
format commands, 2-7
format dot controls, 3-8
forward ^D, 2-3
freeze display, 2-12
Applix
ii
freeze some lines ^KF, 2-12
global search ^QF, 2-13
goto a line ^QG, 2-11
goto a tag ^KT, 2-4
goto line number ^QG, 2-4
goto next paragraph ^OX, 2-8
grep, 2-14
hard newlines <, 1-8
header, 3-11
header justify, 3-10
header margins, 3-12
headerline, 3-6
headers and footers, 3-4
help screens, 2-2
heuristic for document mode, 1-7
high bit set characters, 1-6
hjust, 3-5
Hide a block ^KH, 2-7
include, 3-13
include date, 3-11
include files, 3-1
indent, 3-13
indent first line, 1-9
index tags, 2-17
initialise printer, 3-13
insert and overstrike, 1-9
insert or overstrike toggle ^OI, 2-7
invisible characters, 1-6
italics, 3-11
italics mode ^PY, 2-9
justification flags, 1-2
Dr Doc
justify mode, 1-3
justify toggle ^OJ, 2-8
justifying headers and footers, 3-5
keys, using control key, 2-2
last line, 3-15
last line ^QC, 2-3
left margin, 1-10
left margin ^OL, 2-8
length of page, 3-12
line locate, 2-11
line number to goto ^QG, 2-4
line spacing, 3-14
locate line number, 2-11
locate text ^QF, 2-13
lock some lines ^KF, 2-12
margin set, 1-3
margin settings not stored, 1-10
margins, 1-10
margins command in wprint, 3-5
margins for header, 3-12
marked block to disk ^KW, 2-10
marker, 2-12
marker in editor, 1-6
marker set ^K0, 2-12
match arbitrary pattern, 2-15
match newline ^N, 2-14
maximum line length, 1-5
mgr version, 2-16
mgr windows version, 1-2
MicroPro WordStar, 1-1
mkindex in ctags, 2-17
mouse support, 2-16
Applix
iii
Move block ^KV, 2-6
move to a marker ^Q0, 2-12
moving a single line ^QS ^QD, 2-3
moving to start of next line ^J, 2-3
multiple file edit, 1-3
multiple files, 1-3
next file to edit ^KA, 2-10
next paragraph ^OX, 2-3, 2-8
next replace ^N, 2-13
non-document mode, 1-6
non-document mode flag, 1-2
non-document mode toggle ^ON, 2-8
numbering pages, 3-11
on-screen attributes ^OD, 2-9
optional flags, 1-2
OS/1616 command ^KE, 2-10
OS/1616 escape ^KI, 2-10
overhanging first lines, 1-9
overstrike and insert, 1-9
overstrike or insert toggle ^OI, 2-7
overwrite mode, 1-9
page break, 3-9
page breaks in wprint, 3-7
page eject, 3-9
page length, 3-12
page number, 3-11
page number reset, 3-12
page numbers in headers, 3-6
pagelength, 3-7
pinclude, 3-2, 3-13
place a marker ^K0, 2-12
prdeinit, 3-14
Dr Doc
previous file edit #, 2-10
previous location ^QP, 2-4
previous paragraph ^OE, 2-3
prinit, 3-13
print flags, 3-1
print spooling, 3-2
printer command file, 3-14
printer control file, 3-2
printer control strings, 3-7
printer driver (codes) files, 1-2
printer include files, 3-1
printing, 3-1
pushright, 3-13
quit editor ^KQ, 2-11
quit from edit, no save ^KQ, 2-11
quit from edit ^KX, 2-10
quit from multiple file edit, 1-3
read a file ^KR, 2-10
read margins from line ^OM, 2-8
redirect output, 3-2
redraw display with Esc, 2-4
Reformat marked blocks ^KO, 2-7
reformat marked paragraphs ^KO, 2-8
reformat paragraph ^OO, 2-8
reformat text, 1-9
regular expresions, 2-14
remote use, 1-2
repeat search ^L, 2-13
replace, 2-13
replace after search, 2-13
replace next ^N, 2-13
replace text ^QA, 2-13
reset page number, 3-12
Applix
iv
right justify flag, 1-2
right margin, 1-10
right margin ^OR, 2-8
save indicator status line _, 1-5
screen editor, 1-2
scroll, 2-4
scroll down ^W, 2-5
scroll up ^Z, 2-5
search, editor, 2-13
search again ^L, 2-13
search and replace, 2-13
search and replace text ^QA, 2-13
search for text ^QF, 2-13
serial port used, 1-2
shell escape, 2-11
shell escape from editor ^KI, 2-10
shell file to invoke DrDoc, 1-8
shortform dot commands, 3-16
sinclude, 3-2, 3-14
single 1616/OS command ^KE, 2-10
soft characters, 1-7
spaces substituted for tabs, 1-7
spacing of lines, 3-14
split screen ^KF, 2-12
spooling print, 3-2
start of paragraph ^OE, 2-7
start of text, 3-15
starting the editor, 1-2
status line, 1-4
status line, turn off, 1-5
status line toggle ^KS, 2-12
subscript, 3-14
subscript mode ^PV, 2-9
substitute, in editor, 2-13
Dr Doc
substitute text ^QA, 2-13
superscript, 3-14
superscript mode ^PT, 2-9
switch file to edit ^KN, 2-10
tab key action, 1-7
tab settings, 1-3
tab width default 8 or 5, 1-7
TABSnn tabwidth, 1-8
tabwidth TABSnn, 1-8
tags in ctags, 2-17
tags in documents, 1-3
terminal use, 1-2
terminate without save ^KQ, 2-11
text delete, 2-5
text entry, 1-8
text reformat, 1-9
textend, 3-6, 3-15
textstart, 3-6, 3-15
time of day in header, 3-6
Toggle attribute display ^OD, 2-7
toggle document mode, 1-7
toggle status line, 1-5
toggle status line ^KS, 2-12
top of screen ^QE, 2-3
turn off status line, 1-5
un commands, 3-16
underline, 3-15
underline in status line, 1-4
underline mode ^PS, 2-9
undo buffers, 2-5
undo buffers ^QU, 2-5
undo commands in edit, 2-5
user attributes, 3-15
Applix
v
user code 1 ^PE, 2-9
user code 2 ^PQ, 2-9
user code 3 ^PR, 2-9
user sequences, 3-15
vertical formatting, 3-6
vowels, match only, 2-15
wide mode ^PW, 2-9
wide text, 3-16
windows version, 2-16
windows version for mgr, 1-2
word separation characters, 2-4
WordStar from MicroPro, 1-1
wprint.xrel, 3-1
wprint printer program, 1-1
Write block to disk ^KW, 2-7
write to disk ^KD, 2-10
Dr Doc
Applix
vi
Table of Contents
1The Document Editor .................................................................................................................... 1-1
Introduction .....................................................................................................................................................
Starting the document editor .........................................................................................................................
The cursor ..................................................................................................................................................
The status line ............................................................................................................................................
File sizes ....................................................................................................................................................
General operation ......................................................................................................................................
Document and non-document mode .........................................................................................................
First line override settings .........................................................................................................................
Entering text ....................................................................................................................................................
Insert and overstrike ..................................................................................................................................
Control characters in text ..........................................................................................................................
Text reformat .............................................................................................................................................
Autoindent mode .......................................................................................................................................
The left and right margins .........................................................................................................................
1-1
1-2
1-3
1-4
1-5
1-5
1-6
1-7
1-8
1-9
1-9
1-9
1-10
1-10
2Editing commands ......................................................................................................................... 2-1
Help screens .....................................................................................................................................................
Cursor movement commands ........................................................................................................................
Scrolling commands ........................................................................................................................................
Text deleting commands .................................................................................................................................
Undo commands ..............................................................................................................................................
Block commands .............................................................................................................................................
Format commands ..........................................................................................................................................
Attributes .........................................................................................................................................................
File commands .................................................................................................................................................
Miscellaneous commands ...............................................................................................................................
Applix
2-2
2-2
2-4
2-5
2-5
2-6
2-7
2-8
2-10
2-11
Dr Doc i
Search and replace ..........................................................................................................................................
Regular expression searches ..........................................................................................................................
Editor hints ......................................................................................................................................................
The MGR version of DrDoc ...........................................................................................................................
Index Tags .......................................................................................................................................................
2-13
2-14
2-15
2-16
2-17
3 Printing .......................................................................................................................................... 3-1
Usage of wprint ...............................................................................................................................................
Dot commands .................................................................................................................................................
File inclusion ....................................................................................................................................................
Headers and footers ........................................................................................................................................
Header justification ...................................................................................................................................
Special header sequences ..........................................................................................................................
Vertical formatting .........................................................................................................................................
Page breaks ................................................................................................................................................
Output device control strings .........................................................................................................................
Dot commands .................................................................................................................................................
.; .................................................................................................................................................................
.* ................................................................................................................................................................
.bold n1 n2 ... .............................................................................................................................................
.cp n ...........................................................................................................................................................
.eject ..........................................................................................................................................................
.fjust setting ...............................................................................................................................................
.hjust setting ..............................................................................................................................................
.footer n "string for footer" .......................................................................................................................
.formfeed n1 n2 .. ......................................................................................................................................
.header n "string for header" ....................................................................................................................
.italics n1 n2 .. ...........................................................................................................................................
.linestart n1 n2 .. ........................................................................................................................................
.lineend n1 n2 .. .........................................................................................................................................
Applix
3-1
3-2
3-3
3-4
3-5
3-6
3-6
3-7
3-7
3-8
3-9
3-9
3-9
3-9
3-9
3-9
3-10
3-10
3-11
3-11
3-11
3-12
3-12
Dr Doc ii
.margins n n ...............................................................................................................................................
.newline n1 n2 .. ........................................................................................................................................
.pageno n ...................................................................................................................................................
.pagelength n .............................................................................................................................................
.pagepause .................................................................................................................................................
.pinclude filename.codes ......................................................................................................................
.pushright n ................................................................................................................................................
.prinit n1 n2 .. ............................................................................................................................................
.prdeinit n1 n2 .. ........................................................................................................................................
.spacing n ...................................................................................................................................................
.sinclude .....................................................................................................................................................
.subscript n1 n2 .. ......................................................................................................................................
.superscript n1 n2 .. ...................................................................................................................................
.textstart n ..................................................................................................................................................
.textend n ...................................................................................................................................................
.underline n1 n2 .. ......................................................................................................................................
.user1 n1 n2 .. ............................................................................................................................................
.user2 n1 n2 .. ............................................................................................................................................
.user3 n1 n2 .. ............................................................................................................................................
.wide n1 n2 .. .............................................................................................................................................
.unbold .unitalics .unsubscript .unsuperscript .ununderline .unuser1 .unuser2 .unuser3 .unwide ............
wprint dot commands: a short form list .......................................................................................................
3-12
3-12
3-12
3-12
3-12
3-13
3-13
3-13
3-14
3-14
3-14
3-14
3-14
3-15
3-15
3-15
3-15
3-15
3-15
3-16
3-16
3-16
4 Example files ................................................................................................................................. 4-1
Common include files ..................................................................................................................................... 4-1
Screen include file ........................................................................................................................................... 4-1
Printer include files ......................................................................................................................................... 4-2
Applix
Dr Doc iii