1
Finish the Mortise & Tenon Joints
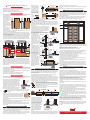
a) First, carefully “haunch” the tenons as shown in Figure 16. This step produces a stronger and more attractive joint and
conceals the tenon within the end of the stile. Cut the haunched tenon with a band saw, jig saw or handsaw.
b) For wide tenons such as those
in the bottom rails, divide the tenon
into two parts as shown in Figure
17. Using a band saw, jig saw or
coping saw, cut a 1-1/2" space
between the tenons.
c) Lay out and cut mortises in the
door stiles to accept the tenons.
The tenon should fit snugly into the
mortise. There are several ways to
cut mortises:
• The easiest method is to use a
mortiser or drill press mortising
Figure 16
Figure 17
attachment. Use a 5/8" hollow
chisel mortising bit for 1-3/4" exterior doors, or a 3/8" hollow chisel mortising bit for 1-3/8" doors. If your mortiser will not
accept 5/8" chisels, make multiple cuts with a smaller chisel.
• If you don’t have a mortiser or mortising machine, an alternative technique is to use a brad point bit or forstner bit (5/8"
diameter for exterior doors, 3/8" for interior doors) in a drill press to remove most of the stock for the mortise, and then use a
chisel to remove the remaining stock and to “square up” the mortise. Carefully center the brad point bit in the groove and drill
only about 1/16" deeper than required for the tenon.
• A third mortising technique combines the use of the drill press and brad point or forstner bits with Freud straight router bits
to finish, or “clean out”, the mortise. First, use a brad point or forstner bit (5/8" diameter for exterior doors, 3/8" for interior
doors) to remove most of the stock for the mortise. Drill the holes as close together as possible. Take care to be sure the
holes are perfectly centered in the groove of the stile. Next, build a simple mortising jig as shown below in Figure 18 and 19.
1/2” collet plunge router
Stop
Block
Stop Block to
control length
of mortise.
Stop Block to
control length
of mortise.
Add filler strip to guide
bit on back of stile.
First pass to clean mortise
–no more than 1" deep.
(use Freud # 12-116)
Full depth of mortise predrilled to 2-1/2" using
forstner or brand point bit.
Final pass to clean mortise.
Use Freud # 12-128 for
2-1/2" deep mortises.
Stile
Full depth of mortise predrilled to 2-1/2" using
forstner or brand point bit.
Stile
1-1/2” thick blocks, cut to match stile width, cut from 2x6 stock.
Figure 18
Figure 19
Clamp the stile securely between the sides of the jig. As shown in the illustration, you must create a “filler strip to serve as a
bit guide on one side of the jig. You also must attach stops to the top surface of the jig to control how far the router will rout
the mortise, as shown. Now, use Freud straight router bits to carefully remove the remaining stock in the mortise. As shown in
the illustration, the smooth portion of the shank of the bit will follow the inside of the groove and act as a guide for the router.
This may produce a slight burn on the inside surface of the stile groove, but this is concealed when the door is assembled.
Depending on the depth of your mortise, you will need to use two or more different bits to reach the full depth. Please see the
illustration for more details.
Assembling the Door, Sidelight and Transom
Installing Glass in the Door Unit
FENCE
Mill wooden glass stop. For best appearance, mill the stop from the same material used for the door. In many cases, you may
have enough scrap stock left when you rip your stiles and rails to finished width to make the glass stop.
Replace Slot Cutters with Spacers
Important: Use feather boards to
hold stock down and against fence.
®
R o u t e r Ta b l e
Figure 20
Note: For safety, rout the glass stop from material larger than the finished size of
the stop, then rip to finished size on the table saw, as shown in Figure 21.
RAIL or STILE
Figure 25
RAIL or STILE
Figure 26
Length of Muntins
b) Cut your muntins to length. Vertical muntins should be exactly the length of the distance between the shoulders of the
profiles routed on the top and bottom rails, as shown in Fig. 26. Horizontal muntins should be the length of the distance
between the shoulders of the profiles routed on the vertical stiles.
c) Lay out the spacing of the “lights” that you want the grill to form. The most common pattern for a 3'0" x 6'8" French door is
15 lights, but you can create a grill in any stile you desire. Mark the center of each joint on each vertical and horizontal piece.
d) Install the Muntin joint bit in the router. Adjust the height to match the height of the stile profile on your Set Up Block. If the
grill will go on the side of the door where you installed glazing tape, you will need to raise the bit higher to account for the
thickness of the tape.
e) First, rout a cope profile on the end of a scrap piece of muntin stock. Use your Set
Up Block to position the fence, as shown in Fig 27. Using your miter gauge with a
backerboard to prevent blowout, make a cut across a piece of scrap muntin stock.
Set Up
Check to be sure it matches the profile on the door’s styles and rails. Adjust the fence
Block
or bit height as needed, and make more test cuts until you get a perfect fit.
f) Rout the cope profile on both ends of each muntin.
Router Table
g) DO NOT CHANGE THE HEIGHT OF THE BIT. Remove the router table fence.
Make a simple jig to attach to your miter gauge to control the spacing of the
Figure 27
intersection joints, as shown in Fig.
Figure 28
28. The jig must include a backer
Backer
Stop
board to prevent blowout. Rout each
Board
intersection joint in the horizontal
Section A-A
Backer
muntins. Push the muntin across the
Horizontal Muntin
Miter
Board
bit, holding the muntin securely down
Muntin
Rout Face Side Up
Gauge
Miter
Joint Bit
on the table and against the
Stop
Gauge
backerboard. DO NOT pull the jig
and muntin back across the spinning
R outer Table
router bit! Allow the bit to stop before
A
A
returning the jig to the starting
position.
h) Now change to the straight bit to
rout the matching slots in the vertical
Figure 29
muntins. Using the miter gauge with
Backer
Spacer
a backerboard, carefully rout each
Board
slot as shown in Fig. 29. Make test
Vertical Muntin
Section A-A
Backer
cuts in scrap stock first to test the fit.
Rout Face Side Down
Miter
1/4"
Board
The jig shown in Fig. 30 will allow
Gauge
1/4"
Straight
Miter
you to produce an even spacing.
Straight
Bit
Spacer
Gauge
Bit
i) Assemble the grill using glue and
small spring clamps, and allow to dry.
R outer Table
j) The SDL grill may be attached in
A
A
two ways. For a permanent
installation, grills can be glued and
tacked in place with brads, using care
not to hit the glass with the brad. For
Position spacer to match layout of horizontal muntins.
removable grills, small spring clips can Spacer, sized to match
top bead of muntin
1/4"
be purchased from various suppliers.
profile. Attach spacer
Straight
Contact a local door and window
to backer board.
Bit
End View
supplier to locate clips. These clips
slip behind the glass trim and hold the
grill in place. For clip suppliers, please
R o u t e r Table
visit freudtools.com.
Be sure to read and follow all of the safety instructions included with your table saw. If you are uncertain
about safe procedures for ripping narrow pieces of molding, consult your saw supplier or manufacturer
before proceeding.
If you choose to build French Doors with true divided light grills, the procedures are very similar to milling and joining stiles
and rails. For best results, mill stock for the muntins at the same time that you mill stock for stiles and rails. Then rout tenons
and stile profiles while you rout the rails and stiles for your door. Routing all parts at the same time will save time, and
improve the accuracy of the joints.
a) Plan the muntin arrangement. The most common design for French doors is a “15 Light” design, which includes two
vertical and four horizontal muntins (see Fig. 1). You can alter this design in any way you choose.
b) Calculate muntin sizes and lengths. Muntins will be the same thickness as your stiles and rails: 1-3/4" for exterior doors or
1-3/8" for interior doors. Muntins for true divided light should be at least 1-1/2" wide, as shown in Fig. 31. Horizontal muntins
will be the same length as the door rails. Vertical muntins will be cut to fit between the horizontal muntins. The length of the
vertical muntins depends upon the width of your muntins and the spacing between them. For best results make a test joint
before cutting vertical muntins to length – this will help you make accurate calculations of the length of the vertical parts. Be
sure to allow for the length of the tenons when you cut vertical muntins!
c) Cut “blanks” for your muntins. These blanks will be the finished length of your muntins, but wide
Figure 31
enough to create several muntins. Using this technique makes it easier to rout your tenons accurately.
1-1/2" d) Rout long tenons on horizontal muntins as you rout the long tenons on your door rails, as shown in
the section titled “Making the Rail End Cuts” on the other side of this poster. Tenons on horizontal muntis
1/2"
will be the same length as the tenons on the door rails.
e) Rout tenons on your vertical muntins using the same procedure, but these tenons will not need to be as long. As shown in
Fig. 32, the tenons should meet in the center of the horizontal muntins.
Vertical Muntin
RAIL
Tenons on vertical muntins meet
in center of horizontal muntins
Vertical Muntin
Vertical Muntin
Special Section 1: Building Grills for Simulated Divided Lite Doors
If you purchased a set containing Freud’s unique Muntin Joint Bit and a 12-100 1/4" diameter straight bit, you have all the bits
you need to make beautiful French-style simulated divided light (SDL) grills. If you have a 3 Piece Full Light French Door set,
you can easily obtain the muntin joint and straight bits from your Freud dealer.
a) First, mill the stock for your muntins. To get perfect intersection joints in your grills, you need to mill this stock to precisely
the same width as the diameter of the Muntin Joint Bit, as shown in Fig. 23. The thickness of your muntins is determined by
the distance from the surface of the glass to the surface of the door’s stiles and rails, as shown in Fig. 24.
Figure 32
Horizontal Muntins
Horizontal Muntins
f) Rout the stile profile on the edge of each of your
1/2" thick spacer on outfeed
muntin blanks. Use the technique described in the
side of fence supports muntin.
section entitled “Routing Profiles on Stiles and
Rails.” Then rip off the routed edge to the finished
width of the muntin. Carefully rout the stile profile
Figure 33
on the other edge of the muntin. As shown in Fig.
33, you must attach a 1/4" thick spacer to the
outfeed fence of your router table to reduce the
R o u t e r Ta b l e
Router Table
chance of the muntin tipping. Note: you must use
a pusher stick to feed the workpiece, and
featherboards to hold stock against the fence and
Notes:
down against the router table. Continue to rout
1 - Use push stick to feed stock. Keep hands clear!
one edge of the blank, rip the muntin to width,
2 - Use featherboards (not shown) to hold muntin
then rout the other edge, until all muntins are
down on table and against fence
completed.
g) Lay out and cut mortises, using the same mortise procedure you use for the stile and rail joints. You will cut mortises in the
stiles and rails to match the layout of your muntins. You also will cut mortises through the horizontal muntins to accept the tenons
of the vertical muntins. See the section entitled “Finishing the Mortise and Tenon Joints” for more information on mortising.
OUTFEED FENCE
d) Carefully fit the wooden glass stop in the opening, mitering the corners of each piece. Install the glass stop using finish
nails or screws. Be sure to predrill the stop, and use great care to avoid hitting the glass with the fasteners or your drill,
screwdriver or hammer.
Elements of the Door Frame
Figure 34
Header
Hinge Jamb
/ Mullion
Sill/Threshold
a) Sill or threshold: This is the horizontal element that forms the base of a door frame. This is usually found only on exterior
door units. Interior door frames are usually open at the base, allowing the flooring material to go through the opening. The sill
or threshold on exterior doors provides a seal to prevent air and moisture from coming under the door, and is angled to shed
water away.
b) Header: This is the horizontal element that forms the top of the door frame.
c) Sides, or “Hinge Jamb” and “Strike Jamb”: Vertical elements that form the sides of the door frame.
d) Mullion or Mull Post: Vertical element that stands between the door panel and the sidelights.
Door frame parts are commonly available at lumberyards and home centers. If you have trouble finding suitable door frame
parts locally, refer to the supplier list at freudtools.com. Note: If you are building a frame for an exterior door, be sure to
purchase frame parts that include weatherstripping, or add weatherstripping yourself after installation.
• Assemble the frame first on a flat surface, then install your door frame securely in the wall opening. A poorly constructed or
installed door frame will affect the appearance and function of your new door panel.
• For interior doors, nails can be used to assemble the frame and attach it to wall framing.
• For exterior doors, stainless steel or galvanized screws are the preferred fasteners.
• When installing exterior door frames, put a generous amount of caulking under the threshold or sill in continuous beads to
prevent water from seeping between the sill and subfloor or slab.
• Be sure that all vertical elements are perfectly “plumb,” or vertical, all horizontal elements are level, and all corners of the
frame are square.
• Because “rough” door openings in walls are commonly a little larger than the finished size of the door frame, there may be
space between the door frame and the wall framing. Be sure to fill this space with wooden shim shingles at all fastener
locations. Be especially careful to shim solidly at the locations of hinges and locks, as these points are most prone to failure.
• Consult your building department for complete requirements for door framing, required fastening systems, insulation, wind
resistance and other local regulations.
Installing, or “hanging” a door panel in an existing frame: If you are replacing a door panel in an existing door frame, you may
be able to use the hinges that are already in place. Follow these steps:
Special Section 2: Building True Divided Lite Doors
INFEED FENCE
Note: Wear safety glasses and protective gloves when handling glass. If you are unfamiliar with handling glass, consult your
glass supplier for complete information on proper safety procedures before proceeding.
Note: Before building or installing a new door frame, contact your local building department to ask about applicable local
codes. The instructions that follow are only intended to illustrate the key aspects of door frame construction. Your local
building codes may have special requirements, particularly in areas that are prone to severe weather.
Special Section 4: Installing Door Hinges & Hardware
Glazing Tape
b) As shown in Figure 22, apply 1/16" or 3/32" thick glazing tape to the face of the glass rabbet.
Apply the tape on all four sides of the opening, and fit the tape carefully to avoid gaps. Apply
sealant to the joints between the sections of tape. Refer to the instructions that came with the
tape for recommended sealants and complete installation instructions, or check with the tape
Figure 22
supplier for more details.
c) Carefully place the glass in the opening against the glazing tape. Follow the tape manufacturer’s recommendations
carefully to ensure a good seal!
If you are simply replacing the door panel or even the sidelights and transom of an existing door unit, you may be able to use
the door frame that already is in place. Check the door frame carefully for any signs of rot or other damage. If it is in good
condition, you need only build your new door panel and other parts to fit. If you need to construct a new door frame, refer to
the following instructions and illustrations:
a) Remove the existing hinges and any other protruding hardware from the door frame.
b) Carefully fit your new door panel into the opening. Many existing door frames may be slightly out of plumb, or the header
may be out of level, due to normal shifting and settling of the building. Slowly and carefully plane, cut or sand the edges of
the door panel until it matches the shape of the frame. The door should slip easily into the opening, but it should not be loose.
c) With the door standing in the frame and pressed snugly against the hinge side and the header, mark the locations of the
existing hinge mortises.
d) Cut mortises for your hinges in the edge of your door panel so the surface of the hinge is flush with the surface of the door
or frame. You can cut hinge mortises with a sharp chisel, but a faster method is to use a hinge mortising jig with your router
and a Freud router bit. Freud has a selection of mortising bits to work with all common jigs.
e) Reinstall the hinges on the door jamb. Install the hinges in your door panel. (Be sure to predrill the holes!)
f) Carefully align the two matching leaves, or “butts” of each hinge and install the hinge pins. Start with the top hinge and
work downward.
g) If necessary, mark and trim the latch side of the door so it closes easily with a gap of not more than 3/32" between the
door panel and jamb.
Installing a door panel in a new frame: If you are hanging a door in a new door frame, follow these steps: For doors up to 6'8"
tall, you will need to use three hinges. Taller doors should be hung on at least four hinges. For exterior doors, 4" hinges are
recommended. 3-1/2" hinges are acceptable for most interior doors. “Butt” style hinges with loose pins are easily found at any
lumberyard, home center or hardware store in a variety of sizes and finishes.
a) Carefully fit your new door panel into the opening. If both your door panel and door frame are perfectly square and
correctly dimensioned, this should not be difficult, but slight corrections are not unusual. Slowly and gradually plane, cut or
sand the edges of the door panel until it matches the shape of the frame.
b) With the door standing in the frame and pressed snugly against the hinge jamb and the header, mark the locations of the
hinges on both the frame and the door panel. Hinges should be placed so the top edge of the upper hinge is 5" to 7" from the
top of the door, the bottom edge of the bottom hinge should be 7" to 9" from the bottom of the door, and one or more hinges
should be evenly spaced in between.
c) Cut mortises for your hinges in the edge of your door panel and door frame, so the surface of the hinge is flush with the
surface of the door or frame. You can cut mortises with a chisel, but a faster method is to use a hinge mortising jig with your
router and a Freud router bit. Freud has a selection of mortising bits to work with all common jigs.
d) Install the hinges in the door jamb and in your door panel. (Be sure to predrill the holes!) Carefully align the two matching
leaves, or “butts” of each hinge and install the hinge pins. Start with the top hinge and work downward.
e) If necessary, mark and trim the latch side of the door so it closes easily with a gap of not more than 3/32".
Installing a lockset: When you purchase a lockset it should include detailed installation instructions, as well as templates to
lay out hole locations. Hole sizes and patterns vary for different manufacturers and lock styles, so follow the instructions with
care. If instructions were not included with the lockset you purchased, return it or contact the manufacturer before
proceeding.
®
Figure 21
Length of Muntins
Figure 30
a) Be sure to dry fit all parts of each element of the door unit before applying any glue. Be certain that all joints will close
completely, and that the door will be flat and square when assembled. Plan your clamping procedure in advance, and be sure
you have enough clamps on hand to secure all joints.
b) Carefully apply glue to the tenons, the ends of all rails, and the matching locations on the stiles. With the door panels in
place, assemble the entire door and clamp all joints.
c) Allow the glue to cure at least 24 hours, or longer if recommended by the glue manufacturer.
d) Remove all clamps and carefully sand both sides of the door, sidelights and transom.
a) We suggest that you use the stile bit from your French Door Set to mill the
glass stop. For safety, remove the three slot cutters from the stile bit, and replace
them with the spacers that were included with your set. Retighten the nut
securely. Begin with a piece of stock at least 9/16" thick and wide enough to
safely handle in routing and sawing operations. Rout the stile profile carefully,
using featherboards to control the workpiece, and observing all of the safety
procedures in those instructions. If your stock is wide enough, rout both edges to
produce two pieces of glass stop as shown in Figure 20.
Special Section 3: Building & Installing the Door Frame, or “Jamb”
®
Bit shank acts as guide
Stock for Muntins
Muntins
®
1/2” collet plunge router
Groove router with
Muntin joint bit.
Muntins
FENCE
Tip 1: Before routing, mark which edges of each part should be routed to help avoid mistakes.
1-1/8"
h) Carefully “dry fit” all muntin parts along with your stiles and rails to check the fit.
i) Once your fit is correct, assemble all door parts as suggested in the section entitled “Assembling the Door, Sidelights and
Transom.”
j) Install multiple glass lights using procedure described in the section entitled “Installing Glass in the Door Unit.”
®
Making the stile or profile cuts.
• With the good side of the rails and stiles facing down, rout the stile profile on one edge of each rail and stile part. Use two
passes to make these cuts, just as you did when routing your test piece.
Thickness of muntins should match distance
from glass to face of stiles and rails.
Figure 24
Figure 23
®
Routing Profiles on Stiles & Rails...continued.
Tip: To make a simple gauge to
check the width of your muntins, use
the muntin joint bit to rout a groove in
a piece of scrap stock, as shown in
Fig. 25. As you plane or cut your
muntins to the proper thickness, use
this gauge to check for accuracy. The
stock for the muntins should slip
snugly into the groove in your gauge.
®
! WARNING!: Read all safety warnings on the other side of this poster before proceeding.
To find out more about Freud products or to order a catalog visit: www.freudtools.com
Freud America, Inc. 1-800-472-7307 (U.S.) 1-905-670-1025 (Canada)
©2007 Freud America, Inc. No portion of this piece may be reprinted without the written consent of Freud America, Inc. The color Red on router bits and saw blades is a US Registered Trademark of Freud America, Inc.