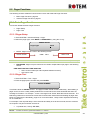
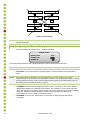
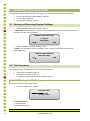
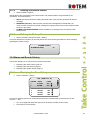
1
Communicator User & Installation Manual P/N: 110048 WARRANTY & LIMITATION OF LIABILITY 1. ROTEM warrants that the product shall be free of defects in materials or workmanship and will conform to the technical specification for a period of 1 (one) year from the date of initial installation on site (the "warranty period"). 2. Load cells are not covered by ROTEM’s warranty. 3. ROTEM warrants that during said warranty period, any item/items or part/parts of equipment found defective with respect to materials or workmanship or which do not conform to the technical specification shall be repaired or replaced (at ROTEM's sole discretion), free of charge. 4. During the warranty period, in the event of an alleged defect, authorized resellers in relevant regions should be notified as soon as possible from the date of noticing the said defect, but no longer than thirty (30) days from such a discovery. The report shall include (1) a short description of the defects noticed (2) type of card / component and its matching serial number. 5. ROTEM's sole liability under this warranty is the repair or replacement of the defective item of product. Conditions and Limitations 1. ROTEM will not be responsible for any labor costs or expenses associated with replacement of defective items or other parts of the product or repair. 2. This warranty shall not cover: (i) product or part therein which has been modified (without prior written approval of ROTEM), or (ii) product or part therein which has not handled or installed by an authorized reseller of ROTEM or (iii) product or part therein which has either been handled or installed not in strict accordance with ROTEM's instructions, (iv) products which were used for a function other than the agriculture industry. 3. This warranty will not apply in the following cases: (i) if all components of the product are not originally supplied by ROTEM (ii) the defect is the result of an act of nature, lighting strikes, electrical power surge or interruption of electricity (iii) the defect is the result of accident, misuse, abuse, alteration, neglect, improper or unauthorized maintenance or repair. ROTEM warns and alerts all users that the Product is inherently complex and may not be completely free of errors. ROTEM's products are designed and manufactured to provide reliable operation. Strict tests and quality control procedures are applied to every product. However, the possibility that something may fail beyond our control exists. Since these products are designed to operate climate control and other systems in confined livestock environments, where failure may cause severe damage, the user should provide adequate backup and alarm systems. These are to operate critical systems even in case of a ROTEM system failure. Neglecting to provide such a backup will be regarded as the user’s willingness to accept the risk of loss, injury and financial damage. In no event will ROTEM be liable to a user or any third party for any direct, indirect, special, consequential or incidental damages, including but not limited to any damage or injury to business earnings, lost profits or goodwill, personal injury, costs of delay, any failure of delivery, costs of lost or damaged data or documentation, lost or damaged products or goods, lost sales, lost orders, lost income. Except for the above express warranty, ROTEM makes no other warranties, express or implied, relating to the products. ROTEM disclaims and excludes the implied warranties of merchantability and fitness for a particular purpose. No person is authorized to make any other warranty or representation concerning the performance of the products other than as provided by ROTEM. Software Version: 3.04 Document Version: 2.6 ATTENTION! The Communicator is the central communication center and provides critical alarm warnings. THEREFORE IT IS CRITICAL THAT YOU CARRY OUT THE FOLLOWING MAINTENANCE CHECKS ACCORDING TO THE RECOMMENDED SCHEDULE: 1. Daily (minimum weekly) alarm tests. Refer to Setting the Test Schedule, page 12. 2. Monthly battery (minimum between flock) test. a) Disconnect power to Communicator b) Ensure Communicator transmits SMS and voice alarms. c) Wait one hour, and confirm that Communicator continues to transmit alarms. d) Restore power to Communicator. 3. Test the Alarm Backup Batteries monthly (refer to page 41). WARNING! Communicator does not support pre-paid SIM cards. Use a regular card only! CAUTION Use an exclusive phone line for the Communicator! NOTE: Sometimes using a phone line via private switchboard might interfere with communication. Rotem recommends using a different line to the Communicator. CAUTION As a backup to the Communicator, Rotem recommends installing an Emergency Light and Siren system. If the Communicator is unable to transmit alarms via SMS or the telephone (for example there is a complete power failure), the Emergency Light and Siren system sounds an alarm. TABLE OF CONTENTS 1 Front Matter .................................................................................................... 7 1.1 1.2 1.3 1.4 2 Precautions ..................................................................................................... 8 2.1 2.2 3 Introduction .......................................................................................................... 7 Conventions ......................................................................................................... 7 Contact Information .............................................................................................. 7 Document Information .......................................................................................... 7 Grounding ............................................................................................................ 8 Checking the Battery Level ................................................................................... 8 Introduction to the Rotem Communicator ................................................... 9 3.1 Main Features ....................................................................................................... 9 3.2 What’s New in Version 3.04 ................................................................................... 9 3.3 User Interface ..................................................................................................... 10 3.3.1 Front Panel .............................................................................................. 10 3.3.2 Menu Tree................................................................................................ 11 4 Initial Configuration ..................................................................................... 12 4.1 Communication Recommendations ..................................................................... 12 4.2 Setting the Test Schedule ................................................................................... 13 4.3 Setting the Language .......................................................................................... 13 4.4 Setting the Farm Site Name ................................................................................. 13 4.5 Indentifying the Controllers ................................................................................. 14 4.6 Setting the Time & Date ...................................................................................... 14 4.7 Adding Names to the Address Book .................................................................... 14 4.7.1 Phone Number Structure ............................................................................ 15 4.8 Setting the Password .......................................................................................... 15 5 Communicator to User Functions............................................................... 16 5.1 Voice Functions .................................................................................................. 16 5.1.1 Basic Voice Functions................................................................................ 16 5.1.2 Advanced Voice Functions ......................................................................... 18 5.1.3 Responding to an Audio Alarm Message ...................................................... 19 5.2 Pager Functions ................................................................................................. 20 5.2.1 Basic Pager Functions ............................................................................... 20 5.2.2 Advanced Pager Functions ......................................................................... 21 5.3 Text Functions.................................................................................................... 21 5.3.1 Basic Text Functions ................................................................................. 21 5.3.2 Advanced Text Functions ........................................................................... 23 5.3.3 Text Message Responses .......................................................................... 23 5.4 Common Functions ............................................................................................ 24 5.4.1 Selecting the CDMA Operator ..................................................................... 24 5.4.2 Technician Tools ....................................................................................... 25 6 Communicator to Controller Functions ..................................................... 26 6.1 Network Connection Configuration ..................................................................... 26 6.1.1 Routing Methods ....................................................................................... 26 6.1.2 Configuring the Channel Settings ................................................................ 27 Displaying the Controllers........................................................................... 28 6.1.3 6.1.4 Listing the Network Devices ....................................................................... 28 6.2 RS-232 Connection ............................................................................................. 29 6.2.1 Setting up the RS-232 Connection .............................................................. 29 6.2.2 RS-232 Approximate Distances and Baud Rate ............................................ 30 6.3 RS-485 Connection ............................................................................................. 30 6.3.1 Setting up the RS-485 Connection .............................................................. 30 6.3.2 RS-485 Approximate Distances & Baud Rates .............................................. 31 6.4 RF Connection .................................................................................................... 31 6.4.1 Option A with Platinum RF (RCLP-RF)......................................................... 31 6.4.2 Option B with Platinum RF Remote ............................................................. 32 6.5 Channel/Signal Tests .......................................................................................... 32 6.5.1 Testing the RS-232/485 Channel ................................................................ 32 6.5.2 Testing the Radio RF Signal ....................................................................... 32 7 Communicator to PC Configuration ........................................................... 33 7.1 7.2 Defining the Communication Speed with the Local PC ......................................... 33 Configuring the Data Connection ........................................................................ 33 8 Configuring the Dry Contact Card .............................................................. 34 9 Communicator Functions ............................................................................ 35 9.1 Saving and Restoring System Settings ................................................................ 35 9.2 Test Functions.................................................................................................... 35 9.2.1 3535Testing the CPU Battery ..................................................................... 35 9.2.2 Viewing Device Status ............................................................................... 36 9.2.3 Viewing the Software and Hardware Version ................................................ 36 9.3 Viewing Relay Settings ....................................................................................... 36 10 Alarms ........................................................................................................... 37 10.1 Introduction to Alarms and Responses ............................................................... 37 10.2 Event Codes ....................................................................................................... 38 10.3 Advanced Alarm Settings.................................................................................... 38 10.3.1 Reseting the Alarms .................................................................................. 38 10.3.2 Disabling Alarms ....................................................................................... 39 10.3.3 Defining the Message Delay ....................................................................... 39 10.3.4 Defining the Message Repeat Parameter ..................................................... 39 10.3.5 Defining the Internal Alarms ....................................................................... 40 10.3.6 Defining the Battery Alarm .......................................................................... 40 10.4 Alarm and Events History ................................................................................... 40 10.4.1 Displaying the Alarm History ....................................................................... 40 10.4.2 Displaying the User Events ......................................................................... 41 10.4.3 Displaying the System Events ..................................................................... 41 10.5 Testing the Alarm Backup Batteries .................................................................... 41 10.5.1 Dial-Up Test ............................................................................................. 42 10.5.2 Voltage Test ............................................................................................. 43 11 Installation .................................................................................................... 44 11.1 Hardware Installation .......................................................................................... 44 11.1.1 Preliminary Steps ...................................................................................... 44 Connecting the Unit to External Components ................................................ 46 11.1.2 11.1.3 Additional Details ...................................................................................... 47 11.1.4 USB Driver Installation ............................................................................... 47 11.2 Completing the Installation ................................................................................. 48 11.2.1 Configuring the Communication to Outside Devices ...................................... 48 11.2.2 Setting Up an Internet Connection ............................................................... 48 11.2.3 Setting Up a Network Using RotemNet ........................................................ 50 12 Troubleshooting ........................................................................................... 52 12.1 12.2 12.3 12.4 12.5 12.6 12.7 Hardware ............................................................................................................ 52 Communication to Controllers/PC ....................................................................... 52 Cellular Modem................................................................................................... 54 RF Communication ............................................................................................. 55 Voice Card .......................................................................................................... 56 Alarm ................................................................................................................. 57 Line Modem ........................................................................................................ 57 13 Specifications ............................................................................................... 58 14 Parts Catalog ................................................................................................ 59 14.1 14.2 14.3 14.4 Standard Components ........................................................................................ 59 Additional Components ...................................................................................... 60 Ordering Information .......................................................................................... 61 Compatibility Issues with the Communicator CPU ............................................... 64 15 Appendix A: Replacing Communication Cards and Modems .................. 65 15.1 15.2 15.3 15.4 Replacing the RS-232 Card ................................................................................. 65 Replacing the RS-485 Card ................................................................................. 66 Replacing the RF-Card ........................................................................................ 67 Installing a CDMA, GSM-S, or GSM-W Card ......................................................... 68 16 Appendix B: Pager Codes ........................................................................... 69 1 FRONT MATTER This section includes information on the manual and general information. 1.1 Introduction Rotem manuals provide easy-to-use information regarding the installation, operation, long/short term planning and parts listing (this manual may not deal with all of the above subjects). The table of contents is an outline of the relevant information in this manual. Read this manual before operating your Rotem product. Using this equipment for any other purpose or in a way not within the operating recommendations specified in this manual will void the warranty and may cause personal injury. If you have any questions or comments regarding your product please contact your local Rotem dealer. 1.2 Conventions NOTE: Notes provide important details regarding specific procedures. CAUTION Cautions alert you to potential damage to the controller if the procedures are not followed carefully. WARNING! Warnings alert you to potentially hazardous situations which, if not avoided could result in death or personal injury. 1.3 Contact Information Rotem Control and Management Email: [email protected] URL: www.rotem.com 1.4 Document Information Revision History Revision Level / Date Section Affected Description 2.1 Board 3.1 added 2.3 / July 2011 Hardware Installation 4.3.1.2/ 4.3.1.3/ 4.1.15/ 4.3.2.2/ 12.3 9/ 13 / 15.3/ 16 2.4 / May 2012 2.5 July 2012 2.6 / Jan 2013 10.5 Appendix B 2.2 Cellular dial out test/ Status reports/ SMS ringtones, Installation summary provided Added support information, updated troubleshooting, added compatibility issues, added appendix Formatting Formatting, battery test Added pager codes © 2011 Rotem Corp. All rights reserved. Document Number: 110048 Revision Number: 2.6 No part of this publication may be reproduced, stored in an automated data file or made public in any form or by any means, whether electronic, mechanical, by photocopying, recording or in any other manner without prior written permission of the publisher. Rotem will not accept responsibility for damage resulting from the use of this manual. Rotem also reserves the right to make changes and improvements to its products and/or the associated documentation without prior notice. 7 Communicator | 3.04 2 PRECAUTIONS Observe the following precautions when using your unit. • Grounding • Checking the Battery Level 2.1 Grounding CAUTION Always connect temperature and sensor shields to earth ground. Avoid mixing high voltage wiring with sensor and low voltage wiring. CAUTION Keep the controller as far as possible from heavy contactor boxes and other sources of electrical interference. CAUTION Do not connect communication wire shields, which go from one house to another at both ends. Connect them at one end only. Connection at both ends can cause ground loop currents to flow, which reduce reliability. CAUTION The COM connection for communications is not the shield wire. The COM, RX and TX wires must connect to each other at all controllers. 2.2 Checking the Battery Level 21B CAUTION Check the battery once a year. The output must be 2.7 volts (minimum). Authorized personnel only must replace the battery if the output is below the minimum required level or every five years. Communicator | 3.04 8 3 INTRODUCTION TO THE ROTEM COMMUNICATOR ROTEM Communicator, Version 3.04 is a state-of-the-art alarm and communication center used by famers to monitor and control their Rotem Controllers and accessories. The Communicator has a user friendly interface with an alfa-numeric keypad, 20 character by 4 line LCD and indicative LED. • Main Features, page 9 • What’s New in Version 3.04, page 9 • User Interface, page 10 3.1 Main Features • Supports connectivity of several contacts simultaneously on various communication devices (such as dial-up, internet, GSM, USB). • Voice Solution Plug-in: supports incoming and outgoing phone calls for alarms and status reports. Voice messages can be edited according to personal preference. • Remote access via dial-up connection • Send and receive functional text messages (CDMA/GSM networks) • Pager support • 8 digital inputs • 3 dry contact, output relays 5 Amp • Battery backup 3.2 What’s New in Version 3.04 • SMS ringtones: To ensure that you don’t miss alarm messages, enable this option. It causes your cell phone to play a ringtone when an alarm is sent. Refer to Configuring an SMS Ringtone, page 23. • Status reports: You can receive reports on conditions in the house and animal statistics via SMS (refer to Status Report, page 22 ) or via a phone (refer to Receiving a Status Report, 17). • Cellular dial out test: Ensure that the text and ringtone functions function as required. Refer to Testing the SMS Ringtone, page 21. In addition, Communicator now sends: • an acknowledgment that commands sent via SMS were performed • confirmation of alarm reset Refer to Introduction to Alarms and Responses, page 37, which explains the alarm distribution process. 9 Communicator | 3.04 3.3 User Interface The following sections detail how to access and use the Communicator user interface. • Front Panel, page 10 • Menu Tree, page 11 3.3.1 Front Panel LED Function PC Com 1 TD/RD PC is transmitting/receiving data to/from the Communicator Modem Com 2 TD/RD Modem is transmitting and receiving data Modem Com 2 DTR/DCD Data transmitter ready/Data carrier detect (technician only) Cellular Com 3 TD/RD Cellular modem is transmitting and receiving data Controller Transmit Data Receive Data Controller relays are transmitting and receiving data Output 1 Output 2 Non-functional Communicator | 3.04 10 3.3.2 Menu Tree 1. FARM NAME 2. ADDRESS BOOK MY FARM 3. STATUS REPORT 3. CONTROLLERS 4. PASSWORD 5. TIME & DATE 1. RESET ALARM 2. TEST SCHEDULE 3. DISABLED ALARMS 4. OPTIONS HISTORY 1. ALARM 1. BATTERY SIGNAL STRENGTH 2. USER EVENTS 2. GSM/CDMA SEND TEXT MSG 3. SYSTEM EVENTS 3. RADIO RF SIGNAL DIAL OUT 4. HARDWARE PROFILE 1. TEST 5. WIRED RS232/485 6. NETWORK LIST 2. DIGITAL INPUT 7. VOICE 8. PAGER 3. RELAY SYSTEM 9. DIAL OUT 4. SAVE/RES SETTING 5. LANGUAGE 1. RESTORE 2. SAVE 1. VOICE 2. RF/WIRED NETWORK 3. BATTERY 6. ADVANCED SETUP 7. TECHNICIAN TOOLS 4. INTERNET 5. COM/USB 6. LINE MODEM 7. GSM/CDMA 8. PAGER 11 Communicator | 3.04 4 INITIAL CONFIGURATION This section describes how to configure the Communicator’s initial settings. • Communication Recommendations, page 12 • Setting the Test Schedule, page 13 • Setting the Language, page 13 • Setting the Farm Site Name, page 13 • Indentifying the Controllers, page 14 • Setting the Time & Date, page 14 • Adding Names to the Address Book, page 14 • Setting the Password, page 15 CAUTION Many of these settings are critical in ensuring the safety and well-being of your stock. These settings must be made as soon as Communicator is installed. Refer to Installation, page 44 for complete installation instructions. Refer to the sections listed below for information on other functions: • Communicator to User Functions, page 16 • Communicator to Controller Functions, page 26 • Communicator to PC Configuration, page 33 • Configuring the Dry Contact Card, page 34 • Communicator Functions, page 35 • Alarms, page 37 NOTE: Before installing a SIM card, disable the PIN code (if the card has this code). Communicator text functions are disabled if the SIM card has a PIN code. 4.1 Communication Recommendations Rotem strongly recommends: • enabling both the telephony and SMS functions to transmit alarms (via voice and SMS) • enabling SMS alarm acknowledgment • employing a secondary alarm system to act as a backup to Communicator's primary monitoring and alarm system WARNING! BECAUSE OF LIMITATIONS BUILT INTO SMS DELIVERY SYSTEMS, THERE MAY BE DELAYS IN THE ACTUAL SMS DELIVERY TIME. BY DEFAULT A REMINDER SMS IS TRANSMITTED AFTER TWO MINUTES. IF THE MESSAGE DELIVERY IS DELAYED FOR ANY REASON, INCLUDING DELAYS CAUSED BY THE INFRASTRUCTURE, A REMINDER SMS IS SENT. THEREFORE INCREASING THE DELAY TIME FOR A REMINDER PLACES YOUR LIVESTOCK AT RISK. Communicator | 3.04 12 4.2 Setting the Test Schedule 1. Select ALARM > Test Schedule. 2. Configure the parameters. ALARM TEST FREQUENCY AT DAY DAILY 12:00 SUN o FREQUENCY: Daily, weekly, disabled o AT: Time of day to perform the alarm test o DAY: Define the day of the week to perform the alarm test (this is required only when FREQUENCY=WEEKLY) WARNING! ROTEM STRONGLY RECOMMENDS REGULAR TESTING OF THE ALARMS., DO NOT DISABLE THIS TEST UNLESS THE HOUSE IS EMPTY! 4.3 Setting the Language 1. Select SYSTEM > Language. 2. Configure the parameters. LANGUAGE LANGUAGE REGION ENGLISH US o LANGUAGE: Select the required language for the user interface. o REGION: Select the site location. CAUTION Select the correct region! The modem functions correctly only when the correct region is selected! 4.4 Setting the Farm Site Name • Select MY FARM > Farm /Site Name. FARM/SITE NAME NAME: NUMBER: Define the site’s name and reference number. PC network software employs these parameters when sending an alarm. In case several Communicators are present, this will help in identifying each one separately. NOTE: 13 Be sure that each Communicator has a unique name and number. Communicator | 3.04 4.5 Indentifying the Controllers 1.Select MY FARM > Controllers. 2. Identify controllers that are present within the network. CONTROLLERS PRIMARY UNITS SECONDARY FOUND-PRIM 0 1 0 Sec 0 • PRIMARY UNITS: Select the number of master controllers the site contains (for example Platinum/AC-2000) • SECONDARY UNITS: Select the number of slave controllers the site contains (for example PigGuard) • FOUND-PRIMARY/SECONDARY: Displays the number of controllers the Communicator was able to locate (read-only) 4.6 Setting the Time & Date 1. Select MY FARM > Time & Date. 2. Adjust the time and date in this menu. TIME&DATE CLOCK: DATE: 12:18 07-FEB-10 • CLOCK: hh:mm: (24 hour format; for example 2:15 PM = 14:15) • DATE: dd-mmm-yy: (for example 14-JAN-10) 4.7 Adding Names to the Address Book • Select MY FARM > Address Book. ADDRESS BOOK ===========USER-2========= NAME John Smith VOICE 9,555555 TEXT PAGER Msg By FROM TO 9005555554 9,555555,,, idle 00:00 0:00 The address book contains the contact information of up eight users. Communicator contacts these users in the event of an alarm. Priority of contacts is defined by the user number (1-16). Top priority contacts should be entered into the address book first. CAUTION Rotem strongly recommends entering contact information immediately. Contact list fields: • NAME: Enter the contact name using the keypad. • VOICE: Enter the phone number for receiving the VOICE CALL service (refer to Setting the Communicator | 3.04 14 Voice , page 16 and Testing the Voice Call Service, page 17 for advanced settings and testing). • MOBILE NUMBER: Enter the mobile number for the text message service. • PAGER: Enter the pager phone number. Refer to Pager Setup, page 20 for options and testing. In addition, refer to Configuring the Dial Delay, page 21. NOTE: When entering the above numbers, refer to Phone Number Structure, page 15. • MSG BY: Define which services the contact receives (Idle, Voice, Text, Voice+Text, Pager). • FROM/TO: Time frame for receiving messages/calls (Default – FROM: 0:00; TO: 00:00 – time frame is 24 hours, meaning always receiving messages). • LANGUAGE: Select the language in which SMS messages are written: English, Turkish, Russian, Spanish, Thai or Hebrew. NOTE: Distribution of the alarm messages is according to the address book list, contact by contact. Each user receives all forms of communication that are selected (Msg. By option) before continuing to the next user. The first user does NOT have a "FROM" or "TO" field to ensure there is always someone that receives the notification from Communicator. 4.7.1 Phone Number Structure When entering the voice, mobile and pager numbers the phone number structure is: • 9 (outside line, if needed), # # # # # # #,, The commas are the dial delay. Refer to Configuring the Dial Delay, page 21. NOTE: To enter a comma, press and hold the “1” button. 4.8 Setting the Password 1. Select MY FARM > Password. 2. Define a password and confirm it (to disable, type “0”). SECURITY TYPE NEW PASSWORD: If selected, a password is required for: • Locally: Using the menu items • Remotely: Acknowledge/disabling of alarms via phone NOTE: 15 If a password is defined, the Communicator locks the system when idle for five minutes or if you press “9” from the main menu. Communicator | 3.04 5 COMMUNICATOR TO USER FUNCTIONS The following sections detail how to use the: • Voice, page 16 • Pager, page 20 • Text, page 21 • Common Functions, page 24 5.1 Voice Functions The following sections detail Communicator’s basic and advanced Voice functions. • Basic Voice Functions, page 16 • Advanced Voice Functions, page 18 • Responding to an Audio Alarm Message, page 19 5.1.1 Basic Voice Functions This section details the basic Voice functions. • Setting the Voice Parameters, page 16 • Testing Voice Quality, page 16 • Testing the Voice Call Service, page 17 • Testing the Cellular Signal Strength, page 17 • Receiving a Status Report, page 17 5.1.1.1 Setting the Voice Parameters 1. Select SYSTEM > Advanced Setup > Voice. VOICE SETTING VOLUME SPEED SPEAKER 2. Define the speech VOLUME and SPEAKER volume and it’s SPEED (if using a TTS voice card). 3. Scroll down to TEST and press ENTER to hear the selected settings. 5.1.1.2 Testing Voice Quality 1. Select SYSTEM > Test > Voice. 2. Define speech VOLUME and SPEED. 3. To test, press ENTER. VOICE SETTING VOLUME SPEED NOTE: Voice Setting and Test Voice perform the same functions. Communicator | 3.04 16 5.1.1.3 Testing the Voice Call Service This menu tests the VOICE CALL service. 1. Select SYSTEM > Test > Dial Out. 2. Enter the required phone number to receive the “Test Call”. 3. Press ENTER. ENTER NUMBER 5.1.1.4 Testing the Cellular Signal Strength • Select SYSTEM > Test > GSM/CDMA. 23415 RED WIRELESS <Ber=…> -51 dBm This screen displays the cellular service provider’s Received Signal Strength Indicator. This screen displays the cellular service provider’s number, name, BER (Bit Error Rate (if available)), the reception bar graph as well as the measured signal reading. NOTE: Signal strength must be between -113 dBm to -51 dBm. 5.1.1.5 Receiving a Status Report You can receive a status report over the phone. Refer to Status Report, page 21 for details on the function. To hear the status report: 1. Call the Communicator phone number. 2. When prompted, select Status report. 17 Communicator | 3.04 5.1.2 Advanced Voice Functions This section details Communicator’s advanced Voice functions. CAUTION Rotem recommends that only trained, authorized technicians configure these functions. • Configuring the Telephone Modem, page 18 • Defining when Communicator Answers Incoming Calls, page 18 5.1.2.1 Configuring the Telephone Modem • Select SYSTEM > Advanced Setup > Line Modem. LINE MODEM AUTO ANSWER LINE TEST DIAL DELAY ( , ) 4 YES 2 INPUT GAIN VOICE DIAL-IN 70 YES This screen defines the line modem specifications. • AUTO ANSWER: Number of rings before the Communicator automatically answers a dialed-in call. For example: if set to 4 the Communicator answers a call after four rings. • LINE TEST: Monitors the phone line and activates an alarm in case of disconnection. Default: YES. • INPUT GAIN: For factory use only. If your Communicator is unable to connect your voice dial in phone line, consult your local dealer regarding this feature. • VOICE DIAL-IN: This option enables the user to call in at any time and receive information from the communicator regarding alarms. To receive the information in voice mode only: 1. Call the controller, wait for one ring less than the AUTO ANSWER set parameter number and hang up. 2. Wait at least five seconds (but no longer than 60 seconds) and then call again. Follow the instructions given by the controller. • If the AUTO ANSWER parameter is set to zero (0), then the Communicator answers in voice mode. • If the AUTO ANSWER parameter is set to zero and the VOICE DIAL IN parameter is set to YES, the controller answers in voice mode every time. 5.1.2.2 Defining when Communicator Answers Incoming Calls 1. Select SYSTEM > Advanced Setup > GSM/CDMA. 2. In Auto Answer, define the number of rings until the Communicator answers through the cellular modem. CELLULAR MODEM TEXT FROM Auto Answer Operator Addr. Book 2 STD Communicator | 3.04 18 5.1.3 Responding to an Audio Alarm Message The Voice Dial Out service transmits audio alarm message, via telephony, from Communicator to the contacts entered in the Address Book (page 14). This section details the procedure to follow when an audio alarm is received. NOTE: This service is provided by the Communicator ONLY if the Address book is properly defined with contacts and the "VOICE" service selected per contact. CAUTION Communicator only broadcasts its alarm message AFTER someone speaks into the phone. Any word or sound is sufficient. The following illustrates the sequence of ALARM messages: "Good <Morning / Afternoon / Evening> farm <#> active alarm. Please, press 1 to listen." 1 "House <#> has <#> alarm message<s>." • • Alarm messages for the first house are played and then the following options are available: 1 Acknowledge Replay house message 9 Play next house message 0 End call Enter password (if acknowledging for the first time this call) and press . • "Please wait… Reset for house <#> successful. <Next Message / Goodbye>." • Right after "Please wait" is heard, press to access the ALARM OPTIONS MENU. "Entering alarm options for House <#>" • System reports alarm and then offers the following options: NOTE: • NOTE: 19 Disable 0 Return to house messages 1 Replay alarm message 9 Next alarm message Disabling alarms disables them until 12:00 PM the following day. "Disable <confirmed / failed>!" message is repeated and returns to House Alarm Messages If at any time an incorrect key is pressed or if nothing is pressed, the system repeats itself three times and then ends the call. Communicator | 3.04 5.2 Pager Functions The following sections detail the Communicator’s basic and advanced Pager functions. • Basic Pager Functions, page 20 • Advanced Pager Functions, page 21 5.2.1 Basic Pager Functions This section details the basic Pager functions. • Pager Setup • Pager Test 5.2.1.1 Pager Setup 1. Select SYSTEM > Advanced Setup > Pager. 2. Define the pager type, either BASIC or ENHANCED by using the +/- key. PAGER SETUP Pager Type • BASIC: Pages are per house in the following format: House number NOTE: basic 005* 124 Alarm code If a house has more than one alarm active, then the multiple alarms code is sent (code: 255). • ENHANCED: Pages are per house and can contain multiple alarms per page in the following format: HHH*AAA*AAA*AAA**HHH*AAA*AAA o HHH: House number (two stars separate between houses) o AAA: Alarm code 5.2.1.2 Pager Test 1. Select SYSTEM > Test > Pager. 2. Enter the pager phone number and press ENTER. ENTER NUMBER This feature tests the PAGER service. The pager number should include a dial delay. When dialing a pager service, there is usually a delay between the moment when the call is answered and when the message is recorded. For example: “Leave a message for Mr. Smith” takes about three seconds. The Dial Delay parameter is the amount of time that Communicator waits before transmitting its pager alert. Refer to Configuring the Dial Delay, page 21 for more information. Delay is also required when dialing for an outside line. For example: If the required delay is three seconds and delay is set to two seconds, then two commas are required. The phone number structure is: • NOTE: 9 (outside line, if need), ###-####,, To enter a comma, press and hold the “1” button. Communicator | 3.04 20 5.2.2 Advanced Pager Functions The following section details the advanced Pager functions. 5.2.2.1 Configuring the Dial Delay • Select SYSTEM > Advanced Setup > Line Modem. When dialing a pager service, some services require additional tone menu browsing (interactive voice response). Use this feature to set a delay between the phone number and the tone browsing. Each “,”represents the number of seconds in delay between the phone number and the next browsing number. Refer to Pager Test, page 20 for more information. 5.3 Text Functions The following sections detail the Communicator basic and advanced Text functions. • Basic Text Functions, page 21 • Advanced Text Functions, page 23 • Text Message Responses, page 23 5.3.1 Basic Text Functions The following sections detail the basic Text functions. • Testing the Text Function, page 21 • Testing the SMS Ringtone, page 21 • Status Report, page 22 5.3.1.1 Testing the Text Function This menu enables testing the text function. 1. Select SYSTEM > TEST > GSM/CDMA > SEND TEXT MSG. TEST TEXT MSG Destination Number: Ch i 2. Enter in the required mobile phone number to receive the “Test Text” and press ENTER. 3. Confirm that the mobile phone received the following text message: “Your Communicator is ready to send alerts via text messages.” 5.3.1.2 Testing the SMS Ringtone This menu tests the SMS ringtone service. 1. Select SYSTEM > Test > Dial Out. 2. Enter the required phone number to receive the “Test Call”. 3. Press ENTER. ENTER NUMBER 21 Communicator | 3.04 5.3.1.3 Status Report Upon a user request, Communicator sends a status report on basic house functions and animal statistics. The report includes the following specifications: • Target Temp • Average Temp • Vent Level • Vent Mode (minimum ventilation, natural, tunnel) • Humidity • Weight (current average animal weight) • Pressure (static pressure) • Water Control (daily water consumption) • Feed Count (daily feed consumption) • Mortality By default, the report only includes Target Temp, Average Temp, Vent Level and Humidity. NOTE: Platinum Controllers, Version 3.0 and higher, support this function. To select the parameters: 1. Select SYSTEM > Advanced Setup > GSM/CDMA. 2. Use the +/- key to select the required parameter. 3. Press Enter to select/deselect the parameter. 4. Press Save. The parameters are configured. To receive a status report: • Receiving the Report for One House ?SX > 'Send SMS' to the Communicator cell phone number. ? = Start of message S = Status report X = Represents house number (can be any positive number from 1 - 64) • Receiving the Report for Several Houses ?SX#X#X > 'Send SMS' to the Communicator cell phone number ? = Start of message S = Status report X = Represents house number (can be any positive number from 1-64) # = Sign separates between every house number Communicator | 3.04 22 5.3.2 Advanced Text Functions The following sections detail the advanced Text functions. • Defining Who Can Text Communicator • Configuring an SMS Ringtone 5.3.2.1 Defining Who Can Text Communicator 1. Select SYSTEM > Advanced Setup > GSM/CDMA. CELLULAR MODEM TEXT FROM TEXT PRECALL PRECALL TIME Auto Answer Operator Addr. Book Yes/No 5 2 STD This menu defines which cell phones can send messages to the Communicator via text. 2. In the Text From field, choose: NOTE: o Addr. Book (only those addresses which are text enabled) or o Any (enables sending text via any cell phone). Acknowledgement messages are only sent when Addr. Book is selected. 5.3.2.2 Configuring an SMS Ringtone If desired, a ringtone can play when an SMS message from Communicator arrives, thereby alerting you of an upcoming message. 1. Select SYSTEM > Advanced Setup > GSM/CDMA. 2. In the Text Precall field, select Yes. 3. In the Precall time, enter the time (in seconds). This parameter ensures that there is sufficient time for the phone to ring before the SMS tone plays. 5.3.3 Text Message Responses This section details how to respond to a text message sent from Communicator to a mobile phone. The response can reset a siren, an alarm, or acknowledge the messages. Event Codes, page 38 lists the events corresponding to the codes sent in a text message. • Resetting the Siren, page 23 • Resetting the Alarm, page 24 • Acknowledging a Message, page 24 5.3.3.1 Resetting the Siren NOTE: After typing the text message, press the 'Send' button to send it to the Communicator. In the procedures below, the highlighted text shows the SMS text to be sent. • Resetting the Siren of One House !RX > 'Send SMS' to the Communicator cell phone number. ! = Start of message 23 Communicator | 3.04 R = Reset X = Represents house number (can be any positive number from 1-64) • Resetting the Siren of Several Houses !RX#X#X > 'Send SMS' to the Communicator cell phone number ! = Start of message R = Reset X = Represents house number (can be any positive number from 1-64) # = Sign separates between every house number • Resetting the Siren for All Houses !RALL > 'Send' to the Communicator cell phone number ! = Start of message R = Reset ALL = Can be typed both in capital letters or small letters. 5.3.3.2 Resetting the Alarm To reset all the alarms, send the following text message: !C > 'Send' to the Communicator cell phone number ! = Start of message C = Communicator 5.3.3.3 Acknowledging a Message If Message Repeat is enabled (refer to page 39), Communicator continues to send alarms until an acknowledgement is sent. • Requesting a Response for Every Sent Text Message !AON > 'Send' to the Communicator cell phone number ! = Start of message A = Acknowledgement • Canceling a Response for Every Sent Text Message !AOFF > 'Send' to the Communicator cell phone number ! = Start of message A = Acknowledgement. 5.4 Common Functions The following sections detail functions which are common to all Communicator to User tasks. • Selecting the CDMA Operator, page 24 • Technician Tools, page 25 5.4.1 Selecting the CDMA Operator • Select SYSTEM > Advanced Setup > GSM/CDMA The OPERATOR menu enables a user to choose to choose one of the following operators: NOTE: o STD (standard) o Sprint o Verizon This menu only appears if a cellular modem (CDMA) is present. Communicator | 3.04 24 5.4.2 Technician Tools • Select SYSTEM > Technician Tools. TECHNICAL TOOLS TEST HYPER TERMINAL MONITOR 4 YES 2 This menu provides testing tools used by an authorized technician only. • Test • Hyper Terminal • Monitor 5.4.2.1 Test • PHONE LINE: Measures the line voltage. • INTERNET: (TBD). • RELAYS: Toggle Relays 1, 2 and Alarm relay status by pressing ENTER. • DIGITAL INPUT: Displays the status of the eight digital inputs. • MEMORY: Performs EEPROM test by pressing the MENU key. • KEYBOARD: Tests the functionality of each key. Test keys by pressing them and verifying visually that the right key is displayed on the screen. 5.4.2.2 Hyper Terminal This is a dedicated function for system integrators ONLY! 5.4.2.3 Monitor TBD 25 Communicator | 3.04 6 COMMUNICATOR TO CONTROLLER FUNCTIONS The following sections detail how to configure the connections between Communicator and the controllers (local communication). • Network Connection Configuration, page 26 • RS-232 Connection, page 29 • RS-485 Connection, page 30 • RF Connection, page 31 • Channel/Signal Tests, page 32 6.1 Network Connection Configuration The following sections detail how to configure the baud rate and communication between the Communicator (master) and its subunits (slaves). Communication can be via RS-232, RS-485, or RF . • Routing Methods, page 26 • Configuring the Channel Settings, page 27 • Displaying the Controllers, page 28 • Listing the Network Devices, page 28 6.1.1 Routing Methods There are two common routing methods for running the communications connections; Daisy Chain (recommended) and Star connection (not recommended). Figure 1: Daisy Chain Figure 2: Daisy and Star Combination Communicator | 3.04 26 Figure 3: Star Routing NOTE: Employing a Rotem RS-232 or RS-485 Repeater enables star routing. Refer to the relevant manuals for details. 6.1.2 Configuring the Channel Settings • Select SYSTEM > Advanced Setup > RF/Wired Network. SERIAL PORT BAUD RATE CHAN(6-7-8) ADDR(4-5) 9600 This menu defines data rate and settings between the Communicator and its subunits. NOTE: • 27 This menu does not define the data rates to the PC. Baud Rate: For communication to operate properly, set all controllers to the same Baud Rate. NOTE: Set the Baud Rate to 9600 BPS. Incorrect definitions can result in alarms for missing controllers and communication from unidentified controllers. For detailed information on setting the RS-232/485 baud rate, refer to RS-232 Approximate Distances and Baud Rate, page 30 and Setting up the RS-485 Connection, page 31. • CHANNEL: Sets the module’s hopping channel number. A channel is one of three layers of addressing available to the XStream radio modem. For modules to communicate with each other, they must have the same channel number since each network uses a different hopping sequence. Different channels should be used to prevent modules from listening to transmissions from one another in the same network. • ADDRESS: For future use: make sure it is in the OFF position (both squares remain unshaded). Communicator | 3.04 6.1.3 Displaying the Controllers • Press 0 01 17 33 49 01 16 32 48 64 16 This screen displays all the controllers that are connected to the system. - Represents a recognized controller - No controller is recognized NOTE: The letter 'F' indicates that communication to that house has been lost. The 'F' continues to appear until the unit is reset (disconnect and reconnect the power). 6.1.4 Listing the Network Devices • Select SYSTEM > Test > Network List. NETWORK LIST PRIMARY FOUND: SECONDARY FOUND: SCAN NETWORK? 0 0 NO • PRIMARY FOUND: Displays the number of primary units found in the network. • SECONDARY FOUND: Displays the number of secondary units found in the network. • SCAN NETWORK?: Use +/- key to select YES or NO and then press ENTER to scan the network to find/remove primary or secondary units. Communicator | 3.04 28 6.2 RS-232 Connection The following sections detail how to set up an RS-232 connection between the Communicator and the controllers. • Setting up the RS-232 Connection, page 29 • RS-232 Approximate Distances and Baud Rate, page 30 6.2.1 Setting up the RS-232 Connection Figure 4: Connecting the External Connection Box to Rotem's Controllers via RS-232 Cards NOTE: The cards shown are controller cards. • The cable between the external connection box and the controllers should be a 3 Wire Shielded Cable (22 AWG minimum). • This cable is daisy-chained to all controllers and to the communication line of the external connection box in the following manner: • The Black wire (COMMON) is connected to the COMMON in the communication terminal of the controller. • The Red wire, TX in the connection box, is connected to RX in the Controller. • The Green wire, RX in the connection box, is connected to TX in the Controller. • The shield should be connected to the earth (Safety Ground). CAUTION Connect the shield (safety ground) only on one side! 29 Communicator | 3.04 6.2.2 RS-232 Approximate Distances and Baud Rate • • For one controller: o ~2000 meters (~6500 feet): 9600 Baud o ~2500 meters (~8200 feet): 4800 Baud o ~3000 meters (~9800 feet): 2400 Baud For 10 controllers: o NOTE: ~1200 meter (~4000 feet): 9600 Baud o ~1800 meter (~6000 feet): 4800 Baud o ~2400 meter (~7870 feet): 2400 Baud Baud rate depends on cable length and on the number of controllers. 6.3 RS-485 Connection The following sections detail how to set up an RS-485 connection between the Communicator and the controllers. • Setting up the RS-485 Connection, page 30 • RS-485 Approximate Distances & Baud Rates, page 31 6.3.1 Setting up the RS-485 Connection Figure 5: Connecting the External Connection box to ROTEM'S Controllers via RS-485 Cards NOTE: The cards shown are controller cards. Communicator | 3.04 30 • The cable between the external connection box and the controllers should be a 2-wire shielded cable. • This cable is daisy-chained to all controllers and to exrternal connection box: o Connect the shield to the COM terminal of the controller on one side and leave unconnected on the other side. o Red wire to terminal A of the controller and terminal A of the external connection box. o Green wire to terminal B of the controller and terminal B of the external connection box. 6.3.2 RS-485 Approximate Distances & Baud Rates • • For one controller: o ~2000 meters (~6500 feet): 9600 Baud o ~2500 meters (~8200 feet): 4800 Baud o ~3000 meters (~9800 feet): 2400 Baud For 10 controllers: o NOTE: ~1200 meter (~4000 feet): 9600 Baud o ~1800 meter (~6000 feet): 4800 Baud o ~2400 meter (~7870 feet): 2400 Baud Baud rate is dependent on cable length and number of controllers. 6.4 RF Connection The following sections detail how to set up an RF connection to the controllers. • Option A with Platinum RF (RCLP-RF), page 31 • Option B with Platinum RF Remote, page 32 6.4.1 Option A with Platinum RF (RCLP-RF) 31 Communicator | 3.04 6.4.2 Option B with Platinum RF Remote 6.5 Channel/Signal Tests The following sections detail how to test the controller communication channels. • Testing the RS-232/485 Channel • Testing the Radio RF Signal 6.5.1 Testing the RS-232/485 Channel • Select SYSTEM > Test > Wired 232/485. COMMUNICATION SET UNIT NUMBER: < 1> GO, STOP USING ENTER. Tx Rx This menu tests the RS-232/485 communication channel. Enter the required unit number and press ENTER to start and stop the test. The screen displays a shaded box in the Tx when transmitting and a shaded box by the Rx when receiving (when functioning properly the shading switches back and forth between the two boxes). NOTE: If the checkbox remains blank, check all connections between the Communicator and the controller. 6.5.2 Testing the Radio RF Signal • Select SYSTEM > Test > Radio RF Signal. RF TEST SET UNIT NUMBER: 1 This menu tests the RF communication channel. Enter the required unit number and press ENTER. The screen displays the reception bar graph as well as the measured signal reading once available (testing is continuous until exiting this menu). Refer to RF Connection, page 31 for information on configuring the RF network. Communicator | 3.04 32 7 COMMUNICATOR TO PC CONFIGURATION The following sections detail the communication between the Communicator and the PC. • Defining the Communication Speed with the Local PC • Configuring the Data Connection 7.1 Defining the Communication Speed with the Local PC • Select SYSTEM > Advanced Setup > COM/USB. COM/USB BAUD RATE 9600 This screen defines the communication speed (BAUD RATE) corresponding with the local PC. 7.2 Configuring the Data Connection • Select SYSTEM > Advanced Setup > Line Modem > Advanced. DATA CONNECTION MODULATION COMPRESSION DATA FLOW AUTO ENABLE 2 The Communicator can compress data and send it faster. Use this screen to increase the transfer rate between the Communicator and a remote modem. • MODULATION: Auto or V34 transmission. During connect negotiation at which the modems have determined which modulation and rate will be used, meaning before any error. • COMPRESSION: Enables or disables data compression performed by the modem, also known as hardware compression. It reduces the amount of time required to transfer data. Make sure the modem you are connected to can read and decompress the received data. • DATA FLOW: This feature enables the hardware to vary the data transmission rate. CAUTION Rotem recommends that the user leave the Advanced menu items at their default settings. 33 Communicator | 3.04 8 CONFIGURING THE DRY CONTACT CARD The following section details how to set up the dry contact cards. Communicator supports an eight dry contact digital input card that can be programmed as a normally open / close dry contact input. These inputs can be connected to a wide variety of sensors such as generator operation, magnetic door or window, thermostat, etc. 1. Select SYSTEM > Digital Input. DIGITAL INPUT # MESSAGE 1 door opened 2 [N] 1 0 2.Use the alphanumeric keypad to enter in the message and press ENTER. 3. Define [N] as 1 or 0 The '[N]' column's two possibilities: • 0: Represents the open contact (Normally Open). If there is a change from the usual state (closed state), an alarm occurs. • 1: Represents closed contact (Normally Closed). If there is a change from the usual state (opened state), an alarm occurs. The figure above serves as an example of a digital input program. The programmed line No. 1 is set as normally closed for the house door. The message for this program is “door opened”. If the door opens, the dry contact is disconnected and changes from 1 to 0. This change triggers the alarm and the message “door opened” is sent to all addresses programmed in the Adding Names to the Address Book (page 14). Communicator | 3.04 34 9 COMMUNICATOR FUNCTIONS The following sections detail functions which relate to the Communicator hardware and software. • Saving and Restoring System Settings, page 35 • Test Functions, page 35 • Viewing Relay Settings, page 36 9.1 Saving and Restoring System Settings • Select SYSTEM > Save/Res Setting > Restore. 1. RESTORE: Use this feature to restore all settings that were previously saved (restore point is the date of the last save performed). MEMORY RESTORE POINT 21-FEB-10 CONTINUE? NO YES • Select SYSTEM > Save/Res Setting > Save. 2. SAVE: Use this feature to save all settings (once a SAVE is performed, this is the new RESTORE point). CREATE A NEW MEMORY RESTORE POINT NO YES 9.2 Test Functions The following section details how to test Communicator functions. • Testing the CPU Battery, page 35 • Viewing Device Status, page 36 • Viewing the Software and Hardware Version, page 36 9.2.1 3535Testing the CPU Battery 94B This section details the CPU battery test. • Select SYSTEM > Test > Battery. BATTERY TEST - + 100% Charger active To test the battery: 1. Unplug the unit. 2. View the battery test. CAUTION In addtion to this test, refer to Testing the Alarm Backup Batteries, page 41. 35 Communicator | 3.04 9.2.2 Viewing Device Status • Select SYSTEM > Test > Hardware Profile. HARDWARE PROFILE 1 VOICE 2 LINE MODEM 3 CELLULAR OK OK OK View functionality status of all possible installed devices. 9.2.3 Viewing the Software and Hardware Version • Press ? http://www.rotem.com SOFTWARE 3.00r01-b HARDWARE 2.04 U1 1.00 This screen displays the software and hardware version numbers. 9.3 Viewing Relay Settings RELAYS SETTING CODE RLY1 RLY2 TIME (s) 0 0 • Select SYSTEM > Relay. TBD Communicator | 3.04 36 10 ALARMS This section details how to: • Configure advanced alarm settings. • View the history of alarms and events Basic Alarm functions are defined in the Initial Configuration, page 12. • Introduction to Alarms and Responses, page 37 • Event Codes, page 38 • Advanced Alarm Settings, page 38 • Alarm and Events History, page 40 10.1 Introduction to Alarms and Responses Figure 6 illustrates the alarm sequence. The flow ends when an alarm is acknowledged or is no longer active. Alarm Generated In House Call Out Delay Send an SMS Message to Contact 1 (if enabled) Send an SMS Message to Last Contact (if enabled) Send a Phone Message to Last Contact (if enabled) Send a Phone Message to Contact 1 (if enabled) Delay Between Contacts Yes Response from User No Reminder Delay Figure 6: Alarm Flow Chart Responding to alarms can be done over: • Land line: Via verbal and interactive messaging • Cellular: Via text messaging NOTE: 37 Communicator does not support verbal and interactive messaging via cell phones. Communicator | 3.04 End 10.2 Event Codes Table 1 lists the event codes sent in text messages. Table 1: Event Codes Event Code LCD Message 1 "power off " 2 "power on" 3 "cold start" 4 "error-01" 5 "test running" 6, 7 , 9, 10, 11, 12, 16, 17 "fail" 8, 13 "no answer " 14 "page sent " 18 "text sent " 19, 20 "ack alarm " 21 "disable alarm " 22, 23, 24 "low signal" 10.3 Advanced Alarm Settings The following sections detail the advanced alarm functions. Basic alarms are set up in the Initial Configuration. • Reseting the Alarms, page 38 • Disabling Alarms, page 39 • Defining the Message Delay, page 39 • Defining the Message Repeat Parameter, page 39 • Defining the Internal Alarms, page 40 • Defining the Internal Alarms, page 40 • Defining the Battery Alarm, page 40 10.3.1 • Reseting the Alarms Select ALARM > Reset. SELECT UNIT (+/- KEY) TO RESET PRESS ENTER UNIT = ↵ This menu resets the alarms of any controller that exists within the network. The Communicator’s unit number is 0. Use the +/- key to navigate to the required unit number. Communicator | 3.04 38 10.3.2 • Disabling Alarms Select ALARM > Disabled Alarms DISABLE ALARMS DISABLE ALARMS HOUSE DISABLE CODE MESSAGE 23 YES 185 25 YES 155 View disabled alarms and re-enable these alarms. NOTE: : Alarms are disabled until 12:00 PM the following day. • Scroll right to view message. • Press +/- to re-enable the alarm and then press ENTER. NOTE: Alarms that are re-enabled are cleared from the list. 10.3.3 • Defining the Message Delay 9B Select ALARM > Options. OPTIONS ==MESSAGE DELAY=== Call Out (s) Between Users (s) 60 60 TEXT ==MESSAGE REPEAT== Voice 20 Pager 35 Text 35 ===INTERNAL ALARM=== Delay(s) 60 Reminder (m) 60 P R t M NO This menu defines the waiting times between an alarm event and its reporting. • CALL-OUT (seconds): Define the waiting time before the communicator begins the reporting sequence. • BETWEEN USERS (seconds): Define the waiting time before contacting the next user within the address book. 10.3.4 Defining the Message Repeat Parameter 10B • Select ALARM > Options. By default, when an alarm is sent, it must be acknowledged by one of the contacts. If there is no acknowledgment, Communicator resends the alarm (refer to Acknowledging a Message, page 24). This menu defines the waiting time before Communicator reinitiates the reporting (VOICE, PAGER, TEXT). NOTE: 39 Enter 0 to disable this option. Communicator | 3.04 10.3.5 Defining the Internal Alarms • Select ALARM > Options. Internal alarms are generated by the Communicator unit (external alarms are generated by the controllers). This menu defines: • DELAY (seconds): Define the waiting time before the communicator generates an internal message. • REMINDER (minutes): After an alarm has been acknowledged but not dealt with, the communicator recreates an internal message according to the amount of time defined. Define the time in this option. • POWER RESTORE MESSAGE: Define YES/NO for a message to be sent after a Power Restore event 10.3.6 Defining the Battery Alarm • Select SYSTEM > Advanced Setup > Battery. This menu defines the hold time (in seconds) before the communicator generates an alarm message regarding the battery charge. POWER OPTION ALARM DELAY(S) 60 10.4 Alarm and Events History This section details how to view records of alarms and events. • Displaying the Alarm History, page 40 • Displaying the User Events, page 41 • Displaying the System Events, page 41 10.4.1 • Displaying the Alarm History Select HISTORY > Alarms. LOG [SORT BY: H] HOUSE DATE 1 07-FEB 2 05-FEB CODE 240 240 XT 3 3 4 5 07-FEB 06-FEB 07-FEB 06-FEB 240 240 240 240 This screen displays alarms from all houses as well as the Communicator (Communicator: 0 and Houses: 1 – 64). • Use +/- to toggle the SORT BY option from: H=House; D=Date; and C=Code. • Scroll right to view message. Communicator | 3.04 40 10.4.2 • Displaying the User Events Select ALARM > User Events. USER EVENTS DATE 18-JAN 07-FEB TIME 16:16 11:47 CODE 2 2 Any changes or events created by users from the address book appear in this table. • Scroll right to view alarm and user number. • Code is the alarm code. 10.4.3 • Displaying the System Events Select ALARM > System Events. SYSTEM EVENTS DATE 18-JAN 07-FEB TIME 16:16 11:47 CODE 2 2 This menu displays all Communicator system events. • Scroll right to view message. 10.5 Testing the Alarm Backup Batteries To ensure that the Communicator continues to broadcast alarms in the event of a power outage, the unit comes equipped with a set of 12 V backup batteries. These batteries must be kept properly charged at all times. WARNING! Failure to test your pack regularly and change the pack as required can result in losses in the event of a general power failure! Rotem strongly recommends: 41 • Checking the backup battery pack once a month (see the procedure below). • Replacing the battery pack once a year, regardless of the test results. Communicator | 3.04 Figure 7: Communicator Battery Packs, Version 3.1 Figure 8: Communicator Battery Packs, Version 2.3 The following two tests provide accurate data regarding the backup battery pack’s charge level. Rotem recommends performing both tests. If you need to replace the battery, order a Communicator Battery Pack (P/N:SP-COMM-BA). NOTE: Rotem recommends keeping a spare pack in stock to avoid any shipping delays. 10.5.1 • Dial-Up Test Unplug the unit. o If the batteries are charged, Communicator sends an SMS/voice/pager alarm message to the numbers configured in the Address Book. The message should arrive within several minutes. o If the batteries are not charged, Communicator does not send an alarm message. In addition, an alarm message appears on the screen. Communicator | 3.04 42 10.5.2 Voltage Test 1. Remove the battery pack, 2. Using a voltmeter, test the pack. The voltage of a new, charged battery pack ranges between 7.2 V and 7.6 V. The voltage of a battery pack that has been in use for an extended period of time will be 7.2 V or lower. o If the power is above 7.0 volts or higher, continue using the battery pack. o CAUTION 43 If the power is below 7.0 volts, replace the pack immediately. Check the CPU Battery once a year, as described in Testing the CPU Battery, page 35. Communicator | 3.04 11 INSTALLATION The following sections detail how to install the Communicator. CAUTION Rotem recommends that only an authorized technician install and configure the Communicator unit. • Hardware Installation, page 44 • Completing the Installation, page 48 11.1 Hardware Installation The following sections detail how to perform the Communicator’s physical setup. • Preliminary Steps, page 44 • Connecting the Unit to External Components, page 46 • Additional Details, page 47 • USB Driver Installation, page 47 11.1.1 Preliminary Steps 1. Open the Communicator and verify that all required components are physically installed. Figure 9 and Figure 10 illustrate sample Communicators and their components. Figure 9: External Connection Box Connector and Internal Components (Sample) Board Version 2.3 Communicator | 3.04 44 Figure 10: External Connection Box Connector and Internal Components (Sample) Board Version 3.1 (line and port cards not shown) NOTE: This version supports two sockets for communication adaptors. 2. Connect the ground cable to the dedicated ground terminal (Figure 11). Figure 11: Grounding Terminal (Version 3.1) CAUTION The Communicator must be grounded at all times! 45 Communicator | 3.04 3. Apply power while pressing # Del until the Cold Start screen appears. COLD START YES NO 4. Select YES. NOTE: The COLD START resets the Communicator to original factory settings and erases previous history. Perform COLD START when installing new hardware, changing the software version, or if instructed by a ROTEM technician. 5. Select SYSTEM > Test > Hardware Profile. HARDWARE PROFILE 1 VOICE 2 LINE MODEM 3 CELLULAR OK OK OK 6. Ensure that Communicator recognizes the components. 7. Select SYSTEM > Test > Battery. BATTERY TEST - + 100% Charger active 8. Check for battery recognition and charging. As long as the communicator unit is plugged in, the charger inactive note is displayed. 9. Install the communication software using the accompanying CD (for installation instructions, refer to USB Driver Installation, page 47). 11.1.2 Connecting the Unit to External Components 1. Connect the External Connection Box to the Communicator as shown in Figure 9 or Figure 10. 2. Connect the External Connection box to a controller as shown in Figure 12. 3. Connect the local computer by via the PC Port or a USB cable. NOTE: If you use the USB drive, install the Rotem driver (refer to USB Driver Installation, page 47). 4. Connect the line and phone cables. 5. Connect the ethernet cable to ethernet access point; for example an ADSL modem/router (Version 3.1 only). Communicator | 3.04 46 11.1.3 • Additional Details Table 2 details the communication card types. Table 2: Communication Card Types RS-232 Card • RS-485 Card RF Card Figure 12 illustrates how to wire the External Communication Box to a controller and an ELS system. Figure 12: External Communication Box Wiring Diagram with ELS 11.1.4 USB Driver Installation The following procedure details how to install R-USB Driver version 5.00. This driver must be installed before plugging in the USB cable between the host computer and the R-USB plug. 1. Ensure that the USB cable is disconnected from Communicator before installing the driver. 2. On the CD, click 47 . Communicator | 3.04 3. Click . 4. Follow the instructions. 5. Restart the computer. 6. Connect a USB cable from the Communicator to the computer. NOTE: If older versions of the driver exist on the computer, the installation program must delete them. Click Yes if prompted. 11.2 Completing the Installation The following section summarizes the steps needed to complete the installation. Refer to the relevant sections in the manual for further details. NOTE: Before beginning, verify that all cables are connected properly (refer to Hardware Installation, page 44). • Configuring the Communication to Outside Devices, page 48 • Setting Up an Internet Connection, page 48 • Setting Up a Network Using RotemNet, page 50 11.2.1 Configuring the Communication to Outside Devices 1. Set the baud rate to the controllers (refer to Routing Methods, page 26). 2. Test the connection to each controller (refer to Displaying the Controllers, page 28). 3. Test the communication channel to each controller (refer to Channel/Signal Tests, page 32). 4. Set the baud rate to the local computer (refer to Defining the Communication Speed with the Local PC, page 33). 11.2.2 Setting Up an Internet Connection Accessing the Communicator and controllers via a web browser enables viewing the controller parameters. NOTE: For full control, use RotemNet.(refer to Setting Up a Network Using RotemNet, page 50). Internet is supported by: • Communicator, software version 3.0 and higher • Platinum Controllers, software version 3.0 and higher • Rotem Net, version 1.3.17 and higher NOTE: This section refers to Communicator Version 3.1 only equipped with Ethernet mode cards. Users having Version 2.3 should contact technical support. 1. In the Communicator screen, select SYSTEM > Advanced Setup > Internet > My Account. 2. Write down the Ethernet device serial number. 3. On the Ethernet cable port (Figure 10), verify that: • the green lights remains on • the yellow light blinks 4. Set the Communicator Internet settings. a. In a web browser, go to http://www.myrotem.net. b. In the Account Name field, type Rotem. Communicator | 3.04 48 c. In the Password field, type 1. The Register page appears. d. Fill out all of the fields. NOTE: The Allowed S/N is the Device S/N found in SYSTEM > Advanced Setup > Internet. NOTE: If you want to add a picture to your Internet account, click Browse and select the file. e. Type the CAPTCHA letters. f. Click Submit. A confirmation message will be sent to you. 5. In SYSTEM > Advanced Setup > Internet > My Account a. Edit the IP number or address (myrotem.net) and PORT number as required. b. In the Name field, type the name. c. In the Account name, type the account name that you chose on the myrotemnet page. d. In the Users field, type the maximum number of users that can simultaneously access the network. e. Click Save. INTERNET DEVICE SN: 140011BD [SERVER] IP: 80.179.187.139 Port: 1500 Name : Rotem Account : <Farm 1 Users : 03 The Internet connection is now configured. 6. In a web browser, go to http://www.myrotem.net and login using the name and password that you chose. Figure 13 appears • If the Communicator is defined correctly, it is displayed on the site with its name and its status is a green circle. 49 • If the Communicator is not defined correctly, it does not appear on the screen. • The red exclamation mark (!) indicates that the chip is not online. This means that there is a connectivity problem, lost internet connection, or other possible problems. It does not mean that the Communicator is not defined properly. Communicator | 3.04 Figure 13: My RotemNet Home Page (Example) 7. Click to view the controller details. Figure 14 appears. Figure 14: Controller Data (Example) • Rotem recommends the following resolutions when viewing the web: o PC: 1280/1024 Text size medium o Laptop: 1024/768 Text size medium 11.2.3 Setting Up a Network Using RotemNet Accessing the Communicator or controllers via RotemNet enables local and remote management of your equipment. The following is a summary of the steps needed to setup a remote network using the RotemNet software. For complete instructions, refer to the RotemNet manual. 1. Using the provided CD, install and run RotemNet. 2. Refer to the following sections: o Local Network o Remote Network Communicator | 3.04 50 11.2.3.1 Local Network 1. Under Network Setup, select Local Network. 2. Select the required baud rate. NOTE: The selected baud rate must be the same as the rate selected in the Communicator. 3. Select the communication port. NOTE: If the connection is via the USB port, select Communicator. 4. Select the number of controllers and the controller type. 5. Press Start Scan. RotemNet scans the system and lists the controllers. 11.2.3.2 Remote Network 1. In RotemNet, select Internet and click OK. 2. In the Internet Communication window set the: a) Farms account name b) Account Name c) Chip serial number NOTE: This information must be the same as the data entered in Communicator. 3. If you are configuring multiple farms: a) Enter a name for each farm. b) Enter an Ethernet chip number for each farm. c) Configure the controller setup for each farm. 4. To connect to a farm, click Connect. NOTE: 51 Refer to Initial Configuration, page 12 for instructions on the initial configuration. Communicator | 3.04 12 TROUBLESHOOTING The following section details common troubleshooting procedures. • Hardware, page 52 • Communication to Controllers/PC, page 52 • Cellular Modem, page 54 • RF Communication, page 55 • Voice Card, page 56 • Alarm, page 57 • Line Modem, page 57 NOTE: Lists of part numbers and their descriptions are located in Ordering Information, page 61. 12.1 Hardware Connected hardware is not recognized in the hardware profile list under system Menu (voice, cell modem, Line modem) Refer to Viewing Device Status, page 36. The Communicator displays O.K. for an installed device and N/A for a device that is not available. 1. Reset the hardware: Turn the battery switch OFF and unplug the power source. 2. Reconnect the power and switch the battery ON so that the unit rescans the hardware. 3. Open the Communicator and check that the device is installed properly. 4. If still not operating, replace the device. Battery failure alarm is received 1. Make sure the Communicator is connected to an electric power supply. 2. In ‘Battery Test’ menu (page 35), check the battery and charger status. 3. Open the Communicator's box and check the battery's wiring (Figure 9, page 44). 4. If the wiring connections are OK, replace the battery pack. (Part number: SP-COMM-BAT). NOTE: If you replace the voice card, Ethernet card, line modem or cell modem, perform a Cold Start after replacing the device (Section 11.1, page 44). 12.2 Communication to Controllers/PC NOTE: Refer to Displaying the Controllers, page 28 to display the controller. Not all units found due to updating primary units. In other words, the number of controllers is not identical to the number of controllers entered in the Controllers menu (Indentifying the Controllers, page 14). 1. Make sure the Communicator is connected to an electric power supply. 2. Press Hot Key 0 (page 28) and check if either some of the controllers are missing (empty squares), or all of them. 3. Check communication with the missing unit: o If the system has a wired connection, refer to Channel/Signal Tests, page 32. o If the system has an RF link, refer to page 32. 4. Check Baud Rate (refer to the relevant section in Network Connection, page 26) on both sides if using 232/485 communication card. Communicator | 3.04 52 5. Go over the number of controllers and make sure there is no conflict between the units (make sure that two units do not have the same configuration number). 6. If all above are OK: a) Check the wiring for 232/485 communication card. b) Check RF card signal strength (refer to Testing the Cellular Signal Strength, page 17). 'Lost unit number' alarm 1. Verify that the Communicator is connected to a power supply. 2. Press Hot Key 0 (page 28) and check if either some or all of the controllers are missing (empty squares). 3. Verify communication with the missing unit: a) If the system has a wired connection, go to System – Test – Wired RS232/485 (refer to page 32). b) If the system has an RF link, go to Radio System – Test Radio RF Signal (Refer to page 32). 4. If you are using a 232/485 communication card, check the Baud Rate on both sides (refer to Routing Methods, page 26). 5. If an RF communication card is being used, check Additional Channel Setting (refer to Routing Methods, page 26). 6. Go over the controller numbers and make sure there is no conflict between the units (make sure two units do not have the same configuration number). 7. If all above are Ok: a) Make sure the wiring is OK for communication card 232/485. b) Check signal strength for RF card (refer to Testing the Cellular Signal Strength, page 17). No local communication with PC 1. Ensure that the serial port Baud Rate matches the PC baud rate (refer to Routing Methods, page 26). 2. Go to Computer Port list. 'Com 1 RD' LED should flash on the front panel. Test the communicator through RotemNet software. NOTE: If the LED does not flash, it is not the right computer port. 3. If using a USB cable, reinstall the driver from the CD (refer to USB Driver Installation, page 47). 53 Communicator | 3.04 12.3 Cellular Modem Problem in signal strength Figure 15: Cell Modem Card Location Figure 16: Line Modem Card Location The modem has to be placed in a way that ensures sufficient signal strength. • To improve signal strength, the antenna can be moved to another position. Signal strength may depend on how close the modem is to a radio base station. You must ensure that the location, at which you intend to use the modem, is within the network coverage area. • Reboot through unplugging the power. 1. If signal does not improve, insert the SIM card into a cell phone and check the signal (GSM only). 2. If the signal is weak, check with your service provider. 3. If the signal is OK, change the module. Communicator | 3.04 54 4. If no signal exists: a) Check antenna connection. b) Check connection to the module (GSM). c) Check the wiring. If there is a problem, contact the dealer. Refer to the appropriate section in Appendix A: replacing communication cardS and Modems, page 65 for detailed instructions on exchanging the modem. • Text test failure in menu (refer to Testing the Text Function, page 21). The modem has to be placed in a way that ensures sufficient signal strength. To improve signal strength, the antenna can be moved to another position. Signal strength may depend on how close the modem is to a radio base station. You must ensure that the location, at which you intend to use the modem, is within the network coverage area 12.4 RF Communication No RF connection Figure 17: RF Card Location • Check the signal strength (refer to Testing the Radio RF Signal, page 32). o If it is weak, change the antenna location. o If the strength is zero: 1. Check the baud rate and the channel address (refer to Configuring the Channel Settings, page 26). Correct if needed. 2. Ensure that the Communicator’s baud rate matches the controllers’ baud rate. • Check RF card configuration: o NOTE: 55 Try to change the baud rate and channels on both sides (refer to Configuring the Channel Settings, page 26). In this situation, lower the baud rate. o Improve the antenna's location. o Replace P-COMM-RF10-9-S COMMUNICATOR RF (Refer to Replacing the RF-Card, page 67). Communicator | 3.04 12.5 Voice Card Voice does not function Figure 18: Voice Card Location 1. Refer to Testing Voice, page 16 and perform voice test. 2. Change the parameters as required (refer to Setting the Voice , page 16). NOTE: Do not forget to confirm by moving the cursor to the ‘TEST’ parameter and pressing 'ENTER'. 3. Verify speaker cable is connected. 4. Turn volume trimmer on voice card until required volume is reached (Figure 19) (Refer to Figure 9, page 44 / Figure 10, page 45 to see the voice card location). 5. If none of the above helps, contact your dealer. Figure 19: Volume Trimmer Communicator | 3.04 56 12.6 Alarm No messages are being received from the Communicator 1. Verify active alarms are not defined as disable state (refer to Setting the Test Schedule, page 12). 2. Go over the contact group, make sure the users are not set to 'idle' (refer to Adding Names to the Address Book, page 14) and that the contact information is entered correctly. 3. Verify that the controllers are functioning properly (meaning are transmitting alarms or messages). Alarm LED is ON but the siren does not operate 1. Check the siren's connection to the relay with battery (see Figure 12, page 47). 2. Perform an alarm relay test found in SYSTEM->Technician Tools->Test->Relays (refer to Test, page 25). 12.7 Line Modem ‘No dial tone' alarm 1. Verify that there is a line by using a phone connected to the phone jack. 2. Perform PHONE LINE VOLTAGE test, (SYSTEM – Technician Tools – Test – Phone Line (page 25)). Voltage should be above 40 V (normally it is 48 V or more). 3. If it is above 40 V, connect a regular phone for testing. 4. If the line is not operating, check with your service provider. 5. If the line is operational, perform power cycle for Communicator (turn device off and then back on). Allow a few minutes until the Communicator recovers. Dial Out is not functioning 1. Insert extra delay by adding commas (refer to Configuring the Dial Delay, page 21). 2. If you have an ADSL modem on the same line, verify that your ADSL line filter meets your service provider’s specifications (high quality line balanced). 3. Contact technical support. 57 Communicator | 3.04 13 SPECIFICATIONS Power Supply Mains Voltage 115 VAC Mains Frequency Maximum Power Consumption Single Phase 230 VAC (outside the US & Canada) 0.5 A (US & Canada) 50/60 Hz 40 W Main Fuse Main Fuse (12 V) Main Fuse (Switching P.S.) 125/250 V, 100 mA T 125/250 V, 2 A T Connection Box Peripherals Digital Inputs 8 Digital Inputs Dry Contact, 5V /2 mAmp Relays Outputs N.C/N.O. (OMI) Blue Small Low Power Relay 5 Amps, 250 VAC Alarm Output N.O and N.C (Double) (OMI) Pilot Duty 5 Amps, 250 VAC Housing Metal Box Dimensions (L x W x H) 262 x 262 x 80 mm Ambient Climate Operating Temperature Range Operating Humidity Range Storage Temperature Range 0° to +50° C / 32° to 125° F 0% to 95% -10° to +70° C / 14° to 158° F Communicator | 3.04 58 14 PARTS CATALOG The following sections illustrate the components that come with the Communicator. • Standard Components, page 59 • Additional Components, page 60 • Ordering Information, page 61 • Compatibility Issues with the Communicator CPU, page 64 14.1 Standard Components The following components are included in every order. 59 Power Line Protector Communicator Keys External Connection Box Modem Line Cable External Connection Cable PC Cable USB Cable Communicator | 3.04 14.2 Additional Components The following components are specific for each installation. P-COMM-RS485 P-COMM-RS232 P-COMM-LM-S Communicator RS-485 Card Communicator RS-232 Card Communicator Line Modem Set P-COMM-RF5-24-S P-COMM-RF232-S2 A-RF5-24-AN-D Communicator RF 50 mW 2.4 GHz set P-COMM-RF10-9-S Communicator RF & RS232 900 MHz Set RF 2.4 GHz Directional Antenna A-RF10-9-AN-D RF 900 MHz Directional Antenna Communicator RF 100 mW 900 MHz Set P-COMM-GSM-S Communicator GSM modem Set Communicator | 3.04 60 14.3 Ordering Information The following tables list every Communicator component. The basic unit includes the following parts list. Table 3: Basic Unit Part Number: P-COMM-V1 # 61 Part # Description 1 C-COMM-BOX Communicator Connection Box Card 2 C-COMM-CPU Communicator CPU Card 3 C-COMM-KBD Communicator Keyboard Card w/o Display 4 C-COMM-PS-V1 Communicator Power Supply Card 115 Volt 5 C-COMM-VOICE Communicator Voice Card 6 SP-COMM-BAT Communicator Battery Pack 7 SP-COMM-LCD Communicator Display 8 SP-COMM-SPEAKER Communicator Voice Speaker 9 C-COMM-RJM10 Communicator Power To CPU Jumper Card 10 C-COMM-LM-RJM10 Communicator Protect To CPU Jumper Card 11 SP-COMM-F Communicator Flat Cable Communicator | 3.04 Table 4 lists the part number of kits containing the basic unit along with additional components. Table 4: Basic Unit and Additional Units # Part # Description 1 P-COMM232-S-V1 Communicator Set 115Volt (LM, RPLP, RS232) 2 P-COMM-RFS-V1 3 P-COMM485-S-V1 Communicator basic unit + Line Modem, RPLP-1, and RS-232 Card Communicator Set 115Volt (LM, RPLP, RF, C15) Communicator basic unit + Line Modem, RPLP-1, and RF Card with 15 meter (50 feed) cable and Antenna Communicator Set 115Volt (LM, RPLP, RS-485) Communicator basic unit + Line Modem, RPLP-1, and RS-485 Card Table 5: Cables and Communicator Box # Part # Description 1 A-COMM-BOX Communicator Connection Box 2 A-COMM-C-CB Cable For Connection Box 3 A-COMM-C-PC Serial DB9 Cable For PC 4 A-COMM-C-USB USB Cable For PC 5 A-COMM-LM-C Communicator Line Modem Telephone Cable Communicator | 3.04 62 Table 6: Accessories List # Description 1 C-COMM-GSM-AD Communicator GSM Adaptor Card w/o Module 2 C-COMM-GSM-M Communicator GSM Module Only P-COMM-GSM-S Assembled Communicator GSM Modem Set C-COMM-GSM-S Spare Communicator GSM Modem Set 4 A-COMM-GSM-AN Call Antenna 5 C-COMM-LM-M Communicator Line Modem Module Only 6 C-COMM-LM-PRO Communicator Line Modem Protect Card 7 C-COMM-LM- RJM14 Communicator Protect To CPU Jumper Card P-COMM-LM-S Assembled Communicator Line Modem Set C-COMM-LM-S Spare Communicator Line Modem Set 9 P-COMM-ETH-S Communicator Ethernet Card Set 10 C-COMM-RF-AD Communicator RF Adapter Card w/o Module 11 C-COMM-RF10-9-M Communicator RF 100 mW 900 MHz Module Only P-COMM-RF10-9-S Assembled Communicator RF 100 mW 900 MHz SET Spare Communicator RF 100 mW 900 MHz SET A-RF-AN-2-C6-58 RF 6 M RG58 Cable & Clip for 2 dBi Antenna A-RF-AN-2-C15-58 RF 15 M RG58 Cable & Clip for 2 dBi Antenna A-RF-AN-2-C23-58 RF 2 3M RG58 Cable & Clip for 2 dBi Antenna 14 C-COMM-RS232 Communicator RS232 Card 15 C-COMM-RS485 Communicator RS-485 Card 16 A-RF10-9-AN-2 RF 900 MHz 2 dBi Antenna 3 8 12 13 63 Part # Communicator | 3.04 14.4 Compatibility Issues with the Communicator CPU There are occasions when upgrading or replacing the Rotem Communicator CPU in which the replacement unit does not support the existing hardware. The CPU replacement card is P/N: COMM–CPU Version 2.3 or 3.1. Supported Hardware: • Keyboard P/N: COMM–KBD Version 2.3 and higher • Connection Box P/N: COMM–BOX Version 2.0 and higher NOTE: • NOTE: Version 1.4 is supported but lacks recommended lightening protection. Rotem recommends installing Version 2.0 or higher. Line Modem Protection P/N: COMM–LM–PRO Version 2.0 and higher Version 1.4 is supported but lacks recommended lightening protection. Rotem recommends installing Version 2.0 or higher. • Power Supply P/N: COMM–PS. All versions are supported • RS-232 Communication Card P/N: COMM–RS232 Version 2.1 and higher NOTE: Most Communication Cards, Version 2.0 have a wired correction added to the card. The CPU supports these cards as well. Card lacking the correction are not supported. • RS-485 Communication Card P/N: COMM–RS485 Version 2.0 and higher • Voice Card P/N: COMM–Voice Version 2.1 and higher NOTE: Version 2.0 is also supported. However the speaker must be plugged directly into the voice card. Communicator | 3.04 64 15 APPENDIX A: REPLACING COMMUNICATION CARDS AND MODEMS The following sections illustrate how to replace various communication cards. • Replacing the RS-232 Card, page 65 • Replacing the RS-485 Card, page 66 • Replacing the RF-Card, page 67 • Installing a CDMA, GSM-S, or GSM-W Card , page 68 15.1 Replacing the RS-232 Card 65 Communicator | 3.04 15.2 Replacing the RS-485 Card Communicator | 3.04 66 15.3 Replacing the RF-Card 1. Insert the card to its socket in the communicator. 2. Fit the black wire through the hole as illustrated above and connect to the RF card. Screw nuts connected to the RF card (make sure you leave enough slack for antenna cable). 3. Set the dipswitches. Refer to the RF Communication Card Installation sheet for more information. 67 Communicator | 3.04 15.4 Installing a CDMA, GSM-S, or GSM-W Card NOTE: Before installing a SIM card, disable the PIN code (if the card has this code). Communicator text functions are disabled if the SIM card has a PIN code. 1. Turn off the Communicator and open the cover. 2. Place the card in place. CDMA does not require a SIM Card. Insert a SIM card into GSM-S to enable the Voice Dial-In feature. Insert a SIM Data card into GSM-W to enable the Voice Dial-In feature. WARNING! Communicator does not support pre-paid SIM cards. Use a regular card only! Communicator | 3.04 68 16 APPENDIX B: PAGER CODES The following table lists the pager codes and their description. Code 69 Description 0 Unknown Alarm 1 Low Temperature 2 High Temperature 3 Sensor 1 Low Temperature 4 Sensor 1 High Temperature 5 Emergency 1 Low Temperature 6 Emergency 1 High Temperature 7 Circuit Breaker High Temperature 8 Egg Room Low Temperature 9 Egg Room High Temperature 10 Temperature Sensor 1 Out of Range 11 Difference Between Outside Sensors 12 Low Relay Current 13 High Relay Current 21 Low Humidity 22 High Humidity 23 Egg Room Low Humidity 24 Egg Room High Humidity 31 Low Pressure 32 High Pressure 33 Emergency Pressure 34 Low System Pressure 40 Valve 1 Low EC 41 Valve 1 High EC 42 Valve 1 Low PH 43 Valve 1 High PH 44 EC Pre-Control Valve 1 Low 45 EC Pre-Control Valve 1High 46 EC Sensor 1 Failure 47 pH Sensor 1 Failure 48 EC Pre-Control Sensor Failure 49 EC Sensors High Difference 50 pH Sensors High Difference 51 Emergency Wind Speed Communicator | 3.04 Code Description 52 High Ammonia 53 Weather Station Lost 54 Low Oxygen 55 Oxygen Sensor Failure 56 Radiation Factor Is 0 82 Feeder 1 in Overtime 83 Female Auger in Overtime 84 Male Auger in Overtime 85 Auger 1 In Overtime 89 Low Feed In Female Bin 90 Low Feed In Male Bin 91 Low Feed in Bin 1 92 Feed Container Overflow 93 Feed Shortage 101 Water Overflow 102 Water Shortage 103 Water Meter 1 Leak * 104 Valve 1 High Flow 105 Valve 1 Low Flow 106 Valve 1 No Flow 107 System Stopped by Flow Alarm 108 Negative Flow 109 Low Water Pressure 111 Temperature Sensor 1 Shorted 112 Temperature Sensor 1 Opened 113 Zone 1 Temperature Failure 114 Outside Temperature Failure 115 Temperature Sensor 1 Failure 116 Humidity Sensor 1 Failure 117 Pressure Sensor Failure 118 Emergency Sensor 1 Shorted 119 Emergency Sensor 1 Opened 120 Circuit Breaker Temperature Failure 121 Emergency Card 1 Temperature Failure 122 Average Sensors Failure 123 Indoor Pressure Sensor Failure Communicator | 3.04 70 Code 71 Description 124 Outside Pressure Sensor Failure 125 Outside Temperature Sensor Shorted 126 Outside Temperature Sensor Opened 127 Short Circuit 128 Indoor Humidity Failure 129 Outside Humidity Failure 130 Fogger Overflow 131 Feed Bin 1 Failure 132 Feed Container Failure 133 Scale 1 Failure 134 Incompatible hardware 135 Bird Scale 1 Failure 136 Clock Failure 137 Damper 1 Failure 138 Memory Failure 139 Potentiometer 1 Failure 140 Fertilizer 1 Failure 141 Switch Card 1 Failure 142 Relay Card 1 Failure 143 Analog Input Card 1 Failure 144 Digital Input Card 1 Failure* 145 Analog Output Card 1 Failure 146 Scale Card 1 Failure 147 Alarm Card Failure 148 Remote output key Failure 149 Remote Unit 1 Failure 151 Remote Unit 1 Error 152 Scale Card Plug Failure 153 Vent 1 Failure 154 Curtain 1 Failure 155 Extension Box 1 Error 156 Generator Activated 157 GSM Modem Not Powered 158 GSM Modem SIM Not Present 159 GSM Modem Not Registered to Cellular Operator 160 GSM Modem RF Signal Low Communicator | 3.04 Code Description 161 Emergency Card 1 Battery Failure 162 Emergency Card 1 Low Battery 163 Low Battery 164 Battery Failure 165 Power Failure 166 Main Battery Low 167 Backup Battery Connected 168 Emergency Power Down 169 IDLE_MODE Due to Low Power 171 Bus Failure 172 Lost Communication Port 173 Lost Communication To Controller 1 174 No Dial Tone 175 Remote Unit 1 Communication Failure 176 Single Net Communication Off 177 Secondary unit missing 178 Extension Box 1 Communication Failure 179 Single Net Host Error 181 Dosing Channel 1 Leak 182 Dosing Channel 1 Failure 183 Dosing Booster Protection Activated 184 Irrigation Without Drainage 185 Fresh Tank Empty 186 Drainage Tank Empty 187 EC Emergency High 188 EC Emergency Low 191 Pressure Sensors Difference 192 Auxiliary 1 Activated 193 Emergency Card 1 Active 194 External Pause Activated 195 External Alarm 1 Activated 196 Fail Safe Active 201 Emergency Temperature Settings Error 202 Insufficient number of Tunnel Fans 203 No Ventilation Mode Defined 204 Sensor 1 Defined Error Communicator | 3.04 72 Code 73 Description 205 Temperature Sensor Not Defined 206 Switches Changed 207 Memory Failure Check All Settings 208 Egg Sensor Conflict 209 Outside Sensor Conflict 210 Poultry Inventory not defined 211 Outside Temperature Error 212 Alarm Definition Conflict 213 Insufficient Air supply 214 Soft Minimum Sensor Error 231 Alarm Test Communicator | 3.04 Communicator | 3.04 74