1
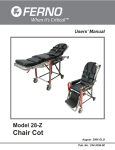
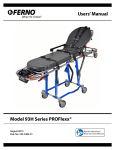
Combined Users’ Manual
and Installation Manual
Model 185, 185-MT, 185-LT
Stat Trac® Cot Fastening System
April 2013
Pub. No. 234-2132-04
Read this Manual and
Retain for Future Reference
Combined Stat Trac® Users’ & Installation Manual
Ferno Technical Support
Customer service and product support are important aspects of each
Ferno product. Please have the product serial number available
when calling, and include it in all written communications. For
technical support questions:
Telephone (Toll-free)
1.800.733.3766 ext. 1010
Telephone 1.937.382.1451 ext. 1010
[email protected]
users’ manual
To request additional free users’ manuals,
contact Ferno Customer Relations, your
Ferno distributor, or visit www.ferno.com.
Ferno Customer Relations
For ordering assistance or general information:
Canada and the U.S.A.
Telephone (Toll-free)
1.877.733.0911
Telephone 1.937.382.1451
Fax (Toll-free)
1.888.388.1349
Fax1.937.382.1191
Internetwww.ferno.com
All Other Locations
For assistance or information, please contact your Ferno
distributor. If you do not have a Ferno distributor, please contact
Ferno Customer Relations:
Ferno-Washington, Inc., 70 Weil Way
Wilmington, Ohio 45177-9371, U.S.A.
Telephone +1.937.382.1451
Fax+1.937.382.6569
Internetwww.ferno.com
Serial Number _________________________
Location: Inside the track, near the funnel
Disclaimer
This manual contains general instructions for the use, operation
and care of this product. The instructions are not all-inclusive. Safe
and proper use of this product is solely at the discretion of the
user. Safety information is included as a service to the user. All
other safety measures taken by the user should be within and under
consideration of applicable regulations. It is recommended that
training on the proper use of this product be provided before using
this product in an actual situation.
Retain this manual for future reference. Include it with the product
in the event of transfer to new users. Additional free copies are
available upon request from Customer Relations.
Proprietary Notice
The information disclosed in this manual is the property of FernoWashington, Inc., Wilmington, Ohio, USA. Ferno-Washington, Inc.
reserves all patent rights, proprietary design rights, manufacturing
rights, reproduction use rights, and sales use rights thereto, and
to any article disclosed therein except to the extent those rights
are expressly granted to others or where not applicable to vendor
proprietary parts.
Limited Warranty Statement
The products sold by Ferno are covered by a limited warranty,
which is printed on all Ferno invoices. The complete terms and
conditions of the limited warranty, and the limitations of liability
and disclaimers, are also available upon request by calling Ferno at
1.800.733.3766 or 1.937.382.1451.
2
© Ferno-Washington, Inc 234-2132-04 April 2013
Combined Stat Trac® Users’ & Installation Manual
Table of Contents
Users’ Manual_______________________________ 1-16
Installation Manual_________________________ 17-40
SectionPage
Ferno Technical Support________________________ 2
Ferno Customer Relations______________________ 2
1 - Safety Information___________________________ 4
1.1Warning________________________________ 4
1.2Important_______________________________ 4
1.3Tip_____________________________________ 4
1.4 Bloodborne Disease Notice_________________ 4
1.5 Cot and Fastening System Compatibility______ 4
1.6 Symbol Glossary__________________________ 4
1.7 Responsibility of User to Maintain
a Safe Fastening System____________________ 5
2 - Operator Skills and Training___________________ 6
2.1Skills___________________________________ 6
2.2Training_________________________________ 6
3 - About the Stat Trac___________________________ 6
3.1Description______________________________ 6
3.2 Compatible Cots/Transporters_______________ 7
3.3 General Specifications_____________________ 7
3.4 Using This Manual________________________ 7
3.5 Before Using the Stat Trac__________________ 7
3.6Components_____________________________ 8
4 - Features____________________________________ 9
4.1 Mounting Handle_________________________ 9
4.2 Cot Lock, Cot Release Handle______________ 10
4.3 Safety Stop_____________________________ 10
5 - Using the Stat Trac__________________________ 11
5.1 Compatible Cots_________________________ 11
5.2 Loading a Cot___________________________ 11
5.3 Unloading a Cot_________________________ 12
6 - Maintenance_______________________________ 13
6.1 Maintenance Schedule___________________ 13
6.2 Disinfecting the Stat Trac__________________ 13
6.3 Cleaning the Stat Trac____________________ 13
6.4 Inspecting the Stat Trac___________________ 14
Training Record_______________________________ 15
Maintenance Record___________________________ 16
SectionPage
1 - Safety Information__________________________ 18
1.1Warning_______________________________ 18
1.2Important______________________________ 18
1.3Tip____________________________________ 18
1.4 Cot and Fastening System Compatibility_____ 18
2 - About the Stat Trac__________________________ 19
2.1Description_____________________________ 19
2.2 Compatible Cots/Transporters______________ 19
2.3 General Specifications____________________ 19
2.4 Items Required: Model 185 Only____________ 20
2.5 Items Required: Model 185-MT, Model 185-LT___ 20
2.6Components____________________________ 21
3 - Before You Begin____________________________ 22
3.1 Installation Requirements_________________ 22
3.2 Backing Plate Requirements_______________ 23
4 - Marking the Floor___________________________ 24
4.1 Using this Section________________________ 24
4.2 Finding the Centerline____________________ 24
4.3 Positioning For Any Model Stat Trac
Using a Template________________________ 25
4.4 Measuring for the Model 185
(Short) Stat Trac®_________________________ 26
4.5 Measuring for the Model 185-MT
Medium) Stat Trac®_______________________ 27
4.6 Measuring for the Model 185-LT
(Long) Stat Trac®_________________________ 28
5 - Installing the Stat Trac_______________________ 29
5.1 Drilling the Holes________________________ 29
5.2 Cutting Cavities for the Mounting Blocks_____ 30
5.3 Placing the Mounting Blocks_______________ 31
5.4 Installing the Mounting Blocks_____________ 32
5.5 Checking the Stat Trac
With the Ambulance Floor_________________ 33
5.6 Adjusting the Fastener Posts_______________ 34
5.7 Adjusting the Fastener-Post Brackets________ 35
6 - Troubleshooting____________________________ 36
6.1 Troubleshooting Table____________________ 36
7 - Parts and Service, Accessories_________________ 37
7.1 U.S.A. and Canada_______________________ 37
7.2Worldwide_____________________________ 37
7.3 Retrofitting a Cot for Stat Trac______________ 37
7.4Accessories_____________________________ 37
Notes_____________________________________ 38-39
© Ferno-Washington, Inc 234-2132-04 April 2013
3
Stat Trac® Users’ Manual
Safety Information
Stat Trac® Users’ Manual
1 - Safety Information
1.1Warning
1.4Bloodborne Disease Notice
Warning notices indicate a potentially hazardous situation
which, if not avoided, could result in injury or death.
To reduce the risk of exposure to bloodborne diseases such
as HIV-1 and hepatitis when using the Stat Trac® follow the
disinfecting and cleaning instructions in this manual.
Warning
Improper or inadequate installation can cause injury. The
installer should test your fastening system setup to meet
or exceed all applicable guidelines.
A Stat Trac installed without backing plates can fail in a
crash. Use properly installed backing plates to secure the
Stat Trac at all mounting points.
Improperly installed backing plates can fail in a crash.
Secure the backing plates to primary structural members
of the ambulance at all mounting points.
Untrained operators can cause injury or be injured.
Permit only trained personnel to operate the Stat Trac.
Improper use can cause injury. Use the Stat Trac only for
the purpose described in this manual.
An improper cot can cause injury. Use only Ferno cots
designed or properly modified for use with the Stat Trac.
Improper operation can cause injury. Operate the Stat
Trac only as described in this manual.
Improper maintenance can cause injury. Maintain the
Stat Trac only as described in this manual.
1.5 Cot and Fastening System
Compatibility
Note: For the purpose of this notice, all Ferno® transporters
are included under the generic term, “cot.”
Combining different manufacturers’ products into a “mixedcomponent” cot/cot fastening system can increase the user’s
risk of injury and damage.
Ferno-Washington, Inc. strongly recommends that only
Ferno-manufactured cots be used in Ferno-manufactured
cot fastening systems, and that only Ferno-manufactured cot
fastening systems be used for securing Ferno-manufactured
cots in ambulances.
ANY COMBINATION OF A FERNO COT OR COT
FASTENING SYSTEM WITH A NON-FERNO COT OR
COT FASTENING SYSTEM IS MISUSE OF THE FERNO
PRODUCT. Responsibility for the outcome of known,
intentional misuse rests squarely on the misuser.
1.6 Symbol Glossary
1.2Important
Important notices emphasize important usage or maintenance
information. Failure to follow Important notices could result
in damage to the product or property damage.
The symbols defined below are used on the Stat Trac® and/
or in this users’ manual. Ferno uses symbols recognized by
the International Standards Organization (ISO), American
National Standards Institute (ANSI) and the emergency
medical services industry.
Important
1.3Tip
General Warning of
Potential Injury
Read the Users’
Manual
Tips provide recommendations for easier use of the product.
Product meets European
Union Standards
4
Unlocked
Locked
© Ferno-Washington, Inc 234-2132-04 April 2013
Stat Trac® Users’ Manual
Safety Information
1.7 Responsibility of User to Maintain a Safe Fastening System
The Ferno® Stat Trac® Cot Fastening System is designed
to securely hold an ambulance cot inside a ground-based
ambulance.
Warning
Improper or inadequate installation can cause
injury. The installer should test your fastening
system setup to meet or exceed all applicable
guidelines.
It has been designed and tested by Ferno to meet or exceed
existing ambulance standards from:
●
Ambulance Manufacturer’s Division (AMD) of the
National Truck Equipment Association.
●
Federal Ambulance Specification KKK-A-1822.
Warning
A Stat Trac installed without backing plates can fail
in a crash. Use properly installed backing plates to
secure the Stat Trac at all mounting points.
Note: AMD and KKK-A-1822 standards are updated
periodically. Current guidelines are available from these
organizations. See page 6.
The integrity of the fastening system relies heavily on the
installer to secure the fastening system to the ambulance
in a way that meets or exceeds these guidelines (See the
Installation Manual for details). Also, the integrity of the
fastening system relies on the user to regularly inspect and
maintain the system.
Warning
Improperly installed backing plates can fail in a
crash. Secure the backing plates to primary structural
members of the ambulance at all mounting points.
Ferno’s Stat Trac Cot Fastening System, when installed
and maintained properly, meet or exceed all applicable
KKK-A-1822 specifications and AMD standards. To help
the user achieve a compliant system, Ferno strongly
recommends:
user:
1. Inspect the fastening system a minimum of once each month, or more often with frequent use. Check under the
ambulance to see if exposure to the environment has damaged the backing plates, nuts or bolts. Make sure the nuts are
tight and secure, while observing Point 2, below. Replace the fastening system if its integrity is in question.
2. During inspections, make sure all fastening system components are tight, however, do not repeatedly tighten the
bolts with powered equipment. Over time, using powered tools to repeatedly tighten connections can cause damage to
the fastening system by compressing the nut and bolt through the backing plate. If inspection indicates the components
are “pulling through” the backing plate, immediately take the ambulance out of service and install a new fastening system
with new backing plates.
3. Consult your installer to ensure your fastening system meets all applicable standards. The installer’s responsibility
includes installing a test fastening system in the same manner as the fastening systems are to be installed on your
ambulance(s) and testing this setup to meet or exceed the pull test stipulated in AMD .004. Your installer should
be able to show that your fastening system setup is equal to a setup that passes this test.
4. Make sure your fastening system has been installed with backing plates beneath the ambulance floor at all mounting
points. If the backing plates are not present, immediately take the ambulance out of service and have a new fastening
system with backing plates installed.
© Ferno-Washington, Inc 234-2132-04 April 2013
5
Stat Trac® Users’ Manual
Operator Skills & Training, About the Stat Trac
2 - Operator Skills and Training
2.1Skills
Operators using the Stat Trac need:
●
a working knowledge of emergency patient-handling
procedures.
●
a complete understanding of the procedures described
in this manual.
2.2Training
Warning
Operator trainees need to:
●
read and understand this manual.
●
be trained on the use of the Stat Trac.
●
practice with the Stat Trac before using it with a
patient.
●
record their training information. A sample training
record sheet is provided on page 15.
Untrained operators can cause injury or be injured.
Permit only trained personnel to operate the Stat
Trac.
3 - About the Stat Trac
3.1Description
Models 185, 185-MT and 185-LT Stat Trac® Cot Fastening
Systems (referred to as the Stat Trac in this manual) are
devices designed to secure a Ferno cot or transporter inside
a ground-based ambulance. See Cot and Fastening System
Compatibility, page 4, for more information.
Each Stat Trac is sold with one track and one Combined
Users’ and Installation Manual. Installation kits are sold
separately. Stat Trac features include:
●
Wide-Angle Funnel: makes loading cots easy
●
Track Loading: allows straight-in cot loading without
cot drift
●
Safety Stop: holds cot secure inside ambulance while
operators unlock the undercarriage during the loading
and unloading process
●
Single-Hand Cot Release
●
Aluminum shell: impact resistant, easy to clean
●
Easy Removal: for cleaning
The Stat Trac is for professional use only. Ferno strongly
recommends that the Stat Trac is installed according to AMD
(Ambulance Manufacturer’s Division) guidelines. See the
Installation Manual for more information. It is designed
for use with ambulances that meet the requirements of the
Federal Ambulance Specification KKK-A-1822.
6
Warning
Improper use can cause injury. Use the Stat Trac
only for the purpose described in this manual.
contacts for industry standards
For information about Federal Ambulance Specification
KKK-A-1822, contact:
Federal Supply Services
Specifications Section
Suite 8100
470 E. L’Enfant Plaza, SW
Washington, DC 20407
For information about AMD standards, contact:
Ambulance Manufacturer’s Division
National Truck Equipment Association
37400 Hills Tech Drive
Farmington Hills, MI, 48331-3414
© Ferno-Washington, Inc 234-2132-04 April 2013
Stat Trac® Users’ Manual
About the Stat Trac
3.2 Compatible Cots/Transporters
The Stat Trac is for use with the following Ferno cots that
have been designed specifically for use with the Stat Trac:
●
POWERFlexx-ST®
●
PROFlexx® Series 35PST, 35XST, 93PST, 93HST
●
35A-ST, 35A+ST, 93ES-ST, 93EX-ST, and XCalibur
(if factory-equipped).
Warning
An improper cot can cause injury. Use only Ferno
cots designed or properly modified for use with the
Stat Trac.
Adaptor kits are available to modify Ferno Series 35A,
35A+, 35P, 93ES, 93EX, 93H, POWERFlexx® and XCalibur
(if not factory-equipped) for use with the Stat Trac.
3.3General Specifications
Specifications are rounded to whole numbers. Contact
Ferno Customer Relations for additional information
(page 2). Ferno reserves the right to change specifications
without notice.
Stat Trac Change
In 2012, the Stat Trac changed from plastic to
aluminum sides. The function of the Stat Trac
is identical. Only the weight and appearance
changed.
Specification
Imperial
Metric
86 in
2184 mm
Model 185-MT
96 in
2438 mm
Model 185-LT
103 in
2616 mm
8 in
203 mm
3 in
76 mm
Model 185
55 lb
24.9 kg
Model 185-MT
61 lb
27.7 kg
Model 185-LT
65 lb
29.5 kg
Length
Model 185
Width
Overall
3.4 Using This Manual
In this manual, the term Stat Trac is used to refer to all
models of the Stat Trac. When differences exist, the specific
model name (Model 185, Model 185-MT or Model 185-LT)
is used.
3.5Before Using the Stat Trac
To install the Stat Trac, refer to the Installation Manual,
pages 17-40. As a user, be aware of the following:
●
In the USA, the ambulance must comply with the
current version of Federal Ambulance Specification
KKK-A-1822.
●
Stat Trac installation requires the use of backing plates
beneath the ambulance floor at all mounting points. If
your ambulance does not have the required backing
plates, have them installed.
●
Inspect the Stat Trac regularly to ensure it meets all
required standards required by your local government.
See Inspecting the Stat Trac, page 14.
●
Install a new Stat Trac when remounting an ambulance
box. Removing and reinstalling an old Stat Trac can
weaken the Stat Trac.
●
Height
Overall
Weight
Important
Owners of cots in the PROFlexx®, POWERFlexx®, and
XCalibur series:
Cots with 6”/152 mm wheels require the Stat Trac to
be installed at least 17”/431.8 mm from the side walls.
Installing closer than 17”/431.8 mm may not allow
clearance for the wheels to swivel during transporter
removal.
If you installed a Stat Trac at the old minimum
distance prior to June 1, 2000, you must adjust
your Stat Trac to the new 17”/431.8 mm minimum
wall clearance. Center-mounted Stat Tracs and those
installed 17”/431.8 mm or more from the wall do not
require adjustment.
Follow the instructions on pages 17-40 of this manual
for proper installation.
Replace the Stat Trac if the ambulance is involved in
a traffic accident.
© Ferno-Washington, Inc 234-2132-04 April 2013
7
Stat Trac® Users’ Manual
About the Stat Trac
3.6Components
Fastener Post (2)
Fastener Post (3)
Fastener Post (3)
Length Comparison (Top to Bottom): Model 185, Model 185-MT, Model 185-LT
Mounting Handle
Safety Stop
Bumper
Funnel
Cot Lock
Cot Release Handle
The Components are Common to All Models
The Only Variation is the Distance of the Components from the Funnel
8
© Ferno-Washington, Inc 234-2132-04 April 2013
Stat Trac® Users’ Manual
Features
4 - Features
4.1 Mounting Handle
The mounting handle locks the Stat Trac in the ambulance. It
is also designed to stop a cot from being loaded when the Stat
Trac is not completely secured to the floor.
If the cot will not load into the Stat Trac, make sure the
mounting handle is engaged. See Troubleshooting, page 36.
To mount the Stat Trac to the ambulance floor:
Fastener Post
(2 or 3)
1. Slide the Stat Trac toward the front of the ambulance
so that each fastener post slides into its mounting
block (Figure 1).
2. To lock the Stat Trac in place, swing the mounting
handle down and toward the safety stop (Figure 2)
until it is parallel with the floor.
3. Verify that the Stat Trac is locked before use. To do
this, pull on the track with your hands. The Stat Trac
should remain firmly in place.
Mounting Block
(2 or 3)
Figure 1 - Mounting the Stat Trac
To un-mount the Stat Trac from the ambulance floor:
1. Swing the mounting handle upward, toward the cot
lock, to release the Stat Trac from the mounting blocks
(Figure 2).
2. Pull the Stat Trac toward the rear of the ambulance to
remove it.
Mounting Handle
Figure 2 - Using the Mounting Handle
© Ferno-Washington, Inc 234-2132-04 April 2013
9
Stat Trac® Users’ Manual
Features
4.2 Cot Lock, Cot Release Handle
Cot Lock
The cot lock (Figure 3) holds the cot securely in the Stat
Trac during transport in an ambulance and prevents the cot
from being removed from the Stat Trac.
To engage the cot in the cot lock, load the cot into the Stat
Trac and slide the foot-end loading post to the left, into the
cot lock.
To disengage the cot lock, simultaneously pull the cot
release handle toward the rear of the ambulance (Figure 3)
and pull the cot to the right to position the foot-end loading
post in the center of the channel.
Cot
Release Handle
Figure 3 - Cot Release Handle
For complete unloading instructions, see Unloading a Cot,
page 12.
4.3 Safety Stop
The safety stop (Figure 4) holds the head end of the cot
securely in the ambulance while the operators unlock the
undercarriage during loading or unloading. At the proper
time, the head-end operator uses the release mechanism on
the cot to disable the safety stop.
Safety Stop
For complete loading and unloading instructions, see
Section 5, Using the Stat Trac, pages 11-12.
using the safety stop during loading
When loading a cot into the ambulance, the operators:
1. Roll the loading end of the cot into the Stat Trac until
the head-end loading post passes the safety stop.
2. Roll the cot out of the ambulance until it stops on the
safety stop. This verifies the cot is being held by the
safety stop.
using the safety stop during unloading
When unloading a cot from the ambulance, pull the cot out
of the ambulance until the safety stop catches the cot’s headend loading post.
10
Figure 4 - Safety Stop
Engaging the Safety Stop
The safety stop holds the cot secure while
the operators unlock and raise or lower the
undercarriage during loading and unloading.
During cot loading and unloading, the
operators should roll the cot firmly against the
safety stop to verify that the cot is held securely.
This safety step confirms to the operators that
they are using the Stat Trac and cot properly.
© Ferno-Washington, Inc 234-2132-04 April 2013
Stat Trac® Users’ Manual
Using the Stat Trac
5 - Using the Stat Trac
5.1 Compatible Cots
The Stat Trac is for use only with Ferno® cots and
transporters. See Cot and Fastening System Compatibility,
page 4, and Compatible Cots/Transporters, page 7.
Warning
Improper operation can cause injury. Operate the
Stat Trac only as described in this manual.
Warning
An improper cot can cause injury. Use only Ferno
cots designed or properly modified for use with the
Stat Trac.
5.2 Loading a Cot
To secure a cot in the Stat Trac:
1. If the ambulance has a folding step bumper, raise it.
2. Place the cot in a loading position (see the cot Users’
Manual for instructions).
3. Roll the cot to the open rear doors of the ambulance
and align the head-end loading post on the cot with the
Stat Trac (Figure 5).
4. Using the Stat Trac funnel as a guide, roll the cot into
the ambulance until the head-end loading post passes
the safety stop.
5. Roll the cot out of the ambulance until it stops against
the safety stop. This verifies the cot is held securely
before the operators unlock the undercarriage.
Cot Head-End
Loading Post
Figure 5 - Loading Post Aligned for Loading
6. Keeping the cot level with the ambulance floor, fold
the cot undercarriage as instructed in the cot Users’
Manual and begin pushing the cot into the ambulance
and Stat Trac.
7. While keeping the cot level with the ambulance floor,
align the cot’s foot-end loading post with the funnel
and push the cot into the Stat Trac as far as possible.
8. Slide the foot end of the cot to the left to engage the
foot-end loading post in the cot lock (Figure 6).
Figure 6 - Locking the Cot in the Stat Trac
© Ferno-Washington, Inc 234-2132-04 April 2013
11
Using the Stat Trac
Stat Trac® Users’ Manual
5.3 Unloading a Cot
To release a cot from the Stat Trac:
1. If the ambulance has a folding step bumper, raise it.
2. Pull the cot release handle toward the rear of the
ambulance (Figure 7) and slide the foot-end of the cot
to the right to free it from the cot lock.
3. Both Operators: Pull the cot out of the patient
compartment until the safety stop engages the cot’s
head-end loading post.
4. Both Operators: Follow the instructions in the
cot Users’ Manual to properly unfold and lock the
undercarriage of your cot.
5. Verify that the undercarriage is locked before
continuing.
6. Head-End Operator: Use the fastener release lever
(or fastener release handle) on the cot to disengage the
cot from the safety stop (Figure 8 and Figure 9).
Figure 7 - Releasing the Cot from the Stat Trac
Note: The mechanism to release the cot from the Stat Trac
varies from model to model. See your cot Users’ Manual for
instructions.
7. While the head-end operator engages the fastener
release lever/handle, both operators pull the cot out of
the patient compartment to release the safety stop. Let
go of the fastener release lever/handle after the headend loading post moves beyond the safety stop.
Figure 8 - Using the Fastener Release Lever
Figure 9 - Using the Fastener Release Handle
(PROFlexx® Series Cots)
12
© Ferno-Washington, Inc 234-2132-04 April 2013
Stat Trac® Users’ Manual
Maintenance
6 - Maintenance
6.1 Maintenance Schedule
Warning
Contact Ferno Customer Relations to order Ferno cleaners
and disinfectants (page 2).
Minimum
Maintenance Intervals
6.2 Disinfecting the Stat Trac
Disinfecting (this page)
Remove the Stat Trac from the ambulance. Wipe all surfaces
with a disinfectant, following the disinfectant manufacturer’s
directions. Ferno recommends you inspect the Stat Trac for
obvious damage as you disinfect it.
Cleaning (this page)
6.3 Cleaning the Stat Trac
Remove the Stat Trac from the ambulance. Wash all surfaces
with a mild detergent. Use a stiff-bristled brush if necessary
to remove stains. Rinse with warm water and dry with a
towel.
Inspecting (page 14)
Each Use
When using maintenance products, follow the manufacturer’s
directions and read the manufacturers’ material safety data
sheets.
•
Each Month
Improper maintenance can cause injury. Maintain
the Stat Trac only as described in this manual.
As Needed
The Stat Trac requires regular maintenance. Set up and
follow a maintenance schedule. A form is provided on page
16. The chart at right represents minimum maintenance.
•
•
•
Important
Disinfectants and cleaners containing bleach,
phenolics, or iodines can harm the Stat Trac. Disinfect
and clean the Stat Trac only with products that do not
contain these chemicals.
Important
Using abrasive cleaning compounds or applicators
on the cot can cause damage. Do not use abrasive
materials to clean the cot.
© Ferno-Washington, Inc 234-2132-04 April 2013
13
Maintenance
6.4 Inspecting the Stat Trac
Stat Trac® Users’ Manual
Important
Have your service’s equipment maintenance personnel
inspect the Stat Trac. Follow the checklist below and work
the Stat Trac through all its functions as described in this
manual. Also see the Responsibility of User to Maintain a
Safe Fastening System, page 5.
If the required backing plates are not present, take the
Stat Trac out of service and have the backing plates
installed immediately. Then, install a new Stat Trac.
If the inspection indicates damage or excessive wear, see
Troubleshooting, page 36. For service, see Parts and
Service, page 37.
Important
●
Are all components present?
●
Are all parts in good condition (no cracks, corrosion,
or damage)?
●
Do all moving parts operate smoothly and properly?
●
Does the Stat Trac lock properly to the mounting
blocks?
●
Does the cot load and unload properly?
●
Does the cot lock properly into the Stat Trac?
●
Monitor the ambulance floor, including beneath the
ambulance, and check the integrity of the fastening
system. Is the system worn? Has exposure to the
environment caused noticeable damage?
●
Are the required backing plates present, and are they
securely welded to a primary structural member of the
ambulance floor?
●
Is all the hardware tight? (Reminder: Do not repeatedly
tighten the hardware.)
14
Make sure all connections are tight, but do not
overtighten
the
hardware.
Overtightening,
especially with powered tools, can cause the nut and
bolt beneath the ambulance floor to pull through the
backing plate.
If inspection indicates the components are pulling
through the backing plate, take the Stat Trac out of
service immediately and install a new Stat Trac with
new backing plates.
© Ferno-Washington, Inc 234-2132-04 April 2013
Stat Trac® Users’ Manual
Training Record
Date
Name
© Ferno-Washington, Inc 234-2132-04 April 2013
Training Method
15
Stat Trac® Users’ Manual
Maintenance Record
Date
16
Maintenance Performed
By
© Ferno-Washington, Inc 234-2132-04 April 2013
Installation Manual
Model 185, 185-MT, 185-LT
Stat Trac® Cot Fastening System
April 2013
Pub. No. 234-2132-04
Read this Manual and
Retain for Future Reference
Stat Trac® Installation Manual
Safety Information
Stat Trac® Installation Manual
1 - Safety Information
1.1Warning
1.2Important
Warning notices indicate a potentially hazardous situation
which, if not avoided, could result in injury or death.
Important notices emphasize important usage or maintenance
information. Failure to follow Important notices could result
in damage to the product or property damage.
Warning
Important
An improper cot can cause injury. Use only Ferno cots
designed or properly modified for use with the Stat Trac.
Improper or inadequate installation can cause injury.
The installer must test the fastening-system setup to
meet or exceed all applicable guidelines before using the
setup in an ambulance.
Improper testing can cause injury. Installers must test the
fastening-system setup to pass AMD Standard 004 before
installing a Stat Trac in an ambulance.
1.3Tip
Tips provide recommendations for easier use of the product.
Improperly-installed backing plates can fail. Secure the
backing plates to primary structural members of the
ambulance at all mounting points.
Improper adjustment can cause injury and damage. Do
not loosen the fastener posts. If needed, adjust only the
height of the fastener-post brackets.
1.4 Cot and Fastening System
Compatibility
Improper parts and service can cause injury. Use only
Ferno-approved parts and Ferno-approved service on the
Stat Trac.
Note: For the purpose of this notice, all Ferno® transporters
are included under the generic term, “cot.”
Modifying the Stat Trac can cause injury and damage. Use
the Stat Trac only as designed by Ferno.
Combining different manufacturers’ products into a “mixedcomponent” cot/cot fastening system can increase the user’s
risk of injury and damage.
Ferno-Washington, Inc. strongly recommends that only
Ferno-manufactured cots be used in Ferno-manufactured
cot fastening systems, and that only Ferno-manufactured cot
fastening systems be used for securing Ferno-manufactured
cots in ambulances.
ANY COMBINATION OF A FERNO COT OR COT
FASTENING SYSTEM WITH A NON-FERNO COT OR
COT FASTENING SYSTEM IS MISUSE OF THE FERNO
PRODUCT. Responsibility for the outcome of known,
intentional misuse rests squarely on the misuser.
18
© Ferno-Washington, Inc 234-2132-04 April 2013
Stat Trac® Installation Manual
About the Stat Trac
2 - About the Stat Trac
2.1Description
Model 185, Model 185-MT and Model 185-LT Stat Trac® Cot
Fastening Systems (referred to as the Stat Trac in this manual)
are devices designed to secure a Ferno cot or mobile transporter
inside a ground-based ambulance. See Cot and Fastening
System Compatibility, page 18, for more information.
Each Stat Trac is sold with one track and one Combined
Users’ and Installation Manual. Installation kits are sold
separately.
The Stat Trac is for professional use only. It is designed
for use with ambulances that meet the requirements of the
Federal Ambulance Specification KKK-A-1822.
For information about Federal Ambulance Specification
KKK-A-1822, see Contacts for Industry Standards, page 23.
Important
Owners of cots in the PROFlexx®, POWERFlexx®, and
XCalibur series:
Cots with 6”/152 mm wheels require the Stat Trac to
be installed at least 17”/431.8 mm from the side walls.
Installing closer than 17”/431.8 mm may not allow
clearance for the wheels to swivel during transporter
removal.
If you installed a Stat Trac at the old minimum
distance prior to June 1, 2000, you must adjust
your Stat Trac to the new 17”/431.8 mm minimum
wall clearance. Center-mounted Stat Tracs and those
installed 17”/431.8 mm or more from the wall do not
require adjustment.
Follow the instructions on pages 17-40 of this manual
for proper installation.
2.2 Compatible Cots/Transporters
The Stat Trac is for use with the following Ferno cots that
have been designed specifically for use with the Stat Trac:
●
POWERFlexx-ST®
●
PROFlexx® Series 35PST, 35XST, 93PST, 93HST
●
35A-ST, 35A+ST, 93ES-ST, 93EX-ST, and XCalibur
(if factory-equipped).
Warning
An improper cot can cause injury. Use only Ferno
cots designed or properly modified for use with the
Stat Trac.
Adaptor kits are available to modify Ferno Series 35A,
35A+, 35P, 93ES, 93EX, 93H, POWERFlexx® and XCalibur
(if not factory-equipped) for use with the Stat Trac.
2.3General Specifications
Specifications are rounded to whole numbers. Contact
Ferno Customer Relations for additional information
(page 2). Ferno reserves the right to change specifications
without notice.
Specification
Imperial
Metric
86 in
2184 mm
Model 185-MT
96 in
2438 mm
Model 185-LT
103 in
2616 mm
8 in
203 mm
3 in
76 mm
Model 185
55 lb
24.9 kg
Model 185-MT
61 lb
27.7 kg
Model 185-LT
65 lb
29.5 kg
Length
Model 185
Width
Overall
Height
Overall
Weight
© Ferno-Washington, Inc 234-2132-04 April 2013
19
About the Stat Trac
2.4 Items Required: Model 185 Only
The following items (not supplied) are required to install the
Model 185 Stat Trac:
Mounting block (2 ea.)
Order kit 056-7027
Beauty Shim plate (2 ea., may be needed)
Order kit 056-7027
Backing (anchor) plates*
2 ea.
3/8" SAE Grade 5, UNC 2,
Zinc-plated socket head cap screws**
8 ea.
3/8" SAE Grade 5, UNC 2, Zinc-plated
elastic lock nuts**
8 ea.
3/8" Drill bit
1 ea.
1/8" Drill bit
1 ea.
1/8" Socket head wrench
1 ea.
3/8" Box wrench
1 ea.
Tube of silicone caulking
1 ea.
Router or saber saw
1 ea.
Template Model 185 (optional)
Order kit 081-9539
* The Stat Trac is designed to be installed with, at minimum:
A36 Grade steel backing plates, 6061-T6 Grade aluminum
backing plates, or equivalent at all mounting points. (See
Backing Plate Requirements, page 23 for more information).
If the vehicle in which you are installing the Stat Trac does
not have the required backing plates or their equivalent,
have them installed. Consult the ambulance manufacturer
for installation information.
** The socket head cap screws and nuts should be of at
least SAE Grade 5, with a corrosion-resistant coating (zinc
plating recommended) and a UNC-2 threading. The length
of the screws will be determined by the combined thickness
of the patient compartment floor, the mounting block, any
shim plates used, and the backing plate. When installed,
the cap screws should extend beyond the backing plates a
minimum of 3/4"/19 mm.
Note: To order the required mounting kit or an optional
Installation Template, see Accessories, page 37.
Stat Trac® Installation Manual
2.5 Items Required:
Model 185-MT, Model 185-LT
The following items (not supplied) are required to install the
Model 185-MT and 185-LT Stat Trac:
Mounting blocks (3 ea.)
Beauty Shim plates (3 ea., may be needed)
Backing (anchor) plates*
3/8" SAE Grade 5, UNC 2, Zinc-plated
socket head cap screws**
3/8" SAE Grade 5, UNC 2, Zinc-plated
elastic lock nuts**
3/8" Drill bit
1/8" Drill bit
3/8" Socket head wrench
3/8" Box wrench
Tube of silicone caulking
Router or saber saw
Template Model 185-MT (optional)
Template Model 185-LT (optional)
Order kit 056-7030
Order kit 056-7030
3 ea.
12 ea.
12 ea.
1 ea.
1 ea.
1 ea.
1 ea.
1 ea.
1 ea.
Order kit 081-9875
Order kit 081-9543
* The Stat Trac is designed to be installed with, at minimum:
A36 Grade steel backing plates, 6061-T6 Grade aluminum
backing plates, or equivalent at all mounting points. (See
Backing Plate Requirements, page 23 for more information).
If the vehicle in which you are installing the Stat Trac does
not have the required backing plates or their equivalent,
have them installed. Consult the ambulance manufacturer
for installation information.
** The socket head cap screws and nuts should be of at
least SAE Grade 5, with a corrosion-resistant coating (zinc
plating recommended) and a UNC-2 threading. The length
of the screws will be determined by the combined thickness
of the patient compartment floor, the mounting block, any
shim plates used, and the backing plate. When installed,
the cap screws should extend beyond the backing plates a
minimum of 3/4"/19 mm.
Note: To order the required mounting kit or an optional
Installation Template, see Accessories, page 37.
20
© Ferno-Washington, Inc 234-2132-04 April 2013
Stat Trac® Installation Manual
About the Stat Trac
2.6Components
Model 185 Components
185 Stat Trac
Installation Template Accessory Kit 081-9539 for 185
Mounting Kit 056-7027 (Required)
2 - Mounting Blocks
2 - Beauty Shim Plates (.030 thick)
Backing Plate (2 required, not supplied)
Model 185-MT and Model 185-LT Components
185-MT Stat Trac
Backing Plate (3 required, not supplied)
185-LT Stat Trac
Installation Template
Accessory Kit 081-9875 for 185-MT
Accessory Kit 081-9543 for 185-LT
© Ferno-Washington, Inc 234-2132-04 April 2013
Mounting Kit 056-7030 (Required):
3 -Mounting Blocks
3 - Beauty Shim Plates (.030 thick)
21
Stat Trac® Installation Manual
Before You Begin
3 - Before You Begin
3.1 Installation Requirements
installer requirement
The integrity of the cot-fastening system relies on the
installer to mount the Stat Trac to meet or exceed the AMD
standards and KKK-A-1822 guidelines.
Installers must confirm the validity of their installation
method by mounting and pull-testing a cot fastening system
separate from an ambulance.
Before mounting a Stat Trac in an ambulance, install a
test Stat Trac fastening system and test this setup to meet or
exceed the pull test specified in AMD 004. When the setup
has passed this test, use the same setup when installing new
Stat Trac(s) in your ambulance(s).
For more information, see Contacts for Industry Standards,
page 23.
general requirements
●
To install the Stat Trac, a skilled professional who is
familiar with ambulance construction is required.
●
Install the Stat Trac to meet or exceed all applicable
standards in your country.
●
Properly-installed backing plates (not supplied) must
be used at all mounting points. See Backing Plate
Requirements, page 23.
Warning
Improper or inadequate installation can cause
injury. The installer must test the fastening-system
setup to meet or exceed all applicable guidelines
before using the setup in an ambulance.
Warning
Improper testing can cause injury. Installers must
test the fastening-system setup to pass AMD 004
before installing a Stat Trac in an ambulance.
Warning
A Stat Trac installed without backing plates can fail.
Secure the Stat Trac to properly-installed backing
plates at all mounting points.
Warning
Improperly-installed backing plates can fail. Secure
the backing plates to primary structural members
of the ambulance at all mounting points.
Vehicle Requirements
●
Consult the ambulance manufacturer for ambulance
structural details and ambulance warranty information.
●
Inspect the ambulance for anything that might interfere
with the installation.
●
The floor to which the mounting components are
attached must have sufficient strength to hold the
mounted Stat Trac and cot with patient.
●
Install a new Stat Trac when remounting an ambulance
box.
●
If the ambulance is involved in a traffic accident, the
Stat Trac could sustain hidden damage (damage that
is not visible to the eye). Replace the Stat Trac if the
ambulance is involved in a traffic accident.
●
The ambulance bumper extension should not exceed
14" (356 mm). The patient compartment should have a
level floor large enough for the folded cot and cot Stat
Trac. See the cot users’ manual for details.
Important
The Stat Trac is designed to be installed with backing
plates welded to rigid structural frame members at
all mounting points. See Specification KKK-A-1822,
Section 3.10.6 and the instructions in this manual.
Important
Inspect under the floor and behind the wall of the
ambulance for anything (fuel tank, wiring, brake lines,
fuel lines, oxygen lines or other items) that might
interfere with the installation.
Important
If the ambulance is involved in a traffic accident,
replace the Stat Trac.
22
© Ferno-Washington, Inc 234-2132-04 April 2013
Stat Trac® Installation Manual
3.2Backing Plate Requirements
●
Backing plates must be used at all mounting points.
●
Backing plates must be ASTM A36 grade steel,
aluminum 6061-T6, or equivalent (minimum).
●
At all mounting points, the backing plates must be large
enough to be welded at both ends to a rigid structural
frame or structural reinforcement of the ambulance.
See Table 1 below for recommendations. Ferno’s
recommendations do not replace the need to test your
fastening system setup.
●
At all mounting points, use a full penetration weld to
secure the backing plates to the rigid structural frame
members. Spot-welding is not sufficient for a quality
installation.
Before You Begin
contacts for industry standards
For information about Federal Ambulance Specification
KKK-A-1822, contact:
Federal Supply Services
Specifications Section
Suite 8100
470 E. L’Enfant Plaza, SW
Washington, DC 20407
For information about AMD standards, contact:
Ambulance Manufacturer’s Division
National Truck Equipment Association
37400 Hills Tech Drive
Farmington Hills, MI, 48331-3414
Install backing plates on the ambulance if none are present.
Contact the ambulance manufacturer for installation
information.
table 1 - recommended minimum backing plates
Thickness and Style
A36 Steel
6061-T6
Aluminum
Less than 9" (229 mm)
1/2" (13 mm) plate
9"-21" (229-533 mm)
3/4" (19 mm) plate
21"-38" (533-965 mm)
1" (25 mm) plate
38"-54" (965-1372 mm)
Structural C-channel, 7.25 lb/ft,
1.721" legs, 0.321" flange
Less than 6" (152 mm)
1/2" (13 mm) plate
6"-13" (152-330 mm)
3/4" (19 mm) plate
13"-24" (330-610 mm)
1" (25 mm) plate
Width
Length
Sufficient to span the
distance between two rigid
structural frame members
Recommended Minimum* Backing Plate
4" (102 mm)
Span Between Two Rigid
Structural Frame Members
Note: (*) These recommendations are guidelines. Test your fastening system setup to meet or exceed all applicable standards.
Contact your ambulance manufacturer for installation assistance and for alternate materials of equal or greater strength.
Important
Important
The Stat Trac is designed to be installed with backing
plates welded to rigid structural frame members at all
mounting points. See Contacts for Industry Standards
above.
Ambulance construction varies widely. Ferno’s
backing-plate recommendations do not replace the
installer’s requirement to test the setup to meet or
exceed all applicable standards.
© Ferno-Washington, Inc 234-2132-04 April 2013
23
Stat Trac® Installation Manual
Marking the Floor
4 - Marking the Floor
4.1 Using this Section
Center-mounted
(Stat Trac in Center of patient compartment)
Use the measurements in Subsection 4.2 to begin marking
the floor of the ambulance for the Stat Trac. Then, if you
purchased the optional template, use Subsection 4.3,
“Positioning For Any Model Stat Trac Using a Template,”
to finish marking the floor.
1. Measure across the patient compartment from one side
wall to the other (or to the bench seat, if present), and
divide the total by two. This is the distance to the center
of your patient compartment.
If you do not have a template, use the appropriate
measurements for your model Stat Trac in Subsections 4.4,
4.5 or 4.6 to finish marking the floor of the ambulance.
2. Starting at the patient compartment wall near the
rear doors, measure toward the center of the patient
compartment and mark a point at the distance you
calculated in Step 1.
4.2 Finding the Centerline
3. From the same wall but near the forward end of the
patient compartment, measure and mark a second
point at the distance you calculated in Step 1.
Items Needed:
1
1
Pen, pencil, or similar to mark the floor
Measuring tape
4. Start at the rear doors and draw a line between the marks
you make. This is the Centerline.
Before you begin, remove the cot and any existing cot
fastening system from the ambulance.
Then, decide where to place the Stat Trac. Follow the
instructions below to place it to one side of the ambulance,
in the center of the ambulance, or prepare for dual Stat Trac
mountings.
LBS and LBS Jr. Customers: The width of the Large
Body Surface accessories requires the Stat Trac to be
mounted in the center of the vehicle.
dual Stat Trac mounting
If you want two Stat Trac mounting positions in the patient
compartment, use one or both of the above measuring methods
while following the guidelines below.
When installing two Stat Trac mounting positions in a
single ambulance compartment, the Centerlines:
Side-mounted Stat Trac
(as close as possible to one wall)
1. Starting at the patient compartment wall near the (rear)
compartment doors, measure toward the center of the
patient compartment and mark a point at 17 inches/432
millimeters.
2. From the same wall but near the forward end of the
patient compartment, measure and mark a second
point at 17 inches/432 millimeters.
3. Starting at the rear doors, draw a straight line between
the 17-inch/432 millimeters marks. This will be the
Centerline.
24
33
MUST BE A minimum of 17 inches/432 millimeters
from the patient compartment walls1 and more than 5
inches/127 millimeters apart.2
22
CANNOT BE Between 15-20 inches/381-508
millimeters apart.3
1
Note: Each Centerline must be a minimum of 17 inches/432
millimeters from the patient compartment’s side walls to
allow room between the cot wheels and wall.
Note: The Centerlines must be a minimum of 5 inches/127
millimeters apart to ensure the mounting blocks or backing
plates do not overlap.
2
Note: Keep the Centerlines less than 15 inches/381
millimeters apart or greater than 20 inches/508 millimeters
apart to ensure the cot wheels do not rest on top of the
alternate mounting blocks.
3
© Ferno-Washington, Inc 234-2132-04 April 2013
Marking the Floor
Stat Trac® Installation Manual
4.3 Positioning For Any Model Stat Trac Using a Template
Note:
Refer to Figure 1 for these instructions.
1. Close the rear doors.
2. Mark the floor along the line where the (closed) rear
doors meet the patient compartment floor. If the doors
close flush with the patient compartment floor, start
from this edge.
3. Use the mark on the floor at the doors’ edge and place
the template at this line with the lip facing up. Or,
if the doors close flush with the edge of the patient
compartment floor, place the template at the edge of
the floor with the lip facing down.
4. Center the template on the Centerline and inspect for
any interference between the mounting block slots and
the wheel plates in the patient compartment. Remove
the wheel plates and any other fixtures that interfere
with the mounting slots.
5. With the template on the Centerline, mark the
outline of the mounting block slots on the floor.
If you are installing two mounting positions in the same
ambulance, repeat Steps 1-5, using the second Centerline.
17" Minimum Distance
From Side Wall
Template
Wheel Plate
(If Present)
Mounting Block Slot
Door Edge Mark
Centerline
Template Lip
Figure 1 - Floor Markings Using a Template
© Ferno-Washington, Inc 234-2132-04 April 2013
25
Stat Trac® Installation Manual
Marking the Floor
4.4 Measuring for the Model 185 (Short) Stat Trac®
Note:
Refer to Figure 2 for these instructions.
1. Mark the floor along the line where the (closed) rear
doors meet the patient compartment floor. If the doors
close flush with the edge of the patient compartment
floor, start from this edge.
2. Starting from the mark made in Step 1 (or the floor
edge), measure and mark a point on each side of the
Centerline at 2.26 (2-17/64) inches/57 millimeters into
the patient compartment.
3. Connect the two marks made in Step 2. This line (Line
A) will be the rear edge of the first mounting block.
4. Starting from the Centerline on Line A, mark a point
1.5 (1-1/2) inches/38 millimeters to each side of the
Centerline. These points show the width of the first
mounting block.
5. Place a mounting block on Line A with the corners
on the 1.5-inch/38 millimeter marks made in Step 4.
Trace the outline of the bottom edge of the mounting
block.
6. Starting at Line A, measure 73.236 (73-15/64)
inches/1860 millimeters into the patient compartment
and mark a point on each side of the Centerline.
7. Connect the two marks made in Step 6. This line (Line
B) will be the rear edge of the second mounting block.
8. Starting from the Centerline on Line B, mark a point
1.5 (1-1/2) inches/38 millimeters to each side of the
Centerline. These points show the width of the second
mounting block.
9. Place a mounting block on Line B with the corners on
the 1.5-inch marks made in Step 8. Trace the outline of
the bottom edge of the mounting block.
17.000
Minimum
Centerline
3.000
7.310
First Mounting
Block Outline
Second Mounting
Block Outline
B
73.236
1.500
1.500
Ambulance Front
Floor Edge or
Door Edge
2.260
A
Ambulance Rear
Figure 2 - Floor Markings for Model 185 (Short/86") Stat Trac®
26
© Ferno-Washington, Inc 234-2132-04 April 2013
Stat Trac® Installation Manual
Marking the Floor
4.5 Measuring for the Model 185-MT (Medium) Stat Trac®
Note:
Refer to Figure 3 for these instructions.
7. Connect the two marks made in Step 6. This line (Line
B) will be the rear edge of the second mounting block.
8. Starting from the Centerline on Line B, mark a point
1.5 (1-1/2) inches/38 millimeters to each side of the
Centerline. These points show the width of the second
mounting block.
9. Place a mounting block on Line B with the corners on
the 1.5-inch marks made in Step 8. Trace the outline of
the bottom edge of the mounting block.
10. Starting from Line B, measure 73.236 (7315/64)/1860.2 millimeters inches into the patient
compartment and mark a point on each side of the
Centerline.
11. Connect the two marks made in Step 10. This line
(Line C) will be the rear edge of the third mounting
block.
12. Starting from the Centerline on Line C, mark a point
1.5 (1-1/2) inches/38 millimeters to each side of the
Centerline. These points show the width of the third
mounting block.
13. Place a mounting block on Line C with the corners on
the 1.5-inch marks made in Step 12. Trace the outline
of the bottom edge of the mounting block.
1. Mark the floor along the line where the (closed) rear
doors meet the patient compartment floor. If the doors
close flush with the patient compartment floor, start
from this edge.
2. Starting from the mark made in Step 1 (or the floor
edge), measure and mark a point on each side of the
Centerline at 2.385 (2-25/64) inches/60.58 millimeters
into the patient compartment.
3. Connect the two marks made in Step 2. This line (Line
A) will be the rear edge of the first mounting block.
4. Starting from the Centerline on Line A, mark a point
1.5 (1-1/2) inches/38 millimeters to each side of the
Centerline. These points show the width of the first
mounting block.
5. Place a mounting block on Line A with the corners on
the 1.5-inch marks made in Step 4. Trace the outline of
the bottom edge of the mounting block.
6. Starting at Line A, measure 9.547 (9-35/64)
inches/242.5 millimeters into the patient compartment
and mark a point on each side of the Centerline.
Centerline
17.000
Minimum
Second Mounting Block
Outline
3.000
First Mounting Block
Outline
7.310
Third Mounting
Block Outline
C
73.236
1.500
B
1.500
Ambulance Front
9.547
Floor Edge or
Door Edge
2.385
A
Ambulance Rear
Figure 3 - Floor Markings for Model 185-MT (Medium/96") Stat Trac®
© Ferno-Washington, Inc 234-2132-04 April 2013
27
Stat Trac® Installation Manual
Marking the Floor
4.6 Measuring for the Model 185-LT (Long) Stat Trac®
Note:
Refer to Figure 4 for these instructions.
1. Mark the floor along the line where the (closed) rear
doors meet the patient compartment floor. If the doors
close flush with the patient compartment floor, start
from this edge.
2. Starting from the mark made in Step 1 (or the floor
edge), measure and mark a point on each side of the
Centerline at 2.385 (2-25/64) inches/60.58 millimeters
into the patient compartment.
3. Connect the two marks made in Step 2. This line (Line
A) will be the rear edge of the first mounting block.
4. Starting from the Centerline on Line A, mark a point
1.5 (1-1/2) inches/38 millimeters to each side of the
Centerline. These points show the width of the first
mounting block.
5. Place a mounting block on Line A with the corners on
the 1.5-inch marks made in Step 4. Trace the outline of
the bottom edge of the mounting block.
6. Starting at Line A, measure 15.875 (15-7/8)
inches/403.23 millimeters into the patient compartment
and mark a point on each side of the Centerline.
8. Starting from the Centerline on Line B, mark a point
1.5 (1-1/2) inches/38 millimeters to each side of the
Centerline. These points show the width of the second
mounting block.
9. Place a mounting block on Line B with the corners on
the 1.5-inch marks made in Step 8. Trace the outline of
the bottom edge of the mounting block.
10. Starting from Line B, measure 73.236 (7315/64) inches/1860.20 millimeters into the patient
compartment and mark a point on each side of the
Centerline.
11. Connect the two marks made in Step 10. This line
(Line C) will be the rear edge of the third mounting
block.
12. Starting from the Centerline on Line C, mark a point
1.5 (1-1/2) inches/38 millimeters to each side of the
Centerline. These points show the width of the third
mounting block.
13. Place a mounting block on Line C with the corners on
the 1.5-inch marks made in Step 12. Trace the outline
of the bottom edge of the mounting block.
7. Connect the two marks made in Step 6. This line (Line
B) will be the rear edge of the second mounting block.
Centerline
17.000
Minimum
Second Mounting Block
Outline
First Mounting Block
Outline
3.000
7.310
C
Third Mounting
Block Outline
73.236
1.500
Ambulance Front
B
1.500
15.875
Floor Edge or
Door Edge
2.385
A
Ambulance Rear
Figure 4 - Floor Markings for Model 185-LT (Long/103") Stat Trac®
28
© Ferno-Washington, Inc 234-2132-04 April 2013
Stat Trac® Installation Manual
Installing the Stat Trac®
5 - Installing the Stat Trac
5.1 Drilling the Holes
Items Needed:
1
1
1
1
1
Mounting Block
1/8" inch Diameter Drill Bit
5/16" inch Diameter Drill Bit
3/8-16 Tap
Backing Plates
Note:
Refer to Figure 5 for these instructions.
1. Before drilling, inspect the underside of the ambulance
for obvious obstructions to the installation. If the fuel
tank, oxygen lines, or other elements are in the way,
contact the ambulance manufacturer for advice on
how to avoid them.
2. Place a mounting block on each mounting block
outline and mark the mounting hole positions.
3. Cautiously drill a small guide hole (or pilot hole)
through the floor at each mounting hole position, using
a 1/8 inch diameter drill bit.
4. Reinspect the underside of the ambulance to verify
nothing will be damaged by drilling the mounting holes.
Align the backing plates with the holes.
Warning
A Stat Trac installed without backing plates can fail.
Secure the Stat Trac to properly-installed backing
plates at all mounting points.
Important
The Stat Trac is designed to be installed with backing
plates at all mounting points.
If the vehicle in which you are installing the Stat Trac
does not have the required backing plates, have them
installed. Consult the ambulance manufacturer for
installation information.
Important
Inspect the underside of the ambulance for anything
(wiring, brake lines, fuel tank, oxygen lines or other
elements) that might interfere with the installation.
5. Consult the ambulance manufacturer to make sure the
backing plates can be installed without interference
and welded safely.
6. Weld backing plates beneath the ambulance floor at all
mounting points using a full penetration weld. Use a
setup identical to one you have tested to meet or exceed
all applicable guidelines. See page 22 to obtain AMD
standards and federal specification KKK-A-1822.
Also see Backing Plate Requirements, page 23.
7. Using the guide holes, drill completely through the
ambulance floor and backing plates with the 5/16
inch diameter drill bit. These larger holes are for the
mounting block bolts. Repeat for each guide hole.
Mounting Block
Outlines (2 or 3)
Figure 5 - Drilling the Guide Holes and Bolt Holes
8. Use a 3/8-16 tap to tap the backing plates for use with
3/8 inch socket head cap screws.
© Ferno-Washington, Inc 234-2132-04 April 2013
29
Stat Trac® Installation Manual
Installing the Stat Trac®
5.2 Cutting Cavities for
the Mounting Blocks
Items Needed:
1
1
1
3/8" Drill bit
Router, saber saw or other device
Measuring tape
Note:
Refer to Figures 6-8 for these instructions.
Note: A typical ambulance floor cross-section, showing a
floor covering, floor, and subfloor is shown in Figure 7. Your
ambulance floor may vary from this.
Important
Ambulance flooring styles vary widely. Consult the
ambulance manufacturer for the proper method and
tools to recess the floor for your style of ambulance.
3/8 inch
Bolt Holes
3/8 inch
Starting Hole
1. Mark a point at one corner of each mounting block
outline.
2. Carefully and slowly drill a starting hole through the
floor covering (typically linoleum or similar) and
floor (typically plywood) and stop when you reach
the subfloor (typically metal). Use a 3/8 inch diameter
drill bit (Figure 6).
3. Measure the thickness of the floor (typically plywood,
Figure 7). Set the router or saber saw to the proper
height to cut through the floor but not the subfloor
(typically metal).
Figure 6 - Drilling to Measure Floor Thickness
Floor Covering (typical: Linoleum)
Floor (typical: Plywood)
Subfloor (typical: Metal)
Mounting Block Cavity
4. Insert the saw or router blade into the starter hole you
drilled in Step 2. Beginning in this hole, carefully and
evenly cut along each mounting block outline.
5. Remove the section of floor covering and floor (Figure
8). Smooth the edges of the cavity with the router or
saw. Make sure the mounting block will fit inside the
mounting block cavity.
Note: If a threshold plate at the door interferes with the
mounting block cavity, notch the threshold plate to allow
proper installation of the mounting block.
Backing
Plate
Ambulance
Structure
Welding Bead
(both ends)
Bolt Holes
Ambulance
Structure
Figure 7 - Typical Floor Cross-Section for
Cutting the Mounting Block Cavities
(Plywood) Floor
Metal Subfloor
Figure 8 - Finished Mounting Block Cavity
30
© Ferno-Washington, Inc 234-2132-04 April 2013
Stat Trac® Installation Manual
Installing the Stat Trac®
5.3 Placing the Mounting Blocks
Items Needed:
2
2
Mounting Blocks (3 ea. for 185-MT and 185-LT)
Beauty Shim Plates* (3 ea. for 185-MT and 185-LT)
*Use as needed
Placement Notes
●
If the mounting block does not completely fill the
cavity, place the beauty shim plate in the cavity.
Add additional shims (thin metal plates) as needed
to fill the space between the metal subfloor and the
mounting block. Use the beauty shim plate as the
top shim, placing any additional shims beneath it.
●
If you have properly cut the floor down to the
metal subfloor and the mounting block is too high,
contact the ambulance manufacturer or Ferno
Customer Relations (page 2) for assistance.
●
If your ambulance has a corrugated subfloor, use
shims to fill any areas that do not provide stable
support for the mounting blocks.
Note:
Refer to Figure 9 for these instructions.
1. Place the mounting block in the mounting block
cavity, with the ramp toward the door (Figure 9) and
test the fit.
The flange (or lip) on the mounting block should rest
flat on the floor. Refer to the Placement Notes at right
to resolve any issues.
2. If the mounting block does not completely fill the
cavity, place the beauty shim plate in the cavity and
then the mounting block. Test the fit.
3. Repeat Steps 1-2 to place the other mounting block(s).
Mounting Block Ramp
Faces Rear Doors
Ambulance Doors
Figure 9 - Installing the Mounting Blocks
© Ferno-Washington, Inc 234-2132-04 April 2013
31
Stat Trac® Installation Manual
Installing the Stat Trac®
5.4 Installing the Mounting Blocks
Items Needed (Model 185):
8
2
8
1
3/8" inch Socket Head Cap Screws
Backing Plates
3/8" inch Elastic Locknuts
Tube of Silicone Caulking
Items Needed (Models 185-MT, 185-LT):
12
3
12
1
3/8” inch Socket Head Cap Screws
Backing Plates
3/8” inch Elastic Locknuts
Tube of Silicone Caulking
Note: Use Figure 10 below for reference as you follow the
instructions.
1. Measure floor thickness to determine the proper screw
length needed. The 3/8 inch socket head cap screws
must be long enough to pass through the mounting
block, shim plate, any additional shims used, the
metal subfloor, and the backing plate, and still have
3/4 inches of threads extending past the backing plate.
2. Apply silicone caulk to the entire mounting block
cavity, especially the areas around the holes. This will
provide a corrosion barrier.
3. Place a mounting block, beauty shim plate and any
additional shims needed inside each mounting block
cavity.
4. Insert the screws into the mounting holes. The screws
should extend at least 3/4 inch past the backing plates.
Attach the elastic locknuts to the socket head cap
screws and tighten.
5. Apply silicone caulk around the floor edge and
mounting block flange. This will keep contaminants
out of the cavity.
6. Repeat steps 1-5 to place the other mounting block(s).
7. Verify the mounting blocks are mounted and secured
properly.
Socket Head Cap Screw (4)
Mounting Block
Floor (Plywood)
Subfloor (Metal)
Bottom of flange
should rest on floor
Elastic Locknut
Ambulance
Structure
3/4" Minimum
Beauty Shim Plate
Additional Shim(s) As Needed
Backing Plate
Ambulance
Structure
Figure 10 - Mounting the Mounting Blocks
32
© Ferno-Washington, Inc 234-2132-04 April 2013
Stat Trac® Installation Manual
Installing the Stat Trac®
5.5 Checking the Stat Trac With
the Ambulance Floor
The Stat Trac is adjustable to account for dips, swells, or
other imperfections in the ambulance floor. Check the fit of
the Stat Trac with the floor, and then follow the procedures
in Section 5.6 and/or Section 5.7 to make adjustments.
mounting the stat trac
to the ambulance floor
Fastener Post
(2 or 3)
Before making any adjustments, test the Stat Trac with the
floor:
1. Slide the Stat Trac toward the front of the ambulance
to seat the fastener posts in the mounting blocks
(Figure 11).
2. To lock the Stat Trac in place, swing the mounting
handle down and toward the safety stop (Figure 12)
until it is parallel to the floor.
Mounting Block
(2 or 3)
Figure 11 - Mounting the Stat Trac
3. Verify that the Stat Trac is locked. To do this, pull on
the track with your hands. The Stat Trac should remain
firmly in place.
4. If there is any difficulty mounting the Stat Trac to
the floor or locking the mounting handle, inspect
the fastener posts inside the track (Figure 11) and
determine if the ends of the fastener posts are slotted
(capable of being adjusted with a slotted [flat-blade]
screwdriver).
Mounting Handle
fastener posts are Not Slotted
If the fastener posts are not slotted, they are not adjustable.
However, you can adjust the fastener-post brackets. See
Adjusting the Fastener-Post Brackets, page 35. If the Stat
Trac cannot be adjusted to fit the mounting blocks, see
Troubleshooting, page 36.
Figure 12 - Using the Mounting Handle
fastener posts are Slotted
If the fastener posts are slotted (Figure 13) you can adjust the
height of the fastener posts and the fastener-post brackets. If
adjustment is needed:
Post with Slotted End
1. Adjust the height of the fastener posts first (See
Adjusting the Fastener Posts, page 34).
2. Adjust the fastener-post brackets second (See Adjusting
the Fastener-Post Brackets, page 35.
3. If the Stat Trac cannot be adjusted to fit the mounting
blocks, see Troubleshooting, page 36.
Figure 13 - Adjustable Fastener Post
© Ferno-Washington, Inc 234-2132-04 April 2013
33
Installing the Stat Trac®
Stat Trac® Installation Manual
5.6Adjusting the Fastener Posts
Items Needed:
1
1
1
1
Stat Trac
Slotted Screwdriver
Socket Wrench with 3/4" Socket
Deep-Well Socket or Socket Extension
The slotted fastener posts (Figures 14) extend both below
and into the center of the Stat Trac to secure the Stat Trac
to the ambulance floor. The depth of the fastener posts can
be adjusted using a slotted screwdriver and 3/4" socket and
socket wrench.
Slot
Nut
Welded Insert
(Not Removable)
Figure 14 - Fastener Post (Side View)
Note: A deep-well socket or socket wrench with an extension
is needed.
1. Use the 3/4" socket wrench to loosen and raise each
fastener-post nut until it is at the end (top) of the
fastener post (Figures 14-15). Repeat for the remaining
nut(s).
2. Use the slotted screwdriver to lower (turn clockwise)
each fastener post until the fastener posts fit into the
mounting blocks.
3. Mount the Stat Trac to the floor (see Mounting the Stat
Trac to the Ambulance Floor, page 33).
4. With the Stat Trac still locked in the floor, use the
screwdriver to raise each fastener post (turn counterclockwise) until the fastener posts stop against the top
inside of the mounting blocks. Do not overtighten.
5. Using the screwdriver to hold the position of the
fastener posts if needed, hand-tighten the nuts to
the welded insert in the floor of the channel (Figure
14) to set the fastener posts at the correct height for
your ambulance. (Note that the welded insert is not
removable).
6. Use the 3/4" socket wrench to finish tightening each
nut. Tighten until snug.
Figure 15 - Using the Socket Wrench
Tighten Until Snug
Tighten the fastener posts nuts until snug.
Overtightening may cause difficulty in unmounting and mounting the Stat Trac to the
ambulance floor.
Note: Inspect the nut and fastener post after you have
finished the adjustment. The fastener posts should be fully
engaged with the nut, with at least one or two threads
showing above the nut. If the fastener post does not fully
engage the nut (some of the threads inside the nut are
visible) adjust the installation. See Adjusting the FastenerPost Brackets, page 35, and Troubleshooting, page 36 for
additional methods to adjust the Stat Trac.
7. Un-mount and remount the Stat Trac. Verify the
installation is correct. Inspect the mounting blocks
and Stat Trac for binding, friction, wedging, or loose/
wobbly mounting. If the Stat Trac shows any of these
symptoms, see Troubleshooting, page 36.
34
© Ferno-Washington, Inc 234-2132-04 April 2013
Stat Trac® Installation Manual
Installing the Stat Trac®
5.7Adjusting the Fastener-Post Brackets
To adjust the height of the fastener-post brackets, loosen the
screws, set the adjustment height, and retighten as follows:
1.
All models: Loosen but do not remove the four screws on
the end opposite the funnel (Figure 16) using a 1/2" socket
or angled open wrench. Access the screws either from above
or below the Stat Trac.
Warning
Improper adjustment can cause injury and damage.
Do not loosen the fastener posts. If needed, adjust
only the height of the fastener-post brackets.
Note: Loctite® threadlocker was applied to the screws during the
manufacturing process. The screws may be difficult to loosen, but
do not apply heat.
Note:
Owners of a Model 185 (short) Stat Trac skip Step 2.
2.
3.
Models 185-MT, 185-LT only: Loosen but do not remove
the 11 screws on the funnel end (Figure 16) using a 7/16"
socket or angled open wrench. (There are five screws on the
side with the safety stop, and six on the opposite side).
Important
●
The funnel-end fastener-post bracket (below the cot
lock) is not adjustable on Model 185.
●
The center fastener-post bracket (below the cot
lock) is not adjustable on Model 185-MT and Model
185-LT.
With the brackets loosened, mount the Stat Trac (See
Mounting the Stat Trac to the Ambulance Floor, page 33). If
the Stat Trac cannot be mounted to the floor, contact Ferno
Customer Relations, page 2.
cleaner/primer (not provided), then apply 1-2 drops of
Loctite® 242 (blue) threadlocker (provided) and immediately
reinstall the screw.
4.
With the Stat Trac mounted to the floor, tighten all screws to
set the position of the fastener-post brackets.
5.
Unlock and remove the Stat Trac from the floor plates.
Model 185 (short) Stat Trac: Repeat Step 6 three times
to clean and reinstall the remaining screws in the bracket
opposite the funnel.
6.
Working with only one screw at a time, remove the screw
from the Stat Trac, clean the threads with acetone or a Loctite®
Models 185-MT and 185-LT: Repeat Step 6 a total of 15 times
to clean and reinstall the screws at each end of the Stat Trac.
7.
Screw (x4)
Use 1/2" Wrench
Screw (x11)
Use 7/16" Wrench
ALL Models: This
end is adjustable.
Model 185 (short)
track: ONLY this
end is adjustable
Models 185-MT and
185-LT: The funnel
end is also adjustable.
Funnel
Figure 16 - Adjusting the Height of the Fastener-Post Brackets (Model 185-MT or 185-LT shown)
© Ferno-Washington, Inc 234-2132-04 April 2013
35
Troubleshooting
Stat Trac® Installation Manual
6 - Troubleshooting
6.1 Troubleshooting Table
Problem
Cause
Corrective Action
Stat Trac is being inserted into the mounting Load both ends of the Stat Trac in the
blocks incorrectly.
mounting blocks at the same time.
Wedging
Loose Mounting
(Vertical looseness)
Wobbly Mounting
(Side-to-side looseness)
Stat Trac Will Not Lock
Into the Mounting Blocks
1) Adjust the Stat Trac (see Adjusting the
Fastener Posts, page 34 and Adjusting the
One of the mounting blocks is installed at a Fastener-Post Brackets, page 35).
different level than the other(s).
2) Remount the mounting blocks so they are
level or 1/16"/1.6 mm above the floor.
The mounting blocks are loose.
Tighten the mounting block socket-head cap
screws.
The fastener posts are not adjusted properly.
Adjust the Stat Trac (see Adjusting the Fastener
Posts, page 34 and Adjusting the Fastener-Post
Brackets, page 35).
1) Take out the mounting block and remove
shim(s) as needed. Reinstall the mounting
The mounting blocks are more than 1/16"/1.6 blocks and remaining shim(s).
mm inch above the floor.
2) Adjust the Stat Trac (see Adjusting the
Fastener Posts, page 34 and Adjusting the
Fastener-Post Brackets, page 35).
Dirt or debris is inside the mounting block.
Remove debris and clean the mounting
blocks and/or Stat Trac.
The floor of the ambulance is not level.
Adjust the Stat Trac (see Adjusting the Fastener
Posts, page 34 and Adjusting the Fastener-Post
Brackets, page 35).
Note: If the corrective actions above do not solve the problem, contact Ferno Customer Relations (page 2) or your ambulance
manufacturer for assistance.
36
© Ferno-Washington, Inc 234-2132-04 April 2013
Stat Trac® Installation Manual
Parts and Service, Accessories
7 - Parts and Service, Accessories
7.1 U.S.A. and Canada
In the United States and Canada, to order parts or for
professional repairs, contact EMSAR® - the only agent
authorized by Ferno to manage, service, and repair Ferno
products.
Telephone (Toll-Free)
1.800.73.EMSAR
Telephone1.937.383.1052
Fax+1.937.383.1051
Internetwww.EMSAR.com
7.2Worldwide
To order Ferno parts and for professional repairs, contact
your Ferno distributor. Your distributor is the only agent
authorized by Ferno to manage, service, and repair Ferno
products.
7.3 Retrofitting a Cot for Stat Trac
If your cot does not have the required Stat Trac components
(loading posts and release handle or lever), the cot must be
retrofitted to make it compatible with the Stat Trac.
Warning
Improper parts and service can cause injury. Use
only Ferno-approved parts and Ferno-approved
service on the Stat Trac.
Warning
Modifying the Stat Trac can cause injury and
damage. Use the Stat Trac only as designed by
Ferno.
required components
Kit #
056-7027
056-7030
Description
Mount Block/Bty Shim Kit
Mount Block/Bty Shim Kit
Use With
185
185-MT, 185-LT
installation templates
Kit #
081-9539
081-9875
081-9543
Description
Installation Template
Installation Template
Installation Template
Use With
185
185-MT
185-LT
Contact EMSAR (above) or Ferno (page 2) for information.
stat trac accessories
7.4Accessories
Ferno offers a full line of accessories approved for installing
the Stat Trac. Always follow the instructions packed with
accessories. Keep the instructions with this manual.
Ferno also offers a full line of emergency products for the
EMS professional. Contact Ferno Customer Relations (page
2) or your Ferno distributor for product information.
© Ferno-Washington, Inc 234-2132-04 April 2013
Kit #
081-9540
081-9977
056-7028
056-7040
056-7031
Description
Safety Yellow Touch-up Paint
Black Touch-up Paint
Deluxe Retrofit Install. Kit*
Deluxe Retrofit Install. Kit*
Deluxe Retrofit Install. Kit*
Use With
All
All
185
185-MT
185 LT
Note: The three Deluxe Retrofit Installation Kits include
plastic covers to cover mounting points for a Ferno® Model
175 cot fastener plus shims and beauty rings for use with the
Stat Trac floor mounting blocks.
37
Notes
Stat Trac® Installation Manual
Notes
38
© Ferno-Washington, Inc 234-2132-04 April 2013
Notes
Stat Trac® Installation Manual
Notes
© Ferno-Washington, Inc 234-2132-04 April 2013
39