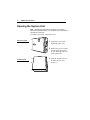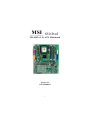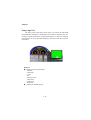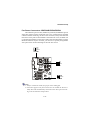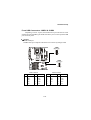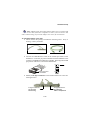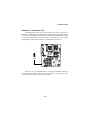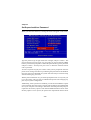
1
PC0027 mech 4/12/2000 4:55 PM Page 3
Apollo/Shadowhawk
Apollo/Shadowhawk 440S Series User’s Manual
u s e r
m a n u a l
System Manual
ii
PREMIO System Manual
Copyright
PREMIO is a registered trademark of Premio Computer, Inc. All
other brands and product names are trademarks or registered
trademarks of their respective companies.
© 1997 by Premio Computer, Inc. All rights reserved.
Printed in Taiwan.
Version 2.0, September, 1997.
Disclaimers
PREMIO makes no representation or warranties, either expressed
or implied, with respect to the contents of this publication and
specifically disclaims the implied warranties of merchantability
or fitness for a particular purpose. PREMIO shall not be liable for
technical or editorial errors or omissions in this publication, or
for incidental or consequential damages resulting from the
furnishing, performance, or use of this publication. We reserve
the right to revise this publication and to make changes from
time to time in its contents without notification.
iii
Contents
GETTING STARTED ..................................................................1
Setting Up ........................................................................2
Switches and Indicators.................................................3
UPGRADING ..............................................................................5
Opening the System Unit ...............................................6
Installing an Expansion Card ........................................7
Installing Memory ...........................................................8
Installing a SIMM .................................................................8
Removing a SIMM................................................................9
Installing a DIMM ................................................................9
Removing a DIMM .............................................................10
Installing a Hard Drive..................................................11
GETTING HELP........................................................................12
Troubleshooting ...........................................................12
Monitor Does Not Work .....................................................12
Keyboard Does Not Work...................................................13
Mouse Does Not Work........................................................13
System Unit Problems.........................................................14
Hard Disk Problems ............................................................14
iv
PREMIO System Manual
Warranty Service.......................................................... 15
Technical Support........................................................ 15
PREMIO on the Internet............................................... 15
APPENDIX ................................................................................16
Limited 3-Year Warranty.............................................. 16
FCC Standards ............................................................. 18
Important Safety Instructions ..................................... 19
Getting Started
Your PREMIO® system consists of three components:
a mid-tower or desktop system unit
a keyboard
a mouse
Add your choice of monitor, and your system is ready to use.
System Unit
Mid-tower system
Keyboard
Mouse
Desktop system
System Unit
Keyboard
Mouse
2
PREMIO System Manual
Setting Up
To set up your PREMIO system, simply connect your monitor,
the mouse, the keyboard, and any additional components you
want to use to the system unit.
Follow these easy steps:
1 Attach your monitor’s video cable
Power Connector
to the video connector.
2 Attach the mouse cable to the
Mouse Connector
Keyboard Connector
USB Connector
Serial-1 Connector
Serial-2 Connector
Parallel Connector
Video Connector
Sound Card Connectors
mouse connector.
3 Attach the keyboard cable to the
keyboard connector.
4 Attach the cables for any
additional components, such as a
printer, scanner, or modem, to the
parallel, serial, or universal serial
bus (USB) connector, as directed
in the component’s manual.
5 If your system is equipped for
multimedia, attach your speakers
and microphone to the sound card
connectors.
6 Plug your monitor’s power cord into a power outlet.
7 Attach the female end of the system power cord to the
system unit’s power connector, and then plug the other
end of the cord into a power outlet.
Your PREMIO system is now ready to use. To start the system,
turn on your monitor’s power switch and then press the system
power switch as shown on the next page.
Switches and Indicators
3
Switches and Indicators
The system unit’s front panel provides access to the CD-ROM
and floppy drives, and to the system’s switches and indicator
lights.
The illustration below shows a mid-tower system. If you have a
desktop system, turn to the illustration on the next page.
The CD-ROM drive reads
information on CDs.
Mid-tower system
CD ROM Drive
Floppy Drive
Power Switch
The floppy drive reads and
writes information on
diskettes.
The power switch turns the
system on and off.
The hard drive indicator
lights when the hard drive is in
use.
The power indicator lights
when the system is on.
Hard Drive Indicator
Power Indicator
Reset Button
The reset button restarts the
system.
4
PREMIO System Manual
Desktop system
Reset Button
Hard Drive Indicator
Power Indicator
Power Switch
CD ROM Drive
Floppy Drive
The reset button restarts the system.
The hard drive indicator lights when the hard drive is in
use.
The power indicator lights when the system is on.
The power switch turns the system on and off.
The CD-ROM drive reads information on CDs.
The floppy drive reads and writes information on
diskettes.
Upgrading
You can upgrade your PREMIO system with:
Expansion cards
More memory
An additional hard drive
To install an upgrade, you must open the system unit. Before
proceeding, read the important cautionary note below. Then
follow the steps on the next page.
Caution! Static discharge can cause permanent damage to
internal electronic components of your computer. Always use
the following precautions when working inside the system unit:
Wear a grounding wrist strap (available at most
electronics stores) when handling electronic components.
Do not remove a component from its antistatic packaging
until you are ready to install it.
Keep one hand in contact with the metal system case.
6
PREMIO System Manual
Opening the System Unit
Note Opening the system unit could affect your warranty.
Check with the dealer where you purchased your system before
opening the system unit.
To open the system unit, follow these steps
Mid-tower system
1 Turn off the system and
unplug the power cord.
2 Remove the screws securing
the side panel (mid-tower)
or case (desktop) at the rear
of the system unit.
Desktop system
3 Slide the side panel or case
up and to the rear, and
remove it.
Installing an Expansion Card
7
Installing an Expansion Card
To install an expansion card, open the system unit as described
on the
previous
page.
Then
follow
these
steps:
1 Remove the screw securing
the slot bracket cover for the
expansion slot you want to
use. Save the screw to secure the expansion card.
2 Insert the expansion card
firmly into the slot, making
sure it is seated completely.
3 Secure the card with the
saved screw.
8
PREMIO System Manual
Installing Memory
Note For details on memory configuration, including the
placement and type of memory to use in your system, refer to
the motherboard user’s manual that came with your system.
Follow these general guidelines when adding memory:
Use only the same type of memory throughout. For
example, do not mix EDO and fast page memory.
SIMMs must be installed in pairs, and both SIMMs in the
pair must be the same size and speed. For example, do
not install one 16-MB and one 8-MB SIMM.
Installing a SIMM
To install a SIMM, follow these steps:
1 Insert the SIMM into the socket at a
45° angle. (SIMMs can be installed
only one way.)
2 Gently press the SIMM up into a
vertical position until it snaps into
place. The SIMM’s clips will hold it
firmly at a 90° angle when it is
properly installed.
Installing Memory
9
Removing a SIMM
To remove a SIMM, follow these steps:
1 Press the holding clips on both sides of the SIMM
outward to release it.
2 Tilt the SIMM to a 45° angle.
3 Pull the SIMM up and out of the socket.
Installing a DIMM
To install a DIMM, follow these steps:
1 Insert the DIMM vertically into the
socket. (DIMMs can fit into the slot
only one way.)
2 Push down on the DIMM to seat it,
and then raise the plastic clips at
either side to lock it in place.
10
PREMIO System Manual
Removing a DIMM
To remove a DIMM, follow these steps:
1 Push down and out on the plastic
clips at either end to release
them.
2 Pull the DIMM up and out of the
socket.
Installing a Hard Drive
11
Installing a Hard Drive
To install a hard drive in your system, follow these steps:
Mid-tower system
Desktop system
1 Disconnect the hard drive cable and power connector.
2 Remove the two screws securing the drive bay.
3 Slide the bay toward the rear of the system unit to
remove it.
4 Insert the new drive into an open position in the bay and
secure it with four screws.
5 Slide the bay back into the system unit and secure it with
two screws.
6 Connect the cables.
Getting Help
Troubleshooting
Your PREMIO system is designed to provide years of troublefree performance. If you have a problem with your system, first
check the information in this section for a quick solution.
Monitor Does Not Work
If your monitor appears not to be working properly:
Check that the monitor’s power cable is securely attached
to the monitor and to an outlet that is receiving power.
Check that the monitor’s video cable is securely attached
to the monitor and to the system unit’s video card
connector.
Check that the monitor’s power switch is on.
Adjust the monitor’s brightness and contrast controls.
If possible, substitute another monitor that is in good
working order. If the substitute works, your monitor may
need repair or replacement.
Troubleshooting
13
Keyboard Does Not Work
If the NumLock indicator in the upper right corner of the
keyboard does not light when the system powers up, or the
keyboard does not work:
Check that the keyboard cable is securely attached to the
system unit’s keyboard connector.
If possible, substitute another keyboard that is in good
working order. If the substitute works, your keyboard
may need replacement.
Mouse Does Not Work
If your mouse pointer does not move or moves erratically when
you move the mouse:
Check that the mouse cable is securely attached to the
mouse connector on the system unit.
Disassemble the mouse and clean the roller ball.
14
PREMIO System Manual
System Unit Problems
The fan inside the system unit should make a low, steady sound
when operating properly. If the fan is totally silent:
Check that the system power cord is securely attached to
the back of the system unit and to a power outlet. Verify
that the outlet has power.
If possible, substitute another power cord that is in good
working order. If the substitute works, replace your
power cord.
If the fan makes excessive noise:
Turn off the system, open the system unit case, and
inspect the fan for any obstructions.
Turn on the system and listen closely to the fan. If the
noise comes from inside the fan housing, your power
supply may need replacement.
Hard Disk Problems
Your hard disk should make a slight whirring sound when
operating properly. If the disk is totally silent:
Turn off the system, open the system unit case, and check
that the power cable between the power supply and the
hard disk is securely attached at both ends. If it is, your
hard disk may be defective.
If the hard disk makes excessive noise:
Turn off the system, open the system unit case, and
remove the hard disk power cable connector from the
hard disk. Then turn the system back on. If the noise
disappears, your hard disk may be defective.
If you have more than one hard disk, repeat the same
procedure for each disk.
Warranty Service
15
Warranty Service
If you have a problem with your PREMIO system that requires
service during the warranty period, contact the dealer where
you purchased your system. Your dealer will try to resolve the
problem for you. If your dealer cannot resolve the problem, you
can contact PREMIO directly at the address below.
Note To obtain warranty service, you must provide proof of
purchase, including the purchase date.
Technical Support
You can contact PREMIO technical support at the following
address:
Premio Computer, Inc.
918 Radecki Court
City of Industry, CA 91748
Telephone: 800-568-6388
Fax: 626-839-3191
Email: [email protected]
PREMIO on the Internet
PREMIO maintains a web page on the Internet with the latest
information on PREMIO products, updated drivers, answers to
common problems, a Windows 95 troubleshooting guide, and
more. Visit our web page at:
http://www.premiopc.com
Appendix
Limited 3-Year Warranty
Premio Computer, Inc. warrants its line of PREMIO® computer systems
(hereinafter “Product”) to be free from defects in material and
workmanship for a period of three (3) years from the date of original
purchase from Premio Computer, Inc. or a Premio Computer, Inc.
authorized reseller. This warranty does not cover monitor and LCD
panels, nor third-party hardware and software which has a separate
manufacturer’s warranty. Warranty for such third-party hardware and
software, if any, is subject to the third-party’s warranty policy.
PREMIO branded monitors are warranted as follows:
Three (3) year parts and labor except for CRT
One (1) year parts and labor for CRT
PREMIO branded LCD panels are warranted as follows:
One (1) year parts and labor
SERVICE UNDER WARRANTY
If this Product fails to be in good working order during this 3year warranty period (or specific period of time as noted
above), Premio Computer, Inc. will, at its option, repair or
replace the Product. Repair parts and/or replacement Products
may be either new or reconditioned at Premio Computer Inc.’s
discretion. The limited warranty does not include service to
repair damage from improper installation, abuse or
modifications to the Product not approved in writing by Premio
Computer, Inc. Any service repair outside the scope of this
limited warranty shall be at Premio Computer, Inc.’s or its
Authorized Service Provider’s rates and terms in effect.
This warranty is valid only within the United States and applies only
to Products which are new and in cartons which are unopened on the
date of purchase.
Limited 3-Year Warranty
17
EXCLUSIONS FROM PREMIO, INC. LIMITED
WARRANTY PROGRAM
ALL OTHER EXPRESSED AND IMPLIED WARRANTIES FOR
THIS PRODUCT, INCLUDING THE WARRANTIES OF
MERCHANTABILITY AND FITNESS FOR A PARTICULAR
PURPOSE, ARE HEREBY DISCLAIMED. IF THIS PRODUCT IS
NOT IN GOOD WORKING ORDER AS WARRANTED ABOVE,
PREMIO COMPUTER, INC.'S SOLE AND EXCLUSIVE REMEDY
SHALL BE REPAIR OR REPLACEMENT AS STATED ABOVE.
IN NO EVENT WILL PREMIO COMPUTER, INC. BE LIABLE TO
THE CUSTOMER OR ANY THIRD PARTY FOR ANY
DAMEAGES IN EXCESS OF THE PURCHASE PRICE OF THE
PRODUCT. THIS LIMITATION APPLIES TO DAMAGES OF ANY
KIND INCLUDING ANY DIRECT OR INDIRECT DAMAGES,
LOST PROFITS, LOST SAVINGS OR OTHER SPECIAL,
INCIDENTAL, EXEMPLARY OR CONSEQUENTIAL DAMAGES
WETHER ARISING OUT OF THE USE OF OR INABILITY TO
USE SUCH PRODUCT, EVEN IF PREMIO COMPUTER, INC. OR
AN AUTHORIZED PREMIO COMPUTER, INC.
REPRESENTATIVE OR DEALER HAS BEEN ADVISED OF THE
POSSIBILITY OF SUCH DAMAGES OR OF ANY CLAIM BY
ANY OTHER PARTY. SOME STATES DO NOT ALLOW THE
EXCLUSION OR LIMITATION OF INCIDENTAL OR
CONSEQUENTIAL DAMAGES FOR SOME PRODUCTS, SO THE
ABOVE LIMITATIONS OR EXCLUSIONS MAY NOT APPLY TO
YOU. PREMIO COMPUTER, INC. AUTHORIZED RESELLERS
AND SERVICE PROVIDERS/PARTNERS MAY BE CHANGED,
ADDED OR DELETED, WITHOUT NOTICE OR LIABILITY.
PREMIO COMPUTER, INC. DISCLAIMS ANY AUTHORIZED
RESELLERS AND SERVICE PROVIDER/PARTNER TO THE
PROGRAM. THIS WARRANTY GIVES YOU SPECIFIC LEGAL
RIGHTS AND YOU MAY ALSO HAVE OTHER RIGHTS WHICH
MAY VARY FROM STATE TO STATE.
FCC Standards
The FCC (Federal Communications Commission) restricts the
amount of radiation and radio frequency emissions from
computing equipment.
This equipment generates and uses radio frequency energy and
if not installed and used properly in strict accordance with the
operation instructions, reference manuals, and the service
manual, may cause interference to radio or television reception.
This equipment can be tested and found to comply with the
limits for a Class B digital device pursuant to part 15 of the
FCC rules. There limits are designed to provide reasonable
protection against harmful interference in a residential
installation. This equipment generates, uses, and can radiate
radio frequency energy and, if not installed and used in
accordance with the instructions, may cause harmful
interference to radio communications. However, there is no
guarantee that interference will not occur in a particular
installation. If this equipment does cause harmful interference
to radio or television reception, which can be determined by
turning the equipment off and on, then the user is encouraged to
try to correct the interference by one or more of the following
procedures:
Reorient or relocate the receiving antenna.
Increase the separation between the equipment and
receiver.
Connect the equipment into an outlet on a circuit
different from that to which the receiver is connected.
Consult the dealer or an experienced radio/TV technician
for help.
Important Safety Instructions
19
Important Safety Instructions
These instructions are provided by Underwriters Laboratories, Inc.
1.
Read all of these instructions and save them for later reference.
2.
Follow all warnings and instructions marked on the product.
3.
Unplug this product from the wall outlet before cleaning. Do not
use liquid or aerosol cleaners. Use a damp cloth for cleaning.
4.
Do not use this product near water.
5.
Do not place this product on an unstable cart, stand or table. The
product may fall, causing serious damage to the product.
6.
Slots and openings on the cabinet and the back or bottom are
provided for ventilation. To ensure reliable operation of the
product and to protect it from overheating, do not block or cover
these openings. The openings should never be blocked by placing
the product on a bed, sofa, rug or other similar surface. This
product should never be placed near or over a radiator or heat
register. This product should not be placed in a built-in
installation unless proper ventilation is provided.
7.
This product should be operated from the type of power source
indicated on the marking label. If you are not sure of the type of
power available, consult your dealer or local power company.
8.
This product is equipped with a 3-wire grounding-type plug, a
plug having a third (grounding) pin. This plug will only fit into a
grounding-type power outlet. This is a safety feature. If you are
unable to insert the plug into the outlet, contact your electrician to
replace your obsolete outlet. Do not defeat the safety purpose of
the grounding-type plug.
9.
Do not allow anything to rest on the power cord. Do not locate
this product where the cord will be walked on.
10. If an extension cord is used with this product, make sure that the
total of the ampere ratings on the products plugged into the
extension cord do not exceed the extension cord ampere rating.
Also, make sure that the total of all products plugged into the wall
outlet does not exceed 15 amperes.
11. Never push objects of any kind into this product through cabinet
slots as they may touch dangerous voltage points or short out
parts that could result in a risk of fire or electric shock. Never
spill liquid of any kind on the product.
12. Except as explained elsewhere in this manual, don't attempt to
service this product yourself. Opening and removing those covers
that are marked “Do Not Remove” may expose you to dangerous
voltage points or other risks. Refer all servicing on those
compartments to service personnel.
13. Unplug this product from the wall outlet and refer servicing to
qualified service personnel under the following conditions:
A.
B.
C.
D.
E.
F.
When the power cord or plug is damaged or frayed.
If liquid has been spilled into the product.
If the product has been exposed to rain or water.
If the product does not operate normally when the operating
instructions are followed. Adjust only those controls that are
covered by the operating instructions since improper
adjustment of other controls may result in damage and will
often require extensive work by a qualified technician to
restore the product to normal operation.
If the product has been dropped or the cabinet has been
damaged.
If the product exhibits a distinct change in
performance, indicating a need for service.
MSI
MICRO-STAR INTERNATIONAL
850 Pro5
MS-6545 (v1.X) ATX Mainboard
Version 1.1
G52-MA00453
i
Manual Rev: 1.0
Release Date: Sept. 2001
FCC-B Radio Frequency Interference Statement
This equipment has been tested and found to comply with the limits for a class
B digital device, pursuant to part 15 of the FCC rules. These limits are designed
to provide reasonable protection against harmful interference when the equipment is operated in a commercial environment. This equipment generates, uses
and can radiate radio frequency energy and, if not installed and used in accordance with the instruction manual, may cause harmful interference to radio
communications. Operation of this equipment in a residential area is likely to
cause harmful interference, in which case the user will be required to correct
the interference at his own expense.
Notice 1
The changes or modifications not expressly approved by the party responsible for compliance could void the user’s authority to operate the equipment.
Notice 2
Shielded interface cables and A.C. power cord, if any, must be used in order to
comply with the emission limits.
VOIR LA NOTICE D’INSTALLATION AVANT DE RACCORDER AU
RESEAU.
Micro-Star International MS-6545
Tested to comply
with FCC Standard
For Home or Office Use
ii
Edition
Sept. 2001
Copyright Notice
The material in this document is the intellectual property of MICROSTAR INTERNATIONAL. We take every care in the preparation
of this document, but no guarantee is given as to the correctness of its
contents. Our products are under continual improvement and we reserve the right to make changes without notice.
Trademarks
All trademarks used in this manual are the property of their respective
owners.
Intel and Pentium are registered trademarks of Intel Corporation.
PS/2 and OS/2 are registered trademarks of IBM Corporation.
Windows 95 and Windows NT are registered trademarks of Microsoft.
Netware is a registered trademark of Novell.
Award is a registered trademark of Award Software Inc.
Revision History
Revision
V1.0
Revision History
First release
iii
Date
Sept. 2001
Safety Instructions
1.
2.
3.
4.
5.
Always read the safety instructions carefully.
Keep this User’s Manual for future reference.
Keep this equipment away from humidity.
Lay this equipment on a reliable flat surface before setting it up.
The openings on the enclosure are for air convection hence protects the
equipment from overheating. DO NOT COVER THE OPENINGS.
6. Make sure the voltage of the power source and adjust properly 110/220V
before connecting the equipment to the power inlet.
7. Place the power cord such a way that people can not step on it. Do not
place anything over the power cord.
8. Always Unplug the Power Cord before inserting any add-on card or module.
9. All cautions and warnings on the equipment should be noted.
10. Never pour any liquid into the opening that could damage or cause electrical shock.
11. If any of the following situations arises, get the equipment checked by a
service personnel:
z The power cord or plug is damaged
z Liquid has penetrated into the equipment
z The equipment has been exposed to moisture
z The equipment has not work well or you can not get it work according
to User’s Manual.
z The equipment has dropped and damaged
z If the equipment has obvious sign of breakage
12. DO NOT LEAVE THIS EQUIPMENT IN AN ENVIRONMENT
UNCONDITIONED, STORAGE TEMPERATURE ABOVE 600 C (1400F), IT
MAY DAMAGE THE EQUIPMENT.
CAUTION: Danger of explosion if battery is incorrectly replaced.
Replace only with the same or equivalent type recommended by the
manufacturer.
iv
CONTENTS
Chapter 1. Introduction ............................................................... 1-1
Mainboard Specification ............................................................ 1-2
Mainboard Layout ..................................................................... 1-4
Quick Components Guide ......................................................... 1-5
Key Features ............................................................................ 1-6
MSI Special Features ................................................................ 1-7
T.O.P Tech™ ...................................................................... 1-7
PC Alert™ III ....................................................................... 1-8
D-LED™ & D-Bracket™ (Optional) .................................... 1-10
Fuzzy Logic™ III ............................................................... 1-12
Live BIOS™/Live Driver™ .................................................. 1-13
Chapter 2. Hardware Setup ........................................................ 2-1
Central Processing Unit: CPU ................................................... 2-2
CPU Installation Procedures ............................................... 2-2
Installing the CPU Fan ........................................................ 2-3
CPU Core Speed Derivation Procedure ................................ 2-4
Memory Installation ................................................................... 2-5
Memory Population Rules ................................................... 2-5
Installing RIMM Modules ..................................................... 2-6
Power Supply ............................................................................ 2-7
ATX 20-Pin Power Connector: JWR1 ................................... 2-7
ATX 12V Power Connector: JWR3 ....................................... 2-8
ATX 5V/3V Power Connector: JWR2 ................................... 2-8
Back Panel ............................................................................... 2-9
Mouse Connector: JKBMS1 ................................................ 2-9
Keyboard Connector: JKBMS1 .......................................... 2-10
USB Connectors ............................................................... 2-10
Serial Port Connector: COM A & COM B .......................... 2-11
Joystick/Midi Connectors .................................................. 2-11
v
Audio Port Connectors ...................................................... 2-11
Parallel Port Connector: LPT1 ........................................... 2-12
Connectors ............................................................................. 2-13
Floppy Disk Drive Connector: FDD1 .................................. 2-13
Remote Power On/Off Switch Connector: JRMS1 ............. 2-13
Hard Disk Connectors: IDE1 & IDE2 ................................. 2-14
Front Panel Connector: JFP1 or J23 (Optional Intel spec) . 2-15
CD-In/Aux-In/Modem-In Connector: JCD1/JAUX1/JPHN1 ... 2-16
Fan Power Connectors: CPUFAN/SYSFAN/PSFAN .......... 2-17
Wake On Ring Connector: JMDM1 ................................... 2-18
Power Saving Switch Connector: JGS1 ............................. 2-18
IrDA Infrared Module Connector: J18 ................................. 2-19
Chassis Intrusion Switch Connector: J12 .......................... 2-19
Front Panel Audio Connector: J22 (Optional Intel spec) ..... 2-20
Front USB Connectors: JUSB1 & JUSB2 .......................... 2-21
D-Bracket™ Connector: J24 .............................................. 2-25
Jumpers .................................................................................. 2-27
Clear CMOS Jumper: JBAT1 ............................................. 2-27
RDRAM Over Voltage Jumper: J20 .................................... 2-28
Clear BIOS Password Jumper: J17 ................................... 2-29
BIOS Flash Jumper: J16 ................................................... 2-29
Slots ....................................................................................... 2-30
AGP (Accelerated Graphics Port) Slot .............................. 2-30
PCI Slots .......................................................................... 2-30
CNR (Communication Network Riser) Slot ........................ 2-30
PCI Interrupt Request Routing ........................................... 2-31
Chapter 3. AWARD® BIOS Setup .................................................. 3-1
Entering Setup .......................................................................... 3-2
Control Keys ............................................................................. 3-2
vi
Getting Help .............................................................................. 3-3
The Main Menu ......................................................................... 3-4
Standard CMOS Features ......................................................... 3-6
Advanced BIOS Features .......................................................... 3-8
Advanced Chipset Features .................................................... 3-12
Integrated Peripherals ............................................................. 3-14
Power Management Setup ...................................................... 3-19
PNP/PCI Configurations .......................................................... 3-23
PC Health Status .................................................................... 3-25
Frequency/Voltage Control ...................................................... 3-26
High System Performance ...................................................... 3-28
Load Optimized Defaults ......................................................... 3-29
Set Supervisor/User Password ................................................ 3-30
Save & Exit Setup ................................................................... 3-32
Exit Without Saving ................................................................. 3-33
Appendix A: MSI Smart Key ....................................................... A-1
Installing MSI Smart Key ......................................................... A-2
Using MSI Smart Key .............................................................. A-3
Appendix B: Using 4-/6-channel Audio Function ...................... B-1
Installing C-Media Drivers ......................................................... B-2
Hardware Configuration ............................................................ B-2
Software Configuration .............................................................. B-3
Appendix C. USB PC to PC Networking Function ..................... C-1
Installing GeneLink™ LAN Driver .............................................. C-3
Using USB PC to PC Networking Function .............................. C-5
Glossary ........................................................................................ G-1
vii
Introduction
1
Chapter 1.
Introduction
The 850 Pro5 (MS-6545 v1.X) ATX mainboard is a high-performance
computer mainboard based on Intel® 82850 chipset. It is optimized to support
Intel® Pentium® 4 processors for high-end business/personal desktop markets.
The Intel® 850 chipset supports 64-byte cache line size and a 32-bit host
addressing, allowing the processor to access the chipset’s memory address
space. It also provides 4x AGP data transfers and AGP Fast Write capability.
The Intel® 850 chipset features a dual channel Direct RDRAM memory
operating in lock-step using RSL technology. It is a highly-flexible chipset
which is designed to extend the basic graphics/multimedia PC platform up to
the mainstream performance desktop platform.
The Intel® 82801BA (ICH2) chipset is a highly integrated multifunctional
I/O Controller Hub that provides the interface to the PCI Bus and integrates
many of the functions needed in today’s PC platforms. It communicates with
the host controller over a dedicated hub interface and provides added flexibility in designing cost-effective system solutions.
This chapter includes the following topics:
Mainboard Specification
Mainboard Layout
Quick Components Guide
Key Features
MSI Special Features
1-1
1-2
1-4
1-5
1-6
1-7
Chapter 1
Mainboard Specification
CPU
z Supports Intel® Pentium® 4 processor in the 478 pin package.
z Supports 1.5GHz, 1.6GHz, 1.7GHz, 1.8GHz, 1.9GHz, 2GHz and up.
Chipset
z Intel® 82850 MCH (615 OLGA)
- Supports Direct RDRAM up to 2GB maximum memory.
- Supports 400 MHz system bus.
- 1.5V AGP interface with 4x data transfer and 4x fast write capability.
z Intel® 82801BA ICH (360 EBGA)
- Upstream hub interface for access to the Intel MCH.
- 2-channel Ultra ATA/100 Bus Master IDE controller.
- USB controller 1.1 (expanded capabilities for 4 ports).
- I/O APIC.
- SMBus controller.
- FWH interface.
- LPC interface.
- AC’97 2.1 interface.
- PCI 2.2 interface.
- Integrated system management controller.
Main Memory
z Supports four 184-pin gold-lead RIMM sockets.
z Supports a maximum memory size of 2GB.
Slots
z One AGP (Accelerated Graphics Port) 4x slot.
z Four PCI 2.2 32-bit PCI bus slots (support 3.3v/5v PCI bus interface).
z One CNR (Communication Network Riser) slot.
On-Board IDE
z An IDE controller on the ICH2 chipset provides IDE HDD/CD-ROM with
PIO, Bus Master and Ultra DMA100 operation modes.
z Can connect up to four IDE devices.
On-Board Peripherals
z On-Board Peripherals include:
1-2
Introduction
- 1 floppy port supports 2 FDDs with 360K, 720K, 1.2M, 1.44M and
2.88Mbytes.
- 2 serial ports (COM A + COM B).
- 1 parallel port supports SPP/EPP/ECP mode.
- 1 IrDA connector for SIR.
- 1 audio/game port.
USB Interface
z The mainboard comes with two optional USB interfaces:
- 6 USB 1.1 ports (Rear * 2/ Front * 4, two with Intel spec & two with MSI
spec).
- 4 USB 1.1 ports (Rear * 2/ Front * 2, one regular USB 1.1 port and the other
with USB PC to PC networking function).
Audio
z C-Media CMI8738 / PCI-6ch supports 2/4/6 ch speaker
- 6CH DAC for AC3® 5.1CH purpose.
- HRTF-based 3D positional audio, supporting DirectSoundTM 3D and A3DTM
interface.
- Supports 4.1/5.1 speakers, C3DX positional audio in 4/6 CH speaker mode.
- Legacy audio SBPROTM compatible.
- DLS-based wavetable music synthesizer.
BIOS
z The mainboard BIOS provides “Plug & Play” BIOS which detects the peripheral devices and expansion cards of the board automatically.
z IDE drive auto configure, Advanced Power Management (APM) 1.2, ACPI
1.0, DMI 2.0, ECC/Parity support, LS120 support, auto enabled onboard
SCSI termintor.
Dimension
z ATX Form Factor: 30.4cm(L) x 24.3cm(W) x 4 layers PCB.
Mounting
z 9 mounting holes.
1-3
Chapter 1
Mainboard Layout
Top : mouse
Bottom: keyboard
CPUFAN
J20
JWR2
PSFAN1
Top : Parallel Port
ATX
Power Supply
USB
ports
IDE 2
Bottom:
COM A
COM B
D-LED (optional)
FDD1
RIMM4
JWR3
RIMM3
RIMM2
Bottom:
Line-Out
Line-In
Mic
JCD1
Top :
Game port
JAUX1
JPHN1
RIMM1
Winbond
W83627HF-AW
BATT
+
AGP Slot
JBAT1
Intel
82801BA
CMI8738
PCI Slot 1
PCI Slot 2
J12
PCI Slot 3
JGS1
JUSB1
J16
BIOS
(Optional)
JUSB2
(Optional)
J17
J24
J18
CNR
J23
PCI Slot 4
JMDM1
SYSFAN
J22 (Optional)
(Optional)
JFP1
JRMS1
850 Pro5 (MS-6545 v1.X) ATX Mainboard
1-4
Introduction
Quick Components Guide
Component
JWR1/2/3
JKBMS1
USB Connectors
COM A & COM B
LPT1
FDD1
JRMS1
IDE1~ IDE2
JFP1/J23
JCD1/JAUX1/JPHN1
CPU/PS/SYS FAN
JMDM1
JGS1
J18
J12
J22
JUSB1/JUSB2
J24
JBAT1
J20
J17
J16
AGP Slot
PCI Slots
CNR Slot
Function
ATX power connectors
Mouse/keyboard connector
Connecting to USB devices
Serial port connector
Parallel port connector
Floppy disk drive connector
Remote power on/off switch
Hard disk connectors
Front panel connector
CD/AUX/Modem-in connectors
Fan power connectors
Wake on ring connector
Power saving switch connector
IrDA infrared module connector
Chassis intrusion switch connector
Front panel audio connector
Connecting to USB devices
D-Bracket connector
Clear CMOS jumper
RDRAM over voltage jumper
Clear BIOS password jumper
BIOS flash jumper
Connecting to AGP cards
Connecting to expansion cards
Connecting to expansion cards
1-5
Reference
See p. 2-7
See p. 2-9
See p. 2-10
See p. 2-11
See p. 2-12
See p. 2-13
See p. 2-13
See p. 2-14
See p. 2-15
See p. 2-16
See p. 2-17
See p. 2-18
See p. 2-18
See p. 2-19
See p. 2-19
See p. 2-20
See p. 2-21
See p. 2-25
See p. 2-27
See p. 2-28
See p. 2-29
See p. 2-29
See p. 2-30
See p. 2-30
See p. 2-30
Chapter 1
Key Features
z ATX Form Factor
z CPU: Intel® Pentium® 4 processor in the 478 pin package
z Smart Key - the best solution to prevent unauthorized access to your PC
z
z
z
z
z
z
z
z
z
(Optional)
USB PC to PC networking function (Optional)
Fuzzy Logic 3
Live BIOS / Live Driver
CMI8738/PCI-6ch supports 2/4/6 ch. speaker
PC Alert™ III system hardware monitor
D-LED/ D-Bracket (Optional)
Modem (Internal/External) Ring Wake Up Function
Suspend to RAM/Disk
PC2001 Compliant
1-6
Introduction
MSI Special Features
T.O.P Tech™
The T.O.P TechTM is an extended sensing device that can 100% accurately detect the CPU’s temperature. You can find out the temperature on BIOS
setup menu. The PC AlertTM also provides the information.
CPU temperaure on Setup menu
CMOS Setup Utility - Copyright(C) 1984-2001 Award Software
PC Health Status
CPU Warning Temperature
Current System Temp.
Current CPU Temperature
Current Top Tech. III Temp.
SYSTEM fan
POWER fan
CPU fan
Vcore
VTT
3.3V
+5V
+12V
-12V
-5V
VBAT(V)
5VSB(V)
Chassis Intrusion Detect
Shutdown Temperature
[Disabled]
Item Help
Menu Level
>
[Disabled]
[Disabled]
↑ ↓ → ← Move Enter:Select +/-/PU/PD:Value F10:Save ESC:Exit F1:General Help
F5:Previous Values F6:Fail-Safe Defaults F7:Optimized Defaults
1-7
Chapter 1
PC Alert™ III
The PC AlertTM III is a utility you can find in the CD-ROM disk. The
utility is just like your PC doctor that can detect the following PC hardware
status during real time operation:
* monitor CPU & system temperatures
* monitor fan speed(s)
* monitor system voltage
* monitor chassis intrusion
If one of the items above is abnormal, the program main screen will be
immediately shown on the screen, with the abnormal item highlighted in red.
This will continue to be shown,until user disables the warning.
Note: Items shown on PC Alert III vary depending on your system’s
status.
1-8
Introduction
Features:
z Network Management
- Monitoring & remote control
z Basic System Utilities
- Scandisk & Defragment to maintain your HDD
z 3D Graphics Design
- Enables a more friendly user interface
z Sofware Utilities
- SoftCooler Optimized Cooling
1-9
Chapter 1
D-LED™ & D-Bracket™ (Optional)
The D-LED™ uses graphic signal display to help
1
users understand their system. Four LEDs embedded in
the mainboard provide up to 16 combinations of signals to
2
debug the system. The 4 LEDs can debug all problems that
3
fail the system, such as VGA, RAM or other failures. This
4
special feature is very useful for the overclocking users.
These users can use the feature to detect if there are any Diagnostic LED
problems or failures.
The D-Bracket™ which integrates four Diagnostic LEDs is optional.
Definitions of the D-Bracket™ LED signals are the same as D-LED™ as shown
below.
Green
Red
D-LED
1 2 3 4
D-Bracket
Description
System Power ON
1
3
2
4
- The D-LED will hang here if the processor is damaged or
not installed properly.
Early Chipset Initialization
Memory Detection Test
- Testing onboard memory size.
The D-LED will hang if
the memory module is damaged or not installed properly.
Decompressing BIOS image to RAM for fast booting.
Initializing Keyboard Controller.
Testing VGA BIOS
- This will start writing VGA sign-on message to the screen.
1-10
Introduction
D-LED
D-Bracket
Description
Processor Initialization
- This will show information regarding the processor (like
brand name, system bus, etc…)
Testing RTC (Real Time Clock)
Initializing Video Interface
- This will start detecting CPU clock, checking type of video
onboard.
Then, detect and initialize the video adapter.
BIOS Sign On
- This will start showing information about logo, processor
brand name, etc….
Testing Base and Extended Memory
- Testing base memory from 240K to 640K and extended
memory above 1MB using various patterns.
Assign Resources to all ISA.
Initializing Hard Drive Controller
- This will initialize IDE drive and controller.
Initializing Floppy Drive Controller
- This will initializing Floppy Drive and controller.
Boot Attempt
- This will set low stack and boot via INT 19h.
Operating System Booting
1-11
Chapter 1
Fuzzy Logic™ III
The Fuzzy Logic™ III utility allows users to overclock the CPU FSB
(Front Side Bus) frequency in the Windows environment. Select the CPU frequency you prefer and click Go to apply the frequency or click Save allowing
the system to run at the specified frequency each time when the system is
powered on.
Features:
z Display Current System Status
- CPU Fan
- CPU Temp.
- Vcore
- Vio
- Memory Clock
- CPU Clock
- AGP Clock
- PCI Clock
z Adjust CPU FSB Frequency
1-12
Introduction
Live BIOS™/Live Driver™
The Live BIOSTM is a tool used to detect and update your
BIOS online so that you don’t need to search for the correct
BIOS version through the whole web site. To use the function,
you need to install the “MSI Live Update Series” application.
After installation, the “MSI Live Update Series” icon (as the
right view) will appear on the screen.
Double click the “MSI Live Update Series” icon, and the following screen
will appear.
Four buttons are placed on the left column of the screen. Click the desired
button to start the update process.
z Live BIOS – Updates the BIOS online. If your motherboard does not support
the function, the “sorry” message is displayed.
z Live Driver – Updates the drivers online. If your motherboard does not support the function, the “sorry” message is displayed.
z Live VGA BIOS – Updates the VGA BIOS online. If your VGA device does
not support the function, the “sorry” message appears.
z Live VGA Driver – Updates the VGA driver online. If your VGA device does
not support the function, the “sorry” message is displayed.
For more information on the update instructions, insert the companion CD and
refer to the “Live Update Series Guide” under the “Manual” tab.
1-13
Hardware Setup
2
Chapter 2.
Hardware Setup
This chapter provides you with the information about hardware setup
procedures. While doing the installation, be careful in holding the components
and follow the installation procedures. For some components, if you install in
the wrong orientation, the components will not work properly.
Use a grounded wrist strap before handling computer components. Static
electricity may damage the components.
This chapter contains the following topics:
Central Processing Unit: CPU
Memory Installation
Power Supply
Back Panel
Connectors
Jumpers
Slots
2-1
2-2
2-5
2-7
2-9
2-13
2-27
2-30
Chapter 2
Central Processing Unit: CPU
The mainboard supports Intel® Pentium® 4 processor in the 478 pin
package. The mainboard uses a CPU socket called PGA478 for easy CPU
installation. When you are installing the CPU, make sure the CPU has a heat
sink and a cooling fan attached on the top to prevent overheating. If you do not
find the heat sink and cooling fan, contact your dealer to purchase and install
them before turning on the computer.
Open Lever
CPU Installation Procedures
1. Pull the lever sideways away
from the socket. Then, raise
the lever up to a 90-degree
angle.
Sliding
Plate
2. Look for the dot/cut edge. The
dot/cut edge should point towards the lever pivot. The
CPU will only fit in the correct
orientation.
Dot / Cut edge
Close
Lever
3. Hold the CPU down firmly,
and then close the lever to
complete the installation.
WARNING!
Overheating will seriously damage the CPU and system,
always make sure the cooling fan can work properly to
protect the CPU from overheating.
2-2
Hardware Setup
Installing the CPU Fan
As processor technology pushes to faster speeds and higher
performance, thermal managment becomes increasingly important. To dissipate heat, you need to attach the CPU cooling fan and heatsink on top of the
CPU. Follow the instructions below to install the Heatsink/Fan:
1. Locate the CPU and its retention
2. Position the heatsink onto the reten-
mechanism on the motherboard.
tion mechanism.
retention mechanism
3. Mount the fan on top of the heatsink.
4. Press the two levers down to fasten
Press down the fan until its four clips
get wedged in the holes of the retention mechanism.
the fan. Each lever can be pressed
down in only ONE direction.
levers
2-3
Chapter 2
5. Connect the fan power cable from the mounted fan to the 3-pin fan power connector
on the board.
fan power cable
CPU Core Speed Derivation Procedure
If
CPU Clock
Core/Bus ratio
then CPU core speed
WARNING!
=
=
=
=
=
100MHz
14
Host Clock x Core/Bus ratio
100MHz x 14
1.4GHz
Overclocking
This motherboard is designed to support overclocking.
However, please make sure your components are able to
tolerate such abnormal setting, while doing overclocking.
Any attempt to operate beyond product specifications is not
recommended. We do not guarantee the damages or risks
caused by inadequate operation or beyond product
specifications.
2-4
Hardware Setup
Memory Installation
R IMM4
RIMM2
R IMM3
The mainboard provides 4 gold-lead sockets for 184-pin RIMM modules.
To operate properly, at least two RIMM modules must be installed. The
mainboard supports the memory size up to 2 GB.
RIMM Slots
(RIMM 1~4)
RIMM1
Memory Population Rules
z
z
z
Support RIMM only.
To operate properly, make sure that the RIMM banks are using the same
type and equal size density memory.
Support FSB 100MHz: PC600/PC800 RIMM.
Note: PC700 will run at PC600 specification.
z
z
z
Support up to 32 Direct Rambus Device.
Support ECC Single bit Correction and Multiple bit error detection
(Setting in BIOS).
Install two RIMM modules either on “RIMM 1and RIMM 2” or on
“RIMM3 and RIMM4” slots.
About RIMM Module
RIMM module is a module integrated with RDRAM chips. It is similar to
a DIMM package but uses different pin settings. Rambus trademarked the term
RIMM as an entire word for a module using Rambus technology.
2-5
Chapter 2
Installing RIMM Modules
You can install two or four RIMM modules in the following combination:
DIMM Socket
Memory Module
Total Memory
Socket 1
(Bank 0 & Bank 1)
32MB, 64MB, 128MB,
256MB, 512MB
32MB ~ 512MB
Socket 2
(Bank 2 & Bank 3)
32MB, 64MB, 128MB,
256MB, 512MB
32MB ~ 512MB
Socket 3
(Bank 4 & Bank 5)
32MB, 64MB, 128MB,
256MB, 512MB
32MB ~ 512MB
Socket 4
(Bank 6 & Bank 7)
32MB, 64MB, 128MB,
256MB, 512MB
32MB ~ 512MB
Total System Memory
64MB ~ 2GB
Note: If only two RIMM slots are
populated, you must install C-RIMM
(Continuity RIMM) modules on the other
C-RIMM Module
unused RIMM slots. A C-RIMM module is a dummy module for continuing
the signal connection.
1. The RIMM slot has 2 Notch
2. Insert the RIMM memory module
Keys, so the RIMM memory
module can only fit in one
orientation.
vertically into the RIMM slot.
Then push it in.
RIMM Module
NOTCH
3. The plastic clips at sides of the
4. If you won’t insert any RIMM
RIMM slot will automatically
close.
modules on the other two RIMM
slots, you must install C-RIMM
modules on the empty slots.
2-6
Hardware Setup
Power Supply
The mainboard supports ATX power supply for the power system. Before inserting the power supply connector, always make sure that all components are installed properly to ensure that no damage will be caused.
ATX 20-Pin Power Connector: JWR1
This connector allows you to connect to an ATX power supply. To
connect to the ATX power supply, make sure the plugs of the power supply is
inserted in the proper orientation and the pins are aligned. Then push down
the power supply firmly into the connector. The power connector supports
instant power on function which means that system will boot up immediately
when the power supply connector is inserted on the board.
10
20
1
11
JWR1
JWR1 Pin Definition
2-7
PIN
SIGNAL
PIN
SIGNAL
1
2
3
4
5
6
7
8
9
10
3.3V
3.3V
GND
5V
GND
5V
GND
PW_OK
5V_SB
12V
11
12
13
14
15
16
17
18
19
20
3.3V
-12V
GND
PS_ON
GND
GND
GND
-5V
5V
5V
Chapter 2
ATX 12V Power Connector: JWR3
Attaching the ATX power supply to the connector help offer sufficient
voltage to Pentium 4 CPU. This power connector also supports instant power
on function.
1
3
2
4
JWR3
PIN
1
2
3
4
SIGNAL
GND
GND
12V
12V
ATX 5V/3V Power Connector: JWR2
The mainboard provides an extra 5V/3V power connector for you to
connect to the ATX power supply.
6
1
JWR2
PIN
1
2
3
2-8
SIGNAL
GND
GND
GND
PIN
4
5
6
SIGNAL
3.3V
3.3V
5V
Hardware Setup
Back Panel
The Back Panel provides the following connectors:
Parallel
Mouse
Keyboard
USB
COM A
Midi/Joystick
COM B
L-out L-in MIC
Mouse Connector: JKBMS1
The mainboard provides a standard PS/2® mouse mini DIN connector for
attaching a PS/2 ® mouse. You can plug a PS/2® mouse directly into this
connector. The connector location and pin assignments are as follows:
Pin Definition
6
5
3
4
2
1
PS/2 Mouse (6-pin Female)
PIN
SIGNAL
DESCRIPTION
1
2
3
4
5
6
Mouse DATA
NC
GND
VCC
Mouse Clock
NC
Mouse DATA
No connection
Ground
+5V
Mouse clock
No connection
2-9
Chapter 2
Keyboard Connector: JKBMS1
The mainboard provides a standard PS/2® keyboard mini DIN connector
for attaching a PS/2® keyboard. You can plug a PS/2® keyboard directly into
this connector.
Pin Definition
6
5
4
3
2
1
PS/2 Keyboard (6-pin Female)
PIN
1
2
3
4
5
6
SIGNAL
Keyboard DATA
NC
GND
VCC
Keyboard Clock
NC
DESCRIPTION
Keyboard DATA
No connection
Ground
+5V
Keyboard clock
No connection
USB Connectors
The mainboard provides a UHCI (Universal Host Controller Interface)
Universal Serial Bus root for attaching USB devices such as keyboard, mouse
or other USB-compatible devices. You can plug the USB device directly into
ths connector.
USB Port Description
1 2 3 4
5 6 7 8
USB Ports
PIN
1
2
3
4
5
6
7
8
SIGNAL
VCC
-Data 0
+Data0
GND
VCC
-Data 1
+Data 1
GND
2-10
DESCRIPTION
+5V
Negative Data Channel 0
Positive Data Channel 0
Ground
+5V
Negative Data Channel 1
Positive Data Channel 1
Ground
Hardware Setup
Serial Port Connector: COM A & COM B
The mainboard offers two 9-pin male DIN connectors for serial port COM
A and COM B. The ports are 16550A high speed communication ports that
send/receive 16 bytes FIFOs. You can attach a serial mouse or other serial
devices directly to them.
Pin Definition
1 2 3 4 5
6 7 8 9
9-Pin Male DIN Connectors
PIN
SIGNAL
DESCRIPTION
1
2
3
4
5
6
7
8
9
DCD
SIN
SOUT
DTR
GND
DSR
RTS
CTS
RI
Data Carry Detect
Serial In or Receive Data
Serial Out or Transmit Data
Data Terminal Ready)
Ground
Data Set Ready
Request To Send
Clear To Send
Ring Indicate
Joystick/Midi Connectors
You can connect a joystick or game pad to this connector.
Audio Port Connectors
Line Out is a connector for Speakers or Headphones. Line In is used for
external CD player, Tape player, or other audio devices. Mic is a connector for
microphones.
1/8” Stereo Audio Connectors
Line Out
Line In MIC
Note: Details on the application of 6-channel audio can be acquired
by installing the CMI8738 Audio Driver on the CD-ROM (enclosed in
the product package).
2-11
Chapter 2
Parallel Port Connector: LPT1
The mainboard provides a 25-pin female centronic connector for LPT. A
parallel port is a standard printer port that supports Enhanced Parallel Port
(EPP) and Extended Capabilities Parallel Port (ECP) mode.
13
1
25
14
Pin Definition
PIN
1
2
3
4
5
6
7
8
9
10
11
12
13
14
15
16
17
18
19
20
21
22
23
24
25
SIGNAL
STROBE
DATA0
DATA1
DATA2
DATA3
DATA4
DATA5
DATA6
DATA7
ACK#
BUSY
PE
SELECT
AUTO FEED#
ERR#
INIT#
SLIN#
GND
GND
GND
GND
GND
GND
GND
GND
2-12
DESCRIPTION
Strobe
Data0
Data1
Data2
Data3
Data4
Data5
Data6
Data7
Acknowledge
Busy
Paper End
Select
Automatic Feed
Error
Initialize Printer
Select In
Ground
Ground
Ground
Ground
Ground
Ground
Ground
Ground
Hardware Setup
Connectors
The mainboard provides connectors to connect to FDD, IDE HDD, case,
modem, LAN, USB Ports, IR module and CPU/System FAN.
Floppy Disk Drive Connector: FDD1
The mainboard provides a standard floppy disk drive connector that
supports 360K, 720K, 1.2M, 1.44M and 2.88M floppy disk types.
FDD1
Remote Power On/Off Switch Connector: JRMS1
Connect to a 2-pin push button switch. When OFF, pressing the button
can turn the system on. When ON, pressing the button once will make the
system enter the sleep/suspend state. If the button is pressed for more than
four seconds, the system will be turned off. To change the setup, go to the
BIOS Power Management Setup.
JRMS1
2-13
Chapter 2
Hard Disk Connectors: IDE1 & IDE2
IDE 1
IDE 2
The mainboard has a 32-bit Enhanced PCI IDE and Ultra DMA 33/66/100
controller that provides PIO mode 0~4, Bus Master, and Ultra DMA/33/66/100
function. You can connect up to four hard disk drives, CD-ROM, 120MB Floppy
(reserved for future BIOS) and other devices. These connectors support the
provided IDE hard disk cable.
IDE1 (Primary IDE Connector)
The first hard drive should always be connected to IDE1. IDE1 can
connect a Master and a Slave drive. You must configure second hard
drive to Slave mode by setting the jumper accordingly.
IDE2 (Secondary IDE Connector)
IDE2 can also connect a Master and a Slave drive.
TIP:
If you install two hard disks on cable, you must configure the
second drive to Slave mode by setting its jumper. Refer to the
hard disk documentation supplied by hard disk vendors for jumper
setting instructions.
2-14
Hardware Setup
Front Panel Connector: JFP1 or J23 (Optional Intel spec)
This connector is for electrical connection to the front panel switches
and LEDs.
Keylock
1
10
HDD LED
+
Buzzer
(short pin)
Power
LED
15
+
Power
Switch
14
Speaker
Reset
Switch
JFP1
1
2
J23
(Optional Intel spec)
J23 Pin Definition
PIN
SIGNAL
DESCRIPTION
1
2
3
4
5
6
7
8
9
HD_LED_P
FP PWR/SLP
HD_LED_N
FP PWR/SLP
RST_SW_1
PWR_SW_P
RST_SW_2
PWR_SW_N
RSVD_DNU
Hard disk LED pull-up
MSG LED pull-up
Hard disk active LED
MSG LED pull-up
Reset Switch 1
Power Switch high reference pull-up
Reset Switch 2
Power Switch low reference pull-down to GND
Reserved. Do not use.
Note: The RST_SW_1 and RST_SW_2 signals should be connected to
the Reset Switch independently from other signals (HDD, PWR, GND,...)
on the J23 Front Panel Connector.
2-15
Chapter 2
CD-In/Aux-In/Modem-In Connector: JCD1/JAUX1/JPHN1
JCD1 connector is for CD-ROM audio connector.
JAUX1 connector is for DVD add-on card with Line-in connector.
JPHN1 connector is for modem with internal audio connector.
R
GND
L
JCD1
R
GND
L
JAUX1
Mono_Out
GND
Phone_In
JPHN1
Note:
Mono_Out is connected to the Modem speaker-out connector.
Phone_In is connected to the Modem Microphone-In connector.
2-16
Hardware Setup
Fan Power Connectors: CPUFAN/SYSFAN/PSFAN
The CPUFAN (processor fan), SYSFAN (system fan) and PSFAN1 (power
supply fan) support system cooling fan with +12V. It supports three-pin head
connector. When connecting the wire to the connectors, always take note that
the red wire is the positive and should be connected to the +12V, the black wire
is Ground and should be connected to GND. If the mainboard has a System
Hardware Monitor chipset on-board, you must use a specially designed fan
with speed sensor to take advantage of the CPU fan control.
GND
+12V
SENSOR
CPUFAN
GND
+12V
SENSOR
PSFAN1
GND
+12V
SENSOR
SYSFAN
Note:
1. Always consult the vendor for proper CPU cooling fan.
2. CPU Fan supports the fan control. You can install the PC Alert
utility that will automatically control the CPU Fan speed according to the actual CPU temeperature.
2-17
Chapter 2
Wake On Ring Connector: JMDM1
This connector allows you to connect to a modem card with Wake On
Ring function. The connector will power up the system when a signal is received through the modem card.
1
NC
GND
MDM_WAKEUP
NC
5VSB
JMDM1
Note: Modem wake-up signal is active “low”.
Power Saving Switch Connector: JGS1
Attach a power saving switch to this connector. Pressing the switch
once will have the system enter the sleep/suspend state. Press any key to wake
up the system.
JGS1
2-18
Hardware Setup
IrDA Infrared Module Connector: J18
This connector allows you to connect to an IrDA Infrared module. You
must configure the setting through the BIOS setup to use the IR function.
1
5
J18
Pin
1
2
3
4
5
Signal
VCC
NC
IRRX
GND
IRTX
Chassis Intrusion Switch Connector: J12
The connector is connected to a 2-pin chassis switch. If the chassis is
opened, the switch will be short. The system will record this status and show
a warning message on the screen. To clear the warning, you must enter the
BIOS utility and clear the record.
J12
2-19
Chapter 2
Front Panel Audio Connector: J22 (Optional Intel spec)
This connector allows you to connect to the front panel audio.
J22
(Optional Intel spec)
9
1
10
2
Pin Definition
PIN
SIGNAL
DESCRIPTION
1
2
3
4
5
6
7
8
9
10
AUD_MIC
AUD_GND
AUD_MIC_BIAS
AUD_VCC
AUD_FPOUT_R
AUD_RET_R
HP_ON
KEY
AUD_FPOUT_L
AUD_RET_L
Front panel microphone input signal
Ground used by analog audio circuits
Microphone power
Filtered +5V used by analog audio circuits
Right channel audio signal to front panel
Right channel audio signal return from front panel
Reserved for future use to control headphone amplifier
No pin
Left channel audio signal to front panel
Left channel audio signal return from front panel
2-20
Hardware Setup
Front USB Connectors: JUSB1 & JUSB2
Depending on users’ request, the mainboard can provide ONE or TWO
USB (Universal Serial Bus) pin headers that allow you to connect optional USB
ports for front panel.
Option 1
JUSB1: MSI spec
JUSB2: Intel spec/compliant with Intel® I/O Connectivity Design Guide
JUSB1
(MSI spec)
1
2
9
10
JUSB2
(Intel spec)
1
2
9
10
JUSB2 Pin Definition
JUSB1 Pin Definition
Pin
Description
Pin
Description
Pin
Description
Pin
Description
1
VCC
2
GND
1
VCC
2
VCC
3
USB0-
4
GND
3
USB0-
4
USB1-
5
USB0+
6
USB1+
5
USB0+
6
USB1+
7
GND
8
USB1-
7
GND
8
GND
9
GND
10
VCC
9
NC
10
OC0
2-21
Chapter 2
Option 2
JUSB1: USB PC to PC networking function
JUSB1
2
1
(USB PC to PC
Networking)
(USB 1.1)
9
10
JUSB1 Pin Definition
Pin
Description
Pin
Description
1
VCC
2
NC
3
USB0-
4
GND
5
USB0+
6
USB1+
7
GND
8
USB1-
9
GND
10
NC
2-22
Hardware Setup
Note: USB PC to PC Networking feature allows users to transfer and
receive data from other computers or share system resources with
others without using any network adapter. See below for instructions.
To Attach the USB PC to PC cable
1. Check whether the package includes the following items. If any is
missing, contact your dealer.
USB PC to PC Cable
USB PC to PC Bracket
2. Connect the USB Bracket’s cable to the JUSB1 pin header on the
mainboard. Locate the pin position marked with the ARROW on the
connector of USB Bracket and Pin# 2 of JUSB1. Then align the marked
pin position with Pin# 2 to attach the USB Bracket.
Pin Position marked
with ARROW
1
2
9
10
JUSB1
3. Identify the B Type Connector on the bracket used for PC to PC Net-
working function.
B Type Connector
A Type Connector
for PC to PC
Networking
for attaching
USB 1.1 Peripherals
2-23
Chapter 2
4. Connect your PC to another PC via USB PC to PC cable. The transfer
rate will run at USB 1.1 speed (12Mbps/s).
Connect to the B
Type Connector
on your PC
Connect to the
USB 1.1 port of
another PC
B Type Connector
For more information on USB PC to PC Networking function, refer
to Appendix A: USB PC to PC Networking Function.
2-24
Hardware Setup
D-Bracket™ Connector: J24
The mainboard comes with a J24 connector for you to connect to DBracket™. D-Bracket™ is a USB Bracket integrating four LEDs whose functions are similar to D-LED™ and allows users to identify system problem through
16 various combinations of LED signals. For definitions of 16 signal
combinations, please refer to Chapter 1. D-LED™ & D-Bracket™.
J24
There are two types of D-Bracket™: one supports USB PC to PC Networking function, and the other doesn’t (see photos on the next page). You
can purchase the one you need from your dealer.
2-25
Chapter 2
z D-Bracket™ with one USB PC to PC port and one regular USB port
Connected to J24
Connected to JUSB1 pin header which is
implemented with USB PC To PC Networking
function
z D-Bracket™ with two regular USB ports
Connected to J24
Connected to JUSB1 or JUSB2 pin header
which DOES NOT support USB PC To PC
networking function
2-26
Hardware Setup
Jumpers
The motherboard provides one jumper for you to set the computer’s
function. This section will explain how to change your motherboard’s function
through the use of the jumper.
Clear CMOS Jumper: JBAT1
There is a CMOS RAM on board that has a power supply from external
battery to keep the data of system configuration. With the CMOS RAM, the
system can automatically boot OS every time it is turned on. That battery has
long life time for at least 5 years. If you want to clear the system configuration,
use the JBAT1 (Clear CMOS Jumper ) to clear data. Follow the instructions
below to clear the data:
1
JBAT1
1
1
3
3
Keep CMOS
WARNING!
Clear CMOS
You can clear CMOS by shorting 2-3 pin while the
system is off. Then return to 1-2 pin position. Avoid
clearing the CMOS while the system is on; it will
damage the mainboard.
2-27
Chapter 2
RDRAM Over Voltage Jumper: J20
The jumper is used to set the RDRAM voltage for overclocking purpose.
1
J20
1
1
1
3
3
3
Normal
(2.5V)
Over Voltage
(2.58V)
Over Voltage
(2.68V)
Over Voltage
This motherboard is designed to support over voltage.
However, please make sure your components are able to
WARNING!
tolerate such abnormal setting, while doing over voltage.
Any attempt to operate beyond product specifications is not
recommended. We do not guarantee the damages or risks caused by
inadequate operation or beyond product specifications.
Avoid setting J20 while the sytem is on. It will damage the RDRAM.
2-28
Hardware Setup
Clear BIOS Password Jumper: J17
The jumper is used to clear the BIOS password. To clear the password,
open the jumper and restart your computer.
Normal
Clear
J17
BIOS Flash Jumper: J16
This jumper is used to lock or unlock the boot block area on BIOS.
When unlocked, the BIOS boot block area can be updated. When locked, the
BIOS boot block area cannot be updated.
BIOS Flash
Locked
J16
2-29
BIOS Flash
Unlocked
Chapter 2
Slots
The motherboard provides four 32-bit Master PCI Bus Slots, one AGP
and one CNR slot.
AGP Slot
PCI Slots
CNR Slot
AGP (Accelerated Graphics Port) Slot
The AGP slot allows you to insert the AGP graphics card only. AGP is an
interface specification designed for the throughput demands of 3D graphics.
It introduces a 66MHz, 32-bit channel for the graphics controller to directly
access main memory. The slot only supports 1.5V 4x AGP card.
PCI Slots
Four PCI slots allow you to insert the expansion cards to meet your
needs. When adding or removing expansion cards, make sure that you unplug
the power supply first. Meanwhile, read the documentation for the expansion
card to make any necessary hardware or software settings for the expansion
card, such as jumpers, switches or BIOS configuration.
CNR (Communication Network Riser) Slot
The CNR slot allows you to insert the CNR expansion cards. CNR is a
specially designed network, audio, or modem riser card for ATX family
motherboards. Its main processing is done through software and controlled by
the motherboard’s chipset.
2-30
Hardware Setup
PCI Interrupt Request Routing
The IRQ, abbreviation of interrupt request line and pronounced I-R-Q,
are hardware lines over which devices can send interrupt signals to the
microprocessor. The PCI IRQ pins are typically connected to the PCI bus as
follows:
Order 1
Order 2
Order 3
Order 4
PCI Slot 1
INT C#
INT F#
INT G#
INT A#
PCI Slot 2
INT F#
INT G#
INT A#
INT C#
PCI Slot 3
INT G#
INT A#
INT C#
INT F#
PCI Slot 4
INT A#
INT C#
INT F#
INT G#
2-31
AWARD® BIOS Setup
3
Chapter 3. AWARD® BIOS Setup
AWARD® BIOS Setup
The mainboard uses AWARD® BIOS ROM that provides a Setup utility
for users to modify the basic system configuration. The information is stored
in a battery-backed CMOS RAM so it retains the Setup information when the
power is turned off.
This chapter provides you with the overview of the BIOS Setup program.
It contains the following topics:
Entering Setup
Control Keys
Getting Help
The Main Menu
Standard CMOS Features
Advanced BIOS Features
Advanced Chipset Features
Integrated Peripherals
Power Management Setup
PNP/PCI Configurations
PC Health Status
Frequency/Voltage Control
High System Performance
Load Optimized Defaults
Set Supervisor/User Password
Save & Exit Setup
Exit Without Saving
3-1
3-2
3-2
3-3
3-4
3-6
3-8
3-12
3-14
3-19
3-23
3-25
3-26
3-28
3-29
3-30
3-32
3-33
Chapter 3
Entering Setup
Power on the computer and the system will start POST (Power On Self Test)
process. When the message below appears on the screen, press <DEL> key to
enter Setup.
Press DEL to enter SETUP
If the message disappears before you respond and you still wish to enter
Setup, restart the system by turning it OFF and On or pressing the RESET
button. You may also restart the system by simultaneously pressing <Ctrl>,
<Alt>, and <Delete> keys.
Control Keys
<↑>
Move to the previous item
<↓>
Move to the next item
<←>
Move to the item in the left hand
<→>
Move to the item in the right hand
<Enter>
Select the item
<Esc>
Jumps to the Exit menu or returns to the main menu from a submenu
<+/PU>
Increase the numeric value or make changes
<-/PD>
Decrease the numeric value or make changes
<F1>
General help, only for Status Page Setup Menu and Option Page
<F5>
Restore the previous CMOS value from CMOS, only for Option Page
Setup Menu
Setup Menu
<F6>
Load the default CMOS value from Fail-Safe default table, only for
Option Page Setup Menu
<F7>
Load Optimized defaults
<F10>
Save all the CMOS changes and exit
3-2
AWARD® BIOS Setup
Getting Help
After entering the Setup menu, the first menu you will see is the Main Menu.
Main Menu
The main menu lists the setup functions you can make changes to. You can use
the control keys ( ↑↓ ) to select the item. The on-line description of the highlighted setup function is displayed at the bottom of the screen.
Sub-Menu
If you find a right pointer symbol (as shown in
the right view) appears to the left of certain fields
that means a sub-menu containing additional
options can be launched from this field. You can
use control keys ( ↑↓ ) to highlight the field and
press <Enter> to call up the sub-menu. Then you
can use the control keys to enter values and
move from field to field within a sub-menu. If
you want to return to the main menu, just press
<Esc >.
8IDE
8IDE
8IDE
8IDE
Primary Master
Primary Slave
Secondary Master
Secondary Slave
General Help <F1>
The BIOS setup program provides a General Help screen. You can call up this
screen from any menu by simply pressing <F1>. The Help screen lists the
appropriate keys to use and the possible selections for the highlighted item.
Press <Esc> to exit the Help screen.
3-3
Chapter 3
The Main Menu
Once you enter Award® BIOS CMOS Setup Utility, the Main Menu (Figure 1)
will appear on the screen. The Main Menu allows you to select from twelve
setup functions and two exit choices. Use arrow keys to select among the items
and press <Enter> to accept or enter the sub-menu.
Standard CMOS Features
Use this Menu for basic system configurations.
Advanced BIOS Features
Use this menu to set the Advanced Features available on your system.
Advanced Chipset Features
Use this menu to change the values in the chipset registers and optimize your
system’s performance.
Integrated Peripherals
Use this menu to specify your settings for integrated peripherals.
Power Management Setup
Use this menu to specify your settings for power management.
PnP/PCI Configurations
This entry appears if your system supports PnP/PCI.
3-4
AWARD® BIOS Setup
PC Health Status
This entry shows your PC health status.
Frequency/Voltage Control
Use this menu to specify your settings for frequency/voltage control.
High System Performance
Use this menu to load the BIOS values for the best system performance, but
the system stability may be affected.
Load Optimized Defaults
Use this menu to load factory default settings into the BIOS for optimal and
stable system operations.
Supervisor/User Password
Use this menu to set User and Supervisor Passwords.
Save & Exit Setup
Save CMOS value changes to CMOS and exit setup.
Exit Without Saving
Abandon all CMOS value changes and exit setup.
3-5
Chapter 3
Standard CMOS Features
The items in Standard CMOS Features Menu are divided into 10 categories.
Each category includes no, one or more than one setup items. Use the arrow
keys to highlight the item and then use the <PgUp> or <PgDn> keys to select
the value you want in each item.
Date
The date format is <day><month> <date> <year>.
day Day of the week, from Sun to Sat, determined by BIOS. Read-only.
month The month from Jan. through Dec.
date The date from 1 to 31 can be keyed by numeric function keys.
year The year, depends on the year of the BIOS
Time
The time format is <hour> <minute> <second>.
IDE Primary/Secondary Master/Slave
Press PgUp/<+> or PgDn/<-> to select Manual, None, Auto type. Note that the
specifications of your drive must match with the drive table. The hard disk will
not work properly if you enter improper information for this category. If your
hard disk drive type is not matched or listed, you can use Manual to define
your own drive type manually.
If you select Manual, related information is asked to be entered to the follow-
3-6
AWARD® BIOS Setup
ing items. Enter the information directly from the keyboard. This information
should be provided in the documentation from your hard disk vendor or the
system manufacturer.
If the controller of HDD interface is SCSI, the selection shall be “None”.
If the controller of HDD interface is CD-ROM, the selection shall be “None”.
Access Mode
The settings are CHS, LBA, Large, Auto.
Capacity
The formatted size of the storage device.
Cylinder
Number of cylinders.
Head
Number of heads.
Precomp
Write precompensation.
Landing Zone Cylinder location of the landing zone.
Sector
Number of sectors.
Drive A/B
This item allows you to set the type of floppy drives installed. Available
options are None, 360K, 5.25 in., 1.2M, 5.25 in., 720K, 3.5 in., 1.44M, 3.5 in.,
2.88M, 3.5 in.
Video
The setting controls the type of video adapter used for the primary monitor of
the system. Available options are EGA/VGA , CGA 40, CGA 80 and Mono.
Halt On
The setting determines whether the system will stop if an error is detected at
boot. Available options are:
All Errors
No Errors
All, But Keyboard
All, But Diskette
All, But Disk/Key
The system stops when any error is detected.
The system doesn’t stop for any detected error.
The system doesn’t stop for a keyboard error.
The system doesn’t stop for a disk error.
The system doesn’t stop for either a disk or a
keyboard error.
3-7
Chapter 3
Advanced BIOS Features
Virus Warning
The setting is to set the virus warning feature for IDE hard disk boot sector
protection. If the function is enabled and any attempt to write data into this
area is made, BIOS will display a warning message on the screen and beep.
Setting options: Disabled, Enabled.
BIOS Flash Write Control
This function protects the BIOS from accidental corruption by unauthorized
users or computer viruses. When disabled, the BIOS' data cannot be changed
when attempting to update the BIOS with a Flash utility. To successfully update the BIOS, you'll need to enable this BIOS Flash Write Control function.
Setting options: Disabled, Enabled.
CPU L1 & L2 Cache
Cache memory is additional memory that is much faster than conventional
DRAM (system memory). When the CPU requests data, the system transfers
the requested data from the main DRAM into cache memory, for even faster
access by the CPU. This setting enables/disables the internal cache (also known
as L1 or level 1 cache) and external cache (also known as L2 or level 2 cache).
Setting options: Disabled, Enabled.
Quick Power On Self Test
The option speeds up Power On Self Test (POST) after you power on the
3-8
AWARD® BIOS Setup
computer. When setting the item to Enabled, BIOS will shorten or skip some
check items during POST. Setting options: Enabled, Disabled.
First/Second/Third Boot Device
The items allow you to set the sequence of boot devices where BIOS attempts
to load the disk operating system. The settings are:
Floppy
The system will boot from floppy drive.
LS120
The system will boot from LS-120 drive.
HDD-0
The system will boot from the first HDD.
SCSI
The system will boot from the SCSI.
CDROM
The system will boot from the CD-ROM.
HDD-1
The system will boot from the second HDD.
HDD-2
The system will boot from the third HDD.
HDD-3
The system will boot from the fourth HDD.
ZIP100
The system will boot from ATAPI ZIP drive.
LAN
The system will boot from the Network drive.
Disabled
Disable this sequence.
Boot Other Device
Setting the option to Enabled allows the system to try to boot from other
device if the system fails to boot from the First/Second/Third boot device.
Swap Floppy Drive
Setting to Enabled will swap floppy drives A: and B:.
Boot Up Floppy Seek
Setting to Enabled will make BIOS seek floppy drive A: before booting the
system. Settings: Disabled and Enabled.
Boot Up NumLock Status
This setting is to set the Num Lock status when the system is powered on.
Setting to On will turn on the Num Lock key when the system is powered on.
Setting to Off will allow users to use the arrow keys on the numeric keypad.
Setting options: On, Off.
Gate A20 Option
This item is to set the Gate A20 status. A20 refers to the first 64KB of extended
memory. When the default value Fast is selected, the Gate A20 is controlled by
Port92 or chipset specific method resulting in faster system performance. When
3-9
Chapter 3
Normal is selected, A20 is controlled by a keyboard controller or chipset
hardware.
Typematic Rate Setting
This setting is used to enable or disable the typematic rate setting including
Typematic Rate & Typematic Delay.
Typematic Rate (Chars/Sec)
After Typematic Rate Setting is enabled, this item allows you to set the rate
(characters/second) at which the keys are accelerated. Settings: 6, 8, 10, 12,
15, 20, 24 and 30.
Typematic Delay (Msec)
This item allows you to select the delay between when the key was first pressed
and when the acceleration begins. Settings: 250, 500, 750 and 1000.
Security Option
This specifies the type of BIOS password protection that is implemented. Settings are described below:
Option
Setup
Description
The password prompt appears only when end users try to
run Setup.
System
A password prompt appears every time when the computer is powered on or when end users try to run Setup.
OS Select For DRAM > 64MB
This allows you to run the OS/2® operating system with DRAM greater than
64MB. Setting options: Non-OS2, OS2.
HDD S.M.A.R.T. Capability
This allows you to activate the S.M.A.R.T. (Self-Monitoring Analysis & Reporting Technology) capability for the hard disks. S.M.A.R.T is a utility that
monitors your disk status to predict hard disk failure. This gives you an opportunity to move data from a hard disk that is going to fail to a safe place before
the hard disk becomes offline. Settings: Enabled and Disabled.
3-10
AWARD® BIOS Setup
Report No FDD For WIN 95
For compatibility with Windows 95 logo certification, select Yes to release IRQ6
when the system contains no floppy drive. When this setting is set to Yes,
users have to select Disabled for the Onboard FDC Controller in the Integrated Peripherals menu. Setting options: Yes, No.
3-11
Chapter 3
Advanced Chipset Features
The Advanced Chipset Features Setup option is used to change the values of
the chipset registers. These registers control most of the system options in the
computer.
Choose the “ADVANCED CHIPSET FEATURES” from the Main Menu and
the following screen will appear.
Note: Change these settings only if you are familiar with the chipset.
RDRAM Bus Frequency
This setting allows you to set the bus frequency for installed RDRAM. Setting
options: Auto, 400 MHz, 300 MHz.
DRAM Data Integrity Mode
Select ECC (Error-Checking & Correcting Code) or Non-ECC according to the
type of DRAM installed.
System BIOS Cacheable
Selecting Enabled allows caching of the system BIOS ROM at F0000h-FFFFFh,
resulting in better system performance. However, if any program writes to this
memory area, a system error may result. Setting options: Enabled, Disabled.
Video BIOS Cacheable
Selecting Enabled allows caching of the video BIOS ROM at C0000h to C7FFFh,
resulting in better video performance. However, if any program writes to this
3-12
AWARD® BIOS Setup
memory area, a system error may result. Setting options: Enabled, Disabled.
Delayed Transaction
The chipset has an embedded 32-bit posted write buffer to support delayed
transactions cycles so that transactions to and from the ISA bus are buffered
and PCI bus can perform other transactions while the ISA transaction is
underway. Select Enabled to support compliance with PCI specification version 2.1. Setting options: Enabled, Disabled.
AGP Aperture Size (MB)
This setting controls just how much system RAM can be allocated to AGP for
video purposes. The aperture is a portion of the PCI memory address range
dedicated to graphics memory address space. Host cycles that hit the aperture
range are forwarded to the AGP without any translation. The option allows the
selection of an aperture size of 4MB, 8MB, 16MB, 32MB, 64MB, 128MB, and
256MB.
3-13
Chapter 3
Integrated Peripherals
On-Chip Primary/Secondary PCI IDE
The integrated peripheral controller contains an IDE interface with support for
two IDE channels. Choose Enabled to activate each channel separately.
IDE Primary/Secondary Master/Slave PIO
The four items allow you to set a PIO (Programmed Input/Output) mode for
each of the four IDE devices that the onboard IDE interface supports. Modes
0~4 provide increased performance. In Auto mode, BIOS automatically determines the best mode for each IDE device.
IDE Primary/Secondary Master/Slave UDMA
Ultra DMA implementation is possible only if your IDE device supports it and
your operating environment contains a DMA driver. If both your hard drive
and software support Ultra DMA 33/66/100, select Auto to enable BIOS support.
3-14
AWARD® BIOS Setup
USB Controller
Select Enabled if your system contains a Universal Serial Bus (USB) controller
and you have USB peripherals. Setting options: Enabled, Disabled.
USB Keyboard Support
Set to Enabled if your need to use an USB keyboard in the operating system
that does not support or have any USB driver installed, such as DOS and SCO
Unix.
Init Display First
This item specifies which VGA card is your primary graphics adapter. Settings:
PCI Slot and AGP.
AC’97 Audio
Auto allows the mainboard to detect whether an audio device is used. If the
device is detected, the onboard AC’97 (Audio Codec’97) controller will be
enabled; if not, it is disabled. Disable the controller if you want to use other
controller cards to connect an audio device. Settings: Auto, Disabled.
AC’97 Modem
Auto allows the mainboard to detect whether a modem is used. If a modem is
used, the onboard MC’97 (Modem Codec’97) controller will be enabled; if not,
it is disabled. Disable the controller if you want to use other controller cards to
connect to a modem. Settings: Auto, Disabled.
Onboard Sound
Auto allows the mainboard to detect whether an audio device is used. If the
device is detected, the onboard audio controller will be enabled; if not, it is
disabled. Disable the controller if you want to use other controller cards to
connect an audio device. Settings: Auto, Disabled.
IDE HDD Block Mode
This allows your hard disk controller to use the fast block mode to transfer data
to and from the hard disk drive. Block mode is also called block transfer, multiple commands or multiple sector read/write. Enabled enables IDE controller to
use block mode; Disabled allows the controller to use standard mode.
POWER ON Function
This controls which part on the PS/2 mouse or keyboard can power on the
3-15
Chapter 3
system. Settings: Password, Hot KEY, Mouse Left, Mouse Right, BUTTON
ONLY and Keyboard 98.
KB Power ON Password
If POWER ON Function is set to Password, then you can set a password in the
field for the PS/2 keyboard to power on the system.
Hot Key Power ON
If POWER ON Function is set to Hot KEY, you can assign a hot key combination in the field for the PS/2 keyboard to power on the system. Settings: CtrlF1 through Ctrl-F12.
Onboard FDC Controller
The item is used to enable or disable the onboard Floppy controller. Select
Enabled when you have installed a floppy disk drive and want to use it.
Onboard Serial Port 1/2
The items specify the base I/O port address and IRQ for the onboard Serial Port
A/Serial Port B. Selecting Auto allows BIOS to automatically determine the
correct base I/O port address. Settings: Disabled, 3F8/IRQ4, 2F8/IRQ3, 3E8/
IRQ4, 2E8/IRQ3 and Auto.
UART Mode Select
The field allows you to specify the operation mode for serial port “COM B”.
Settings are:
Normal:RS-232C Serial Port
IrDA: IrDA-compliant Serial Infrared Port
ASKIR: Amplitude Shift Keyed Infrared Port
RxD, TxD Active
This setting controls the receiving and transmitting speed of the IR peripheral
in use. Setting options: Hi/Hi, Hi/Lo, Lo/Hi, Lo/Lo.
IR Transmission Delay
This setting determines whether the IR transmission rate will be delayed while
converting to receiving mode. Setting options: Disabled, Enabled.
UR2 Duplex Mode
This setting controls the operating mode of IR transmission/reception. Setting
3-16
AWARD® BIOS Setup
options: Full, Half. Under Full Duplex mode, synchronous, bi-directional transmission/reception is allowed. Under Half Duplex mode, only asynchronous, bidirectional transmission/reception is allowed.
Use IR Pins
Please consult your IR peripheral documentation to select the correct setting
of the TxD and RxD signals. Setting options: RxD2/TxD2, IR-Rx2Tx2.
Onboard Parallel Port
This specifies the I/O port address and IRQ of the onboard parallel port. Settings:
378/IRQ7, 278/IRQ5, 3BC/IRQ7 and Disabled.
Parallel Port Mode
SPP : Standard Parallel Port
EPP : Enhanced Parallel Port
ECP : Extended Capability Port
ECP + EPP: Extended Capability Port + Enhanced Parallel Port
SPP/EPP/ECP/ECP+EPP
To operate the onboard parallel port as Standard Parallel Port only, choose
“SPP.” To operate the onboard parallel port in the EPP mode simultaneously,
choose “EPP.” By choosing “ECP”, the onboard parallel port will operate
in ECP mode only. Choosing “ECP + EPP” will allow the onboard parallel
port to support both the ECP and EPP modes simultaneously.
EPP Mode Select
The onboard parallel port is EPP Spec. compliant, so after the user chooses the
onboard parallel port with the EPP function, the following message will be
displayed on the screen: “EPP Mode Select.” At this time either EPP 1.7 spec or
EPP 1.9 spec can be chosen.
ECP Mode Use DMA
The ECP mode has to use the DMA channel, so choose the onboard parallel
port with the ECP feature. After selecting it, the following message will appear:
“ECP Mode Use DMA.” At this time, the user can choose between DMA
channel 3 or 1.
PWRON After PWR-Fail
This setting specifies whether your system will reboot after a power failure or
3-17
Chapter 3
interrupts occurs. Available settins are:
Off
Leaves the computer in the power off state.
On
Reboots the computer.
Former-Sts Restores the system to the status before power failure or
interrupt occurs.
Game Port Address/Midi Port Address
This setting disables or assigns an address for the onboard game/midi port.
Midi Port IRQ
This setting specifies an IRQ for the onboard midi port.
Power Status LED
This item sets how the system uses Power LED on the case to indicate the
suspend/sleep state. Settings are:
Single
The Power LED blinks to indicate the suspend/sleep
state.
Dual
The Power LED changes its color to indicate the suspend/sleep state.
3-18
AWARD® BIOS Setup
Power Management Setup
The Power Management Setup allows you to configure you system to most
effectively save energy while operating in a manner consistent with your own
style of computer use.
ACPI Suspend Type
This item specifies the power saving modes for ACPI function. Options are:
S1/POS
The S1 sleep mode is a low power state. In this state, no
system context (CPU or chipset) is lost and hardware
maintains all system context.
S3/STR
The S3 sleep mode is a power-down state in which power
is supplied only to essential components such as main
memory and wake-capable devices and all system context is saved to main memory. The information stored in
memory will be used to restore the PC to the previous
state when an “wake up” event occurs.
Power Management
This item is used to select the degree (or type) of power saving and is related
3-19
Chapter 3
to these modes: Suspend Mode and HDD Power Down. There are three options for power management:
Min Saving Minimum Power Management. Suspend Mode = 1 Hour,
and HDD Power Down = 15 Min.
Max Saving Maximum Power Management. Suspend Mode = 1 Min,
and HDD Power Down = 1 Min.
User Define Allows end users to configure each mode separately.
Video Off Method
This determines the manner in which the monitor is blanked.
V/H SYNC+Blank
This selection will cause the system to turn off
the vertical and horizontal synchronization ports
and write blanks to the video buffer.
Blank Screen
This option only writes blanks to the video buffer.
DPMS
Initial display power management signaling.
Video Off In Suspend
This setting determines whether the monitor will be turned off during suspend
mode. Setting options: Yes, No.
Suspend Type
This setting allows you to select the type of Suspend mode. Setting options:
Stop Grant (saves the state of the entire system to disk and then powers off
the system), PwrOn Suspend (the CPU and core system remain powered on in
a very low-power mode).
Modem Use IRQ
Name the interrupt request (IRQ) line assigned to the modem (if any) on your
system. Activity of the selected IRQ always awakens the system. Settings are
3, 4, 5, 7, 9, 10, 11 and NA.
Suspend Mode
After the selected period of system inactivity, all devices except the CPU shut
off. Settings are Disabled, 1 Min, 2 Min, 4 Min, 8 Min, 12 Min, 20 Min, 30
Min, 40 Min and 1 Hour.
3-20
AWARD® BIOS Setup
HDD Power Down
If HDD activity is not detected for the length of time specified in this field, the
hard disk drive will be powered down while all other devices remain active.
Settings are Disabled and 1 through 15 Min.
Soft-Off by PWR-BTTN
This feature allows users to configure the power button function. Settings are:
Instant-Off
The power button functions as a normal power-on/off button.
Delay 4 Sec.
When you press the power button, the computer
enters the suspend/sleep mode, but if the button is
pressed for more than four seconds, the computer is
turned off.
Wake Up by PCI Card, Power On by Ring, Wake Up On LAN, USB KB/MS
Wake-Up From S3
These fields specify whether the system will be awakened from power saving
modes when activity or input signal of the specified hardware peripheral or
component is detected.
Note: To use the function of “Power On by Ring” and “Wake Up On
LAN”, you need to install a modem/LAN card supporting power on
function.
CPU THRM-Throttling
The item allows you to specify the CPU speed (at percentage) to which it will
slow down when the CPU reaches the predetermined overheat temperature.
Settings range from 12.5% to 87.5% at 12.5% increment.
Resume by Alarm
The field is used to enable or disable the feature of booting up the system on
a scheduled time/date.
Date (of Month) Alarm
The field specifies the date for Resume by Alarm. Settings: 0~31.
Time (hh:mm:ss) Alarm
The field specifies the time for Resume by Alarm. Format is <hour>
<minute><second>.
3-21
Chapter 3
Reload Global Timer Events: Primary IDE 0/1, Secondary IDE 0/1, FDD/
COM/LPT Port, PCI PIRQ [A-D]#
Global Timer Events are I/O events whose occurrence can prevent the system
from entering a power saving mode or can awaken the system from such a
mode. In effect, the system remains alert for anything which occurs to a device
that is configured as Enabled, even when the system is in a power down mode.
3-22
AWARD® BIOS Setup
PNP/PCI Configurations
This section describes configuring the PCI bus system. PCI, or Personal Computer Interconnect, is a system which allows I/O devices to operate at speeds
nearing the speed the CPU itself uses when communicating with its own special components. This section covers some very technical items and it is
strongly recommended that only experienced users should make any changes
to the default settings.
Reset Configuration Data
Normally, you leave this field Disabled. Select Enabled to reset Extended System Configuration Data (ESCD) when you exit Setup if you have installed a
new add-on and the system reconfiguration has caused such a serious conflict
that the operating system can not boot. The settings are: Enabled and Disabled.
Resource Controlled By
The Award Plug and Play BIOS has the capacity to automatically configure all
of the boot and Plug and Play compatible devices. However, this capability
means absolutely nothing unless you are using a Plug and Play operating
system such as Windows 95/98. If you set this field to “manual” choose specific resources by going into each of the sub menu that follows this field (a sub
menu is preceded by a “¾”). The settings are: Auto (ESCD), Manual.
IRQ Resources
The items are adjustable only when Resources Controlled By is set to Manual.
3-23
Chapter 3
Press <Enter> and you will enter the sub-menu of the items. IRQ Resources list
IRQ 3/4/5/7/9/10/11/12/14/15 for users to set each IRQ a type depending on the
type of device using the IRQ. Settings are:
PCI Device
For Plug & Play compatible devices designed for PCI
bus architecture.
Reserved
The IRQ will be reserved for further request.
PCI/VGA Palette Snoop
When set to Enabled, multiple VGA devices operating on different buses can
handle data from the CPU on each set of palette registers on every video
device. Bit 5 of the command register in the PCI device configuration space is
the VGA Palette Snoop bit (0 is disabled). For example, if there are two VGA
devices in the computer (one PCI and one ISA) and the:
VGA Palette Snoop
Bit Setting
Action
Disabled
Data read or written by the CPU is only directed to the
PCI VGA device’s palette registers.
Enabled
Data read or written by the CPU is directed to both the
PCI VGA device’s palette registers and the ISA VGA
device’s palette registers, permitting the palette registers
of both VGA devices to be identical.
The setting must be set to Enabled if any ISA bus adapter in the system
requires VGA palette snooping.
3-24
AWARD® BIOS Setup
PC Health Status
This section shows the status of your CPU, fan, warning for overall system
status.
Chassis Intrusion Detect
Set this option to enable, reset, or disable the chassis intrusion detector. During Enabled, any intrusion on the system chassis will be recorded. The next
time you turn on the system, it will show a warning message. To be able to clear
those warnings, choose Reset. After clearing the message it will go back to
Enabled.
CPU Warning Temperature
If the CPU temperature reaches the upper limit preset in this setting, the warning mechanism will be activated. This helps you to prevent the CPU overheat
problem.
Current System/CPU Temperature, Current CPU/SYS/PS FAN Speed, Vcore,
+1.80V, Vio, +5V, +12V, -12V, -5V, VBAT(V), 5VSB(V)
These items display the current status of all of the monitored hardware devices/components such as CPU voltages, temperatures and all fans’ speeds.
Shutdown Temperature
The setting allows ACPI-aware OS to automatically shutdown if the system
temperature reaches a thermal level preset in the field. This can prevent the
system components from being damaged due to overheat.
3-25
Chapter 3
Frequency/Voltage Control
CPU Clock Ratio
This setting controls the multiplier that is used to determine the internal clock
speed of the processor relative to the external or motherboard clock speed.
CPU Vcore Select
This setting allows you to set the CPU core voltage. Setting options: Default,
+25mV, +50mV, +75mV, +100mV.
Auto Detect PCI Clk
To reduce the occurrence of electromagnetic interference (EMI), the BIOS detects the presence or absence of components in PCI slots and turns off system
clock generator pulses to empty slots. The settings are: Enabled, Disabled.
Spread Spectrum
When the motherboard’s clock generator pulses, the extreme values (spikes)
of the pulses creates EMI (Electromagnetic Interference). The Spread Spectrum function reduces the EMI generated by modulating the pulses so that the
spikes of the pulses are reduced to flatter curves. If you do not have any EMI
problem, leave the setting at Disabled for optimal system stability and
performance. But if you are plagued by EMI, setting to Enabled for EMI
reduction. Remember to disable Spread Spectrum if you are overclocking because even a slight jitter can introduce a temporary boost in clockspeed of
3-26
AWARD® BIOS Setup
25MHz (with a 1GHz CPU) which may just cause your overclocked processor
to lock up.
CPU Clock
This setting specifies the clock frequency of CPU host bus (FSB) and provides
a method for end-users to overclock the processor accordingly.
3-27
Chapter 3
High System Performance
This option on the main menu allows users to restore all the BIOS settings to
the default High Performance values. The High Performance Defaults are the
default values set by the mainboard manufacturer specifically for maximal system performance but will probably cause a stability issue.
When you select High System Performance, a message as below appears:
Pressing ‘Y’ loads the default BIOS values that enable the best system performance (better than the Optimized Defaults) but may result in the instability of
the system.
WARNING!
This setting is for experienced or overclocking users only. If the
system crashes or hangs after enabling the feature, please CLEAR
CMOS DATA to resolve the problem. For more information, refer to
Clear CMOS Jumper in Chapter 2.
3-28
AWARD® BIOS Setup
Load Optimized Defaults
This option on the main menu allows users to restore all the BIOS settings to
the default Optimized values. The Optimized Defaults are the default values
also set by the mainboard manufacturer for both optimized and stable performance of the mainboard.
When you select Load Optimized Defaults, a message as below appears:
Pressing ‘Y’ loads the default values that are factory settings for optimal and
stable system performance.
3-29
Chapter 3
Set Supervisor/User Password
When you select this function, a message as below will appear on the screen:
Type the password, up to eight characters in length, and press <Enter>. The
password typed now will clear any previously set password from CMOS
memory. You will be prompted to confirm the password. Re-type the password
and press <Enter>. You may also press <Esc> to abort the selection and not
enter a password.
To clear a set password, just press <Enter> when you are prompted to enter the
password. A message will show up confirming the password will be disabled.
Once the password is disabled, the system will boot and you can enter Setup
without entering any password.
When a password has been set, you will be prompted to enter it every time you
try to enter Setup. This prevents an unauthorized person from changing any
part of your system configuration.
Additionally, when a password is enabled, you can also have BIOS to request
a password each time the system is booted. This would prevent unauthorized
use of your computer. The setting to determine when the password prompt is
required is the Security Option of the Advanced BIOS Features menu. If the
Security Option is set to System, the password is required both at boot and at
3-30
AWARD® BIOS Setup
entry to Setup. If set to Setup, password prompt only occurs when trying to
enter Setup.
About Supervisor Password & User Password:
Supervisor password : Can enter and change the settings of the
setup menus.
User password:
Can only enter but do not have the right to
change the settings of the setup menus
3-31
Chapter 3
Save & Exit Setup
When you want to quit the Setup menu, you can select this option to save the
changes and quit. A message as below will appear on the screen:
Typing “Y” will allow you to quit the Setup Utility and save the user setup
changes to RTC CMOS.
Typing “N” will return to the Setup Utility.
3-32
AWARD® BIOS Setup
Exit Without Saving
When you want to quit the Setup menu, you can select this option to abandon
the changes. A message as below will appear on the screen:
Typing “Y” will allow you to quit the Setup Utility without saving any changes
to RTC CMOS.
Typing “N” will return to the Setup Utility.
3-33
MSI Smart Key
Appendix A: MSI Smart Key
MSI Smart Key
A
If security is important to you, the MSI Smart Key is the best solution to prevent your data in the computer from being accessed by unauthorized people.
In the public workspace, the passwords (BIOS password, system
password, etc.) are not enough to keep your privacy. Do you believe
that a hacker can easily enter your computer and monitor your confidential data? It happens everyday, everywhere; you just do not know...
A password only stops them at the first gate. If this protection is broken,
what else can you rely on?
The MSI Smart Key is a hardware device that provides you the
complete and perfect protection on your system. Once the key is installed and setup, any unauthorized user absolutely can not access and
use your computer without the key. The computer needs the key to
boot up, and the operating system needs the key to work normally.
Furthermore, if you have to leave your desktop for a while, you can
simply unplug the key to keep your system in a safest status.
The section includes the following topics:
Installing MSI Smart Key
Using MSI Smart Key
A-2
A-3
A-1
Appendix A
Installing MSI Smart Key
Installation
Simply follow the few steps below, you can install the Smart Key
into your computer very easily.
1.
2.
3.
4.
Turn off the computer.
Locate the USB port on your computer.
Connect the cable to the USB port, and then plug the Smart Key
into the connector properly.
Turn on the computer, and now you can implement this powerful feature.
Note: After you have installed the Smart Key into your computer, the
BIOS will detect it when the system boots up, and you have to enabled/
disabled this function. Furthermore, you should install the dedicated
software application in the operating system, which is provided by MSI,
to obtain the overall protection on your system. The following sections
will provide the detailed instructions for the BIOS setup and software
installation.
System Requirements
Before you use the MSI Smart Key, please check the hardware,
software and operating system requirements first.
Operating System
Connector
Disk Space
Windows 98/ME/2000/XP
USB port
At least 2 MB to install the
software application
A-2
MSI Smart Key
Using MSI Smart Key
BIOS Setup
When the Smart Key is inserted into your computer, the BIOS
will detect it automatically. You can enable or disable the Smart Key
through the BIOS setting. Please note that it needs a personalized
password to execute any kind of Smart Key setting; so, keep the password firmly in mind. If, unfortunately, the Smart Key is lost or the
password is missed, you can not enter the operating system
successfully. At this time, contact your local dealer for further service.
Enable/Disable the Smart Key
The first time installation
1.
2.
3.
Insert the Smart Key into the computer and turn on the power.
Press <F7> during system boot up.
The message as below appears on the screen asking you to
enable or disable the key:
Welcome to MSI Smart Key, please press “Y” to begin,
press “N” to exit
Type <Y> to enable it; type <N> to disable it and bypass the
BIOS to enter the operating system. When you type <Y>, it shows
the following message:
Please input your password and press “Enter”
password:
A-3
Appendix A
4.
Type the password, up to 8 characters, and press <Enter>, it will
show the following message to ask you confirm the password:
Please input your password and press “Enter”
Confirm your password:
Type the password again and press <Enter>.
5.
After the password is confirmed, the system will generate a set
of random ID, and record this ID into the BIOS ROM and the
memory chip on the key; it will show the following message
when the Smart Key is enabled successfully:
Processing .....
You have enabled the Smart Key Successfully
Then, you can enter the operating system and start to work.
Note:
1. You should firmly remember the password you set; if the Smart Key
is lost, you can get a new key from MSI, and turn on the computer
with the original password.
2. To avoid the password from being forgotten, we provide the table
below for you to keep note in this guide. Please write down the password and keep the guide properly.
3. After the Smart Key function is successfully configured under DOS,
the system will automatically reset and enter the installed OS. Please
DO NOT unplug the Smart Key until the system has entered the OS.
A-4
MSI Smart Key
Enable/disable Smart Key function
1.
2.
3.
Turn on the computer with the Smart Key installed.
Press <F7> during system boot up.
The message as below appears on the screen asking you to
enable or disable the key:
If you want to disable MSI Smart Key,
please press “Y”, or press “N” to exit
Type <Y> to disable it; type <N> to keep the function enabled
and enter the operating system. When you type <Y>, it shows
the following message:
Processing .....
You have disabled the Smart Key Successfully
Then, you can enter the operating system and start to work.
A-5
Appendix A
Boot up with no key /wrong key/new key installed
Once the MSI Smart Key is enabled, always keep the key inserted
in the computer. If the key is unplugged, the other user can not access
the computer. The message as below appears during the system booting up:
No MSI Smart Key is Present
Please plug in your MSI Smart Key
or contact your local distributor for details
The user have to find and re-plug the original key into the computer to continue booting up the system. If the wrong key or a new
key* is inserted, it will show the message as below on the screen:
MSI Smart Key password is wrong
Please input your password and press “Enter”
password:
If the user remember the original password, typing in the password will allow the user to enter the operating system, and the system
BIOS will copy the original password data into the wrong key/new
key. Otherwise, the system will halt after entering the wrong password for three times.
* If, unfortunately, your Smart Key was lost , you have to purchase a new
key from MSI as a replacement.
A-6
MSI Smart Key
Software Setup
When the Smart Key is inserted into your computer and the software application is installed in the operating system, it will serve as a
safeguard for your system. When the key is unplugged, the operating
system will enter protection status immediately and the mouse and
keyboard will be locked; when the key is inserted again, the operating
system will resume from the protected mode.
Installation
1.
Install the Smart Key into the computer and turn on the power
to enter the operating system successfully.
2.
Insert the CD-ROM provided and the setup program will
execute automatically. The welcome screen will appear as below:
3.
Press [ Next > ] to start the installation.
A-7
Appendix A
4.
When the Software License Agreement window appears on the
screen, press [ Yes ] to continue.
Click here
5.
Choose the folder to install the software in your computer;
simply press [ Next > ] to install it in the default folder.
Default folder
6.
When the installation is completed, restart the computer as
instructed.
A-8
MSI Smart Key
Using the Software Application
1.
When the program is installed in the operating system, it will
embed in the system tray and show an icon as below:
Smart Key icon
Note: When the Smart Key function is disabled in BIOS, this program
will not be launched in the operating system.
2.
To launch the program’s setup screen, simply left-click on the
Smart Key icon in the system tray. The program’s setup screen
appears as below.
Control options
Program version
This window contains the information of the program and
the main options for the user to control: Security Setting and
Other.
A-9
Appendix A
Security Setting
This option allows you to logon to Windows automatically.
Select the “Auto Login” item and check the “Auto Logon to Windows”
item in the Setting Page field to enable the function. Once the function
is enabled and set properly, you do not have to type the user’s name
and password everytime when entering Windows.
Check this
In Windows 2000, it will show the related fields when the “Auto Logon
to Windows” is checked, you should fill in the correct information in
these fields.
Enter the
information
A-10
MSI Smart Key
Other
This option contains two items:
1) Disable Screen Saver allows you to enable/disable the screen
saver program when the system is locked.
Check this
2)
Set Screen When System Locked allows you to set the status
when the Smart Key is unplugged and the system locked. You
can set the monitor to display:
a) blank screen
b) the retaining screen when the system locked
c) MSI Logo
The default setting is to show MSI Logo.
A-11
Appendix A
3.
Press the “Apply Changes” button to enable the option you
choose.
Click here
4.
Press the “bulb” button at the right-bottom to hide the program
in the system tray and keep on monitoring the system.
Click here
5.
Press the “door” button at the right-bottom to exit the program.
Click here
A-12
MSI Smart Key
Removing the Software Application
To remove the program, follow the steps below:
1.
Click
and choose Settings → Control Panel; doubleclick the Add/Remove Programs item to open the “Add/Remove
Programs Properties” window.
Choose this
Click here
2.
Select the “SmartKey” item in the field and click the [ Add/
Remove... ]; when it shows the dialog box requiring your
confirmation, press [ Yes ] to start removing the program as the
on-screen instructions.
3.
Restart the computer when the un-installation is completed.
A-13
Using 4-/6-channel Audio Function
Appendix B: Using 4-/6-channel Audio
Function
Using 4-/6-channel Audio Function
B
The mainboard comes with C-Media 6-channel audio function, which
allows you to attach 4 or 6 speakers for better space sound effect. The section
will tell you how to activate 4-/6-channel audio function.
This section includes the following topics:
Installing C-Media Drivers
Hardware Configuration
Software Configuration
B-1
B-2
B-2
B-3
Appendix B
Installing C-Media Drivers
The mainboard is able to transform the audio connectors on the back panel
from 2-channel to 4-/6-channel. To use the function, you need to install the CMedia drivers.
To install C-Media drivers:
1. Insert the companion CD into the CD-ROM drive. The setup screen will
automatically appear.
2. Click on C-Media Sound Drivers.
3. Follow the on-screen instructions to complete installation.
4. Restart the system.
Note: For Windows NT4.0, you need to install the C-Media Sound
Drivers manually.
Hardware Configuration
After installing the C-Media drivers, you can attach the speakers for 4-/6channel audio output. Always connect the speakers to the LINE OUT
connectors. Different connector configurations for 2-/4-/6-channel operations
are listed below:
In 2-channel configuration, Line
Out, Line In and MIC functions
all exist.
2-Channel
LINE OUT
Line In
MIC
When set to 4-channel
configuration, LINE IN function
DOES NOT WORK any more.
4-Channel
LINE OUT LINE OUT MIC
6-Channel
LINE OUT LINE OUT LINE OUT
B-2
When set to 6-channel
configuration, LINE IN and MIC
functions DO NOT WORK
anymore.
Using 4-/6-channel Audio Function
Software Configuration
To have 4-/6-channel audio work, you must set appropriate configuration in
the C-Media software application.
To set the multi-channel configuration:
1. Click the C-Media Mixer icon
from the window tray on the bottom.
2. The following screen appears. Click the indicated button.
Click here
3. The “Advanced” window appears.
4. Select 5.1 for 6-channel or 4 for 4-channel audio output.
5. Click OK.
B-3
USB PC to PC Networking Function
Appendix C. USB PC to
PC Networking Function
USB PC to PC Networking
Function (Optional)
C
USB PC to PC is the best solution for providing the easiest network
connection service to you. By connecting multiple PCs through USB PC to PC
port, you can build up a local area network without any network adapter. We
give this Ethernet emulation environment a name — USB PC to PC. USB PC to
PC supports TCP/IP, NetBEUI and IPX protocols. These features make your
PCs able to share their resources such as files or printers to each other.
Furthermore, USB PC to PC also gives you the ability of connecting to your
existing Home or Office LAN for network resource or Internet sharing.
The section includes the following topics:
Installing GeneLink™ LAN Driver
Using USB PC to PC Networking Function
C-1
C-2
C-4
Appendix C
Installing GeneLink™ LAN Driver
Before you use the function, you need to install the GeneLink™ LAN Driver
to all PCs connected via USB PC to PC cables.
Step 1. Installing driver
1. Insert the driver CD and click “USB PC to PC” button to install the driver.
2. The welcome dialog box appears and click Next > button.
3. Choose the destination folder and click Next > button.
4. Select components that you want to install and then click Next > button.
(GeneLinkTM LAN Driver is used only for those PCs connected via USB
PC to PC port so that resources are shared between these PCs;
GeneLinkTM Software Router allows your PC to connect to another
existing Home/Office LAN for network resource or Internet sharing.)
5. The Setup Program will install all necessary components automatically.
6. Setup completes. Then select ‘Yes, I want to restart my computer now’
and click “FInish” button to reboot your computer for updating your
driver configuration.
After you complete the installation procedures, you’ll find Setup Program
has installed GeneLinkTM network driver in your computer. It binds TCP/IP,
NetBEUI and IPX protocols to GeneLinkTM device.
Step 2 – Connect your PCs via the USB PC to PC cable
Step 3 - Network Login
When you restart your computer, you will be prompted for a user name and
password to login your network. Please enter an unique name for your PC.
Step 4 – Sharing your resources and Connecting to Internet
You need to manually share your resources (files, folders, drives and
printers) to make them accessible for other computers. For Internet
accessing, you must define which computer (That has already been connected to Internet) should install GeneLinkTM Software Router. And all
clients accessing Internet resources through GeneLinkTM USB port should
have installed GeneLinkTM LAN driver.
C-2
USB PC to PC Networking Function
Notice:
1. You should use the same network protocol (TCP/IP, NetBEUI or IPX)
for connecting GeneLinkTM LAN to existing Home/Office LAN.
2. If you’ve already configured your [IPX/SPX] and [Client for Netware
Networks] before installing GeneLinkTM driver, we strongly recommend
that you should also install Software Router while installing
GeneLinkTM driver into your system.
C-3
Appendix C
Using USB PC to PC Networking Function
How to share your files, folders, drives and printers
a.
b.
Go to the file, folder, drive or printer that you want to share.
Right click your mouse pointer on the resource you want to share,
you’ll see a POP-UP Menu.
c.
Select “ Sharing” and you’ll see another POP-UP Menu.
C-4
USB PC to PC Networking Function
d.
e.
f.
g.
In “Sharing” tag, select “Share As”.
Enter a name to help others recognize your sharing file or device
(optional).
Select “Access Type”. If you select “ Depend on Password”, your need
to assign an access password for this device.
Click “OK” button.
How to check if you have already shared your resources
Go to the resource and check if Windows had added a hand on its icon or
not. If yes, it means you’ve successfully shared your resource and others
can access it through USB PC to PC; if not, you need to repeat the steps
described in “How to share your files, folders, drives and printers” to
complete your sharing processes.
Connecting to your existing Home or Office LAN
To connect your USB PC to PC to another existing Home of Office LAN via
USB PC to PC port, you need to install GeneLinkTM Software Router in
addition to GeneLinkTM LAN driver. GeneLinkTM Software Router is responsible for handling all network packets between USB PC to PC and your
Home/Office LAN. So only the computer that is physically connected to
both LANs needs to install GeneLinkTM Software Router (i.e., this computer
should install both GeneLinkTM LAN and one network adapter for Home/
Office LAN). For those computers on USB PC to PC, you only need to
follow installation procedures on the manual to install GeneLinkTM LAN
driver. The following procedures will show you how to install drivers to the
computer that will link both PC and your existing Home/Office LAN:
Notice: If you want to connect your GeneLinkTM LAN to your existing
Home/Office LAN, you should use the same protocol for the two LANs. For
example, if your Home/Office LAN uses TCP/IP protocol, you should also
use TCP/IP protocol for your GeneLinkTM LAN. Otherwise, these two LANs
cannot communicate to each other. The Setup Program installs TCP/IP,
NetBEUI and IPX protocols for GeneLinkTM LAN by default. If your Home/
Office LAN uses other protocol, please install the same protocol for those
computers within GeneLinkTM LAN.
C-5
Appendix C
Connecting to Internet through USB PC to PC & Office/Home LAN
If you would like to access Internet resources through USB PC to PC, here
are some things you should notice:
a.
You must define which computer should install GeneLinkTM
Software Router.
b.
The computer which has installed GeneLinkTM Software Router
should have already been connected to internet.
c.
All clients which would like to access Internet resources
through USB cable should have installed GeneLinkTM driver.
Now we need to make some network configurations on the Desktop/
Notebook which connect to GeneLinkTM Software Router to make your
Internet access possible (maybe you need to consult you Network Administrator for doing that):
a.
If your existing home/office network is NOT using DHCP to
assign client’s IP address, your need to:
- Move your mouse pointer on Network Neighborhood icon
and right click on it. You’ll see a pop-up menu.
C-6
USB PC to PC Networking Function
- Click on “Properties”, you’ll see another menu.
- Choose TCP/IP in Configuration tag, and then press “Properties” button. You’ll see “TCP/IP Properties” menu.
C-7
Appendix C
- Now you need to navigate between “IP Address”, “Gateway”,
and “DNS Configuration” tags to specify “IP Address”, “Subnet
Mask”, “Gateway” and “DNS Server”. If you don’t know their
values, pleases consult your Network Administrator.
- Press “OK” button to go back to “Network” pop-up menu.
Choose “Identification” tag. Specify an unique name for your
computer if it doesn’t have and fill in the name of your
workgroup. If you are not sure what’s the name of your computer or Workgroup, please consult your Network Administrator.
- Press “OK” to complete your network configuration. Restart
your computer and you’ll be ready to connect to Internet.
b.
If your existing HOME/OFFICE network is using DHCP to
assign client’s IP address, your Network Sever will configure
your network configuration automatically. So you can skip
those procedures described in the previous session.
C-8
USB PC to PC Networking Function
SPECIAL NOTICE for those users who have already installed
Network Adapter in their system:
If you’ve already configured your [IPX/SPX] and [Client for Netware
Networks] before installing GeneLinkTM driver, we strongly recommend that
you should also install Software Router when you install GeneLinkTM driver
into your system. If you decide not to install Software Router, then the OS
will not allow two IPX/SPX configurations co-exist in the same system. This
will cause GeneLinkTM Driver Install Program overwrite your original IPX/
SPX configuration and make your original network configuration
malfunction.
C-9
Appendix C
Connecting to internet through USB PC to PC & remote modem
If there is no existing Office/Home LAN and your computer does not have a
modem, you still can connect USB PC to PC to internet through another
computer with a modem installed. The function is available in Windows®
98SE and ME.
Internet
Phone Line
PC with modem
installed
USB PC to PC cable
Your PC with USB
PC to PC function
To access internet through another computer with modem, you need to
setup “Internet Connection Sharing” on all computers connected via USB
PC to PC cables. Instructions are as follows:
a.
b.
c.
Go to “Control Panel”.
Double click “Add/Remove Programs” and the “Add/Remove
Programs Properties” window appears.
Select “Windows Setup” tag and double click
C-10
USB PC to PC Networking Function
d.
“Communications”. The “Communications” window appears.
Check “Internet Connection Sharing” and click “OK”.
e.
The “Home Networking Wizard” starts. Click “Next”.
C-11
Appendix C
f.
g.
Click “Adirect connection to my ISP using the following
device”, and select “GeneLink Network Adapter” from the pulldown menu. Click “Next”.
Note: For the computer with a modem installed, you need to
select “My Connection” instead of “GeneLink Network
Adapter” on the step, and after finishing installation of “My
Connection”, select “GeneLink Network Adapter” when the
above window returns.
Continue to click “Next”.
C-12
USB PC to PC Networking Function
h.
Click “Finish.”
i.
Restart the computer.
Note: In Windows® 98SE, you can access internet through the
shared connection of another computer, but it is unable for you
to control the remote modem. However, in Windows® ME, you
are allowed to dial the remote modem of another computer using
the dialing program built in Windows®.
C-13
Glossary
Glossary
Glossary
ACPI (Advanced Configuration & Power Interface)
This power management specification enables the OS (operating system) to control the amount
of power given to each device attached to the computer. Windows 98/98SE, Windows 2000
and Windows ME can fully support ACPI to allow users managing the system power flexibly.
AGP (Accelerated Graphics Port)
A new, high-speed graphics interface that based on PCI construction and designed especially
for the throughput demands of 3-D graphics. AGP provides a direct channel (32-bit wide bus)
between the display controller and main memory for high graphics quality and performance.
ATX
A modern shape and layout of mainboard that supersedes the widely-used Baby AT form
factor. It improves many placement of components and makes a more efficient design.
BIOS (basic input/output system)
On PCs, an essential software that contains all the control code of input/output interface (such
as keyboard, disk drives, etc.). It executes hardware test on booting the system, starts the OS,
and provides an interface between the OS and the components . The BIOS is stored in a ROM
chip.
Buffer
A region of memory reserved as a temporary storage area. In most cases, the OS or applications will create buffer areas to save the necessary data, and the applications can find the data
in the areas first to increase the processing speed.
Bus
A set of hardware lines within the computer system, through which the data is transferred
among different components. In a PC, the term bus usually refers to a local bus that connects
the internal components to the CPU and main memory.
Cache
A special memory subsystem that is used to speed up the data traffer. It stores the contents
of frequently accessed RAM locations and the addresses where these data items are stored.
Chipset
A collection of integrated chips designed to perform one or more related functions. For
G-1
Glossary
example, a modem chipset contains all the primary circuits for transmitting and receiving data;
a PC chipset provides the electronic interfaces between all subsystems.
CMOS (complementary metal-oxide semiconductor)
CMOS is a widely used type of semiconductor, which features high speed and low power
consumption. PCs usually contain a small amount of battery-powered CMOS memory to
retain the date, time, and system setup parameters.
COM
In MS-DOS system, the name of a serial communications port. DOS supports four serial
ports. For example, if a modem is connected to one serial port and a serial mouse to another,
they are identified as COM1 and COM2.
DIMM (dual in-line memory module)
A small circuit board that holds memory chips. A SIMM (single in-line memory module) has
a 32-bit path to the memory chips whereas a DIMM has 64-bit path.
DMA (direct memory access)
A transfer mode between the main memory and the peripheral devices that without passing
through the CPU. Using the DMA controller, data is transferred much faster.
DRAM (Dynamic RAM)
A most common type of computer memory. It usually uses one transistor and a capacitor to
represent a bit. As the development of technology, the memory type and specification used
in computer becomes variety, such as SDRAM, DDR SDRAM, and RDRAM. For further
instruction, please see the table below:
Dynamic RAM (DRAM) Memory Technologies
Type
FPM (60,70ns)
EDO (50,60,70ns)
SDRAM (66MHz)
SDRAM (100MHz)
SDRAM (133MHz)
RDRAM (Direct Rambus)
DDR SDRAM (100MHz)
DDR SDRAM (133MHz)
First Used Clock Rate Bus* Width
1990
1994
1996
1998
1999
1999
2000
2000
25MHz
40MHz
66MHz
100MHz
133MHz
400MHz
100MHz
133MHz
64 bits
64 bits
64 bits
64 bits
64 bits
16 bits
64 bits
64 bits
* Memory channel width (64 bits started with 75MHz Pentium)
Source: Computer Desktop Encyclopedia
G-2
Peak
Volts
Bandwidth
200 MBps
5v
320 MBps
5v
528 MBps
3.3v
800 MBps
3.3v
1.1 GBps
3.3v
1.6 GBps
2.5v
1.6 GBps
3.3v
2.1 GBps
3.3v
Glossary
ECC Memory (error correcting code memory)
A type of memory that contains special circuitry for testing the accuracy of data and correcting
the errors on the fly.
IDE (Integrated Drive Electronics)
A type of disk-drive interface widely used to connect hard disks, CD-ROMs and tape drives
to a PC, in which the controller electronics is integrated into the drive itself, eliminating the
need for a separate adapter card. The IDE interface is known as the ATA (AT Attachment)
specification.
IEEE 1394
A new, high speed external bus standard, also known as FireWire or iLink, which supports
data transfer rates of up to 400 Mbps for connecting up to 63 external devices.
IrDA (Infrared Data Association)
A group of device vendors, including computer, component and telecommunications, who
have developed a standard for transmitting data via infrared light waves. This enables you to
transfer data from one device to another without any cables.
LAN (local area network)
A computer netwoek that covers a relatively smaller area, such as in a building or an enterprise.
It is made up of servers, workstations, shared resources, a network operating system and a
communications link. These individual PCs and devices on a LAN are known as “nodes”, and
are connected by cables to access data and devices anywhere on the LAN, so that many users
can share expensive devices and data.
LED (light emitting diode)
A semiconductor device that converts electrical energy into light. Since it lights up (usually
red) when electricity is passed through it, it is usually used for the activity lights on computer’s
component, such as disk drivers.
LPT (line printer terminal)
Logical device name for a line printer; a name reserved by the MS-DOS for up to three parallel
printer ports: LPT1, LPT2, and LPT3. It is frequently used by the OS to identify a printer.
PCI (Peripheral Component Interconnect)
A local bus standard developed by Intel that first appeared on PCs in late 1993. PCI provides
“plug and play” capability and allows IRQs to be shared. The PCI controller can exchange data
with the system's CPU either 32 bits or 64 bits at a time.
G-3
Glossary
PnP (Plug and Play)
A set of specifications that allows a PC to configure itself automatically to work with peripherals.
The user can "plug" in a peripheral device and "play" it without configuring the system
manually. To implement this useful feature, both the BIOS that supports PnP and a PnP
expansion card are required.
POST (Power On Self Test)
During booting up your system, the BIOS executes a series of diagnostic tests, include checking the RAM, the keyboard, the disk drives, etc., to see if they are properly connected and
operating.
PS/2 Port
A type of port developed by IBM for connecting a mouse or keyboard to a PC. The PS/2 port
supports a mini DIN plug containing just 6 pins. Most modern PCs equipped with PS/2 ports
so that the special port can be used by another device, such as a modem.
USB (universal serial bus)
A hardware interface for low-speed peripherals such as the keyboard, mouse, joystick, etc.
USB provides a maximum bandwidth of 12 Mbit/sec (Mbps) for connecting up to 127 peripheral devices to PC. USB features hot swap capability and multiple data streams, allows
external devices to be plugged in and unplugged without turning the system off.
Virus
A program or a piece of code that infects computer files by inserting in those files copies of
itself. The virus code is buried within an existing program, and is activated when that program
is executed. All the viruses are man-made, and often have damaging side effects.
G-4