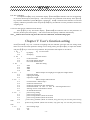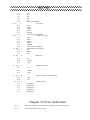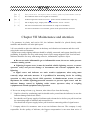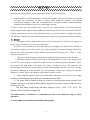
1
K7+E data is larger than or equal to 20 divisions and after about 1-2 seconds after the data is stable. Re-press
the FUNCTION and [*] keys at the same time or press [#] key to exit the automatic accumulation. Note:
automatic accumulation state will not be saved when the power is off; however, the accumulation
data will be saved.
5.
Clear the accumulation result:
Press the CLEAR key in weighing state, the indicator will clear the times of accumulation and the overall
accumulation data. The user should Clear first and then do the operation in first time accumulation.
6.
Switching between kg and lb:
Press the FUNCTION and [#] keys at the same time in normal weighing state, the indicator will
perform switching between units; when the measurement unit is lb, the last digit behind decimal point of
the shown data is on. The users can also switching unit by adjust the parameter of P1.
7.
Preset tare and upper & lower limits alarm:
Press the [#] keys for long in normal weighing status in the following steps:
Step
1
2
3
4
5
Operation
Press FUNCTION
for long time
Input the preset tare
value, e.g. “6000”
Upper limit alarm
value, e.g. “3000”
Lower limit alarm
value, e.g. “0”
6
Display
[******]
[P00000]
[
6000]
[H 00000]
[L 00000]
[******]
Description
Weighing indication status
Guide the user to enter preset tare value. Preset tare value
can be set within 5 numbers value.
Press the [#] key to make confirmation and move to Step
4.
Press the [#] key to make confirmation and move to Step
5
Press the [#] key to make confirmation and move to Step
6
Go back to weighing mode., displaying net weight after
tare.
【Note】Cancel the upper and lower limit alarm is not workable when both the upper and the lower limit
is 0;
Chapter IV Calibration Description
Properly connect the signal source and power supply to preheat the indicator for 15-30 minutes when there is
no load on weighing platform.
After lead sealing is broken, please insert short connecting ring to connect pin J7 on the indicator main
board, and allows the indicator to be calibrated. (circuit board is setting as default that allows
calibration, new indicator can omit this step),then operate as following steps(after calibration, lead
sealing again):
(1) Press【#】key during startup initialization, the indicator will come into calibration state.
1、 Division setting:
Display 【d
X 】
press【tare】key to choose 1、2、5、10、20、50,press【#】key for confirmation,
and will enter into next parameter setting, press【tare】 key for automatic
-8-