1
2. INTRODUCTION
The Davis DriveRight™ is designed to allow straightforward installation. The specific details of installation vary by vehicle model and year. This manual provides
general instructions sufficient to guide a professional installer or knowledgeable,
experienced individual through a successful installation. Please read or at least skim
the entire manual before beginning the installation. Read and understand each step
thoroughly before starting that step. Your DriveRight includes a limited number of
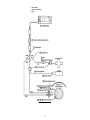
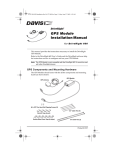
extra parts. In this manual, parts will be referred to by their item numbers shown in
Figure 1.
WARNING: The magnet supplied with the DriveRight is extremely strong and will de-magnetize
ATM cards, credit cards, etc., if brought in contact. It may also affect other sensitive
electronic equipment.
PROFESSIONAL VS. DO-IT-YOURSELF INSTALLATION
Davis Instruments strongly recommends that the DriveRight be installed by ASE
(Automotive Service Excellence) certified technicians or professional automotive
mechanics. As with any installation of an automotive accessory, the installer must
make a series of decisions, in this case decisions such as where and how the sensor
and brackets are mounted, where holes are drilled, how wires are routed, where to
locate unswitched +12V and ground and so on. These decisions are best made by a
knowledgeable and experienced professional. Poor decisions may damage your vehicle or cause accidents or injuries.
If you select professional installation, use the procedure described in “Initial Test”
on page 18 to verify the work done.
WARNING: Working beneath your vehicle and installing the DriveRight may be hazardous.
Improper installation may damage your vehicle and cause accidents and/or injuries. If
you are uneasy about installing your unit please have a qualified professional complete
the installation. Davis specifically disclaims any liability for injury or loss resulting
from the installation or use of the DriveRight.
GETTING READY
Before installing your DriveRight:
• You may need to raise the vehicle in order for you to work under it. Always use
safety stands when working on or under any vehicle that is supported by only a
jack.
• You may need the following tools or equivalent. Additional tools may be
required depending on your specific installation.
• drill and drill bits, 1/8” to 5/16” (3 to 8mm)
• multimeter and/or test light
• hacksaw
• adjustable wrenches
• vise
• metal forming tools
• crimp tools
• wire cutter
2