1
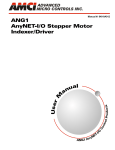
ADVANCED
MICRO CONTROLS INC.
Manual #: 940-0S063
SD17060B
SD17060B-25
Stepper Drivers
2
3
5
6
7
8
10
al
u
an
du
ct
s
11
12
14
16
17
18
ro
General Information ..................
Introducing the SD17060B .......
Specifications ............................
Mounting the SD17060B ...........
Switch Settings .........................
Connecting Your Controller .....
Connecting Your Motor ............
Power Connector and
Indicator LED’s ..........................
Verifying System Setup ............
Troubleshooting ........................
Using Older
SD17060B Drivers .....................
Using Older
SD17060B-25 Drivers ................
Using Older
SD17060B-24 Drivers ................
User
M
Table of Contents
A
M
CI
M o tio n C
t
on
ro
l
P
GENERAL INFORMATION
Important User Information
The products and application data described in this manual are useful in a wide variety of different applications.
Therefore, the user and others responsible for applying these products described herein are responsible for determining the acceptability for each application. While efforts have been made to provide accurate information
within this manual, AMCI assumes no responsibility for the application or the completeness of the information
contained herein.
UNDER NO CIRCUMSTANCES WILL ADVANCED MICRO CONTROLS, INC. BE RESPONSIBLE OR
LIABLE FOR ANY DAMAGES OR LOSSES, INCLUDING INDIRECT OR CONSEQUENTIAL DAMAGES OR LOSSES, ARISING FROM THE USE OF ANY INFORMATION CONTAINED WITHIN THIS
MANUAL, OR THE USE OF ANY PRODUCTS OR SERVICES REFERENCED HEREIN.
No patent liability is assumed by AMCI, with respect to use of information, circuits, equipment, or software
described in this manual.
The information contained within this manual is subject to change without notice.
This manual is copyright 2009 by Advanced Micro Controls Inc. You may reproduce this manual, in whole or
in part, for your personal use, provided that this copyright notice is included. You may distribute copies of this
complete manual in electronic format provided that they are unaltered from the version posted by Advanced
Micro Controls Inc. on our official website: www.amci.com. You may incorporate portions of this documents in
other literature for your own personal use provided that you include the notice “Portions of this document copyright 2009 by Advanced Micro Controls Inc.” You may not alter the contents of this document or charge a fee
for reproducing or distributing it.
Standard Warranty
ADVANCED MICRO CONTROLS, INC. warrants that all equipment manufactured by it will be free from
defects, under normal use, in materials and workmanship for a period of [18] months. Within this warranty
period, AMCI shall, at its option, repair or replace, free of charge, any equipment covered by this warranty
which is returned, shipping charges prepaid, within eighteen months from date of invoice, and which upon
examination proves to be defective in material or workmanship and not caused by accident, misuse, neglect,
alteration, improper installation or improper testing.
The provisions of the “STANDARD WARRANTY” are the sole obligations of AMCI and excludes all other
warranties expressed or implied. In no event shall AMCI be liable for incidental or consequential damages or
for delay in performance of this warranty.
Returns Policy
All equipment being returned to AMCI for repair or replacement, regardless of warranty status, must have a
Return Merchandise Authorization number issued by AMCI. Call (860) 585-1254 with the model number and
serial number (if applicable) along with a description of the problem. An “RMA” number will be issued.
Equipment must be shipped to AMCI with transportation charges prepaid. Title and risk of loss or damage
remains with the customer until shipment is received by AMCI.
24 Hour Technical Support Number
24 Hour technical support is available on this product. Start at our website, www.amci.com if you have internet access. Product documentation and FAQ’s are available on the site that answer most common questions.
If you require additional technical support, call (860) 583-7271. Your call will be answered by the factory
during regular business hours, Monday through Friday, 8AM - 5PM Eastern. During non-business hours an
automated system will ask you to enter the telephone number you can be reached at. Please remember to
include your area code. The system will page an engineer on call. Please have your product model number
and a description of the problem ready before you call.
We Want Your Feedback
Manuals at AMCI are constantly evolving entities. Your questions and comments on this manual are both welcomed and necessary if this manual is to be improved. Please direct all comments to: Technical Documentation,
AMCI, 20 Gear Drive, Terryville CT 06786, or fax us at (860) 584-1973. You can also e-mail your questions
and comments to [email protected]
ADVANCED MICRO CONTROLS INC.
INTRODUCING THE SD17060B
This manual is designed to get you up and running quickly using the SD17060B or SD17060B-25
stepper drivers. As such, it assumes you have some basic knowledge of stepper systems, such
as the resolution you want run your motor at, and the reasons why you’d want to use Idle Current
Reduction and the reasons why you wouldn’t. If these terms or ideas are new to you, we’re here
to help. AMCI has a lot of information on our website and we are adding more all the time. If you
can’t find what you’re looking for at http:///www.amci.com, send us an e-mail or call us. We’re
here to back you up with all of our knowledge and experience.
Applicable Units
This manual applies to all SD17060B and SD17060B-25 drivers manufactured after December of 2008 as
well as some SD17060B drivers manufactured during December of 2008. You will be able to determine the
date of manufacture from the serial number on the driver. Serial numbers for all AMCI drivers are formed
from a date code and sequential number. The serial number format is shown below.
"D" prefix on all Drive
Serial Numbers
Digits 1&2
Month of Manufacture
Digits 3&4
Year of Manufacture
D12080135
Dmmyynnnn
Serial Number of the 135th drive manufactured
in December of 2008.
Digits 5-8
Sequential Number
within the month
For SD17060B Drives...
h If your year of manufacture is 2009 or later, (digits 3 and 4 are “09” or greater), then this manual
applies.
h If your month and year of manufacture is December of 2008, (digits 1 through 4 are “1208”), and the
sequential number is “0135” or greater, then this manual applies.
h If your month and year of manufacture is December of 2008, (digits 1 through 4 are “1208”), and the
sequential number is less than “0135” then most of the information in this manual applies. The only
difference is that these older SD17060B drivers require external resistors for input signals greater than
5Vdc. Refer to Appendix A on page 16 for additional information.
h If your month and year of manufacture is November of 2008 or earlier, (digits 1 through 4 are “1108”
or less), then most of the information in this manual applies. The only difference is that these older
SD17060B drivers require external resistors for input signals greater than 5Vdc. Refer to Appendix A
on page 16 for additional information.
For SD17060B-25 Drives...
h If your year of manufacture is 2009 or later, (digits 3 and 4 are “09” or greater), then this manual
applies.
h If your month and year of manufacture is December of 2008 or earlier, (digits 1 through 4 are “1208”
or less), then most of the information in this manual applies. The only difference is that older
SD17060B-25 drivers will only accept 24Vdc input signals. Refer to Appendix B on page 17 for additional information.
For SD17060B-24 Drives...
As of this manual, the SD17060B-24 has been phased out of production and replaced by the standard
SD17060B. The older SD17060B drivers required an external resistor when using a 24Vdc input signal and
the SD17060B-24 drivers had this resistor added internally. With this manual, the standard SD167060B drivers have inputs that accept 5 to 24Vdc signals without the need for an external resistor and they replace the
SD17060B-24 in all applications. See Appendix C on page 18 for more information.
20 Gear Drive, Plymouth Ind. Park, Terryville, CT 06786
Tel: (860) 585-1254 Fax: (860) 584-1973 http://www.amci.com
3
INTRODUCING THE SD17060B
The SD17060B and SD17060B-25
The SD17060B and SD17060B-25 are micro-stepping drivers that are part of the growing line of motion control products from AMCI. They are designed for use with a variety of stepper motors including AMCI’s size
23 through size 42 motors. The two drivers can be programmed to a maximum resolution of 50,800 steps per
turn and output a motor current of 1.0 to 6.3ARMS that is programmable in 0.1ARMS increments. Other features of the two drivers include:
h
h
h
h
h
h
h
Inputs that accept 5Vdc to 24Vdc without the need of an external current limiting resistor
Anti-Resonance Circuitry
Back-EMF Protection Circuity
Programmable Idle Current Reduction
Programmable Current Loop Gain
Programmable Pulse Train Input (Step/Direction or CW/CCW)
Programmable Active State for the Disable Input
The only difference between the SD17060B and the SD17060B-25 is the resolution settings available on the
two drivers. The table below shows the settings available on each driver with the differences highlighted.
SD17060B
200
400
1,000 2,000 5,000 10,000 12,800 18,000 20,000 21,600 25,000 25,400 25,600 36,000 50,000 50,800
SD17060B-25
200
400
1,000 1,600 2,000 3,200 5,000 10,000 12,800 18,000 20,000 21,600 25,000 36,000 50,000 50,800
Figure 1: Available Position Resolutions
Most of the information in this manual applies to both drivers and the “SD17060B” part number is used to
refer to both. When giving information that only applies to the SD17060B-25, the “SD17060B-25” part number will be used.
Replacing an Older SD17060B
When replacing a SD17060B that was produced prior to December, 2008 with a unit that was produced after
December, 2008, you will have to remove any current limiting resistors if you had driven the inputs with 12
or 24Vdc. Refer to Appendix A, USING OLDER SD17060B DRIVES, on page 16.
Upgrading from the SD17060
The SD17060B replaces the AMCI SD17060 in all applications. The SD17060B has several advantages:
h The SD17060B uses the latest power switching transistors for greater efficiency and fewer thermal loses.
h Greater efficiency and a thinner front panel means you can space the drivers closer together in an enclosure.
h The Disable Input on the SD17060B can be used to reset the driver. The SD17060 could only be reset by cycling
power to it.
h The SD17060B has the same back panel mounting pattern, allowing you to quickly change between units.
h The Current Loop Gain now has an automatic setting that allows the SD17060B to determine the appropriate gain
when the driver is powered up.
However, improvements sometimes require changes, and there are a few minor changes between the drivers.
h The ±STEP/CW pins on the Indexer Connector are swapped. This change makes the SD17060B indexer pinout
the same as a majority of our other drivers.
h The SD17060 required external resistors to use 12 Vdc or 24 Vdc inputs. These resistors are no longer needed
when using the SD17060B and they must be eliminated for proper operation. This statement only applies to
SD1760B drivers shipped during the second half of December, 2008 and later. See Applicable Units on page 3 to
determine when your SD717060B driver was shipped.
h The third harmonic switch settings on the SD17060 have been replaced with the following on the SD17060B:
1) Disable Input Active State: Allows you to program the Disable Input to be active when voltage is applied to the input or active when voltage is removed. The default setting mimics the
behavior of the Disable Input on the SD17060.
2) Anti-Resonance Enable: The anti-resonance circuitry can be enabled or disabled.
4
ADVANCED MICRO CONTROLS INC.
SPECIFICATIONS
Driver Type
Two bipolar MOSFET H-bridges with 170Vdc
output bus. 20KHz PWM current control.
Motor Current
Switch selectable from 1.0 to 6.3ARMS in 0.1
Amp steps.
Physical Dimensions
Width: 2.1 inches max.
Idle Current Reduction
Switch selectable to Not reduced, To 69%, To
50%, or To 0%. Motor current is reduced to
selected level if a step pulse is not received for
one second for the To 50%, and To 0% settings. For the To 69%, setting, current is
reduced after 10 milliseconds. Current is
restored to full value on next pulse.
Depth:
4.0 inches max.
Height:
6.2 inches
7.0 inches with mounting tabs
Weight
2.4 lbs. (1.1 kg.)
Inputs
Electrical Characteristics for all Inputs: ..........
Differential. 1500 Vac/dc opto-isolated. Can
be wired as single ended inputs.
Resolution
SD17060B:
Switch selectable to 200, 400, 1,000, 2,000,
5,000, 10,000, 12,800, 18,000 20,000, 21,600,
25,000, 25,400, 25,600, 36,000, 50,000, or
50,800 steps per turn.
Indexer .... Motor steps on high going pulse.
250 nS min. pulse width, 2 MHz
maximum input frequency. 500 nS
minimum dwell time between direction changes.
Disable .... Programmable Active State (ON or
OFF). Disables current to motor.
Driver does not accept steps while disabled.
Fault Output
Electrical Characteristics:
Open Collector/Emitter. 1500 Vac/dc
opto-isolated. 30Vdc, 20 mA max.
SD17060B-25:
Switch selectable to 200, 400, 1,000, 1,600,
2,000, 3,200 5,000, 10,000, 12,800, 18,000
20,000, 21,600, 25,000, 36,000, 50,000, or
50,800 steps per turn.
Internal Power Fuses
10 Amp Slow Blow. Both Line and Neutral are
fused. Fuses are not user replaceable.
Environmental Specifications
Input Power 95 to 132Vac, 50/60 Hz, 5.0 Apk
max.
Driver will retain control of motor down to 85Vac
at reduced torque.
The Fault Output is normally on. Turns off under
the following conditions:
Ambient Operating Temperature
-4° to 122°F (-20° to 50°C)
Reset ............... The driver initialization is not
yet complete on power up.
Storage Temperature
-40° to 185°F (-40° to 85°C)
Short Circuit .... Motor Phase to Phase or Phase
to Earth Ground
Over Temp ...... Heat Sink temperature exceeds
90° C (195° F)
Humidity 0 to 95%, non-condensing
Motor Specifications
Type 2 phase hybrid. 4, 6, or 8 lead motor
No Motor ........ The motor interlock terminals
are not connected.
Insulation Minimum 500Vdc phase-to-phase and
phase-to-case
Pulse Train Input
Switch selectable to CW/CCW or Step/Direction.
Inductance 0.3 mH minimum. 2.5 to 45 mH recommended
Connectors
All mating connectors are included with driver.
5
Connector
Wire
Strip Length
Min. Tightening Torque
Indexer
28 - 16 AWG
0.275 inches
1.95 lb-in (0.22 nM)
Motor
24 - 12 AWG
0.275 inches
4.43lb-in (0.5 nM)
Power
24 - 12 AWG
0.275 inches
4.43lb-in (0.5 nM)
ADVANCED MICRO CONTROLS INC.
MOUNTING THE SD17060B
Outline Drawing
There are two ways to mount the SD17060B.
h The first method is with four #10-32 screws into its side panel.
h The second method is by the mounting tabs. Mounting tabs are for #6 screws.
Minimum and maximum screw lengths should be observed to prevent a screw from
shorting to the PC Board.
There are airflow holes in the top and bottom of the enclosure. To ensure adequate convectional airflow, the driver must be mounted in the orientation shown in the drawing.
2.05" (52.1)
0.152" (3.86) dia.
#10-32 UNF-2B.
Four places.
Min. screw length = 0.31" (7.9) + thickness of mounting panel.
Max. screw length = 0.62" (15.8) + thickness of mounting panel.
1.10"
0.312" (7.92) dia.
(27.9)
0.118"
DIR/CCW +
DIR/CCW
STEP/CW +
STEP/CW
DISABLE +
DISABLE
FAULT +
FAULT
(4.78)
STEP/FAULT
INTERLOCK
6.15"
B CTAP
B
6.71"
B
(170.4)
(156.2)
4.000"
EARTH GND
(101.60)
A
7.00"
A
(177.8)
A CTAP
INTERLOCK
POWER
GND
AC POWER
95 – 132 VAC
50/60 Hz
N
1.073"
(27.25)
L
0.60" (15.2)
0.152"
(3.86)
typ.
1.000"
(25.40)
2.750" (69.85)
0.875"
(22.23)
4.00" (101.6)
Grounding
The SD17060B must be grounded for proper operation. The GND connection on the power connector is connected to the SD17060B enclosure and is a sufficient grounding point for most applications. When mounted
the SD17060B on a surface that is electrically conductive and grounded, you should also take steps to ensure
that the two are electrically bonded together. If necessary, remove paint for the bolt mounting surfaces of the
panel to ensure adequate electrical bonding.
Airflow and Wiring Space
To ensure adequate airflow and wiring space, you need two inches (50 mm) of space above and below the
driver, one and one-half inches (37 mm) of space to the left and right of the driver, and one inch (25 mm) of
space in front of the driver. These dimensions are typical for convectional cooling. If you have an active
cooling system such as enclosure fans, you will be able to mount the drivers closer together.
6
ADVANCED MICRO CONTROLS INC.
SWITCH SETTINGS
The SD17060B is configured by DIP switches on the top of the driver. The factory default setting has all
switches in their off (0) position except for SB2-1. (CurrentLoop Gain = 1) All switch setting are latched.
You must cycle power to the driver before changes take effect.
Note on Idle Current Reduction
0
SWITCH
SETTINGS
SB3
SB4
ON
ON
ON
1 2 3 4 5
1 2 3 4 5
1 2 3 4 5
1 2 3 4 5
PULSE TRAIN INPUT
STEP/DIR 0
CW/CCW 1
IDLE CURRENT
REDUCTION
NO REDUCTION
TO 50%
TO 69%
TO 0%
Disable Input
You can program the Disable Input's
active state. When Active High, you
must apply power to the input to disable
the driver. When Active Low, you must
apply power to the input to enable the
driver. If you are not using the input, set
this switch to Active High and the driver
will operate as you expect. When the Disable Input is active, the SD17060B
removes power from the motor and stops
accepting indexer pulses. Over-temp and
Over-current faults are cleared when the
driver transitions from a Disabled state.
Anti-Resonance
Allows the SD17060B to compensate for
back-EMF generated by the motor. It
should be left enabled for most applications. Disable only if you are sure you do
not want this feature or under the advice of
AMCI tech support.
Current Loop Gain
SB2
ON
0
0
1
1
0
1
0
1
SD17060B
RESOLUTION
DISABLE INPUT
ACTIVE STATE
ACTIVE HIGH 0
ACTIVE LOW 1
ANTI-RESONANCE
ENABLED 0
DISABLED 1
CURRENT LOOP
GAIN
AutoID
Gain = 1
Gain = 2
Gain = 3
Gain = 4
Gain = 5
Gain = 6
Gain = 7
Gain = 8
Gain = 9
Gain = 10
Gain = 11
Gain = 12
Gain = 13
Gain = 14
Gain = 15
Gain = 16
Gain = 17
Gain = 18
Gain = 19
Gain = 20
Gain = 21
Gain = 22
Gain = 23
Gain = 24
Gain = 25
Gain = 26
Gain = 27
Gain = 28
Gain = 29
Gain = 30
Gain = AutoMode
0
1
0
1
0
1
0
1
0
1
0
1
0
1
0
1
0
1
0
1
0
1
0
1
0
1
0
1
0
1
0
1
0
0
1
1
0
0
1
1
0
0
1
1
0
0
1
1
0
0
1
1
0
0
1
1
0
0
1
1
0
0
1
1
0
0
0
0
1
1
1
1
0
0
0
0
1
1
1
1
0
0
0
0
1
1
1
1
0
0
0
0
1
1
1
1
0
0
0
0
0
0
0
0
1
1
1
1
1
1
1
1
0
0
0
0
0
0
0
0
1
1
1
1
1
1
1
1
0
0
0
0
0
0
0
0
0
0
0
0
0
0
0
0
1
1
1
1
1
1
1
1
1
1
1
1
1
1
1
1
(Steps / Revolution)
200 STEPS
400 STEPS
1,000 STEPS
2,000 STEPS
5,000 STEPS
10,000 STEPS
12,800 STEPS
18,000 STEPS
20,000 STEPS
21,600 STEPS
25,000 STEPS
25,400 STEPS
25,600 STEPS
36,000 STEPS
50,000 STEPS
50,800 STEPS
0
1
0
1
0
1
0
1
0
1
0
1
0
1
0
1
0
0
1
1
0
0
1
1
0
0
1
1
0
0
1
1
0
0
0
0
1
1
1
1
0
0
0
0
1
1
1
1
0
0
0
0
0
0
0
0
1
1
1
1
1
1
1
1
0
1
0
1
0
1
0
1
0
1
0
1
0
1
0
1
0
0
1
1
0
0
1
1
0
0
1
1
0
0
1
1
0
0
0
0
1
1
1
1
0
0
0
0
1
1
1
1
0
0
0
0
0
0
0
0
1
1
1
1
1
1
1
1
SD17060B-25
RESOLUTION
(Steps / Revolution)
200 STEPS
400 STEPS
1,000 STEPS
1,600 STEPS
2,000 STEPS
3,200 STEPS
5,000 STEPS
10,000 STEPS
12,800 STEPS
18,000 STEPS
20,000 STEPS
21,600 STEPS
25,000 STEPS
36,000 STEPS
50,000 STEPS
50,800 STEPS
This setting allows you to compensate for
variations in motor properties which will give you smoother motion and better positional
accuracy. See the Setting the Current Loop Gain section on page 12 for more information.
Self-Test Mode
Self-Test mode is controlled by the switch SB4-1. If you change the state of this switch
while power is applied to the SD17060B, the driver will respond by rotating the attached
motor clockwise at 60 RPM with a resolution of 50,000 steps per turn. Note that changing
this switch does not alter the current supplied to the motor. All switch settings are read and
latched on power up. However, you must return this switch to its correct setting for normal
operation before cycling power or resetting the SD17060B.
20 Gear Drive, Plymouth Ind. Park, Terryville, CT 06786
Tel: (860) 585-1254 Fax: (860) 584-1973 http://www.amci.com
0
1
0
1
0
1
0
1
0
1
0
1
0
1
0
1
0
1
0
1
0
1
0
1
0
1
0
1
0
1
0
1
0
1
0
1
0
1
0
1
0
1
0
1
0
1
0
1
0
1
0
1
0
1
0
1
0
1
0
1
0
1
0
1
0
0
1
1
0
0
1
1
0
0
1
1
0
0
1
1
0
0
1
1
0
0
1
1
0
0
1
1
0
0
1
1
0
0
1
1
0
0
1
1
0
0
1
1
0
0
1
1
0
0
1
1
0
0
1
1
0
0
1
1
0
0
1
1
0
0
0
0
1
1
1
1
0
0
0
0
1
1
1
1
0
0
0
0
1
1
1
1
0
0
0
0
1
1
1
1
0
0
0
0
1
1
1
1
0
0
0
0
1
1
1
1
0
0
0
0
1
1
1
1
0
0
0
0
1
1
1
1
0
0
0
0
0
0
0
0
1
1
1
1
1
1
1
1
0
0
0
0
0
0
0
0
1
1
1
1
1
1
1
1
0
0
0
0
0
0
0
0
1
1
1
1
1
1
1
1
0
0
0
0
0
0
0
0
1
1
1
1
1
1
1
1
0
0
0
0
0
0
0
0
0
0
0
0
0
0
0
0
1
1
1
1
1
1
1
1
1
1
1
1
1
1
1
1
0
0
0
0
0
0
0
0
0
0
0
0
0
0
0
0
1
1
1
1
1
1
1
1
1
1
1
1
1
1
1
1
0
0
0
0
0
0
0
0
0
0
0
0
0
0
0
0
0
0
0
0
0
0
0
0
0
0
0
0
0
0
0
0
1
1
1
1
1
1
1
1
1
1
1
1
1
1
1
1
1
1
1
1
1
1
1
1
1
1
1
1
1
1
1
1
1.0
1.0
1.0
1.0
1.0
1.0
1.0
1.0
1.0
1.0
1.0
1.1
1.2
1.3
1.4
1.5
1.6
1.7
1.8
1.9
2.0
2.1
2.2
2.3
2.4
2.5
2.6
2.7
2.8
2.9
3.0
3.1
3.2
3.3
3.4
3.5
3.6
3.7
3.8
3.9
4.0
4.1
4.2
4.3
4.4
4.5
4.6
4.7
4.8
4.9
5.0
5.1
5.2
5.3
5.4
5.5
5.6
5.7
5.8
5.9
6.0
6.1
6.2
6.3
7
OUTPUT CURRENT
The SD17060B controls the
RMS current through the motor.
Therefore it can momentarily
put 1.4 times the motor's rated
current through the windings
safely. If you choose a setting
of No Reduction, the
SD17060B will revert to peak
current control when the motor
is not turning. This feature protects the motor from damage.
You will not see a reduction in
holding torque.
SB1
1 ON
CONNECTING YOUR CONTROLLER
I/O Connector
The I/O connector on the SD17060B accepts inputs from your indexer
as well as the Disable Input and Fault Output.
All inputs accept 5Vdc differential signals and can also be wired to
accept single ended sinking or sourcing inputs of up to 24Vdc without
the need of an additional current limiting resistor. This is true for all
SD17060B and SD17060B-25 units sold by AMCI after December,
2008. See Applicable Units on page 3 for information on determining
when your unit was shipped from the AMCI factory.
DIR/CCW +
DIR/CCW
STEP/CW +
STEP/CW
DISABLE +
DISABLE
FAULT +
FAULT
Indexer Inputs
Disable Input
Fault Output
Input Wiring
All inputs on the SD17060B are low
voltage, low power signals. All wiring
should use shielded, twisted pair cable
such as Belden 9727 instrumentation
cable.
The shield of the cable should be
grounded at one end only, preferably at
the indexer or controller. Do not ground
the shields at the SD17060B. If you
must splice the cable, do not connect the
shields to ground of the junction box.
Indexer/Disable
Input
5V
Differential
Output
+
–
Shielded, Twisted
Pair Cable
Open Collector Sourcing Connection
Shielded, Twisted
Pair Cable
Indexer Inputs
These inputs can be programmed to
accept Step & Direction or CW/CCW
pulses. This setting is controlled by
SW1-1.
Indexer/Disable
Input
Disable Input
When active, the motor current is off
and the driver does not accept indexer
pulses. The active state of the Disable
Input is set by switch SB1-4.
R LD may be needed in applications using a PLC DC output
to generate index pulses at high speeds. See the note on
this page for more information.
RLD
An additional load resistor may be
required on some PLC outputs to
improve switching time. A symptom of
this problem is that the motor will begin
to run rough at high speeds. A 470 or
560 ohm resistor should be used. For
5V and 12V systems use a 1W resistor.
For 24V systems use a 2W resistor.
These power ratings assume that the output can be normally on. For systems
where you are sure the output is always
normally off, the wattage ratings can be
cut in half.
8
Differential Connection
V DC
+5 to +24V
Sourcing
Output
+
R LD
–
(As Needed)
Open Collector Sinking Connection
Shielded, Twisted
Pair Cable
VDC
+5 to +24V
R LD
+
(As Needed)
Indexer/Disable
Input
–
Sinking
Output
R LD may be needed in applications using a PLC DC output
to generate index pulses at high speeds. See the note on
this page for more information.
ADVANCED MICRO CONTROLS INC.
CONNECTING YOUR CONTROLLER
Output Wiring
The ±Fault Output is an optically isolated transistor capable of driving a typical PLC input. The Fault Output
is normally on (conducts current) and turns off under the following conditions:
h
h
h
h
The Interlock jumper is missing on the motor connector
There is a short in the motor, either phase to phase or phase to ground
The heatsink temperature exceeds 90°C (195°F)
The driver is in its reset state and is not ready to accept pulses
Both ends of the output are uncommitted, so it can be wired as a sourcing or sinking output. The figure shows
a typical connection as a sourcing output.
Open Collector Sourcing Output
FAULT+
VDC
+5 to +24V
Ic
RLIMIT*
SD17060B
Fault Output
PLC Input
FAULT–
Shielded, Twisted
Pair Cable
FAULT OUTPUT Electrical Specifications
VDC max: 30Vdc
Ic max: 20 mA
VCESAT
SAT: 1Vdc @ 20 mA
Power Dissipation: 20 mW max.
RLIMIT
A resistor may be needed to limit the current through the Fault Output. The value, and power rating of the
resistor is dependent on the value of Vdc, the voltage drop across the input, and the current requirements of
the input.
20 Gear Drive, Plymouth Ind. Park, Terryville, CT 06786
Tel: (860) 585-1254 Fax: (860) 584-1973 http://www.amci.com
9
CONNECTING YOUR MOTOR
Compatible Motors
The SD17060B will work with many different motors, including those not sold by AMCI. This section
assumes that you have already chosen your motor and you are looking for wiring information. No wire colors
are given because there is no single industry wide color coding standard for stepper motor wires. You must
refer back to your motor data sheets for this information.
AMCI offers several different stepper motors in sizes 23, 34, and 42. Refer to our website, www.amci.com,
for additional information on these products.
Motor Wiring
Eight Lead Series Connected
INTERLOCK
B CTAP
B
B
EARTH GND
Eight Lead Parallel Connected
8
LEAD
MOTOR
SHIELDS
A
A
A CTAP
INTERLOCK
Interlock Jumper
INTERLOCK
B CTAP
B
B
EARTH GND
A
A
A CTAP
INTERLOCK
Motor Case
Motor Case
6
LEAD
MOTOR
INTERLOCK
B CTAP
B
B CTAP
B
B
SHIELDS
EARTH GND
A
A
A CTAP
INTERLOCK
INTERLOCK
Motor Case
Interlock Jumper
Interlock Jumper
NOTES
Four Lead Connected
Motor Case
4
LEAD
MOTOR
INTERLOCK
B CTAP
B
SHIELDS
A
A
A CTAP
INTERLOCK
Motor Case
Motor Case
1) The Interlock jumper is a safety
device that is needed for proper
operation. The SD17060B will not
power the motor without this jumper.
When the jumper is installed,
up to 170Vdc is present on the
connector. Do not use the Interlock
for anything other than its
intended use as a safety device.
2) 170Vdc is present on the
connector when power is applied
to the motor. Install the supplied
rubber boot on the connector
during normal operation.
Interlock Jumper
Refer to the torque vs. speed curves on your motor's
specifications sheet to determine if you should wire the
motor to the SD17060B in series, parallel, or centertap
configuration.
10
SHIELDS
A
A CTAP
B
6
LEAD
MOTOR
INTERLOCK
A
EARTH GND
Motor Case
Six Lead Center Tap Connected
Motor Case
EARTH GND
SHIELDS
Interlock Jumper
Six Lead Series Connected
B
8
LEAD
MOTOR
3) Motor connections should be tight.
Loose connections may lead to
arcing which will heat the connector.
Phoenix Contact specifies a tightening torque of 4.4 to 5.4 lb-in. (0.5 to
0.6 Nm)
ADVANCED MICRO CONTROLS INC.
POWER CONNECTOR AND INDICATOR LED’s
Power Connector
GND
N
L
AC POWER
95 – 132 VAC
50/60 Hz
The SD17060B operates on 115Vac. If 230Vac is the only power available, consider using
one of the 230Vac drivers available from AMCI. Information on these drivers can be found
on our website, http://www.amci.com. If this is not an option, a step-down transformer must
be installed to power the SD17060B. The transformer must have a minimum power rating of
800 VA.
The SD17060B must be grounded for proper operation. Grounding is accomplished with the
GND pin on the power connector, and through proper bonding to the enclosure. Power connections should be tight. Loose connections may lead to arcing which will heat the connector.
Phoenix Contact specifies a tightening torque of 4.4 to 5.4 lb-in (0.5 to 0.6 nM)
Indicator LED’s
The SD17060B has two indicator LED’s.
STEP/FAULT {
h Green: Driver Operational
h Flashing Green: Driver Operational, Receiving Pulses
h Red: Driver Fault (The Over Temperature and Over Current faults can be cleared with the Disable Input.)
1) Over Temperature Fault: The heatsink temperature exceeds 90°C (195°F)
2) Over Current Fault: Generally, a short exists somewhere in the system. This can be a short in the
motor or in the driver itself.
A) Phase–Phase Short: There is an electrical short between the two motor windings. The short
exists in the motor cable or in the motor itself.
B) Phase–Ground Short: One of the motor’s windings is shorted to earth ground. (The EARTH
GND terminal of the Motor Connector is used as the reference point.) The
fault can be in the motor cable or in the motor itself.
C) Back EMF: In applications with large motors and high deceleration rates, back-EMF generated
by the motor may also cause this fault.
3) Interlock Fault: The two Interlock Terminals on the motor connector are not connected with a short
jumper.
h Flashing Red: Current Loop Gain AUTOID Error. There is a problem with the motor wiring or the motor
current is set to zero.
h Flashing Red/Green @ 1Hz: Step Violation: The indexer sent step pulses to the SD17060B before the
driver was ready for them. The driver was disabled, in a fault condition, or had not completed its initialization
sequence on power up or reset. The stepper motor position will be invalid. The motor is not disabled and can still
be driven. While there is motion, the LED will flash at approximately 4 Hz.
h CURRENT LOOP GAIN: This LED is also used when the Current Loop Gain is set to AutoID. (SB2:1-
5 all turned off) When set to AutoID, the driver will determine the parameters of the attached motor
and will flash the Step/Fault LED green the number of times that the parameter should be set to. Flashing red indicates a problem with the motor wiring or the motor current is set to zero. Further information can be found in the next section of the manual, Verifying System Setup.
Power {
h Green: Power is applied to the driver in the range of 95 or 132 Vac.
20 Gear Drive, Plymouth Ind. Park, Terryville, CT 06786
Tel: (860) 585-1254 Fax: (860) 584-1973 http://www.amci.com
11
VERIFYING SYSTEM SETUP
Setting the Current Loop Gain
Setting the Current Loop Gain correctly allows you to maximize your motor’s performance. The SD17060B
takes into account the line voltage, output current and motor impedances when determining the optimum gain
for your system.
Assuming a stable line voltage of 115 Vac, the following gains can be used for AMCI motors. These gain
settings are factory suggestions and are average settings for our motors. Your system may benefit from
increasing or decreasing these settings. In general, increase the setting by one or two counts to improve high
speed performance or decrease the settings for quieter low speed operation.
MOTOR PART #
GAIN SETTINGS
MOTOR CURRENT t
1A
1.5 A
2A
SM23-130 (Series)
SM23-130 (Parallel)
SM23-240 (Series)
SM23-240 (Parallel)
SM34-450
SM34-850
SM34-1100
SM42-1800
4
6
6
8
7
2
10
4
6
11
12
3A
4A
3
4
5
9
14
17
10
6
11
17
21
11
5A
6A
12
14
If you are using a non-AMCI motor, use the AutoID setting to determine the correct gain for your system.
Turn off all of the switches in switch bank 2 and then verify that the motor current is set correctly and the
motor is attached to the driver. Cycle power to the driver. The STEP/FAULT LED will begin to blink almost
immediately. Count the number of blinks. This number is what you should initially set the Current Loop
Gain to. Use the Switch Setting page of this manual to determine the correct switch settings. When you are
done, cycle power to the SD17060B and verify motor operation using the System Checkout procedure on the
following page and adjust the Current Loop Gain settings up or down depending on your application.
In most cases, the Current Loop Gain can be set to its AutoMode setting and the SD17060B will automatically
determine the proper gain on every power up or reset. This procedure is done in under two seconds.
12
ADVANCED MICRO CONTROLS INC.
VERIFYING SYSTEM SETUP
System Checkout
1) Verify all wiring and grounding before applying power to the SD17060B. Make sure the rubber boots are
on the driver’s motor and power connectors.
2) Apply 115Vac power. With the motor attached, the power and status LED’s should come on green. A
problem exists if either LED does not light, or the Status LED is red. Remove power and refer to the
Troubleshooting section of this manual which begins on the following page.
3) Check for holding torque on the motor. If you have less then you expected, the most common causes are
improper motor current switch settings or having the Idle Current Reduction turned on.
4) The Self-Test feature of the SD17060B allows you to verify your motor wiring without an indexer. With
power applied to the driver, toggle the SB4-1 switch. The motor will begin to rotate clockwise at 60 RPM.
You must remove power from the driver to stop the rotation. If the motor rotates in the counter-clockwise
direction, swap the +B and –B connections. If the motor does not rotate at all, verify your current setting
and the motor’s wiring.
5) Have your indexer make a slow move in the clockwise direction for one turn. While the turn is in progress,
the STEP LED should blink. Verify that the motor rotated in the correct direction for one complete turn. If
you are using an optical encoder or other position feedback, verify that the indexer or controller is reading
it properly.
6) Repeat step 4 with a one turn move in the counter-clockwise direction. Again verify that the motor rotated
in the correct direction for one turn.
Any failures at steps 5 or 6 are usually caused by not setting the Pulse Train Input switch correctly or programming the wrong number of pulses in the indexer profile. If the motor rotates
in the wrong direction you can swap the +B and –B connections instead of altering your programming.
7) If you are using the Disable Input, verify its operation with the motor stopped. Note that the motor will have
no holding torque while this input is active and the motor’s shaft will be free to rotate.
8) If you are using the Fault Output, verify that it is On (conducting). Remove power from the SD17060B,
disconnect the motor, and re-apply power. The STEP/FAULT LED should be red and the Fault Output
should be off (not conducting).
9) Remove power and re-attach the motor. Power the driver.
10) Consider altering the motor current or enabling the Idle Current Reduction if it is not already enabled.
Lowering the motor current or enabling Idle Current Reduction can greatly reduce motor heating.
20 Gear Drive, Plymouth Ind. Park, Terryville, CT 06786
Tel: (860) 585-1254 Fax: (860) 584-1973 http://www.amci.com
13
TROUBLESHOOTING
Indexer Problems
Symptom
Solution
My indexer/PLC reports a fault
from the SD17060B when everything seems fine.
Your logic may be reversed. On the SD17060B, the Fault Output is on (conducts current) when the driver is working correctly and turns off (stops current flow) when there is a fault with the driver. Therefore, losing power to the
driver appears as a fault. If you’re expecting the fault output to turn on and
conduct current when there is a fault, then your logic is reversed.
The motor is running faster/slower
than expected and/or the distance
traveled is farther/shorter than
expected.
Most likely a problem with the SD17060B’s Step Resolution setting or
the indexer’s programming. If the motor is running too fast, the Step
Resolution on the SD17060B is set lower than the indexer’s programmer
assumed it would. If the motor is running slow, the Step Resolution is set
higher than the indexer programmer assumed it would be.
Driver Problems
Symptom
Solution
Both LED’s are off, and the Fault
Output is active. (Not conducting)
Power is applied to the driver.
1) The AC line voltage may be too low. It must be greater than 85Vac
for the SD17060B to operate properly.
2) One or both of the 10A fuses may be blown. These fuses will not
blow under normal circumstances, so call AMCI for assistance.
Blown fuses may be a sign of serious installation problems.
Both LEDs are green, the Fault
Output is inactive, (conducting) but
the motor is not powered.
1) The ±Disable input may be active. The active state, (power applied
or power removed), is set by DIP switch SB1-4. This switch may be
set incorrectly.
2) The Idle Current Reduction may be set to its To 0% setting. With this
setting, current is removed from the motor if a directional pulse is not
received for one second.
The STEP/FAULT LED does not
blink when the indexer sends
pulses to the driver. The motor
does not turn.
1) Verify that your two directional inputs on the Indexer Connector are
not swapped or cross-wired.
2) If the inputs are wired as a sinking or sourcing instead of differential,
verify that they are wired correctly. If your indexer has sourcing outputs, then the inputs of the SD17060B must be wired as sinking
inputs and vice versa. Also note, if you are using an older
SD17060B-24, or older SD17060B-25, the outputs must be at 24Vdc.
3) If you are using a 24Vdc system and you are converting from an
older SD17060B to a newer SD17060B, you must remove the external 3.9K resistors from your wiring. Refer to the Applicable Units
section on page 3 to determine the age of you driver.
The STEP/FAULT LED is red.
The driver is experiencing a fault condition. All faults are latched, so
power must be cycled to the driver or the Disable Input must be toggled
before the fault will clear.
1) Over Temp Fault. Is the driver very hot? It shuts down when its
internal temperature exceeds 90°C (195°F).
2) Interlock Fault. The motor is not plugged into the driver or a wire
jumper was not installed between the two Interlock pins on the Motor
Connector.
3) Short in Motor. Shut off the SD17060B and disconnect the motor.
Pull back the rubber boot and verify the following with an ohmmeter.
a) Open circuit from “A+” to “B+” pins. (Tests for short between
phases.)
b) Open circuit from “A+” to “Earth Ground” and “B+” to “Earth
Ground”. (Tests for short between phase and case.)
If any of these readings is not an open circuit, then check your wiring.
The most common cause of a short between phases is cross-wiring
the phases when wiring the connector. If you see a phase-to-case
short, make sure you don’t have a stray wire from the “B+” or “A-” terminals hitting the Earth Ground terminal on the connector.
20 Gear Drive, Plymouth Ind. Park, Terryville, CT 06786
Tel: (860) 585-1254 Fax: (860) 584-1973 http://www.amci.com
14
TROUBLESHOOTING
Motor Problems
Symptom
Solution
The motor has no holding torque.
1) If the Step/Fault LED is red, then a problem exists with the driver or
motor. Refer to Power Connector and Indicator LED’s on page 11 for
information.
2) If the motor rotates when commanded but has no holding torque,
then your Idle Current Reduction switch is set to the To 0% setting.
This setting removes motor current when the driver is idle for more
than one second. There are other idle current reduction settings
available. See Switch Settings on page 7 for more information.
3) The SD17060B ships with the motor current set to its minimum value
of 1.0 amp. It’s possible that it was not set for your application. See
Switch Settings starting on page 7 for the proper switch settings.
The SD17060B blinks its STEP/
FAULT LED green when pulses are
1) The acceleration or starting speed values may have been set too
high when the indexer was programmed. The motor may start to
accelerate and stall as the acceleration increases.
2) The Step Resolution may be set to a values lower than you are
expecting. For example, if the Step Resolution is set to 200 instead
of 400, the acceleration value is effectively doubled.
applied to the driver, but the motor
only emits a high pitch noise. It
does not rotate.
The motor only runs in one direction.
This problem is usually caused by the directional pulse inputs. If your
indexer is sending pulses in the CW/CCW format and the driver is configured for the Step & Direction format, the motor will rotate counter-clockwise when the driver receives CW pulses, and it will not rotate at all
when the driver receives CCW pulses. If the indexer is sending pulses in
the Step & Direction format and the driver is configured for the CW/CCW
format, the motor will only rotate clockwise, even when the indexer is
commanding a counter-clockwise move.
The motor runs backwards. (CW
instead of CCW and/or CCW
instead of CW)
1) One of the motor phases may be reversed. The “quick fix” is to
reverse the connections on the ±B windings.
2) There may be a problem with the directional inputs. Either they are
wired incorrectly or the format is wrong. Check wiring and see the
previous problem for more information on problems with format.
As its running speed increases, the
motor begins to run rough, and
eventually stops while pulses are
being applied.
1) If you are using single ended outputs for your pulse and direction signals, you may have a problem with the outputs not switching fast
enough. See the note on the RLD Resistor in the Connecting Your
Indexer section on page 8.
2) You may have a problem with resonance in the system. Run the system with the Anti-Resonance feature enabled and disabled to see
which give you better performance. The Anti-Resonance feature is
set with SB1-5. See page 7 for more information.
The motor runs erratically.
1) The motor is not correctly coupled to the load.
2) The deceleration rate is set to high and the inertia of the load is carrying the motor past the point where it is supposed to stop.
3) You are performing a slow move, (under 1 revolution/second) while
the Step Resolution is set to 200 or 400 steps/turn. To correct this
problem, try increasing the indexer’s starting speed parameter. Do
not increase the starting speed beyond your slowest running speed.
4) The motor current is set too low and the motor is unable to move the
load.
5) The motor is not correctly wired. Eight lead motors can be wired in
series or parallel. Series connection gives you more torque at lower
speeds and parallel connection gives you more torque at higher
speeds.
As noted above, sometimes a problem that appears to be with the motor is actually a problem
with the indexer. The SD17060B has a Self-Test feature that allows you to verify motor operation without an indexer. With power applied to the driver, toggle the SB4-1 switch. The motor
will begin to rotate clockwise at 60 RPM. You must remove power to the driver to end the self
test. Please remember to return SB4-1 to its original position before cycling power to the driver.
20 Gear Drive, Plymouth Ind. Park, Terryville, CT 06786
Tel: (860) 585-1254 Fax: (860) 584-1973 http://www.amci.com
15
APPENDIX A
USING OLDER SD17060B DRIVES
Applicable Units
This appendix applies to all SD17060B drivers manufactured prior to December of 2008 as well as some
SD17060B drivers manufactured during December of 2008. The inputs of these units were designed for use
with 5Vdc differential outputs and require external current limiting resistors when used with 12Vdc and
24Vdc input signals.
You will be able to determine the date of manufacture from the serial number on the driver. Serial numbers
for all AMCI drivers are formed from a date code and sequential number. The serial number format is shown
below.
"D" prefix on all Drive
Serial Numbers
D12080135
Dmmyynnnn
Serial Number of the 135th drive manufactured
in December of 2008.
Digits 1&2
Month of Manufacture
Digits 3&4
Year of Manufacture
Digits 5-8
Sequential Number
within the month
For SD17060B Drives...
h If your month and year of manufacture is December of 2008, (digits 1 through 4 are “1208”), and the
sequential number is less than “0135” then this appendix applies.
h If your month and year of manufacture is November of 2008 or earlier, (digits 1 through 4 are “1108”
or less), then this appendix applies.
If you are replacing an SD17060 with an older SD17060B, then keep any current limiting
resistors you already have in the circuit. The only wiring change that you will have to make is
swapping the ±STEP/CW connections on the indexer connections.
Current Limiting Resistor
Open Collector Sourcing Connection
Indexer/Disable
Input
V DC
+5 to +24V
Shielded, Twisted
Pair Cable
Sourcing
Output
R LIM
(As Needed)
+
R LD
–
(As Needed)
R LD may be needed in applications using a PLC DC output
to generate index pulses at high speeds. See the note on
this page for more information.
Open Collector Sinking Connection
Shielded, Twisted
Pair Cable
R LD
+
R LIM
Indexer/Disable
Input
–
VDC
+5 to +24V
(As Needed)
Common Values of RLIM
VDC
5 Volts
12 Volts
15 Volts
24 Volts
RLIM
None
2.0 KΩ
2.0 KΩ
3.9 KΩ
RLD
An additional load resistor may be required on some
PLC outputs to improve switching time. A symptom
of this problem is that the motor will begin to run
rough at high speeds. A 470 or 560 ohm resistor
should be used. For 5V and 12V systems use a 1W
resistor. For 24V systems use a 2W resistor. These
power ratings assume that the output can be normally on. For systems where you are sure the output
is always normally off, the wattage ratings can be cut
in half.
(As Needed)
Sinking
Output
R LD may be needed in applications using a PLC DC output
to generate index pulses at high speeds. See the note on
this page for more information.
20 Gear Drive, Plymouth Ind. Park, Terryville, CT 06786
Tel: (860) 585-1254 Fax: (860) 584-1973 http://www.amci.com
16
APPENDIX B
USING OLDER SD17060B-25 DRIVERS
Applicable Units
This appendix applies to all SD17060B-25 drivers manufactured prior to December of 2008. The inputs of
these units were designed for use with 24Vdc outputs and will not work with 5Vdc differential input signals.
You will be able to determine the date of manufacture from the serial number on the driver. Serial numbers
for all AMCI drivers are formed from a date code and sequential number. The serial number format is shown
below.
"D" prefix on all Drive
Serial Numbers
D12080135
Dmmyynnnn
Digits 1&2
Month of Manufacture
Digits 3&4
Year of Manufacture
Serial Number of the 135th drive manufactured
in December of 2008.
Digits 5-8
Sequential Number
within the month
For SD17060B-25 Drives...
h If your month and year of manufacture is December of 2008 or earlier, (digits 1 through 4 are “1208” or
less), then this appendix applies.
Using Older SD17060B-25 Units
Because of their internal current limiting resistors, the inputs on older SD17060B-25 drivers require 24Vdc to
operate. They cannot be used in 5Vdc or 12Vdc systems.
Newer SD17060B-25 units (manufactured after December, 2008) can replace older SD17060B-25 units without system modification.
20 Gear Drive, Plymouth Ind. Park, Terryville, CT 06786
Tel: (860) 585-1254 Fax: (860) 584-1973 http://www.amci.com
17
APPENDIX C
USING OLDER SD17060B-24 DRIVERS
Applicable Units
This appendix applies to all SD17060B-24 drivers. The SD17060B-24 has internal current limiting resistors
on its inputs and can only be used in 24Vdc systems. The SD17060B-24 was phased out of production in
December of 2008 and replaced by the redesigned SD17060B.
Replacing a SD17060B-24
A SD17060B-24 can be replaced by a SD17060B without changes to the system as long as the SD17060B
was manufactured after December of 2008. If the SD17060B was manufactured prior to the second half of
December 2008, you will have to add current limiting resistors to the circuit before using the SD17060B. See
appendix A on the previous page for more information.
20 Gear Drive, Plymouth Ind. Park, Terryville, CT 06786
Tel: (860) 585-1254 Fax: (860) 584-1973 http://www.amci.com
18
ADVANCED MICRO CONTROLS INC.
20 GEAR DRIVE, TERRYVILLE, CT 06786 T: (860) 585-1254 F: (860) 584-1973
www.amci.com
LEADERS IN ADVANCED CONTROL PRODUCTS