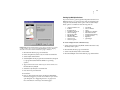
1
Version 2.0
User Guide
P.O. Box 65580
West Des Moines
Iowa 50265 USA
(515) 221-1801
http://www.cesoft.com
Second Edition
© 2000 CE Software, Inc. All rights reserved.
QuicKeys is a registered trademark of CE Software, Inc.
All other brands or product names are trademarks or registered trademarks of their respective holders.
The following pertains to any software of CE Software’s licensor(s) included with this software package:
CE SOFTWARE’S LICENSOR(S) MAKES NO WARRANTIES, EXPRESS OR IMPLIED, INCLUDING WITHOUT
LIMITATION THE IMPLIED WARRANTIES OF MERCHANTABILITY AND FITNESS FOR A PARTICULAR PURPOSE,
REGARDING THE SOFTWARE. CE SOFTWARE’S LICENSOR(S) DOES NOT WARRANT, GUARANTEE OR MAKE
ANY REPRESENTATIONS REGARDING THE USE OR THE RESULTS OF THE USE OF THE SOFTWARE IN TERMS OF
ITS CORRECTNESS, ACCURACY, RELIABILITY, CURRENTNESS OR OTHERWISE. THE ENTIRE RISK AS TO THE
RESULTS AND PERFORMANCE OF THE SOFTWARE IS ASSUMED BY YOU. THE EXCLUSION OF IMPLIED
WARRANTIES IS NOT PERMITTED BY SOME JURISDICTIONS. THE ABOVE EXCLUSION MAY NOT APPLY TO YOU.
IN NO EVENT WILL CE SOFTWARE’S LICENSOR(S), AND THEIR DIRECTORS, OFFICERS, EMPLOYEES OR
AGENTS (COLLECTIVELY CE SOFTWARE’S LICENSOR) BE LIABLE TO YOU FOR ANY CONSEQUENTIAL,
INCIDENTAL OR INDIRECT DAMAGES (INCLUDING DAMAGES FOR LOSS OF BUSINESS PROFITS, BUSINESS
INTERRUPTION, LOSS OF BUSINESS INFORMATION AND THE LIKE) ARISING OUT OF THE USE OR INABILITY TO
USE THE SOFTWARE EVEN IF CE SOFTWARE’S LICENSOR HAS BEEN ADVISED OF THE POSSIBILITY OF SUCH
DAMAGES. BECAUSE SOME JURISDICTIONS DO NOT ALLOW THE EXCLUSION OR LIMITATION OF LIABILITY FOR
CONSEQUENTIAL OR INCIDENTAL DAMAGES, THE ABOVE LIMITATIONS MAY NOT APPLY TO YOU. CE Software’s
Licensor’s liability to you for actual damages from any cause whatsoever, and regardless of the form of the action (whether
in contract, tort [including negligence], product liability or otherwise), will be limited to $50.
This CE Software publication was created electronically using Adobe® FrameMaker®.
Art was produced using Adobe Photoshop®.
Additional design by Lessing-Flynn Advertising Company.
CE Software, Inc.
P.O. Box 65580
1801 Industrial Circle
West Des Moines, Iowa 50265
(515) 221-1801
http://www.cesoft.com
Table of Contents
Graphical Table of Contents . . . . . . . . . . . . . . . . . . . . vii
Chapter 1: Welcome to QuicKeys . . . . . . . . . . . . . . . . 1
What QuicKeys Can Do For You . . . . . . . . . . . . . . . . 1
What’s New in QuicKeys 2.0 . . . . . . . . . . . . . . . . . . . 2
New Actions . . . . . . . . . . . . . . . . . . . . . . . . . . . . 2
New Sequence Actions . . . . . . . . . . . . . . . . . . . . 2
Toolbars . . . . . . . . . . . . . . . . . . . . . . . . . . . . . . . . 2
Additional Improvements . . . . . . . . . . . . . . . . . 3
About this User Manual . . . . . . . . . . . . . . . . . . . . . . . 3
Organization . . . . . . . . . . . . . . . . . . . . . . . . . . . . 3
Assumptions . . . . . . . . . . . . . . . . . . . . . . . . . . . . 4
Conventions . . . . . . . . . . . . . . . . . . . . . . . . . . . . . 4
Contacting CE Software . . . . . . . . . . . . . . . . . . . . . . . 4
Technical Support . . . . . . . . . . . . . . . . . . . . . . . . 4
Product Feedback . . . . . . . . . . . . . . . . . . . . . . . . 5
User Guide Feedback . . . . . . . . . . . . . . . . . . . . . 5
Sales and Customer Service . . . . . . . . . . . . . . . 5
Chapter 2: Installing and Starting QuicKeys . . . . . 7
Requirements . . . . . . . . . . . . . . . . . . . . . . . . . . . . . . . .
Installing QuicKeys . . . . . . . . . . . . . . . . . . . . . . . . . . .
After Installation . . . . . . . . . . . . . . . . . . . . . . . . . . . . .
How to Use Your New Actions . . . . . . . . . . . . .
Using the QuickReference Card . . . . . . . . . . . .
More About the QuickStart wizard . . . . . . . . .
Starting QuicKeys . . . . . . . . . . . . . . . . . . . . . . . . . . . .
Check for QuicKeys Updates . . . . . . . . . . . . . . . . . . .
7
7
7
8
8
8
8
9
Chapter 3: QuicKeys Overview . . . . . . . . . . . . . . . . 11
QuicKeys Actions and Sequences . . . . . . . . . . . . . .
Creating Actions and Sequences . . . . . . . . . . .
QuicKeys Components . . . . . . . . . . . . . . . . . . . . . . .
QuicKeys Editor . . . . . . . . . . . . . . . . . . . . . . . .
QuicKeys Engine . . . . . . . . . . . . . . . . . . . . . . . .
11
11
12
12
18
QuicKeys Plug-ins . . . . . . . . . . . . . . . . . . . . . .
QuicKeys Menu . . . . . . . . . . . . . . . . . . . . . . . . . . . . .
Adding Actions . . . . . . . . . . . . . . . . . . . . . . . . .
Using QuicKeys . . . . . . . . . . . . . . . . . . . . . . . . . . . . .
Creating QuicKeys Actions . . . . . . . . . . . . . . .
Triggering Actions . . . . . . . . . . . . . . . . . . . . . .
Managing QuicKeys . . . . . . . . . . . . . . . . . . . . . . . . .
Printing Actions . . . . . . . . . . . . . . . . . . . . . . . .
Renaming Actions . . . . . . . . . . . . . . . . . . . . . . .
Saving Actions . . . . . . . . . . . . . . . . . . . . . . . . . .
Clearing Hot Keys . . . . . . . . . . . . . . . . . . . . . .
Enabling/Disabling Actions . . . . . . . . . . . . . .
Resolving Hot Key Conflicts . . . . . . . . . . . . . .
Importing Action Sets . . . . . . . . . . . . . . . . . . .
Exporting Action Sets . . . . . . . . . . . . . . . . . . . .
Customizing QuicKeys . . . . . . . . . . . . . . . . . . . . . . .
Setting QuicKeys Options . . . . . . . . . . . . . . . .
Resizing Toolbars . . . . . . . . . . . . . . . . . . . . . . .
Sorting Information . . . . . . . . . . . . . . . . . . . . .
Changing Views in the My Actions Tab . . . .
Using Online Help . . . . . . . . . . . . . . . . . . . . . . . . . . .
Your First Action . . . . . . . . . . . . . . . . . . . . . . . . . . . .
How to Set Up and Use a QuicKeys Action .
Deleting Multiple Actions . . . . . . . . . . . . . . . . . . . .
Using the QuickReference Card . . . . . . . . . . . . . . .
Exiting QuicKeys . . . . . . . . . . . . . . . . . . . . . . . . . . . .
18
19
19
20
21
25
26
26
26
26
26
26
27
29
30
30
30
32
32
32
32
32
32
34
34
35
Chapter 4: QuicKeys Toolbars . . . . . . . . . . . . . . . . . . 37
Toolbar Styles . . . . . . . . . . . . . . . . . . . . . . . . . . . . . . .
Click-N-Go . . . . . . . . . . . . . . . . . . . . . . . . . . . . .
Dockable . . . . . . . . . . . . . . . . . . . . . . . . . . . . . . .
Floating . . . . . . . . . . . . . . . . . . . . . . . . . . . . . . . .
Pop Out . . . . . . . . . . . . . . . . . . . . . . . . . . . . . . .
37
37
38
38
39
••••
ii
Creating Toolbars . . . . . . . . . . . . . . . . . . . . . . . . . . . .
Using the Setup Wizard . . . . . . . . . . . . . . . . . .
Using the Action Properties Dialog . . . . . . . .
Adding Buttons to Toolbars . . . . . . . . . . . . . . . . . . .
Using the Toolbar Button Wizard . . . . . . . . . .
Using Drag-and-Drop Functionality . . . . . . .
Types of Toolbar Buttons . . . . . . . . . . . . . . . . . . . . .
Open File Buttons . . . . . . . . . . . . . . . . . . . . . . .
QuicKeys Action Buttons . . . . . . . . . . . . . . . . .
Action Menu Buttons . . . . . . . . . . . . . . . . . . . .
Displaying Toolbars . . . . . . . . . . . . . . . . . . . . . . . . . .
Editing Toolbars . . . . . . . . . . . . . . . . . . . . . . . . . . . . .
Changing the Toolbar Style . . . . . . . . . . . . . . .
Adjusting Toolbar Size . . . . . . . . . . . . . . . . . . .
Rearranging Toolbar Buttons . . . . . . . . . . . . .
Changing Toolbar Scope . . . . . . . . . . . . . . . . .
Closing Toolbars . . . . . . . . . . . . . . . . . . . . . . . . . . . . .
Deleting Toolbars . . . . . . . . . . . . . . . . . . . . . . . . . . . .
Editing Toolbar Buttons . . . . . . . . . . . . . . . . . . . . . .
Adjusting Toolbar Button Size . . . . . . . . . . . .
Changing Button Icons . . . . . . . . . . . . . . . . . . .
Deleting Toolbar Buttons . . . . . . . . . . . . . . . . . . . . .
40
40
41
42
42
43
43
43
44
44
45
45
46
46
46
46
48
49
49
50
50
53
Chapter 5: Controlling The QuicKeys Program . 55
QuicKeys Controller . . . . . . . . . . . . . . . . . . . . . . . . .
Setting Up QuicKeys Controller Actions . . . .
QuicKeys Controller Options . . . . . . . . . . . . .
Deleting QuicKeys Controller Actions . . . . .
55
55
56
57
Chapter 6: Typing with QuicKeys . . . . . . . . . . . . . . 59
Using Advanced Text Tools . . . . . . . . . . . . . . . . . . .
Setting Up Advanced Text Tools Actions . . .
Advanced Text Tools Options . . . . . . . . . . . . .
Deleting Advanced Text Tools Actions . . . . .
59
59
60
62
Using Quick Type . . . . . . . . . . . . . . . . . . . . . . . . . . .
Setting Up Quick Type Actions . . . . . . . . . . . .
Quick Type Options . . . . . . . . . . . . . . . . . . . . .
Deleting Quick Type Actions . . . . . . . . . . . . .
Using Check Spelling . . . . . . . . . . . . . . . . . . . . . . . .
Setting Up Check Spelling Actions . . . . . . . .
Check Spelling Options . . . . . . . . . . . . . . . . . .
Deleting Check Spelling Actions . . . . . . . . . .
Special Characters . . . . . . . . . . . . . . . . . . . . . . . . . . .
Setting Up Special Characters Actions . . . . .
Special Characters Options . . . . . . . . . . . . . . .
Deleting Special Characters Actions . . . . . . .
Typing the Date and Time . . . . . . . . . . . . . . . . . . . .
Setting Up Type Date/Time Actions . . . . . . .
Type Date/Time Options . . . . . . . . . . . . . . . . .
Deleting Type Date/Time Actions . . . . . . . . .
Typing Text . . . . . . . . . . . . . . . . . . . . . . . . . . . . . . . . .
Setting Up Type Text Actions . . . . . . . . . . . . .
Editing Type Text Actions . . . . . . . . . . . . . . . .
Deleting Type Text Actions . . . . . . . . . . . . . . .
62
62
63
64
64
64
65
66
66
66
68
68
68
68
70
71
71
71
73
73
Chapter 7: Working With Files and Folders . . . . . 75
File Handler . . . . . . . . . . . . . . . . . . . . . . . . . . . . . . . .
Setting Up File Handler Actions . . . . . . . . . . .
Triggering File Handler Actions . . . . . . . . . . .
File Handler Options . . . . . . . . . . . . . . . . . . . .
Deleting File Handler Actions . . . . . . . . . . . .
Folders . . . . . . . . . . . . . . . . . . . . . . . . . . . . . . . . . . . . .
Setting Up Folders Actions . . . . . . . . . . . . . . .
Triggering Folders Actions . . . . . . . . . . . . . . .
Folders Options . . . . . . . . . . . . . . . . . . . . . . . . .
Deleting Folders Actions . . . . . . . . . . . . . . . . .
The Open Action . . . . . . . . . . . . . . . . . . . . . . . . . . . .
75
75
77
77
83
84
84
86
86
87
87
••••
Setting Up the Open Action . . . . . . . . . . . . . .
Open Options . . . . . . . . . . . . . . . . . . . . . . . . . .
Deleting Open Actions . . . . . . . . . . . . . . . . . . .
Recent Files . . . . . . . . . . . . . . . . . . . . . . . . . . . . . . . . .
Setting Up Recent Files Actions . . . . . . . . . . .
Deleting Recent Files Actions . . . . . . . . . . . . .
Zip Files . . . . . . . . . . . . . . . . . . . . . . . . . . . . . . . . . . . .
Setting Up Zip Files Actions . . . . . . . . . . . . . .
Zip Files Options . . . . . . . . . . . . . . . . . . . . . . . .
Deleting Zip Files Actions . . . . . . . . . . . . . . . .
87
89
90
90
90
92
92
92
94
94
Chapter 8: Using System Tools . . . . . . . . . . . . . . . . . 95
Button Click . . . . . . . . . . . . . . . . . . . . . . . . . . . . . . . . 95
Setting Up Button Click Actions . . . . . . . . . . . 95
Button Click Options . . . . . . . . . . . . . . . . . . . . 95
Deleting Button Click Actions . . . . . . . . . . . . . 96
Mouse Click . . . . . . . . . . . . . . . . . . . . . . . . . . . . . . . . 96
Setting Up a Mouse Click Action . . . . . . . . . . 97
Mouse Click Options . . . . . . . . . . . . . . . . . . . . 97
Deleting Mouse Click Actions . . . . . . . . . . . . . 98
Mouse Position . . . . . . . . . . . . . . . . . . . . . . . . . . . . . . 98
Setting Up a Mouse Position Action . . . . . . . 98
Mouse Position Options . . . . . . . . . . . . . . . . . . 99
Deleting Mouse Position Actions . . . . . . . . . . 99
QuicKeys Clipbook . . . . . . . . . . . . . . . . . . . . . . . . . 100
Setting Up the QuicKeys Clipbook Action . 102
Using the QuicKeys Clipbook Action . . . . . 103
The Clipbook Editor . . . . . . . . . . . . . . . . . . . . 104
QuicKeys Clipbook Options . . . . . . . . . . . . . 104
Deleting Clipbook Actions . . . . . . . . . . . . . . 105
Deleting Clips from the Clipbook Editor . . 105
Run Script . . . . . . . . . . . . . . . . . . . . . . . . . . . . . . . . . 105
Setting Up the Run Script Action . . . . . . . . . 105
Run Script Options . . . . . . . . . . . . . . . . . . . . .
Deleting Run Script Actions . . . . . . . . . . . . .
Select Menu. . . . . . . . . . . . . . . . . . . . . . . . . . . . . . . .
Setting Up Select Menu Actions . . . . . . . . . .
Select Menu Options . . . . . . . . . . . . . . . . . . .
Deleting Select Menu Actions . . . . . . . . . . . .
Set System Clock . . . . . . . . . . . . . . . . . . . . . . . . . . .
Setting Up Set System Clock Actions . . . . . .
Set System Clock Options . . . . . . . . . . . . . . .
Deleting a Set System Clock Action . . . . . . .
Using System Specials. . . . . . . . . . . . . . . . . . . . . . .
Setting Up System Specials Actions . . . . . . .
System Specials Options . . . . . . . . . . . . . . . .
Deleting a System Specials Action . . . . . . . .
Type Keystroke. . . . . . . . . . . . . . . . . . . . . . . . . . . . .
Setting Up Type Keystroke Actions . . . . . . .
Type Keystroke Options . . . . . . . . . . . . . . . .
Deleting a Type Keystroke Action . . . . . . . .
Window Handler . . . . . . . . . . . . . . . . . . . . . . . . . . .
Setting Up Window Handler Actions . . . . .
Window Handler Options . . . . . . . . . . . . . . .
Deleting Window Handler Actions . . . . . . .
106
106
107
107
108
110
110
110
112
112
113
113
114
114
115
115
116
116
116
116
118
120
Chapter 9: Using Screen Tools . . . . . . . . . . . . . . . . 121
Screen Capture . . . . . . . . . . . . . . . . . . . . . . . . . . . . .
Setting Up the Screen Capture Action . . . . .
Screen Capture Options . . . . . . . . . . . . . . . . .
Deleting Screen capture Actions . . . . . . . . . .
Screen Saver . . . . . . . . . . . . . . . . . . . . . . . . . . . . . . .
Setting Up the Screen Saver Action . . . . . . .
Screen Saver Options . . . . . . . . . . . . . . . . . . .
Deleting Screen Saver Actions . . . . . . . . . . .
Screen Settings . . . . . . . . . . . . . . . . . . . . . . . . . . . . .
121
121
122
122
123
123
124
124
125
iii
••••
iv
Setting Up the Screen Settings Action . . . . . 125
Screen Settings Options . . . . . . . . . . . . . . . . . 126
Deleting Screen Setting Actions . . . . . . . . . . 126
Chapter 10: Using Multimedia Tools . . . . . . . . . . 127
CD/DVD . . . . . . . . . . . . . . . . . . . . . . . . . . . . . . . . . .
Setting Up a CD/DVD Action . . . . . . . . . . .
CD/DVD Options . . . . . . . . . . . . . . . . . . . . . .
Deleting CD/DVD Actions . . . . . . . . . . . . . .
Play Sound . . . . . . . . . . . . . . . . . . . . . . . . . . . . . . . .
Setting Up a Play Sound Action . . . . . . . . . .
Play Sound Options . . . . . . . . . . . . . . . . . . . .
Deleting Play Sound Actions . . . . . . . . . . . . .
Set Audio Volume . . . . . . . . . . . . . . . . . . . . . . . . . .
Setting Up a Set Audio Volume Action . . . .
Set Audio Volume Options . . . . . . . . . . . . . .
Deleting Audio Volume Actions . . . . . . . . . .
127
127
128
128
129
129
130
130
130
131
132
132
Chapter 11: Using Network Tools . . . . . . . . . . . . . 133
Choose Printer . . . . . . . . . . . . . . . . . . . . . . . . . . . . .
Setting Up the Choose Printer Actions . . . .
Choose Printer Options . . . . . . . . . . . . . . . . .
Deleting Choose Printer Actions . . . . . . . . .
Dial-Up Networking . . . . . . . . . . . . . . . . . . . . . . . .
Setting Up Dial-Up Networking Actions . .
Dial-Up Networking Options . . . . . . . . . . . .
Deleting Dial-Up Networking Actions . . . .
Network Drives . . . . . . . . . . . . . . . . . . . . . . . . . . . .
Setting Up the Network Drives Action . . . .
Network Drives Options . . . . . . . . . . . . . . . .
Deleting Network Drive Actions . . . . . . . . .
133
133
134
134
135
135
136
137
137
137
139
139
Chapter 12: Using Internet Tools . . . . . . . . . . . . . . 141
Instant E-mail . . . . . . . . . . . . . . . . . . . . . . . . . . . . . . 141
Setting Up Instant E-mail Actions . . . . . . . . 141
More About Instant E-mail . . . . . . . . . . . . . .
Instant E-mail Options . . . . . . . . . . . . . . . . . .
Deleting Instant E-mail Actions . . . . . . . . . .
Web Launcher. . . . . . . . . . . . . . . . . . . . . . . . . . . . . .
Setting Up Web Launcher Actions . . . . . . . .
Web Launcher Options . . . . . . . . . . . . . . . . .
Deleting Web Launcher Actions . . . . . . . . . .
143
143
143
144
144
145
146
Chapter 13: Building Sequences . . . . . . . . . . . . . . . 147
Overview of Sequences. . . . . . . . . . . . . . . . . . . . . .
Using Sequences in Information Systems . .
Using Sequences as a Webmaster . . . . . . . . .
Using Sequences with Database Programs .
Recording Sequences. . . . . . . . . . . . . . . . . . . . . . . .
The Sequence Editor . . . . . . . . . . . . . . . . . . . . . . . .
The Actions Toolbar . . . . . . . . . . . . . . . . . . . .
The Result Column . . . . . . . . . . . . . . . . . . . . .
The Repeat Tab . . . . . . . . . . . . . . . . . . . . . . . .
Printing Sequence Steps . . . . . . . . . . . . . . . . .
Closing the Sequence Editor . . . . . . . . . . . . .
Creating Sequences Without Recording. . . . . . . .
Using the Result Handling Feature. . . . . . . . . . . .
Result Handling Example . . . . . . . . . . . . . . .
Editing Sequences . . . . . . . . . . . . . . . . . . . . . . . . . .
Inserting Steps . . . . . . . . . . . . . . . . . . . . . . . . .
Rearranging Steps in the Sequence . . . . . . .
Renaming Sequences . . . . . . . . . . . . . . . . . . .
Deleting Sequence Steps . . . . . . . . . . . . . . . .
Sequence Tips . . . . . . . . . . . . . . . . . . . . . . . . .
Subordinate Sequences . . . . . . . . . . . . . . . . . . . . . .
Creating Subordinate Sequences . . . . . . . . .
How a Sub-Sequence Works . . . . . . . . . . . . .
Sub-Sequence Editor . . . . . . . . . . . . . . . . . . .
147
147
149
151
152
153
153
153
153
153
153
154
154
154
155
155
156
156
156
156
157
157
157
158
••••
Saving Sequences . . . . . . . . . . . . . . . . . . . . . . . . . . .
Triggering Sequences . . . . . . . . . . . . . . . . . . . . . . .
Editing Failed Sequences . . . . . . . . . . . . . . . .
Playback Options . . . . . . . . . . . . . . . . . . . . . .
Deleting Sequences . . . . . . . . . . . . . . . . . . . . .
Sequence Tools . . . . . . . . . . . . . . . . . . . . . . . . . . . . .
Check Condition . . . . . . . . . . . . . . . . . . . . . . .
Message . . . . . . . . . . . . . . . . . . . . . . . . . . . . . .
Password Vault . . . . . . . . . . . . . . . . . . . . . . . .
Pause . . . . . . . . . . . . . . . . . . . . . . . . . . . . . . . . .
QuicKeys Event Logger . . . . . . . . . . . . . . . . .
Select Items in Dropdown List . . . . . . . . . . .
Select Items in List . . . . . . . . . . . . . . . . . . . . .
Switch Tabs . . . . . . . . . . . . . . . . . . . . . . . . . . .
Wait for User Input . . . . . . . . . . . . . . . . . . . . .
Wait for Window . . . . . . . . . . . . . . . . . . . . . . .
Window Selector . . . . . . . . . . . . . . . . . . . . . . .
Clearing Selected Hot Keys . . . . . . . . . . . . . . . . . .
159
159
160
160
160
160
160
165
166
167
168
169
169
171
171
172
174
174
Appendix A: Tips and Troubleshooting . . . . . . . . 175
Tips. . . . . . . . . . . . . . . . . . . . . . . . . . . . . . . . . . . . . . . 175
Troubleshooting . . . . . . . . . . . . . . . . . . . . . . . . . . . . 175
Multi-User Workstations. . . . . . . . . . . . . . . . . . . . . 176
Appendix B: Creating Custom Toolbar Icons . . 177
Using Bitmap Images . . . . . . . . . . . . . . . . . . . . . . .
Restoring Default Icons . . . . . . . . . . . . . . . . .
Creating an Icon . . . . . . . . . . . . . . . . . . . . . . . . . . . .
Setting the Icon in Quickeys. . . . . . . . . . . . . . . . . .
177
177
177
178
Appendix C: The QuicKeys Architecture . . . . . . 179
Appendix D: Hot Keys That Cannot Be Used . . 181
Glossary . . . . . . . . . . . . . . . . . . . . . . . . . . . . . . . . . . . . . 183
v
••••
vi
••••
vii
GRAPHICAL TABLE OF CONTENTS
••••••
Use the following table as a guide to locate information about each QuicKeys Action.
Use this QuicKeys Action...
If you want to automate these tasks...
Advanced Text Tools
Reformat a block of text to remove unwanted line breaks and spaces.
See page 59 for more information.
Change a block of text to title case, uppercase, or lowercase.
Remove quote marks from an E-mail message that was forwarded to you.
CD/DVD
Play, pause, stop, eject, or skip to the next track on your audio CD or DVD.
See page 127 for more information.
Check Spelling
Check the spelling of words in any document.
See page 64 for more information.
Choose Printer
Switch your default printer.
See page 133 for more information.
Dial-Up Networking
Connect to or disconnect from a dial-up networking service.
See page 135 for more information.
File Handler
Set the file extension for a group of files.
See page 75 for more information.
Move a group of files to another directory or drive.
Folders
Switch to another directory when you are opening or saving a file or when you are exploring a folder.
See page 84 for more information.
Instant E-mail Action
See page 141 for more information.
Send an E-mail that contains attachments to a friend.
••••
viii
Graphical Table of Contents
Use this QuicKeys Action...
Network Drives
If you want to automate these tasks...
Connect to or disconnect from a network volume.
See page 135 for more information.
Open
Open programs, control panels, documents, or other types of files.
See page 87 for more information.
Quick Type
Type long words or phrases using abbreviations specified in a user-created glossary.
See page 62 for more information.
QuicKeys Clipbook
Control QuicKeys’ version of the system Clipboard.
See page 100 for more information.
QuicKeys Controller
Open/Close the QuicKeys Editor.
See page 55 for more information.
Show the QuicKeys QuickReference Card.
Enable/Disable QuicKeys hot keys and timers.
Control QuicKeys recording.
Recent Files
Search for files modified within a specified amount of time.
See page 90 for more information.
Screen Capture
Take a screen shot of the selected window or the desktop and outputs the image to a user-specified
location.
See page 121 for more information.
Screen Saver
See page 123 for more information.
Start or stop your selected screen saver.
••••
Use this QuicKeys Action...
Screen Settings
If you want to automate these tasks...
Change your screen settings when attaching your laptop computer to a full-size monitor.
See page 125 for more information.
Select Menu
Select an item from a menu without using your mouse.
See page 107 for more information.
Set Audio Volume
Adjust the various audio devices on your computer.
See page 130 for more information.
Set System Clock
Set your system clock based on your input or based on specified time server information.
See page 110 for more information.
Special Characters
Type symbols or international characters.
See page 66 for more information.
System Specials
Empty your Recycle Bin.
See page 113 for more information. Lock your computer.
Log off your computer.
Restart/shutdown your computer.
Set your computer to standby.
Restart Windows.
Toolbar
See page 37 for more information.
Create QuicKeys toolbars that provide quick access to your QuicKeys Actions.
ix
••••
x
Graphical Table of Contents
Use this QuicKeys Action...
Type Date/Time
If you want to automate these tasks...
Type the date and time in a specific format.
See page 68 for more information.
Type Keystroke
Reassign hot keys built into the programs you use so they make sense to you.
See page 115 for more information.
Type Text
Type text you specify.
See page 71 for more information.
Web Launcher
Open a specified URL in your default Web browser.
See page 144 for more information. Open selected text as a URL.
Display a list of Netscape Bookmarks or Internet Explorer Favorites.
Window Handler
Manipulate all windows, active windows, and specified windows.
See page 116 for more information.
Zip Files
Compress, decompress, and verify Zip files.
See page 92 for more information.
Sequence (only available from the
Create menu)
See page 153 for more information.
Display the Sequence Editor, which you can use to combine Actions and recorded tasks.
CHAPTER 1
WELCOME TO QUICKEYS
••••••
QuicKeys® for Windows® is software that lets you create
custom keyboard actions, menu commands, and toolbars so
you can perform routine tasks with a single mouse click, a
keystroke, or a key combination. These tasks are referred to as
Actions. QuicKeys Actions are similar to macros, except that
they are much easier to create.
To create a QuicKeys Action, all you have to do is define the
task you want to perform in the QuicKeys Setup Wizard. You
must then choose to replace the task, or series of tasks, with a
single trigger, such as a hot key, a QuicKeys toolbar, or a
desktop shortcut. QuicKeys automates common computer
tasks that include anything from opening folders you
frequently use to logging into your favorite database
program.
QuicKeys provides you with a powerful and versatile
recording function that is ideal for automating lengthy or
complex tasks. Tell QuicKeys to watch your Actions on the
PC, and it can then play those actions back whenever you
want. These recorded actions are called Sequences, and they
can mimic virtually anything you do on your computer.
QuicKeys toolbars work much like the toolbars you use in
your other programs, except that you call the shots with
QuicKeys toolbars. You specify what each toolbar button
does, which icon is used, and when the toolbars are displayed.
In other words, QuicKeys toolbars give you complete control.
And, like the recording feature, toolbars save you time by
making your interaction with your computer more efficient.
However you choose to use it, QuicKeys represents powerful
solutions that make it indispensable for assigning
unrewarding and repetitive tasks to the computer and not to
the computer user.
WHAT QUICKEYS CAN DO FOR YOU
Think of something you do on a daily basis. Chances are that
whatever task you thought of can probably be automated by
QuicKeys. For example, if you frequently switch between
printers on your network, QuicKeys can do that for you with
a single hot key. Changing your printer with a single hot key
rather than navigating through numerous printer windows
saves you time and frustration.
QuicKeys can also assist you with multi-step tasks. For
example, if your job requires that you routinely change
graphics from one format to another, have QuicKeys do it for
you. Just direct QuicKeys to watch and record what you do
and then assign QuicKeys a trigger that will tell it when to
repeat your actions. You will learn more about triggers in
Chapter 3, but for now just think of triggers as the click or
keystroke that communicates to QuicKeys that it’s time to
start a specific task.
When you select the trigger, QuicKeys will not only remember
the steps required to change your graphics, but it will do so
quickly and accurately. Humans are prone to error. If,
however, you can do a job right once, QuicKeys can replicate
it thousands of times with no mistakes.
••••
2
Chapter 1
Welcome to QuicKeys
The savings in time and frustration is easy to measure. The
real advantage of QuicKeys, however, is intangible. After you
install QuicKeys, your computer work flows more smoothly.
Instead of working in one program and then spending
valuable time searching for another, programs and data
appear and disappear automatically as they are needed. The
disparate parts of your computer merge in a way that makes
sense to you so you can finally complete a day’s work in a
day’s time. How many other programs do you know of that
can add such value to your computing experience?
WHAT’S NEW IN QUICKEYS 2.0
QuicKeys 2.0 offers many new features and key
improvements that will provide you with even more ways to
get your work done quickly and efficiently.
NEW ACTIONS
• Screen Capture: Take screen shots of your entire screen or
an active window using a Screen Capture Action. You can
then save the captured image to a file, the Windows
clipboard, the QuicKeys Clipbook, or you can print it.
• Screen Saver: Control your screen saver with a Screen
Saver Action. You can use QuicKeys to select a screen saver
or to turn your screen saver on and off.
• Set System Clock: Change your system clock to a time you
provide or to a time designated on a specified time server.
• Zip Files: Compress files, extract compressed files, add to
compressed files, and validate compressed files with the
new Zip Files Action.
• Quick Type: Specify typed abbreviations for long words,
names, or phrases. Build a glossary of the words you use
and then choose which characters you want to represent
those long words or names.
• Check Spelling: Check the spelling of a selected block of
text in virtually any document.
• Mouse Position: Specify where you want your mouse with
a QuicKeys trigger so you can keep your hands on the
keyboard.
NEW SEQUENCE ACTIONS
• Select Items in List: Select an item in a dropdown list by
inserting a step in your Sequence that checks for specific
list controls. You can direct QuicKeys to check by index or
by text.
• Select Items in Dropdown List: Select an item in a
dropdown list by inserting a step in your Sequence that
checks for specific combo box controls.
• Switch Tabs: Switch tabs in a Sequence using tab controls.
• Wait for User Input: Wait for user input, such as a
keystroke or a mouse click, before proceeding with a
Sequence.
• Check Condition: Verify that a specific condition is met
before proceeding to the next step of the sequence.
• QuicKeys Event Logger: Write out events to the Windows
NT and Windows 2000 System Event log or to a log file on
Windows 98.
TOOLBARS
Residing primarily off-screen, new Pop Out toolbars “pop
out” when your mouse moves near them. They are similar to
Dockable toolbars that use the Auto-hide feature, except that
you can have multiple Pop Out toolbars on one side of your
screen and you can choose the orientation and shape of each
toolbar.
Another improvement made to QuicKeys toolbars is the
availability of defined and recent Actions in Toolbar Action
Menu buttons. Now you can have frequently-used Actions at
the tip of your fingertips without having to make any
adjustments within QuicKeys.
••••
ADDITIONAL IMPROVEMENTS
• QuicKeys Editor: The QuicKeys Editor offers
improvements in the interface as well as in functionality.
The My Keyboard, My Toolbars, and My Actions views
each offer a tab that enables you to look at all of your
Actions or all of your toolbars, regardless of scope. Plus,
when you scope an Action to a particular application, that
application appears at the top of the scope menu next time
you create an Action. Finally, you can now edit Action
names directly in QuicKeys Editor Action list.
• System Specials: Use the System Specials Action to lock
your Windows NT or 2000 computer, or to empty the
Recycle Bin.
• Window Handler: Restore the last minimized window;
center the active window; set active window size;
maximize, restore, or center specified windows; and set the
window size for specified windows using the Window
Handler options.
• File Handler: Set file and folder attributes to read-only,
hidden, system, archived, or to a specific date and/or time.
You can also display the Windows “Open With” dialog so
you can choose which program opens the selected file.
Choose among new options that support the use of
wildcards, skip sub-folders, and move selected files/
folders to the Recycle Bin rather than immediately deleting
them.
• QuicKeys Clipbook: Use the “Clear all” option in the
Clipbook Editor to clear all your clips. You can also specify
the name of the file you want added to your paste, copy, or
delete functions.
• Folders: Create a new folder with the Folders Action.
3
• Sequences: Like the QuicKeys Editor, the Sequence Editor
offers improvements in both the interface and program
functionality. New in the interface are Action buttons that
make it much easier to edit your Sequences. For example,
just click the Folders button in the Sequence Editor to add
a Folders action to your Sequence.
In terms of functionality, version 2.0 provides several
useful enhancements. You can edit Sequence step names
directly in Sequence Editor list. Plus, using the QuicKeys
menu, you can record a single Action and take advantage
of the updated playback palette, which now displays the
Sequence name and step number. The playback palette
also has a handy new “Stop and open Editor” button that
opens the Sequence Editor.
• Printing: Click the Print option in the QuicKeys Editor or
the Sequence Editor to print Action subsets and Sequence
steps, respectively.
• QuicKeys Tips: Create Actions directly from the QuicKeys
Tips window at startup.
• Update Checking: Use the Check for QuicKeys updates
option in the QuicKeys Editor Help menu to see if you
have the latest version of QuicKeys.
ABOUT THIS USER MANUAL
Read this section to learn how the QuicKeys instructions are
organized and to become acquainted with the conventions
used in this manual. Knowing how the manual is set up will
help you use it more efficiently.
ORGANIZATION
Each chapter of this manual first describes the topic of each
section and its benefit to you. Then, each chapter offers
instructions for setting up and using the software. Each
section ends with information about the options available in
the dialogs or wizards discussed in that portion of the User
Guide.
••••
4
Chapter 1
Welcome to QuicKeys
• Chapter 1: Introduces you to QuicKeys and provides
information about using the manual and contacting the
makers of QuicKeys.
• Chapter 2: Lists the system requirements, provides
installation instructions and information about the
QuickStart Wizard.
• Chapter 3: Introduces you to the different components of
QuicKeys and provides an overview of the process of
creating QuicKeys Actions. This chapter is very
informative for users who are new to the QuicKeys
software.
• Chapter 4: Introduces you to toolbars and provides
instructions for using them.
• Chapter 5-Chapter 12: Provides information about the
features and benefits of each individual QuicKeys Action,
as well instructions for using those Actions.
• Chapter 13: Introduces you to sequences and provides
instructions for using them.
• Appendix a: Provides tips for using QuicKeys and
solutions for problems you may encounter while using
QuicKeys.
• Appendix b: Provides instructions for creating custom
icons that can be used in QuicKeys toolbars.
• Appendix c: Provides an illustration of the QuicKeys
architecture.
• Appendix d: Provides a list of hot keys that QuicKeys
cannot use.
ASSUMPTIONS
This documentation assumes you are familiar with the
Windows operating system and hardware. If you need
assistance with standard Windows procedures, consult the
online Windows Help that’s available from the Start menu on
your taskbar.
CONVENTIONS
• Helvetica Bold Condensed font indicates menu options,
buttons, and active dialog text that is referred to in the
instructions. Example: Go to the File menu.
• A right-arrow character (>) indicates the hierarchy of
menu and submenu options.
• A ❖ symbol indicates a note that provides supplemental
information about the topic being covered.
• A ▲ symbol indicates an important statement that requires
special attention.
CONTACTING CE SOFTWARE
If you have questions about QuicKeys that are not addressed
in the manual, use this section to learn how to contact CE
Software.
TECHNICAL SUPPORT
CE Software offers online, fax, and telephone support. Visit
the Technical Support Web page at http://www.help.cesoft.com for
information about the various support options.
Contact Information
The Technical Support Department is available Monday
through Friday from 8:00 A.M. to 5:00 P.M. U.S. Central Time.
CE Software Technical Support can be reached by:
• Phone: 515-221-1803
• Fax: 515-221-1806
• Web page: http://www.help.cesoft.com
• E-mail: [email protected]
••••
5
Before You Call
Contact Information
Check the following Web sites for technical information:
• Have you checked the CE Software Technical Support Web
page or newsgroups at http://www.help.cesoft.com
The CE Software Customer Service department is open
Monday through Friday from 8:00 A.M. to 5:00 P.M. U.S.
Central Time. If you have a question about your CE Software
product, please have your serial number ready when you call.
For customers outside the U.S., please contact your local
distributor.
When You Call
• Phone: Domestic orders 800-523-7638
To help our Technical Support team assist you as quickly as
possible, please have the following information available
when you speak with, or write to, a Technical Advisor:
• International orders: 515-221-1801
• Have you checked the QuicKeys Web site for updates and
product information at http://www.cesoft.com
• Product name and version (e.g. QuicKeys 2.0)
• Fax: International and Domestic orders 515-221-2258
• Online: http://www.cesoft.com/
• Computer type and model (e.g. Pentium 2 333 Mhz)
Ownership Transfer
• Operating system and version (e.g. Windows 98)
If you transfer ownership of a CE Software product, please
E-mail us at [email protected] or send a letter with the product
name, serial number, your name, and the new owner’s name
and address to:
CE Software, Inc.
Attn: Ownership Transfer
P.O. Box 65580
West Des Moines, IA 50265 U.S.A.
PRODUCT FEEDBACK
What do you think of QuicKeys? We want to know and we
encourage you to submit your ideas to [email protected] so
we can consider them for the next version of QuicKeys.
USER GUIDE FEEDBACK
We also welcome feedback about the documentation that
accompanies QuicKeys. Please E-mail us at [email protected]
with your comments and suggestions.
The most current version of this manual is available online at
http://www.cesoft.com/ and can be viewed with Adobe® Acrobat
Reader 3.0 or greater. Visit http://www.adobe.com/ to download a
free copy of Acrobat Reader.
SALES AND CUSTOMER SERVICE
CE Software’s sales and customer service staff can answer
your questions about product availability, upgrades, product
prices, damaged disks, customer registration, and general
policies.
Change of Address
If you change your address, please E-mail us at [email protected]
or send a letter indicating your old and new address to:
CE Software, Inc.
Attn: Change of Address
P.O. Box 65580
West Des Moines, IA 50265 U.S.A.
••••
6
Chapter 1
Welcome to QuicKeys
CHAPTER 2
INSTALLING AND STARTING QUICKEYS
••••••
The steps involved in setting up QuicKeys include installing
QuicKeys on your hard disk, completing the questions in the
QuickStart Wizard, and starting the QuicKeys Editor. This
chapter explains how to accomplish these tasks.
REQUIREMENTS
The minimum requirements your computer must meet to
install and operate this product include:
• Intel compatible PC running Windows 98 or NT 4.0 or
greater
• Personal computer with a Pentium or equivalent processor
• Internet Explorer 4.0 or greater
• 16 MB of RAM (32 MB recommended)
• One CD-ROM drive
• At least 20 MB of available hard disk space
• SVGA 800x600 monitor
❖
Certain features are enhanced by an Internet
connection
INSTALLING QUICKEYS
If you are using Windows NT, installation must take place
while logged in as an administrator or as a user with
administrative rights.
1. Read the wizard dialog that appears when you start
installation and click Next.
2. Read the terms of the Software License Agreement. Click
Yes if you agree with the terms and want to install the
software.
3. Read the Readme file and click Next.
4. Type your Name, Company, and Activation Key in the
appropriate boxes and click Next. (Your company name is
not required.)
5. Choose the directory where you would like to install
QuicKeys and click Next. A status bar appears.
6. Read the final wizard dialog and click Finish. The Startup
QuicKeys Engine is selected by default so the QuicKeys
Engine is running when you complete the installation.
AFTER INSTALLATION
When you complete the installation wizard, the QuicKeys
Engine and QuicKeys Editor are automatically started. The
first time the QuicKeys Editor opens, the QuickStart Wizard
appears. The QuickStart Wizard is designed to set up a variety
of common QuicKeys Actions so you can take advantage of
QuicKeys immediately. Before you use the QuickStart Wizard,
spend a few minutes thinking about what you want to
automate on your computer. The QuickStart Wizard will
likely provide an opportunity for you to automate the tasks
you have in mind. Remember, you can always edit the tasks
you set up with the QuickStart Wizard later.
••••
8
Chapter 2
Installing and Starting QuicKeys
HOW TO USE YOUR NEW ACTIONS
You can trigger the Actions created by the QuickStart Wizard
by:
• Selecting the hot key you assigned to your new Actions.
• Selecting an Action from the QuicKeys menu.
Each of these methods is discussed in “Triggering Actions” on
page 25, but this section provides instructions for using the
QuickReference Card to trigger your Actions.
USING THE QUICKREFERENCE CARD
To trigger your new Actions using the QuickReference
Card:
1. Click the close box to close the QuicKeys Editor.
2. If you chose to print the QuickReference Card, refer to
your printout right now and select one of the hot keys
listed on it. Your computer should complete the Action
described in the Action column of your printed
QuickReference card.
•If you chose not to print the QuickReference Card, press
Shift+Control+Space to display the QuickReference Card on
your screen. Click one of the Actions listed in the QuickReference Card to trigger it. See page 34 for more information on the QuickReference Card.
MORE ABOUT THE QUICKSTART WIZARD
Below are some quick facts about the QuickStart Wizard you
just completed.
• The QuickStart Wizard only displays when there are no
Actions created or when you select Run QuickStart Wizard from
the Help menu.
• If you want to edit an Action you created in the QuickStart
Wizard, double-click the Action in the My Actions tab of the
QuicKeys Editor.
• By default, all Actions created with the QuickStart Wizard
are universal in scope. This means that you can use the
Actions in any of the programs you have open. See page 22
for more information on Action Scope.
• The list of programs presented to you in the QuickStart
Wizard is populated by the programs available in your Start
menu. If you want to open a program that is not listed, see
page 87 for information on the Open Action.
• By default, all Actions created with the QuickStart Wizard
are listed in the My Actions tab of the QuicKeys Editor and in
the QuicKeys menu. See Figure 1 for an illustration of the
QuicKeys menu.
• If you want to trigger your Actions with hot keys rather
than selecting them from the QuicKeys menu, refer to the
printed QuickReference Card for a list of the hot keys
automatically assigned to the Actions. See page 34 for
more information on the QuickReference Card.
• You can type up to 10 KB (more than 10,000 characters) of
text when you set up the Type Text Action with the
QuickStart Wizard.
• The QuickStart Wizard creates a Dockable toolbar that
displays QuicKeys Action Menu buttons.
STARTING QUICKEYS
Since the QuickStart Wizard only appears when there are not
any QuicKeys Actions created, it’s likely that the only time
you will see the QuickStart Wizard is immediately after
installation. When QuicKeys is started again after completing
the QuickStart Wizard, you see the QuicKeys Editor. To learn
more about the QuicKeys Editor, see page 12. To learn how to
start QuicKeys without the assistance of a wizard, use the
following instructions:
••••
To open the QuicKeys Editor:
1. Right-click the QuicKeys icon. It is located in the status
area of the taskbar (commonly known as the tray).
FIGURE 1: By default, you can open the QuicKeys menu from the
Windows taskbar. The QuicKeys menu is located in the status area of the
taskbar.
2. Select Open QuicKeys Editor from the QuicKeys menu. The
QuicKeys Editor appears. See page 12 for more
information on the QuicKeys Editor.
CHECK FOR QUICKEYS UPDATES
When you select Check for QuicKeys updates from the QuicKeys
Editor Help menu, QuicKeys connects to CE Software using
TCP/IP. If your version of QuicKeys is not current, an alert is
displayed telling you how to get the newest version of
QuicKeys. You can choose to go to CE Software’s Web site
immediately or you can choose to be reminded of the update
in “X” days.
If you are unable to connect to CE Software, the attempt will
time out. A connection failure may occur if you have no
Internet connection configured, if you have problems with
your dial-up service, or if CE Software’s server is not
available.
9
••••
10
Chapter 2
Installing and Starting QuicKeys
CHAPTER 3
QUICKEYS OVERVIEW
••••••
This chapter explains how to use QuicKeys and provides an
overview of the QuicKeys architecture. Reading this chapter
will acquaint you with the capabilities of QuicKeys so you can
take full advantage of the software’s power and flexibility.
QUICKEYS ACTIONS AND SEQUENCES
QuicKeys Actions and Sequences are the foundation of the
QuicKeys program. QuicKeys Actions automate simple onestep tasks, such as choosing a network printer. QuicKeys
Sequences automate multi-step tasks, such as starting a
database program, searching for a specific item, or printing
out the selected database records. Actions can be built using
Setup Wizards or the Action Properties dialog. Sequences are
built using a collection of Actions that can be assembled
manually or by using the QuicKeys recording feature. The
recording feature enables QuicKeys to “watch” what you are
doing and repeat your actions.
CREATING ACTIONS AND SEQUENCES
Probably the single most important factor involved in using
QuicKeys is understanding the concept behind its usage.
QuicKeys is a powerful software tool you can use to automate
your computer. It’s a tool, however, that is only as effective as
you make it. Once you install QuicKeys, you need to make a
mental note of the tedious, routine tasks you perform on your
computer and earmark those tasks for some attention from
QuicKeys. Each time you think of something that QuicKeys
could make easier for you, create an Action or Sequence that
automates that task or series of tasks.
When you create a QuicKeys Action or Sequence, you can
choose the trigger that launches it. In other words, you need
to specify the “signal” that tells QuicKeys when to perform the
Action or Sequence. For example, if you want QuicKeys to
open a database program and enter the current date and time,
you need to let QuicKeys know when to begin. You can use a
hot key (such as F5), or a number of other available QuicKeys
triggers (such as toolbars, the QuicKeys menu, or timed
triggers) to communicate with QuicKeys that you want to
begin this Sequence. It’s kind of like having a personal
assistant inside your computer that understands a language of
triggers you choose.
That’s all there is to using QuicKeys: thinking of tasks to
automate, creating QuicKeys Actions or Sequences that
replace those tasks, and triggering the tasks. You need to
spend a few minutes telling QuicKeys what you want, but
from that point on you save hours, days, maybe even weeks
with the Action or Sequence that only took you a couple of
minutes to set up. It’s a pretty good return for a small
investment of time. In fact, after using QuicKeys for a few
weeks, you will probably be amazed when you recall how
much of your day was once spent searching through folders,
rearranging windows on your desktop, or clicking the same
options in countless windows.
••••
12
Chapter 3
QuicKeys Overview
QUICKEYS COMPONENTS
Part of understanding any piece of software is understanding
its different components. Understanding the parts of
QuicKeys will familiarize you with the logic behind the
QuicKeys architecture, making it easier to find things and use
the software more efficiently.
The QuicKeys Editor Tabs
QuicKeys is composed of three main elements: the QuicKeys
Editor, the QuicKeys Engine, and QuicKeys Actions. This
section familiarizes you with each of these components.
❖
For a diagram of the QuicKeys architecture, see
page 179.
QUICKEYS EDITOR
When you select QuicKeys from the Start menu, the QuicKeys
Editor appears. It is your control center for creating, editing,
and deleting Actions. There are four separate tabs available in
the QuicKeys Editor that each serve a different purpose: the
Setup Wizards tab, the My Keyboard tab, the My Toolbars tab, and the
My Actions tab.
Use the Setup Wizards tab as a starting point for
setting up Actions with the Setup Wizard.
Create, edit, and delete toolbars from the
My Toolbars tab.
••••
13
The Setup Wizards Tab
When you first start QuicKeys, you see a tabbed window that
displays the Setup Wizards tab as the frontmost tab. Click one of
the buttons in the Setup Wizards tab to be guided through the
process of setting up an Action that will automate the task
described on the button. When your cursor is positioned over
an Action button for more than one second, a hot help
description of the Action appears.
Click the drop-down
arrow to display a list
of Setup Wizard
viewing options.
The text of the Wizard window
label changes depending upon
which group of Setup Wizards
is displayed.
Use the My Keyboard tab to quickly add or change
hot key triggers for existing Actions.
View all your QuicKeys Actions and their properties from the
My Actions tab. This illustration uses the Details view, but you
can also select the Large Icons, Small Icons, or List views
from the View menu.
FIGURE 2: Click a button in the Setup Wizards tab to be guided through
the process of creating, editing, and deleting Actions.
••••
14
Chapter 3
QuicKeys Overview
The My Keyboard Tab
When you click the My Keyboard tab, you see a diagram of your
keyboard along with a tabbed Action Sets pane. Raised keys
in the Keyboard Layout pane indicate the keys that QuicKeys
is currently using as triggers. Click a raised key to display the
Action it triggers on the right side of the window. See
Figure 3.
Hot keys can be edited
by clicking in the Hot
key column and
pressing a different key
combination.
The selected key
displays in the Key
area, along with the
Actions that use that
key.
Drag and drop Actions from the Action Sets pane to one of the
Keyboard Layout buttons to assign or reassign a hot key.
When you release the mouse, the menu shown in Figure 4
appears. Use the menu to choose modifier key(s) that will be
pressed simultaneously with the selected Keyboard Layout
key.
Modifier keys used in
combination with the
selected key display
in the Key area.
FIGURE 4: The modifier menu
For example, if you drag a Type Text Action from the Universal
tab to the F8 key, the modifier menu appears. If you select
(None), pressing F8 alone will trigger the Type Text Action. If
you select Ctrl+Alt+Shift, you must press Ctrl+Alt+Shift+F8 to trigger
the Type Text Action.
❖
FIGURE 3: Use the My Keyboard tab to assign hot key triggers to
your Actions. The standard keyboard layout is shown here, but
you can also specify a laptop keyboard layout. See page 30 for
more information.
You can also access the modifier key menu by
right-clicking an Action listed in the Key area of the
My Keyboard tab and selecting the Modifiers option.
••••
Right-click an Action in the Action Sets pane to create a new
Action; cut, copy, paste, or delete Actions; select all options;
change the way the Action list is displayed; display properties
or advanced options; or clear the hot key for the selected
Action. See Figure 5 for an illustration of this context menu.
15
The My Toolbars Tab
When you click the My Toolbars tab, you can see a list of all your
toolbars. Toolbars are graphical representations of specific
tasks on the computer. Most programs provide toolbars that
perform a specific function, such as printing, when you click
the Print icon. QuicKeys toolbars are different, however,
because you specify the appearance and functionality of the
toolbar.
Toolbars are a valuable asset if you have created several
QuicKeys Actions. They provide a quick and easy way of
triggering your Actions. You don’t have to remember a hot
key and you don’t have to fill up your QuicKeys menu if you
use toolbars to trigger at least some of your Actions.
FIGURE 5: Right-click an Action in the Action Sets pane of the My
Keyboard tab to display the context menu.
Right-click the Actions listed in the Key area to delete a
selected Action from the Set, to display the Properties and
Advanced options, to clear the selected hot key, or to select
Modifiers for the selected Action.
FIGURE 6: Right-click an Action in the Key area of the My Keyboard tab
to display the above menu.
••••
16
Chapter 3
QuicKeys Overview
When you click the toolbar name in the My Toolbars tab of the
QuicKeys Editor, all the Actions that reside on that toolbar
display in the Toolbar Buttons pane.
Click a column
heading to choose how
your toolbars are
sorted.
When you select a toolbar,
the buttons placed on that
toolbar display in the Toolbar
Buttons pane.
• Double-click a toolbar to display the toolbar’s Action
Properties dialog.
• See Chapter 4 on page 37 for more detailed information
about toolbars.
The My Actions Tab
When you click the My Actions tab, all of your Actions display in
the default Details view. This tab is useful when you want to
view and edit all the Actions you created from a single
window.
There is a different tab
for each Action Scope
you have specified.
Double-click an
Action to edit it.
Actions that can be
triggered using the
QuicKeys menu or a timed
trigger can be identified by a
menu icon or timer icon.
FIGURE 7: Use the My Toolbars tab to create, edit, and delete QuicKeys
toolbars.
• Right-click a toolbar in the My Toolbars tab to create a new
toolbar, create a new toolbar button, display the Toolbar
Button Wizard, hide the toolbar, delete the toolbar, or
display the toolbar’s properties.
• Right-click in the Toolbar Buttons pane to create a new
button, display the Toolbar Button Wizard, or delete the
selected toolbar button.
FIGURE 8: Use the My Actions tab to view, create, or edit your Actions.
••••
• Double-click an Action in the My Actions tab to display a
Setup Wizard or an Action Properties dialog where you
can edit the Action.
• Right-click an Action to create a new Action; cut, copy,
paste, or delete Actions; select all options; change the way
the Action list is displayed; display properties or advanced
options; or clear the hot key for the selected Action.
Move the insertion line
to specify where you
want the new Action or
Sequence tool
inserted.
Add steps to your
Sequence using the
options in the Create
menu or the Action
toolbar.
17
Double-click a
Sequence step to
edit it.
• Drag-and-drop an Action from one tab to another to edit
the Action scope.
Sequence Editor
You can open the Sequence Editor by selecting Sequence in the
Create menu. The Sequence Editor enables you to consolidate
Actions into a more complex Action, so it’s likely you may not
choose to use the Sequence Editor until you are comfortable
creating QuicKeys Actions. A Sequence is a collection of
Actions that completes a multi-step task. For example, you
can create a Sequence that launches your E-mail application,
types your user name and password, and clicks OK in the
appropriate dialog. The Sequence would contain four
separate Actions that are individually only capable of
completing a single task until they are combined into a
Sequence.
FIGURE 9: The Sequence Editor
If the Sequence does not execute successfully, a dialog
displays the Step ID number where the Sequence is having
difficulty.
The Sequence Editor allows you to edit each step of a
Sequence. There are three different methods for opening the
Sequence Editor:
• Record a Sequence and the Sequence Editor appears
automatically when you are done recording. See page 152
for more information on recording.
• Select Sequence from the Create menu.
• Double-click a Sequence listed in the My Actions tab.
••••
18
Chapter 3
QuicKeys Overview
QUICKEYS ENGINE
The QuicKeys Engine is a background program that is
necessary for the QuicKeys Editor to function. Most of the
time you don’t need to pay any attention to the Engine
because it’s started whenever you turn on your computer.
However, if you ever turn off the QuicKeys Engine, it’s
important to know how to turn it back on because your
Actions won’t work without it.
QUICKEYS PLUG-INS
A plug-in is a software component that adds functionality to
QuicKeys. There are several plug-ins available in QuicKeys.
Each plug-in can be turned on or off individually, and third
party plug-ins can easily be added to QuicKeys due to its
flexible architecture.
When you install QuicKeys, a shortcut to the QuicKeys
Engine is placed in the Startup Items folder. The only time you
may need to exit the QuicKeys Engine is when you install new
programs that require you exit all programs. In such a
situation, you can right-click the QuicKeys icon located on the
taskbar and choose Exit to quit the Engine. Use one of the
following methods to restart the Engine:
• Restart your computer
• Select Programs>QuicKeys>QuicKeys on the Start menu
FIGURE 10: You can manage QuicKeys Plug-ins from the Plug-in
Manager window. When you click the + icon, you can see the Actions that
are included in that category.
If you want more information about turning plug-ins on or
off, see page 18. If you are interested in extending the power
of QuicKeys by creating your own plug-ins, visit CE
Software’s Web site at http://www.cesoft.com/.
••••
19
QUICKEYS MENU
By default, a QuicKeys icon appears on your taskbar after
installation. When you right-click that icon, the QuicKeys
menu appears. In the QuicKeys menu you can:
• Trigger QuicKeys
Actions
• Create toolbars
• Start/Stop recording
a Sequence
• Open the QuicKeys
About box
• Open toolbars
• Open the QuicKeys
Editor
• Exit QuicKeys
• Abort the playback
of a sequence
ADDING ACTIONS
You can add Actions to the QuicKeys menu by selecting the
Include in QuicKeys menu check box in the Setup Wizard or in the
General tab of the Action Properties dialog. The hot keys
assigned to each Action also appear in the QuicKeys menu
unless you have cleared the option to Show hot keys in QuicKeys
menu in the Options dialog. See page 30 for more information.
FIGURE 11: Right-click the QuicKeys icon in the Windows taskbar to
display the QuicKeys menu.
• Toolbars submenu—Views or creates toolbars.
• Abort Sequence—Stops the playback of a Sequence.
• Start/Stop Recording—Records a new Sequence or stops
recording.
• Record One Action—Creates a single QuicKeys action by
recording your computer movements. After you record
your Action, the Action Properties dialog appears for the
Action you performed. The QuicKeys Editor does not have
to be open to use this recording option.
• Open QuicKeys Editor—Opens the QuicKeys Editor.
• Exit QuicKeys—Closes the QuicKeys Editor and the
QuicKeys Engine.
••••
20
Chapter 3
QuicKeys Overview
• Check For Update—Checks CE Software’s Web site for
information about QuicKeys updates and upgrades. If
there is a new update, you can choose to open the Web site
or you can choose to be reminded about the update again
in “X” days.
• About QuicKeys—Displays the QuicKeys About box,
where you can browse registration and system
information, CE Software credits, and relevant Web sites.
If the QuicKeys icon or QuicKeys hot keys are not displayed
in your taskbar, check to make sure the Show icon in taskbar and
Show hot keys in QuicKeys menu options are selected. You can view
these items by selecting Options from the QuicKeys Editor View
menu.
USING QUICKEYS
There are two rudimentary steps involved in using the
QuicKeys program: setting up Actions or Sequences and
triggering Actions. This section provides general information
about this process. For information on specific Actions, see the
corresponding chapter in this manual. For example,
Chapter 13 discusses “Building Sequences” in detail.
Setting Up Actions
Click a Setup Wizard button in
the Setup Wizards tab.
Set the options you want to
use in the Setup Wizard. Make
sure you set the trigger (such
as a hot key) you want to use
to activate the Action.
Click Finish when you reach
the end of the Setup Wizard.
(Your Action is saved as soon
as you click the Finish button.)
Triggering Actions
Select the trigger you
specified to activate the
Action. QuicKeys reacts to the
trigger and completes the task
immediately.
FIGURE 12: The process of setting up QuicKeys involves setting up
Actions and triggering Actions.
••••
CREATING QUICKEYS ACTIONS
When you create a QuicKeys Action, you can use the Setup
Wizard (shown in Figure 13) or the Action Properties dialog
(shown in Figure 14) to specify how the Action behaves. The
Setup Wizard is used by default because it prompts you for
information in a step-by-step fashion. If you are a more
advanced user, you can turn off the Setup Wizard in the
QuicKeys Editor Options dialog and instead use the Action
Properties dialog. (See page 30 for more information on the
Options dialog.) The Action Properties dialog presents all the
setup options for an Action in a single dialog.
21
Using the Setup Wizard
When you begin using QuicKeys, you will probably use the
Setup Wizard because it provides the most basic method for
creating QuicKeys. You simply click an Action button in the
Setup Wizards tab and a series of wizard dialogs guide you
through the process of setting up or editing a QuicKeys
Action.
Whichever method you use to create QuicKeys Actions is
completely dependent upon your comfort level with
QuicKeys.
FIGURE 13: The Introduction page of the Setup Wizard appears when
you click a button in the Setup Wizards tab.
Using the Action Properties Dialog
When you are more comfortable with QuicKeys and you want
to use a more direct approach to create and edit Actions, you
can select a Action from the Create menu to open the Action
Properties dialog. Action Properties are the options you
specify for each QuicKeys Action you want to create. These
Action-specific options are presented to you item-by-item
when you use the Setup Wizard to create Actions. However,
these same options are presented in a single dialog when you
use the Action Properties dialog to create and edit QuicKeys
Actions.
••••
22
Chapter 3
QuicKeys Overview
FIGURE 15: The Action Properties General tab.
Toolbars—Click the Toolbars Tab to select the toolbar in which
you want this Action displayed.
FIGURE 14: The Action Properties dialog for the Web Launcher Action
appears when you select Create>Internet Tools>Web Launcher.
General—Supply the name of the Action and the hot key that
triggers it in this tab. You can also select the Include in QuicKeys
menu check box to list the Action in the QuicKeys menu or click
the Clear hot key button to clear the contents of the hot key field.
➣ You must use the Clear hot key button to clear the hot key
field because the Delete and Backspace keys cannot delete a hot
key.
FIGURE 16: The Action Properties Toolbars tab
Action Scope—Specify the range of operation for the Action.
In other words, choose whether the Action works at any time,
or whether it can only be triggered from the desktop, from a
specific program, or from a particular hardware profile. See
Figure 17.
• Universal—Universal is selected by default for each Action
you create. Use Universal when you want to be able to
trigger the Action at any time, regardless of what program
you are in or whether or not the desktop is active.
❖
Buttons on toolbars are always Universal in scope.
••••
23
• Desktop—Select Desktop when you only need to trigger the
Action from the desktop. This option is useful for your
toolbars. When toolbars are assigned Desktop scope, they
appear whenever the desktop is active.
• Program—When you select Program, a Program drop-down
list appears where you can choose the program in which
you want to use the Action. Click the Browse button and
navigate to the program you want to use if the program is
not listed in the drop-down list. This scope option is useful
if you have several Actions you only need to use within a
program, such as Microsoft Access.
• Hardware Profile—A hardware profile is a set of
instructions specified within your operating system that
tell your computer which devices to start when you turn
on your computer. In other words, hardware profiles
enable you to categorize QuicKeys Actions under different
hardware identities.
For example, you can set up the F5 key as the QuicKeys hot
key that tells your portable computer to switch to Standby
mode when your computer is using a Docked Hardware
Profile. Additionally, you can use the F5 key within the
Undocked Hardware Profile scope to shut down your
computer when your computer is undocked. The same hot
key works differently depending upon the “state” of your
computer.
FIGURE 17: The Action Properties Action Scope tab If you have already
scoped an Action to an application, that application appears at the top of
the scope list.
When you trigger a QuicKeys Action, QuicKeys examines the
Action Scope you set in order to determine whether or not it
should trigger the Action. This decision process is illustrated
in Figure 18.
••••
24
Chapter 3
QuicKeys Overview
Timed Triggers—Choose a specific time you want the Action
to be triggered. By default, there is no timed trigger selected.
QuicKeys
trigger
Desktop
Scope
Program-specific Scope
FIGURE 19: The Action Properties Timed Triggers tab
Hardware Profile Scope
Action-Specific Properties—The Action Properties dialog
contains an Action-specific properties pane that is unique for each
QuicKeys Action.
Universal Scope
FIGURE 18: This diagram illustrates Action Scope priority from the most
specific Scope selection to the least specific Action Scope option.
There is no limit on the number of Action scopes you can
specify, but if you have a set of Actions for each program you
use, you may have too many tabs for the QuicKeys Editor to
display. If this happens, small arrows appear on the right side
of the QuicKeys Editor. Click the arrows to scroll through the
list of Action Scope tabs.
To delete a particular Action Scope tab, delete or reassign the
scope for each of the Actions in that tab. Then, close and
reopen the QuicKeys Editor. When the QuicKeys Editor
appears, the Action Scope tab you chose is no longer
displayed.
FIGURE 20: The Action-specific properties pane for the Web Launcher
Action
••••
TRIGGERING ACTIONS
QuicKeys provides a variety of ways to trigger Actions so you
can use the methods that make sense to you. QuicKeys makes
customizing the way you work easy.
25
You can set your triggers in the various tabs of the Action
Properties dialog or in the Triggers page of the Setup Wizard.
You can use any or all of the following triggers for each
QuicKeys Action:
• Hot key—The key(s) on the keyboard used to trigger your
QuicKeys Actions.
• Toolbars—The collection of QuicKeys buttons that enable
you to simply point and click to open files or folders,
trigger Actions, or display QuicKeys Action menus.
• Timed triggers—The specific date/time, time of day, or
repeating interval when QuicKeys Actions are
automatically triggered.
• QuicKeys menu—The menu that appears when you rightclick the QuicKeys icon in the taskbar. Trigger Actions by
selecting them from the QuicKeys menu.
• QuickReference Card—Launch the QuickReference Card
and click an Action listed in the QuickReference Card
window.
• Shortcut on desktop—Drag-and-drop an Action to the
desktop or Start menu to create a Windows shortcut to the
Action. This option is useful for Actions you use
frequently. See Figure 21 for an illustration of a desktop
shortcut.
FIGURE 22: Specify QuicKeys triggers in the Action Properties dialog or
the Setup Wizard.
FIGURE 21: A Windows shortcut to a QuicKeys Sequence
••••
26
Chapter 3
QuicKeys Overview
MANAGING QUICKEYS
This section discusses standard procedures, such as printing
and saving QuicKeys Actions. It also provides information on
turning individual Actions on and off, resolving hot key
conflicts, and importing/exporting Actions.
PRINTING ACTIONS
If you want to print a list of your Actions, select Print from the
File menu. The same Action list is printed regardless of which
QuicKeys Editor tab is in the foreground. The following
information is printed:
SAVING ACTIONS
Your Actions are automatically saved whenever you click
Finish in the Setup Wizard or click OK in the Action Properties
dialog. However, if you create a Sequence, you are prompted
to save your changes to the Sequence.
CLEARING HOT KEYS
When you no longer want a hot key assigned to an Action,
click the Clear hot key button in the Action Properties dialog.
• Action names
• Action descriptions
• Hot keys assigned to Actions
• Whether or not Actions are displayed in the QuicKeys
menu.
FIGURE 24: The Clear hot key button is located in the upper part of the
Action Properties dialog
Do not try to clear your hot keys with the Delete or Backspace
keys because QuicKeys will begin to use those keys as
triggers.
ENABLING/DISABLING ACTIONS
FIGURE 23: The File menu
RENAMING ACTIONS
To rename an Action, open the QuicKeys Editor and select the
Action you want to rename. Click the Action name a second
time to display a blinking text cursor. Then, make your
changes to the Action name and press the Enter key.
If you find that you do not have a need for some of the Actions
installed with QuicKeys, you can turn those Actions off so
they no longer display in the QuicKeys Editor. For example, if
you use a PC that does not have a sound card and if you don’t
use your CD-ROM drive for audio CDs, you probably don’t
need any of the multimedia Actions, such as CD/DVD or Set
Audio Volume.
To enable/disable Actions:
1. Select View>Plug-ins.
••••
2. In the QuicKeys Plug-in Manager dialog, click the + and icons to expand and collapse the various Action categories.
27
QuicKeys follows rules of priority to resolve hot key conflicts.
When the same hot key is used for several different tasks, the
resulting Action depends upon where the hot key falls in the
following hierarchy:
A. Program-specific hot keys
B. Universal hot keys
C. Hot keys defined by a particular program
Applying this information to the above example, if the
database program is open, F5 formats a database document. If
the database program is not the active program, F5 starts
Photoshop.
If you don’t want to change assigned hot keys to avoid these
conflicts, you can either use the QuicKeys Controller to turn
your hot keys on/off for a brief period of time, or you can
substitute QuicKeys hot keys for the hot keys that are built
into the programs you use.
FIGURE 25: Use the Plug-in Manager to enable or disable plug-ins and
Actions.
3. Select the Actions or Action categories you no longer wish
to view and click the Disable button.
4. Click Close when you are finished.
5. Look at the My Actions tab of the QuicKeys Editor. The
Actions you turned off in the Plug-in Manager are no
longer displayed.
RESOLVING HOT KEY CONFLICTS
Hot key conflicts occur when a hot key in one Action Set
conflicts with a hot key in another set or a hot key that is built
into another program. For example, let’s say the F5 hot key is
assigned to two Actions. One hot key opens Photoshop and is
universal in scope. The other hot key changes the layout of a
document and can only be triggered in a specific database
program. What happens when you press F5?
Enable/Disable Hot Keys
If hot key conflicts only occur in programs you use very
infrequently, the best way to avoid them is to turn your
QuicKeys hot keys on and off using the QuicKeys Controller
Action. This feature enables you to briefly disable a QuicKeys
hot key while you work in a program that uses conflicting hot
keys. When you are finished working in the program, you can
turn QuicKeys hot keys back on.
For example, you may want to disable QuicKeys hot keys
while working in Microsoft® Excel™ if Excel uses Ctrl+1 to
insert cells, but you have directed QuicKeys to use Ctrl+l to
change selected text to italics.
••••
28
Chapter 3
QuicKeys Overview
The easiest way to enable or disable hot keys is by using the
QuicKeys Controller Action Menu button that was
automatically placed on your QuicKeys toolbar when you
installed QuicKeys. However, if you edited the toolbar and
that button is no longer available to you, use the following
instructions to set up this Action.
5. Select Create a new Action and click Next.
FIGURE 26: You can disable hot keys and timers from the QuicKeys
Controller Action menu located in your QuicKeys toolbar.
To turn QuicKeys hot keys on and off using the Setup
Wizard:
FIGURE 27: The Setup Wizard for QuicKeys Controller
6. Select Set status of QuicKeys and click Next.
1. Start QuicKeys.
7. Select Toggle status and click Next.
2. Select the Setup Wizards tab.
8. A name is automatically assigned to the Action. You can
use the assigned Action name or type a different one.
3. Click the QuicKeys Controller button.
4. Read the introduction page and click Next.
9. Select the Assign hot key check box and click Next.
10. Click in the Hot key box and press the F11 key.
11. Click Next.
12. Click Finish.
Now simply press F11 to turn QuicKeys hot keys on and off.
••••
29
Reassigning Built-in Program Hot Keys
Importing Duplicate Hot Keys
If hot key conflicts occur in programs you use on a daily basis,
you need to change either the hot keys QuicKeys assigned or
the hot keys (or shortcuts) your programs use. You can change
your QuicKeys hot keys simply by going through the
QuicKeys Setup Wizard and pressing a different hot key when
you see the wizard page with the Hot key field. To change
your built-in program hot keys, you can use the Type
Keystroke Action. For information on using the Type
Keystroke Action, see page 115.
If you import QuicKeys Actions that use hot keys already
assigned to existing Actions, the dialog in Figure 28 appears.
IMPORTING ACTION SETS
You can import Action Sets when you receive QuicKeys
Action Sets from other QuicKeys users or when you want to
use some of the Action sets installed with QuicKeys. When
you import Actions, you import all the attributes originally
assigned to the particular Actions. For example, you import
the triggers, icons, and scope selections for the Actions. If the
scope of the Action is invalid in the new environment, the
scope is automatically reassigned to Universal.
To import your Action Set:
1. Select File>Import.
2. Navigate to the location of the Quickeys Action Set you
want to import and select the file with the .qkx extension.
3. Click Open. The Action Set is imported into your collection
of QuicKeys Actions. Look in the My Actions tab to view
them.
❖
You can also double-click a .qkx file to import it into
your collection of QuicKeys Actions.
FIGURE 28: The QuicKeys Import dialog appears when QuicKeys notices
duplicate hot keys as it imports new Actions.
Import new Actions without hot key assignment—
Unassigns hot keys for imported Actions that use existing hot
key triggers. Imported Actions that do not use existing hot
keys retain their hot key trigger after import.
Import new Actions and unassign existing hot key
triggers—Unassigns existing hot keys so imported hot keys
can use them. All imported Actions retain their hot keys,
while Actions that already exist in the My Actions tab are
stripped of their hot key assignments.
Cancel the import of new Actions—Stops the import of new
Actions.
••••
30
Chapter 3
QuicKeys Overview
EXPORTING ACTION SETS
You can export Action Sets when you want to share your
QuicKeys Actions with other QuicKeys users or when you
want to back up your Actions. When the Setup Wizard tab is
displayed, you can export all of your QuicKeys Actions. If any
of the other tabs are displayed, only selected Actions are
exported. When you export Actions, all attributes are
exported. These attributes include the triggers, icons, and
scope assignments for the Actions being exported.
Keyboard Layout—Chooses the keyboard layout that is
similar to the keyboard you use. You can choose between a
standard or laptop layout.
To export your Action Set:
1. Select the Actions you want to export.
2. Select Export or Export Selection from the File menu.
3. Choose where you want to save the exported file and click
Save. Your Action Set is saved to the location you specified.
❖
QuicKeys 2.0 Actions Sets are not compatible with
QuicKeys 1.0.
CUSTOMIZING QUICKEYS
There are several different ways to customize QuicKeys. For
example, you can choose whether or not the introduction
page appears in the Setup Wizard and what type of view you
use in the My Actions tab. You can also resize a QuicKeys
Floating toolbar by clicking a corner of the toolbar and
dragging it so it appears as a single, double, or triple-column
toolbar. It’s completely up to you.
SETTING QUICKEYS OPTIONS
You can customize what you see when you run QuicKeys in
the Options dialog. Click Options on the View menu to view the
Options dialog. You choices include:
FIGURE 29: The Options dialog
Show icon in taskbar—Displays the QuicKeys icon in your
taskbar. You can right-click the QuicKeys icon to display the
QuicKeys menu.
You can disable this option if you do not want to trigger
Actions from the QuicKeys menu. When this check box is
cleared, the Option dialog’s Show hot keys in QuicKeys menu check
box is dimmed.
Show hot keys in QuicKeys Menu—Displays the hot keys
assigned to your Actions in the QuicKeys menu. Show Icon in
taskbar must be selected for this option to be available. You may
want to disable this option if you only want Action names to
display in the QuicKeys menu.
••••
Show Setup Wizard introduction page—Displays the
introduction page in the Setup Wizards whenever you create
or modify an Action from the Setup Wizards tab. When you
become familiar with what each Action does, you may want
to disable this option to go through the Setup Wizard more
quickly.
31
Show sequence recording toolbar—Displays a QuicKeys
recording toolbar after you select the Start Recording option so
you can control recording with a click of your mouse.
Pause
Stop
Cancel
FIGURE 31: The Recording toolbar
Show sequence playback toolbar—Displays a playback
toolbar when you are running a Sequence so you can control
the playback of a QuicKeys Sequence with a click of your
mouse.
Cancel
FIGURE 30: The Setup Wizard introduction page
Always use Setup Wizards for editing—Displays a Setup
Wizard each time you modify an Action. When this check box
is cleared and you attempt to modify an Action from the My
Actions tab, the Action Properties dialog appears rather than a
Setup Wizard. Clear this option if you are an advanced
QuicKeys user and you do not want to use wizards.
Collapse/
expand toolbar
Pause
Open Sequence
Editor
Current
Sequence step
FIGURE 32: The Playback toolbar when it is minimized and maximized
••••
32
Chapter 3
QuicKeys Overview
RESIZING TOOLBARS
You can resize toolbars by clicking on a corner of the toolbar
and dragging it until it appears as a long, single-row toolbar
or a short, multi-row toolbar.
The Help system installed with QuicKeys is different than the
printed manual in that it is written to answer specific
questions you may have as you use the QuicKeys software. In
contrast, this printed manual is written to teach you about
QuicKeys using detailed explanations and examples.
YOUR FIRST ACTION
FIGURE 33: You can resize toolbars to the dimensions you prefer.
SORTING INFORMATION
HOW TO SET UP AND USE A QUICKEYS ACTION
You can choose how you want to sort information in the
different QuicKeys dialogs by clicking a column header.
CHANGING VIEWS IN THE MY ACTIONS TAB
You can view the My Actions tab in any of the views available in
the View menu. You can choose from the following views:
• Large Icons
• List
By now you’ve probably completed the QuickStart Wizard, so
you have already created some Actions. However, this section
takes you through your first Action from beginning to end just
as you would set up Actions without the QuickStart Wizard.
In the following instructions, you create an Action that opens
Notepad with a hot key.
• Small Icons
• Details
USING ONLINE HELP
You can access QuicKeys Help from the Help menu, from the
QuicKeys menu, by pressing F1, or by clicking the Help button.
The Help system allows you to browse or search topics using
the Contents, Index, or Find tabs. Use the Contents and Index tabs as
you would use the table of contents or index in a standard
manual. Use the Find tab as you would use the Find feature in
a standard software product.
1. Right-click the QuicKeys menu in the taskbar and select
Open QuicKeys Editor.
2. In the Setup Wizards tab, select the Open button.
••••
33
Setting Up Multiple Actions
If you don’t want to go through the Setup Wizard 5 times for 5
different Actions, you can create all 5 Actions simultaneously
using the Create/edit multiple Actions option. The Create/edit multiple
Actions option is available for the following Actions:
•
•
•
•
•
•
•
•
•
•
Advanced Text Tools
Folders
Instant E-mail
QuicKeys Clipbook
Screen Settings
Type Date/Time
File Handler
Window Handler
Screen Saver
Screen Capture
•
•
•
•
•
•
•
•
•
CD/DVD
Choose Printer
Open
QuicKeys Controller
Set Audio Volume
Dial-Up Networking
System Specials
Zip Files
Quick Type
To create multiple Actions simultaneously:
FIGURE 34: The Wizard introduction page appears whenever you create
or edit an Action. If you do not want the introduction page to display,
select the “Don’t show Wizard introduction pages” check box.
3. Read the introduction page and click Next.
4. In the Setup Wizard, select Create a new Action and click Next.
5. Select Program and click Next.
6. Select Notepad from the program list and click Next. (Notepad
is a program installed with the Windows operating
system.)
7. Type a name for the new Action if you do not want to use
the default name, Notepad.
8. Select the Assign hot key box and click Next.
9. Press the F7 key and click Next.
10. Click Finish.
11. Press F7. The Notepad program should start. Remember
this hot key trigger so you can use it whenever you want to
open Notepad. See “Triggering Actions” on page 25 for
more information on hot keys and other triggers.
1. Select an Action in the Setup Wizards tab that offers the Create/
edit multiple Actions option.
2. Read the Introduction page and click Next.
3. Select Create/edit multiple Actions and click Next.
4. Read the Multiple Action Introduction page and click Next.
••••
34
Chapter 3
QuicKeys Overview
5. Select the check box for each Action you wish to create.
USING THE QUICKREFERENCE CARD
The QuickReference Card is a window that displays all your
QuicKeys Actions and corresponding hot keys. Its main
purpose is to jog your memory if you forget which hot key
performs which Action. You can launch Actions by clicking
them in the QuickReference Card, or you can simply use the
QuickReference Card to view the Actions and hot keys you
have created.
By default, QuicKeys uses the Shift+Ctrl+Space hot key to open
the QuickReference Card. When triggered, the
QuickReference Card opens to the tab representing Actions in
the most restrictive scope. For example, if FileMaker is open
when you press Shift+Ctrl+Space, the Actions scoped to
FileMaker appear in the frontmost QuickReference Card tab.
If there are no Actions scoped to FileMaker, the Universal tab is
frontmost.
FIGURE 35: A dialog similar to this one appears when you click Create/
Edit Multiple Actions in the Setup Wizard.
6. Choose whether you want to trigger the Actions using hot
keys or the QuicKeys menu. If you want to use a hot key,
position your cursor in the Hot key column and press a hot
key. If you want to use the QuicKeys Menu, click the Menu
column.
DELETING MULTIPLE ACTIONS
You can delete multiple Actions simultaneously from the
QuicKeys Editor My Actions tab. Just Ctrl+click the Actions you
want to delete and then right-click the selected Actions. Select
Delete from the context menu that appears.
FIGURE 36: Use the QuickReference Card to help remember your hot
keys.
••••
EXITING QUICKEYS
When you want to close the QuicKeys Editor, simply click the
QuicKeys Editor close box or select Exit from the File menu.
However, if you select Exit QuicKeys from the QuicKeys menu,
the QuicKeys Engine is turned off. To turn it back on again,
you must click the Windows Start menu and select QuicKeys
from the Programs submenu.
FIGURE 37: By default, you can exit the QuicKeys program from the
QuicKeys menu. The QuicKeys menu is located in the status area of the
taskbar.
35
••••
36
Chapter 3
QuicKeys Overview
CHAPTER 4
QUICKEYS TOOLBARS
••••••
Some programs contain toolbars that allow you to cut, copy,
and paste selected items just by clicking the corresponding
icons. Similarly, QuicKeys offers toolbars which allow you to
start Quickeys Actions by clicking a QuicKeys toolbar button.
Using toolbars is beneficial if you want quick and convenient
access to specific Actions without having to remember the hot
key that triggers them. In fact you can place all of your
QuicKeys Actions on toolbars if you are visually-oriented. You
can even choose to Auto-hide your toolbars to preserve space
on your screen. And, if you find the program toolbars you use
on a daily basis a bit limited in their functionality, supplement
your program toolbars with QuicKeys toolbars. The way you
set up and use your QuicKeys toolbars is completely
dependent upon you and the way you work.
CLICK-N-GO
A Click-N-Go toolbar closes immediately after you click a
button on the toolbar. This type of toolbar is useful if you
want to preserve screen real estate. For example, if you don’t
want to memorize which Action starts one of the 15 programs
installed on your computer, you can create a Click-N-Go
toolbar that enables you to start each of these programs by
clicking the appropriate program button on the toolbar. All
you have to remember is the hot key that opens the Click-NGo toolbar or select the toolbar from the QuicKeys menu. You
can then click the appropriate program icon on the toolbar
and watch as the toolbar disappears just as the selected
program opens.
QuicKeys toolbars have two components: the toolbar itself
and the buttons on the toolbar. The Toolbar Setup Wizard
guides you through creating both components, so setting up
your toolbars is relatively easy.
FIGURE 38: The Click-N-Go toolbar disappears as soon as you click one
TOOLBAR STYLES
There are four toolbar styles available for QuicKeys toolbars:
• Click-N-Go
• Dockable
• Floating
• Pop Out
This section discusses each toolbar style and provides
examples of when to use one style over another.
of its buttons.
Sizing Click-N-Go Toolbars
You can size Click-N-Go toolbars by clicking on the corner or
edge of the toolbar and dragging when the cursor becomes a
double-sided arrow. If some buttons are not visible after you
size the toolbar, the toolbar frame becomes a dotted line.
••••
38
Chapter 4
QuicKeys Toolbars
DOCKABLE
A Dockable toolbar attaches to an entire side of your screen.
This type of toolbar is useful when you want to keep your
toolbar in the same position whenever you start a specific
program. For example, if you have several Actions for
Microsoft Word, you can place them on a program-specific,
Dockable toolbar so they are accessible whenever Microsoft
Word is open. See page 22 for more information on Action
scope or making Actions program-specific.
FIGURE 39: This Dockable toolbar is anchored to the same side of the
screen that contains the taskbar. You can drag Dockable toolbars to any
side of your screen.
Each side of your screen supports one Dockable toolbar that
uses the Auto-hide feature. By default, Dockable toolbars
dock to the top of your screen. Consequently, if you try to
create a second Dockable/Auto-hide toolbar without moving
your first Dockable/Auto-hide toolbar to a different side of
your screen, you get the error message shown in Figure 40.
FIGURE 40: This error appears when you attempt to put more than one
Auto-hide Dockable toolbar on the same side of your screen.
Moving Dockable Toolbars
Auto-hide
You can choose to hide Dockable toolbars by selecting the
Auto-hide check box in the Toolbars Setup Wizard or Action
Properties dialog. When Auto-hide is selected, the Dockable
toolbar is hidden from view until your cursor is placed near
the side of the screen where the toolbar is located.
You can drag Dockable toolbars from one side of your screen
to another. If you drag Dockable toolbars away from the side
of the screen, they become Floating toolbars.
FLOATING
A Floating toolbar can be moved anywhere on your screen.
This type of toolbar is useful when your project requires
working in several different programs simultaneously. The
benefit of using a Floating toolbar in this type of situation is
that your Actions are only a click away.
••••
For example if you are creating an advertisement for your
company picnic, you can have a Universal, Floating toolbar
with buttons that start PageMaker, open a specific project
folder on your hard drive, change the view of the pamphlet to
75%, and save your work.
39
POP OUT
A Pop Out toolbar enables you to save on desktop real estate
by popping out from the side of the screen only when your
mouse moves near the toolbar. Unlike Auto-hide toolbars,
multiple Pop Out toolbars can be placed on the same side of
the screen. When you click a button on a Pop Out toolbar, the
toolbar retreats back to the side of the screen where it doesn’t
interfere with your work. See Figure 42.
FIGURE 41: This Floating toolbar displays anywhere you drag it. Floating
toolbars are the only type of QuicKeys toolbar that contain a title bar and
close box.
Moving Floating Toolbars
You can move Floating toolbars anywhere on your screen.
However, if you move them near the side of your screen they
become Dockable toolbars.
Sizing Floating Toolbars
You can size Floating toolbars by clicking on the corner or
edge of the toolbar and dragging. You can make Floating
toolbars as big or as small as you want. You can even size
them so your toolbar buttons appear in multiple rows. If some
buttons are not visible after you size the toolbar, the toolbar
frame becomes a dotted line.
FIGURE 42: Three Pop Out toolbars on the right side of the Windows
desktop
❖
To hide the title of a Pop Out toolbar, right-click the
toolbar and select Hide Toolbar Title.
Moving Pop Out Toolbars
You can move Pop Out toolbars anywhere on your screen by
clicking and dragging on the empty area inside the toolbars.
••••
40
Chapter 4
QuicKeys Toolbars
Sizing Pop Out Toolbars
You can size Pop Out toolbars by clicking on the corner or
edge of the toolbar and dragging when the cursor becomes a
double-sided arrow. If some buttons are not visible after you
size the toolbar, the toolbar frame becomes a dotted line.
CREATING TOOLBARS
You can choose whether or not to use the Setup Wizard to
assist you in creating your QuicKeys Toolbars. If you are a
QuicKeys beginner, CE Software recommends using the Setup
Wizard because it explains each of your options. If you are
already familiar with the available toolbar options, use the
Action Properties dialog. You can open the Action Properties
dialog by selecting Create>QuicKeys Tools>Toolbar.
USING THE SETUP WIZARD
To create a toolbar using the Setup Wizard:
FIGURE 43: Select the type of toolbar you want to create.
1. Select the Toolbar button in the Setup Wizards tab.
5. Select Small or Large and click Next.
2. Read the introduction page and click Next.
6. Type a descriptive name for this toolbar in the Name box.
For example, if the buttons in the toolbar start programs,
name the toolbar “Programs.”
3. Select Create a new Action and click Next.
4. Select Floating, Dockable, Click-N-Go, or Pop Out and click Next.
7. Select the Place in QuicKeys menu check box and click Next.
8. Click Finish. The Toolbar Button Wizard appears to help you
add buttons to your toolbar.
9. Read the introduction screen and click Next.
10. Select the check box for each program you want to add to
the toolbar and click Next.
11. Select the check box for each QuicKeys Action you want to
add to the toolbar and click Next.
12. Select the check box for each QuicKeys Action Menu you
want to add to the toolbar and click Next.
13. Read the final wizard page and click Finish. The Toolbar
Button Wizard appears.
••••
❖
See “Adding Buttons to Toolbars” on page 42 for
more information on toolbar buttons.
41
5. In the Action Properties dialog that appears, select the
toolbar style you want to use. The toolbar style options are
defined on page 37.
USING THE ACTION PROPERTIES DIALOG
To create a toolbar without the Setup Wizard:
1. Select the View>Options.
2. Clear the check box to Always show Setup Wizards for editing and
click OK.
3. Select the My Toolbars tab.
FIGURE 45: You can change the properties of your toolbar in the Action
Properties dialog.
6. Click the Auto-hide check box if you want to create a
Dockable toolbar that hides when the cursor moves away
from it.
7. Select the toolbar button size.
FIGURE 44: The My Toolbars tab
4. Right-click anywhere on the Toolbars pane and select New
Toolbar from the context menu that appears.
8. Type a name for the toolbar in the Name box.
9. If you want to choose a hot key to trigger this Action, click
on the Hot key box and press the keys you want to use. For
example, press the Shift key, the Control key, and the F8 key
simultaneously.
10. Click OK when you are finished. The Toolbar Button Wizard
appears. See page 42 for more information.
••••
42
Chapter 4
QuicKeys Toolbars
ADDING BUTTONS TO TOOLBARS
You can add buttons to your toolbar by using the Toolbar
Button Wizard or by dragging-and-dropping items to your
toolbar.
USING THE TOOLBAR BUTTON WIZARD
You can open the Toolbar Button Wizard using one of three
methods:
• Right-click a toolbar or toolbar button listed in the My
Toolbars tab and select Toolbar Button Wizard.
• Right-click anywhere in the Toolbars pane of the My Toolbars
tab. When you complete the Action Properties dialog and
press OK, the Toolbar Button Wizard automatically
appears.
• Right-click an existing toolbar and select Toolbar Button
Wizard.
The Toolbar Button Wizard appears after you create a toolbar.
1. Read the introduction page of the Toolbar Button Wizard
and click Next.
2. Select the check box for each program you would like to
display in your toolbar.
FIGURE 46: The Toolbar Button Wizard
3. Click Next.
4. Select the check box for each QuicKeys Action you would
like to display on your toolbar. If you have not created any
QuicKeys Actions, there are no items listed on this page of
the wizard.
5. Click Next.
6. Select the check box for each QuicKeys Action Menu you
would like to display on your toolbar. See page 44 for more
information on Action Menu buttons.
7. Click Next.
8. Read the final wizard page and click Finish.
Your buttons now display on the toolbar.
••••
USING DRAG-AND-DROP FUNCTIONALITY
An easy way to add a button to a toolbar is to select a file or
QuicKeys Action and drag it to an existing toolbar. Drag-anddrop functionality only works for Open File and QuicKeys
Action buttons. It does not work for QuicKeys Action Menu
buttons. Some examples of when you would want to dragand-drop items to toolbars include:
• Drag your weekly report from your My Documents folder
to a QuicKeys toolbar, so you can simply click a toolbar
button next time you need to open it rather than
navigating through countless directories.
43
OPEN FILE BUTTONS
Use Open File buttons to open any file you select. For
example, you can create an Open File button that starts
Acrobat Reader. Open File buttons adopt the icon of the file
you have chosen to open.
To add an Open File button to your toolbar:
1. Right-click an empty area in a toolbar that is already open
on your desktop.
• If you have a File Handler Action on your toolbar that
changes the file extension to .doc, you can drag a .txt file to
the File Handler button to quickly change the file extension.
• Create an Microsoft Word “Open” button. Drag files to
this button to open documents in Microsoft Word.
TYPES OF TOOLBAR BUTTONS
When you create a QuicKeys toolbar, you can choose from
three different types of toolbar buttons: Open File buttons,
QuicKeys Action buttons, or Action Menu buttons.
Open File
button that
opens the
Acrobat Reader
program
QuicKeys Action
button that performs
a specific QuicKeys
Controller Action
Action Menu button
that displays the
options available in
the Advanced Text
Tools Action when
you click the list
arrow
FIGURE 47: In this example, you can see what each type of toolbar button
looks like. An Open File button uses the icon of the file it opens, a
QuicKeys Action button uses the icon of the QuicKeys Action it opens,
and an Action Menu button uses the icon of the QuicKeys Action it opens
along with a drop-down arrow.
FIGURE 48: Right-click an area of an open toolbar that does not contain a
toolbar button to view this menu.
2. Select Open File from the New Button submenu that appears.
3. Select the file you want to open from your toolbar and click
Open.
The toolbar displays the new Open File button.
••••
44
Chapter 4
QuicKeys Toolbars
QUICKEYS ACTION BUTTONS
Use QuicKeys Action buttons to trigger QuicKeys Actions you
have already created. For example, if you have created a
QuicKeys Action that reformats selected text, you can put a
button that triggers that Action on the toolbar.
To add a QuicKeys Action button to your toolbar:
1. Right-click an empty area in a toolbar that is already open
on your desktop.
ACTION MENU BUTTONS
Use Action Menu buttons to place special functions on a
toolbar drop-down menu. QuicKeys provides Action Menu
buttons so you can access a set of related Actions from a single
toolbar button. For example, if you add a QuicKeys Clipbook
Action Menu button to your toolbar, you will see a list of
Clipbook Actions when you click it. You can also choose
options from the Defined Actions and Recent Actions menus.
FIGURE 49: Right-click an area of an open toolbar that does not contain a
toolbar button to view this menu.
2. Select QuicKeys Action from the New Button submenu that
appears.
3. Select an Action from the Add Action to Toolbar window. The
Actions in this window are taken from the Action list
displayed in the My Actions tab of the QuicKeys Editor.
4. Click OK when you have selected the Action.
The toolbar displays the new QuicKeys Action button.
FIGURE 50: Toolbar Action Menus provide shortcuts to your QuicKeys
Actions.
❖
Some Actions are not available as Action Menu
buttons.
Tip for laptop users: The Window Selector Action is
especially useful as an Action Menu button on toolbars. It
provides laptop users with a quick and easy method for
switching between open windows when the Windows tray is
full.
••••
To add an Action Menu button to your toolbar:
1. Right-click an empty area on a toolbar that is already open
on your desktop.
45
• Right-click a QuicKeys toolbar in the My Toolbars tab and
select Show Toolbar in the context menu.
FIGURE 52: Right-click a toolbar in the My Toolbars tab to view this
menu.
FIGURE 51: Right-click an area of an open toolbar that does not contain a
toolbar button to view this menu.
2. Select Action Menu from the New Button submenu that appears.
3. Select an Action from the Add Menu to Toolbar window and
click OK.
The toolbar displays the new Action Menu button.
DISPLAYING TOOLBARS
You can display, or trigger, toolbars using one of the following
methods:
• Press the hot key you assigned to it.
• Open the QuicKeys menu and select it from the Toolbars
submenu.
• Direct the toolbar to display at a certain time using the
Timed Triggers tab in the Action Properties dialog.
• Create a button on one of your toolbars that opens another
toolbar.
EDITING TOOLBARS
You can edit a toolbar by right-clicking it and selecting one of
the options that appears in the context menu. Right-click an
empty area of the toolbar to edit the toolbar, or right-click a
toolbar button to edit the toolbar button.
You can also edit toolbars by changing toolbar style, toolbar
size, toolbar button order, and toolbar scope.
••••
46
Chapter 4
QuicKeys Toolbars
CHANGING THE TOOLBAR STYLE
• Change Dockable toolbars to Floating toolbars by
dragging the Dockable toolbar from the edge of the
screen.
• Change Floating toolbars to Dockable toolbars by
dragging the Floating toolbar to the edge of the screen.
• Change Floating toolbars to Click-N-Go toolbars by
selecting the Toolbars button in the Setup Wizards tab and
selecting Edit an Action in the appropriate wizard page.
Change the selection from Floating to Click-N-Go and
continue through the wizard until you are finished
making changes.
• Change Dockable toolbars to Click-N-Go toolbars by
selecting the Toolbars button in the Setup Wizards tab and
selecting Edit an Action in the appropriate wizard page.
Change the selection from Dockable to Click-N-Go and
continue through the wizard until you are finished
making changes.
• Change Floating toolbars to Pop Out toolbars by selecting
the Toolbars button in the Setup Wizards tab and selecting Edit
an Action in the appropriate wizard page. Change the
selection from Floating to Pop Out and continue through the
wizard until you are finished making changes
ADJUSTING TOOLBAR SIZE
Position your cursor on the edge of the toolbar until the
pointer becomes a sizing arrow. Drag the toolbar to the size
you prefer using the sizing arrow.
❖
You cannot size Dockable toolbars.
REARRANGING TOOLBAR BUTTONS
You can rearrange toolbar buttons on a toolbar by holding
down the Alt key and dragging them to the area of the toolbar
where you want them displayed. If you want to move an
Action menu button, you must press the Alt key as you drag
the button.
CHANGING TOOLBAR SCOPE
Toolbar Scope is the range of operation for a toolbar. For
example, you can choose whether a specific toolbar displays
in only one program, or in all of your programs. You can
change the scope of a toolbar using the Setup Wizards tab, the
Action Properties dialog or drag-and-drop functionality.
❖
It is possible to add toolbar buttons to toolbars that
have a different scope than the toolbar buttons. For
example, a toolbar button representing a Microsoft
Word Action can be added to a toolbar that only
works in Internet Explorer.
Using the Setup Wizard
To use the Setup Wizard to change toolbar scope, select the
Toolbars button in the Setup Wizards tab. Read the pages of each
wizard dialog and follow the instructions. At the beginning of
the Setup Wizard, you are presented with options to Create an
Action, Edit an Action, Delete an Action, or Create/edit multiple Actions. The
setup for each of these options is explained within the Setup
Wizard.
••••
47
5. In the Scope drop-down list, choose when you want the
toolbar to display. See page 22 for more detailed
information on Action Scope.
FIGURE 54: The Action Scope tab
6. Click OK when you are finished.
Using Drag-and-Drop Functionality
FIGURE 53: This dialog appears when you click the Toolbars button in the
Setup Wizards tab and choose to create or edit a Toolbars Action.
Using the Action Properties Dialog
The following instructions assume you have the Always use Setup
Wizards for editing check box cleared in the Options dialog. See
page 30 for more information.
To change the scope of a toolbar using the Action Properties
dialog:
1. Click the My Toolbars tab in the QuicKeys Editor.
2. Right-click one of the toolbars listed on the Toolbars pane.
3. Select Properties from the context menu that appears.
4. In the Action Properties dialog, click the Action Scope tab.
You can change Action scope by dragging Actions from one
Scope tab to another in the My Keyboard, My Toolbars, or My Actions
tabs. For drag-and-drop functionality to be available, other
Scope tabs must already be created. For example, if you want
to change your Reformat Text Action from a Universal Action
to a Microsoft Word Action, Microsoft Word must already be
specified as a program-specific Scope option. In other words,
the tab has to exist before you can drag an Action to it.
••••
48
Chapter 4
QuicKeys Toolbars
CLOSING TOOLBARS
Toolbar Style
There are a variety of methods for closing QuicKeys toolbars,
depending on the toolbar’s style.
Toolbar Style
Dockable
Click-N-Go
How to Close the Toolbar
• Use the Auto-hide feature to
temporarily hide the toolbar.
Floating
• Click the close box in the title bar
of the toolbar.
• Right-click the toolbar in the My
Toolbars tab and select Hide
Toolbar from the context menu
that appears.
• Right-click the QuicKeys menu in
the status area of the taskbar and
select the toolbar from the
Toolbars submenu. The
checkmark that was next to the
toolbar name disappears.
• Right-click the toolbar in the My
Toolbars tab and select Hide
Toolbar from the context menu
that appears.
• Right-click the QuicKeys menu in
the status area of the taskbar and
select the toolbar from the
Toolbars submenu. The
checkmark that was next to the
toolbar name disappears.
• Right-click the toolbar in the My
Toolbars tab and select Hide
Toolbar from the context menu
that appears.
• Right-click the QuicKeys menu in
the status area of the taskbar and
select the toolbar from the
Toolbars submenu. The
checkmark that was next to the
toolbar name disappears.
How to Close the Toolbar
• Click outside the Click-N-Go
toolbar.
Pop Out
• Right-click the toolbar in the My
Toolbars tab and select Hide
Toolbar from the context menu
that appears.
• Right-click the QuicKeys menu in
the status area of the taskbar and
select the toolbar from the
Toolbars submenu. The
checkmark that was next to the
toolbar name disappears.
••••
DELETING TOOLBARS
There are three methods for deleting toolbars:
• Right-click a toolbar and select Delete from the context
menu that appears.
• Select the Toolbar button in the Setup Wizards tab and choose
to Delete an Action on the appropriate Setup Wizard page.
49
EDITING TOOLBAR BUTTONS
Use the Toolbar Button Wizard if you want to be guided
through the process of adding buttons to your toolbar. You
can add one button at a time or add several buttons
simultaneously.
To add a single button to your toolbar:
1. Right-click an area of the open toolbar that does not contain
a toolbar button.
2. Select Open File from the New Button submenu.
3. Navigate through your directories until you find the file
you want to open from your toolbar. After you select the
file, click Open. The file automatically appears in your
toolbar.
To add multiple buttons to your toolbar:
1. Right-click anywhere on an open toolbar.
2. Select Toolbar Button Wizard from the context menu that
appears.
3. Read the introduction page of the wizard that appears and
click Next.
FIGURE 55: You can delete a toolbar from the QuicKeys Setup Wizard.
• Select a QuicKeys toolbar listed in the My Toolbars tab and
select Delete Toolbar from the Edit menu.
••••
50
Chapter 4
QuicKeys Toolbars
ADJUSTING TOOLBAR BUTTON SIZE
To change the size of your toolbar buttons, right-click the area
of an open toolbar that does not contain any toolbar buttons.
Choose whether you want to use Small Buttons or Large Buttons
from the context menu that appears.
CHANGING BUTTON ICONS
QuicKeys uses different button icons for each button type. For
example, Open File buttons use the icons of the files they
open, while QuicKeys Action buttons use the icons of the
QuicKeys Actions they trigger. If you want to change any of
the button icons on your toolbar, you can substitute the
default icons with sample icons installed by QuicKeys or with
your own custom icons or bitmaps.
Using Icons Supplied with QuicKeys
FIGURE 56: The Toolbar Button Wizard introduction page
4. Select the check box(es) for each program you would like
to display in your toolbar.
QuicKeys installs several different sets of icons you can use in
your toolbars. These icons are located in the Program
Files\CE Software\QuicKeys directory.
5. Click Next.
To select sample icons:
6. Select the check box(es) for each QuicKeys Action you
would like to display in your toolbar. If you have not
created any QuicKeys Actions, no items are listed on this
page.
1. Right-click a button on an open toolbar.
7. Click Next.
8. Select the check box(es) for each QuicKeys Action menu
you would like to display on your toolbar
9. Click Next.
10. Read the final wizard page and click Finish. The toolbar
displays with the additional buttons you specified.
2. Select Set icon from file.
3. Select an icon collection from the Icon File drop-down list.
You can choose from workplace icons, multimedia icons,
symbols, or Windows control icons. See the next section for
information on using the Browse button in the Select Icon
dialog.
••••
51
Using Custom Icons
There are two types of custom icons: icons from your
computer programs (such *.exe files, *.dll, and *.ico files) and
icons you create. The following instructions provide general
information on selecting any of these icons for your QuicKeys
toolbar buttons. For information on creating custom icons to
add to your toolbar icon collection, see page 177.
To select custom icons:
1. Right-click a button on an open toolbar.
2. Select Set icon from file.
3. Click the Browse button.
4. Navigate to the icon file you want to use.
5. Choose the icon file you want to use and click Open. The
contents of the icon file you selected appear in the Select Icon
window.
FIGURE 57: Choose an icon from one of the icon sets installed with
QuicKeys.
4. Click the icon you want to use. The icon darkens when it is
selected.
5. Click OK when you have selected the icon you want to use
on your toolbar. The new icon appears on the button you
selected.
❖
Once you select a custom icon file, it displays
permanently as an option on the Icon File drop-down
list.
••••
52
Chapter 4
QuicKeys Toolbars
Using Bitmap Images
Bitmap files use the .bmp file extension, and, unlike icon files,
they cannot be sized. They must use the same dimensions that
were specified when the bitmap was originally created. The
ability to add bitmaps to your toolbars enables you to choose
from a wide variety of graphics for your toolbar buttons, as
long as the graphic is proportional to your screen.
FIGURE 59: In this illustration, the QuicKeys Web Launcher icon is
replaced by a custom bitmap graphic.
To select a bitmap file:
FIGURE 58: The collection of icons shown in this graphic was selected by
clicking the Browse button and navigating to the EXPLORE.EXE file.
1. Right-click a button on an open toolbar.
6. Select an icon from your new icon file and click OK. The
new icon appears on the toolbar you selected.
❖
If you delete, rename, or move custom icons that are
used in toolbars, the toolbar button that used that
icon displays the default icon.
FIGURE 60: Select a standard bitmap file to use as toolbar icons.
2. Select Set icon from bitmap.
3. Navigate to the bitmap graphic you want to use. The
graphic must use the .bmp extension in the file name.
••••
4. Choose the graphic you want to use and click Open.
The new icon appears on the toolbar you selected.
Restoring Icons
Just as many programs have the “Undo” function, QuicKeys
offers the Restore default icon option. This feature allows you to
go back to using the default toolbar button icon for the
selected toolbar button. Just right-click a button on an open
toolbar and select Restore default icon from the context menu that
appears. This is extremely useful if you want to experiment
with different icons because you can return to the default
icons at any time.
DELETING TOOLBAR BUTTONS
To delete a toolbar button, open the toolbar and right-click the
toolbar button you want to delete. Select Delete Button from the
context menu that appears. Select Yes at the Confirm Delete
prompt. The button is deleted from the toolbar.
FIGURE 61: To delete a toolbar button, right-click the toolbar button and
select Delete Button from the menu that appears.
❖
If you delete all your Actions from the My Actions tab,
the toolbar buttons that display QuicKeys Action
menus remain available on the toolbar until each
button is manually deleted or until the entire
toolbar is deleted.
53
••••
54
Chapter 4
QuicKeys Toolbars
CHAPTER 5
CONTROLLING THE QUICKEYS PROGRAM
••••••
The QuicKeys Controller Action gives you special controls
over the QuicKeys program. These controls, or Actions, allow
you to use QuicKeys without interrupting your work. The
Actions at your disposal when you use the QuicKeys
Controller include:
• Open QuicKeys
Editor
• Show QuickReference
Card
• Enable hot keys and
timers
• Disable hot keys and
timers
• Toggle QuicKeys
Status
• Start Recording
[Sequences]
• Stop Recording
[Sequences]
• Toggle Recording
Using the Setup Wizard
To use the Setup Wizard, select the Setup Wizards tab in the
QuicKeys Editor and click the QuicKeys Controller button. Read
the pages of each wizard dialog and follow the instructions.
At the beginning of the Setup Wizard, you are presented with
options to Create an Action, Edit an Action, Delete an Action, or Create/edit
multiple Actions. The setup for each of these options is explained
within the Setup Wizard.
• Exit QuicKeys
This chapter provides information about each of these Actions
as well as instructions for creating, editing, and deleting them.
QUICKEYS CONTROLLER
The QuicKeys Controller Action is invaluable when you use
QuicKeys on a daily basis. This Action automates the
QuicKeys program so it works as smoothly as everything else
that QuicKeys controls.
SETTING UP QUICKEYS CONTROLLER ACTIONS
There are two ways to create or edit QuicKeys Controller
Actions: use the Setup Wizard or use the Action Properties
dialog.
FIGURE 62: This dialog appears when you click the QuicKeys Controller
button in the Setup Wizards tab and choose to create or edit a QuicKeys
Controller Action.
Using the Action Properties Dialog
The Action Properties dialog enables you to edit all of the
options within a QuicKeys Action from a single window. This
capability provides an alternative for users who prefer not to
use the Setup Wizard.
••••
56
Chapter 5
Controlling The QuicKeys Program
The following instructions assume you have the Always use Setup
Wizards for editing check box cleared in the Options dialog. See
page 30 for more information.
To use the Action Properties dialog to create or edit a
QuicKeys Controller Action, follow these steps:
1. Select Create>QuicKeys Tools>QuicKeys Controller.
2. Choose an option from the Action-specific properties pane
of the dialog. The available options are discussed in the
next section of this chapter.
3. In the General tab of the Action Properties dialog, a name is
automatically assigned to the Action. You can use the
assigned Action name or type a different one.
4. If you want to choose a hot key to trigger this Action, click
in the Hot key box and press the key(s) you want to use. For
example, press the Alt key, the Control key, and the F10 key
simultaneously.
5. Click OK. Your new Action immediately appears in the My
Actions tab.
6. Close the QuicKeys Editor and press the hot key you
selected. The Action-specific option you selected should
react immediately to the trigger.
QUICKEYS CONTROLLER OPTIONS
Below is a description of the Action-specific properties
available with the QuicKeys Controller Action.
Open QuicKeys Editor—Opens the QuicKeys Editor.
Show QuickReference Card—Displays the QuickReference
Card. The QuickReference Card is useful when you forget the
hot key for a specific Action and want to look it up quickly.
You can also click an Action listed in the QuickReference Card
to trigger it. Read more about the QuickReference Card on
page 34.
Set status of QuicKeys—Turns QuicKeys hot keys on or off,
or toggles between the on and off state.
FIGURE 63: The QuicKeys Controller Action Properties dialog appears
when you select the QuicKeys Controller Action from the Create menu, or
when you double-click an existing QuicKeys Controller Action in the My
Actions tab.
Enable hot keys and timers—Turns QuicKeys hot keys
and timers on.
Disable hot keys and timers—Turns QuicKeys hot keys
and timers off.
••••
Toggle status—Switches between QuicKeys being on
and off.
Set recording status—Starts or stops recording, or uses the
same trigger to toggle between the start or stop state.
Start recording—Starts recording a Sequence.
Start recording (disable smart recognition)—Starts
recording a Sequence. You should only select this option
if you are having difficulty using Sequences with a
particular program. For example, if your Sequence
cannot complete a Select Menu Action successfully, you
may want to choose this type of recording. When smart
recognition is disabled, Sequences are composed solely
of Mouse Click, Window Select, Window Waits, Type
Text, and Type Keystroke Actions.
Stop recording—Stops the recording process.
Toggle recording—Starts and stops recording.
Exit QuicKeys—Quits the QuicKeys Engine and the
QuicKeys Editor.
DELETING QUICKEYS CONTROLLER ACTIONS
To delete a QuicKeys Controller Action:
1. Select the My Actions tab in the QuicKeys Editor.
2. Right-click the Action you want to delete.
3. Select Delete from the context menu that appears.
4. Choose Yes at the Confirm Delete prompt. The Action is
immediately cleared from the Actions list.
57
••••
58
Chapter 5
Controlling The QuicKeys Program
CHAPTER 6
TYPING WITH QUICKEYS
••••••
Do you ever get tired of typing the same lines of text in E-mail
messages? Or do you routinely need to type special
characters, such as an umlaut, into foreign correspondence?
You probably guessed it—QuicKeys can take care of these
chores for you.
The QuicKeys Type Text, Type Date/Time, Advanced Text
Tools, and Special Characters Actions save you time by typing
the information you need with a QuicKeys trigger. This
chapter provides instructions for using these Actions to type
text, type the date and time in a specified format, insert
symbols and international characters in documents, reformat
selected text, and much more.
Using the Setup Wizard
To use the Setup Wizard, select the Setup Wizards tab in the
QuicKeys Editor and click the Advanced Text Tools button. Read
the pages of each wizard dialog and follow the instructions.
At the beginning of the Setup Wizard, you are presented with
options to Create an Action, Edit an Action, Delete an Action, or Create/edit
multiple Actions. The setup for each of these options is explained
within the Setup Wizard.
USING ADVANCED TEXT TOOLS
The Advanced Text Tools Action is useful when you want to
manipulate blocks of text. For example, you can use this
Action to eliminate those pesky quote marks from your E-mail
messages before you forward the message to another person.
The tasks, or Actions, available using the Advanced Text Tools
include:
• Reformat Text
• Quote Text
• Strip Quote Marks
• Uppercase
FIGURE 64: This dialog appears when you click the Advanced Text Tools
• Lowercase
• Title Case
button in the Setup Wizards tab and choose to create or edit an Advanced
Text Tools Action.
SETTING UP ADVANCED TEXT TOOLS ACTIONS
There are two ways to create and edit QuicKeys Advanced
Text Tools Actions: use the Setup Wizard or use the Action
Properties dialog.
••••
60
Chapter 6
Typing with QuicKeys
Using the Action Properties Dialog
The following instructions assume you have the Always use Setup
Wizards for editing check box cleared in the Options dialog. See
page 30 for more information.
To use the Action Properties dialog to create or edit an
Advanced Text Tools Action, follow these steps:
4. If you want to choose a hot key to trigger this Action, click
in the Hot key box and press the key(s) you want to use. For
example, press the Alt key, the Control key and the R key
simultaneously.
❖
This Action is also a good candidate for a Toolbar
Action Menu trigger. See page 44 for more
information on Action Menu toolbar buttons.
1. Select Create>Text Tools>Advanced Text Tools.
2. Select an Action from the Action drop-down list.
5. Click OK. Your new Action appears in the My Actions tab.
3. In the General tab of the Action Properties dialog, a name is
automatically assigned to the Action. You can use the
assigned Action name or type a different one.
6. Close the QuicKeys Editor and open a word processing
program. Select a block of text and press the hot key you
assigned to this Action. The block of text you selected
changes, depending on what type of text Action you chose.
ADVANCED TEXT TOOLS OPTIONS
This section describes the Action-specific properties available
with the Advanced Text Tools Action.
Reformat text—Removes carriage returns and white space
from selected text. This is especially useful for people who
want to copy text from a Web page or an E-mail message.
FIGURE 65: The Advanced Text Tools Action Properties dialog appears
when you select the Advanced Text Tools Action from the Create menu, or
when you double-click an existing Advanced Text Tools Action in the My
Actions tab.
••••
61
FIGURE 66: The graphic on the left illustrates text copied from a Web
page before it is reformatted. Notice the irregular line breaks. The graphic
on the right illustrates text copied from a Web page after it is reformatted.
Notice the irregular line breaks are gone.
Quote text—Inserts a specified character at the beginning of
each line of selected text. This option is useful when you want
to forward a message from a client to your manager and you
need to distinguish your comments from the customer’s
comments.
Quote—The character you specify for the Quote Text option.
You can specify up to eight characters in this field.
Characters per line—The number of consecutive
characters the Quote Text option counts before inserting a
carriage return.
FIGURE 67: The top graphic shows an E-mail message that contains quote
marks. The bottom graphic shows an E-mail message that has had the
quote marks stripped using the Strip Quote Marks Action.
Strip quote marks—Deletes the quote character inserted at
the beginning of each line of selected text. This option is
useful when E-mail reply text needs to be copied to a word
processing document.
Uppercase—Converts all selected text to uppercase
characters. For example, the sentence you just read would
look like this after selecting it and triggering the Uppercase
option: CONVERTS ALL SELECTED TEXT TO UPPERCASE
CHARACTERS.
Lowercase—Converts all selected text to lowercase
characters. For example, the sentence you just read would
look like this after selecting it and triggering the Lowercase
option: converts all selected text to lowercase characters.
••••
62
Chapter 6
Typing with QuicKeys
Title case—Converts all selected text to title case characters.
For example, the sentence you just read would look like this
after selecting it and triggering the Title Case option: Converts
All Selected Text To Title Case Characters.
Toggle case—Converts lowercase text to uppercase text and
vice versa.
DELETING ADVANCED TEXT TOOLS ACTIONS
To delete an Advanced Text Tools Action:
1. Select the My Actions tab in the QuicKeys Editor.
2. Right-click the Action you want to delete.
SETTING UP QUICK TYPE ACTIONS
There are two ways to create and edit QuicKeys Quick Type
Actions: use the Setup Wizard or use the Action Properties
dialog.
Using the Setup Wizard
To use the Setup Wizard, select the Setup Wizards tab in the
QuicKeys Editor and click the Quick Type button. Read the
pages of each wizard dialog and follow the instructions. At
the beginning of the Setup Wizard, you are presented with
options to Create an Action, Edit an Action, Delete an Action, or Create/edit
multiple Actions. The setup for each of these options is explained
within the Setup Wizard.
3. Select Delete from the context menu that appears.
4. Choose Yes at the Confirm Delete prompt. The Action is cleared
from the Actions list.
USING QUICK TYPE
With Quick Type, you can specify typed abbreviations for
long words, names, or phrases up to 10 KB. All you need to do
is build a glossary of the words you use and then choose
which abbreviations you want to use for them. When a
character key is followed by a tab, space, or return key, the
character represented by the key is replaced by the word or
name you specified in the Quick Type Action. For example,
you could type Q+space and the words “CE Software, Inc.”
would be typed into your document.
❖
❖
If you accidentally type the wrong Quick Type
abbreviation, you can cancel the Action by pressing
Ctrl+Esc.
For best performance, limit Quick Type text to 2 KB.
FIGURE 68: This dialog appears when you click the Quick Type button in
the Setup Wizards tab and choose to create or edit a Quick Type Action.
Using the Action Properties Dialog
The following instructions assume you have the Always use Setup
Wizards for editing check box cleared in the Options dialog. See
page 30 for more information.
••••
To use the Action Properties dialog to create or edit a Quick
Type Action, follow these steps:
1. Select Create>Text Tools>Quick Type.
2. Select an Action from the Action drop-down list.
3. In the General tab of the Action Properties dialog, a name is
automatically assigned to the Action. You can use the
assigned Action name or type a different one.
63
Enable Quick Type—Turns on Quick Type functionality.
When QuickType is enabled, the Quick Type icon appears in
the Tray. Right-click the Quick Type icon in the Tray to display
the Quick Type menu.
Disable Quick Type—Turns off Quick Type functionality.
Toggle Quick Type—Alternately enables and disables Quick
Type functionality.
Edit Quick Type glossary—Opens the Quick Type Glossary
window shown in Figure 70.
The Quick Type Glossary
The Quick Type glossary contains all the words, phrases, or
names you want to type when you trigger a Quick Type
Action.
To add text to your glossary:
1. Click the Edit glossary button in the Quick Type Setup Wizard
or Action Properties dialog. (See Figure 68 and Figure 69.)
2. In the Quick Type Glossary window, click the Add button.
FIGURE 69: The Quick Type Action Properties dialog appears when you
select the Quick Type Action from the Create menu, or when you doubleclick an existing Quick Type Action in the My Actions tab.
4. Assign a trigger to the Action.
5. Click OK. Your new Action appears in the My Actions tab.
6. Close the QuicKeys Editor.
QUICK TYPE OPTIONS
This section describes the Action-specific properties available
with the Quick Type Action.
FIGURE 70: The Quick Type Glossary window
••••
64
Chapter 6
Typing with QuicKeys
3. In the Edit Glossary Entry dialog, specify the text key that
will trigger the Action, the application (scope) in which the
Action will occur, and the text you want the Action to type.
SETTING UP CHECK SPELLING ACTIONS
There are two ways to create and edit QuicKeys Check
Spelling Actions: use the Setup Wizard or use the Action
Properties dialog.
Using the Setup Wizard
To use the Setup Wizard, select the Setup Wizards tab in the
QuicKeys Editor and click the Check Spelling button. Read the
pages of each wizard dialog and follow the instructions. At
the beginning of the Setup Wizard, you are presented with
options to Create an Action, Edit an Action, Delete an Action, or Create/edit
multiple Actions. The setup for each of these options is explained
within the Setup Wizard.
FIGURE 71: The Edit Glossary Entry dialog
4. Click OK to return to the Quick Type Glossary window.
5. Click Done in the Quick Type Glossary window when you
are finished.
DELETING QUICK TYPE ACTIONS
To delete a Quick Type Action:
1. Select the My Actions tab in the QuicKeys Editor.
2. Right-click the Action you want to delete.
3. Select Delete from the context menu that appears.
4. Choose Yes at the Confirm Delete prompt. The Action is cleared
from the Actions list.
USING CHECK SPELLING
With the Check Spelling Action you can check the spelling of a
selected block of text in virtually any document.
❖
Only one personal dictionary may be selected for
each Check Spelling Action.
FIGURE 72: This dialog appears when you click the Check Spelling
button in the Setup Wizards tab and choose to create or edit a Check
Spelling Action.
Using the Action Properties Dialog
The following instructions assume you have the Always use Setup
Wizards for editing check box cleared in the Options dialog. See
page 30 for more information on the Options dialog.
••••
65
5. Click OK. Your new Action appears in the My Actions tab.
To use the Action Properties dialog to create or edit a Check
Spelling Action, follow these steps:
1. Select Create>Text Tools>Check Spelling.
2. Select an Action and a dictionary.
3. In the General tab of the Action Properties dialog, a name is
automatically assigned to the Action. You can use the
assigned Action name or type a different one.
Close the QuicKeys Editor and open a word processing
program. Select a block of text and press the hot key you
assigned to this Action. The block of text you selected is
checked for spelling errors.
CHECK SPELLING OPTIONS
Below is a description of the Action-specific properties
available with the Check Spelling Action.
Check spelling—Checks the spelling of selected text with the
specified dictionary.
Add words to dictionary—Adds words to the QuicKeys
Check Spelling dictionary.
FIGURE 73: The Check Spelling Action Properties dialog appears when
you select the Check Spelling Action from the Create menu, or when you
double-click an existing Check Spelling Action in the My Actions tab.
4. Assign a trigger to the Action.
••••
66
Chapter 6
Typing with QuicKeys
Edit dictionaries—Changes the words in the Check Spelling
dictionaries.
DELETING CHECK SPELLING ACTIONS
To delete a Check Spelling Action:
1. Select the My Actions tab in the QuicKeys Editor.
2. Right-click the Action you want to delete.
3. Select Delete from the context menu that appears.
4. Choose Yes at the Confirm Delete prompt. The Action is cleared
from the Actions list.
SPECIAL CHARACTERS
The Special Characters Action is useful when you want to
type a specific symbol or international character with a trigger
you specify. International symbols and characters are the
accents, diacriticals, and special alphabetic characters
required for punctuation and non-English words. Since not
everyone uses these symbols and characters, they are not easy
to use in the Windows operating system.
FIGURE 74: The Personal Dictionaries dialog
Dictionary options—Chooses which language options you
want to use for your default dictionary.
For example, if you wanted to type a trademark symbol (™),
you would usually have to press Alt+0153. This is a lengthy
shortcut key to remember, especially if you need to remember
several of these types of “shortcuts.” QuicKeys makes it much
easier to use special characters by providing a method for
assigning simple triggers to the characters you need to use.
For instance, you can use QuicKeys to make Ctrl+M type the
trademark symbol rather than using Alt+0153.
QuicKeys can type characters and symbols from the font you
have selected. By default, QuicKeys uses the system font.
SETTING UP SPECIAL CHARACTERS ACTIONS
There are two ways to create or edit QuicKeys Type Text
Actions: use the Setup Wizard or use the Action Properties
dialog.
FIGURE 75: The Language Options window
••••
Using the Setup Wizard
2. Select the font you want to view.
To use the Setup Wizard, select the Setup Wizards tab in the
QuicKeys Editor and click the Special Characters button. Read the
pages of each wizard dialog and follow the instructions. At
the beginning of the Setup Wizard, you are presented with
options to Create an Action, Edit an Action, or Delete an Action. The
setup for each of these options is explained within the Setup
Wizard.
3. Select the character you want to type.
FIGURE 76: This dialog appears when you click the Special Characters
button in the Setup Wizards tab and choose to create or edit a Special
Characters Action.
Using the Action Properties Dialog
The following instructions assume you have the Always use Setup
Wizards for editing check box cleared in the Options dialog. See
page 30 for more information.
To use the Action Properties dialog to create or edit a Special
Characters Action, follow these steps:
1. Select Create>Text Tools>Special Characters.
67
4. In the General tab of the Action Properties dialog, type a
name for this Action in the Name box.
FIGURE 77: Select the character you want to type in the Action-specific
properties pane. If you want to view this character table in a pop-up list
when you select the Special Characters trigger, click the Select character
from a popup list check box.
5. If you want to choose a hot key to trigger this Action, click
in the Hot key box and press the key(s) you want to use. For
example, press the Alt key, the Control key, and the - key
simultaneously.
••••
68
Chapter 6
Typing with QuicKeys
6. Click OK. Your new Action appears in the My Actions tab.
7. Close the QuicKeys Editor and open a word processing
program. Position your cursor in the document and press
the hot key you assigned to this Action. The special
character you specified is typed into the open document.
SPECIAL CHARACTERS OPTIONS
This section describes the Action-specific properties available
with the Special Characters Action.
Sample font—Changes the symbols based on the selected
font. The font is only for sample viewing; the character you
select will be inserted using the font already chosen in the
receiving program.
Select the character to type—This option is available in the
Setup Wizard. Simply click which character you would like to
type using this Action. Notice that uppercase and lowercase
characters are listed separately.
Select character from a popup list—Choose this option when
you want a table of special characters to appear when you
select the Special Characters trigger. For example, if you are
typing a letter to your business partner in France and you
trigger this option, you can select the international character
used in his name from the character table. The table
disappears and the international character is automatically
inserted into your letter.
DELETING SPECIAL CHARACTERS ACTIONS
To delete a Special Characters Action:
1. Select the My Actions tab in the QuicKeys Editor.
2. Right-click the Action you want to delete.
3. Select Delete from the context menu that appears.
4. Choose Yes at the Confirm Delete prompt. The Action is cleared
from the Actions list.
TYPING THE DATE AND TIME
The Type Date/Time Action is useful when you want to insert
the date and/or time into documents. For example, you can
use this Action to insert the date and time in your weekly
reports.
SETTING UP TYPE DATE/TIME ACTIONS
There are two ways to create and edit QuicKeys Type Date/
Time Actions: use the Setup Wizard or use the Action
Properties dialog.
Using the Setup Wizard
To use the Setup Wizard, select the Setup Wizards tab in the
QuicKeys Editor and click the Type Date/Time button. Read the
pages of each wizard dialog and follow the instructions. At
the beginning of the Setup Wizard, you are presented with
options to Create an Action, Edit an Action, Delete an Action, or Create/edit
multiple Actions. The setup for each of these options is explained
within the Setup Wizard.
••••
69
3. In the General tab of the Action Properties dialog, a name is
automatically assigned to the Action. You can use the
assigned Action name or type a different one.
FIGURE 78: This dialog appears when you click the Type Date/Time
button in the Setup Wizards tab and choose to create or edit a Type Date/
Time Action.
Using the Action Properties Dialog
The following instructions assume you have the Always use Setup
Wizards for editing check box cleared in the Options dialog. See
page 30 for more information.
To use the Action Properties dialog to create or edit a Type
Date/Time Action, follow these steps:
1. Select Create>Text Tools>Type Date/Time.
2. Select the Date/Time format you want to use from the
Format drop-down list.
FIGURE 79: The Type Date/Time Action Properties dialog appears when
you select the Type Date/Time Action from the Create menu, or when you
double-click an existing Type Date/Time Action in the My Actions tab.
4. If you want to trigger this Action from the QuicKeys menu,
click the Include in QuicKeys menu check box.
5. Click OK. Your new Action appears in the My Actions tab.
6. Close the QuicKeys Editor.
7. Open a document in a word processing program.
8. Trigger the Type Date/Time Action you created. The date
and time you specified is typed into the open document.
••••
70
Chapter 6
Typing with QuicKeys
TYPE DATE/TIME OPTIONS
This section describes the Action-specific properties available
with the Type Date/Time Action.
Custom Format—If you select Custom Format from the Format list,
the Format Builder button is enabled.
Format—This option is available in the Action Properties
dialog. The Format drop-down list displayed in this dialog
contains several different formats you can choose from when
you create a Date/Time Action. When you select a format, a
sample of how that format will look appears in the Sample
field.
Date/Time Abbreviation
Meaning
mm
month
dd
day
yyyy
year
dow
day of the week
hh
hour
mm
minute
ss
second
ap
AM/PM
24 hour
military time
FIGURE 80: Use the Custom Date/Time Builder to build your own date
and time formats.
Custom Format Builder—Clicking the Format Builder button in
either the Setup Wizard or the Action Properties dialog
displays a Custom Date/Time Builder dialog. Select a format from
the left column of the window and click the Add button to
move it to the right column. Rearrange the order of the
selected formats using the Up and Down buttons. Click the Type
in ALL CAPS check box to capitalize all your date and time
characters. A sample of the combined formats you select
displays at the bottom of the window.
••••
Notice in Figure 80 that you must specify commas, colons,
dashes, slashes, and spaces in your formats if you want to use
them in your custom format. Click OK in the Custom Date/Time
Builder window when you are finished. Your new format
displays in the Sample field of the Action Properties dialog.
If you combine these custom
formats in the Custom Date/
Time Builder...
Your Date/Time Action
types something similar to
this...
Full month name+space+Day of
month+space+Two digit
year+space+slash+space+Hour in
12hr format+space+Minute as
number
October 04 98 / 03 45
Full weekday
name+colon+space+Abbreviated
month name+space+Day of
month+colon+space+Four digit year
Sunday: Oct 04: 1998
71
4. Choose Yes at the Confirm Delete prompt. The Action is cleared
from the Actions list.
TYPING TEXT
The Type Text Action is useful when you want to type
frequently-used text with a simple trigger. For example, you
can use this Action to type your signature line in E-mail
messages or to enter common information into databases.
SETTING UP TYPE TEXT ACTIONS
There are four ways to create QuicKeys Type Text Actions: use
the Setup Wizard, use the Action Properties dialog, use dragand-drop functionality, or cut and paste.
Hour in 12hr format+colon+Minute as 03:51:27 PM / Central Daylight
Time
number+colon+Second as
number+space+AM/PM
indicator+space+slash+space+Time
zone
Standard Formats—This radio button is available in the Setup
Wizard. The scroll list displays the formats you can choose
from when you create a Date/Time Action. When you select a
format, a sample of how that format will look displays at the
bottom of the wizard screen.
DELETING TYPE DATE/TIME ACTIONS
To delete a Type Date/Time Action:
1. Select the My Actions tab in the QuicKeys Editor.
2. Right-click the Action you want to delete.
3. Select Delete from the context menu that appears.
Using the Setup Wizard
To use the Setup Wizard, select the Setup Wizards tab in the
QuicKeys Editor and click the Type Text button. Read the pages
of each wizard dialog and follow the instructions. At the
beginning of the Setup Wizard, you are presented with
options to Create an Action, Edit an Action, or Delete an Action. The
setup for each of these options is explained within the Setup
Wizard.
••••
72
Chapter 6
Typing with QuicKeys
3. In the General tab of the Action Properties dialog, a name is
automatically assigned to the Action. You can use the
assigned Action name or type a different one.
FIGURE 81: This dialog appears when you click the Type Text button in
the Setup Wizards tab and choose to create or edit a Type Text Action.
Using the Action Properties Dialog
The following instructions assume you have the Always use Setup
Wizards for editing check box cleared in the Options dialog. See
page 30 for more information.
To use the My Actions tab to create or edit a Type Text
Action, follow these steps:
1. Select Create>Text Tools>Type Text.
2. Type the text you want to use when you trigger this Action.
❖
Press Ctrl+Tab to insert a tab in the text you type.
❖
The text box can hold up to 10 KB of text, or up to
10,000 characters.
FIGURE 82: The Type Text Action Properties dialog appears when you
select the Type Text Action from the Create menu, or when you doubleclick an existing Type Text Action in the My Actions tab.
4. If you want to choose a hot key to trigger this Action, click
in the Hot key box and press the key(s) you want to use. For
example, press the Alt key, the Control key, and the S key
simultaneously.
5. Click OK. Your new Action appears in the My Actions tab.
6. Close the QuicKeys Editor and open your E-mail program.
Position your cursor in the document and press the hot key
or other trigger you assigned to this Action. The text you
specified is typed into the open document.
••••
Using Drag-and-Drop Functionality
You can select text from one window and drag-and-drop it in
the QuicKeys Editor to create a Type Text Action. When you
drop the selected text onto one of the Editor tabs, the Action
Properties dialog (shown in Figure 82) appears. The text you
dropped onto the QuicKeys Editor appears in the Action-specific
properties area of the dialog. You can edit the text in this dialog
or you can assign the Type Text Action a trigger, such as a hot
key or a place on an existing toolbar. Click OK in the Action
Properties dialog when you are finished creating your Type
Text Action.
Cutting and Pasting Text
You can cut selected text from one window and paste it into
the Setup Wizards, My Keyboard, or My Actions tabs of the QuicKeys
Editor.
To create a Type Text Action using cut and paste:
1. Select a block of text.
2. Copy it to the Clipboard.
3. Right-click in the Setup Wizards tab, the My Keyboard tab, or the
My Actions tab of the QuicKeys Editor and select Paste from
the context menu that appears.
A new Type Text Action appears in the My Actions tab of the
QuicKeys Editor. You must assign the Type Text Action a
trigger before you can use it.
EDITING TYPE TEXT ACTIONS
To edit a Type Text Action:
1. Select the My Actions tab in the QuicKeys Editor.
2. Double-click the Action you want to edit.
3. Make the necessary changes in the Action Properties dialog
and click OK.
73
DELETING TYPE TEXT ACTIONS
To delete a Type Text Action:
1. Select the My Actions tab in the QuicKeys Editor.
2. Right-click the Action you want to delete.
3. Select Delete from the context menu that appears.
4. Choose Yes at the Confirm Delete prompt. The Action is cleared
from the Actions list.
••••
74
Chapter 6
Typing with QuicKeys
CHAPTER 7
WORKING WITH FILES AND FOLDERS
••••••
All computer users must learn how to manipulate files and
folders early in their computer experience. Navigating
through countless directories searching for that one file soon
becomes second nature out of necessity, but such tasks can
also become quite time-consuming. QuicKeys can automate
these tedious processes for you with Actions such as File
Handler, Folders, Open, Recent Files, and Zip Files.
FILE HANDLER
The File Handler Action is useful when you want to rename,
move, or edit the attributes of selected files. Attributes can be
anything from read/write access to file names. This feature is
extremely valuable if you ever work with large batches of
files.
For example, some Web sites make heavy use of scanned or
digital photographs. Often, these are delivered in large
batches to webmasters to be posted on the Web. QuicKeys
makes it possible to rename these images en masse with
numerical or alphabetical modifiers, so that files named
001.jpg, 002.jpg, etc., can me renamed chicago001.jpg,
chicago002.jpg, etc. This helps bring order to the batch of
images. Additionally, files can be locked and unlocked by
QuicKeys with a single hot key or mouse click. This is
valuable when you want to lock a batch of original images to
ensure that modifications are made only to the copies.
All of the tasks, or Actions, available with File Handler
include:
• Set attributes
• Set extensions
• Move
• Copy
• Rename
• Delete
• Open with
SETTING UP FILE HANDLER ACTIONS
There are two ways to create or edit QuicKeys File Handler
Actions: use the Setup Wizard or use the Action Properties
dialog. When you are setting up File Handler Actions, you can
use wildcards (such as * and ?) in the Specified file or folder text
box.
••••
76
Chapter 7
Working With Files and Folders
Using the Setup Wizard
Using the Action Properties Dialog
To use the Setup Wizard, select the Setup Wizards tab in the
QuicKeys Editor and click the File Handler button. Read the
pages of each wizard dialog and follow the instructions. At
the beginning of the Setup Wizard, you are presented with
options to Create an Action, Edit an Action, or Delete an Action. The
setup for each of these options is explained within the Setup
Wizard.
The following instructions assume you have the Always use Setup
Wizards for editing check box cleared in the Options dialog. See
page 30 for more information
To use the Actions Properties dialog to create or edit a File
Handler Action, follow these steps:
1. Select Create>File & Folder Tools>File Handler.
2. Choose an option from the Action-specific properties pane
of the dialog. For example, choose to Mark Files Read-only.
3. In the General tab of the Action Properties dialog, a name is
automatically assigned to the Action. You can use the
assigned Action name or type a different one.
FIGURE 83: This dialog appears when you click the File Handler button
in the Setup Wizards tab and choose to create or edit a File Handler
Action.
••••
77
7. Select a group of files or folders and press the hot key or
other trigger you assigned to this Action.
TRIGGERING FILE HANDLER ACTIONS
After you have specified your File Handler options, you can
trigger your File Handler Actions several ways:
• You can right-click any file on your hard drive and select a
File Handler Action from the context menu that appears. A
File Handler Action is only available from a context menu
when you have created one using the QuicKeys Editor.
• If you have a File Handler Action Menu on a QuicKeys
toolbar, you can drag files to the Action Menu toolbar
button to move or copy the files, set the file extension, etc.
• You can press the hot key you assigned to the File Handler
Action to trigger it.
• You can set up a timed trigger to start the File Handler
Action.
• You can place File Handler Actions in the QuicKeys menu
and select the Action from the menu.
FILE HANDLER OPTIONS
Below is a description of the Action-specific properties
available with the File Handler Action.
FIGURE 84: The File Handler Action Properties dialog appears when you
select the File Handler button from the Create menu, or when you doubleclick an existing File Handler Action in the My Actions tab.
4. If you want to choose a hot key to trigger this Action, click
in the Hot key box and press the key(s) you want to use. For
example, press the Shift key, the Control key, and the S key
simultaneously.
5. Click OK. Your new Action appears in the My Actions tab.
6. Close the QuicKeys Editor.
Set attributes—Alters the current selection or the specified
file or folder. You can change one or many file and folder
attributes such as read-only, hidden, system, archive, date, or
time. Select Read-only so files cannot be edited. Choose Hidden to
hide the selected file or folder. Select System to set the file or
folder to one that is exclusively used by the operating system.
Select Archive to mark the file or folder for backup or removal.
••••
78
Chapter 7
Working With Files and Folders
Set extension—Appends a specified extension to the file
names of currently selected or pre-specified files and folders.
File extensions are the three-characters appended to selected
files. Changing file extensions is useful when you want the
selected file to be recognized by a different program.
❖
You do not have to type the period character when
specifying the file extension; QuicKeys
automatically inserts it.
FIGURE 86: This dialog appears when you have the “Ask for extension”
check box selected.
Move—Moves the current selection or pre-specified files or
folders to a destination you specify.
If using wildcards, ignore subfolders—Directs QuicKeys
not to move subfolders if a wildcard is used in the folder
name. A wildcard is a character, such as an asterisk (*) or a
question mark (?), that can be used to represent one or may
characters.
FIGURE 85: Use the lower half of the Action Properties dialog to specify
Action-specific options.
Ask for extension...—Prompts you for a file extension
when you trigger the Set extension Action. You must
supply an extension composed of up to three characters
when the prompt appears. For example, you would type ico
and click OK if you wanted the selected files to be
recognized as icon files.
••••
79
Copy—Moves the current selection or pre-specified files or
folders to one of the locations specified in the Copy drop-down
list. Select To Windows Desktop, Up One Folder, Out of All Folders, or To
Specified Folder.
If using wildcards, ignore subfolders—Directs QuicKeys
not to move subfolders if a wildcard is used in the folder
name. A wildcard is a character, such as an asterisk (*) or a
question mark (?), that can be used to represent one or may
characters.
FIGURE 87: Action-specific properties for moving files or folders
Move To—Moves the selected files or folders to one of the
locations specified in the Move drop-down list. Select To
Windows Desktop, Up one folder, Out of all folders, and To specified
folder,.
Browse—Specifies where the selected files will be moved.
The location you specify displays in the Folder text box.This
option is only available when the To specified folder option is
selected in the Move list.
❖
Be very careful when you choose to move large
batches of files to the root level of your hard drive.
Due to the way the Windows operating system
stores filenames, you may run into a character limit
if you copy files with long file names to the root
level of your drive.
FIGURE 88: Action-specific properties for copying files or folders
Rename—Renames the currently selected or pre-specified
files or folders using the naming conventions you choose.
Delete—Deletes currently selected or pre-specified files or
folders. You can choose to move files/folders to the Recycle
Bin or you can choose to delete them permanently.
••••
80
Chapter 7
Working With Files and Folders
Display “Open with...” dialog—Displays the Windows
“Open With” dialog for the currently selected file or prespecified file. For example, this option may be useful for textbased files that you alternately open in Notepad and
Microsoft Word.
Using the Rename Files or Folders Action
The following section only provides information on the
various renaming options available in the Action-specific
properties pane of the Action Properties dialog.
To rename files and folders using prefix text:
1. Select Rename Files or Folders in the Action drop-down list of the
File Handler’s Action Properties dialog.
2. Select Prefix Text in the Style drop-down menu.
3. Type the text you want to use as a prefix in the names of
the selected files or folders. An example of what the
renamed files/folders will look like displays at the bottom
of the dialog.
FIGURE 89: Prefix text options
4. Click OK when you are finished.
To rename files and folders using a prefix variable:
1. Select Rename Files or Folders in the Action drop-down list of the
File Handler’s Action Properties dialog.
2. Select Prefix Variable in the Style drop-down list.
3. Choose the variable you want to use as a prefix in the
names of the selected files or folders. An example of what
the renamed files/folders will look like displays at the
bottom of the dialog.
••••
81
4. Choose the variable you want to use from one of the Variable
radio buttons. An example of what the renamed files/
folders will look like displays at the bottom of the dialog.
FIGURE 90: The Prefix Variable option
4. Click OK when you are finished.
To rename files and folders using a variable and text:
FIGURE 91: The Variable Text option
1. Select Rename Files or Folders in the Action drop-down list of the
File Handler’s Action Properties dialog.
5. Click OK when you are finished.
2. Select Variable & Text in the Style drop-down list.
1. Select Rename Files or Folders in the Action drop-down list of the
File Handler’s Action Properties dialog.
3. Type the text you want to use in the Text box.
To rename files and folders using text and a variable:
2. Select Text & Variable in the Style drop-down list.
3. Type the text you want to use in the Text box.
4. Choose the variable you want to use from one of the Variable
radio buttons.
An example of what the renamed files/folders will look like
displays at the bottom of the dialog.
••••
82
Chapter 7
Working With Files and Folders
FIGURE 92: The Text & Variable option
5. Click OK when you are finished.
To rename files and folders by appending text:
1. Select Rename Files or Folders in the Action drop-down list of the
File Handler’s Action Properties dialog.
2. Select Append Text in the Style drop-down list.
3. In the Text box, type the text you want to add to the end of
the file or folder name. An example of what the renamed
files/folders will look like displays at the bottom of the
dialog.
FIGURE 93: The Append Text option
4. Click OK when you are finished.
To rename files and folders by appending a variable:
1. Select Rename Files or Folders in the Action drop-down list of the
File Handler’s Action Properties dialog.
2. Select Append Variable in the Style drop-down list.
3. Select the variable you want to add to the end of the file or
folder name from the Variable radio buttons. An example of
what the renamed files/folders will look like displays at
the bottom of the dialog.
••••
83
3. Type the name you want to use for the currently selected or
pre-specified file or folder.
FIGURE 94: The Append Variable option
4. Click OK when you are finished.
To rename files and folders using a fixed name:
1. Select Rename Files or Folders in the Action drop-down list of the
File Handler’s Action Properties dialog.
2. Select Fixed Name in the Style drop-down menu.
FIGURE 95: Fixed name options
4. Click OK when you are finished.
DELETING FILE HANDLER ACTIONS
To delete a File Handler Action:
1. Select the My Actions tab in the QuicKeys Editor.
2. Right-click the Action you want to delete.
3. Select Delete from the context menu that appears.
4. Choose Yes at the Confirm Delete prompt. The Action is cleared
from the Actions list.
••••
84
Chapter 7
Working With Files and Folders
FOLDERS
SETTING UP FOLDERS ACTIONS
The Folders Action is useful if you frequently switch between
folders during the course of your computer work. For
example, if you are a Webmaster, you know that Web sites
contain hundreds, if not thousands, of files and dozens of
directories. Maneuvering to open or save a file within the
Open and Save dialogs requires either a lot of mouse
movement or keyboarding. QuicKeys chops through this
productivity killer by allowing you to set up shortcuts to
directories. With a simple Folders hot key you can move deep
into the directory hierarchy and save countless hours.
When you set up the Folders Action, you can choose to switch
between the following pre-defined and user-defined folders
during the course of your work:
There are two ways to create or edit QuicKeys Folders
Actions: use the Setup Wizard or use the Action Properties
dialog.
Using the Setup Wizard
To use the Setup Wizard, select the Setup Wizards tab in the
QuicKeys Editor and click the Folders button. Read the pages of
each wizard dialog and follow the instructions. At the
beginning of the Setup Wizard, you are presented with
options to Create an Action, Edit an Action, Delete an Action, or Create/edit
multiple Actions. The setup for each of these options is explained
within the Setup Wizard.
Pre-defined Actions
• Windows folder
• Windows Temporary
folder
• Windows Desktop
folder
• My Documents
folder
• Favorites folder
• Application Data
folder
• Up one folder level
User-defined Actions
• Open a specified
folder
• Create a folder
FIGURE 96: This dialog appears when you click the Folders button in the
Setup Wizards tab and choose to create or edit a Folders Action.
••••
85
Using the Action Properties Dialog
The following instructions assume you have the Always use Setup
Wizards for editing check box cleared in the Options dialog. See
page 30 for more information.
To use the Action Properties dialog to create or edit a Folders
Action, follow these steps:
1. Select Create>File & Folder Tools>Folders.
2. Choose an option from the Action-specific properties pane
of the dialog.
3. In the General tab of the Action Properties dialog, a name is
automatically assigned to the Action. You can use the
assigned Action name or type a different one.
FIGURE 97: The Folders Action Properties dialog appears when you
select the Folders Action from the Create menu, or when you double-click
an existing Folders Action in the My Actions tab.
4. If you want to choose a hot key to trigger this Action, click
in the Hot key box and press the keys you want to use. For
example, press the Shift key, the Alt key, and the F8
simultaneously.
5. Click OK. Your new Action appears in the My Actions tab.
6. Close the QuicKeys Editor.
7. Open a word processing program and select the Save As
option.
••••
86
Chapter 7
Working With Files and Folders
8. Press the Folders hot key. The folder you selected appears
within the standard Save dialog or the folder you specified
will be created.
Windows folder—Opens the Windows or WINNT folder
(depending on your operating system) or switches to your
Windows folder when any standard Save or Open dialog is
displayed.
TRIGGERING FOLDERS ACTIONS
After you have set up your Folders options, you can trigger
them several different ways:
• Right-click any file on your hard drive and select a Folders
Action from the context menu that appears. A Folders
Action is only available from the context menu when you
have created one using the QuicKeys Editor.
• Press the hot key you assigned to the Folders Action to
trigger it.
• Set up a timed trigger to start the Folders Action.
• Place Folders Actions in the QuicKeys menu and select the
Action from the menu.
• Add a Folders Action to a QuicKeys toolbar and trigger the
Action from the toolbar.
FOLDERS OPTIONS
Below is a description of the Action-specific properties
available with the Folders Action.
FIGURE 98: The Folders options in the Action Properties dialog
Windows Temporary folder—Opens the Windows
Temporary folder or switches to your Windows Temporary
folder when any standard Save or Open dialog is displayed.
Windows Desktop folder—Opens the Windows Desktop
folder or switches to your desktop folder when any standard
Save or Open dialog is displayed.
••••
My Documents folder—Opens the My Documents folder or
switches to your My Documents folder (or the Personal folder
if you are using NT) when any standard Save or Open dialog is
displayed.
Favorites folder—Opens the Favorites folder or switches to
your Favorites folder when any standard Save or Open dialog is
displayed.
Application Data folder—Opens the Application Data folder
or switches to your Application Data folder when any
standard Save or Open dialog is displayed.
Up One folder—Switches to the folder above the level of the
folder you are viewing.
Open a specified folder—Switches to the folder you specified
when you created the Action.
Create a folder—Creates a folder in the active Explorer
window or in the directory you specify. The new folder has
the name you provide in the text field.
87
THE OPEN ACTION
The Open Action is useful when you want to open programs,
documents, control panels, or other types of files with a
trigger. For example, you can use this Action to open a report
you frequently need to edit.
SETTING UP THE OPEN ACTION
There are four ways to create QuicKeys Open Actions: use the
Setup Wizard, use the Action Properties dialog, use drag-anddrop functionality, or use cut and paste.
Using the Setup Wizard
To use the Setup Wizard, select the Setup Wizards tab in the
QuicKeys Editor and click the Open button. Read each of the
dialogs in the Setup Wizard and follow the instructions. At the
beginning of the Setup Wizard, you are presented with
options to Create an Action, Edit an Action, Delete an Action, or Create/edit
multiple Actions. The setup for each of these options is explained
within the Setup Wizard.
DELETING FOLDERS ACTIONS
To delete a QuicKeys Folders Action:
1. Select the My Actions tab in the QuicKeys Editor.
2. Right-click the Action you want to delete.
3. Select Delete from the context menu that appears.
4. Choose Yes at the Confirm Delete prompt. The Action is cleared
from the Actions list.
FIGURE 99: This dialog appears when you click the Open button in the
Setup Wizards tab and choose to create or edit an Open Action.
••••
88
Chapter 7
Working With Files and Folders
Using the Action Properties Dialog
The following instructions assume you have the Always use Setup
Wizards for editing check box cleared in the Options dialog. See
page 30 for more information.
4. Click in the Hot key box and press the key(s) you want to use
to trigger the Open Action. For example, press the Alt key,
the Ctrl key, and the 1 key simultaneously.
To use the Action Properties dialog to create or edit an Open
Action, follow these steps:
1. Select Create>File & Folder Tools>Open.
2. Choose option(s) from the Action-specific properties pane
of the dialog. For example, choose Program from the Type
drop-down list and choose a program to open from the Path
drop-down list.
3. In the General tab of the Action Properties dialog, a name is
automatically assigned to the Action. You can use the
assigned Action name or type a different one.
FIGURE 100: The Open Action Properties dialog appears when you select
the Open button from the Create menu, or when you double-click an
existing Open Action in the My Actions tab.
❖
This Action is also a good candidate for a timed
trigger if you open programs, such as E-mail
software, at the same time each day. See page 25 for
more information on timed triggers.
5. Click OK. Your new Action appears in the My Actions tab.
6. Close the QuicKeys Editor and press the hot key you
assigned to this Action. The file or program you selected
opens.
••••
89
Using Drag-and-Drop Functionality
You can drag-and-drop programs, documents, control panels,
or other types of files to the QuicKeys Editor’s Setup Wizards tab
to quickly create an Open Action. When you drop one file onto
the Setup Wizards tab, the Action Properties dialog (shown in
Figure 100) appears. The file you dropped onto the QuicKeys
Editor appears in the Path box of the Action-specific properties area
of the dialog. You can edit the text in this dialog or you can
assign it a trigger, such as a hot key.
Program—When you choose to open a program with
QuicKeys, you are presented with a list of programs from
which to choose. That list is populated by the programs in
your Start menu.
When you drop multiple files onto the Setup Wizards tab, the files
are automatically made into Open Actions that display in the
My Actions tab of the QuicKeys Editor. You can double-click
these new Open Actions to assign triggers to them, such as a
timed trigger or a place in the QuicKeys Menu.
Control Panel—When you choose to open a control panel
with QuicKeys, you are presented with a list of all the control
panels installed on your computer.
Click OK in the Action Properties dialog when you are finished
creating your Open Action.
Copying and Pasting Files and Folders
You can copy selected files to your Clipboard and paste them
into the Setup Wizards, My Keyboard, or My Actions tabs of the
QuicKeys Editor.
To create an Open Action using cut and paste:
1. Select one or several files or folders.
2. Right-click the selected file and folders and choose Copy
from the context menu that appears.
3. Right-click in the Setup Wizards tab, the My Keyboard tab, or the
My Actions tab in the QuicKeys Editor and select Paste from
the context menu.
A new Open Action displays in the My Actions tab of the
QuicKeys Editor.
OPEN OPTIONS
Below is a description of the Action-specific properties
available with the Open Action.
Document—When you choose to open a document with
QuicKeys, you must click the Browse button and navigate to
the document you want to open.
Custom—When you choose to open a file that is not available
using any of the other Open options, you must type the
directory path for that file in the Run field or click the Browse
button and navigate to it.
Type—The type of file you want to open. For example, you
can open programs, documents, control panels, or other
custom files.
Path—The information required in the Path box is dependent
upon the type of file you selected in the Type drop-down list.
Specify the program, document, control panel, or other type
of file you wish to open.
Parameters—The program-specific command lines you can
use to further control the behavior of the selected file. For
example, the /n/e,C:\ parameter is already specified for the
Windows Explorer program. This parameter opens the
Explorer in the C:\ directory in an Explorer view. If you
changed the parameter to /n/e,C:\Windows, the Explorer program
would open in the C:\Windows directory in the Explorer view.
••••
90
❖
Chapter 7
Working With Files and Folders
Each program installed on your computer has its
own unique set of command parameters that are
reminiscent of DOS commands. Consequently, it
would be wise to have experience with DOS before
typing text in the Parameters field.
Start in—This command can be traced back to the DOS
“change directory” (CD) command. If you want to open a
program that can only look for files in the currently selected
directory, it is important to specify the directory path in the
Start in field.
For example, if you can recall any DOS commands, you may
remember that you once had to type copy C:\Programs
C:\System\Documents to successfully copy files from one directory
to another. However, if you typed C:\System C:\Documents, you
would get an error because the computer was looking for
C:\Programs in the C:\System\Documents directory.
Run—The appearance of the window when it opens. You can
make the file appear in a normal, minimized, or maximized
window.
DELETING OPEN ACTIONS
To delete a QuicKeys Open Action:
1. Select the My Actions tab in the QuicKeys Editor.
2. Right-click the Action you want to delete.
3. Select Delete from the context menu that appears.
4. Choose Yes at the Confirm Delete prompt. The Action is cleared
from the Actions list.
RECENT FILES
The Recent Files Action gives you more precise control of the
files you want to locate than what is provided by the
Windows operating system. It enables you to find recently
modified files by searching modification dates based on the
interval you specify. For example, if you download a new
shareware program from the Internet and cannot find it at a
later time, Recent Files can find it for you. You can set the
following search options when you direct the Recent Files
Action to locate files.
• Files modified in the
last 15 minutes
• Files modified in the
last hour
• Files modified in the
last 24 hours
• Files modified in the
last “X” hours and
“X” minutes
• Exclude the Windows
Temporary files from
the search
SETTING UP RECENT FILES ACTIONS
There are two ways to create and edit QuicKeys Recent Files
Actions: use the Setup Wizard or use the Action Properties
dialog.
••••
Using the Setup Wizard
To use the Setup Wizard, select the Setup Wizards tab in the
QuicKeys Editor and click the Recent Files button. Read the
pages of each wizard dialog and follow the instructions. At
the beginning of the Setup Wizard, you are presented with
options to Create an Action, Edit an Action, or Delete an Action. The
setup for each of these options is explained within the Setup
Wizard.
91
To use the Action Properties dialog to create or edit a Recent
Files Action, follow these steps:
1. Select Create>File & Folder Tools>Recent Files.
2. Choose an option from the Action-specific properties pane
of the dialog. For example, choose In the last 15 minutes.
3. In the General tab of the Action Properties dialog, a name is
automatically assigned to the Action. You can use the
assigned Action name or type a different one.
FIGURE 101: This dialog appears when you right-click the Recent Files
button in the Setup Wizards tab and choose to create or edit a Recent Files
Action.
Using the Action Properties Dialog
The following instructions assume you have the Always use Setup
Wizards for editing check box cleared in the Options dialog. See
page 30 for more information.
FIGURE 102: The Recent Files Action Properties dialog appears when you
select Recent Files from the Create menu, or when you double-click an
existing Recent Files Action in the My Actions tab.
4. If you want to trigger this Action from the QuicKeys menu,
click the Include in QuicKeys menu check box.
••••
92
Chapter 7
Working With Files and Folders
5. Click OK. Your new Action appears in the My Actions tab.
Using the Setup Wizard
6. Close the QuicKeys Editor and select the Recent Files
Action from the QuicKeys menu. All the files that have
been modified in the interval you have specified are
displayed in a list.
To use the Setup Wizard, select the Setup Wizards tab in the
QuicKeys Editor and click the Zip Files button. Read the pages
of each wizard dialog and follow the instructions. At the
beginning of the Setup Wizard, you are presented with
options to Create an Action, Edit an Action, or Delete an Action. The
setup for each of these options is explained within the Setup
Wizard.
DELETING RECENT FILES ACTIONS
To delete a QuicKeys Recent Files Action:
1. Select the My Actions tab in the QuicKeys Editor.
2. Right-click the Action you want to delete.
3. Select Delete from the context menu that appears.
4. Choose Yes at the Confirm Delete prompt. The Action is cleared
from the Actions list.
ZIP FILES
The Zip Files Action enables you to compress files, extract
compressed files, add to compressed files, and validate
compressed files.
SETTING UP ZIP FILES ACTIONS
There are two ways to create and edit QuicKeys Zip Files
Actions: use the Setup Wizard or use the Action Properties
dialog.
FIGURE 103: This dialog appears when you click the Zip Files button in
the Setup Wizards tab and choose to create or edit a Zip Files Action.
Using the Action Properties Dialog
The following instructions assume you have the Always use Setup
Wizards for editing check box cleared in the Options dialog. See
page 30 for more information.
••••
93
To use the Action Properties dialog to create or edit a Zip
Files Action, follow these steps:
1. Select Create>File & Folder Tools>Zip Files.
2. Choose an option from the Action-specific properties pane
of the dialog. For example, choose Add files to zip.
3. In the General tab of the Action Properties dialog, a name is
automatically assigned to the Action. You can use the
assigned Action name or type a different one.
FIGURE 104: The Zip Files Action Properties dialog appears when you
select Zip Files from the Create menu, or when you double-click an
existing Zip Files Action in the My Actions tab.
4. Select a trigger for the Action.
5. Click OK. Your new Action appears in the My Actions tab.
6. Close the QuicKeys Editor and trigger the Zip Files Action.
••••
94
Chapter 7
Working With Files and Folders
ZIP FILES OPTIONS
Below is a description of the Action-specific properties
available with the Zip Files Action.
Add files to zip—Adds the specified file to the Zip archive.
When this option is selected, you must choose whether to zip
the file that is currently selected or a pre-specified file. You
must also indicate a destination for the zip file. The
destination can be the same directory as the specified file or a
pre-specified directory. Finally, you must tell QuicKeys how
you want to handle situations where a zip file already exists.
Click the Notify when completed check box if you want to be
alerted when the files have been zipped. See Figure 104.
Extract files from zip—Decompresses the specified files.
When this option is selected, you must choose the source
location of the zip file you want to decompress as well as the
destination for the decompressed files. Then, you must choose
replacement options if the decompressed files are duplicated
in the destination directory. Click the Notify when completed
check box if you want to be alerted when the files have been
unzipped.
Verify zip file—Verifies that the zip file isn’t corrupted. When
this option is selected, you must choose whether to verify the
the file that is currently selected or a file that has been prespecified in the Zip Files Action.
DELETING ZIP FILES ACTIONS
To delete a QuicKeys Zip Files Action:
1. Select the My Actions tab in the QuicKeys Editor.
2. Right-click the Action you want to delete.
3. Select Delete from the context menu that appears.
4. Choose Yes at the Confirm Delete prompt. The Action is cleared
from the Actions list.
CHAPTER 8
USING SYSTEM TOOLS
••••••
System Tools encompass the Button Click, Mouse Click,
Mouse Position, QuicKeys Clipbook, Run Script, Select Menu,
Set System Clock, System Specials, Type Keystroke, and
Window Handler Actions. These Actions are invaluable if you
like to control or change the appearance and behavior of the
Windows environment, but you don’t like digging around in
the system preferences. You can use the System Tools Actions
to change your screen settings, cut and paste text and graphics
to your Clipbook, rearrange the windows on your desktop,
run scripts, and much more.
4. Complete the Sequence Action Properties dialog that is
shown in Figure 105 and click OK.
BUTTON CLICK
The Button Click Action clicks dialog buttons in the frontmost
window. For example, you might want an Action that clicks
the Cancel button in a dialog when you press Alt+Ctrl+C. This is a
useful Action to incorporate into your QuicKeys Sequences.
Click the Specify window properties button to display the Window
Properties dialog. Using the Window finder tool in the
Window Properties dialog enables you to automatically
populate the text fields and buttons in the Action Properties
dialog. See page 173 for more information.
SETTING UP BUTTON CLICK ACTIONS
To insert a Button Click Action in a Sequence:
1. Open the Sequence Editor.
2. Position the insert arrow where you want to insert the
Button Click in the Sequence.
FIGURE 105: The Action Properties dialog for the Button Click Sequence
tool
BUTTON CLICK OPTIONS
Below is a description of the Action-specific properties
available with the Button Click Action.
3. Select Create>System Tools>Button Click.
Find button by name—Locates a dialog button using the
information in the Button Text box.
••••
96
Chapter 8
Using System Tools
Button text—Types the name of the button.
Exact match—Select Exact match if the button text must
match the button in the software exactly.
Find button by coordinates—The intersection of the X and Y
coordinates where the mouse click should occur.
X—The horizontal coordinates for the mouse click.
Y—The vertical coordinates for the mouse click.
Find button by ID—The Button Click looks for a programspecific ID rather than looking for coordinates. Button IDs are
typically only known by developers, so the IDs are not
commonly used.
Specify window properties—Displays the Window Properties
dialog, which allows you to select a specific window with
your mouse. See Figure 190 on page 173 for more information.
Mouse button—The button that is clicked for this Action. The
Middle button option is not applicable unless you have a third
mouse button.
Modifiers—The keys that must be pressed in combination
with the mouse click.
If step succeeds—If the Button Click functions properly, this
list specifies what the Sequence should do next. For example,
it can stop the Sequence, and notify the user, continue to the
next step of the Sequence or skip to the next step.
If step fails—If the Button Click function fails, the list that
appears specifies what the Sequence should do next. For
example, it can stop the Sequence, stop the Sequence and
notify the user, continue to the next step of the Sequence, or
skip to the next step.
DELETING BUTTON CLICK ACTIONS
When button is found—Chooses whether to always click the
button or radio button, click the button only when it’s on, or
click the button only when it’s off. The same rules apply to
check boxes. If you want to look for a checked check box,
select Click always or Click when on. If you want to look for an
unchecked check box, select Click always or Click when off.
A check box that is “on”
A check box that is “off”
A radio button that is “on”
A radio button that is “off”
FIGURE 106: This is an illustration of how QuicKeys defines which
buttons are “on” and which are “off.”
To delete a QuicKeys Button Click Action:
1. Select the My Actions tab in the QuicKeys Editor.
2. Right-click the Action you want to delete.
3. Select Delete from the context menu that appears.
Choose Yes at the Confirm Delete prompt. The Action is cleared
from the Actions list.
MOUSE CLICK
The Mouse Click Action allows you to mimic a mouse click
with a keystroke. This Action is especially useful in QuicKeys
Sequence Actions because there are times when there is no
keyboard equivalent for the option you want to select. For
example, if you are recording a Sequence that opens your
weekly report in Microsoft Word and then performs a Save As
••••
97
command to save the file to a specific directory, the Sequence
will use a Mouse Click Action to tell your computer to click
the Up One Folder Level icon. This specifies the directory at the
appropriate time in the Sequence of Actions.
The Mouse Click Action is based on screen coordinates, which
most users are unfamiliar with. Consequently, it is likely that
the only time you will open the Mouse Click Action is when
you are editing the Mouse Click information after recording a
Sequence.
Click the Specify window properties button to display the Window
Properties dialog. Using the Window finder tool in the
Window Properties dialog enables you to automatically
populate the text fields and buttons in the Action Properties
dialog. See page 173 for more information.
SETTING UP A MOUSE CLICK ACTION
To insert a Mouse Click Action in a Sequence:
1. Open the Sequence in which you want to insert a Mouse
Click.
2. Position the insert arrow where you want to insert the
Mouse Click in the Sequence.
3. Select Create>System Tools>Mouse Click.
4. Complete the Sequence Action Properties dialog that is
shown in Figure 107 and click OK.
FIGURE 107: The Action Properties dialog for the Mouse Click Sequence
tool
MOUSE CLICK OPTIONS
Below is a description of the Action-specific properties
available with the Mouse Click Action.
Click mouse at—Chooses the coordinates for the Mouse Click
as well as the point from which those coordinates are
measured.
Release mouse at—Chooses the coordinates for the release of
the mouse click.
••••
98
Chapter 8
Using System Tools
Double click—Double-clicks the mouse.
X—The horizontal coordinates for the Mouse Click.
DELETING MOUSE CLICK ACTIONS
To delete a Mouse Click Action:
1. Select the My Actions tab in the QuicKeys Editor.
Y—The vertical coordinates for the Mouse Click.
2. Right-click the Action you want to delete.
Referenced from—The point from which the coordinates are
measured. Options include Top Left, Top Right, Bottom Left,
Bottom Right, and Current Mouse Position.
3. Select Delete from the context menu that appears.
Relative to—Chooses whether the mouse click coordinates
occur relative to the Screen, the Frontmost program window,
or the Window selected using the Select Properties button.
Mouse button—The mouse button that is clicked for this
Action. The Middle button option is not applicable unless you
have a third mouse button.
Modifiers—The keys that must be pressed in combination
with the Mouse Click.
If step succeeds—If the Mouse Click functions properly, this
list specifies what the Sequence should do next. For example,
it can stop the Sequence and notify the user, continue to the
next step of the Sequence, or skip to the next step.
If step fails—If the Mouse Click functions fails, the list that
appears specifies what the Sequence should do next. For
example, it can stop the Sequence, stop the Sequence and
notify the user, continue to the next step of the Sequence, or
skip to the next step.
Choose Yes at the Confirm Delete prompt. The Action is cleared
from the Actions list.
MOUSE POSITION
The Mouse Position Action enables you to specify where you
want your mouse with a QuicKeys trigger. With this
functionality you can keep your hands on the keyboard rather
than constantly switching back to your mouse.
Click the Specify window properties button to display the Window
Properties dialog. Using the Window finder tool in the
Window Properties dialog enables you to automatically
populate the text fields and buttons in the Action Properties
dialog. See page 173 for more information.
SETTING UP A MOUSE POSITION ACTION
To create a Mouse Position Action:
1. Open the Sequence in which you want to insert a Mouse
Position.
2. Position the insert arrow where you want to insert the
Mouse Position in the Sequence.
3. Select Create>System Tools>Mouse Position.
••••
4. Complete the Mouse Position Action Properties dialog that
is shown in Figure 108 and click OK.
99
Center mouse on screen—Positions the mouse in the center of
your screen.
Center mouse on active window—Positions the mouse in the
center of the window or dialog that is currently active on your
screen.
Center mouse on control—Positions the mouse at the
coordinates you specify. You can manually enter the
coordinates, or you can use the Specify window properties button to
specify the location. When you click the Specify window properties
button, the Window Properties dialog appears. See Figure 190
on page 173 for more information about the Window
Properties dialog.
DELETING MOUSE POSITION ACTIONS
To delete a Mouse Position Action:
1. Select the My Actions tab in the QuicKeys Editor.
2. Right-click the Action you want to delete.
3. Select Delete from the context menu that appears.
FIGURE 108: The Action Properties dialog for the Mouse Position
Sequence tool
MOUSE POSITION OPTIONS
Below is a description of the Action-specific properties
available with the Mouse Position Action.
Remember mouse position—Memorizes the current location
of the mouse so you can later return the mouse to that location
with a QuicKeys trigger.
Restore last mouse position—Returns the mouse to its
previous location.
Choose Yes at the Confirm Delete prompt. The Action is cleared
from the Actions list.
••••
100
Chapter 8
Using System Tools
QUICKEYS CLIPBOOK
If you ever use a word processor or an E-mail program, you
probably also use the Ctrl+X, Ctrl+C, and Ctrl+V key combinations
to cut, copy and, paste text and graphics to and from your
Clipboard. But were you ever frustrated by the limitations of
the Clipboard? First of all, you can only store one item in the
Clipboard. Secondly, you can’t really view what’s currently in
the Clipboard unless you make a special effort to install the
rather awkward Clipbook or Clipboard Viewer in Windows
95 or 98.
The QuicKeys Clipbook Action remedies both of these system
limitations and adds a lot more functionality to the whole
Clipboard feature. For example, the QuicKeys Clipbook
preserves stylized text, font information, and color. Plus, with
the QuicKeys Clipbook, you can store any item you add to the
Clipbook for as long as you want. For times when the Type
Text Action can’t hold enough text, use the Clipbook Action,
which is only limited by the amount of disk space available.
You can also manage your stored Clipboard items using the
Clipboard Editor. You have much better control and
functionality with the Clipbook Action than you have with
comparable system tools.
1
Select a file, a
block of text, or
a graphic to
add to your
QuicKeys
Clipbook.
2
Select the QuicKeys
Clipbook “copy”
trigger to add the
selected item to the
Clipbook.
3
The selected item
is added to the
QuicKeys
Clipbook.
FIGURE 109: To use the QuicKeys Clipbook, you first add Clipboard
items to your Clipbook collection.
••••
QuicKeys Clipbook vs. the System Clipboard
4
After you add clips to the
QuicKeys Clipbook,
select the “paste” trigger
and choose which
Clipbook clip to paste.
101
5
The clip you select
is pasted into your
open document.
FIGURE 110: When you have items in your Clipbook, you can then paste
them into your documents with a simple QuicKeys trigger.
You can add up to 185 items to the The system Clipboard allows one
QuicKeys Clipbook.
item in the Clipboard.
The QuicKeys Clipbook can store The System Clipboard Viewer
and display any type of information program does not display items
you specify, such as a file, selected well other than text and graphics.
text, graphics, etc.
You can save QuicKeys Clipbook
clips simply by setting up a “Copy
selection to Clipbook” Action.
There’s no way to save a clip in the
Windows operating system unless
you have specifically chosen to
install the Clipboard View in
Windows 98 or the Clipbook in
Windows 95.
The QuicKeys Clipbook saves
multiple items quickly.
If you have the Windows clipboard
utilities installed, you must go
through the standard save dialogs
for each individual item you select.
The QuicKeys Clipbook provides
an editor where you can copy
selected clips to the system
Clipboard, paste items from the
system Clipboard into the
QuicKeys Clipbook, delete
selected clips, and rename
selected clips.
The Windows solution has no
straight desktop interface for the
Clipboard. Windows 95 clipbook
has an editing capability, but it
advertises its contents to the
network when access privileges
are set up because it is a network
program.
You can keep items in the QuicKeys The system Clipboard is lost when
Clipbook for as long as you want. the machine is restarted.
••••
102
Chapter 8
Using System Tools
SETTING UP THE QUICKEYS CLIPBOOK ACTION
There are two ways to create and edit QuicKeys Clipbook
Actions: use the Setup Wizard or use the Action Properties
dialog. Since the QuicKeys Clipbook requires the creation of
multiple Actions to function, the Setup Wizard provides the
most efficient way to set it up the first time you use it.
Using the Setup Wizard
To use the Setup Wizard, select the Setup Wizards tab in the
QuicKeys Editor and click the QuicKeys Clipbook button. Read
each of the dialogs in the Setup Wizard and follow the
instructions. At the beginning of the Setup Wizard, you are
presented with options to Create an Action, Edit an Action, Delete an
Action, or Create/edit multiple Actions. The setup for each of these
options is explained within the Setup Wizard.
If you are setting up the QuicKeys Clipbook for the first
time, follow these steps:
1. Click the QuicKeys Clipbook button in the Setup Wizards tab.
2. Read the introduction page and click Next.
3. Select Create/edit multiple Actions and click Next.
4. Click the check box for Copy selection to clipbook, Open Clipbook
Editor, and Prompt for list of items to paste.
5. Click in the Menu column for each of these options so they
can be triggered from the QuicKeys menu. The menu
column should display a Yes for each of the options you
selected.
6. Click Finish.
Now, you need to add some clips to your clipboard by
choosing items and selecting Copy selection to clipbook from the
QuicKeys menu. When you have collected some clips, you can
start inserting them in your documents by selecting Prompt for
item to paste in the QuicKeys menu. There is no need to interact
with the system Clipboard at all.
❖
You must exit the Clipbook Editor before you can
see your newly added clips in the Prompt for item to
paste window.
Using the Action Properties Dialog
FIGURE 111: Use the “Create/Edit Multiple Actions” option in the Setup
Wizard to set up several Actions simultaneously.
Since the QuicKeys Clipbook requires the creation of multiple
Actions to function, the Setup Wizard provides the most
efficient way to set it up the first time you use it. The Action
Properties dialog is best used for creating a single QuicKeys
Clipbook Action or editing your existing Actions.
The following instructions assume you have the Always use Setup
Wizards for editing check box cleared in the Options dialog. See
page 30 for more information.
••••
To use the Action Properties dialog to create or edit a
QuicKeys Clipbook Action, follow these steps:
1. Select Create>System Tools>QuicKeys Clipbook.
2. Choose an option from the Action-specific properties pane
of the dialog.
3. In the General tab of the Action Properties dialog, a name is
automatically assigned to the Action. You can use the
assigned Action name or type a different name.
FIGURE 112: You must add items to your Clipbook using the “Copy
selection...” Action before anything appears in the “Paste preselected
item...” list.
4. If you want to trigger the QuicKeys Clipbook Actions from
the QuicKeys menu, select the Include in QuicKeys menu check
box.
❖
This Action is also a good candidate for an Action
menu button on a toolbar. See page 44 for more
information.
5. Click OK. Your new Action appears in the My Actions tab.
103
6. Close the QuicKeys Editor and trigger one of the QuicKeys
Clipbook Actions. The Action-specific option you selected
reacts to the trigger.
USING THE QUICKEYS CLIPBOOK ACTION
Figure 109 and Figure 110 provide a general illustration of
how the QuicKeys Clipbook works. First, you create a
QuicKeys Action that adds clips to your QuicKeys Clipbook.
Then you create a QuicKeys Action that lets you choose which
clips you want to paste. If you want to view the QuicKeys
Clipbook Editor to see all the clips you are storing, you can
create a trigger that displays that as well. This feature extends
the functionality of the system’s Cut and Paste features so you
can maintain and use frequently-used files, text, and graphics
with ease.
••••
104
Chapter 8
Using System Tools
❖
THE CLIPBOOK EDITOR
You can use the Clipbook Editor to view, copy, paste, delete,
or rename your clips. The Clipbook Editor appears when you
trigger the Open Clipbook Editor Action. You can close the
Clipbook Editor by selecting Exit from the File menu or by
clicking the close box.
Pastes the System
Clipboard contents
into the QuicKeys
Clipbook.
The Preview area of the Clipbook Editor does not
display any information if a file is selected. It can
only display selected text and graphics.
Prompt for list of items to paste from Clipbook—Displays
the window shown in Figure 114 so you can choose which clip
you would like to paste.
Deletes the
selected clip.
Renames the
selected clip.
Copies the
selected clip to
the System
Clipboard.
The clips you
have added to
the Clipbook
using the “Add
selection to
clipboard”
option or the
Copy button
shown above.
FIGURE 114: When you trigger the Paste function of the Clipbook Action
this window appears. Select a clip to use and click the Paste button.
Information on the
selected clip.
FIGURE 113: The Clipbook Editor
QUICKEYS CLIPBOOK OPTIONS
Below is a description of the Action-specific properties
available with the QuicKeys Clipbook Action.
Paste item from Clipbook—Pastes a block of text or a graphic
into a document. The item may be specified by selecting it in
the Selected item dropdown list or typing the item name in
the text box.
••••
Copy selection to Clipbook—Adds the selected text or
graphic image to the clipbook, where it is stored until you
delete it. The name of your selection can be specified in the
text box, or you can direct QuicKeys to prompt you for the
name of the selection. You can store up to 185 items in the
QuicKeys clipbook.
105
DELETING CLIPS FROM THE CLIPBOOK EDITOR
To delete a single clip from the Clipbook Editor, open the
Clipbook Editor, select the clip you want to delete, and select
Delete from the Edit menu. You can also create an Action using
the Delete item from Clipbook option to eliminate clips from the
Clipbook Editor.
To delete all of your clips from the Clipbook Editor, open the
Clipbook Editor and select Clear all from the Edit menu.
RUN SCRIPT
FIGURE 115: When you trigger the “Copy selection” function of the
Clipbook Action this window appears. Type a name for the clip and click
OK.
Open Clipbook Editor—Displays the items being stored in
the QuicKeys clipbook. You can then select an item and
proceed to paste it into a document.
Delete item from Clipbook—Deletes the currently selected or
pre-specified item from the Clipbook.
DELETING CLIPBOOK ACTIONS
To delete a QuicKeys Clipbook Action:
1. Select the My Actions tab in the QuicKeys Editor.
The Run Script Action executes scripts. Scripts are
instructional commands written in a computer language that
is recognized by specific programs or script engines. The Run
Script Action is only available from the Create menu. The Run
Script Action is useful for running scripts with a simple
QuicKeys trigger.
If you know how to write Windows scripts, QuicKeys can run
them as long as the appropriate script engine is installed on
your computer. You can create and run java scripts, visual
basic scripts, or any other type of scripts Windows Scripting
Host supports. Windows Scripting Host (WSH) is a languageindependent scripting host for 32-bit Windows platforms.
SETTING UP THE RUN SCRIPT ACTION
2. Right-click the Action you want to delete.
You can create and edit QuicKeys Run Script Actions using
the Action Properties dialog.
3. Select Delete from the context menu that appears.
Using the Action Properties Dialog
4. Choose Yes at the Confirm Delete prompt. The Action is cleared
from the Actions list.
The following instructions assume you have the Always use Setup
Wizards for editing check box cleared in the Options dialog. See
page 30 for more information.
••••
106
Chapter 8
Using System Tools
To use the Action Properties dialog to create or edit a Run
Script Action, follow these steps:
1. Select Create>System Tools>Run Script.
2. Choose a script for QuicKeys to launch. Use the Browse
button to navigate through your directories if you cannot
type the path of the script.
3. In the General tab of the Action Properties dialog, a name is
automatically assigned to the Action. You can use the
assigned Action name or type a different name.
5. Click OK. Your new Action appears in the My Actions tab.
6. Close the QuicKeys Editor and press the hot key or other
trigger you assigned to this Action. The script you selected
should launches.
RUN SCRIPT OPTIONS
Below is a description of the Action-specific properties
available with the Run Script Action.
Select script—Displays the directory path for the script in this
field.
Browse—Navigates to the location of the script.
Parameters—The program-specific command lines you can
use to further control the behavior of the selected script. For
example, /n/e,C:\ opens Windows Explorer in the C:\
directory in an Explorer view.
DELETING RUN SCRIPT ACTIONS
To delete a QuicKeys Run Script Action:
1. Select the My Actions tab in the QuicKeys Editor.
2. Right-click the Action you want to delete.
3. Select Delete from the context menu that appears.
4. Choose Yes at the Confirm Delete prompt. The Action is cleared
from the Actions list.
FIGURE 116: The Run Script Action Properties dialog
4. If you want to choose a hot key to trigger this Action, click
on the Hot key box and press the key(s) you want to use. For
example, press the Shift key, the Control key, and the F8 key
simultaneously.
••••
SELECT MENU
You can select any item from a menu without using a mouse
now that you have the Select Menu Action at your disposal.
Select Menu is useful when you want to avoid using your
mouse, or when you want to select a menu item that does not
have a hot key assigned to it. For example, you can use this
Action to assign a single hot key that selects the Exit command
in all of your programs.
❖
107
Using the Setup Wizard
To use the Setup Wizard, select the Setup Wizards tab in the
QuicKeys Editor and click the Select Menu button. Read the
pages of each wizard dialog and follow the instructions. At
the beginning of the Setup Wizard, you are presented with
options to Create an Action, Edit an Action, or Delete an Action. The
setup for each of these options is explained within the Setup
Wizard.
The Select Menu Action is most often used within
QuicKeys Sequences, but it can also be used to
create single-task Actions.
SETTING UP SELECT MENU ACTIONS
There are two ways to create or edit QuicKeys Select Menu
Actions: use the Setup Wizards tab or use the My Actions tab.
FIGURE 117: This dialog appears when you click the Select Menu button
in the Setup Wizards tab and choose to create or edit a Select Menu
Action.
Using the Action Properties Dialog
The following instructions assume you have the Always use Setup
Wizards for editing check box cleared in the Options dialog. See
page 30 for more information.
To use the Action Properties dialog to create or edit a Select
Menu Action, follow these steps:
1. Select Create>System Tools>Select Menu.
••••
108
Chapter 8
Using System Tools
2. Specify the menu item you want QuicKeys to locate when
this Action is triggered.
3. In the General tab of the Action Properties dialog, a name is
automatically assigned to the Action. You can use the
assigned Action name or type a different name.
6. Close the QuicKeys Editor and press the hot key or other
trigger you assigned to this Action. The menu item is
selected.
SELECT MENU OPTIONS
Below is a description of the Action-specific properties
available with the Select Menu Action.
Menu Item—This option is available in the Setup Wizard.
Type the name of the menu item you want to select in this box.
Browse—This option is available in both the Setup Wizard
and the Action Properties dialog. As soon as you click the
Browse button, the QuicKeys Editor disappears and a
recording palette appears. Select the menu item you want
to use for this Action. The QuicKeys Editor reappears with
the name of the menu item you selected displayed in the
Menu Item field. To cancel the Browse option, press the X
button on the recording palette.
FIGURE 118: The Select Menu Action Properties dialog appears when
you choose the Select Menu Action from the Create menu, or when you
double-click an existing Select Menu Action in the My Actions tab.
4. If you want to choose a hot key to trigger this Action, click
on the Hot key box and press the key(s) you want to use. For
example, press the Shift key and the F3 key simultaneously.
5. Click OK. Your new Action appears in the My Actions tab.
FIGURE 119: In this illustration, the Select Menu Action is being used to
select the Word Wrap option in the Notepad program.
❖
The recording palette remembers its previous
position on your screen when it opens.
••••
Starts with—Requires that the menu item QuicKeys
searches for must start with the characters supplied in the
Menu Item box.
Exact match—Requires that the menu item QuicKeys
searches for must exactly match the characters supplied in
the Menu Item box. This means that the search is case
sensitive.
109
[Choose menu item from] Active program system menu—
This option is available in the Action Properties dialog. Use
this Action to select an item from the menu that displays
when you click the program icon in an open program. The
program icon is the icon in the upper left corner of a window.
Contains—Requires that the menu item QuicKeys
searches for must contain the characters supplied in the
Menu Item box.
[Menu item to select] Menu item—This option is available in
the Action Properties dialog. Type the name of the menu item
you want to select in this box.
[Menu item to select] Menu ID—This option is available in
the Action Properties dialog. Menu IDs vary from program to
program. Therefore, the Menu ID field should only be
populated when you click the Browse button and QuicKeys
records the Menu ID number for the menu item selected. The
Menu ID number is useful when a menu contains
information, such as colors, that cannot be specified in the
Menu text field. It is also useful if the menu item toggles
between two options, such as Redo and Undo.
FIGURE 120: This is an example of the program system menu for
Microsoft Excel.
[Choose menu item from] Active document system menu—
This option is available in the Action Properties dialog. Use
this Action to select an item from the menu that displays
when you click the program icon in an open document. The
program icon is the icon in the upper left corner of your
document window.
[Choose menu item from] Active program menu—This
option is available in the Action Properties dialog. Use this
option to select an item from the menus displayed in the
currently active program. For example, if Microsoft Word was
the foreground program on your desktop, this Action would
select an item from one of Word’s menus.
FIGURE 121: This is an example of the document system menu for
Microsoft Excel.
••••
110
Chapter 8
Using System Tools
[Choose menu item from] Start menu—This option is
available in the Action Properties dialog. Use this option to
select an item from the Windows Start menu.
SET SYSTEM CLOCK
Using the Set System Clock Action, you can change your
system clock to a time you specify or to a time designated on a
specified time server.
SETTING UP SET SYSTEM CLOCK ACTIONS
There are two ways to create or edit Set System Clock Actions:
use the Setup Wizards tab or use the My Actions tab.
Using the Setup Wizard
To use the Setup Wizard, select the Setup Wizards tab in the
QuicKeys Editor and click the Set System Clock button. Read the
pages of each wizard dialog and follow the instructions. At
the beginning of the Setup Wizard, you are presented with
options to Create an Action, Edit an Action, or Delete an Action. The
setup for each of these options is explained within the Setup
Wizard.
FIGURE 122: The Windows Start menu
[Choose Menu] Context menu—This option is available in
the Action Properties dialog. Use this option when you want
to select a context menu item within a Sequence. Context
menus appear when you right-click your mouse.
DELETING SELECT MENU ACTIONS
To delete a Select Menu Action:
1. Select the My Actions tab in the QuicKeys Editor.
2. Right-click the Action you want to delete.
3. Select Delete from the context menu that appears.
4. Choose Yes at the Confirm Delete prompt. The Action is cleared
from the Actions list.
FIGURE 123: This dialog appears when you click the Set System Clock
button in the Setup Wizards tab and choose to create or edit a Set System
Clock Action.
••••
Using the Action Properties Dialog
The following instructions assume you have the Always use Setup
Wizards for editing check box cleared in the Options dialog. See
page 30 for more information.
111
3. In the General tab of the Action Properties dialog, a name is
automatically assigned to the Action. You can use the
assigned Action name or type a different name.
To use the Action Properties dialog to create or edit a Set
System Clock Action, follow these steps:
1. Select Create>System Tools>Set System Clock.
2. Specify how you want to set your system clock. You can
choose to set it by a selected remote time server or you can
enter a specific date and time.
FIGURE 124: The Set System Clock Action Properties dialog appears
when you choose the Set System Clock Action from the Create menu, or
when you double-click an existing Set System Clock Action in the My
Actions tab.
4. If you want to choose a hot key to trigger this Action, click
on the Hot key box and press the key(s) you want to use. For
example, press the Shift key, the Ctrl key, and 0
simultaneously.
5. Click OK. Your new Action appears in the My Actions tab.
••••
112
Chapter 8
Using System Tools
6. Close the QuicKeys Editor and press the hot key or other
trigger you assigned to this Action. The system clock is
changed using the date and time you specified.
SET SYSTEM CLOCK OPTIONS
Below is a description of the Action-specific properties
available with the Set System Clock Action.
Remote time server—Sets the system clock according to the
time indicated on a selected remote time server. Default time
servers include NIST, Purdue University, Coypu, and the U.S.
Naval Observatory. You can also click the Edit time servers button
to link to other remote time servers.
To add a time server to your list of remote time servers, click
the Add button and provide the remote time server’s name,
address, time protocol, and network protocol.
❖
If you are using a firewall, check that ports 37 or 123
are open. See your network administrator for more
information.
FIGURE 125: The Remote Time Servers dialog
Specified date and/or time—Chooses the date and/or time to
which you want to set your system clock.
Notify when completed—Alerts you when the system clock
has been successfully changed.
DELETING A SET SYSTEM CLOCK ACTION
To delete a QuicKeys Set System Clock Action:
1. Select the My Actions tab in the QuicKeys Editor.
2. Right-click the Action you want to delete.
3. Select Delete from the context menu that appears.
4. Choose Yes at the Confirm Delete prompt. The Action is cleared
from the Actions list.
••••
113
USING SYSTEM SPECIALS
The System Specials Action offers a way to make a variety of
common computer tasks faster and easier to complete. You
can use the System Specials Action to shutdown your
computer, restart your computer, restart Windows, log off
your computer, lock your computer, set your computer to
standby, or empty the Recycle Bin.
SETTING UP SYSTEM SPECIALS ACTIONS
There are two ways to create or edit QuicKeys System Specials
Actions: use the Setup Wizards tab or use the My Actions tab.
Using the Setup Wizard
To use the Setup Wizard, select the Setup Wizards tab in the
QuicKeys Editor and click the System Special button. Read the
pages of each wizard dialog and follow the instructions. At
the beginning of the Setup Wizard, you are presented with
options to Create an Action, Edit an Action, or Delete an Action. The
setup for each of these options is explained within the Setup
Wizard.
FIGURE 126: This dialog appears when you click the System Specials
button in the Setup Wizards tab and choose to create or edit a System
Specials Action.
Using the Action Properties Dialog
The following instructions assume you have the Always use Setup
Wizards for editing check box cleared in the Options dialog. See
page 30 for more information.
To use the Action Properties dialog to create or edit a System
Specials Action, follow these steps:
1. Select Create>System Tools>System Specials.
2. Specify which basic computer task you want to automate.
••••
114
Chapter 8
Using System Tools
3. In the General tab of the Action Properties dialog, a name is
automatically assigned to the Action. You can use the
assigned Action name or type a different name.
Restart Windows—Restarts the Windows operating system.
This option only works for Windows 98.
Log off computer—Logs you off your computer.
Lock computer—Locks your computer. This option only
works for Windows 2000. When you unlock your computer,
you must enter your Windows password at the prompt.
Set computer to standby—Puts your computer in sleep
mode.
Empty Recycle Bin—Deletes the contents of the Windows
Recycle Bin. Click the check box Prompt for confirmation if you
want to see a prompt before the contents of the Recycle Bin are
actually deleted.
DELETING A SYSTEM SPECIALS ACTION
To delete a System Specials Action:
FIGURE 127: The System Specials Action Properties dialog appears when
you choose the System Specials Action from the Create menu, or when
you double-click an existing System Specials Action in the My Actions tab.
1. Select the My Actions tab in the QuicKeys Editor.
2. Right-click the Action you want to delete.
3. Select Delete from the context menu that appears.
4. Select a trigger for this Action.
5. Click OK.
6. Close the QuicKeys Editor and press the hot key or other
trigger you assigned to this Action.
SYSTEM SPECIALS OPTIONS
Below is a description of the Action-specific properties
available with the System Specials Action.
Shutdown computer—Shuts down your computer.
Restart computer—Restarts your computer.
4. Choose Yes at the Confirm Delete prompt. The Action is cleared
from the Actions list.
••••
115
TYPE KEYSTROKE
To truly personalize your computer, you need to have the
ability to choose how you interact with it. QuicKeys gives you
this ability with the Type Keystroke Action. This Action
provides a way to change hot key assignments built into your
programs with QuicKeys hot keys that make sense to you.
The Type Keystroke Action is useful when you want to
substitute one key for another. For example, if you upgrade
one of your programs only to find that all your favorite builtin shortcut keys have been changed, you can just change them
right back to what you’re accustomed to using with the Type
Keystroke Action.
SETTING UP TYPE KEYSTROKE ACTIONS
There are two ways to create and edit Type Keystroke Actions:
use the Setup Wizard or use the Action Properties dialog.
Using the Setup Wizard
To use the Setup Wizard, select the Setup Wizards tab in the
QuicKeys Editor and click the Type Keystroke button. Read each
of the dialogs in the Setup Wizard and follow the instructions.
At the beginning of the Setup Wizard, you are presented with
options to Create an Action, Edit an Action, or Delete an Action. The
setup for each of these options is explained within the Setup
Wizard.
FIGURE 128: This dialog appears when you click the Type Keystroke
button in the Setup Wizards tab and choose to create or edit a Type
Keystroke Action.
Using the Action Properties Dialog
The following instructions assume you have the Always use Setup
Wizards for editing check box cleared in the Options dialog. See
page 30 for more information.
••••
116
Chapter 8
Using System Tools
To use the Actions Properties dialog to create or edit a Type
Keystroke Action, follow these steps:
1. Select Create>System Tools>Type Keystroke.
6. Close the QuicKeys Editor and press the hot key you
assigned to this Action. The hot key you select should
produce the same results as the key it replaced.
TYPE KEYSTROKE OPTIONS
Below is a description of the Action-specific properties
available with the Type Keystroke Action.
Key(s) to type—The key you want to replace. The Type
Keystroke Action enables you to substitute a QuicKeys hot
key for this key.
Modifiers—The keys that are pressed at the same time as the
key(s) listed in the Key(s) to type box. The modifier key options
include the Shift, Alt, Control, and Windows keys.
DELETING A TYPE KEYSTROKE ACTION
To delete a Type Keystroke Action:
1. Select the My Actions tab in the QuicKeys Editor.
2. Right-click the Action you want to delete.
3. Select Delete from the context menu that appears.
FIGURE 129: The Type Keystroke Action Properties dialog appears when
you select the Type Keystroke Action from the Create menu, or when you
double-click an existing Type Keystroke Action in the My Actions tab.
2. Type the keystroke you want to replace in the Actionspecific properties pane of the dialog.
3. In the Name box of the Action Properties dialog, a name is
automatically assigned to the Action. You can use the
assigned Action name or type a different name.
4. Click on the Hot key box and press the key(s) you want to
use to trigger this Action.
5. Click OK. Your new Action appears in the My Actions tab.
4. Choose Yes at the Confirm Delete prompt. The Action is cleared
from the Actions list.
WINDOW HANDLER
The Windows Handler Action is useful for controlling
Windows without having to use your mouse.
SETTING UP WINDOW HANDLER ACTIONS
There are two ways to create and edit Window Handler
Actions: use the Setup Wizard or use the Action Properties
dialog.
••••
117
Using the Setup Wizard
To use the Setup Wizard, select the Setup Wizards tab in the
QuicKeys Editor and click the Window Handler button. Read each
of the dialogs in the Setup Wizard and follow the instructions.
At the beginning of the Setup Wizard, you are presented with
options to Create an Action, Edit an Action, or Delete an Action. The
setup for each of these options is explained within the Setup
Wizard.
FIGURE 131: The Window Handler Action Properties dialog appears
FIGURE 130: This dialog appears when you click the Window Handler
button in the Setup Wizards tab and choose to create or edit a Window
Handler Action.
Using the Action Properties Dialog
The following instructions assume you have the Always use Setup
Wizards for editing check box cleared in the Options dialog. See
page 30 for more information.
To use the Actions Properties dialog to create or edit a
Window Handler Action, follow these steps:
1. Select Create>System Tools>Window Handler.
when you select the Window Handler Action from the Create menu, or
when you double-click an existing Window Handler Action in the My
Actions tab.
2. Select the type of window you want to manipulate and
then choose the Action you want to perform with the
window.
3. In the Name box of the Action Properties dialog, a name is
automatically assigned to the Action. You can use the
assigned Action name or type a different name.
4. Click on the Hot key box and press the key(s) you want to
use to trigger this Action.
••••
118
Chapter 8
Using System Tools
5. Click OK. Your new Action appears in the My Actions tab.
6. Close the QuicKeys Editor and press the hot key you
assigned to this Action.
Tile windows horizontally—Arranges the windows
horizontally on your screen.
WINDOW HANDLER OPTIONS
The Window Handler options vary depending upon whether
you select All windows, Active window, or Specified window. Below is a
description of the Action-specific properties available with the
Window Handler Action.
All Windows
Cascade windows—Staggers your windows across your
screen.
FIGURE 133: Horizontally tiled windows
FIGURE 132: Cascading windows
••••
Tile Windows Vertically—Arranges windows vertically on
your screen.
119
Active Window
Close active window—Closes the frontmost window.
Minimize active window—Minimizes the size of the
frontmost window.
Maximize active window—Maximizes the size of the
frontmost window.
Restore last minimized window—Returns the last window
you minimized back to its original size.
Toggle active window size—Alternately minimizes and
maximizes the frontmost window.
Center active window—Positions the active window so it is
in the middle of your screen.
Set active window size—Adjusts the size of the frontmost
window to the coordinates you specified in QuicKeys.
FIGURE 134: Vertically tiled windows
Specified Window
Close specified window—Closes the specified window.
Close all Windows—Closes all your open windows.
Minimize all Windows—Minimizes all your open windows.
Minimize specified window—Minimizes the specified
window.
Maximize specified window—Maximizes the specified
window.
Restore specified window—Returns the specified window
you minimized back to its original size.
Toggle specified window size—Alternately minimizes and
maximizes the specified window.
••••
120
Chapter 8
Using System Tools
Center specified window—Positions the specified window so
it is in the middle of your screen.
Set specified window size—Adjusts the size of the specified
window to the coordinates you specified in QuicKeys.
DELETING WINDOW HANDLER ACTIONS
To delete a QuicKeys Window Handler Action:
1. Select the My Actions tab in the QuicKeys Editor.
2. Right-click the Action you want to delete.
3. Select Delete from the context menu that appears.
4. Choose Yes at the Confirm Delete prompt. The Action is cleared
from the Actions list.
CHAPTER 9
USING SCREEN TOOLS
••••••
Screen Tools include Screen Capture, Screen Saver, and Screen
Settings Actions. These Actions enable you to capture images
from your screen, trigger your screen saver, and adjust the
resolution of your screen with simple QuicKeys triggers.
SCREEN CAPTURE
With QuicKeys you now have the flexibility of taking screen
shots of your entire screen or an active window with a hot key.
You can then save the captured image to a file, the Windows
clipboard, the QuicKeys Clipbook, or you can print it.
SETTING UP THE SCREEN CAPTURE ACTION
There are two ways to create and edit QuicKeys Screen
Capture Actions: use the Setup Wizard or use the Action
Properties dialog.
Using the Setup Wizard
To use the Setup Wizard, select the Setup Wizards tab in the
QuicKeys Editor and click the Screen Capture button. Read each
of the dialogs in the Setup Wizard and follow the instructions.
At the beginning of the Setup Wizard, you are presented with
options to Create an Action, Edit an Action, Delete an Action, or Create/edit
multiple Actions. The setup for each of these options is explained
within the Setup Wizard.
FIGURE 135: This dialog appears when you click the Screen Capture
button in the Setup Wizards tab and choose to create or edit a Screen
Capture Action.
Using the Action Properties Dialog
The following instructions assume you have the Always use Setup
Wizards for editing check box cleared in the Options dialog. See
page 30 for more information.
••••
122
Chapter 9
Using Screen Tools
To use the Action Properties dialog to create or edit a Screen
Capture Action, follow these steps:
4. If you want to trigger this Action from the QuicKeys menu,
click the Include in QuicKeys menu check box.
1. Select Create>Screen Tools>Screen Capture.
5. Click OK. Your new Action immediately appears in the My
Actions tab.
2. Choose what part of the screen you want to capture and
then choose how you want to save the image.
6. Close the QuicKeys Editor and select the Screen Capture
Action from the QuicKeys menu.
SCREEN CAPTURE OPTIONS
Below is a description of the Action-specific properties
available with the Screen Settings Action.
Capture entire screen—Takes a screen shot of the entire
screen.
Capture active window—Takes a screen shot of the frontmost
window.
Paste into Windows clipboard—Stores the screen shot on the
Windows clipboard.
Paste into QuicKeys Clipbook—Stores the screen shot in the
QuicKeys Clipbook.
Print to the default printer—Prints the screen shot to the
printer specified in Windows as the default printer.
Save as a file—Stores the screen shot in a file you specify.
DELETING SCREEN CAPTURE ACTIONS
FIGURE 136: This dialog appears when you click the Screen Capture
button in the Setup Wizards tab and choose to create or edit a Screen
Capture Action.
3. In the General tab of the Action Properties dialog, a name is
automatically assigned to the Action. You can use the
assigned Action name or type a different one.
To delete a Screen Capture Action:
1. Select the My Actions tab in the QuicKeys Editor.
2. Right-click the Action you want to delete.
3. Select Delete from the context menu that appears.
Choose Yes at the Confirm Delete prompt. The Action is cleared
from the Actions list.
••••
123
SCREEN SAVER
The Screen Saver Action enables you to control your screen
saver with QuicKeys triggers. You can use QuicKeys to select
a screen saver or to turn your screen saver on and off.
SETTING UP THE SCREEN SAVER ACTION
There are two ways to create and edit QuicKeys Screen Saver
Actions: use the Setup Wizard or use the Action Properties
dialog.
Using the Setup Wizard
To use the Setup Wizard, select the Setup Wizards tab in the
QuicKeys Editor and click the Screen Saver button. Read each of
the dialogs in the Setup Wizard and follow the instructions. At
the beginning of the Setup Wizard, you are presented with
options to Create an Action, Edit an Action, Delete an Action, or Create/edit
multiple Actions. The setup for each of these options is explained
within the Setup Wizard.
FIGURE 137: This dialog appears when you click the Screen Saver button
in the Setup Wizards tab and choose to create or edit a Screen Saver
Action.
Using the Action Properties Dialog
The following instructions assume you have the Always use Setup
Wizards for editing check box cleared in the Options dialog. See
page 30 for more information.
••••
124
Chapter 9
Using Screen Tools
To use the Action Properties dialog to create or edit a Screen
Saver Action, follow these steps:
1. Select Create>Screen Tools>Screen Saver.
2. Choose a Screen Saver option. If you choose Select screen
saver, you must specify which screen saver you want to use.
6. Close the QuicKeys Editor and select the Screen Saver
Action from the QuicKeys menu.
SCREEN SAVER OPTIONS
Below is a description of the Action-specific properties
available with the Screen Saver Action.
Start screen saver—Starts your screen saver.
Stop screen saver—Closes the screen saver so your desktop is
again visible.
Enable screen saver—Enables the screen saver so it starts at
the specified interval.
Disable screen saver—Disables the screen saver so it does not
automatically start.
Toggle enabled/disabled status—Alternately enables and
disables the screen saver.
Select screen saver—Allows you to choose from your
installed screen savers.
DELETING SCREEN SAVER ACTIONS
To delete a Screen Saver Action:
FIGURE 138: This dialog appears when you click the Screen Saver button
in the Setup Wizards tab and choose to create or edit a Screen Saver
Action.
3. In the General tab of the Action Properties dialog, a name is
automatically assigned to the Action. You can use the
assigned Action name or type a different one.
4. If you want to trigger this Action from the QuicKeys menu,
click the Include in QuicKeys menu check box.
5. Click OK. Your new Action immediately appears in the My
Actions tab.
1. Select the My Actions tab in the QuicKeys Editor.
2. Right-click the Action you want to delete.
3. Select Delete from the context menu that appears.
Choose Yes at the Confirm Delete prompt. The Action is cleared
from the Actions list.
••••
125
SCREEN SETTINGS
The Screen Settings Action is useful if you need to change
your screen settings for different programs or different
monitors. For example, if you use your laptop computer with
a desktop monitor when you are at work, you may want to
create a Screen Settings Action that automatically switches
between the laptop screen settings and the desktop screen
settings. The settings available in the Screen Settings Action
depend upon the capabilities of your monitor and video card.
SETTING UP THE SCREEN SETTINGS ACTION
There are two ways to create and edit QuicKeys Screen
Settings Actions: use the Setup Wizard or use the Action
Properties dialog.
Using the Setup Wizard
To use the Setup Wizard, select the Setup Wizards tab in the
QuicKeys Editor and click the Screen Settings button. Read each
of the dialogs in the Setup Wizard and follow the instructions.
At the beginning of the Setup Wizard, you are presented with
options to Create an Action, Edit an Action, Delete an Action, or Create/edit
multiple Actions. The setup for each of these options is explained
within the Setup Wizard.
FIGURE 139: This dialog appears when you click the Screen Settings
button in the Setup Wizards tab and choose to create or edit a Screen
Settings Action.
Using the Action Properties Dialog
The following instructions assume you have the Always use Setup
Wizards for editing check box cleared in the Options dialog. See
page 30 for more information.
To use the Action Properties dialog to create or edit a Screen
Settings Action, follow these steps:
1. Select Create>Screen Tools>Screen Settings.
2. Choose a screen setting from the Action-specific properties
pane of the dialog.
3. In the General tab of the Action Properties dialog, a name is
automatically assigned to the Action. You can use the
assigned Action name or type a different one.
••••
126
Chapter 9
Using Screen Tools
4. If you want to trigger this Action from the QuicKeys menu,
click the Include in QuicKeys menu check box.
Test—Changes the display so you can see what your screen
setting selection looks like.
DELETING SCREEN SETTING ACTIONS
To delete a QuicKeys Screen Settings Action:
1. Select the My Actions tab in the QuicKeys Editor.
2. Right-click the Action you want to delete.
3. Select Delete from the context menu that appears.
4. Choose Yes at the Confirm Delete prompt. The Action is
immediately cleared from the Actions list.
FIGURE 140: The Screen Settings Action Properties dialog appears when
you select the Screen Settings Action from the Create menu, or when you
double-click an existing Screen Settings Action in the My Actions tab.
5. Click OK. Your new Action immediately appears in the My
Actions tab.
6. Close the QuicKeys Editor and select the Screen Settings
Action from the QuicKeys menu. The screen settings
should change immediately after you trigger the Action.
SCREEN SETTINGS OPTIONS
This section offers descriptions of the Action-specific
properties available with the Screen Settings Action.
Screen Settings—Choose the settings you want to use for
your screen display. 4-bit uses fewer colors than 16-bit, so it
does not display images as sharply.
❖
The settings that display in the Screen Settings list
depend upon the capabilities of your video card and
monitor.
CHAPTER 10
USING MULTIMEDIA TOOLS
••••••
If you have the appropriate sound hardware you can use
QuicKeys to play your CDs or DVDs, set the volume for your
individual audio devices, and play specified sounds. This
chapter provides instructions for setting up CD/DVD, Set
Audio Volume, and Play Sound Actions to control all these
tasks for you.
❖
You must have a sound card installed for the
multimedia tools to function properly.
Using the Setup Wizard
To use the Setup Wizard, select the Setup Wizards tab in the
QuicKeys Editor and click the CD/DVD button. Read each of the
dialogs in the Setup Wizard and follow the instructions. At the
beginning of the Setup Wizard, you are presented with
options to Create an Action, Edit an Action, Delete an Action, or Create/edit
multiple Actions. The setup for each of these options is explained
within the Setup Wizard.
CD/DVD
With QuicKeys you can control your internal CD-ROM and
DVD players. With a trigger you can:
• Play a CD or DVD
• Pause a CD or DVD
• Stop a CD or DVD
• Skip to the Next Track
• Go back to the
Previous Track
• Eject the CD or DVD
SETTING UP A CD/DVD ACTION
There are two ways to create and edit QuicKeys CD/DVD
Actions: use the Setup Wizard or use the Action Properties
dialog.
FIGURE 141: This dialog appears when you click the CD/DVD button in
the Setup Wizards tab and choose to create or edit a CD/DVD Action.
Using the Action Properties Dialog
The following instructions assume you have the Always use Setup
Wizards for editing check box cleared in the Options dialog. See
page 30 for more information.
••••
128
Chapter 10
Using Multimedia Tools
To use the Action Properties dialog to create or edit a CD/
DVD Action, follow these steps:
1. Select Create>Multimedia Tools>CD/DVD.
2. Choose an option from the Action-specific properties pane
of the dialog. For example, select Pause.
6. Close the QuicKeys Editor and press the hot key or other
trigger you assigned to this Action.
CD/DVD OPTIONS
Below is a description of the Action-specific properties
available with the CD/DVD Action:
Play—Plays the CD or DVD.
Pause—Pauses the CD or DVD.
Stop—Stops the CD or DVD.
Next track—Skips to the next track on the CD or DVD.
Previous track—Skips to the previous track on the CD or
DVD.
Eject—Ejects the CD or DVD.
DELETING CD/DVD ACTIONS
FIGURE 142: The CD/DVD Action Properties dialog appears when you
select the CD/DVD Action from the Create menu, or when you doubleclick an existing CD/DVD Action in the My Actions tab.
To delete a QuicKeys CD/DVD Action:
1. Select the My Actions tab in the QuicKeys Editor.
3. In the General tab of the Action Properties dialog, a name is
automatically assigned to the Action. You can use the
assigned Action name or type a different name.
2. Right-click the Action you want to delete.
4. If you want to choose a hot key to trigger this Action, click
in the Hot key box and press the key(s) you want to use. For
example, press the Control key and the F2 key
simultaneously.
4. Choose Yes at the Confirm Delete prompt. The Action is cleared
from the Actions list.
❖
This Action is also a good candidate for an Action
Menu toolbar button. See page 44 for more
information on Action Menu toolbar buttons.
5. Click OK. Your new Action appears in the My Actions tab.
3. Select Delete from the context menu that appears.
••••
129
PLAY SOUND
The Play Sound Action is only available from the Create menu.
This is because the Play Sound Action is typically used within
QuicKeys Sequences. You can use the Play Sound Action to
play selected .wav sound files when you select a QuicKeys
trigger.
SETTING UP A PLAY SOUND ACTION
There are two ways to create and edit QuicKeys Play Sound
Actions: use the Setup Wizard or use the Action Properties
dialog.
Using the Setup Wizard
You cannot select the Play Sound Action from the Setup Wizards
tab. You can, however, use the Setup Wizard for this Action
from the Create menu.
To use the Setup Wizard with the Play Sound Action:
1. Select View>Options.
2. Verify the Always use Setup Wizards for editing check box is
selected in the Options dialog and click OK.
FIGURE 143: This dialog appears when you have “Always use Setup
Wizards for editing” checked in the Options dialog and you select Play Sound
from the Create menu.
3. Back in the QuicKeys Editor, select Multimedia from the Create
menu.
4. Select Play Sound in the Multimedia submenu.
5. The Setup Wizard appears to lead you through the process
of setting up the Play Sound Action.
Using the Advance Properties Dialog
The following instructions assume you have the Always use Setup
Wizards for editing check box cleared in the Options dialog. See
page 30 for more information.
••••
130
Chapter 10
Using Multimedia Tools
To use the Action Properties dialog to create or edit a Play
Sound Action, follow these steps:
1. Select Create>Multimedia Tools>Play Sound.
PLAY SOUND OPTIONS
Below is a description of the Action-specific properties
available with the Play Sound Action:
Sound file—Type the directory path for the sound file you
would like to start with a QuicKeys trigger. The file must have
a .wav extension in the file name.
Test—Click the Test button to verify you selected the correct
sound and that the sound plays properly.
Browse—Click the Browse button to navigate to the sound file
you would like to use.
DELETING PLAY SOUND ACTIONS
To delete a QuicKeys Play Sound Action:
1. Select the My Actions tab in the QuicKeys Editor.
2. Right-click the Action you want to delete.
FIGURE 144: The Play Sound Action Properties dialog appears when you
3. Select Delete from the context menu that appears.
select the Play Sound Action from the Create menu, or when you doubleclick an existing Play Sound Action in the My Actions tab.
4. Choose Yes at the Confirm Delete prompt. The Action is cleared
from the Actions list.
2. Choose a sound file using the Browse button in the Actionspecific properties pane of the dialog.
3. Click the Test button if you want to try out the select sound
file.
4. In the General tab of the Action Properties dialog, a name is
automatically assigned to the Action. You can use the
assigned Action name or type a different name.
5. If you want to trigger the Play Sound Action from the
QuicKeys menu, click the Include in QuicKeys menu check box.
SET AUDIO VOLUME
The Set Audio Volume Action is useful when you want to be
able to set every option in your sound arsenal with a
QuicKeys trigger. For example, with a single QuicKeys trigger
you can set the volume for all of your audio devices or just
one of the available devices. The available audio devices
include:
6. Click OK. Your new Action appears in the My Actions tab.
• Master Out
• Wave
7. Close the QuicKeys Editor and select the new Play Sound
Action using the trigger you specified.
• Synth
• CD
See page 132 for an explanation of these terms.
••••
SETTING UP A SET AUDIO VOLUME ACTION
There are two ways to create and edit QuicKeys Set Audio
Volume Actions: use the Setup Wizard or use the Action
Properties dialog.
Using the Setup Wizard
131
To use the Action Properties dialog to create or edit a Set
Audio Volume Action, follow these steps:
1. Select Create>Multimedia Tools>Set Audio Volume.
2. Choose an option from the Action-specific properties pane
of the dialog. For example, choose Master Out.
To use the Setup Wizard, select the Setup Wizards tab in the
QuicKeys Editor and click the Set Audio Volume button. Read
each of the dialogs in the Setup Wizard and follow the
instructions. At the beginning of the Setup Wizard, you are
presented with options to Create an Action, Edit an Action, Delete an
Action, or Create/edit multiple Actions. The setup for each of these
options is explained within the Setup Wizard.
FIGURE 146: The Set Audio Volume Action Properties dialog appears
when you select the Set Audio Volume Action from the Create menu, or
when you double-click an existing Set Audio Volume Action in the My
Actions tab.
FIGURE 145: This dialog appears when you click the Set Audio Volume
button in the Setup Wizards tab and choose to create or edit a Set Audio
Volume Action.
Using the Action Properties Dialog
The following instructions assume you have the Always use Setup
Wizards for editing check box cleared in the Options dialog. See
page 30 for more information.
3. In the General tab of the Action Properties dialog, a name is
automatically assigned to the Action. You can use the
assigned Action name or type a different one.
4. If you want to choose a hot key to trigger this Action, click
in the Hot key box and press the key(s) you want to use. For
example, press the Shift key, the Control key, and the 2 key
simultaneously.
••••
132
Chapter 10
Using Multimedia Tools
5. Click OK. Your new Action appears in the My Actions tab.
6. Close the QuicKeys Editor and press the hot key or other
trigger you assigned to this Action.
SET AUDIO VOLUME OPTIONS
Below is a description of the Action-specific properties
available with the Set Audio Volume Action:
Master Out—Adjusts the volume in identical increments for
every audio device available on your computer. It’s
comparable to the universal remote you have at home for
your TV, VCR, and CD player.
Wave—Adjusts the volume for digitally sampled files on your
computer. Wave files contain a .wav or .mpg extension and are
usually quite large in size. An example of a wave file would be
the harp-like sound your computer makes when you turn it
on (called “The Microsoft Sound.wav”).
Synth—Adjusts the volume for your Musical Instrument
Device Interface (MIDI) files. MIDI sound files are typically
low fidelity sounds synthesized by your computer that are
much smaller in size than digitally sampled files. An example
of a Synth file would be the music you hear when you visit
some Web sites.
CD—Controls the volume for the computer’s CD player.
Maximum—Turns the volume of the selected audio device
to the loudest setting.
Louder—Turns the volume of the selected audio device to
the next highest incremental setting.
Softer—Turns the volume of the selected audio device to
the next lowest incremental setting.
Toggle on and off—Turns the selected audio device
alternately on and off.
DELETING AUDIO VOLUME ACTIONS
To delete a QuicKeys Set Audio Volume Action:
1. Select the My Actions tab in the QuicKeys Editor.
2. Right-click the Action you want to delete.
3. Select Delete from the context menu that appears.
4. Choose Yes at the Confirm Delete prompt. The Action is cleared
from the Actions list.
CHAPTER 11
USING NETWORK TOOLS
••••••
If your computer does not have access to other computers or
the Internet, the information in this chapter will probably not
be applicable to you. If, however, your computer is on a
network, there are several network tasks that QuicKeys can
help you with. These tasks include choosing printers and
network drives, as well as selecting Microsoft’s Dial-Up
Networking settings.
Using the Setup Wizard
To use the Setup Wizard, select the Setup Wizards tab in the
QuicKeys Editor and click the Choose Printer button. Read each
of the dialogs in the Setup Wizard and follow the instructions.
At the beginning of the Setup Wizard, you are presented with
options to Create an Action, Edit an Action, Delete an Action, or Create/edit
multiple Actions. The setup for each of these options is explained
within the Setup Wizard.
CHOOSE PRINTER
The Choose Printer Action is useful if you frequently switch
printers on your network. For example, this Action can be
extremely useful in QuicKeys Sequences when you want to
send a fax and switch back to your regular printer once the fax
is sent.
SETTING UP THE CHOOSE PRINTER ACTIONS
There are two ways to create and edit QuicKeys Choose
Printer Actions: use the Setup Wizard or use the Action
Properties dialog.
FIGURE 147: This dialog appears when you click the Choose Printer
button in the Setup Wizards tab and choose to create or edit a Choose
Printer Action.
Using the Action Properties Dialog
The following instructions assume you have the Always use Setup
Wizards for editing check box cleared in the Options dialog. See
page 30 for more information.
••••
134
Chapter 11
Using Network Tools
To use the Action Properties dialog to create or edit a Choose
Printer Action, follow these steps:
1. Select Create>Network Tools>Choose Printer.
2. Choose a printer from the Action-specific properties pane
of the dialog.
3. In the General tab of the Action Properties dialog, a name is
automatically assigned to the Action. You can use the
assigned Action name or you can type a different name.
4. If you want to choose a hot key to trigger this Action, click
in the Hot key box and press the key(s) you want to use. For
example, press the Shift key, the Alt key, the Control key, and
the O key simultaneously.
CHOOSE PRINTER OPTIONS
Below is a description of the Action-specific properties
available with the Choose Printer Action:
Select printer—Displays a list of all the printers to which you
have access. You can add more printers to this list by selecting
the Printer Control Panel and choosing the Add Printer option.
Display message when printer has changed—Displays a
message when your default printer has been changed.
DELETING CHOOSE PRINTER ACTIONS
To delete a QuicKeys Choose Printer Action:
1. Select the My Actions tab in the QuicKeys Editor.
2. Right-click the Action you want to delete.
3. Select Delete from the context menu that appears.
4. Choose Yes at the Confirm Delete prompt. The Action is
immediately cleared from the Actions list.
FIGURE 148: The Action Properties dialog
5. Click OK. Your new Action immediately appears in the My
Actions tab.
6. Close the QuicKeys Editor and press the hot key or other
trigger you assigned to this Action. The printer you
selected should immediately become the default printer.
••••
DIAL-UP NETWORKING
135
Using the Setup Wizard
The Dial-Up Networking Action enables you to connect or
disconnect from a Dial-Up Networking service with a simple
QuicKeys trigger. Using the Dial-Up Networking Action is not
as error-prone as manually switching between Dial-Up
Networking services, and it can be invaluable if you use AOL
and want to quickly switch between different access numbers.
Yet another way you could use this Action is to create a timed
trigger that dials your ISP immediately after you start your
computer.
To use the Setup Wizard, select the Setup Wizards tab in the
QuicKeys Editor and click the Dial-Up Networking button. Read
each of the dialogs in the Setup Wizard and follow the
instructions. At the beginning of the Setup Wizard, you are
presented with options to Create an Action, Edit an Action, Delete an
Action, or Create/edit Multiple Actions. The setup for each of these
options is explained within the Setup Wizard.
You must have Dial-Up Networking installed and
configured on your computer for this Action to function
properly. The tasks available using the Dial-Up Networking
Action include:
• Connect to Dial-Up
Networking service
• Disconnect from DialUp Networking
service
• Toggle connection
state
SETTING UP DIAL-UP NETWORKING ACTIONS
There are two ways to create and edit QuicKeys Dial-Up
Networking Actions: use the Setup Wizard or use the Action
Properties dialog.
❖
You must have Dial-Up Networking installed and
configured on your computer for this Action to
function properly.
FIGURE 149: This dialog appears when you click the Dial-Up
Networking button in the Setup Wizards tab and choose to create or edit a
Dial-Up Networking Action.
Using the Action Properties Dialog
The following instructions assume you have the Always use Setup
Wizards for editing check box cleared in the Options dialog. See
page 30 for more information.
••••
136
Chapter 11
Using Network Tools
To use the Action Properties dialog to create or edit a DialUp Networking Action, follow these steps:
4. If you want to trigger this Action from the QuicKeys menu,
select the Include in QuicKeys menu check box.
1. Select Create>Network Tools>Dial-Up Networking.
5. Click OK. Your new Action immediately appears in the My
Actions tab.
6. Close the QuicKeys Editor and trigger the Action from the
QuicKeys menu or with whatever trigger you specified.
The Dial-Up Networking service should immediately react
to the trigger.
DIAL-UP NETWORKING OPTIONS
Below is a description of the Action-specific properties
available with the Dial-Up Networking Action.
Connect to a Dial-Up Networking service—Connects to the
service specified in the Dial-Up Networking control panel.
Disconnect a Dial-Up Networking service—Disconnects
from the specified Dial-Up Networking service.
Toggle connection status—Connects and disconnects from a
Dial-Up Networking service.
Add new connection —Adds another service to the list.
Notify upon success—Displays a dialog if the new
connection is successful.
FIGURE 150: The Dial-Up Networking Action Properties dialog appears
when you select the Dial-Up Networking Action from the Create menu, or
when you double-click an existing Dial-Up Networking Action in the My
Actions tab.
2. Choose an option from the Action-specific properties pane
of the dialog. For example, select Connect to a Dial-Up Networking
service.
3. In the General tab of the Action Properties dialog, a name is
automatically assigned to the Action. You can use the
assigned Action name or type a different name.
Notify upon failure—Displays a dialog if the new connection
is not successful.
••••
DELETING DIAL-UP NETWORKING ACTIONS
To delete a QuicKeys Dial-Up Networking Action:
1. Select the My Actions tab in the QuicKeys Editor.
2. Right-click the Action you want to delete.
3. Select Delete from the context menu that appears.
4. Choose Yes at the Confirm Delete prompt. The Action is
immediately cleared from the Actions list.
137
Using the Setup Wizard
To use the Setup Wizard, select the Setup Wizards tab in the
QuicKeys Editor and click the Network Drives button. Read each
of the dialogs in the Setup Wizard and follow the instructions.
At the beginning of the Setup Wizard, you are presented with
options to Create an Action, Edit an Action, or Delete an Action. The
setup for each of these options is explained within the Setup
Wizard.
NETWORK DRIVES
The Network Drives Action is useful if you need to access
several different network drives on a daily basis. The options
available in the Network Drives Action include:
• Connect to a
network volume
• Toggle connection
• Disconnect from a
network volume
SETTING UP THE NETWORK DRIVES ACTION
There are two ways to create and edit QuicKeys Network
Drives Actions: use the Setup Wizard or use the Action
Properties dialog.
FIGURE 151: This dialog appears when you click the Network Drives
button in the Setup Wizards tab and choose to create or edit a Network
Drives Action.
••••
138
Chapter 11
Using Network Tools
Using the Action Properties Dialog
The following instructions assume you have the Always use Setup
Wizards for editing check box cleared in the Options dialog. See
page 30 for more information.
To use the Action Properties dialog to create or edit a
Network Drives Action, follow these steps:
1. Select Create>Network Tools>Network Drives.
2. Choose a network drive from the Action-specific properties
pane of the dialog.
3. In the General tab of the Action Properties dialog, a name is
automatically assigned to the Action. You can use the
assigned Action name or type a different name.
FIGURE 152: The Network Drives Action Properties dialog appears when
you select the Network Drives Action from the Create menu, or when you
double-click an existing Network Drives Action in the My Actions tab.
4. If you want to trigger this Action from the QuicKeys menu,
select the Include in QuicKeys menu check box.
5. Click OK. Your new Action immediately appears in the My
Actions tab.
6. Close the QuicKeys Editor and trigger the Network Drives
Action from the QuicKeys menu or with whatever other
type of trigger you assigned to this Action. The network
drive you specified is immediately selected.
••••
NETWORK DRIVES OPTIONS
Below is a description of the Action-specific properties
available with the Network Drives Action:
Connect to a network volume—Connects you to a network
volume.
Disconnect from a network volume—Terminates your
connection to a network drive.
Toggle connection—Alternately connects and disconnects
you from a network volume or drive.
Display notification if Action succeeds—Displays a
message alerting you that your map/unmap action was
successful.
Display notification if Action fails—Displays a message
alerting you that your map/unmap action was not
successful.
More About Network Drive Actions
Since QuicKeys Actions are stored under your login
preferences, your user name and password information for
network drives are secure as long as other users do not know
your network login name and password.
Server path—The directory path of the network volume.
DELETING NETWORK DRIVE ACTIONS
Browse—Click the Browse button to navigate to the location
of the network volume.
To delete a QuicKeys Network Drives Action:
1. Select the My Actions tab in the QuicKeys Editor.
Local drive—The drive letter your computer will use to
identify the selected network volume. Do not select any
drive letters that are already in use.
Reconnect at logon—Choose this option when you want to
retain drive mapping information, even after you restart
your machine. If this option is not checked and you restart
your machine, you must trigger the Network Drive Action
to remap the drive.
Name—The user name you use to login to the selected
network volume.
Password—The password you use to login to the selected
network volume.
Remember name and password—Select this option if you
do not want to be prompted for your name and password
each time you trigger this Network Drives Action.
139
2. Right-click the Action you want to delete.
3. Select Delete from the context menu that appears.
4. Choose Yes at the Confirm Delete prompt. The Action is
immediately cleared from the Actions list.
••••
140
Chapter 11
Using Network Tools
CHAPTER 12
USING INTERNET TOOLS
••••••
The Internet has become an integral part of many people’s
computer experience. Anticipating your Internet needs, the
makers of QuicKeys have developed the Web Launcher
Action and Instant E-mail Actions. These Actions automate
tasks such as launching Web sites and managing your
E-mail.
INSTANT E-MAIL
It seems like E-mail is suddenly the preferred mode of
communication in our fast-paced world. So, why not make
using it as efficient as possible? QuicKeys helps you make the
best use of your time by providing the ability to create and
send messages and selected files with a simple QuicKeys
trigger.
SETTING UP INSTANT E-MAIL ACTIONS
There are two ways to create or edit QuicKeys Instant E-mail
Actions: use the Setup Wizard or use the Action Properties
dialog.
Using the Setup Wizard
To use the Setup Wizard, select the Setup Wizards tab in the
QuicKeys Editor and click the Instant E-mail button. Read the
pages of each wizard dialog and follow the instructions. At
the beginning of the Setup Wizard, you are presented with
options to Create an Action, Edit an Action, Delete an Action, or Create/edit
multiple Actions. The setup for each of these options is explained
within the Setup Wizard.
The options available with the Instant E-mail Action include:
• Create new message
• Create message with
text
• Send selected text
• Send recent files
• Send selected files
• Archive attachments
E-mail programs that support mailto: handlers or that support
the Mail Application Program Interface (MAPI) can be used
with the QuicKeys Instant E-mail Action. Some of the more
common programs that support MAPI include Microsoft®
Outlook, Outlook Express, Exchange client/Windows
Messaging, Eudora™ Pro, Eudora™ Lite, Lotus® CC Mail,
Lotus Notes, and Novell® GroupWise. This list is not inclusive,
so you should also ask your E-mail vendor whether or not
their software supports MAPI.
FIGURE 153: This dialog appears when you click the Instant E-mail
button in the Setup Wizards tab and choose to create or edit an Instant Email Action.
••••
142
Chapter 12
Using Internet Tools
Using the Action Properties Dialog
The following instructions assume you have the Always use Setup
Wizards for editing check box cleared in the Options dialog. See
page 30 for more information.
To use the Action Properties dialog to create or edit an
Instant E-mail Action, follow these steps:
1. Select Create>Internet Tools>Instant E-mail.
2. Select an option from the Action-specific properties pane of
the dialog. For example, choose Create message with text and
type the text you want to include in your messages.
FIGURE 154: The Instant E-mail Action Properties dialog appears when
you select the Instant QuicKeys Action from the Create menu, or when
you double-click an existing Instant E-mail Action in the My Actions tab.
3. If you would like to restrict the functionality of this Action
to your E-mail program, select the Action Scope tab and select
Program from the Scope drop-down list. Choose your E-mail
program from the Program drop-down list that appears.
••••
4. In the General tab of the Action Properties dialog, a name is
automatically assigned to the Action. You can use the
assigned Action name or type a different name.
5. If you want to choose a hot key to trigger this Action, click
in the Hot key box and press the key(s) you want to use. For
example, press the Shift key, the Alt key, and the F7 keys
simultaneously.
6. Click OK. Your new Action immediately appears in the My
Actions tab.
7. Close the QuicKeys Editor.
8. Press the hot key or other trigger you assigned to the
Instant E-mail Action. Your E-mail software should
respond immediately to the QuicKeys Action as long as it
handles mailto: or MAPI.
MORE ABOUT INSTANT E-MAIL
QuicKeys uses your default E-mail program for Instant E-mail
Actions. Your default mail program must support mailto:
handling or the Mail Application Program Interface (MAPI) to
work with QuicKeys.
INSTANT E-MAIL OPTIONS
Below is a description of the Action-specific properties
available with the Instant E-mail Action.
Send recent files—Displays a list of recently modified files
you can choose to attach and send in a message. You can
specify the time interval QuicKeys uses to populate the list of
recently modified files. Your choices include In the last 15 minutes,
in the last 6 hours, In the last half hour, In the last 24 hours, or In the last hour.
Send selected files—Attaches and sends a selected file.
Zip attached files—Compresses attached files. Check this
option when you want to compress your E-mail attachments.
Your E-mail client must support the Mail Application
Program Interface (MAPI) to properly enclose the selected
file(s) because attachments are not self-extracting. This means
the recipient of your compressed files must be capable of
unzipping files.
When QuicKeys is used to attach files, the E-mail message
carrying the attachment contains a line that says, “File
attached by QuicKeys.”
Send to mailto handler—Displays a dialog where you can
choose whether to use a MAPI mail handler or a mailto: mail
handler.
DELETING INSTANT E-MAIL ACTIONS
To delete an Instant E-mail Action:
Create new message—Opens a window where you can type
your E-mail message.
1. Select the My Actions tab in the QuicKeys Editor.
Create message with text—Opens a message window that
contains text you have already specified.
3. Select Delete from the context menu that appears.
Send selected text—Attaches and sends selected text.
143
2. Right-click the Action you want to delete.
4. Choose Yes at the Confirm Delete prompt. The Action is
immediately cleared from the Actions list.
••••
144
Chapter 12
Using Internet Tools
WEB LAUNCHER
Using the Setup Wizard
The Web Launcher Action is useful when you want to open
Uniform Resource Locators (URLs) with a single hot key. For
example, you can use this Action to open CE Software’s home
page with your Internet Browser. The Web Launcher Action
includes the following options:
• Open URL
• Open Text Selection
As URL
• Display Netscape
Bookmarks Browser
• Display Internet
Explorer Favorites
Browser
To use the Setup Wizard, select the Setup Wizards tab in the
QuicKeys Editor and click the Web Launcher button. Read the
pages of each wizard dialog and follow the instructions. At
the beginning of the Setup Wizard, you are presented with
options to Create an Action, Edit an Action, or Delete an Action. The
setup for each of these options is explained within the Setup
Wizard.
The Web Launcher Action supports File Transfer Protocol
(FTP), HyperText Transfer Protocol (HTTP), and E-mail URLs.
This means you can use the Web Launcher to visit FTP sites
and Web sites, as well as to E-mail a friend or business
colleague. For example, if you want to use Web Launcher to
go to a secure FTP site, you would type
ftp://<username>:<password>@ftp.companyname.com.
❖
If you use Web Launcher with the America Online
(AOL) browser, Internet Explorer is launched rather
than the AOL browser.
SETTING UP WEB LAUNCHER ACTIONS
There are three ways to create and edit QuicKeys Web
Launcher Actions: use the Setup Wizard, use the Action
Properties dialog, or cut and paste a URL into the QuicKeys
Editor.
FIGURE 155: This dialog appears when you click the Web Launcher
button in the Setup Wizards tab and choose to create or edit a Web
Launcher Action.
••••
Using the Action Properties Dialog
The following instructions assume you have the Always use Setup
Wizards for editing check box cleared in the Options dialog. See
page 30 for more information.
To use the Action Properties dialog to create or edit a Web
Launcher Action, follow these steps:
1. Select Create>Internet Tools>Web Launcher.
2. Select the option you want to use in the Action-specific
properties pane of the dialog. For example, select Open URL.
145
3. In the General tab of the Action Properties dialog, a name is
automatically assigned to the Action. You can use the
assigned Action name or type a different name.
4. If you want to choose a hot key to trigger this Action, click
in the Hot key box and press the key(s) you want to use. For
example, press the Shift key, the Control key, and the - [dash]
key simultaneously.
5. Click OK. Your new Action immediately appears in the My
Actions tab.
6. Close the QuicKeys Editor.
7. Press the hot key or other trigger you assigned to this
Action. The Web site you specified should launch
immediately.
Cut and Paste URLs
1. Copy a URL to the system clipboard using the Control+C key
combination.
2. Open the QuicKeys Editor.
3. Paste the URL into QuicKeys by pressing the Control+V key
combination. A pre-filled Web Launcher Action Properties
dialog appears.
4. Select a trigger for the Action and click OK.
WEB LAUNCHER OPTIONS
Below is a description of the Action-specific properties
available with the Web Launcher Action.
FIGURE 156: The Web Launcher Action Properties dialog appears when
you select the Web Launcher Action from the Create menu, or when you
double-click an existing Web Launcher Action in the My Actions tab.
Open URL—Opens the location specified in the URL field.
URL—The Uniform Resource Locator that specifies where
the specified page is located. Most URLs look like this:
http://www.cesoft.com/.
Show dialog before opening URL—Prompts you to
specify which URL you want to visit.
••••
146
Chapter 12
Using Internet Tools
Open text selection as URL—Opens selected text as a URL.
DELETING WEB LAUNCHER ACTIONS
Display Netscape Bookmarks browser—Displays the list of
Netscape bookmarks you have accumulated in a Bookmark
Browser dialog. See Figure 157.
To delete a Web Launcher Action:
Display Internet Explorer Favorites browser—Displays the
list of Internet Explorer favorites you have accumulated in a
Favorites Browser dialog. See Figure 157.
3. Select Delete from the context menu that appears.
FIGURE 157: Open an Internet Explorer Favorite or a Netscape Bookmark
from the Web Launcher browser that appears.
❖
If you use AOL, use Open URL From Internet Explorer
Favorites to display your list of favorite Web sites.
Using this option does not display custom AOL
items like favorite chat rooms, etc.
1. Select the My Actions tab in the QuicKeys Editor.
2. Right-click the Action you want to delete.
4. Choose Yes at the Confirm Delete prompt. The Action is
immediately cleared from the Actions list.
CHAPTER 13
BUILDING SEQUENCES
••••••
QuicKeys Actions are great for simple, one-step tasks.
However, there are times when repetitive tasks require several
consecutive steps. For these situations, QuicKeys offers
Sequences. Sequences are collections of Actions that you put
together to complete a multi-step task. Sequences can be as
easy or complex as you need and creating them is much easier
than the alternative—learning a scripting language.
1. Start your E-mail
program.
2. Type your user
name and password
at the prompt.
3. Click the OK
button to close the
login window.
Combine these
steps using the
Sequence
Editor or
QuicKeys.
Replace the 4-step
task with a QuicKeys
trigger such as a hot
key, a toolbar button,
an item in the
QuicKeys menu, or a
timed trigger.
4. Check for new
mail.
FIGURE 158: This example illustrates how QuicKeys Sequences can
simplify routine, multi-step tasks.
An example of a simple multi-step task you can replace is
logging into your E-mail account and checking for new mail.
Figure 158 illustrates how QuicKeys Sequences can help you
automate this task. This particular Sequence will enable you
to grab a cup of coffee when you get into the office while
QuicKeys prepares your list of mail. All you have to do is
press the assigned QuicKeys trigger. When you return to your
desk, your mail will be ready for you to read and QuicKeys
will have retreated into the background until it’s directed to
complete other tasks.
OVERVIEW OF SEQUENCES
Building Sequences can be challenging unless you have a
multi-step task clearly mapped out in your mind. Even then,
it’s important to know how QuicKeys Sequences work so you
can make the most of their power and flexibility.
There are two basic tasks you must complete when you build
a Sequence:
• You must record or manually create every individual
Action you want to include in the Sequence.
• You must test and adjust your Sequence.
❖
As you begin building Sequences with QuicKeys,
remember that Sequences can be created a number
of different ways and still be successful.
This section provides some examples of what you can do with
QuicKeys Sequences. While these particular examples may
not directly apply to how you intend to use QuicKeys, they do
provide a striking illustration of how QuicKeys can save time
for just about anyone who uses a computer.
USING SEQUENCES IN INFORMATION SYSTEMS
One task that system administrators must frequently perform
is switching between E-mail accounts. Administrators may
have to assume several different electronic identities. For
example, an administrator may have to send mail as both the
systems administrator and as an individual who works for
Company X, depending on who is receiving the
administrator’s messages. This process of changing your Email identity can be quite time-consuming, so it is an ideal
candidate for automating with a QuicKeys Sequence.
••••
148
Chapter 13
Building Sequences
In this example, an administrator changes the account
properties in Microsoft Outlook Express to change his identity
from [email protected] to [email protected].
First, look at the illustration of the Sequence in the Sequence
Editor shown in Figure 159. Then, look at the instructions that
explain how this Sequence was created to get a feel for how
you can automate a task like this on your computer.
Create an Open Action
1. Create an Open Action and choose to open Outlook
Express with a hot key trigger.
Open the Account Properties dialog in Outlook Express
1. Open Outlook Express with the hot key you just assigned
to it. Select Start Recording from the QuicKeys menu.
2. Press Alt+T to display the Tools menu.
3. Use your mouse to select Accounts from the Tools menu.
4. Click on the Mail tab in the Internet Accounts dialog.
5. Select the account you want to change and click the
Properties button.
6. Click the Stop button on the Recording toolbar. The
Sequence Editor appears.
FIGURE 159: A Sequence for system administrators.
7. Name the Sequence Change E-mail Identity and click the Save &
exit button. At this point, the Outlook Express Properties
dialog should still be in the foreground.
Type information in the Account Properties dialog
How the Sequence Was Created
1. Select Start Recording from the QuicKeys menu.
This particular Sequence was created in three distinct parts.
First, an Open Action was created that started Outlook
Express. Then, the QuicKeys recording feature was put to use
in steps 2-9. Finally, there was some difficulty transitioning to
the area of the Outlook Express Properties dialog where text
was typed so a separate Sequence was created just for that
particular dialog. It’s a good example of how Sequences can
be shared between other Sequences using drag-and-drop
functionality.
2. When you see the Recording toolbar, type a different server
name in the Mail account box of the Properties dialog.
Here’s a play-by-play list of how this Sequence was built:
3. Press the Tab key to move down to the Name box. Type the
name you want to use as your “new” identity.
4. Press the Tab key twice to move down to the E-mail address
box. Type the E-mail address you want to use under your
“new” identity.
5. Press the Enter key to select the OK button.
6. Click the Close button in the Internet Accounts dialog.
7. Press the Stop recording button on the Recording toolbar. The
Sequence Editor appears.
••••
8. Click the Save & exit button. By default, the second recording
you created is called New Recording Sequence.
Combine the three components of the Sequence
1. Now, it’s time to put the final Sequence together. Open the
QuicKeys Editor so the Actions tab appears.
2. Open the Change E-mail Identity Sequence by double-clicking it
in the Actions tab.
3. In the Sequence Editor, position the insertion line at the
first step of the Sequence.
4. Position the My Actions tab so it’s tiled vertically alongside
the Sequence Editor.
5. Drag-and-drop the Open Outlook Express Action from the
QuicKeys Editor Actions tab to the Sequence Editor. As
you drag the Action, your cursor becomes a plus sign (+).
When you drop the Open Action, it is inserted where the
insertion line is located (in the first step of the Sequence).
This makes the Open Action a Sub-Sequence within the
Change E-mail Identity Sequence.
USING SEQUENCES AS A WEBMASTER
The webmaster job is one of today’s hottest and least welldefined jobs. It crosses the boundaries of marketing,
advertising, and technology. The nature of the job itself places
webmasters at the heart of many of the company’s critical
activities, and the end results are seen by thousands, perhaps
even millions of people.
While the tools for creating web sites and web pages have
evolved significantly in the past few years, the fact remains
that there is still substantial room for increased productivity.
Most webmasters have to use a variety of tools to create and
maintain a web site. A typical toolkit may look something like
this:
The Typical Webmaster Toolkit
• Text editor
• Java Editor
• Page editor
• FTP client
6. Move the insertion line to the last step of the Sequence.
• Browser(s)
• Graphics editor
7. Drag-and-drop the New Recording Sequence you recorded
last to the last step of the Sequence Editor.
• E-mail client
8. Assign F3 as the hot key that triggers the Change E-mail Identity
Sequence.
9. Close out of Outlook Express and press F3. QuicKeys
should launch the program and change the Account
Properties.
Now create other Sequences like this one so you can switch
between multiple E-mail accounts with a simple keystroke.
149
While some tools combine a few of these functions, there is
still no single solution that embraces all of the features and
functions listed above. As a consequence, using these tools
collectively is a challenge. However, QuicKeys for Windows
can help you meet the challenges facing most webmasters by
providing measurable improvements in productivity, fewer
errors, and general workload reduction.
••••
150
Chapter 13
Building Sequences
Solutions for Webmasters
The key to not going crazy as a webmaster is to be organized
and to work quickly and accurately. The challenge is to
effectively use the wide array of tools to manage the contents
so that the site is up-to-date and works correctly. QuicKeys
can act as a major productivity enhancer in this environment.
QuicKeys doesn’t represent one specific solution, but rather a
collection of solutions that, applied to the webmaster’s tasks,
can yield substantial savings in time and greater efficiency.
To get a feel for how this Sequence was built, look at the
illustration of the Sequence in the Sequence Editor shown in
Figure 160. Then, look at the instructions that explain how this
Sequence was created to get a feel for how you can automate a
task similar to this on your computer.
The most powerful aspect of QuicKeys for the webmaster is
the ability to record a Sequence of actions and then play them
back. For example, launching an FTP client, typing in user and
password information (QuicKeys encrypts the passwords it
stores), changing directories, and even moving files around
can all be part of a QuicKeys Sequence. You can customize
your favorite page editor so that changing typeface, font size
and style is no longer a series of mouse clicks, but rather a
faster and more reliable QuicKeys Sequence, all driven from a
single-key press. Image editors can replay Sequences that
change image sizes, bit-depth, and other elements and then
saves and names the files.
The recording feature of QuicKeys can create very long and
involved Sequences. One of the biggest strengths of this
function is that it provides an automation solution that works
with virtually all of the programs a webmaster must use. And
best of all, no scripting or programming is necessary to get a
Sequence recorded.
To illustrate a small sample of what QuicKeys recording can
do for you as a webmaster, the following section details the
creation of a Sequence that starts the CuteFTP program and
logs into a frequently used ftp site.
FIGURE 160: This Sequence launches CuteFTP and logs into a commonlyused FTP directory.
How the Sequence Was Created
This particular Sequence was created in two distinct parts.
First, an Open Action was created that started the CuteFTP
program. Then, the QuicKeys recording feature was put to use
in steps 2-10.
❖
Before this Sequence was created, the FTP site used
in the Sequence was added to the Personal FTP Sites
directory within the CuteFTP Site Manager.
••••
Here’s a play-by-play of how this Sequence was built:
Create an Open Action
1. Create an Open Action and choose to open CuteFTP. Use
the instructions on page 87 if you need assistance.
2. Name the Action and assign it a trigger.
Open a frequently-used FTP site
1. Open CuteFTP with the trigger you just assigned to it.
2. Select Start Recording from the QuicKeys menu.
3. In the Site Manager window, open the Personal FTP Sites
directory in the left pane.
4. In the right pane of the Site Manager, select the FTP site
you want open.
5. Press Enter to connect to the site.
6. Click the OK button in the Login Messages window to close
the window. The main CuteFTP dialog is open and the
selected FTP site is displayed.
7. Press the Stop button on the Recording toolbar.
8. The Sequence Editor appears. Name the FTP Sequence FTP
Login and assign it a trigger.
9. Click the Save & Exit button to save your new Sequence and
close the Sequence Editor.
Combine the two components of the Sequence
1. Now, it’s time to put the final Sequence together. Open the
QuicKeys Editor so the My Actions tab appears.
2. Display the Sequence Editor by double-clicking the FTP
Login Sequence in the My Actions tab.
3. In the Sequence Editor, position the insertion line at the
first step of the Sequence.
4. Position the My Actions tab so it’s tiled vertically alongside
the Sequence Editor.
151
5. Drag-and-drop the Open CuteFTP Action from the QuicKeys
Editor My Actions tab to the first step in the Sequence Editor.
As you drag the Action, your cursor becomes a plus sign
(+). When you drop the Open Action, it is inserted where
the insertion line is located (in the first step of the
Sequence).
6. Click the Save & Exit button in the Sequence Editor to save
your changes.
7. Close out of CuteFTP and press the trigger you assigned to
this Sequence. QuicKeys should launch the CuteFTP
program and login to your favorite FTP site.
USING SEQUENCES WITH DATABASE PROGRAMS
If you use a database program that stores data on a network
server, you may be familiar with the often tedious process of
logging into the database each time you want to enter or
retrieve information. For example, if you work in a technical
support department, you might have to open a knowledge
database several times a day to stay up-to-date with the issues
other support representatives are hearing from customers.
QuicKeys can automate many of the repetitive, and often
error-prone, processes that are required when working in
database programs.
In this example, a technical support representative logs into
the company database. Keep in mind that most databases are
customized for different companies and departments within
companies, so you will probably not be able to use this exact
Sequence, but examine it as an example of what you could
create with QuicKeys.
••••
152
Chapter 13
Building Sequences
First, look at the illustration of the Sequence shown in
Figure 161. Then, look at the instructions for how this
Sequence was created to get a feel for how you can automate a
task like this on your computer.
• Choose which database in the selected host is displayed
• Enter a password to the database
• Choose access privileges
• Choose how to view the database
• Maximize the database window
With QuicKeys, all these tasks can be completed with a single
trigger.
RECORDING SEQUENCES
Recording is an easy way of creating multi-step Actions. There
are three ways you can select the Start Recording option:
• From the QuicKeys menu
• From the File menu in the QuicKeys Editor
• With a Start Recording hot key created using the QuicKeys
Controller Action.
FIGURE 161: A Sequence that automates logging into a database
When you start recording, a Recording toolbar appears and
you are “live.” (See page 30 to set Recording palette options.)
This means that QuicKeys is now watching everything you do
on your computer. When you finish the tasks you want
QuicKeys to record, click the Stop button on the Recording
palette. The Sequence Editor automatically appears when you
click Stop. Every task you just completed is listed in the lower
half of the Sequence Editor dialog.
program.
How the Sequence Was Created
This particular Sequence was created solely with the
recording function. Once the Start Recording option was selected
from the QuicKeys menu, the following tasks were recorded:
Pause
Stop
• Start FileMaker Pro
• Choose to show FileMaker Pro Network host
• Select which host server to open
FIGURE 162: The Recording palette
Delete
••••
THE SEQUENCE EDITOR
The Sequence Editor enables you to modify, or fine-tune, your
Sequences. When the Sequence Editor appears, you can name
the Sequence like you name your standard Actions and assign
the Sequence a trigger.
153
THE RESULT COLUMN
The Result column displays the Result Handling options selected
for a particular step in the Sequence. See page 154 for more
information on result handling.
THE REPEAT TAB
The Repeat tab enables you to choose whether you want the
Sequence to repeat automatically or only after presenting you
with a prompt. It also lets you choose how many times you
want the Sequence repeated.
FIGURE 164: The Repeat tab appears in the upper half of the Sequence
Editor.
FIGURE 163: The Sequence Editor
The red line above the selected step is called the insertion line.
The insertion line is useful when you need to insert another
Action or a pause into your Sequence. The new item is
inserted wherever the line is located.
THE ACTIONS TOOLBAR
The tabs in the Sequence Editor are organized similarly to the
QuicKeys Editor Create menu. Click a tab, such as the Network
Tools tab, to display a group of buttons that represent each of
the Actions contained within that category of QuicKeys tools.
Use the buttons in this Action toolbar to add Actions to your
Sequence.
PRINTING SEQUENCE STEPS
To print a list of the steps in your Sequence, as well as your
Sequence Properties, open a Sequence and select Print from the
Sequence Editor’s File menu.
CLOSING THE SEQUENCE EDITOR
When you are ready to close the Sequence Editor, you can
choose Save & Exit or Exit. Clicking the Exit button does not save
any changes you made in the Sequence.
••••
154
Chapter 13
Building Sequences
CREATING SEQUENCES WITHOUT
RECORDING
After you become more familiar with QuicKeys, you may find
that it is not necessary to use the recording feature because
you have already created all of the Actions you want in your
Sequence. If you choose to create the Sequence from scratch,
use the Create menu, drag/drop, cut/paste, or import/export
functions. When you are finished collecting the main pieces of
your Sequence, use the Sequence tools discussed on page 160
to add the finishing touches to your Sequence.
Sequence
Icon
Definition
Continue to next step
Stop Sequence
Stop Sequence and notify user
USING THE RESULT HANDLING FEATURE
When you build Sequences, you may discover that your
Sequence encounters unexpected conditions that can keep it
from completing its assigned task successfully. To resolve this
issue, the QuicKeys Sequence Editor uses built-in result
handling. This essentially means that you can tell each step of
the Sequence what to do if it comes across unexpected dialogs
or other items. That way, you don’t waste your time watching
your Sequence to ensure it doesn’t run into any obstacles
while it’s running.
In the If step succeeds and If step fails lists of the Action Properties
dialog, you can direct a particular step in the Sequence to Stop
the Sequence, Stop the Sequence and notify user, Continue to the next step, or
Skip to the next step. Each result handling option is represented by
a different icon that displays in the Sequence Editor’s Result
column. You can double-click the icons to quickly change the
result handling option for a specific step.
Skip next step
Fail Sequence and notify user (used
only in subordinate Sequences)
Fail Sequence (used only in
subordinate Sequences)
RESULT HANDLING EXAMPLE
Result Handling can be as simple or as powerful as you want.
This example is relatively simple so that if you don’t quite
understand how to implement result handling in your
Sequences, you can see how other people have used it.
In this example, a financial analyst automates the process of
adding a comment to his finance database. Keep in mind that
most databases are customized for different companies and
departments within companies, so you will probably not be
able to use this exact Sequence, but examine it as an example
of what you could create with QuicKeys.
••••
First, look at the illustration of the Sequence shown in
Figure 165. Then, look at the instructions for how this
Sequence was created to get a feel for how you can automate a
task like this on your computer.
155
• If a message was not typed in the Message dialog, the date
and time entry is deleted and the database record returns
to the state it was in at the beginning of the Sequence.
Again, this Sequence is quite simple, but it is useful if you
change your mind about entering information in a database in
the middle of a Sequence.
EDITING SEQUENCES
If your Sequence does not behave as you anticipated or if the
dialog shown in Figure 166 appears, you may need to finetune your Sequence without the recorder. The Sequence Editor
gives you the tools to do this. Fine-tuning a Sequence requires
rearranging and inserting steps, as well as using Sequence
tools.
FIGURE 165: A Sequence that uses Result Handling to add or delete
information in a database.
How this Sequence Was Created
This Sequence is scoped to work only in the analyst’s database
program. In other words, his database program must be open
for this Sequence to function. The Sequence performs the
following tasks:
• Types the current time and date into the record.
• Displays a Message dialog that prompts the analyst for
additional comments. If a message is typed at the prompt,
the Sequence continues to the next step. If a message is not
typed at the prompt, the Sequence skips the next step.
• If a message was typed in the Message dialog, it is pasted
into the database record and the Sequence is stopped.
FIGURE 166: This error dialog reveals which Sequence step failed.
INSERTING STEPS
You can insert Steps, or Actions, by selecting them from the
Create menu and creating them in the Setup Wizard or Action
Properties dialog that appears. You can insert steps that pause
your Sequence, select a specific window, display a custom
dialog, and much more. See page 160 for more information on
these types of Sequence tools.
You can also drag-and-drop Actions from the QuicKeys
Editor’s Action list to the insertion point in the Sequence
Editor. To do this, both windows must be open.
••••
156
Chapter 13
Building Sequences
All Actions you create are inserted at the insertion point.
• Insert Pauses in your Sequences if you are having
problems getting your Sequences to play back correctly.
You must use copy/paste or drag-and-drop to add a Sequence
to another Sequence.
• Use the “Type Text” function to select items in lists. For
example, it’s preferable to type the first two letters of an
item in a drop-down list to select it rather than using your
mouse to select it.
The Create Menu
Use the Create menu to insert Actions into your Sequences.
REARRANGING STEPS IN THE SEQUENCE
Rearrange Sequence steps by dragging-and-dropping them in
the desired location within the Sequence Editor.
RENAMING SEQUENCES
To rename a Sequence, open the Sequence you want to
rename. Then, make your changes to the Sequence name and
press the Enter key.
DELETING SEQUENCE STEPS
To delete steps in a Sequence, open the Sequence Editor, select
the step you want to delete, and press the Delete key.
SEQUENCE TIPS
There are some methods you can use when you build
Sequences that help ensure that they function properly. This
section provides some basic tips for building QuicKeys
Sequences.
• During recording, don’t click taskbar buttons; instead, use
Alt+Tab to select a different program. The taskbar buttons
frequently rearrange themselves on your taskbar, so
clicking on them is not a reliable method of choosing them
in a Sequence.
• Use the keyboard to select options whenever possible.
Keyboard selections are more reliable than mouse clicks.
• Make your movements slow and deliberate while
recording.
• Do not use a mouse wheel when you record your Actions.
• Do not grab a scroll bar to scroll through a list in a
Sequence. Instead, use the Page Up and Page Down keys.
• When you look at a particular Sequence in the Sequence
Editor, it is normal for tabs and returns to be displayed as
Type Keystroke Actions.
• As a matter of practice, you should not select items in the
status area of the taskbar, or “tray,” during a recording
because they may not always be located in the same place
when you trigger your Sequence.
• If you have a choice, use “Cut” and “Paste” rather than
drag-and-drop.
• If you are consistently having problems with the same
program when you are recording Sequences, choose to
Disable smart recognition within the QuicKeys Controller
Action. See page 57 for more information.
••••
SUBORDINATE SEQUENCES
Subordinate Sequences, or “Sub-Sequences,” are Sequences
that are embedded within other Sequences. This feature
allows you to break a larger task into smaller tasks, which
simplifies creating and troubleshooting complex Sequences.
157
HOW A SUB-SEQUENCE WORKS
To better understand Sub-Sequences, take a look at the
following example. The example is very simple, yet it
illustrates the success and failure paths within Sub-Sequences.
The Sequence discussed in this section is shown in Figure 167.
CREATING SUBORDINATE SEQUENCES
You can create subordinate Sequences by opening an existing
Sequence and selecting the Sequence option from the Create
menu that appears. You can tell the difference between the
Sequence Editor and the Sub-Sequence Editor by looking at
the tabs. The Sequence Editor has five tabs: General, Repeat,
Toolbars, Action Scope, and Timed Triggers. The SubSequence Editor only has three tabs: General, Repeat, and
Step Results.
❖
You can also drag-and-drop Sequences from the My
Actions tab to create Sub-Sequences as shown in the
example, “Using Sequences in Information
Systems” on page 147.
FIGURE 167: This Sequence contains two Sub-Sequences.
When you press F11, this Sequence is triggered. Depending on
which button you press in the Message Action, you either
follow a success path or a failure path.
••••
158
Chapter 13
Building Sequences
Using Sub-Sequences in a Sequence
1. Press F11. A window appears with instructions to click OK
to go to Sequence One or Cancel to go to Sequence Two.
SUB-SEQUENCE EDITOR
The Sub-Sequence Editor is composed of three tabs: the General
tab, the Repeat tab, and the Step Results tab.
2. Click OK to start the Sequence. Click Cancel to start Sequence
Two.
FIGURE 168: This window appears when you trigger a Sequence like the
one shown in Figure 167. Depending on which button you select, the main
Sequence branches to different Sub-Sequences.
The Sequence reacts to each choice you make by using the
Result Handling options you have specified in each step of the
Sequence.
FIGURE 169: Open the Sub-Sequence Editor by selecting Sequence from
the Create menu in the Sequence Editor or by double-clicking a SubSequence.
General Tab
Type the name of your Sub-Sequence in the General tab.
Repeat Tab
The Repeat tab enables you to choose whether you want the
Sequence to repeat automatically or only after presenting you
with a prompt. It also lets you choose how many times you
want the Sequence repeated.You can repeat your Sequence up
to 999 times.
••••
Step Results Tab
Choose how you want your Sub-Sequence to react to
successes and failures. In the If step succeeds and If step fails lists
of the Action Properties dialog, you can direct a particular
step in the Sequence to Stop the Sequence, Stop the Sequence and notify
user, Continue to the next step, Skip to the next step, Fail Sequence, or Fail
Sequence and notify user. Each result handling option is
represented by a different icon that displays in the Sequence
Editor’s Result column. You can right-click the icons and select
Properties from the context menu that appears to quickly
change the result handling option for a specific step.
Stop Sequence—Stops the current Sequence and returns
success to the main Sequence.
Stop Sequence and notify user—Stops the current
Sequence, notifies user, and returns success to the main
Sequence.
159
TRIGGERING SEQUENCES
Press the hot key you assigned to your new Sequence. When
the Sequence is triggered, the Playback toolbar appears. (See
page 31 for more information on the Playback palette
settings.) You can use this palette to pause or stop the
Sequence at any time.
FIGURE 170: The Playback toolbar
When the Sequence is finished, the dialog in Figure 171
appears.
Continue to next step—Continues to the next step.
Skip next step—Skips to the next step of the current
Sequence.
Fail Sequence—Exits the current Sequence and returns
failure to the main Sequence.
Fail Sequence and notify user—Exits the current
Sequence, notifies user, and returns failure to the main
Sequence.
SAVING SEQUENCES
When you close the Sequence Editor, you are prompted to
save your Sequence. If you do not choose to save your
Sequence at that time, the Sequence will be deleted. If you are
editing an existing Sequence and you do not choose to save
your Sequence at the prompt, all of your changes are lost.
FIGURE 171: This dialog appears when your Sequence has completed
successfully.
••••
160
Chapter 13
Building Sequences
EDITING FAILED SEQUENCES
If QuicKeys is unable to complete a step in your Sequence that
uses the “notify user” result handling option, an alert window
appears. Click OK to go to the failed step. Click Cancel to stop
the attempted playback of the Sequence. See page 154 for
more information on result handling.
SEQUENCE TOOLS
The Sequence Editor uses Actions that are often not useful in
other contexts. These Actions are called Sequence tools and
they include:
• Check Condition
• Message
• Password vault
• Pause
• QuicKeys Event
Logger
• Select Items in
Dropdown List
• Select Items in List
• Switch Tabs
FIGURE 172: This dialog appears when a sequence fails.
• Wait for User Input
• Wait for Window
PLAYBACK OPTIONS
• Window Selector
Execute and repeat X times—Specifies how many consecutive
cycles you want this Sequence to run.
Ask for repeat count—Prompts you for the number of cycles
QuicKeys should run through for this Sequence.
DELETING SEQUENCES
To delete Sequences, select the My Actions tab in the QuicKeys
Editor. Select the Sequence you want to delete and press the
Delete key.
CHECK CONDITION
The Check Condition Sequence tool is a powerful component
for more advanced QuicKeys Sequences. With a Check
Condition Action, you can verify that a specific condition is
met before proceeding to the next step of the sequence. For
example, you can create a Sequence that checks the date and
time and only continues between 8:00 AM and 5 PM.
To insert a Check Condition Action into a Sequence:
1. Open the Sequence in which you want to insert a Check
Condition Action.
2. Click the step where you want to insert the Check
Condition Action.
3. Select Create>Sequence Tools>Check Condition.
4. Complete the Sequence Action Properties dialog that
appears and click OK. See the Check Condition Options
section that follows for specific information on each Check
Condition option.
••••
Check Condition Options
Below is a description of the Action-specific properties
available with the Check Condition Action.
161
Check folder—Checks for the presence of a user-specified
folder.
Check file—Checks the presence of a user-specified file and
optionally establishes if the file is read-only, a specific size, or
a specific version. For example, you could insert a step in your
sequence that checked for the presence of a specific weekly
report that is greater or equal to 5 bytes in size.
FIGURE 174: The Check folder Action Properties
Check window—Examines the status and/or size of
windows that possess the specified Title, Class, and Type
properties. You can populate most of the text boxes and menu
in this dialog using the Window Finder tool.
FIGURE 173: The Check file Action Properties
••••
162
Chapter 13
Building Sequences
To use the Window Finder:
1. Open the window you want to examine in your Sequence.
2. Open the dialog shown in Figure 175. The window you
opened in step 1 should now be behind the Check
Condition Action Properties dialog.
3. Click your mouse on the Window Finder tool in the Action
Properties dialog, and when your cursor becomes a
magnifying glass, move your mouse over the window you
want to test.
4. Release the Window Finder cursor when it is positioned
over the window you want to use in your Sequence. The
Check window fields are automatically filled with information
about the selected window.
FIGURE 175: The Check window Action Properties
Check window control—Examines the status and/or state of
the control using the specified Text, Class, and Type
properties. You can populate most of the text boxes and menu
in this dialog using the Control Finder tool.
••••
Click on the Control Finder tool and when your cursor
becomes a magnifying glass move it to the control you want
to test. When you release the Control Finder cursor, all the
window control fields are filled with information.
Check clipboard—Looks at the System clipboard for the
presence of a specific data type.
FIGURE 177: The Check clipboard Action Properties
FIGURE 176: The Check window control Action Properties
163
••••
164
Chapter 13
Building Sequences
Check program—Verifies that a specified program exists, is
running, or is frontmost on your desktop.
FIGURE 178: The Check program Action Properties
Check current date and time—Checks the current system
date/time against the specified date/time.
FIGURE 179: Check for specific date and/or time
••••
Run executable and test the result value—Launches an
executable or a script that returns a numeric result. When you
choose this option, you must indicate whether the executable
is a Specified file or an Installed file.
165
For the Installed file option to be available, you must create a
QKScripts directory and store your scripts in that directory.
Just as the Run Script Action works (see page 105), the scripts
you add to this directory require the appropriate script engine
be installed on your computer.
To create the QKScripts directory and install your script(s):
1. Create a folder called “QKScripts” in your QuicKeys
directory. The path of the folder should be C:\Program
Files\CE Software\QuicKeys\QKScripts.
2. Copy your executable(s) into the QKScripts folder.
3. Click the Installed file option and select the executable file
you wish to use for this condition check.
MESSAGE
Use the Message Sequence tool to create a custom dialog that
appears at a designated point in your Sequence. The dialog
input can be used as an if/then decision within the Sequence.
To insert a Message Action into a Sequence:
1. Open the Sequence in which you want to insert a Message
Action.
FIGURE 180: Run an executable from an installed file or from a specified
file.
When you select Specified file, click the Browse button to locate
the executable you want to use. After you select a file, you can
specify a working directory or parameters under which the
executable will run. You can also indicate what the Sequence
can expect from the executable’s return code.
••••
166
Chapter 13
Building Sequences
Show OK button—Displays an OK button in your custom
dialog that you can select to proceed with the Sequence.
Show Cancel button—Displays a Cancel button in your
custom dialog that you can select to cancel the Sequence.
Continue automatically after X seconds—Stops looking for
user input “X” seconds after the custom dialog appears.
Text entry field—Choose to place user-specified text on the
clipboard, to type the text, or to type the text with returns.
If step succeeds—After this Action is completed, this list
specifies what the Sequence should do next. For example, it
can stop the Sequence and notify the user, continue to the next
step of the Sequence, or skip to the next step.
If step fails—After this Action is completed, the list that
appears specifies what the Sequence should do next. For
example, it can stop the Sequence, stop the Sequence and
notify the user, continue to the next step of the Sequence, or
skip to the next step.
FIGURE 181: The Action Properties dialog for the Message Sequence tool
PASSWORD VAULT
3. Select Create>Sequence Tools>Message.
The Password Vault Action can be useful in Sequences for
storing information, such as E-mail passwords. If your
passwords are stored, no one behind you can see what text
you are typing to access other computers, etc.
4. Complete the Sequence Action Properties dialog that
appears and click OK.
Using Password Vault
2. Position the insertion line in the location you want to insert
the Message Action.
Message Options
Below is a description of the Action-specific properties
available with the Message Action.
Message to display—The text you want to appear in your
custom dialog.
To insert a Password Vault Action into a Sequence:
1. Open the Sequence in which you want to insert a Password
Vault Action.
2. Position the insertion line in the location you want to insert
the Password Vault Action.
3. Select Create>Sequence Tools>Password Vault.
••••
4. Complete the Sequence Action Properties dialog shown in
Figure 182 and click OK.
167
PAUSE
The Pause Action is useful if you need to direct a QuicKeys
Sequence to wait for a specified length of time before
proceeding with the Sequence.
Using Pause
To insert a Pause Action into a Sequence:
1. Open the Sequence in which you want to insert a Pause
Action.
2. Position the insertion line in the location you want to insert
the Pause.
3. Select Create>Sequence Tools>Pause.
FIGURE 182: The Action Properties dialog for the Password Vault
4. Complete the Sequence Action Properties dialog shown in
Figure 183 and click OK.
Sequence tool
Password Vault Options
Below is a description of the Action-specific properties
available with the Password Vault Action.
Password—The password you want the Sequence to enter.
If step succeeds—After this Action is completed, this list
specifies what the Sequence should do next. For example, it
can stop the Sequence and notify the user, continue to the next
step of the Sequence, or skip to the next step.
If step fails—After this Action is completed, the list that
appears specifies what the Sequence should do next. For
example, it can stop the Sequence, stop the Sequence and
notify the user, continue to the next step of the Sequence, or
skip to the next step.
FIGURE 183: The Action Properties dialog for the Pause Sequence tool
••••
168
Chapter 13
Building Sequences
Pause Options
Below is a description of the Action-specific properties
available with the Pause Action.
Duration—The length of the pause in measurements of
Seconds or Milliseconds. These options give you precise
control over the duration of your pause so the Sequence takes
no longer than necessary to complete.
QUICKEYS EVENT LOGGER
The QuicKeys Event Logger provides you with the ability to
write out events to the Windows NT and Windows 2000
System Event log or to the log file on Windows 95 and
Windows 98.
If step succeeds—After this Action is completed, this specifies
what the Sequence should do next. For example, it can stop
the Sequence, stop the Sequence and notify the user, continue
to the next step of the Sequence, or skip to the next step.
If step fails—After this Action is completed, the list that
appears specifies what the Sequence should do next. For
example, it can stop the Sequence, stop the Sequence and
notify the user, continue to the next step of the Sequence, or
skip the next step.
FIGURE 184: The QuicKeys Event Logger Action Properties
••••
SELECT ITEMS IN DROPDOWN LIST
Use Select Items in Dropdown List to check for specific combo
box controls. Click the Specify window properties button to display
the Window Properties dialog. Using the Window finder tool
in the Window Properties dialog enables you to automatically
populate the text fields and buttons in the Action Properties
dialog. See Figure 190 on page 173.
169
Select Items in Dropdown List Options
Below is a description of the Action-specific properties
available with the Select Items in Dropdown List Action.
Browse—Click the Browse button to identify the dropdown list
containing the item you want to select.
Select item—Select an item by item index or text or choose to
unselect all items. You can also choose to double-click the
selected item if you choose by item index or by item text.
SELECT ITEMS IN LIST
Use Select Items in List to check for specific list controls. You
can direct QuicKeys to check by index or by text. Click the
Specify window properties button to display the Window Properties
dialog. Using the Window finder tool in the Window
Properties dialog enables you to automatically populate the
text fields and buttons in the Action Properties dialog. See
Figure 190 on page 173.
FIGURE 185: The Dropdown list Action Properties
••••
170
Chapter 13
Building Sequences
Select Items in List Options
Below is a description of the Action-specific properties
available with the Select Items in List Action.
Browse—Click the Browse button to identify the list containing
the item you want to select.
Do action—Choose to Select a single item, Unselect a single item,
Select a range of items, Unselect a range of items, or Unselect all items in
the list. The Select by options change depending upon which
action you choose.
Select by—Select an item by index or text and indicate
whether or not the text must exactly match the text you
specify in the Start text box. You can also choose to double-click
the selected item.
FIGURE 186: The Select Items Action Properties
••••
SWITCH TABS
To switch tabs in a Sequence, specify the tab controls in the
Switch Tabs Action Properties dialog. Click the Specify window
properties button to display the Window Properties dialog.
Using the Window finder tool in the Window Properties
dialog enables you to automatically populate the text fields
and buttons in the Action Properties dialog. See Figure 190 on
page 173.
171
Switch Tabs Options
Below is a description of the Action-specific properties
available with the Switch Tabs Action.
Find tab control—Click the Browse button to identify the tab
control on which to operate.
Find tab control on window—Click the Specify window properties
button to display the Window Properties dialog. Using the
Window finder in the Window Properties dialog enables you
to automatically populate the text fields and buttons in the
Action Properties dialog. See Figure 190 on page 173.
Select tab—Select a tab by item index or by item text and
indicate whether or not the text must exactly match the text
you specify.
WAIT FOR USER INPUT
Direct your Sequence to wait for user input, such as a
keystroke or a mouse click, before proceeding with the
Sequence. You can have the Sequence wait for any keystroke,
a specific keystroke, or a specific mouse click. Click one of the
modifier check boxes to use a specific modifier key in
combination with the mouse button you selected.
FIGURE 187: The Switch Tabs Action Properties
••••
172
Chapter 13
Building Sequences
Click the Specify window properties button to display the Window
Properties dialog. Using the Window finder tool in the
Window Properties dialog enables you to automatically
populate the text fields and buttons in the Action Properties
dialog. See Figure 190.
Using Wait for Window
To insert a Wait for Window Action into a Sequence:
1. Open the Sequence in which you want to insert a Wait for
Window Action.
FIGURE 188: The Wait for User Input Action Properties
WAIT FOR WINDOW
The Wait for Window Sequence tool gives you the ability to
specify which window or what type of window you want
QuicKeys to look for when it is cycling through a Sequence.
For example, if your Sequence opens several windows and
you want to choose an option in the window named Browse,
you just need to specify Wait for window whose title contains Browse
in the Sequence Action Properties dialog.
FIGURE 189: The Action Properties dialog for the Wait for window
Sequence tool.
2. Position the insertion line in the location you want to insert
the Wait for Window Action.
3. Select Create>Sequence Tools>Wait for window.
••••
173
4. Complete the Sequence Action Properties and click OK.
Wait for Window Options
Below is a description of the Action-specific properties
available with the Wait for Window Action.
Wait for window whose title contains—Type the name that
appears in the window’s title bar in this box.
Wait for Window with selected properties—Click the Select
properties box to display the window selection dialog.
Window Properties—Choose the properties a window
must possess to satisfy the Wait command. If you select the
Window finder icon, wait until your cursor becomes a
magnifying glass and drag it to the window you want to
select. When you drag the Window finder icon, all the other
Window Selector fields are filled with information. Click OK
when you are finished with Window Selector. See
Figure 189.
•Window name is the name in the title bar.
•Window class can be populated using the Window
finder tool.
•A Top Level Window is a program or system window.
A Popup Window is a secondary dialog within a program.
•Click the Window finder icon and drag it to the window you want to select in your Sequence. As you drag,
your cursor becomes a magnifying glass and the Window name, class, and type fields change dynamically,
depending on where the cursor is positioned.
•Select the Hide QuicKeys Editor check box when you
want the Editor dialog to disappear while you use the
window finder tool.
FIGURE 190: The Window Properties dialog
Wait until window—Waits until the window appears,
disappears, becomes active, or becomes inactive.
Give up after X seconds—Stops looking for the Action “X”
seconds after this step of the Sequence is triggered.
If step succeeds—After this Action is completed, this list
specifies what the Sequence should do next. For example, it
can stop the Sequence and notify the user, continue to the next
step of the Sequence, or skip to the next step.
If step fails—After this Action is completed, the list that
appears specifies what the Sequence should do next. For
example, it can stop the Sequence, stop the Sequence and
notify the user, continue to the next step of the Sequence, or
skip to the next step.
••••
174
Chapter 13
Building Sequences
WINDOW SELECTOR
Use the Window Selector to choose a program window in a
Sequence. Click the Specify window properties button to display the
Window Properties dialog. Using the Window finder tool in
the Window Properties dialog enables you to automatically
populate the text fields and buttons in the Action Properties
dialog. See Figure 190.
To insert a Window Selector Action into a Sequence:
1. Open the Sequence in which you want to insert a Window
Selector Action.
Window Selector Options
Below is a description of the Action-specific properties
available with the Window Selector Action.
Select window whose title contains—The name of the
window for which you want the Sequence to search.
Select window with selected properties—Enables the Select
Properties button.
Select Properties—Displays the dialog shown in Figure 190
and discussed on page 173.
If step succeeds—After this Action is completed, this list
specifies what the Sequence should do next. For example, it
can stop the Sequence, stop the Sequence and notify the user,
continue to the next step of the Sequence, or skip the next
step.
If step fails—After this Action is completed, the list that
appears specifies what the Sequence should do next. For
example, it can stop the Sequence, stop the Sequence and
notify the user, continue to the next step of the Sequence, or
skip the next step.
FIGURE 191: The Action Properties dialog for the Window Selector
Sequence tool.
2. Position the insertion line in the location you want to insert
the Window Selector Action.
3. Select Create>Sequence Tools>Window Selector.
4. Complete the Sequence Action Properties dialog and click
OK.
CLEARING SELECTED HOT KEYS
When you no longer want a hot key assigned to the selected
Sequence, click the Clear hot key button in the Sequence Editor.
You may want to take advantage of this option if you want to
make this Sequence part of a larger Sequence and you need
the assigned hotkey for a different Action.
APPENDIX A:
TIPS AND TROUBLESHOOTING
••••••
This section provides tips for using QuicKeys and describes
solutions for some common problems you may encounter
when using QuicKeys.
TIPS
• You can drag files to the QuicKeys Editor to create Open
Actions.
• You can drag text to the QuicKeys Editor to create Type
Text Actions.
• Speed up the process of creating and editing Actions by
unchecking the Show Setup Wizard introduction page and Always
use Setup Wizards for editing check boxes in the Options dialog.
See page 30 for more information.
• You can right-click an Action in the QuicKeys Editor and
choose Cut or Copy from the context menu that appears.
Then you can set the insert arrow in the Sequence Editor,
right-click and choose Paste from the context menu to paste
your Action into the Sequence.
• You can create a Windows Selector Action if you use a
laptop computer so that you can see all your open
programs without running out of room on the taskbar. The
Windows Selector Action is available in the Sequence Tools
submenu of the Create menu.
• Press Control+Tab to insert a tab in the Type Text Action
Properties dialog.
• If you have a scrolling mouse button between your right
and left mouse buttons do not use it to record your
Actions.
• If you use Web Launcher with the America Online (AOL)
browser, Internet Explorer is launched rather than the AOL
browser.
• If you want the hot help that appears over toolbar buttons
to be more descriptive, change the name of the Action
represented by the toolbar button. The hot help pop-ups
are filled by the information you provide in the Name field
of your Actions.
• Cut and paste URLs into the QuicKeys Editor to quickly
create Web Launcher Actions.
• Press Ctrl+Esc to stop Quick Type while it is typing text.
TROUBLESHOOTING
• Make sure you are very careful about assigning single keys
as your hot key triggers. For example, assigning the
Backspace key for the Open Microsoft Explorer Action
could get irritating after a few minutes. If you do attempt
to assign a single key as your hot key, QuicKeys displays a
warning dialog. The warning dialog is permanently
turned off if you check the Do not ask me this again check box
within the dialog.
• If you are using Windows NT, installation must take place
while logged in as an administrator or as a user with
administrative rights.
• If you are consistently having problems with the same
program when you are recording sequences, choose to
Disable smart recognition within the QuicKeys Controller
Action.
• You must have a sound card for the Multimedia Actions to
work properly.
••••
176
Tips and Troubleshooting
• Desktop Scope is limited to the actual desktop being
active. It does not include drive windows.
• If you have an Action that doesn’t function properly with a
toolbar trigger, try using a hot key trigger instead.
• If you deselect Show Wizards For Editing, you see a different
dialog when you edit an Action in the My Actions tab.
• Make sure when you create toolbar triggers that you do
not create an infinite loop. For example, you can
repeatedly choose the current toolbar as a QuicKeys button
in the Toolbar Button Wizard.
• The Windows Specials Up one folder Action does not navigate
up one folder level if you are using it within a standard
Windows Explorer window. It only works within Open or
Save dialogs.
• If you choose to open Microsoft Explorer in Full Screen view
over an auto hide toolbar, the auto hide toolbar will remain
behind the Explorer window until you close the toolbar
and reopen it.
• If one of your QuicKeys triggers suddenly doesn’t work,
make sure you don’t have a QuicKeys dialog open on your
desktop. When a QuicKeys dialog is open, the QuicKeys
menu in the status area has a red X over it.
• If you only see a few buttons in your Setup Wizards tab, click
the drop-down list arrow at the top of the tab and select All
Wizards from the list that appears. All your Setup Wizard
buttons should immediately return.
• You must exit the Clipboard Editor before you can see
your newly added clips in the Prompt for item to paste window.
• You must have an insertion point available before the
QuicKeys Clipboard paste function works properly.
• If you delete, rename, or move custom icons that are used
in toolbars, the toolbar button that used that icon will no
longer display that graphic.
• It is possible to add toolbar buttons to toolbars that have a
different scope than the Actions represented by the toolbar
buttons. This capability may keep the Action that is
triggered with the toolbar button from functioning
properly. For example, a toolbar button representing a
Microsoft Word Action can be added to a toolbar that only
works in Internet Explorer.
• If you are using a firewall and are having difficulty
connecting to a remote time server, check that ports 37 or
123 are open. See your network administrator for more
information.
• If you are experiencing frequent timeouts when you select
Check for QucKeys updates, check your Internet connection. If
your Internet connection is functioning properly, call CE
Software’s technical support team.
MULTI-USER WORKSTATIONS
If your Windows machine is on a network, you probably have
to provide your user name and password when you restart
your computer. If you start QuicKeys and create Actions after
completing the login process, those Actions are stored in a
preference file that is linked to your user name and password.
The benefit of this architecture is that multiple users can log
into the network from the same workstation, yet retain their
own personal QuicKeys Actions. The process is invisible to
you, but it’s important to know if you are concerned about
your Actions being used by someone else.
APPENDIX B:
CREATING CUSTOM TOOLBAR ICONS
••••••
This chapter discusses how to create icons that can be used in
QuicKeys toolbars. The ability to create your own toolbar
icons enables you to completely customize how QuicKeys
toolbars look and function.
USING BITMAP IMAGES
If you have a company logo or some other graphic saved as a
bitmap, you can use it in a QuicKeys toolbar. Unlike icons,
QuicKeys toolbars save bitmap images internally, so even if
you delete the original image, your toolbar icons will remain
intact.
The following example uses Microsoft’s Paint program, since
most Windows users install it with the system software.
However, you can also use other graphics programs to create
icons, such as Adobe® Photoshop®.
To create an icon:
1. Open the Paint program that is installed with standard
installations of Windows.
2. Select Attributes from the Image menu.
To use a bitmap image in your toolbar:
1. Right-click the icon you want to replace on the toolbar and
select Set icon from bitmap. A standard Open dialog appears.
2. Navigate to the bitmap image you want to use
3. Select the bitmap image and click Open. The bitmap image
appears as a button on your QuicKeys toolbar.
RESTORING DEFAULT ICONS
If you don’t like the button changes you made to your
QuicKeys toolbar, you can easily restore your icon buttons to
their original appearance. Just right-click the toolbar button
you want to replace and select Restore default icon.
CREATING AN ICON
If you are a graphics professional and know how to create
icons, this section is for you. The first step in using one of your
own icons in a QuicKeys toolbar is creating the icon. Icons
require the .ico extension in the file name and they must equal
16x16 or 32x32 pixels.
FIGURE 192: The Attributes dialog
3. In the Attributes dialog, type 32 in the Width and Height
fields.
❖
You can also type 16 in both fields if you want to
create a smaller icon.
4. Select Pels in the Units area to use Pixels as your unit of
measurement.
5. Select whether you want to use black and white or colors in
your icon.
6. Click OK when you are done. A blank square appears in the
Paint dialog.
••••
178
Creating Custom Toolbar Icons
7. Use the tools in the Paint program’s tool palette to create
an image.
To set a custom toolbar icon:
1. Right-click a button on an open toolbar.
FIGURE 194: The toolbar button menu
2. Select Set icon from file.
3. Click the Browse button in the Select Icon dialog.
4. Navigate to the custom icon you just created.
5. Choose the icon and click Open. The Select Icon dialog
appears.
FIGURE 193: The icon in this example was created with the circle tool, the
line tool, and the pen tool.
8. Select Save as from the File menu.
9. Navigate to the location on your hard drive where you
want to save this icon.
10. Type a name for the icon in the File name box. For example,
type greenface.ico to mark the file as an icon file.
11. Select 24-bit Bitmap from the Save as type drop-down list.
12. Click Save. The new icon is saved to the location you
specified.
SETTING THE ICON IN QUICKEYS
The next step in customizing your toolbar buttons is adding
your new icon to your toolbar buttons.
6. Select the icon in the Select Icon dialog and click OK. The new
icon appears immediately on the toolbar you selected.
••••
179
APPENDIX C:
THE QUICKEYS ARCHITECTURE
••••••
QuicKeys is composed of three primary components: the QuicKeys Editor, the QuicKeys Engine, and QuicKeys plug-ins. Within
those three primary components are several secondary components. To help you visualize this architecture, see the diagram below.
QuicKeys
Editor
Plug-in
Keyset Manager
Plug-in
Setup Wizard Manager
Sequence
Editor
Action Editor Manager
Plug-In API
QuicKeys
Engine
Playback Manager
Recording Manager
Plug-in
Toolbar Manager
Scope
Manager
Trigger Manager
OLE Automation Interface
VB Script
Office Programs
Plug-in
Other Tools
••••
180
The QuicKeys Architecture
••••
APPENDIX D:
HOT KEYS THAT CANNOT BE USED
••••••
There are some hot keys that QuicKeys cannot use because the hot key is reserved for another function. This appendix lists the
“blacklisted” hot keys along with a brief explanation of why they cannot be used.
Hot Key
Why it can’t be used
F1
Opens QuicKeys Windows online Help
Windows+E
Starts Windows Explorer
Control+Escape
Opens the Start menu
Alt+Tab
Opens the next program listed on the taskbar
Windows+Tab
Selects the next taskbar button
Windows+F
Locates files or folders
Windows+Control+F
Finds a computer on the network
Windows+F1
Opens Windows online Help
Windows+R
Opens the “Run” dialog
Windows+Pause
Opens the System Properties control panel
Windows+E
Opens Windows Explorer
Windows+D
Shows the desktop
Windows+M
Minimizes all windows
Windows+Shift+M
Maximizes all windows
F12 (in NT and Windows 2000)
Used by the Windows NT and Windows 2000
operating system
181
••••
182
Hot Keys That Cannot Be Used
GLOSSARY
••••••
Action—Tasks QuicKeys completes. For example, you can
trigger an Action by selecting the hot key you assigned to the
Action.
Action scope—The range of operation for an Action. For
example, you can create Actions that only work when
Microsoft Word is active or Actions that work in any active
window on your computer.
Action set— A collection of Actions or Sequences used
primarily in the context of importing or exporting Actions.
For example, users can export an Action Set and share it with
another QuicKeys user.
drive—Storage device that holds computer data.
dropdown list—A closed list box containing a list of items
you can select. Clicking the arrow next to the list box opens
the list.
extension—The part of a Windows file name that identifies
file type, such as ".dll".
hot key—The key(s) you can press on your keyboard to
trigger a QuicKeys Action.
list box—Any type of box containing a list of items you can
select. You cannot type a selection in a list box.
class—The way the system defines a window.
clip—Individual item in a QuicKeys clipbook.
Clipboard—The system’s holding area for an item selected
using the cut or copy feature.
clipbook—The QuicKeys-specific holding area for selected
text and graphics.
combo box—A control that combines an edit control with a
list box. This allows the user to type an entry or choose one
from the list.
context menu—The menu that appears when you right-click
your mouse.
dialog—Part of the software interface that contains command
buttons and various kinds of options through which you can
carry out a particular command or task.
parameters—Program-specific command lines you can use to
further control the behavior of the selected file when it is
opened.
plug-in—Use to refer to existing QuicKeys components, such
as the Change Folder Action, as well as to refer to future
QuicKeys add-ons.
properties—Attributes or characteristics of an object used to
define its state, appearance or behavior.
QuicKeys Editor—The main component of the QuicKeys
interface where you access the Setup Wizards, My Keyboard, My
Actions, and My Toolbar tabs as well as the various menu items.
QuickReference Card—The dialog that displays all of your
Actions and hot keys.
••••
184
Glossary
QuicKeys menu—The context menu that appears when you
right-click the QuicKeys icon located by default in the status
area of the taskbar (also referred to as the Tray).
QuickStart Wizard—The wizard that appears automatically
when you have not yet created any Actions in QuicKeys or
when you select Run QuickStart Wizard from the QuicKeys Editor
Help menu.
run—The appearance of a file when it is opened with the
Open Action.
scope—The range of operation for an Action. For example,
you can create Actions that only work when the Microsoft
Word is active or Actions that work in any active window on
your computer.
Sequence—A series of Actions that execute consecutively.
Setup Wizards—The screens that help you create various
items in a step-by-step fashion.
shortcut—The icon that appears when you drag a QuicKeys
Action to the desktop and it becomes an “official” Microsoft
shortcut.
taskbar—The bar that appears by default at the bottom of the
Windows desktop. A QuicKeys icon appears in the status area
of the taskbar (also referred to as the Tray). When you rightclick the QuicKeys menu, a context menu appears that makes
Toolbars, recording options, and open and exit options
available.
toggle—Turns a particular mode on or off. For example, you
can toggle hot keys on or off.
toolbar—The graphical palettes you can use to trigger Actions
and display Action menus.
trigger—Directs QuicKeys to start an Action.
URL—Uniform Resource Locator. The Worldwide Web
(WWW) consists of URLs that take you to specific Web sites.
For example, CE Software’s URL is http://www.cesoft.com/
volume—The level of sound on your computer.
••••
Index
A
B
About this manual 3
Action Menu buttons 44
Action Properties 21, 41
Action scope 22
Actions 11
Creating 21
Creating your first 32
Defined 11
Disabling 26
Enabling 26
Exporting 30
Importing 29
New 2
Printing 26
Saving 26
Setting Up 32
Sharing 29
Tab 16
Triggering 25
Adding
Actions to the QuicKeys menu 19
Buttons to toolbars 42
Steps to a Sequence 155
Advanced Text Tools 59–62
Aliasing a keystroke 115
AOL 144, 146
Application Data folder 87
Attributes 77
Audio
Device 130, 132
Volume 130
Auto-hide 38
Backing up Actions 30
Bitmap images 177
As toolbar buttons 52
Button
Click Action 95
Size 50
Types 43
C
Cascade windows 118
CD 127
Changing
Button icons 50
Toolbar styles 37
Characters per line 61
Check
Condition 160–165
Spelling 64–66
for QuicKeys updates 9
Choose
Folder 87
Printer 133
Clearing
Clipbook clips 105
Hot keys 26, 174
Click-N-Go toolbars 37
Clipbook Action 100–105
Clipbook Editor
Clearing clips 105
Closing
All windows 119
Toolbars 48
Conditional Sequence steps 154
Context menu 110
Control Finder tool 162
Controller Action 55
185
••••
186
Copying files or folders 79
Create
Actions 11, 21
Custom Icons 177
Folders 87
Menu 21, 156
Multiple Actions 33
Sequences 11
Toolbars 40–45
Custom
Format 70
Format Builder 70
Icons 177
D
Date Actions 68
Date/Time formats 70
Defined Actions 44
Delete
Actions 17
Buttons 53
Clipbook Editor clips 105
Files and folders 79
Hot keys 26, 174
Multiple Actions 34
Sequence steps 156
Toolbar buttons 53
Toolbars 16, 49
Type Text Actions 73
Dial-up Networking 135
Disable
Actions 26
Hot keys 27
Hot keys and timers 56
Smart recognition 57
Display
Actions 16, 34
My Actions tab 16
My Keyboard tab 14
My Toolbars tab 15
Setup Wizard introduction page 31
Setup Wizards tab 13
Toolbars 45
Dockable toolbars 38
Drag-and-drop 43
DVD 127
E
Editing
Actions 21
Options 31
Toolbar buttons 49
Toolbars 45
Type Text Actions 73
E-mail 141
Embedded Sequences 157
Enabling
Hot keys 27
Hot keys and timers 56
Error handling 154
Event Logger 168
Exiting QuicKeys 57
Exporting 30
Extensions 78
F
Favorites folder 87
Features 2
Feedback 5
File & Folder Tools 75–94
File Handler Action 75
Files
Attributes 77
Copying 79
Deleting 79
Extensions 78
Moving 78
Opening 80
Renaming 80–83
Zipping 92–94
Firewalls 112, 176
Floating toolbars 38
••••
Folders 84
Attributes 77
Copying 79
Creating 87
Deleting 79
Moving 78
Renaming 80–83
Format Builder 70
FTP launch 144
G
Glossary 63, 183
H
Help information 32
Hierarchy of keystrokes 27
Hot Help 175
Hot keys 25
Blacklisted 181
Clearing 26, 174
Conflicts 27
Deleting 174
Enable/Disable 56
In the QuicKeys menu 30
Priority 27
I
Icons 50
Importing Actions 29
Installed file 165
Installing QuicKeys 7
Instant E-mail 141
Internet Explorer Favorites browser 146
Internet Tools 141–146
Introduction page 31
K
Keyboard
Layout 30
Tab 13, 14
L
Laptops 44
Launch files 87
Lock computer 114
Log off computer 114
Lowercase 61
M
Manual conventions 4
Master Out 132
Menu
ID 109
Item 108
Select 107
Text 109
Message Action 165
Mouse Click Action 96
Mouse Position 98
Moving
Files and folders 78
Toolbars 38, 39
Multimedia Tools 127–132
Multiple Actions 33
Multi-User workstations 176
My Actions tab 16
My Documents Folder 87
My Keyboard tab 14
My Toolbars Tab 15
N
Netscape Bookmarks browser 146
Network
Drives 137
Printers 133
Tools 133–139
Volumes 135
New Actions 2
New QuicKeys features 2–3
187
••••
188
O
Online help 32
Open
Files and folders 80
Text Selection as URL 146
URL 145
Open Action 87
Options 30
P
Parameters 89, 106
Password Vault Action 166
Pause 167, 172
Play Sound Action 129
Playback toolbar 31, 159
Plug-ins 18
Pop Out toolbars 39
Printing 133
Actions 26
Sequence steps 153
Priority of keystrokes 27
Q
QKScripts 165
Quick Type 62–64
Glossary 63
Icon 63
Menu 63
QuicKeys
Architecture 179
Check for updates 9
Clipbook 100–105
Close 57
Components 12
Controller 55
Editor 8, 12
Engine 18
Event Logger 168
Exit 57
Installing 7
Managing 26
Menu 19, 25
Opening the Editor 56
Set status 56
QuicKeys Tools 55–57
QuicKeys Controller 55–57
Toolbars 37–53
QuickReference Card 8, 25, 34, 56
QuickStart Wizard 7
Quote
Characters 61
Text 61
R
Recent Actions 44
Recent files 90
Recording 152
Palette 152
Set status 57
Start/Stop 152
Tips 156
Toolbar 31
Using smart recognition 57
Recycle Bin
Empty 114
Move files to 79
Reformat text 60
Renaming files and folders 80–83
Repeat Tab 153
Requirements 7
Restart
Computer 114
Windows 114
Restore default icon 53, 177
Result handling 154
Return code 165
Run
Executable 165
Script 105
••••
S
Sales and customer service 5
Saving
Actions 26
Sequences 159
Scope 22–23, 46
Screen
Capture 121–122
Saver 123–124
Settings 125–126
Scripts 105, 165
Select
Character from a popup menu 68
Character to type 68
Items in dropdown list 169
Items in list 169
Menu 107
Sequence Editor 17, 153
Sequence steps
Delete 156
Printing 153
Rearranging 156
Sequence Tools
Message 165
Password Vault 166
Pause 167
Wait for Window 172
Window Selector 174
Sequences 11
Conditional 154
Create manually 154
Editing 155
Embedded 157
Insert Steps 155
Modifying 155
Printing 153
Recording 152
Renaming 156
Result handling 154
Smart recognition 57
Subordinate 157
Tips 156
Server Path 139
Set
Attributes 77
Audio Volume 130
Extensions 78
Recording status 57
Status of QuicKeys 56
System Clock Action 110
Set icon from bitmap 52, 177
Set icon from file 50
Setup Wizard 13, 21
Sharing Actions 29
Shortcuts. See Actions
Show
Hot keys in QuicKeys menu 20, 30
Icon in taskbar 20, 30
Sequence playback toolbar 31
Sequence recording toolbar 31
Setup Wizard introduction 31
Shutdown computer 114
Sizing toolbars 39, 40, 46
Smart recognition 57
Special Characters Action 66
Specify window properties 95, 97, 98, 169, 171, 172, 174
Spelling 64–66
Standard formats 71
Step Results tab 159
Strip quote marks 61
Subordinate Sequences 157
Sub-Sequences 149, 157
Substituting keystrokes 115
Switch Tabs 171
Synth 132
System Specials Action 113
T
Technical support 4
Text Actions 71
Tile windows
Horizontally 118
Vertically 119
189
••••
190
Time Actions 68
Timed triggers 24
Tips 175
Title case 62
Toggle
Case 62
Recording 57
Status of hot keys and timers 57
Toolbar buttons
Adjusting button size 50
Changing button icons 50
Delete 53
Editing 49
Toolbars 25
Adding buttons 42
Adjusting size 46
Buttons 49
Closing 48
Creating 40–45
Deleting 16, 49
Displaying 45
Dockable 38
Editing 45
Floating 38
Moving 38, 39
Pop Out 39
Restoring icons 53
Scope 46
Tab 15
Types 37
Triggers
Enable/Disable 56
Hot keys 25
QuicKeys Menu 25
Timed 24, 25
Toolbars 25
Windows Shortcuts 25
Troubleshooting 175
Typing
Date/Time 68
Keystroke 115
Text 71
U
Undo toolbar changes 177
Up One Folder 87
Updates 9
Uppercase 61
URL 145
W
Wait for
User Input 171
Window 172
Wave 132
Web Launcher 141
What’s new in QuicKeys 2.0 2
Wildcards 78, 79
Window
Selector 44
Window Finder 162, 173
Window Handler Action 116
Window properties 96
Window Selector 174
Windows
Adjust size 119, 120
Cascade 118
Center on screen 119, 120
Close 119
Desktop folder 86
Folder 86
Maximize 119
Minimize 119
Restore 119
Scripting host 105
Specials 120
Temporary folder 86
Tile 118
Z
Zip files 92–94