1
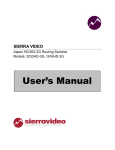
LGZ USB
LGZ Broadcasting Tech
Installation
Instructions
Tech Specs
Troubleshooting
[LGZ USB USER MANUAL]
This document contains technical information on ther LGZ USB device. The features of this device are
explained through examples and step by step instructions so that users can learn to operate it
correctly, safely and to make use of its full potential.
LGZ USB
[LGZ USB USER MANUAL]
Purpose and use
The LGZ USB device is intended to help broadcasters, ob-trucks and tv-stations save onto USB sticks
or USB hard drives video and audio data for quick review and distribution. It can record in real time 1
HD/SD-SDI stream directly onto 8 USB devices simultaneously encoded in high quality H.264. The
recorded data is easily played back onto any PC, MAC or smart TV. The LGZ USB can easily format the
USB devices connected to it to make sure they are empty and correctly formatted for the best
results.
The device is easily operated and can record onto USB devices in either SD or HD quality. With this in
your installation, you will be able to record your productions and as soon as they are done, distribute
copies of it to your customers or anyone in need of a copy for review or storage purposes.
In this document you’ll learn how to properly use and handle this device meant to facilitate your
work.
2
User Manual | 2013 version 1.2 | LGZ Broadcasting Tech
[LGZ USB USER MANUAL] LGZ USB
Table of content
Purpose and use ...................................................................................................................................... 2
1.
Technical Specifications................................................................................................................... 4
1.1
Transport and installation ....................................................................................................... 4
1.2
Power Supply .......................................................................................................................... 4
1.3
Cooling system........................................................................................................................ 4
Technical Specifications table ................................................................................................................. 5
2.
Usage Examples ............................................................................................................................... 6
2.1
Choose quality ......................................................................................................................... 6
2.2
Conservation of type ............................................................................................................... 6
3.
Getting started ................................................................................................................................ 7
3.1
Navigating the menus.............................................................................................................. 7
3.2
Screenshots of the menus ....................................................................................................... 7
3.3
Inputs / Outpus...................................................................................................................... 10
4
Important to know .................................................................................................................... 12
LGZ Broadcasting Tech | Copyright 2013 | Purpose and use
3
LGZ USB
[LGZ USB USER MANUAL]
1. Technical Specifications
1.1
Transport and installation
The device must be transported safely packed in the box it is delivered in. It can also be
transported if mounted properly and safely in a 19” rack itself designed and purposed for the
transport intended.
When used, the device must be placed on a flat surface or mounted in a 19” rack with the use of
4 screws, one in each of the mounting holes on the front side.
1.2
Power Supply
The device is turned on or off by pressing once the ON/OFF switch on the devices front. The
switch will be lit when the device is on. Booting up usually takes less than 30 seconds but can
take up to 2 minutes.
The device should be fed adequate and stable power AC 100-240V 12A 50/60Hz. It means that it
practically works in most countries but do make sure that you are indeed connecting it to a
suitable power socket as to not blow its fuse. If the quality of the power isn’t good enough, it
could result in a power failure or even damage to the device. In the event of a power loss the
device will turn off which might result in the loss of all the data on the USB devices connected to
it.
1.3
Cooling system
The device theoretically generates a maximum of 1109 BTU/hour. In practice that number is
lower. The heat is dissipated through the chassi and a fan on the devices backside. Air circulation
is made possible by holes on the devices topside and sides. Make sure no to cover these holes or
leave appropriate distances above the device for a correct airflow. Failure to do this may result in
overheating in which case the chassi might become quite hot and the device turns off to avoid
heat damage.
OBS! Do not cover the devices sides, backside or topside. Leave appropriate space for a correct
airflow.
4
User Manual | 2013 version 1.2 | LGZ Broadcasting Tech
[LGZ USB USER MANUAL] LGZ USB
Technical Specifications table
LGZ USB
Comments
Video Inputs
(option for Decklink
Studio card)
1 x HD/SD-SDI
Additional input types
available with the Decklink
Studio option
Video format
SD-SDI PAL 576i
HD-SDI 720p50
HD-SDI 1080i50
(1080i5994, 720p60 and
480i are also available since
software 1.8)
Audio Inputs
2 channels (embedded)
(audio pair can be chosen)
AES stereo available with
Decklink Studio option
1 x on front
Press once to turn on or off
1 x LCD screen with buttons
All features can also be
controlled via the Web
Interface
1U 19” rackmountable
35 cm deep. Can be
mounted without support rail
ON/OFF Switch
Interface
Dimensions
Weight
4 kg
Power supply
300W 100-240V
Temperature (in use)
Temperature (storage)
Air humidity (in use)
10 ~ 45°C
- 30 ~ 60°C
20 % ~ 80 %
Shock resistance (storage)
5G
Shock resistance (lagring)
70G
Heat build-up
1109 BTU/hour
Altitude (in use)
-20 ~ 3000m
Altitude (storage)
-20 ~11000m
Sound level
50-60Hz
~ 40 dB
High temperature differences
may result in condensation.
Maximum theoretical value
dB SPL level at 1m distance
LGZ Broadcasting Tech | Copyright 2013 | Technical Specifications table
5
LGZ USB
[LGZ USB USER MANUAL]
2. Usage Examples
In many productions, at the end of the day or end of the event, your customer or some of your
partners may want a copy of the production, either for reviewing it or maybe just for safe
keeping. It is not uncommon during events that many people involved such as producers,
referees, players or other people will each want a copy of the data.
To fit all different purposes, the data can be recorded in SD or HD. Although it can take in as
inputs several types of video standards, it can downconvert the HD types into SD quality to fit
more data on smaller USB sticks. But it can also record in HD quality to keep as much of the
information of the data as possible allowing you to use it in professional equipment later on.
2.1
Choose quality
Standard Definition quality recording – 3mbps – 1hr/1.35GB
No matter the standard you feed into the device (HD or SD), it can be saved into SD (when fed
HD it downconverts it to SD if that option is selected in the menu). The SD quality is at 3mbps
and is very good if the copies are simply meant for reviewing (i.e players from a team during a
game want a copy of the game to review the game on the way home). This makes it possible to
fit a lot of data on small and cheap USB sticks as you will be able to record 1hr of data on 1.35GB
of memory.
High Definition quality recording – 8mbps – 1hr/4GB
This quality level can be suitable if you intend to save a proper Master copy of the data you feed
into the device. The recorded data is kept in the format it is recorded in. Meaning that i.e
1080i50 will still be interlaced on the usb stick making it easier to later on ingest into professional
equipment for editing and playback. This high quality does however take up more space so make
sure the USB devices you use are big enough.
2.2
Conservation of type
If the input format (such as 576i or 1080i) is interlaced, the files created on your USB devices
during the recording process will also be interlaced. Most programs on computers, MACs and
smart TV automatically deinterlace it during playback. Leaving it interlaced also means it is easier
to reuse later on professional equipment in the same format.
If the input format is progressive (such as 720p50), the files created will also be progressive.
This was designed on purpose to make it easier for all kind of users. Professionals can work with
the data without converting it forth and back and non technical users can easily review the data
as almost all playback devices deinterlace automatically.
6
User Manual | 2013 version 1.2 | LGZ Broadcasting Tech
[LGZ USB USER MANUAL] LGZ USB
3. Getting started
Once the device is properly installed on flat surface or in a rack you can turn it on. It does not
matter if the SDI cable is already plugged in nor should it matter if USB devices (sticks or drives)
are already connected to its front. If for some reason you after 3 minutes still haven’t gotten past
the bootup screen. Try unplugging all USB devices and restart the device (shut it off and turn it
back on).
3.1
Navigating the menus
The different menus and features can be accessed by using the buttons on both sides of the LCD
screens. There are five buttons:
-
Arrow UP
OK
Arrow Down
Home
Arrow Back
The OK button is used to enter a menu or set a selected feature. The Back button takes you back
to the previous window. The up and down arrows are used to move the selection up and down
and the Home button takes you immediately back the the Main menu.
3.2
Screenshots of the menus
Screenshot
Comment
Bootup screen (picture 1)
Wait until the startup process is
finished and you reach the Main menu.
Bootup usually takes around 30 seconds but can take up to 1 or 2 minutes. Please wait that long
before trying to restart the device.
Main menu (picture 2)
Press OK to enter any of the 4 available
submenus.
The 4 available menus are:
-
SET STANDARD (picture 3)
USB LIST (picture 4)
RECORD (picture 7)
EXTRAS (picture 8)
LGZ Broadcasting Tech | Copyright 2013 | Getting started
7
LGZ USB
Screenshot
[LGZ USB USER MANUAL]
Comment
Set Standard (picture 3)
The “>>>” symbol shows what format
is currently selected. Press OK to set
the formats you want to use.
There are 3 available input formats: SD576i, HD720p50 and HD1080i50.
Use the arrows to highlight the INPUT FORMAT you want to use. Press OK to activate it. The
“>>>” arrows shows the one currently active. You can on the right hand side of the screen see a
video preview of the input and audio bars of channels 1 and 2.
Then use the up and down arrows to select if you wish to save your data in SD or HD. The device
can downconvert live from HD to SD so you can save space. You can not upconvert from SD to
HD.
In SD you can approximately record 43 min per GB and in HD approximately 14 min per GB.
The data streams are recording at 3mbps respectively 8 mbps.
More standards will become available with updates (until all supported by Blackmagic are
available)
USB List (picture 4)
This list shows information on
currently connected USB drives. Allow
up to 10 seconds for it to update when
plugging/unplugging drives.
You can plug in up to 8 USB drives/sticks into the devices. Just scroll down with the arrows to see
the bottom 3 if you have 8 plugged in.
In this list you can see to the left hand side in front of the name of each device either a cross or a
check sign. If there is a cross the device isn’t formatted in the right standard. To work properly
the USB drives must be formatted in NTFS. If a device shows a check sign, it has the correct
format and you can start recording on it safely.
You can then from left to right see the devices name, its original size in GB. The available size in
GB rounded down to the closest integer, the available record time left on it in Hours and Minutes
(with the selected output) and if that USB device is currently idle (STP) or currently recording
(REC).
By pressing OK when the FORMAT ALL button is highlighted you will be taken to a control
window (picture 5).
Press OK to enter each specific USB device and see its settings (see picture 6).
8
User Manual | 2013 version 1.2 | LGZ Broadcasting Tech
[LGZ USB USER MANUAL] LGZ USB
Screenshot
Comment
Format All (picture 5)
Accessed by pressing OK when
FORMAT ALL is selected in the USB List
menu (pic 4). Press OK to format all
connected drives.
BY pressing OK again here you will format all connected drives to NTFS. All the content on them
will be lost and irretrievable. If you wish to go back to the previous menu without formatting all
drives, press the BACK ARROW button.
USB Specs (picture 6)
Here you can see the details of a
specific USB. From here you can
independently of other USBs format,
start rec and stop rec.
Here the operator can see information about each specific USB. It is important to know that the
free space is rounded down to the closest integer (an 8GB USB stick will often have 7,8 GB free
space, thus rounded down to 7).
Independently of other USB devices, here the recording can be started and stopped on this
device. The device can also be formatted. Beware, the FORMAT DRIVE button here will not ask if
you are sure. The drive will be formatted right away.
Record menu (picture 7)
Here you can see a preview of the
INPUT and 2 audio level bars at the
right end of the screen. You can start
and stop recording on all units at once.
In this view you can see the time left on all USB devices connected at the same time. You also see
the picture Preview and the 2 audio level bars. If recording on at least on device the REC sign to
the top center of the screen will blink. The time left is indicated in HH:MM. This is the menu we
recommend you are in when recording to keep a good view of the work.
USB Info (picture 8)
This page shows information on the
unit (such as Uptime) as well as certain
settings that can be set. It is also here
that the IP is displayed if your unit is
connected to a network.
LGZ Broadcasting Tech | Copyright 2013 | Getting started
9
LGZ USB
3.3
[LGZ USB USER MANUAL]
Inputs / Outputs
The device was designed to keep both the I/O and the interface to a minimum. All to make it as
simple to operate and understand as possible.
3.4
Web Interface
With the software version 2.0 or higher. The device can be accessed via a web interface. All
features are then available through this web interface and the unit can be remotely controlled.
The Interface has been tested on Chrome, Firefox, Explorer and Safari. To reach it simply type, in
the browser of a computer connected to the same network as the unit, the IP address of the unit
itself.
10
User Manual | 2013 version 1.2 | LGZ Broadcasting Tech
[LGZ USB USER MANUAL] LGZ USB
The LGZ USB has two IP settings:
-
DHCP
This is the default setting and means that if your unit is connected to a DHCP
network prior to being started, it will during boot up receive an IP from the local
router. This IP will be displayed on the LCD screen under the INFO menu (picture
8).
-
Static IP
If instead you want to assign your unit to a specific static IP address you must first
access it through the web interface (while it is in DHCP mode) and then, in the
settings tab there assign it the static IP address you want it to have. As soon as you
acknowledge the change, it will lose its connection and from that point on have
the static IP you gave it.
The Web interface also allows users to change the device between “PAL” and “NTSC” modes so that
you can either read standard PAL formats such as 1080i50, 720p50 or 576i or you can read standard
NTSC formats such as 1080i5994, 720p60 or 480i.
Other features are that you can set the name of the files you wan recorded, you can change the local
displayed time of your unit and you can choose what audio pair from your SDI signal you want to be
recorded (only 1 pair can be recorded).
LGZ Broadcasting Tech | Copyright 2013 | Getting started
11
LGZ USB
4
[LGZ USB USER MANUAL]
Important to know
The LGZ USB can only write to drives formatted in NTFS. This is so that your customers can read
the files on both MAC and PC computers as well as smartTV’s.
The device can format your drives to NTFS if they aren’t in the correct format but this will delete
all the content that is on them.
There are many different format types and even though we’ve tested the standard ones, it is
possible the device doesn’t manage to format your drive properly. It might be able to write to it
anyway but we then recommend you take that specific drive and format it in a computer or MAC
to NTFS or FAT. In those formats the drive should be recognized properly by the device and to be
safe you can once again format it in the LGZ USB device.
There are many standards of USB drives on the market and we have tested the device with a
large number of them. We do however recommend our customers to test the drives they plan on
using before using it live on important productions to make sure the drives in their respective
formats will work properly.
On MAC computers we recommend using VLC Player to playback your files as Quicktime
depending on version and operative system may not be able to open a .ts stream. VLC Player can
be downloaded for free at http://www.videolan.org/vlc/
! Warning ! When stopping the recording by pressing STP we recommend strongly that you wait
5 seconds before unplugging the devices to make sure that the Operative System no longer is
emptying its buffer to them – unplugging a drive during a write may corrupt the whole file.
12
User Manual | 2013 version 1.2 | LGZ Broadcasting Tech