1
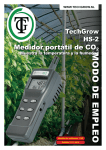
WWW.TECHGROW.NL TechGrow T-Mini CO2 CONTROLLER Internal CO2 sensor & light sensor Built-in calibration function Easily installed thanks to Plug & Play Built-in min/max measurement Issued: 01-11-2014 MANUAL software version: 1.10 TechGrow T-Mini user manual Congratulations! You have just purchased the TechGrow T-Mini CO2 controller. This TechGrow CO2 controller is very easy to use. By far the best in its class thanks to its completely digital technique and its revolutionary Push & Turn controls Special features: • Plug & Play, can be used in small to very large rooms. • Adjustable between 300 – 2000 ppm. • Built-in calibration function to calibrate the CO2 sensor against outdoor air. • Extremely accurate internal CO2 sensor, produced by SenseAir® Sweden, the absolute market standard in CO2 measurement. • Built-in fan for optimal airflow. This provides an accurate and fast measurement. • Overview of minimum and maximum CO2 value. • The sensor takes a measurement every second. • Turns the CO2 source (CO2 generator, CO2 cylinder) on/off using a 230V relay. • Memory in case of power outages for setpoint and hysteresis. • LED indicates when CO2 is being dosed. • The T-Mini has a built-in light sensor to automatically switch between Day-Night settings. • Possibility to connect the TechGrow AM-T: a SMS-module to remotely read the CO2 value of the CO2 Controller. Installation: 1.It is recommended to place the T-Mini with light sensor on a wall near the CO2 source, with a minimum distance of 50cm. It is better to not place the T-Mini directly over the CO2 source if the source can reach very high temperatures (CO2 generator).The T-Mini must be placed approximately 1 meter above the floor. For this, use the enclosed fixing bracket. ATTENTION: make sure the light sensor (the milk-colored cap on top of the CO2 sensor) can observe any light directly and is not obstructed by for example any shelves or fixings! 2.Plug the CO2 source into the outlet of the T-Mini controller. 3.Plug the T-Mini controller in to a 230V outlet. 4.Ready! 2 TechGrow T-Mini user manual OPERATING AND ADJUSTING THE TECHGROW T-MINI CONTROLLER: All the settings are adjusted using the Push & Turn button (PTB). Enter the menu by briefly pushing the button. An arrow appears on the left side of the display. If you turn the button now, the arrow will switch from CO2 set to CO2 +/- and back again. ADJUSTING SETPOINT ++ push the PTB once (photo 1) ++ an arrow (=>) appears on the display in front of the value CO2 or SET, turn the PTB so that the arrow is in front of SET (photo 2). push the PTB again (photo 3). ++ use the PTB to place the arrow (=>) in front of SET (photo 3). a blinking square and a line will alternately appear in front of the CO2 set value (photo 4). ++ you can set the desired CO2 level using the PTB (photo 4). ++ wait 5 seconds to confirm the new value, the display will now automatically return to the main menu (photo 1) =>C02= 725 SET= 650 ppm ppm =>C02= 725 SET= 650 ppm ppm CO2= 725 =>SET= 650 ppm ppm 1 =>SET= 650 +/-= 50 ppm ppm =>SET= 650 +/-= 50 3 CO2= 725 =>SET= 650 ppm ppm 2 ppm ppm =>SET=_650 +/-= 50 ppm ppm =>SET=_650 +/-= 50 ppm ppm 4 3 TechGrow T-Mini user manual ADJUSTING HYSTERESIS (BANDWIDTH) ++ push the PTB once (photo 1). An arrow (=>) appears on the display in front of CO2 or SET. ++ use the rotary button to place the arrow (=>) in front of SET (photo 2). ++ push the PTB again (photo 3) and rotate to place the arrow in front of +/- (photo 4). ++ push the PTB again (photo 5), a blinking square and a line will alternately appear in front of the +/- value. ++ use the rotary button to adjust the value (photo 6). ++ wait 5 seconds to confirm the new value, the display will now automatically return to the main menu (photo 1). =>C02= 725 SET= 650 ppm ppm =>C02= 725 SET= 650 ppm ppm C02= 725 =>SET= 650 ppm ppm 1 =>SET=_725 +/-= 50 ppm ppm =>SET=_725 +/-= 50 ppm ppm SET= 725 =>+/-=_50 5 4 ppm ppm 2 ppm ppm SET= 725 =>+/-= 50 ppm ppm 3 SET= 725 =>+/-=_50 C02= 725 =>SET= 650 SET= 725 =>+/-= 50 ppm ppm 4 ppm ppm SET= 725 =>+/-=_70 ppm ppm SET= 725 =>+/-=_70 6 ppm ppm TechGrow T-Mini user manual RESETTING MIN/MAX CO2 VALUES ++ push the PTB once (photo 1). an arrow (=>) will appear on the display in front of CO2 or SET. ++ use the rotary button to place the arrow (=>) in front of CO2 +/- (photo 2). ++ push the PTB again (photo 3). ++ the display will now show the Min and Max values (photo 4). ++ if you push the PTB for 3 seconds, the min/max values will be replaced with the current CO2 level (photo 5). ++ if you do nothing, the display will return to the main menu after 5 seconds (photo 1). CO2= 725 SET= 650 ppm ppm CO2= 725 SET= 650 ppm ppm =>CO2= 725 SET= 650 ppm ppm 1 =>CO2= 725 SET= 650 ppm ppm =>CO2= 725 SET= 650 ppm ppm MIN= 725 MAX= 725 ppm ppm 2 ppm ppm 3 MIN= 725 MAX= 725 =>CO2= 725 SET= 650 MIN= 554 MAX= 778 ppm ppm MIN= 554 MAX= 778 ppm ppm 4 ppm ppm 5 5 TechGrow T-Mini user manual WORKING WITH THE TECHGROW T-MINI CONTROLLER: When the CO2 value of the room drops below the set value (setpoint), the CO2 source will be activated. After a while, the CO2 value will rise and when it reaches the set value, the source will be deactivated again. EXAMPLE: The CO2 value is set at 670. The CO2 +/- is set at 40. The current CO2 value of the room is e.g. 733, which is higher than the CO2 SET, so the CO2 source is turned off. The red light is now off. The CO2 slowly starts to drop to 670: nothing happens yet. Only when the CO2 level drops below the CO2 set minus the CO2 +/-, in this case 670 - 40 = 630, the CO2 source will be turned on and the red light will light up. The CO2 level will start to rise and when the value of 670 has been reached, the CO2 source will turn off again. By adjusting the CO2 +/-, a calm and stable atmosphere can be created. The factory setting for the CO2 SET is 700, and the CO2 +/- at 50. AUTOMATIC DAY/NIGHT SWITCH: 1. During the night (when the lights are off) and when the light sensor detects no or very little light, the CO2 source is ALWAYS switched off. That is why it is very important that the light sensor can directly detect the light source! Otherwise you would be unable to dose any CO2 during the day, because the TechGrow T-Mini controller would think it is night! TECHNICAL SPECIFICATIONS: Power supply: 110V/230 Volt, 50/60 Hz Consumption: 3 Watt Range CO2 set: 300 to 2000 ppm Range CO2 +/-: 10 to 200 ppm (advice 50 ppm) (hysteresis bandwidth) Measurement frequency: 1 measurement per second FIXING BRACKET: Every T-Mini comes with a standard fixing bracket so it can be easily mounted to a wall. Use the included screws to screw the bracket to the backside of the T-Mini and then mount the device to the wall. 6 WWW.TECHGROW.NL TechGrow T-Mini CALIBRATION PROCEDURE MANUAL software version: 1.10 7 TechGrow T-Mini calibration procedure The TechGrow T-Mini comes with a unique calibration feature that allows you to calibrate the device in case of large deviations. Only calibrate the sensor if you suspect a deviation. Our experience has shown that the SenseAir® sensors we use will function for two years without calibration being necessary. The sensors are calibrated with the utmost precision at the factory, however it is possible that the sensor starts to show a deviation after a year of service and has to be calibrated again. PREPARATION FOR CALIBRATION: 1. P lace the T-Mini in a CO2 neutral environment (+/- 400 ppm), such as a balcony or a backyard, for at least half an hour, or in well-ventilated room for at least 8 hours that has not been visited during that period, including by pets or other animals. There should also not be any plants in the room. Calibration is best done during daytime, because the CO2 values will be closer to 400 ppm. During nighttime, plants and trees emit CO2 and the outdoor CO2 values will be closer to 450 ppm. If the minimal value is not much lower than 370 ppm or much higher than 430 ppm, it is not necessary to calibrate the T-Mini. That is because the value of neutral/clean outdoor air is between 380 ppm and 420 ppm. A deviation of +/- 5% is common with this type of measurement equipment. Please keep that in mind when setting your CO2 values. In case of a greater deviation, calibration is necessary. Please continue with the following step. 8 TechGrow T-Mini calibration procedure CALIBRATION MENU 1. Disconnect the power supply to the T-Mini CO2 controller. 2. Reconnect the power supply after 20 seconds. 3. The display will first show the type and software version of the controller. 4. Next, the calibration menu is shown (image 1); after 5 seconds, you will be asked if you would like to continue with the calibration. Choose Yes (image 2). If you do nothing or choose No, the controller will return to the main menu without calibrating the sensor. CALIBRATION PROCEDURE The calibration menu will guide you through the procedure step by step. Please note: step 5 is your last chance to terminate the calibration and return to the main menu without making any modifications. 1. “CO2 calibration - Continue” > (image 1). 2. “Yes/No” > (image 2). 3. “Press the button for 10 seconds” > (image 3). 4. “Wait 10 seconds...” > (image 4). Arrows (>) will appear on the second line of the display. If the button is released before the line is completely filled, you will return to the main menu. The sensor will not have been calibrated . 5. “Calibration lasts 20 minutes” > (image 5) The display will show “Is the T-Mini placed outside?” (image 6) “Do not approach the T-Mini” (image 7) 6. “Calibrating” - ** (image 8). An asterisk will appear on the bottom line every minute . 7. After 20 minutes, the display will read “Calibration 400 OK” (image 9) and the controller will automatically return to the main menu (image 10). 9 2 1 Calibration menu Continue? Yes => No 4 3 Press the button for 10 sec. Wait 10 sec.... >>>> 6 5 Calibration lasts 20 min. Is the T-Mini placed outside? 8 7 Do not approach the T-Mini 10 9 Calibration OK at 400 ppm 10 Calibrating... **** CO2= 681 SET= 700 ppm ppm Notes 11 12