1
O&O BlueCon V6
User's Manual
O&O Software GmbH
O&O BlueCon V6 User's Manual
Rev. 2006-09-11 - 1
©1997-2006
O&O Software GmbH • Am Borsigturm 48 • 13507 Berlin • Germany
http://www.oo-software.com
Text, illustrations and examples have been produced with great care. The editor is neither legally nor in any other way liable for incorrect
information given and its possible consequences.
This document is protected by copyright. All rights reserved. Without written approval no part of this document may be reproduced through
photocopying, microfilming or any other procedure, nor may it be translated into a language used by machines, especially data-processing plants.
Rights are likewise reserved for quotation in lectures, on radio and television.
Microsoft, Windows, Windows NT, Windows 2000, Windows XP, and Windows 2003 are registered trademarks of Microsoft Corporation,
Redmond, USA. O&O and the O&O-logo are registered trademarks of the O&O Software GmbH, Berlin
Table of Contents
About O&O BlueCon V6
1
Welcome to O&O BlueCon V6! ........................................................................................................................1
The O&O BlueCon CD ......................................................................................................................................1
System Requirements .........................................................................................................................................1
O&O BlueCon Tools..........................................................................................................................................2
The O&O BlueCon V6 Concept.........................................................................................................................2
Common Applications
5
Introduction ........................................................................................................................................................5
Problem 1: Forgotten password..........................................................................................................................5
Problem 2: Backup data externally.....................................................................................................................5
Problem 3: Restore the system ...........................................................................................................................6
Problem 4: Completely delete data.....................................................................................................................6
Problem 5: Reconstruct deleted data ..................................................................................................................7
Getting Started
9
Start the O&O BlueCon CD...............................................................................................................................9
Start programs in O&O BlueCon .....................................................................................................................10
Install drivers before starting O&O BlueCon V6 .............................................................................................10
Close O&O BlueCon........................................................................................................................................11
O&O FileExplorer
13
Introduction ......................................................................................................................................................13
Search for files and directories .........................................................................................................................13
Copy, move or delete files and directories .......................................................................................................13
Build a network drive connection.....................................................................................................................14
View access permissions ..................................................................................................................................14
O&O DeviceManager
15
Introduction ......................................................................................................................................................15
Driver Manager ................................................................................................................................................15
Service Management ........................................................................................................................................16
O&O CheckDisk
17
Introduction ......................................................................................................................................................17
O&O CheckDisk Wizard..................................................................................................................................17
O&O SRPManager
19
Introduction ......................................................................................................................................................19
O&O Wizard for System Restoration...............................................................................................................19
O&O EventViewer
21
Functions ..........................................................................................................................................................21
O&O BlueCon V6
Table of Contents • iii
O&O RegEditor
23
Introduction ......................................................................................................................................................23
Create new keys with values ............................................................................................................................23
Browse the Registry Database..........................................................................................................................23
Change values ..................................................................................................................................................24
Manage rights...................................................................................................................................................24
Export and import keys with values as*.reg files .............................................................................................24
O&O UserManager
25
Introduction ......................................................................................................................................................25
Change user accounts (i.e. passwords, names, properties) ...............................................................................25
Create new user ................................................................................................................................................26
Create new user group......................................................................................................................................26
O&O Prompt
27
Introduction ......................................................................................................................................................27
Batch processing ..............................................................................................................................................27
Command Index ...............................................................................................................................................28
O&O SystemInfo
35
Introduction ......................................................................................................................................................35
Edit system parameters.....................................................................................................................................35
Deactivate system parameters ..........................................................................................................................35
Delete system parameters .................................................................................................................................35
Control Panel
37
Functions ..........................................................................................................................................................37
®
FireFox WebBrowser
39
Functions ..........................................................................................................................................................39
O&O Notepad
41
Functions ..........................................................................................................................................................41
O&O Calc
43
Functions ..........................................................................................................................................................43
O&O Data Recovery Suite
45
Introduction ......................................................................................................................................................45
Differences between O&O UnErase, O&O FormatRecovery, and O&O DiskRecovery.................................45
Starting the programs in Windows ...................................................................................................................46
About O&O UnErase .......................................................................................................................................46
Main View ............................................................................................................................................46
Searching for Deleted Files and Folders ...............................................................................................48
Canceling a Search................................................................................................................................49
Deleted Files and Folder Designations..................................................................................................49
Restoring Files and Folders...................................................................................................................49
Advanced Searches ...............................................................................................................................50
About O&O FormatRecovery ..........................................................................................................................51
Main View ............................................................................................................................................52
Selecting a Drive...................................................................................................................................52
Data Recovery Settings .........................................................................................................................52
Additional Recovery Settings ...............................................................................................................53
iv • Table of Contents
O&O BlueCon V6
Running and Interrupting a Scan...........................................................................................................53
Selecting Files for Restoration ..............................................................................................................53
Selecting a Target Folder ......................................................................................................................54
Creating a Report ..................................................................................................................................54
Saving Files...........................................................................................................................................54
Completing the Data Recovery .............................................................................................................55
About O&O DiskRecovery ..............................................................................................................................55
Starting O&O DiskRecovery ................................................................................................................55
Selecting a Drive...................................................................................................................................56
O&O DiskRecovery Scan Settings .......................................................................................................56
Running and Interrupting a Scan...........................................................................................................57
Selecting Files for Restoration ..............................................................................................................58
Selecting a Target Folder ......................................................................................................................59
Saving Files...........................................................................................................................................60
Completing the Data Recovery .............................................................................................................60
O&O Support and Contact
61
Technical Support ............................................................................................................................................61
Authorized Resellers ........................................................................................................................................61
Software License Agreement
63
END-USER LICENSE AGREEMENT (EULA) for O&O BLUECON V6 ....................................................63
O&O BlueCon V6
Table of Contents • v
About O&O BlueCon V6
Welcome to O&O BlueCon V6!
Thank you for putting your trust in our software. We are very pleased to
introduce you to O&O BlueCon V6.
O&O BlueCon V6 empowers users, administrators and service technicians
with a new collection of high-power tools to repair damaged Windowsbased systems without reinstalling the operating system software. The user
interface is meant to give the look and feel similar to that of Windows,
making O&O BlueCon V6 easier to use than ever.
The following chapters will give you an overview of how best to use
O&O BlueCon V6 and guide you through the first steps with this software.
A detailed User's Guide for this software is available on the product CDROM.
We hope you enjoy using O&O BlueCon. Should you have any questions
regarding our products or licensing, please do not hesitate to contact us. We
look forward to assisting you.
Your O&O Software Team
http://www.oo-software.com
The O&O BlueCon CD
The O&O BlueCon CD is a bootable CD, from which all programs can be
launched. For this reason, it is not necessary to first run a Windows
installation before using O&O BlueCon on your computer.
The O&O BlueCon CD is based on Windows PE, or Windows
Preinstallation Environment.
System Requirements
O&O BlueCon V6
•
System with an Intel® Pentium III or equivalent processor
•
256 MB RAM
•
Bootable CD or DVD drive
•
VGA graphics card with 800x600 resolution at 256 colors
•
Keyboard and Mouse
•
Windows Operating System: Windows NT/2000/XP/2003
•
Windows File System: FAT12/FAT16/FAT32/NTFS4/NTFS5
About O&O BlueCon V6 • 1
Note: To use the O&O BlueCon CD, your computer must have a CD/DVD
drive. It may be necessary to make changes to your computer's BIOS
settings. More information can be found by consulting the documentation
from your motherboard's manufacturer.
O&O BlueCon Tools
O&O BlueCon V6 consists of the following high-power programs:
• O&O FileExplorer: Find files and directories. Copy or move
items to external storage media.
• O&O DeviceManager: Disable or enable drivers and services.
• O&O CheckDisk: Run a diagnostic of the data and structural
integrity of connected drives.
• O&O SRPManager: Restore the system to a previous functioning
condition.
• O&O EventViewer: View all system event logs.
• O&O RegEditor: Access the Windows Registry Database.
• O&O UserManager: Manage local user accounts.
• O&O Prompt: Operate the software through command-line-based
input.
• O&O SystemInfo: View your system's parameters.
• Control Panel: Activate a network connection or select an
operating system.
• O&O Notepad: View and Edit text files.
• O&O Calc: Calculate basic mathematical operations and perform
conversions between common number system.
• FireFox® Web Browser: Access internet-based content.*
O&O BlueCon V6 Admin and Tech Edition license holders have access to
the following data recovery tools:
• O&O DiskRecovery V4.0
• O&O FormatRecovery V4.0
• O&O UnErase V4.0
*Note: To use this feature, it is necessary to be connected to a Local Area
Network (LAN) with access to the internet.
The O&O BlueCon V6 Concept
A total Windows system crash is every administrators worst nightmare. If a
new start or restoring the old settings doesn’t help then it is mostly too late.
Endless hours spent resetting the computer or recovering data can drive one
to despair. But not anymore! O&O BlueCon provides a whole range of
refined tools for solving problems. With our program you can repair brokendown Windows installations, rescue data lost through error or virus attack,
change a forgotten password and much, much more. A particular highlight
is the ability to start O&O BlueCon from CD ROM with no prior
installation. This enables you to access systems that cannot be started
anymore from the hard disk. This prevents data being damaged by
additional or new installations of Windows.
There are many situations in which O&O BlueCon can help you. We have
listed the most common for you here to give you an idea of O&O BlueCon’s
performance range:
•
2 • About O&O BlueCon V6
Windows-based interface – With O&O BlueCon V6 the user has
a task bar, Start menu and all appropriate program buttons at their
O&O BlueCon V6
disposal. This enables access without entering command lines and
with just a few simple mouse clicks. Navigation, like in Windows,
is also with the mouse. For execution, editing or creation of basic
files users have a command-line editor at their fingertips.
•
Rescue crashed Windows installations - O&O BlueCon helps
you get to the root of the problem. With the O&O SPRManager
you can recover your old Windows XP system. You can scan for
defective drivers or system services in the smallest detail and
restore them to their previous condition. (see O&O SRPManager)
•
Backup data from defective systems – Copy data from defective
systems to external storage media. You can access your system
without having to write to it – this gives you the security of
knowing no data will be lost. Simply start the O&O BlueCon CD
and access all partitions! (see O&O FileExplorer)
•
Deactivate defective drivers and system services – Amongst the
most common causes of a system crash are defective drivers or
system services. These are loaded before the user can log on,
giving them no opportunity to remove or replace them. With
O&O BlueCon you can simply deactivate the driver or service, or
replace them with a new version! (see O&O DeviceManager)
•
Edit the Registry – The registry is the central filing system for all
systems and user settings. Any errors here can prevent your system
from running correctly. False driver or service parameters can also
cause severe problems. The O&O RegEditor enables you to change
or correct entries in the registry. (see O&O RegEditor)
•
Gain access without an administrator password – You cannot
log on to your Windows system without a password. If you forget
or lose this password you have to install Windows anew in order to
gain system access. O&O BlueCon provides you with a tool to
delete or change passwords for local user accounts so that they can
access their systems again. (see O&O UserManager)
•
Securely delete data – With O&O BlueConV6 you can delete
data, partitions, harddisks or entire systems beyond any chance of
recovery using the technology of O&O SafeErase. Using five
different methods of deletion it is possible to overwrite data up to
35 times! (see O&O ComandPrompt/Safeerase)
•
Data recovery with the O&O RescueBox V4 included* O&O BlueCon V6 contains the complete O&O data recovery
portfolio consisting of: O&O DiskRecovery V4, O&O
FormatRecovery V4 and O&O UnErase V4. This enables a data
recovery in almost every software related data loss situation, be
that through formatted storage media, loss through error or virus
attack. With the O&O product line, data recovery was never so
easy, quick and affordable.
•
and much, much more …
* In the O&O BlueCon V6 Personal Edition you do not have access to the
following components: O&O DiskRecovery V4, O&O FormatRecovery V4,
O&O UnErase V4.
O&O BlueCon V6
About O&O BlueCon V6 • 3
Common Applications
Introduction
We have listed below some common examples of how O&O BlueCon is
applied.
Problem 1: Forgotten password
A user has forgotten his password, and cannot log on anymore. You as
administrator are asked to help.
Solution:
1.
Start O&O BlueCon V6.
2.
Open the O&O UserManager by navigating to UserManager under
Start/Programs/AdministrativeTools.
3.
Click on the “Switches to User Accounts View” icon in the
toolbar.
4.
Choose the user who has forgotten their password from the list.
5.
Click on Change Password and follow the instructions in the popup window.
6.
Close O&O BlueCon. Once the computer is restarted the user can
log on using his new password.
Important! If you have changed passwords with O&O BlueCon, you will
have no further access to encrypted data. The coding cannot be deciphered
after a password change!
Note: It is not possible to decipher used passwords. You can however
change passwords, even when you do not know what the password is. This
is recommended when, for example, a user has forgotten their password.
Problem 2: Backup data externally
You urgently require data from your system. Right at this moment your
system crashes and will not restart. Because you don’t know the cause, the
very least you wish to do is restore the data to an external storage medium.
Solution:
O&O BlueCon V6
Common Applications • 5
1.
Connect an external storage medium, i.e. USB or hard drive to your
computer.
2.
Start the O&O BlueCon V6 CD. Open the O&O FileExplorer by
selecting FileExplorer under Start/Programs.
3.
Browse the hard disk for files or directories.
4.
Copy the data to the external storage medium.
Note: External storage media must be connected to the computer before
O&O BlueCon V6 is started, otherwise the system will not recognize them.
Problem 3: Restore the system
You have installed a new program, for example a driver. Your system
crashes immediately afterwards and will not restart.
Solution:
1.
Start O&O BlueCon V6.
2.
Open O&O SRPManger by selecting SRPManager under
Start/Programs/SystemRecovery. O&O SRPManager is
recommended in cases where numerous programs are
simultaneously responsible for a system error, or you are unable to
clearly identify the defective program. An alternative solution for
problems with drivers would be to use the O&O DeviceManager.
3.
Take a look at the saved SRP and restore your system to the stage
just before you installed the program.
4.
The files are now “unregistered”. The SRP is by design unable to
delete files that were produced after the creation of a restoration
point. This includes program files (e.g. drivers). Restoring to a SRP
with O&O BlueCon simply undoes changes made to the Registry
database since the SRP's date of creation. In doing so, for instance,
a defective driver hindering successful system startups will no
longer be loaded at the next system startup.
5.
After cleansing the Registry database using O&O BlueCon and
enabling a normal system startup, it is then possible to run the
system restoration function in Windows.
6.
Restoring to the same SRP in Windows will lead to the deletion of
the defective or changed files left behind by O&O BlueCon.
Note: The O&O Wizard for System Restoration only functions when your
target system is running Windows XP. SRPs will not be detected on systems
running other operating systems.
Note: If a SRP is listed as <linked>, it is linked to a SRP of the same name.
You can choose whether you would like to restore both SRPs or just one.
Problem 4: Completely delete data
You want to delete data from your computer securely and beyond recovery.
Moving data to the Recycle bin and then emptying it does not actually
delete data from the hard disk.
Solution:
6 • Common Applications
O&O BlueCon V6
1.
Start O&O BlueCon V6
2.
Open the O&O Prompt by selecting CommandPrompt under
Start/Programs/Accessories.
3.
Enter the command “safeerase” and the file name, for example
“safeerase test.txt” – the file will now be securely deleted.
4.
Using the command “safeerase /volume” you can also securely
delete whole partitions, i.e. safeeerase/volume c: (see
O&O Prompt/ Command Index)
Problem 5: Reconstruct deleted data
A user has inadvertently deleted a very important folder. He also emptied
the Recycle Bin shortly afterwards. Because he needs the data urgently it
must be quickly recovered.
Solution:
1. Start O&O BlueCon V6
2. Open O&O Unerase* (Start/Programs/FileRecovery)
3. Select the drive where you wish to recover data from. Click on the
main display to select it.
4. Select from the file menu the command Search for deleted files. If
the target files can be located then they will appear in the file list
on the right hand side marked with a red arrow.
5. Select the file and then choose the option from the file menu
entitled “Restore”.
*Note: In the O&O BlueCon V6 Personal Edition you do not have access to
the following components: O&O DiskRecovery V4, O&O FormatRecovery
V4, O&O UnErase V4.
6.
7.
O&O BlueCon V6
Choose a target directory. This may not be on the same drive as the
one you are making the recovery from.
After completion of the recovery you can open the file in the target
directory.
Common Applications • 7
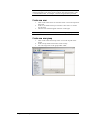
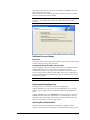
Getting Started
Start the O&O BlueCon CD
Make sure that your system can be started from the CD. The appropriate
settings can be carried out in BIOS: For further information, please contact
your Motherboard manufacturer.
1. Place the O&O BlueCon CD in your computers CD/DVD drive.
2. Start the computer anew.
3. Follow the instructions for starting the
CD.
4.
O&O BlueCon will start from the CD. This procedure can take a
few minutes. The system settings will subsequently appear in the
window.
5.
Select from the menu “System” your target system. This selection
is particularly important when several operating systems are
installed on the computer.
Note: O&O BlueCon and the programs contained in it will only apply
themselves to the target system that you have selected!
Should no system be displayed, it will default to Windows PE.
At this stage you can also select “Initialize Network Connection” should a
network connection need to be activated. If a network connection cannot be
initialized, it means your network card is not supported. In this case you will
see an error message. It is not possible to retrospectively add a driver for
network adaptation that is not supported by Windows PE.
You can then further select language, time, country and keyboard layout.
O&O BlueCon V6
Getting Started • 9
Start programs in O&O BlueCon
Click on the Start button bottom left and then start a program from the
O&O BlueCon Start menu. You can also access online help by clicking on
“Help and Support” in the Start menu.
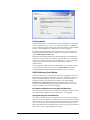
Install drivers before starting O&O BlueCon V6
In order that O&O BlueCon can recognize all connected hard disks it is
possible to install hard disk control drivers before starting O&O BlueCon.
1.
Place the O&O BlueCon CD in your computer’s CD/DVD drive
2.
3.
Start the computer anew.
Follow the instructions for starting the CD.
4.
To install the required drivers, press the F6 button when asked to
make an entry.
5.
Place the disk with the driver into the disk drive.
Note: Encrypted drives are not supported by O&O BlueCon!
10 • Getting Started
O&O BlueCon V6
Close O&O BlueCon
To close O&O BlueCon, click on the “Start” button and select “Restart”.
After confirming the command O&O BlueCon will close down and your
computer will restart.
O&O BlueCon V6
Getting Started • 11
O&O FileExplorer
Introduction
If your system is damaged you have practically no chance of accessing your
files in order to back them up. The O&O FileExplorer in O&O BlueCon V6
enables you to navigate through your computers entire file system.
• To open the O&O FileExplorer click on Start / Programs and then
FileExplorer.
With the O&O FileExplorer you can:
Search for files and directories
1.
2.
Click on the search icon in the menu.
Enter the file or directory name. You can refine your search by
entering further search criteria in the search menu.
Copy, move or delete files and directories
O&O BlueCon V6
1.
Select the file or directory.
2.
Open the context menu.
3.
Now click on the required operation.
O&O FileExplorer • 13
Alternatively you can select the copy to, move to or delete icons from the
menu list.
You can also move files and directories by "Drag and Drop".
Note: If you wish to copy or move files to external storage media, these
must be connected when you start the computer. Media connected after the
start will not be recognized by the system.
Build a network drive connection
O&O BlueCon enables you to create a connection with an approved
network resource.
•
Click on "Map Network Drive…" in the file menu. You can
create a connection in the open dialog.
View access permissions
To view access privileges, click on "Permissions…" in the file menu.
14 • O&O FileExplorer
O&O BlueCon V6
O&O DeviceManager
Introduction
The O&O DeviceManager provides the best possible overview of the
installed hardware. This program consists of two functions:
• Driver Management: To open the Driver Management function in
the O&O DeviceManagement, click on Start / Programs
/AdministrativeTools / and then DriverManager
• Service Management: To open the Service Management function in
the O&O DeviceManagement, click on Start / Programs
/AdministrativeTools / and then ServiceManager.
Driver Manager
The DriverManager in the O&O DeviceManager can control the startup
settings of hard and software drivers. This function is particularly helpful
when defective drivers are affecting system starts.
1.
Select the Drivers icon.
2.
You can now highlight a driver from the list. There are various
options available to determine the settings of each respective
driver.
Disabled: Sets the startup type to Disabled. The driver will not be
loaded. To disable a driver, select disabled from the Startup Type
menu.
•
O&O BlueCon V6
O&O DeviceManager • 15
•
•
•
•
Boot: Sets the startup type to Boot. The device starts before all
others. The driver is loaded and started whilst Windows boots up.
System: Sets the startup type to System. The device starts after all
boot devices have been started. The driver will be started by the
system at a defined time. This does not necessarily have to be
during the system startup.
Auto: Sets the startup type to Automatic. The device starts only
after all boot and system devices have been started.
Manual: Sets the startup type to Manual. The device will not start.
The user can start it up manually after logging on.
Service Management
You can find Services next to the Driver Management icon in the toolbar.
The Service Management function in the O&O DeviceManager can
customize the startup type of Windows services. This means defective or
superfluous services can be disabled and thus enabling a system start again.
Proceed in the same way as with Driver Management.
16 • O&O DeviceManager
O&O BlueCon V6
O&O CheckDisk
Introduction
O&O CheckDisk makes an exhaustive check of the file system and the
storage medium interface and by doing so protects them against possible
loss of data.
To open O&O CheckDisk, click on Start / Programs
/SystemRecovery / and then CheckDisk
O&O CheckDisk Wizard
O&O CheckDisk is a Wizard that guides you step-by-step through the
monitoring of your drives.
1.
After starting O&O CheckDisk click on Next.
2.
In the second stage, select the drive you wish to analyze.
You will have available the following options:
Automatically correct file system errors – This carries out an
automatic error correction. File system errors are remedied quickly
and easily.
Rebuild defective sectors – With this function O&O CheckDisk
checks your disk for damaged sectors and then moves them to
intact sectors.
Display extended information
O&O BlueCon V6
O&O CheckDisk • 17
Should you not choose an option a protocol of the analysis will be created.
In the next stage the analysis will be carried out. While O&O CheckDisk is
going to work, you can monitor the progress on two progress bars. All
program messages will appear in the window.
18 • O&O CheckDisk
O&O BlueCon V6
O&O SRPManager
Introduction
O&O SRPManager allows for the easy access, management and restoration
of Windows System Restore Points (SRP). SRPs enable you to revert back
to previously saved system configuration when the current configuration is
no longer functioning. Restoring SRPs makes changes to system-related
files only. Personal files and directories remain completely preserved.
• To open the O&O SRPManager, click Start / Programs /
SystemRecovery / and then SRPManager.
Note: The O&O Wizard for System Resoration only functions when your
target system is running Windows XP. SRPs will not be detected on systems
running other operating systems.
O&O Wizard for System Restoration
The O&O Wizard for System Restoration guides you step-by-step through
the restoration of your system.
1.
Click Next to proceed to the next step.
2.
Select a Restoration Mode:
• Standard: Select this mode when you would like to restore to
a complete SRP.
• User-defined: Select this mode if you would like to restore
only selected files and/or the Registry database.
After making your mode selection, the next step will be to select the specific
SRP from list organized by date in calendar form.
O&O BlueCon V6
O&O SRPManager • 19
1.
First, select a date. A list of available SRPs will be displayed in the
bottom pane for the selected date. Those dates that appear in bold
text contain SRPs.
2.
Select the SRP, to which you would like to restore your system.
3.
Then click Next.
Note: If a SRP is listed as <linked>, it is linked to a SRP of the same name.
You can choose whether you would like to restore both SRPs or just one.
The O&O SRPManager is not designed to delete files created since the
creation of a restore point. This includes program files (e.g. drivers).
Restoring to a SRP with O&O BlueCon simply undoes changes made to the
Registry database since the SRP's date of creation. In doing so, for instance,
a defective driver hindering successful system startups will no longer be
loaded at the next system startup. After cleansing the Registry database
using O&O BlueCon and enabling a normal system startup, it is then
possible to run the system restoration function in Windows. Restoring to the
same SRP in Windows will lead to the deletion of the defective or changed
files left behind by O&O BlueCon.
In the Standard Mode you will be ask to confirm your selection. Your
system will then be restored back to the selected system restore point.
In the User-defined Mode you will have the opportunity to customize the
nature of your system restoration. In addition, it is possible to select specific
files for restoration.
20 • O&O SRPManager
1.
Select Next when all of the settings are correct.
2.
Confirm to apply your selected settings.
O&O BlueCon V6
O&O EventViewer
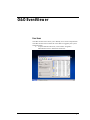
Functions
The O&O EventViewer allows you to identify error sources and problems.
The O&O EventViewer itemizes all events that are logged by the system
and applications.
• To open O&O EventViewer, click on Start / Programs /
AdministrativeTools / and then EventViewer.
O&O BlueCon V6
O&O EventViewer • 21
O&O RegEditor
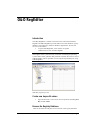
Introduction
The O&O RegEditor is similar in structure to the well-known Windows
RegEdit. The O&O RegEditor provides full access to the Windows registry
database. The settings for numerous Windows applications, drivers and
services are saved here.
• To open O&O RegEditor, click on Start / Programs
/AdministrativeTools / and then RegEdit.
Warning! The incorrect use of O&O RegEditor can cause severe problems
affecting the whole system and may necessitate reinstalling the operating
system. O&O cannot guarantee that problems caused by the incorrect use of
O&O RegEditor will be repairable. You accept full responsibility for using
O&O RegEditor.
With this program you can:
Create new keys with values
•
Open the file menu. You will see various operations including New
Key or New Value.
Browse the Registry Database
Click on the Find icon and gain access to entries in the registry database.
O&O BlueCon V6
O&O RegEditor • 23
Change values
•
Click on that to change values. An editing window will appear
underneath. Here you can change the values, i.e. vary, deactivate or
delete the path.
Manage rights
•
Under “Edit” you will see the menu item Rights. Here you can
add, delete or move rights.
Export and import keys with values as*.reg files
•
24 • O&O RegEditor
You can find import and export functions in the file menu.
O&O BlueCon V6
O&O UserManager
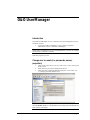
Introduction
The O&O UserManager lets you control the local user management of your
Windows systems.
• To open the O&O UserManager, click on Start / Programs /
AdministrativeTools / and then UserManager.
Note: O&O UserManager can only manage local user accounts. No changes
can be made to a domain controller.
With this program you can:
Change user accounts (i.e. passwords, names,
properties)
1.
2.
3.
Click on the “Switches to User Accounts View” icon in the top left
of the screen.
Select the user you wish to change from the list.
Then select the required modification from the “User Tasks” list,
i.e. Change password, Rename User.
Important! If you have changed passwords with O&O BlueCon, you will
have no further access to encrypted data. The coding cannot be deciphered
after a password change!
O&O BlueCon V6
O&O UserManager • 25
Note: It is not possible to decipher used passwords. You can however
change passwords, even when you do not know what the password is. This
is recommended when, for example, a user has forgotten their password.
Create new user
1.
2.
3.
Click on the “Switch to User Accounts View” icon in the top left of
the screen.
In the “User Tasks” menu you can select “New User” to create a
new account.
The new user will then appear in the list on the right.
Note: A newly created user does not by default belong to a group.
Create new user group
1.
2.
3.
26 • O&O UserManager
Click on the “Switch to Group View” icon in the top left of the
screen.
In the “Group Tasks” menu select “New Group”.
You can assign users to the group under “Add”.
O&O BlueCon V6
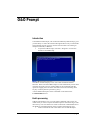
O&O Prompt
Introduction
Command-line-based input, such as the kind offered by O&O Prompt, gives
you the ability to control the software through the direct entry of commands.
This simplifies certain processes, not the least of which is the running of
multiple commands, or Batches.
• To open the O&O Prompt, click Start / Programs / Accessories /
and then CommandPrompt.
The HELP command displays a list of all valid commands and their
functions. Please note that O&O Prompt's screen automatically scrolls down
when the end of the screen is reached. Many of the commands offer the
option of stopping the scroll at the end of the screen and continuing when
any key on the keyboard is pressed. E.g. dir /p.
A more detailed description of the commands can be found in the
Command Index below.
Batch processing
O&O Prompt makes it easy to process batch commands. This can be very
useful when you want to repeat command sequences without having to enter
them one-by-one. This function is similar to the batch command function in
the Windows Command Prompt. Please complete the following steps.
1. Create an ASCII file with a text editor such as O&O Notepad.
O&O BlueCon V6
O&O Prompt • 27
2.
3.
4.
Enter the commands - only one command per line - with the
required arguments.
When finished, save the file with the .BAT extension. We suggest
an 8.3-name convention, as you can easier access short filenames
from the console interface.
Open the file in the O&O Prompt, for example, c: test.bat. The
contained commands will be executed in the order they were saved.
If you would like to prematurely abort a batch operation, press CTRL+C.
Command Index
O&O Prompt offers you the ability to control O&O BlueCon with
command-line-based instructions similar to those from MS-DOS or the
command prompt in Windows NT/2000/XP. The Command Index below
lists all commands, their syntax and parameters. If you need help on a
particular command, you can use the /? switch to display a short description
of the syntax and the command's purpose.
attrib
Displays or changes file attributes. This command displays, sets, or removes
the read-only, archive, system, hidden, and compressed attributes assigned
to files or directories.
Syntax
attrib [+ | - ] [rashc] [<drive:>][<path>]<filename>
Parameters
<drive:>
<path>
<filename>
Specifies the location and name of the directory, file, or
set of files you want to process.
+
Sets the specified attributes.
-
Clears the specified attributes.
r
Read-only file attribute.
a
Archive file attribute.
s
System file attribute.
h
Hidden file attribute.
cd
Displays the name of the current directory or changes the current directory.
Syntax
cd [[<drive:>]<path> | .. ]
Parameters
28 • O&O Prompt
None
Used without parameters, cd displays the names of the
current drive and directory.
<drive:>
<path>
Specifies the drive (if different from the current drive)
and directory to which you want to change.
..
Specifies that you want to change to the parent
directory.
Example:
C:\>Windows\test>cd ..
O&O BlueCon V6
cls
Clears the screen. The cleared screen shows only the command prompt and
cursor.
Syntax
cls
Parameters
None
copy
Copies one or more files to another location.
Syntax
copy <source> <destination>
Parameters
<source>
Specifies the location and name of a file or group of
files you want to copy. Source can consist of a drive
letter and colon, a directory name, a filename or a
combination. To specify a group of files, you may use
wildcards.
<destination>
Specifies the location and name of a file or group of
files to which you want to copy. Destination can consist
of a drive letter and colon, a directory name, a
filename, or a combination. To specify a group of files,
you may use wildcards.
Example:
copy c:\test d:\test
del
Deletes specified files.
Syntax
del [<drive:>][<path>]<filename>
Parameters
<drive:>
<path>
<filename>
Specifies the location and name of the file or set of files
you want to delete. Multiple filenames can be used.
Filenames can be separated by spaces, commas or
semicolons.
Example:
del c:\test.txt
deltree
Deletes specified directory.
Syntax
deltree [<drive:>]<path>
Parameters
O&O BlueCon V6
<drive:>
<path>
Specifies the location and name of the directory you
want to delete. Subdirectories and files in this directory
will also be deleted.
Example:
deltree c:\Windows\test\*.*
O&O Prompt • 29
device / service
Entering the command 'device' oder 'service' launches the
O&O DeviceManager, giving you access to a list of all devices and drivers
installed on your system. It is also possible to configure the startup settings
(Please see O&O DeviceManager).
dir
Displays a list of a directory's files and subdirectories.
Syntax
dir [/p] [[<drive:>][<path>]<filename>]
Parameters
None
Used without parameters or switches, dir displays the
disk's volume label and serial number; one directory or
filename per line, including the filename extension, the
file size in bytes, the date and time the file was last
modified; and the total number of files listed, their total
size, and the free space (in bytes) remaining on the
disk.
/p
Displays one screen of the listing at a time. To see the
next screen, press any key.
<drive:>
<path>
Specifies the drive and directory of which you want to
see a listing.
<filename>
Specifies a particular file or group of files of which you
want to see a listing. Multiple filenames can be used.
Filenames can be separated by spaces, commas, or
semicolons.
Example:
dir /p
edlin
Entering the command 'edlin' will launch the O&O Notepad. O&O Notepad
is a basic text editor that allows you to view, edit and save text files. Files in
ASCII and Unicode may be edited using O&O Notepad.
Exit
Closes O&O Prompt.
Syntax
Exit
Parameters
None
help
Lists all available commands with short descriptions. If you need help on a
particular command, you can use the /? switch to display a short description
of the syntax and the command's purpose.
Syntax
Help
Parameters
None
info
30 • O&O Prompt
O&O BlueCon V6
Displays information about the file system and volumes.
Syntax
Info [ hdd | <drive:> ]
Parameters
Hdd
Displays information about available drives including
hard drives, floppy disks, CD-ROMs etc.
<drive:>
Specifies the drive from which you want to receive
information (MFT location, cluster size, number of
sectors etc.)
mkdir
Creates a directory or subdirectory.
Syntax
mkdir [<drive:>]<path>
Parameters
<drive:>
Specifies the drive on which you want to create the new
directory.
<path>
Specifies the name and location of the new directory.
The maximum length of any single path is determined
by the file system.
Example:
mkdir C:\test
passwd
Changes or removes the password for a user account.
Syntax
passwd <user account> [<password>]
Parameters
<user account>
The user account whose password will be changed or
removed.
<password>
The new password for the user account. An empty
password resets the current password, i.e. the password
becomes empty.
Example:
passwd administrator test
rename
Changes the name of a file. You cannot use the rename command to
rename files across drives or to move files to a different directory location.
Syntax
rename [<drive:>][<path>]<old> <new>
Parameters
<drive:>
Specifies the drive on which you want to rename the
specified file.
<path>
Specifies the location of the file to be renamed. The
maximum length of any single path is determined by
the file system.
Specifies the name of the file you want to rename.
<old>
O&O BlueCon V6
O&O Prompt • 31
Specifies the new name for the file. You cannot specify
a new drive or path.
<new>
rename c:\test\test.txt test1.txt
Example:
rmdir
Deletes (removes) a directory.
rmdir [<drive:>]<path>
Syntax
Parameters
<drive:>
Specifies the drive on which you want to delete the
specified directory.
<path>
Specifies the name and location of the directory to be
deleted. The maximum length of any single path is
determined by the file system.
safeerase
Securely deletes files or volumes.
Syntax
safeerase [/<security level>] [/output <file>]
[/verbose] [/silent] [/help] [/showdisks] [/matchfile]
[/matchfolder] [/matchall] [/volume <drive>] [/disk
<hard drives#>] [/freespace <drive>] [/y]
Parameter
None
Help text will be displayed.
/highestsecurity
The available security levels. They refer to the deletion
methods described. If no security level is chosen, the
default is /highest security.
/highsecurity
/mediumsecurity
/lowsecurity
/lowestsecurity
32 • O&O Prompt
/output <Datei>
Saves the output additionally to a file.
/verbose
Detailed output will be shown.
/silent
Screen output will not be shown.
/help, /?
Help will be shown.
/showdisks
Shows drive and hard disk information. The disks will
be numbered so that the numbers can be used with the
command /disk.
/matchfile
Only matching files will be deleted. (Standard) Use the
'match' command in combination with a file filter (e.g.
*.txt, a?c.exe)
/matchfolder
Only matching folders will be deleted.
/matchall
Matching files and folders will be deleted.
/volume
<Laufwerk>
Deletes the entire content of the drive.
/disk
<Festplatten#>
Deleted the entire hard disk.
O&O BlueCon V6
/freespace
<Laufwerk>
Deletes free space on the drive.
/y
All security checks will be suppressed.
Examples:
safeerase beispiel.txt /output test.log
The text file is deleted with the highest
security method and the output saved in
the file test.log.
safeerase /matchfile *.txt /silent /mediumsecurity
All text files in the current folder are
deleted with the medium security level
without output to screen.
safeerase /freespace c: /verbose
The free space on c: is deleted with the
highest security method and detailed
output.
safeerase /volume d: /y /lowsecurity
The content of the drive d: is delted with
the low security level and without
security checks.
safeerase /disk 0
All partitions on the first hard disk are
completely deleted.
All parameters, apart from /help and /showdisks, can be
combined with one another.
type
Displays the contents of a text file. Use the type command to view a text file
without modifying it.
Syntax
Type [<drive:>][<path>]<filename>
Parameters
<drive:>
<path>
<filename>
Specifies the location and name of the file you want to
view.
Example:
type c:\test\test.txt
If using long filenames and if the filename contains
spaces, you must enclose the filename within quotation
marks (") or use the short (8.3 style) filename.
user
Displays a list of all local user accounts.
Syntax
Parameters
user
None
ver
Displays the version number of O&O BlueCon.
O&O BlueCon V6
O&O Prompt • 33
Syntax
ver
Parameters
None
vmap
Lists all mounted volumes, their mappings and additional information.
Syntax
vmap
Parameters
None
xcopy
Copies files and directories, including subdirectories.
Syntax
xcopy [/e] [/s] <source> <destination>
Parameters
/e
34 • O&O Prompt
Copies all subdirectories, even if they are empty.
/s
If the files are located on an NTFS volume, security
and ownership attributes will be preserved.
<source>
Specifies the location and the name of a file or group of
files you want to copy. Source can consist of a drive
letter and colon, a directory name, a filename or a
combination. To specify a group of files, you may use
wildcards.
<destination>
Specifies the location and name of a file or group of
files to which you want to copy. Destination can consist
of a drive letter and colon, a directory name, a
filename, or a combination. To specify a group of files,
you may use wildcards.
Example:
xcopy c:\windows\test\*.* d:\test\
O&O BlueCon V6
O&O SystemInfo
Introduction
O&O SystemInfo gives you the best possible overview of the system
settings in your Windows operating system. Here you can delete, deactivate
or change system parameters.
• To open O&O SystemInfo, click on Start / Programs
/AdministrativeTools / and then SystemInformation
SystemInformation displays:
Configuration of the win.ini files
Configuration of the system.ini files
Configuration of the boot.ini files
Autostart entries
Environmental variables
Edit system parameters
1.
2.
3.
Select a configuration or entry.
To edit a system parameter, select one from the list on the right.
A window will appear where you can edit.
Deactivate system parameters
1.
2.
3.
Select an entry from a configuration.
Delete the checkmark next to “activate”.
The element and its value are now deactivated.
Delete system parameters
1.
2.
O&O BlueCon V6
Click on a system parameter so that its value is displayed in an
editing window.
You can now delete the parameter.
O&O SystemInfo • 35
Control Panel
Functions
With the Control Panel you can set parameters, screen resolution, language
and keyboard settings, time zones, activate the network and select the
operating system. The last function is particularly important in cases where
the target computer has several operating systems installed. This selection
defines which system database O&O BlueCon should communicate with.
All the O&O BlueCon tools executing system-dependant information will
automatically access the selected system. It is possible to change the target
system or activate the network retrospectively whilst O&O BlueCon is
running using the Control Panel.
• To open the O&O System Settings click on Start / Settings and
then Control Panel.
O&O BlueCon V6
Control Panel • 37
FireFox WebBrowser
®
Functions
The integrated FireFox® Web Browser makes it possible to view internetbased content. This allows you to research problems on the internet or
download files that may be useful to correcting a problem.
Note: To use this feature, it is necessary to be connected to a Local Area
Network (LAN) with access to the internet.
O&O BlueCon V6
FireFox® WebBrowser • 39
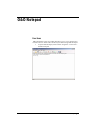
O&O Notepad
Functions
O&O Notepad is a basic text editor that allows you to view, edit and save
text files. Files in ASCII and Unicode may be edited using O&O Notepad.
• To open O&O Notepad, click on Start / Programs / Accessories /
and then Notepad.
O&O BlueCon V6
O&O Notepad • 41
O&O Calc
Functions
O&O Calc, O&O BlueCon's built-in calculator, makes it possible to perform
basic arithmetic as well as conversions between commonly used number
formats (Decimal, Hexadecimal, Octal and Binary). Additionally, O&O
Calc is able to calculate equations.
• To open the O&O Calc, click on Start / Programs / Accessories /
and then Calculator.
O&O BlueCon V6
O&O Calc • 43
O&O Data Recovery Suite
Introduction
Licensees of the O&O BlueCon V6 Tech and Admin Editions have access
to the following professional-grade data recovery products:
O&O UnErase V4
O&O FormatRecovery V4
O&O DiskRecovery V4
These programs offer an excellent addition to the other high-power tools
included in O&O BlueCon V6. With these solutions, you will be prepared
for virtually any type of data loss.
The following chapters will give you an overview of how best to use these
additional products and guide you through the first steps with this software.
Differences between O&O UnErase,
O&O FormatRecovery, and O&O DiskRecovery
O&O DiskRecovery, O&O FormatRecovery, and O&O UnErase are three
separate software products that are designed to compliment each other.
If O&O UnErase is unable to find your missing data, O&O FormatRecovery
or O&O DiskRecovery could still possibly be of help. Here are a few typical
application examples to illustrate the differences between the software
programs.
O&O UnErase
O&O FormatRecovery
O&O DiskRecovery
Files were accidentally
deleted from the Recycle
Bin.
A virus or malicious
software caused damage to
some data and now some
files or folders are
missing.
A drive was formatted
Windows is saying that the
drive has to be
reformatted.
The storage volume was
reformatted and the files
O&O BlueCon V6
O&O Data Recovery Suite • 45
were heavily fragmented.
O&O UnErase did not
produce the desired
results.
Windows can no longer
access the hard drive.
No file system is present
on the drive.
O&O FormatRecovery
and O&O UnErase did not
product the desired results.
A new operating system
was accidentally installed.
Data recovery with O&O
products is not possible.
The storage volume is
defective.
Contact O&O Services by e-mail at:
http://www.oo-services.com
Starting the programs in Windows
The programs O&O UnErase, O&O DiskRecovery and
O&O FormatRecovery can all be launched and run in Windows without
prior installation directly from the O&O BlueCon CD. To do so, simply
insert the O&O BlueCon CD into your CD ROM drive and after Windows
has started. If O&O BlueCon does not start automatically, it is possible that
the Windows Autoplay function is disabled. Make sure this function is
activated and try inserting the CD again.
About O&O UnErase
Whether it be those accidentally deleted text documents or those great
photos from you last vacation: With its Explorer-like file structure,
O&O UnErase enables you to navigate through your deleted files as if they
had never been deleted. With one click of the mouse you can restore single
files or entire folders. Never before was the restoration of deleted files so
easy and intuitive to operate. O&O UnErase can restore all data stored on
drives recognized and monitored by Windows.
The online software documentation is your best source for all details
regarding the operation of O&O UnErase. Access to this documentation can
be made through the program group in the Start Menu or through the Help
menu in O&O UnErase itself. The software's internal Help file can also be
reached by hitting the F1 key while the O&O UnErase is running.
Main View
The Main View in O&O UnErase behaves very similarly to Windows
Explorer, enabling you to easily use the program with only little or no
previous knowledge.
The Main View is divided into three vertically tiled panes:
• Frequently used commands and settings are accessible through
the pane on the left. These commands are also accessible through
the Toolbar or the Context Menu.
• The List of drives and directories in the middle pane enables an
easy navigation through existing and already-deleted files very
similar to Windows Explorer.
46 • O&O Data Recovery Suite
O&O BlueCon V6
The List of Folders and Files on the right-hand side gives you
all pertinent file information regarding the selected existing and
deleted files.
Status Bar
At the very bottom of the Main View the Status Bar can be found in which
the progress of all running searches and other status reports are displayed.
Toolbar
The Toolbar is the fastest way to access the most important functions of
O&O UnErase. All commands, however, can be accessed through the pulldown menus at the top of the Main View. Through the View menu you can
customize the composition of the Toolbar to meet your needs.
Displayed from left to right:
• Search for a drive on the system.
• Open the Advanced Search dialog.
• Restore deleted files.
• Cancel current search.
• Go up one level.
• View Help.
• View program information.
• Switch views.
o Tiles
o Icons
o List
o Details
o Toggle task list.
o Displays only deleted files and folders.
o Toggle Filter function.
Filter
If you would like to limit the files displayed in the file list on the right-hand
side, it is possible to use the Filter function. This feature may be activated
through the View menu or by pressing the Filter icon in the Toolbar. When
activated, a series of fields will appear in which specific text may be entered
O&O BlueCon V6
O&O Data Recovery Suite • 47
to narrow down the number of files displayed. As before, it is possible here
to use place holders.
Tip: In general, it is easier and faster to just use the Advanced Search
function to find and display a specific set of files.
Searching for Deleted Files and Folders
To find deleted files and folders on a drive, please follow the directions
below:
1.
Select from the list of drives on the system the drive which you
would like to search.
2.
From the File menu at the top of the screen select the command
Search for deleted files.
3.
The search will now be initialized. You can follow the progress of
the running search in the Status Bar at the bottom of the screen.
4.
After he search is completed, the files and folders found during the
search will be marked in both the list of drives and files with a red
"X" or arrow.
Tip: You can also execute a Quick Search by way of the Search field in the
Toolbar. Just enter the drive letter and the path of the directory you would
like to search and press Enter on your keyboard.
48 • O&O Data Recovery Suite
O&O BlueCon V6
Canceling a Search
If you would like to cancel a Search, select Cancel search from the File
menu or press the corresponding icon in the Toolbar. The search will then
be canceled and the files and folders that have already been found will be
displayed.
Tip: Alternatively you can use the keyboard shortcut Ctrl+Esc to interrupt
a running search.
Deleted Files and Folder Designations
The red "X" indicates a file or folder is deleted. A small "X" displayed with
a folder indicates that deleted files have been found in this folder, although
the folder itself is still intact.
Icon
Definition
The folder has been completed deleted (large red "X")
The folder contains deleted files or folders (small red "X")
This file has been deleted and can probably be restored (red arrow).
Normally the original filenames of the deleted files can be restored.
However, if this is not possible, the folders and files will be generically
numbered and named by O&O UnErase.
Restoring Files and Folders
The next step after deleted files or folders have been found is to restore the
ones you need (if this is possible).
1.
Files and/or folders you wish to restore can be selected in either the
middle or right-hand panes of the Main View.
Tipp: Please note that in the middle pane of the Main View only one single
folder may be selected for restoration. In the right-hand pane it is possible to
select more than one file for restoration by pressing the Ctrl key on the
keyboard while selecting multiple files. To select all files in a specific older,
use the keyboard shortcut Ctrl+A.
O&O BlueCon V6
2.
Press the Restore icon on the Toolbar or select the corresponding
heading in the Context Menu.
3.
It is now possible to select where the restored files are to be saved.
As your target directory, you may create a new folder or select one
that already exists.
4.
In order to avoid any possibility of data loss, it is advised that you
save the newly restored files onto a different partition than the one
where the files were originally stored. Please be aware that it is
possible to store the files onto a network drive as well.
O&O Data Recovery Suite • 49
Tip: It is also possible to simply drag-and-drop deleted files and folders you
would like to restore into a directory displayed in the Main View. The
restoration of the deleted files will automatically follow.
Advanced Searches
With the O&O UnErase's Advanced Search function, you posses a powerful
tool for quickly and securely finding deleted files. Through a series userdefined search parameters it is possible to considerably increase the
precision of your search result.
Search Settings
The search settings dialog enables you to define the drive or folder to be
searched. If you would like to also search subfolders, select the option with
the same name.
It is also a possibility to expand the search to include files that have not been
deleted. To do so, please uncheck the option Only search for deleted files.
If this option remains selected, only deleted files will appear in the search
results.
Filename
In the field called Filename, you can either enter an exact filename or a
filename containing a placeholder. For example, "*.BMP" would indicate
you only wanted to search for Bitmap images.
Letter capitalizations are not considered in by the search function. You can
use the special characters "*" and "?". "*", however, can be used for
multiple characters, whereas "?" may only stand for a single character.
Contained Text
An especially powerful option is searching for text contained in the file. If
you are looking for a file but only can remember a fragment of its name or
contents, then this could be very useful to you.
Using the Filter When Searching
In order to customize your search further, it is possible to use the Filter
function.
File Size
Here you can limit the size of the files that are to be searched. Just enter a
range in Kbytes in which the desired file might fit.
50 • O&O Data Recovery Suite
O&O BlueCon V6
Date
This option allows you to enter a range of dates pertaining to the file and
defining how that date range is to be applied during the search:
• Created – Date when the file was first created
• Modified – Date when the file was last saved
• Accessed – Date when the file was last accessed
File Attributes
The search can also be narrowed down to looks for specific attributes of the
desired file. You can select from three options regarding each specific
attribute:
• Marked (Checked) – The file must exhibit this attribute.
• Unmarked (Empty) – The file may not exhibit this attribute.
• Marked Green – This attribute will not be considered as a search
parameter.
Running an Advanced Search
To Run an Advanced Search you have three options:
• New Search – A search will be initialized and all previous search
results will be lost.
• Add – The search will be initialized and the search results will be added
to the search results already displayed.
• Remove – The search will be initialized and those search results found
will be filtered out of the list of search results already displayed.
You may repeat the search function as many times as you like, adding or
removing the results from the displayed list of search results as you go.
While the search is running, the search dialog box will remain closed.
When you not long would like to run a search, you can close the search
dialog by pressing the Close button.
About O&O FormatRecovery
It's happened to the best of us: your hard disk is mistakenly formatted and
important files can be deleted and presumed lost forever. Whether the result
of a computer virus, a software error, or user error, this can be devastating.
Important documents and business data aside, in the age of digital
photography the loss of an captured moment can be irreplaceable.
When such a disaster strikes, what can be done? Many users cut their losses
and accept that their files are lost. However, this is not necessarily the way it
has to be. Even when Windows does not offer a viable solution for the
recovery of lost data (i.e. the Recycle Bin), there still is hope with
O&O FormatRecovery, an easy and secure way to recover data you had
thought was deleted. Accompanied by an on-screen assistant, you are guided
through the data recovery process, step-by-step. When all is finished you
will be able to use the once-deleted data just as before.
The online software documentation is your best source for all details
regarding the operation of O&O FormatRecovery. Access to this
documentation can be made through the program group in the Start Menu or
through the Help menu in O&O FormatRecovery itself. The software's
internal Help file can also be reached by hitting the F1 key while the O&O
FormatRecovery is running.
O&O BlueCon V6
O&O Data Recovery Suite • 51
Main View
Selecting a Drive
Select the drive where you would like to scan for deleted data. It is possible
to select a partition (e.g. C: or D:) or an entire hard disk drive. In addition
you can select any storage media, from USB sticks memory cards for digital
cameras. Clicking Next will conclude the drive selection dialog.
By default, the unpartitionable areas of a hard drive, or those located past
the partitioned areas of the disk, are hidden.
If you would like to add drives after O&O FormatRecovery has been loaded
(e.g. USB stick or digital camera), click on Update Drives. The newly
connected hardware will be loaded and displayed in the list of drives.
Drives can be scanned for previous partitions and files systems. This is
necessary is, for example, if a partition has been deleted or a volume has
been reformatted with a different files system. To start the analysis of your
storage volumes, click "Analyze Drive".
Note: Regardless of the size of the storage volume, this analysis could take
some time.
Data Recovery Settings
After the drive has been selected, you have the opportunity to select some
options that will affect the precision and duration of the scanning process. In
most cases, the default settings are sufficient and do not require any
modification.
Restore Empty Folders
With this option, you can have folders restored, even if they do not contain
any data.
This allows for the restoration of complicated directory structures
containing multiple intertwined folders.
Restore Empty Files
With this option, you can have files restored, even if they do not contain any
data.
Restore system and hidden files as they are
52 • O&O Data Recovery Suite
O&O BlueCon V6
This option allows for the restoration of system files and hidden files with
their original attributes intact.
When this option is not selected, these files would be restores as "normal"
files (Not system files, and not hidden).
Note: Please consult your folder options in Windows when modifying this
setting. It is possible that files will not be visible after they have been
restored.
Additional Recovery Settings
Drive Errors
This option allows you to instruct the software to ignore areas of the storage
volume where drive errors have occurred.
Automatically Saving Files After They Are Found
If you would like to execute an unsupervised scan, it is possible to instruct
O&O FormatRecovery to save and restore all of the scan results
automatically. This can save time. If you would like to select this option,
your next step will be to define a target folder. Once this is completed, the
scan will be initiated. More information on this can be found in the section
entitled "Saving Files".
Note: This function is not available in the trial version of the software.
Running and Interrupting a Scan
During the scan you will receive information regarding the
O&O FormatRecovery scan by way of a status dialog box. In it you will
find the overall progress of the scan and the number of files found to this
point.
O&O FormatRecovery can be Minimized in to the System Tray. Pressing
Cancel will interrupt the scan. When the scan is interrupted you will be
returned to the previous page of the assistant where you will be given the
option of resuming the scan or running it again.
Selecting Files for Restoration
After the scan has been completed, all found files, regardless of their
respective save locations, are displayed on the left-hand side. When you are
O&O BlueCon V6
O&O Data Recovery Suite • 53
finished selecting the files for restoration, click Next to continue. Click the
check-box next to the drive's letter to have all of the contained files restored.
In some circumstances, the sorting and listing of a large number of files can
take some time.
Note: ALL found files on the scanned drive are displayed here in the list.
These consists of all files and folders visible to Windows. This list does not
indicate, however, whether specific files or folder restorable or not.
Selecting a Target Folder
To recover selected files you need to enter a saving location. By default
your 'My Documents' folder, but any folder, including network folders, may
be selected for this. O&O FormatRecovery automatically creates a subfolder
into which the recovered files are saved. Because an individual subfolder is
created for every file type recovered, it is advised that you select a target
folder that is new or empty. In addition, it is possible to create a report
regarding the completed data recovery.
Please note that you will not be able to save the recovered files onto the
same partition where the deleted data was originally located. Also do not
forget to make sure you have enough storage capacity on disk to facilitate
the newly recovered files.
Click Next to initiate the recovery of data.
Creating a Report
Activating this option will enable you to view a detailed report regarding the
completed data recovery session. You can have this report saved to a
different target folder as that in which the recovered files are to be saved. By
default, the report will have the filename "oofr_report.rtf".
The reports are saved in Rich Text Format (RTF) and can be viewed and
printed with the help of applications such as WordPad, Microsoft Word, or
any other text editing programs.
Saving Files
While the recovered files are being saved to their target folder,
O&O FormatRecovery keeps you up-to-date by way of a convenient dialog
box. Information, such as overall progress and the total size of the saved
files, is displayed in real-time as the operation progresses.
54 • O&O Data Recovery Suite
O&O BlueCon V6
The elapsed time, as well the estimated time remaining, can also be found
here.
O&O FormatRecovery can be Minimized in to the System Tray. Pressing
Cancel will interrupt the saving operation. When the operation is
interrupted you will be returned to the previous page of the assistant where
you will be given the option of changing the target directory and reselect the
files to be recovered. Please note that all files that have already been
successfully saved will be unselected so that you can continue to save files
where you left off.
Completing the Data Recovery
After the successful recovery of files is completed, a summary of the data
recovery will appear. From here you can Open Target Folder and
immediately access the restored files.
By clicking Finish O&O FormatRecovery will be closed.
About O&O DiskRecovery
It's happened to the best of us: with the blink of an eye important files can
be deleted and presumed lost forever. Whether the result of a computer
virus, a software error, or user error, this can be devastating.
When such a disaster strikes, what can be done? Many users cut their losses
and accept that their files are lost. However, this is not necessarily the way it
has to be. Even when Windows does not offer a viable solution for the
recovery of lost data (i.e. the Recycle Bin), there is hope with
O&O DiskRecovery, an easy and secure way to recover data you had
thought were lost. O&O DiskRecovery intensely combs storage volumes for
lost data and can restore files other software programs cannot.
The online software documentation is your best source for all details
regarding the operation of O&O DiskRecovery. Access to this
documentation can be made through the program group in the Start Menu or
through the Help menu in O&O DiskRecovery itself. The software's internal
Help file can also be reached by hitting the F1 key while the O&O
DiskRecovery is running.
Starting O&O DiskRecovery
As soon as O&O DiskRecovery starts, it is possible to begin a new data
recovery session or continue one you have saved. Clicking Next will take
you to the Drive Selection dialog box. O&O DiskRecovery may be
Cancelled at any time.
Loading a Saved Data Recovery
Select Load Data Recovery and select the data recovery file. Such
a file generally has the extension DRD.
The data recovery information will be loaded and you will then be
able to continue with your saved settings.
If the data volume on which you would like to recover data is not present on
your system, an error message will appear.
O&O BlueCon V6
O&O Data Recovery Suite • 55
Selecting a Drive
Select the drive where you would like to scan for deleted data. It is possible
to select a partition (e.g. C: or D:) or an entire hard disk drive. In addition
you can select any storage media, from USB sticks memory cards for digital
cameras. Clicking Next will conclude the drive selection dialog.
By default, the unpartitionable areas of a hard drive, or those located past
the partitioned areas of the disk, are hidden. To reverse this, unselect the
option Hide unpartitionable areas.
Differing from unpartitionable areas, unpartitioned areas on the hard disk
can also exist under some circumstances. Although these areas on the disk
cannot be accessed by Windows, O&O DiskRecovery is able to scan these
regions. These areas are listed in the list of partitions as RAW or
"unpartitioned".
If you would like to add drives after O&O DiskRecovery has been loaded
(e.g. USB stick or digital camera), click on Update Drives. The newly
connected hardware will be loaded and displayed in the list of drives.
O&O DiskRecovery Scan Settings
After drive selection you will be able to define the settings that will have a
huge effect on the precision and length of the scan. In addition you can lay
down a minimum length for text files. If a device, such as a hard drive or
USB stick, has been selected and not a partition, the options O&O
SmartScan and O&O RawScan are supported and cannot be selected.
However, the default settings are generally sufficient for most cases and
therefore probably do not need to be changed.
Maximum Scan Depth for Recovering Data (O&O DeepScan)
Activate this option when you are scanning for especially small files. Please
note that the O&O DeepScan requires more time to be completed.
Ignoring Existing Files (O&O SmartScan)
A common problem that occurs with data recovery is that not only deleted
files are recovered. In addition, existing files are recovered which can mean
tedious work for you when you have to filter through those files that already
exist on your system. The O&O SmartScan takes over this job for you so
that only deleted files are found and restored. This can greatly accelerate the
data recovery process, depending on the settings.
56 • O&O Data Recovery Suite
O&O BlueCon V6
Please note that this option is only available when scanning partitions and
not entire devices.
Leaving Out the File System During the Scan (O&O RawScan)
If the partition on which you would like to recover data has been formatted
(possibly with another file system), O&O DiskRecovery can be triggered to
not scan the file system. This can increase the duration of the scan.
Please note that this option is only available when scanning partitions and
not entire devices.
Limiting the Scan to File of a Specific Size
This function limits the scanning sequence to notice only files to files
smaller than a set number of Megabytes. This maximum value can be set
anywhere between 1 and 1024 MB.
By default, all recoverable files, regardless of their size, are scanned. Using
this function will conserve system resources and possibly accelerate the
entire scanning operation.
Minimum Length for Text Files
O&O DiskRecovery can recognize a number of different text files (HTML,
source text files etc.). The default value of 512 characters means that all text
files that consist of 512 characters or less will not be picked-up by the scan.
If you would like to set this value lower, you can do so here. Please note that
the minimum value is 16 characters; the smaller the value, the longer the
scan duration.
Running and Interrupting a Scan
During the scan you will receive information regarding the
O&O DiskRecovery scan by way of a status dialog box. In it you will find
the overall progress of the scan, the progress pertaining to a specific file, and
the number of files found to this point.
The elapsed time, as well the estimated time remaining, can also be found
here.
O&O DiskRecovery can be Minimized in to the System Tray. Pressing
Cancel will interrupt the scan. When the scan is interrupted you will be
returned to the previous page of the assistant where you will be given the
option of resuming the scan or running it again.
O&O BlueCon V6
O&O Data Recovery Suite • 57
Selecting Files for Restoration
After the scan has been completed, the files found will be displayed in two
lists; the list to the left displaying the types of files found, the one on the
right showing the actual files of this type found. By selecting a specific file
type on the left, the corresponding list on the right will change. Depending
on which list is activated, the commands Select All, Select, and Unselect
can be used.
When your selections are made, click on Next to continue to the next step.
Note: In the Personal Edition the maximum number of files that may be
restored in a single data recovery is 100. In both the Admin and Tech
Editions of the software there is no limit to the number of files restored in a
single data recovery.
For many image and text files, it is possible to view an preview before they
are restored.
The preview must be activated. First select to the left a file type group and
then click the "Preview" button. If the button is grayed-out, these types of
files cannot be previewed.
With the preview function active, click on the file you would like to
preview. The preview will appear in the space to the left of the file list.
58 • O&O Data Recovery Suite
O&O BlueCon V6
To deactivate the preview function, simply click the "Preview" button one
more time.
Note: The fact that a preview is not available for some files does not rule out
the chance for a successful and flawless restoration of those files. This
function should not be seen as a way to judge the quality of a pending
restoration, but rather as a means to make the file identification process
easier.
Filter
With the Filter option it is possible to include or exclude specific files from
the list depending on their size. To do so, enter the size range in which the
desired files should fall. You can also stipulate whether the filter should
consider all files, only those previously selected, or only those you
previously left unselected.
The command Select highlights all corresponding files for restoration.
Unselect, in contrast, removes those highlights.
Selecting a Target Folder
To recover selected files you need to enter a saving location. By default
your 'My Documents' folder, but any folder, including network folders, may
be selected for this. O&O DiskRecovery automatically creates a subfolder
into which the recovered files are saved. Because an individual subfolder is
created for every file type recovered, it is advised that you select a target
O&O BlueCon V6
O&O Data Recovery Suite • 59
folder that is new or empty. In addition, it is possible to create a report
regarding the completed data recovery.
Please note that you will not be able to save the recovered files onto the
same partition where the deleted data was originally located. Also do not
forget to make sure you have enough storage capacity on disk to facilitate
the newly recovered files.
Click Next to initiate the recovery of data.
Creating a Report
Activating this option will enable you to view a detailed report regarding the
completed data recovery session. You can have this report saved to a
different target folder as that in which the recovered files are to be saved. By
default, the report will have the filename "DiskRecoveryReport.rtf".
The reports are saved in Rich Text Format (RTF) and can be viewed and
printed with the help of applications such as WordPad, Microsoft Word, or
any other text editing programs.
Saving Files
While the recovered files are being saved to their target folder,
O&O DiskRecovery keeps you up-to-date by way of a convenient dialog
box. Information, such as overall progress and the total size of the saved
files, is displayed in real-time as the operation progresses.
The elapsed time, as well the estimated time remaining, can also be found
here.
O&O DiskRecovery can be Minimized in to the System Tray. Pressing
Cancel will interrupt the saving operation. When the operation is
interrupted you will be returned to the previous page of the assistant where
you will be given the option of changing the target directory and reselect the
files to be recovered. Please note that all files that have already been
successfully saved will be unselected so that you can continue to save files
where you left off.
Completing the Data Recovery
After the successful recovery of files is completed, a summary of the data
recovery will appear. From here you can Open Target Folder and
immediately access the restored files.
By clicking Finish, O&O DiskRecovery will be closed.
60 • O&O Data Recovery Suite
O&O BlueCon V6
O&O Support and Contact
Technical Support
To receive more information about O&O BlueCon V6, please visit our
website, http://www.oo-software.com, and get the latest information about
product developments and support. Also included on our website are
regularly updated FAQs and Knowledge Bases that offer the most common
problems and questions regarding our products.
All registered customers receive installation and product support free of
charge for the first 90 days after registration. When contacting our support
department, please do not forget to have your registration code ready.
In addition, it may be helpful to read our frequently asked questions (FAQ)
section of our website before you contact our support department. It is
always possible that your specific question or problem may have already
been addressed.
O&O Software GmbH
Address:
Telephone:
Fax:
Internet:
E-Mail:
Am Borsigturm 48 • 13507 Berlin • Germany
+49 (0)30 4303 4303
+49 (0)30 4303 4399
http://www.oo-software.com
[email protected]
[email protected]
Authorized Resellers
For answers to all questions regarding the licensing and purchase of our
software products, our authorized reseller partners in over 30 countries stand
ready to assist you. Their names and addresses may be found at our website
under the 'Purchase' heading. We would also be more than happy to assist
you in finding the partner closest to you
O&O BlueCon V6
O&O Support and Contact • 61
Software License Agreement
END-USER LICENSE AGREEMENT (EULA) for
O&O BLUECON V6
IMPORTANT – PLEASE READ CAREFULLY
This end user license agreement is a legally binding contract between
yourself (as a natural or a legal person) and the company O&O Software
GmbH (O&O) for the software product named above. By installing the
software product, you declare your agreement with all conditions of the
license agreement.
If you do not agree with the conditions of the license agreement, you are not
entitled to install or use the software product. Should this be the case, you
can return the software product along with a copy of the invoice or receipt to
the distributor from whom the product was purchased in exchange for a full
refund.
The software product is protected by copyright laws and international
copyright contracts as well as other laws and agreements concerning
intellectual property.
IMPORTANT NOTE
This software product utilizes licensed Microsoft Windows technology. It
may only be used in a manner outlined in this agreement and in the product
documentation. It may not be changed or modified in any way. This
software is not meant as an independent operating system, but rather a
software that enables the configuration and restoration of computer systems
and their data in an emergency. Please note that this product will restart
without warning after twenty-four (24) hours of continuous operation.
1. Subject of the contract
The subject of this contract is the computer program, the description thereof
and the user manual as well as any other accompanying written material.
This will henceforth also be referred to as "software".
O&O wishes to point out that, at the current state of technology, it is not
possible to create software that works perfectly in all applications and
combinations. The subject of this contract is therefore a software program
that is fit for the purposes detailed in the description and the user manual.
2. License granting
O&O BlueCon V6
Software License Agreement • 63
For the duration of this contract, O&O grants you the simple, non-exclusive
and personal right (henceforth referred to as "license") to use a copy of the
software on a single computer. Repeated and deliberate installation, use, and
subsequent uninstallation on various computers (floating license) is
prohibited.
This software product may only be used in accordance with the guidelines
set out for each license purchased. The following licenses exist for O&O
BlueCon V6:
(a) O&O BlueCon V6 Personal Edition
You are authorized to install and use the software product on only one
computer. Other limitations may apply in the software itself. Please consult
the software documentation for more information on these limitations.
(b) O&O BlueCon V6 Admin Edition
You are authorized to install and use the software product on all computers
a) in the possession of the company (legal person pr natural person(s) in the
case of corporations) owning the license and b) all located at a single site.
This license is bound to a single natural person and is non-transferable,
unless the transfer is a long-term transfer as stipulated in section 3 above.
(c) O&O BlueCon V6 Tech Edition
You are authorized to install and use the software product on all computers.
This includes computers that do not belong to the company owning the
license (a.k.a. Service Technician's License). This license is bound to a
single natural person and is non-transferable, unless the transfer is a longterm transfer as stipulated in section 3 above.
3. Description of further rights and limits
The license-holder is prohibited from:
1. altering, translating, reverse-developing, decompiling or
disassembling the software without the advance written permission
of O&O
2. creating products derived from the software or making copies of
the written material, translating or altering the written material or
creating products derived from the written material
3. distributing copies of the software to third parties
4. changing or removing the copyright mark on the copies of the
software
5. renting out, - or lending the software
The license holder is permitted to transfer all rights from this license
agreement permanently to another person, provided that the recipient also
agrees to all conditions of this license.
The license holder must use the software only in compliance with all
relevant laws and international treaties.
4. Ownership of rights
Any ownership rights applying to the software, including but not limited to
copyright laws, belong to O&O. Any not explicitly claimed rights are
reserved by O&O.
The purchase of a license for a product simply grants a right to use the
software as described in the conditions of the license agreement. This does
not imply a right to the software itself. In particular, O&O reserves all
publication, multiplication, processing and utilization rights to the software.
64 • Software License Agreement
O&O BlueCon V6
5. Reproduction
The software and accompanying written material are protected by copyright
laws. The user has the right to create copies of the software for back-up and
archiving purposes. He or she is thereby also obliged to reproduce O&O’s
copyright mark on the physical medium or in the program. A copyright
mark present in the software may not be removed. Copying or reproducing
the software in original or altered form, or merged with or included in other
software, is explicitly forbidden.
Provided you pass on only the test version, you may reproduce the
installation data as often as you wish. However, you may only pass on exact
copies and may not alter these in any way.
For such reproduction, you may not demand any kind of compensation. You
may not distribute or market this product in combination with other products
- whether commercially or non-commercially - without the advance written
permission of O&O.
6. Length of the agreement
This agreement is valid indefinitely. The right of a license-holder to use this
software is removed automatically and without notice if he or she violates
one of the terms of this agreement. At the end of the period of right to use,
the license-holder is obliged to destroy the software, all copies of the
software, and the written material.
7. Compensation for breach of contract
O&O would like to point out that you are responsible for any damages
arising from breach of copyright if you violate these contract terms.
8. Changes and Updates
O&O is entitled to update the software as it wishes. O&O is not obliged to
make updated versions available to license holders who have not registered
their product with O&O, or who have not paid the update fee. Any
additional software code that is made available to you as an update is
considered a part of the software and is therefore subject to the terms of this
agreement.
9. O&O’s Guarantees and Responsibility
1.
2.
3.
4.
O&O BlueCon V6
O&O guarantees the original license-holder that the data medium
carrying the software is free of errors at the point of delivery,
assuming normal operating conditions and a normal level of
maintenance.
If the delivered data carrier is faulty, the purchaser can demand a
replacement during the 24-month guarantee period. For this, he or
she must return the data carrier, any back-up copies and the written
material along with a copy of the invoice or receipt to O&O or to
the dealer where the product was purchased.
If a fault as described in clause 9 b is not corrected by means of a
replacement delivery within a reasonable time period, the purchaser
can demand either that the sale price be reduced or that the contract
be cancelled.
For these reasons and for those mentioned in clause 1 of this
Software License Agreement • 65
contract, O&O accepts no responsibility for mistakes in the
software. In particular, O&O does not guarantee that the software
will meet the particular requirements and demands of the purchaser
or that it will function together with other software he or she has
chosen. The purchaser is responsible for the correct choice of
software and the consequences of the use of that software, as well
as the results aimed at or intended. The same principle applies to
the written material that accompanies the software. If the software
is fundamentally unfit for use as described in clause 1, the
customer has the right to cancel the contract. O&O has the same
right should the creation of software that is fundamentally fit for
use as described in clause 1 not be practically possible.
O&O is not responsible for any damages, unless such damages are caused
deliberately or arise from gross negligence on the part of O&O. In contracts
with traders, an assumption of responsibility for gross negligence is
excluded. This does not apply to assurances by O&O that refer to specific
characteristics. Responsibility for damages not included in such an
assurance will not be accepted.
10. Competency
If the license-holder is a registered merchant under German law, the law that
applies to this contract is the law of the Federal Republic of Germany. In
this case, the state and federal courts of the Federal Republic of Germany
assume responsibility.
If you have any questions regarding the licensing of O&O software or you
wish to contact O&O, please get in touch with us as follows:
O&O Software GmbH
Am Borsigturm 48, 13507 Berlin, Germany
International: Tel. +49-30-4303 4303 / Fax +49-30-4303 4399
Germany: Tel. (030) 4303 4303 / Fax (030) 4303 4399
E-mail: [email protected]
Internet: http://www.oo-software.com
Last Modified: September 5, 2006
66 • Software License Agreement
O&O BlueCon V6