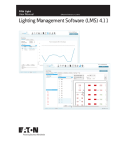
1
USER MANUAL
EVALUATION
EVALUATION TUTORIAL
TUTORIAL
COPYRIGHT © 2009
Eagle Technology, Inc.
All rights reserved.
In the preparation of the information contained in this document, we have
attempted to offer the most current, correct and clearly expressed information
possible. Nonetheless, inadvertent errors can occur.
THE INFORMATION CONTAINED IN THESE DOCUMENT IS PROVIDED "AS
IS" WITHOUT WARRANTY OF ANY KIND, EITHER EXPRESSED OR
IMPLIED, INCLUDING, BUT NOT LIMITED TO, ANY IMPLIED WARRANTIES
OF MERCHANTABILITY AND FITNESS FOR A PARTICULAR PURPOSE.
This document could include technical inaccuracies or typographical errors.
Changes are periodically added to the information herein. Eagle Technology,
Inc. and/or its respective distributors may make improvements and/or changes
in the product(s) and/or the program(s) described herein at any time. In no
event shall Eagle Technology, Inc. and/or its respective distributors be liable for
any special, indirect or consequential damages, or any damages whatsoever
resulting from loss of use, data or profits. If you believe you have discovered an
error, please share it with us so we may correct it as appropriate.
Printed in the USA.
Eagle Technology, Inc.
11019 North Towne Square Road
Mequon, WI 53092 USA
Phone: +1-262-241-3845
In US: +1-800-388-3268
Fax: +1-262-241-5246
www.eaglecmms.com
[email protected]
TRADEMARKS
ProLink III, ProTeus and ProTeus V are trademarks or registered trademarks of
Eagle Technology, Inc. All other trademarks referenced are the property of their
respective owner.
Revision 02/09
Tutorial
2
Table of Contents
Welcome to ProTeus V......................................................... 4
How to Contact Eagle Technology...................................... 6
How to use this Tutorial Manual.......................................... 7
Self-Guided Tour.................................................................................. 7
Exercises ............................................................................................. 7
Self-guided Tour of ProTeus V CMMS ................................ 8
Start the program ................................................................................. 8
Terms and concepts............................................................................. 8
Review the modules............................................................................. 9
Exercises ............................................................................ 15
Overview of the Exercises................................................................. 15
Exercise One: Log in......................................................................... 15
Exercise Two: Add a Part to Inventory .............................................. 15
Exercise Three Add a Piece of Equipment......................................... 16
Exercise Four: Create a PM Work Order .......................................... 17
Exercise Five: Activate a PM Work Order .......................................... 20
Exercise Six: Create a DM Work Order from DM Template .............. 21
Exercise Seven: Create a DM Work Order ....................................... 21
Exercise Eight: Print a Work Order .................................................... 21
Exercise Nine: Print a Report ............................................................ 22
Exercise Ten: Change a Field Name ................................................ 23
Other Information Available............................................... 24
Technical Literature............................................................................ 24
Technical Support .............................................................................. 24
Tutorial
3
Welcome to ProTeus V
Welcome to ProTeus V™ Computerized Maintenance Management Software,
this tutorial manual will guide you to navigate through key features of the
product and assist you in entering records. The complete tutorial will take
approximately 20-30 minutes.
ProTeus V provides efficient and user-friendly asset and maintenance
management. It includes all of the features needed by most maintenance
departments to organize and efficiently manage their operations.
Tutorial
•
Decrease equipment downtime by practical scheduling of preventive
maintenance using the Multi-Cycle PM module.
•
Automated activation and printing for Preventive Maintenance Work Orders.
•
Single or multiple records are able to be updated for labor using Resource
Assignment.
•
Minimize redundant efforts by use of templates.
•
Demand Maintenance allows generation of work orders based on demand
(corrective) maintenance requirements or alarms.
•
Open Work Order tracking, which facilitates labor allocation and eliminates
oversights.
•
Control part quantities by sustaining effective levels of inventory.
•
Create purchase requisitions for inventory and non-inventory items.
•
Comprehensive history records for all maintenance work performed.
•
Life cycle cost analysis for equipment.
4
ProTeus V also includes a host of informative reports to help meet Quality
Control, Health & Safety, FDA Validation, and Joint Commission Standards.
ProTeus V is designed for office buildings, hospitals, universities,
manufacturing plants, warehouses, hotels, schools, and any other organization
where maintenance is vital to the operation. Extensive computer knowledge is
not needed in order to put ProTeus V to work.
ProTeus V is available in two versions:
•
ProTeus V Professional for small to medium size companies.
•
ProTeus V Enterprise for large operations running on a MS SQL database.
ProTeus V runs in the Windows Servers, Windows® 2000 Professional, XP and
vista environments (home versions of Windows XP is not supported). All
ProTeus V information is stored in a fully relational database, which provides
the flexibility, rapid access, and efficiency to accommodate greater amounts of
data as a company’s information level grows. For more detailed information on
ProTeus V product variations and database platforms please contact your
Eagle sales representative or visit our website at www.eaglecmms.com.
ProTeus Alarm Interface (PAI)
The ProTeus V CMMS product family supports interfaces to Building Automation
Systems from the following companies:
BACnet® Protocol: Trane, Johnson Controls, Alerton-Honeywell, Siemens,
KMC Controls, Automated Logic, TAC and American Automatrix
Niagara™Framework Protocol: Tridium, Invensys, Staefa, Honeywell and
Carrier
The optional ProTeus V Alarm Interface module allows automatic activation of
work orders. Activation is based on control parameters such as alarms or
runtimes. PM/DM work orders can be automatically printed or emailed upon
activation.
Tutorial
5
How to Contact Eagle Technology
Do you have questions about the installation of your Evaluation Software?
Questions about the functionality of ProTeus? Not sure if ProTeus offers the
feature you are looking for? Our sales representatives are happy to help you!
Pre-Sales Questions:
1-800-388-3268
1-262-241-3845
[email protected]
Hours:
Monday-Friday
7:30 am – 5:00 pm CST
Tutorial
6
How to use this Tutorial Manual
This document is intended to instruct users in the basic operation of the
ProTeus Computerized Maintenance Management System (CMMS).
It is divided into two sections: A Self-Guided Tour and Exercises.
The evaluation copy of ProTeus V is pre-loaded with data in each of the Master
Files. The login name MM and password MM are already set up with
appropriate rights.
If you require assistance using certain functionality, please call our
Pre-Sales Department at 1-800-388-3268 or 1-262-241-3845.
Self-Guided Tour
The Self-Guided tour is a quick overview of the ProTeus software.
We recommend that you start with the Self-Guided tour.
Time Required: 10 minutes
Exercises
The Exercises section includes exercises that provide you with a general
understanding of the basic operation of ProTeus. For best results, please
complete the exercises in the order listed.
Time Required: 30 minutes
Tutorial
7
Self-guided Tour of ProTeus V CMMS
After you complete the installation of the ProTeus software, you can review the
operation of the system using the following guidelines.
Start the program
1. Start the program by going to Start > Programs > ProTeus V > ProTeus V.
2. Click ProTeus V.
3. Enter MM for the Login Name and MM for the Password, and click OK.
Terms and
concepts
The first screen shown in many of the modules is the Quick List; the Quick List
displays a listing of all records in the current master file. The list is sorted in
ASCII sort order by the contents in the first column. The columns on most quick
lists can be changed so that the settings for column ordering and width will fit
the user’s needs. To sort, click on a column header in a list. Drag the column to
a new location on the list. To modify column width, drag the boundary on the
right side of the column heading until the column is the width you want.
Quick Lists are primarily used for record selection. To the left of each Quick
List will appear an arrow, this arrow indicates the currently selected record.
The current record is also displayed on the title bar. Moving between records in
the quick-list will change the data displayed in the Quick Screen (see next
paragraph), and the contents displayed in the tabs to the right of the Quick List.
To modify data use the Quick-Screen or go through the tabs. Data displayed in
the quick-list grid cannot be changed by typing into the actual grid.
A Quick Screen is provided on the Quick List tabs of virtually all-editable
modules within ProTeus. Quick Screens allow quick creation of a record,
providing only required or most frequently accessed fields in each master file.
This prevents the need for a user to jump from tab to tab when only minimum
information is required, in some areas entire records are created from the Quick
Screen.
located on the top
The Navigator buttons
of the screen are used to move between record selections, add, delete, save
records, cancel changes and refresh the screen.
Position the cursor over each button and read the text in the bubble that defines
the function of the button.
Drop-down Lists are selection panels containing a list of choices for the
corresponding field. Drop-down lists are accessed by clicking on the drop-down
arrow to the right of a field. Click the down-arrow to select from a drop-down list
of items. Selecting the open book icon
to the right of the down-arrow allows
the user to edit the drop-down list. Drop down lists can be sorted by what is
typed into the field. For Example, if the entry “USA” exists in the Country drop
down list, typing US in the field before activating the drop down list will show the
nearest match to what was typed.
Tutorial
8
Review the
modules
Equipment – Click on the “Equipment” icon on the main screen, or under the
Assets drop-down menu, select “Equipment”.
This master file is where all the equipment and sub-assemblies used at your
facility are recorded. The Equipment Master File contains data on all aspects of
the equipment including the Cost History, Bill of Materials (BOM), Runtime
information, associated Sub-assemblies, Attachment Files, list of Preventive
Maintenance (PM) work orders, User Fields and more.
The “Quick Screen” is displayed at the right side of the “Quick List” and shows
key information about the selected piece of equipment. Please note that field
names that are blue, “Equipment Name” and “Equipment No.,” are required
fields. All other fields can be used or left blank at the user’s discretion
Select the first piece of equipment, AHU002, and then select each tab on the
top of the screen to show information that is more detailed. Under the
Equipment, tab notice that the Category field has a down-arrow to select from a
drop-down list of items. Selecting the open book icon
down-arrow allows you to edit the drop-down list.
to the right of the
Review the information available in the other tabs. For example, under the
Attachments tab, select the drawing and right-click to select “view attachment”.
Close the Equipment module by clicking the lower
corner.
(close button) in the right
Inventory - Click on the “Inventory” icon on the main screen, or under the
Assets drop-down menu, select Inventory.
The inventory file is used to track information about all stocked spare parts and
supplies used to perform work orders.
The initial screen is the Quick List and operates the same as in the Equipment
module. Review the information in each tab, Inventory, Quantity, Vendors,
Where used, Allocated, Description, User Fields, Attachments.
Under the Vendors tab, you may choose a vendor by selecting the field under
“Vendor Code,” and then clicking on the down arrow. Select the vendor of your
choice.
Close the Inventory module by clicking the lower
corner
(close button) in the right
Preventive Maintenance Master – At the top of the screen, under the
“Maintenance” drop-down menu, select “PM Master”.
The PM Master file is used to develop, assign, and schedule preventive
maintenance procedures.
Select Job No. AHU-002, and observe the information under each tab: PM
Master, Equipment, Date Schedule, Tasks, Parts, Labor, Tools, W.O. Desc,
User Fields and Attachments.
Tutorial
9
Under the Date Schedule tab, notice at the bottom of the screen that the work
order has a Monthly schedule as well as an Annual schedule, click on the
“monthly” button to the right of the “cycle type” checkbox. To view an extended
schedule, enter 5 in the “Months” field click on the “View” button.
PM Master Date Schedule Tab
Close the Schedule window by clicking the
(close button) in the right corner.
Right-click anywhere in the screen and choose “Print” to print the PM Master
work order form. Wait for the preview of the work order to automatically open.
Tutorial
10
PM Master Work Order
Close the Print Preview window by clicking the
corner.
(close button) in the right
Close the PM Master module by clicking the lower
corner.
(close button) in the right
Preventive Maintenance Work Orders – Click on the “PM Active” icon on the
main screen, or under the “Maintenance” drop-down menu, select “PM Active”.
The PM Active Master file is used to modify, print and close active preventive
maintenance jobs previously created in the PM Master File.
Select a work order, and observe the information under each tab: PM Active,
Equipment, Date Schedule, Tasks, Parts, Labor, Tools, W.O. Desc, User Fields
and Attachments.
to the
Under the Tasks tab, add a task by clicking on the Record View icon
left of the “Task No” field name. Click the “+” icon to add a new task. Using the
task number drop-down arrow, look at the list of tasks. Select the “CHK004”
task. Click Close.
Under the Labor tab, scroll to the right and change the “hours at rate 1” for Carl
Nelson to 5.
Under the Date Schedule tab, enter a “completion date” by selecting the
calendar icon
to the right of the empty field. Then right click and choose
“Quick Close” to close the work order. Closing a work order will remove the job
from PM Active, place a copy of the job in PM History and re-schedule the job
for a later date.
Close the PM Active module by clicking the lower
corner.
Tutorial
(close button) in the right
11
Demand Maintenance Work Orders - Click on the “DM Active” icon on the
main screen, or under the “Maintenance” drop-down menu, select “DM Active”.
The tabs are similar to the PM work orders except for the addition of the
“Causes” tab.
The DM Active is where the user would create work orders “on-the-fly” in
response to maintenance service requests, emergency breakdowns, or other
non-routine maintenance activities.
Under the “Causes”, tab select from the list of causes available by clicking on
the drop-down arrow next to the “Cause No.” label. By reviewing the cause of
breakdowns, the operation of the building/factory can be improved.
Close the DM Active module by clicking the lower
corner.
(close button) in the right
Scheduling – Click on the “Scheduling” icon on the main screen or under the
“Maintenance” drop-down menu select “Scheduling”.
The Scheduling module displays current, overdue and upcoming PM and DM
work orders in calendar-view and tree-view formats. Viewing these active,
overdue, and future work orders allows equipment availability to be planned,
available resources to be identified, and over-scheduling to be eliminated.
The tree-view of the Scheduling module allows users to drill down to see PM
and DM work orders by year, month, week, day, specific employee, equipment
or customer. The number of months that display can be changed by altering
the numbers that appear in the display panel on the lower left-hand side of the
screen. In the tree-view right-click anywhere in the right-hand window to
preview and print a copy of the schedule.
Select the [+] in front of the year to open the calendar and click on a month to
view the PM and DM work orders planned for the month.
When viewing the calendar view in Scheduling, clicking on “PM-Future” Show
will extrapolate the date schedules of existing PM Master records to predict
future occurrences for each work order.
Clicking “Details” Show will expand the details in the right-hand pane for the
following selections in “Tree” view: Weekly, Daily, Equipment, Employee and
Customer.
Close the Scheduling module by clicking the lower
corner.
Tutorial
(close button) in the right
12
Employee – Click on the “Employee” icon on the main screen. From “Quick
List” select Employee No. 10019999. Click the Employee Tab. At the bottom of
the screen in the Max. Purchase Field, highlight the value and type 150000 and
then press the tab key. This will allow the employee to create Purchase Orders
up to $150,000 per order.
Close the Employee module by clicking the lower
corner.
(close button) in the right
Purchasing – At the top of the screen under the “Purchasing” drop-down menu
select “Reorder List”.
The reorder list shows the list of all parts in which the available “Part Quantity”
is less than the defined “Reorder Point”. Scroll to the right to view the stock and
reorder levels.
Select the LUB001 record, and then click the button on the bottom of the
screen labeled “Create Requisition”. This will automatically create a purchase
requisition for the item selected. Review information under the “Order Details”
and “Costs” tabs.
Close the Purchasing module by clicking the lower
right corner.
(close button) in the
Cost Center – Under the “Other” drop-down menu select “Cost Center
Manager”.
The Cost Center Manager is where you set up annual budgets for material and
labor are defined.
Cost Center Manager
Close the Cost Center Manager by clicking the lower
right corner.
Tutorial
(close button) in the
13
Reports – To view any of the over one hundred pre-formatted reports available
select “Reports” at the top of the screen. Next, select one of the following
reports and click the Preview button in the resulting window.
•
Equipment Report>Asset Report
•
Inventory Report>Inventory Cost Report
•
Vendor Reports > Vendor Contact Report
•
Purchasing Reports > Purchase Order Report
•
Maintenance Report > DM Report > DM History Actual Hours By
Craft (Including Labor Costs) Graph
Sample Report- DM History Actual Hours By Craft (Including Labor Costs) Graph
Close the Print Preview window by clicking the
corner.
Close the Report dialog box by clicking the
and return to the Main Screen of ProTeus.
(close button) in the right
(close button) in the right corner.
Refer to the ProTeus V User Manual for more detailed instructions on the
features and functionality of the ProTeus software.
The Online User’s Manual – is available by clicking on the Help > Index
option.
Tutorial
14
Exercises
The exercises presented here cover some of the basic functions of ProTeus V.
Overview of
the Exercises
Exercise One:
Log in
1. Open the ProTeus V application by selecting Start > Programs > ProTeus V
> ProTeus V.
2. When prompted, enter the Login Name: MM and Password: MM and click
OK.
Exercise Two:
Add a Part to
Inventory
This exercise explains how to add a part to the Inventory Master file. We will
add “gear oil” supplied by Press Specialists.
1.
From the Main menu screen, select Assets > Inventory.
2.
The Inventory Quick List is displayed, which will show a listing of all defined
inventory. This module holds all information that pertains to each part, such
as its number, manufacturer and quantity on hand.
Inventory Master File
Tutorial
button on the Navigator.
3.
To add a new part, click the Insert Record
The template clears.
4.
In the blue-highlighted Part No. Field (at the right side of the window), type:
FLT002. Press Tab. The cursor advances to the next field.
15
5.
In the Part Name field, type: FILTER-HEPA. Press Tab. The cursor
advances to the next field.
6.
In the Qty on Hand field, type 5 to add five to inventory. Press Tab.
7.
Click in the Unit Cost field. Highlight the value and then type 5 and press
tab key. This value will indicate that the cost of the filter is $5.00. The
dollar sign ($) does not need to be added; it will appear automatically.
8.
To save the new inventory record, either click the Post Edit
button on
the Navigator or close the file window. The message Do you want to
save the last changes? may appear. Click Yes to save changes.
(close button) in the
9. Close the Inventory module by clicking the lower
right corner and return to the Main Menu of ProTeus.
Exercise Three
Add a Piece of
Equipment
This exercise explains how to add a piece of equipment. The Equipment
Master File will contain everything maintenance will be performed on. In this
example, an air-handling unit will be added.
1.
From the Main menu, select Assets > Equipment.
2.
The Equipment Quick List is displayed, which will show a listing of all
defined equipment.
Equipment Master File
Tutorial
button on
3.
To add a new piece of equipment, click on the Insert Record
the Navigator. The template clears.
4.
In the Equipment No. field, type: AHU004. Press Tab. The cursor
advances to the next field.
16
5.
In the Equipment Name field, type: AIR HANDLING UNIT. Press Tab.
The cursor advances to the next field.
6.
Type the location for the equipment as: FLOOR1.
7.
Click in the Manufacturer field. Type the name of the manufacturer:
TRANE.
8.
Note that Date Installed and Warranty Date default to today’s date. To
change this, tab to the Date Installed field and type (or use the calendar
feature) 01/01/2002 as the Date Installed. Enter 01/01/2005 in the
Warranty Date field.
9.
Note that Original Cost defaults to $0.00. Click in the original cost field,
highlight the value and type: 50,000.00. Press Tab.
10. Now we will add another piece of equipment by clicking on the Insert
Record
button on the Navigator. The template clears.
11. In the Equipment No. field, type: CHL002. Press Tab. The cursor
advances to the next field.
12. In the Equipment Name field, type: CHILLER. Press Tab. The cursor
advances to the next field.
13. Type the location for the equipment as: FLOOR1.
14. To save the new piece of equipment, either click the Post Edit
button
on the Navigator or close the Equipment Master File window. The message
Do you want to save the last changes? may appear. Click Yes
to save changes.
(close button) in the
15. Close the Equipment module by clicking the lower
right corner and return to the Main Menu of ProTeus.
Exercise Four:
Create a PM Work
Order
This exercise explains how to create a new work order for a monthly cleaning of
the filters on the air-handling unit. We will prepare a Preventative Maintenance
(PM) work order. This work order will be created in the PM Master File so it will
occur on the first Monday of every month.
1. From the Main menu, select Maintenance > PM Master.
2. The PM Master Quick List is displayed, which will show a listing of all
defined work orders.
3. To clear the template so that a new work order can be created, click on the
Insert Record
button on the Navigator. The template clears.
4. Type AHU004-CLN in the blue highlighted Job No. field (at the right side of
the window). Press Tab.
5. Click the Equipment No. drop-down arrow to activate the drop-down list.
Select AHU004.
6. Click in the Procedure Description field, type: MONTHLY CLEANING OF
FILTERS.
7. In the Scheduling panel at the bottom of the “Quick Screen”, check the box
next to Monthly. The Monthly Cycle Type window appears.
Tutorial
17
Blank Monthly Cycle Type Window
8. The First Occurrence defaults to today’s date.
9. In the Advance by field, type 1 and press Tab. This signifies that the work
order will activate 1 day before it becomes due.
10. Type 1 in the Est. Down Time field.
11. Since this work order is to become due on the first Monday of every month,
type click to the Every_Months field and type 1.
12. Next, select the second of the last two radio buttons at the bottom of the
screen. From the drop-down lists, choose First and Monday.
Tutorial
18
Monthly Cycle Type Window
13. Click the
in the upper-right hand corner to close the Cycle Type window.
We will now view the schedule for this work order.
14. Click the Date Schedule tab. The Monthly Date Schedule window displays.
Date Schedule Tab
Tutorial
19
15. In the View Schedule panel, type in 6 in the Month(s) field. This will preview
the schedule for this work order for the next 6 months.
16. Click the View button. The Schedule window opens.
Schedule Window
17. Note how the first date in the Schedule is today’s date. That is because
whenever a PM work order is created, it is activated based upon the date
value in the “First Occurrence” field; this date, by default will always be
“today’s date.” Thereafter, the schedule follows the parameters entered in
the Date Schedule tab.
18. Close the Schedule window by clicking the
(close button) in the right
(close button) in
corner. Close PM Master module by clicking the lower
the right corner to return to the main menu.
Exercise Five:
Activate a PM
Work Order
This exercise explains one way to activate the PM work order created in the
previous exercise.
1. From the Main menu, select Maintenance > PM Active.
2. The PM Active Quick List is displayed, which will show a listing of all active
PM work orders.
3. Right-click the mouse button and choose Activate PM’s from the menu.
The message, “Would you like to activate all appropriate
Preventive Maintenance work orders?” appears. Click YES.
4. Locate AHU004-CLN(M) in the Job No. field. The (M) signifies that this is a
monthly PM.
5. Click the Date Schedule tab to view the details of this PM.
6. Close the PM Active module by clicking the lower
right corner to return to the main menu.
(close button) in the
7. PM’s can also be set to activate automatically when ProTeus is opened.
This is the most common method of PM activation.
Tutorial
20
Exercise Six:
Create a DM
Work Order from
DM Template
This exercise will illustrate how to create a new Demand Maintenance work
order from DM Template.
1. From the Main menu, select Maintenance > DM Template.
2. The DM Template Quick List is displayed, which will show a listing of all
current work orders.
3. From the list select a DM Template work order, click on the Job No., right
click and select Activate.
4. A Conformation message appears indicating that the work order has
been activated, select OK.
5. Repeat steps 1-4 to activate a different DM Template work order.
6. Close the DM Template module by clicking the lower
the right corner to return to the main menu.
Exercise Seven:
Create a DM
Work Order
(close button) in
This work order will replace a faulty switch on the Chiller previously created in
the Equipment Master File. This work order will be created in DM Active file,
since it is an unplanned occurrence.
1. From the Main menu, select Maintenance > DM Active.
2. The DM Active Quick List is displayed, which will show a listing of all
current work orders.
3. To clear the template so that a new work order can be created, click on
the Insert Record
button on the Navigator. The template clears.
Note that the date-coded Work Order No. field is filled in automatically.
The Work Order No. Field cannot be edited.
4. Click the Equipment No. drop-down arrow to activate the drop-down list.
Select CHL002. The Equipment Name field fills in automatically.
5. In the Symptom field, type: BAD SWITCH.
6. The Date Required field will default to today’s date. To change the date,
click on the down arrow button to the right of the field or enter it in
manual.
7. To save the new Demand Maintenance Active Work Order, either click
the Post Edit
button on the Navigator or close the file window. The
message Do you want to save the last changes? may
appear. Click Yes to save changes.
8. To return to the Main Menu of ProTeus click the lower
in the right corner.
Exercise Eight:
Print a Work
Order
(close button)
This exercise explains how to print the DM work order created in the previous
exercises. Make sure a default printer is connected and on-line.
1. From the Main menu screen, select Reports> Forms > DM Active Work
Order Form.
2. In the resulting screen, click Query, and then choose New Query from the
pop-up menu.
3. In the Fields list, find Equipment No. and click on it.
Tutorial
21
4. In the Field Value box, type CHL002. Make sure the Exact Match radio
button is selected, so that only work orders in which Equipment No. =
CHL002 are printed.
DM Active Print Query Window
5. Click OK, and the DM Active Work Order Form displays, showing all work
orders that fit the selection criteria.
6. To print a hard copy of the form, click the “printer” icon at the top of the
report window.
Close the Print Preview window by clicking the
corner.
Close the Report dialog box by clicking the
and return to the Main Screen of ProTeus.
(close button) in the right
(close button) in the right corner
An alternate method of printing this work order would be as follows:
1. Select the work order to print (in the DM Active file), right click the
mouse and select Print from the menu.
2. The Work Order Print Preview window displays, showing a preview of
the printed work order. Click the printer icon. A print box appears.
Click OK.
Exercise Nine:
Print a Report
This next exercise explains how to print a report. Follow these steps.
1. From the Main menu, select Reports > Maintenance Reports > DM Reports
> DM History Actual Hours By Employee.
2. The Report Dialog Box appears. Click on Preview to look at the report
before printing.
3. To print the report, click the printer icon on the report screen
4. When the report has printed, close the Print Preview window by clicking on
the
(close button) in the right corner and close the Report dialog box by
(close button) in the right corner.
clicking the
Tutorial
22
Exercise Ten:
Change a Field
Name
This next exercise explains how to change the field names in ProTeus V.
1.
Find the Field Name icon in the ProTeus V program group
(Start>Programs>ProTeus V>Field Name) and click on it.
2.
Use MM for the Login name and Password.
3.
The following window displays. The Default Display Name column shows
the internal field names, which cannot be changed. The Display Name
column contains the field names as displayed in ProTeus V.
4.
Click on the drop-down box next to Module and select Inventory.
5.
Change the Inventory Field Display Name to Parts.
Field Name Change
6.
Click OK to save the change and then click Close.
Note: If you are currently in ProTeus V, you will have to Restart ProTeus V
to see your changes. Once you go back into ProTeus V, your changes will
be applied to all references of that field in the master files, quick lists, menu
options and reports.
Tutorial
23
Other Information Available
For more information about specific features and capabilities of the ProTeus
CMMS product, please see the Help Menu or contact our technical support
team. Other literature, listed below, offers further details about the use and
operation of ProTeus.
Technical
Literature
Quickstart manual – Describes the key activities required to get a system up
and running quickly.
Training manual – Provided during training classes.
Users Manual – The complete technical reference manual for all sections of the
software. This document is included as a file on the product CD.
Technical
Support
For information on our training classes and for technical support please contact
us at the following:
Eagle Technology, Inc.
10500 North Port Washington Road
Mequon, Wisconsin 53092 USA
Telephone: +1-262-241-3845
Toll-Free (USA): 1-800-388-3268
Email: [email protected]
Web: www.eaglecmms.com
We also have dealers worldwide who are trained in the installation and
operation of ProTeus V. Contact Eagle Technology, Inc. for a list of dealers
near you.
Tutorial
24