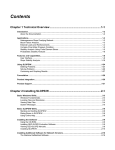
1
Software Installation Manual for x86 and x64 Platforms Running Windows 7, 8, Vista, Server 2003, Server 2008, and Server 2012 Using SCRAMNet+ PCI Document No. C-T-MI-NTPCPC5#-A-0-A1 FOREWORD The information in this document has been carefully checked and is believed to be accurate; however, no responsibility is assumed for inaccuracies. Curtiss-Wright Reserves the right to make changes without notice. Curtiss-Wright makes no warranty of any kind with regard to this printed material, including, but not limited to, the implied warranties of merchantability and fitness for a particular purpose. Copyright 2014 Curtiss-Wright, All Rights Reserved. is a registered trademark of Curtiss-Wright Pentium III is a trademark of the Intel Corporation. Windows, Microsoft Windows 7, Windows 8, Window VISTA, Windows Server 2003, Windows Server 2008, and Windows Server 2012 are registered trademarks of the Microsoft Corporation. Visual C/C++, and Visual Studio are trademarks of the Microsoft Corporation. Motorola is a registered trademark of the Motorola Corporation. Any reference made within this document to equipment from other vendors does not constitute an endorsement of their product(s). Revised: March 5, 2014 Curtiss-Wright Defense Solutions 2600 Paramount Place Suite 200 Fairborn, OH 45324 USA (800) 252-5601 (U.S. only) (937) 252-5601 TABLE OF CONTENTS 1. INTRODUCTION...................................................................................................................................... 1-1 1.1 How to Use This Manual .......................................................................................................... 1-1 1.1.1 Purpose .................................................................................................................. 1-1 1.1.2 Scope ..................................................................................................................... 1-1 1.1.3 Style Conventions .................................................................................................. 1-1 1.2 Related Information .................................................................................................................. 1-1 1.3 Quality Assurance .................................................................................................................... 1-2 1.4 Technical Support..................................................................................................................... 1-3 1.5 Ordering Process ...................................................................................................................... 1-3 2. PRODUCT OVERVIEW ........................................................................................................................... 2-1 2.1 Overview .................................................................................................................................. 2-1 2.2 Hardware Installation ............................................................................................................... 2-1 2.3 Software Distribution ............................................................................................................... 2-1 2.4 System Requirements ............................................................................................................... 2-1 2.4.1 Byte Ordering ........................................................................................................ 2-2 2.4.2 Byte Order in SCRAMNet RAM ........................................................................... 2-2 2.4.3 Byte Order in SCRAMNet Control/Status Registers ............................................. 2-2 2.4.4 Byte Order in SCRAMNet Auxiliary Control RAM.............................................. 2-3 2.5 System Considerations ............................................................................................................. 2-3 2.6 Installation Procedures ............................................................................................................. 2-3 3. INSTALLATION ....................................................................................................................................... 3-1 3.1 Overview .................................................................................................................................. 3-1 3.1.1 Power Up Host....................................................................................................... 3-1 3.1.2 PCI Ethernet Controller ......................................................................................... 3-1 3.1.3 Load the Driver ...................................................................................................... 3-2 3.2 Load the SCRAMNet Applications .......................................................................................... 3-5 3.3 Verify Driver Installation: ........................................................................................................ 3-9 3.4 Uninstall the SCRAMNet Applications .................................................................................. 3-12 3.5 Directory Structure ................................................................................................................. 3-14 3.6 SCRAMNet Device and Vendor IDs ...................................................................................... 3-15 4. SELECT MEMORY AND REGISTER ADDRESSES ............................................................................. 4-1 4.1 Memory Addresses ................................................................................................................... 4-1 4.2 Register Addresses ................................................................................................................... 4-1 4.3 PCI Configuration .................................................................................................................... 4-1 5. CONFIGURE THE BOARD ..................................................................................................................... 5-1 5.1 Software Configuration ............................................................................................................ 5-1 6. RUN THE APPLICATION........................................................................................................................ 6-1 6.1 Overview .................................................................................................................................. 6-1 6.2 Running from the Start Menu Program Icons ........................................................................... 6-1 6.3 Running from File Manager ..................................................................................................... 6-1 6.4 Running from Run dialog box .................................................................................................. 6-1 7. CONNECTING INTERRUPTS ................................................................................................................. 7-1 7.1 Overview .................................................................................................................................. 7-1 Copyright 2014 i PCI WINDOWS SOFTWARE INSTALLATION TABLE OF CONTENTS FIGURES Figure 3-1 PCI Ethernet Controller Message ................................................................................................. 3-1 Figure 3-2 Found New Hardware Wizard ...................................................................................................... 3-2 Figure 3-3 Select to Display Drivers List ....................................................................................................... 3-2 Figure 3-4 Locate Driver Files ....................................................................................................................... 3-3 Figure 3-5 Select a Device Driver .................................................................................................................. 3-3 Figure 3-6 The Driver is Installed .................................................................................................................. 3-4 Figure 3-7 SCRAMNet Software Installation Wizard .................................................................................... 3-5 Figure 3-8 Select Destination Location .......................................................................................................... 3-6 Figure 3-9 Select Components ....................................................................................................................... 3-6 Figure 3-10 Select Start Menu Folder ............................................................................................................ 3-7 Figure 3-11 Ready to Install ........................................................................................................................... 3-7 Figure 3-12 Installation Successful Dialog..................................................................................................... 3-8 Figure 3-13 Installation Complete .................................................................................................................. 3-8 Figure 3-14 Windows Control Panel (view by Category) .............................................................................. 3-9 Figure 3-15 System and Maintenance ............................................................................................................ 3-9 Figure 3-16 System ...................................................................................................................................... 3-10 Figure 3-17 SCRAMNet+ Driver Listed in the Device Manager ................................................................ 3-10 Figure 3-18 Control Panel—System Icon .................................................................................................... 3-11 Figure 3-19 SCRAMNet+ Driver Listed in the Device Manager ................................................................ 3-11 Figure 3-20 Uninstall the SCRAMNet Software from Server 2003 ............................................................. 3-12 Figure 3-21 Uninstall the SCRAMNet Software .......................................................................................... 3-13 Figure 3-22 Illustration of Directory Structure ............................................................................................. 3-14 Figure 5-1 Registry Editor Dialog .................................................................................................................. 5-1 TABLES Table 2-1 CSR Byte Offsets ........................................................................................................................... 2-2 Table 3-1 SCRAMNet ID’s.......................................................................................................................... 3-15 Copyright 2014 ii PCI WINDOWS SOFTWARE INSTALLATION 1. INTRODUCTION 1.1 How to Use This Manual 1.1.1 Purpose This manual describes the installation of SCRAMNet software for all x86 and x64 based Microsoft Windows 7, Windows 8, Windows Vista, Windows Server 2003, Windows Server 2008, and Windows Server 2012 systems. 1.1.2 Scope This information is intended for systems designers, engineers and network installation personnel. To benefit from the manual the reader should have at least a systems-level understanding of general computer processing, memory and hardware operation. 1.1.3 Style Conventions • • • • • • • Hexadecimal values are written with a “0x” prefix; for example, 0xFB001040 Called functions are italicized; for example, OpenConnect() Function parameters are bolded; for example, Action Path names are italicized; for example,: utility/sw/cfg File Names are bolded; for example, config.c Absolute path file names are italicized and bolded; for example, utility/sw/cfg/config.c Code and monitor screen displays of input and output are boxed and indented on a separate line. Operator input is in boldface type. For example: C:\>ls File1 File2 File3 1.2 Related Information SCRAMNet+ Network PCI Hardware Interface Reference (D-T-MR-PCI) SCRAMNet Network Utilities User Manual (C-T-MU-UTIL) SCRAMNet Network NT DLL Reference Guide (C-T-ML-NTDLL) SCRAMNet Network SC150e PCI,PMC,& CPCI Bus (universal Signaling) Hardware Reference (D-T-MR-PCPMCPE) Copyright 2014 1-1 PCI WINDOWS SOFTWARE INSTALLATION INTRODUCTION 1.3 Quality Assurance Curtiss-Wright’s policy is to provide our customers with the highest quality products and services. In addition to the physical product, the company provides documentation, sales and marketing support, hardware and software technical support, and timely product delivery. Our quality commitment begins with product concept, and continues after receipt of the purchased product. Curtiss-Wright’s Quality System conforms to the ISO 9001 international standard for quality systems. ISO 9001 is the model for quality assurance in design, development, production, installation and servicing. The ISO 9001 standard addresses all 20 clauses of the ISO quality system, and is the most comprehensive of the conformance standards. Our Quality System addresses the following basic objectives: • • • • Achieve, maintain and continually improve the quality of our products through established design, test, and production procedures. Improve the quality of our operations to meet the needs of our customers, suppliers, and other stakeholders. Provide our employees with the tools and overall work environment to fulfill, maintain, and improve product and service quality. Ensure our customer and other stakeholders that only the highest quality product or service will be delivered. The British Standards Institution (BSI), the world’s largest and most respected standardization authority, assessed Curtiss-Wright’s Quality System. BSI’s Quality Assurance division certified we meet or exceed all applicable international standards, and issued Certificate of Registration, number FM 31468, on May 16, 1995. The scope of Curtiss-Wright’s registration is: “Design, manufacture and service of high technology hardware and software computer communications products.” The registration is maintained under BSI QA’s bi-annual quality audit program. Customer feedback is integral to our quality and reliability program. We encourage customers to contact us with questions, suggestions, or comments regarding any of our products or services. We guarantee professional and quick responses to your questions, comments, or problems. Copyright 2014 1-2 PCI WINDOWS SOFTWARE INSTALLATION INTRODUCTION 1.4 Technical Support Technical documentation is provided with all of our products. This documentation describes the technology, its performance characteristics, and includes some typical applications. It also includes comprehensive support information, designed to answer any technical questions that might arise concerning the use of this product. We also publish and distribute technical briefs and application notes that cover a wide assortment of topics. Although we try to tailor the applications to real scenarios, not all possible circumstances are covered. Although we have attempted to make this document comprehensive, you may have specific problems or issues this document does not satisfactorily cover. Our goal is to offer a combination of products and services that provide complete, easy-to-use solutions for your application. If you have any technical or non-technical questions or comments, contact us. Hours of operation are from 8:00 a.m. to 5:00 p.m. Eastern Standard/Daylight Time. • • • • Phone: (937) 252-5601 or (800) 252-5601 E-mail: [email protected] Fax: (937) 252-1465 World Wide Web address: www.cwcdefense.com 1.5 Ordering Process To learn more about Curtiss-Wright’s products or to place an order, please use the following contact information. Hours of operation are from 8:00 a.m. to 5:00 p.m. Eastern Standard/Daylight Time. • • • Phone: (937) 252-5601 or (800) 252-5601 E-mail: [email protected] World Wide Web address: www.cwcdefense.com Copyright 2014 1-3 PCI WINDOWS SOFTWARE INSTALLATION 2. PRODUCT OVERVIEW 2.1 Overview These installation procedures apply to SCRAMNet+ host interface node. NOTE: Please read this entire document before attempting to install the SCRAMNet software. 2.2 Hardware Installation Install the SCRAMNet hardware before installing the SCRAMNet Utility software. See the SCRAMNet Hardware Reference Manual for details on installing SCRAMNet hardware in the host system. 2.3 Software Distribution The SCRAMNet software for Windows systems is distributed on one CD. The package contains software utilities, a monitor application, a diagnostic application, EEPROM Programming Utility, and an Installation Utility. In addition, the CD includes a driver for Windows 7, Windows 8, Windows Vista, Windows Server 2003, Windows Server 2008, and Windows Server 2012. Source code for the SCRAMNet libraries and utilities is included to allow for user customization. 2.4 System Requirements The Windows 7, Windows 8 and Windows Server 2012 requirements: • • • 1 GHhz or faster processor Microsoft Visual Studio 2008 or later. 5.1 MB hard drive space. • 1 GB RAM 32-bit, 2 GB RAM 64-bit The Windows Vista and Windows Server 2008 requirements: • • • • 1 GHhz (x86 processor) or 1.4 GHz (x64 processor) Microsoft Visual Studio 2008 or later. 5.1 MB hard drive space. 512 MB RAM. The Windows Server 2003 requirements: • • Intel Pentium III 500 MHz (or faster) or equivalent x86 CPU. • Microsoft Visual Studio 2008 or later. • 5.1 MB hard disk space. 256 MB RAM. Copyright 2014 2-1 PCI WINDOWS SOFTWARE INSTALLATION PRODUCT OVERVIEW 2.4.1 Byte Ordering In the case where PCI hardware is located on an Intel-based (Little Endian) backplane, but is accessed by way of a Motorola-type (Big Endian) host, then the byte order on the PCI must be changed to Big Endian. 2.4.2 Byte Order in SCRAMNet RAM Memory operations to SCRAMNet RAM should not be a problem since byte ordering of host accesses is programmable through software. The SCRAMNet PCI card has two distinct memory apertures that can be set up to access SCRAMNet memory and control/status registers (CSRs) with different transaction sizes. A PCI configuration register on the SCRAMNet card controls the fixed-transaction byte swapping for each memory aperture (offset 0x40 for aperture 0, and offset 0x44 for aperture 1). Align this byte swapping to match the other nodes on the SCRAMNet network. Aperture 0 is set up by default to be 32-bit access only. Aperture 1 is set up by default to be 8-bit access only, but may be set to 16-bit or 32-bit access only if desired. The SCRAMNet PCI DLL exports a function named sp_stm_mm. This function reconfigures the byte-swapping mode of Aperture 1 to perform 8-, 16- or 32-bit byte swapping. Aperture 1 is used by the get_base_mem() function and the other memory access functions. Aperture 0 is used by the CSR register access routines. Therefore, if the byte-swapping mode of Aperture 0 is altered, the CSR access routines must also be altered to function in the new byte-swapping mode. See the SCRAMNet Network PCI Hardware Reference Manual for a detailed description of the registers used to perform byte-ordering operations to SCRAMNet RAM apertures. 2.4.3 Byte Order in SCRAMNet Control/Status Registers The access to the SCRAMNet Control/Status Registers (CSRs) is not sequential on the PCI board. These are 16-bit registers and are accessed as 16-bit values. When accessing registers directly through locally-written software, as opposed to using the SCRAMNet library routines scr_csr_read() and scr_csr_write(), the byte offsets are shown in Table 2-1. Table 2-1 CSR Byte Offsets CSR Byte Offset CSR Byte Offset 8 0x812 0 0x2 1 0x100 9 0x910 2 0x206 10 0xA16 3 0x304 11 0xB14 4 0x40A 12 0xC1A 5 0x508 13 0xD18 6 0x60E 14 0xE1E 7 0x70C 15 0xF1C The SCRAMNet library routines make this transparent. If using an unsigned short array in ‘C’ code (16 bit values), divide this byte offset by two to get the correct index. Copyright 2014 2-2 PCI WINDOWS SOFTWARE INSTALLATION PRODUCT OVERVIEW 2.4.4 Byte Order in SCRAMNet Auxiliary Control RAM When accessing the SCRAMNet Auxiliary Control RAM (ACR), normal RAM is disabled. This allows configuration of the 5-bit ACR field that corresponds to each longword memory location in SCRAMNet RAM. This 5-bit field is defined as the leastsignificant byte of every longword location. Using 32-bit access through Aperture 0, the ACR value would be written to bits [4:0] of a longword address. EXAMPLE Set bits 0 and 1 of ACR location 1 to enable TX and RX Network Interrupts. \* Aperture 0 PCI SCRAMNet Device *\ Write 0x00000003 to memory address 1 ACR read and write routines are provided in the SCRAMNet library. 2.5 System Considerations Since the SCRAMNet hardware, software and installation utilities are host to such a large variety of backplanes and operating systems, some minor differences may be apparent in these instructions such as file names and operating system commands. 2.6 Installation Procedures Complete the following steps to load, configure, and install the SCRAMNet software. 1. 2. 3. 4. Install the SCRAMNet hardware. Install the software. (Chapter 3) Configure the board. (Chapter 5) Run SCRAMNet Monitor software (Chapter 6). Copyright 2014 2-3 PCI WINDOWS SOFTWARE INSTALLATION PRODUCT OVERVIEW This page intentionally left blank Copyright 2014 2-4 PCI WINDOWS SOFTWARE INSTALLATION 3. INSTALLATION 3.1 Overview This chapter contains the software load procedures, the directory structure, and information on building the SCRAMNet Utilities. Prior to loading the SCRAMNet software, hardware must first be installed as described in the SCRAMNet PCI Hardware manual. NOTE: The screen displays shown are from Windows 8. Screen displays from other Windows versions may vary. 3.1.1 Power Up Host When the SCRAMNet hardware is installed, power up the host and wait for Windows to load. 3.1.2 PCI Ethernet Controller When the system is started for the first time users will be informed by the operating system that the host has located a PCI Ethernet controller as shown in Figure 3-1. Figure 3-1 PCI Ethernet Controller Message Copyright 2014 3-1 PCI WINDOWS SOFTWARE INSTALLATION INSTALLATION The Found New Hardware Wizard is displayed. Click Next to continue. Figure 3-2 Found New Hardware Wizard 3.1.3 Load the Driver Once the Install Hardware Device Drivers dialog is displayed, click Display a list of the known drivers for this device so that I can choose a specific driver, then click Next. Figure 3-3 Select to Display Drivers List Copyright 2014 3-2 PCI WINDOWS SOFTWARE INSTALLATION INSTALLATION When the Locate Driver Files dialog is displayed, check the CD-ROM Drives selection box, then click Next to continue. Figure 3-4 Locate Driver Files When the Driver Files Search Results dialog is displayed as shown in Figure 3-5, click Next to continue. Figure 3-5 Select a Device Driver Copyright 2014 3-3 PCI WINDOWS SOFTWARE INSTALLATION INSTALLATION Windows will indicate it has completed installation of the hardware device driver. Click Finish to close the wizard. Figure 3-6 The Driver is Installed Copyright 2014 3-4 PCI WINDOWS SOFTWARE INSTALLATION INSTALLATION 3.2 Load the SCRAMNet Applications Using Windows Explorer, browse the contents of the SCRAMNet Installation CD-ROM to locate the automated installation file setupSCRAMNet.exe. Launch the installation program by double clicking the setupSCRAMNet.exe file. When the screen shown below (Figure 3-7) is displayed, click Next to continue. Figure 3-7 SCRAMNet Software Installation Wizard A dialog containing the Curtiss Wright Controls licensing agreement will be displayed. Please read and understand the licensing agreement before continuing the installation. Click the I agree radio button and then click Next to continue. The SCRAMNet readme file is displayed. The file contains information regarding recent changes to the package. Click Next to continue. Copyright 2014 3-5 PCI WINDOWS SOFTWARE INSTALLATION INSTALLATION The Select Destination Location dialog is then displayed. Indicate to Windows the folder where the source and executable files are to be installed (the default is c:\program files\scramnet). Click Next to continue Figure 3-8 Select Destination Location The Select Components dialog is now displayed. In most cases, “Full installation” should be selected because it installs all application executables and source files, whereas the “Compact” selection only installs application executables. Make a selection and then click Next. Figure 3-9 Select Components Copyright 2014 3-6 PCI WINDOWS SOFTWARE INSTALLATION INSTALLATION The Select Start Menu Folder dialog is now displayed. Click Browse and Select a Start Menu folder or Click Next to accept the default folder and continue. Figure 3-10 Select Start Menu Folder The Ready to Install dialog is now displayed. Review the options selected and then click Install to start the installation. Figure 3-11 Ready to Install Copyright 2014 3-7 PCI WINDOWS SOFTWARE INSTALLATION INSTALLATION Once the automated installer has completed copying files, the WinInst application is displayed. Click the Install button to register the SCRAMNet+ device driver. If changes are needed to the card’s default node ID, memory size, or timeout value, click Edit. Click Exit to close the WinInst application. Figure 3-12 Installation Successful Dialog An installation complete dialog is now displayed as shown in Figure 3-13. Click Finish to exit the wizard. Figure 3-13 Installation Complete Copyright 2014 3-8 PCI WINDOWS SOFTWARE INSTALLATION INSTALLATION 3.3 Verify Driver Installation: To verify the installation of the SCRAMNet+ device driver using Windows 7, Windows Vista, or Windows Server 2008 click Open the Control Panel. Next, double-click System Maintenance or System and Security, shown in Figure 3-14 below: Figure 3-14 Windows Control Panel (view by Category) From the System Maintenance Screen select System. Figure 3-15 System and Maintenance Copyright 2014 3-9 PCI WINDOWS SOFTWARE INSTALLATION INSTALLATION From the “System” dialog, select Device Manager. Figure 3-16 System From the list in the Device Manager dialog, find the SCRAMNet+ device driver as shown in Figure 3-17 below. Figure 3-17 SCRAMNet+ Driver Listed in the Device Manager Copyright 2014 3-10 PCI WINDOWS SOFTWARE INSTALLATION INSTALLATION To verify the SCRAMNet+ device driver installation using Server 2003, click Start | Settings | Control Panel. Next, double-click the System icon as show in the Figure 3-18 below. Figure 3-18 Control Panel—System Icon From the Systems Properties dialog select the Hardware tab then click Device Manager. From the list in the Device Manager window, find the SCRAMNet+ device driver as shown in Figure 3-19 below. Figure 3-19 SCRAMNet+ Driver Listed in the Device Manager Copyright 2014 3-11 PCI WINDOWS SOFTWARE INSTALLATION INSTALLATION 3.4 Uninstall the SCRAMNet Applications To uninstall the SCRAMNet applications, from server 2003, select Start->Settings>Control Panel->Add/Remove Programs, and the following dialog is displayed. Scroll down the list of installed packages and locate the one entitled SCRAMNet. Click the Remove button and follow the on-screen prompts to complete removal of the software. Figure 3-20 Uninstall the SCRAMNet Software from Server 2003 Copyright 2014 3-12 PCI WINDOWS SOFTWARE INSTALLATION INSTALLATION To uninstall the SCRAMNet applications from Windows Server versions, Vista and later systems, open the control panel and select Programs, then select Uninstall a program. The following dialog shown in Figure 3-21 is displayed. Scroll down the list of installed packages, and select the one entitled SCRAMNet, click Uninstall to remove the software. Figure 3-21 Uninstall the SCRAMNet Software Copyright 2014 3-13 PCI WINDOWS SOFTWARE INSTALLATION INSTALLATION 3.5 Directory Structure The SCRAMNet software and related files are placed into several subdirectories as shown: \Program Files \SCRAMNET \Bench \Bin or \Bin64 \Inc \Debug or \Debug64 \Lib or \Lib64 \Master workspace \Ntpciscr \PCItest \Pvt \Vb \Windiags \Winepi \WinInst \Winmon Figure 3-22 Illustration of Directory Structure • • • • • • • • • • • • • • • The Bench directory contains the source files for a utility, which reports PIO and DMA benchmarking results and can run DMA-read and DMA-write tests on SCRAMNet memory. The Bin directory contains the 32-bit release (non-debug) versions of all the utilities. The Bin64 directory contains the 64-bit release (non-debug) versions of all the utilities. The Debug directory contains 32-bit debug versions of the binaries. The Debug64 directory contains 64-bit debug versions of the binaries. The Inc directory contains the header files for SCRAMNet Network library routines. The Lib directory contains the 32-bit debug and release version of the DLL’s as well as files required to link to the API. The Lib64 directory contains the 64-bit debug and release version of the DLL’s as well as files required to link to the API. The Master Workspace directory contains a Microsoft Visual Studio workspace used to rebuild all of the SCRAMNet project files. The NtPciScr directory contains the source code for creating the PCI DLL as well as the SCRAMNet API library. The PCItest subdirectory contains the source code for an example interrupt application. The pvt directory contains SCRAMNet Performance Verification Tool program used to read, write and verify SCRAMNet. The Vb directory contains the Visual Basic definitions for the API as well as an example of their usage. The WinDiags directory contains the source files for an interactive utility used to test the SCRAMNet PCI hardware. The WinEpi directory contains the source files for a utility used to modify the SCRAMNet EEPROM. Copyright 2014 3-14 PCI WINDOWS SOFTWARE INSTALLATION INSTALLATION • • • The WinInst directory contains the source files for a utility that installs and removes the SCRAMNet device driver, as well as functionality for modifying the device registry values. The WinMon directory contains the source files for an interactive utility used to read/write SCRAMNet CSRs and memory locations. The root SCRAMNet directory contains release notes and readme files with information and updates not available in the printed manuals. It also contains a batch file to build the software from the command line. 3.6 SCRAMNet Device and Vendor IDs All PCI devices are required to have a Device ID and Vendor ID. All Curtiss-Wright PCI and PMC products have received a new Device ID and Vendor ID from the PCI SIG. Table 3-1 shows the old and new SCRAMNet IDs. Table 3-1 SCRAMNet ID’s Copyright 2014 Vendor ID Device ID New 0x1387 0x5300 Old 0x11B0 0x4750 3-15 PCI WINDOWS SOFTWARE INSTALLATION INSTALLATION This page intentionally left blank Copyright 2014 3-16 PCI WINDOWS SOFTWARE INSTALLATION 4. SELECT MEMORY AND REGISTER ADDRESSES 4.1 Memory Addresses The SCRAMNet+ Node is a physical memory device, which requires the SCRAMNet+ memory to be mapped into the PCI Bus Address space. Available host system RAM is also mapped into the same address space on the PCI Bus. The host computer will assign SCRAMNet two 16 MB address ranges for aperture 0 and aperture 1 that do not conflict with other boards/devices in the system. 4.2 Register Addresses The register address will always be at an 8 MB offset from SCRAMNet Memory. For example, if the memory base address is at 0xFD000000, the register address will be 0xFD800000. 4.3 PCI Configuration The system will automatically determine SCRAMNet base addresses and IRQ level, which is known as “Plug & Play” capability. The addresses for Aperture 0 and Aperture 1 are different but will be mapped to the same local side address; that is, they will both access SCRAMNet memory at the same offsets. The two apertures are useful for setting the fixed transaction byte swapper separately for each. Aperture 0 default is 32-bit access and aperture 1 default is 8-bit access (see Section 2.4.2). Copyright 2014 4-1 PCI WINDOWS SOFTWARE INSTALLATION SELECT MEMORY AND REGISTER ADDRESSES This page intentionally left blank Copyright 2014 4-2 PCI WINDOWS SOFTWARE INSTALLATION 5. CONFIGURE THE BOARD 5.1 Software Configuration The PCI SCRAMNet board boots up with minimal system configuration needed. In order for the card to function properly, the software may need to alter this configuration to assign the card all of the necessary resources needed for its operation. When an application calls the function sp_scram_init() to map the SCRAMNet memory and registers, the program also reads values from the Windows registry. The registry contains values that the program will use to set initial values for the SCRAMNet card’s Node ID, Memory Size, and Timeout parameters. These registry values can be modified using the SCRAMNet installation utility. To modify, click the “WinInst” icon. From the utility dialog, press the Edit Registry Settings button. This will bring up a registry-editing dialog as shown in Figure 5-1. Figure 5-1 Registry Editor Dialog The editor provides the ability to modify the registry settings for each installed SCRAMNet device, as well as increase or decrease the number of boards installed. Note that upon installing the SCRAMNet driver, the PCI bus is scanned to identify the number of boards installed. The Registry Editor automatically defaults to the proper number of boards. If this number is different from the number of boards installed, power down the system and reseat each of the installed SCRAMNet boards. Once the registry values are set as required, clicking the OK button rewrites the registry values. Under Windows Vista and Windows Server 2008, WinInst must be run as administrator so that the program can alter the registry values. Copyright 2014 5-1 PCI WINDOWS SOFTWARE INSTALLATION CONFIGURE THE BOARD This page intentionally left blank Copyright 2014 5-2 PCI WINDOWS SOFTWARE INSTALLATION 6. RUN THE APPLICATION 6.1 Overview There are three basic ways to run one of the SCRAMNet programs: • • • From an icon created for the program in the Start Menu under Programs | SCRAMNet From Windows Explorer From the Start Menu’s Run dialog box Once the application is started, follow the directions in the SCRAMNet Network Windows NT Utilities (C-T-MU-NTUTIL) user manual. NOTE: For Vista and 2003 the programs, Wininst and Pvt must to be run as administrator. To run a program as administrator left click the program icon and select run as administrator from the pop up menu. 6.2 Running from the Start Menu Program Icons To run the program from the Start Menu: 1. Click the Start Menu and select Programs. 2. Select SCRAMNet and then click the application to run. 6.3 Running from File Manager To run the program from Windows Explorer: 1. Open Windows Explorer from the Start Menu. 2. Change to the appropriate subdirectory. 3. Double-click the executable file. 6.4 Running from Run dialog box To run the program from the Run dialog box: 1. Click the Start Menu and select Run.… 2. Type the full path name of the executable file in the Command Line box, or select the executable file by clicking the “Browse” button and double-clicking the proper file. 3. Click/select “OK”. Copyright 2014 6-1 PCI WINDOWS SOFTWARE INSTALLATION RUN THE APPLICATION This page intentionally left blank Copyright 2014 6-2 PCI WINDOWS SOFTWARE INSTALLATION 7. CONNECTING INTERRUPTS 7.1 Overview Interrupts are connected at the user level by creating an event object with the name SCR_INTERRUPT_OBJECT#. Where # is the board number 0, 1, 2, etc. NOTE: The software only allows one application at a time to connect an interrupt event handler. The software will return an error if an attempt is made to connect multiple interrupt event handlers. If another program needs to be forced to release its handler, the function sw_int_flush() may be called to cause the release of all registered interrupt event handlers. The following code provides a simple example of how to connect interrupts for a single device system. (Refer to the source code in PCITEST or WINDIAGS/TST/SCR_INT.C for an example of using this interrupt): #include <scr.h> #include <scrplus.h> int main( void ) { char intString[30]; sp_scram_init(); // map CSRs and memory if ( sw_int_connect() ) { /* Create interrupt event object. */ sprintf(intString, “%s%d”, SCR_INTERRUPT_OBJECT, 0); hIntEvent = CreateEvent(NULL,FALSE,FALSE,intString); /* Wait forever, or until SCRAMNet interrupts. */ if (WAIT_OBJECT_0 == WaitForSingleObject(hIntEvent,INFINITE)) { printf(“SCRAMNet interrupted!\n”); sw_int_disconnect(); // disconnect interrupts CloseHandle(hIntEvent); // close interrupt object handle } /* if */ return(0); } } /* main */ For more information on connecting interrupts, refer to the SCRAMNet Network Windows NT DLL Reference Guide. Copyright 2014 7-1 PCI WINDOWS SOFTWARE INSTALLATION CONNECTING INTERRUPTS This page intentionally left blank Copyright 2014 7-2 PCI WINDOWS SOFTWARE INSTALLATION