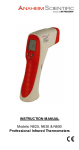
1
GUARANTEE CARD
ITEM:
MODEL:
I TEM NO.:
DATE OF PURCHASE:
CLIENT NAME:
CONTACT ADDRESS:
CONTACT TEL
IMPORTANT NOTICE
1. Pleas e fill out the Guaran tee Card str ictly accordi ng to the fact s;
2. Only will this Guar antee Card b e valid when sealed by our
franch isers;
3. We pr ovide 1 year warranty to the pro duct. If product fai ls to
work p roperly under warranty p eriod, our fa ctory w ill hel p
repair it free of charge;
4. This l imited warranty doe s not apply to:
(1). Damag e to a p roduc t that i s out o f warranty;
(2) . Cosmetic damage, s uch as scratches, nicks and dents;
(3). Damag e caused by accide nt, abu se, misuse, water, flood,
fire, or other a cts of nature ;
(4). Damag e caused by service perfo rmed by any one who is
not an a uthorized se rvice p rovider;
(5). Damag e to a p roduc t that h as be en modified o r altered
w ithout permission;
(6). Damag e to a p roduc t that h as be en use d in da mp, high/low
t emperature or any other harsh environment s;
(7). Any other damages that are not c aused by our factory.
5. Pleas e keep the Guaran tee Card properly. We res erve the right
to Ref use warranty in case of no Guarantee Card p rovided.
The instructio n applies to VR 8800 series pro ducts. Please r ead it carefully before
using the prod ucts!
PDF 文件使用 "pdfFactory Pro" 试用版本创建 @www.fineprint.com.cn
DISKPLAYER
I n d ex
Instruction Before Use
Attentions .....................................................................................................
Features .......................................................................................................
Applica tions ..................................................................................................
Packing List ..................................................................................................
Technical Paramete rs ....................................................................................
Structure Explanation ......................................... ......... ......... ......... ...............
Connecting Diagram ......................................................................................
Power Cable Connection ................................................................................
Contro l Wires Definition .................................................................................
How to Install Hard Drive ...............................................................................
Indicator Explanation .....................................................................................
Remote Control .............................................................................................
Hard disk cap ability calculation .......................................................................
How to Mount the DVR....................................................................................
02
02
02
03
04
05
06
07
08
08
09
09
09
10
B. Control Buttons
Ple ase re fer to the for m for f unctio n of ea ch but ton;
Butto n
F uncti on
Button
Functio n
Slow x1/x 2/x3/x4
Play
No U se
Pause
Fas t x1/x2 /x3/x4
Stop
Play Fram e by Frame
C. Speed Display Bar
Spee d(KM/H)
Function Settings
1. S ystem Login ....................................................................... ......... ............ 11
2. S hortc ut Men u ...... ......... ......... ......... ......... ......... ......... ......... ......... ......... .... 11
2 .1 Ma in Men u ...... ......... ......... ......... ......... ......... ......... ......... ......... ......... .... 11
2 .2 Record M ode ................................................ ......... ......... ......... ......... ... 11
2 .3 Pla yback
2. 3.1 Fil e Searching
2 .3.2 Fi le Bac kup ... ......... ......... .... 12
2 .4 PTZ Cont rol .............. ......... ......... ......... ......... ......... ......... ......... ......... ... 13
2 .5 Hig h Spee d PTZ ....... ......... ......... ......... ......... ........................................ 13
2 .6 Ala rm out put ........................................................................................ 14
2 .7 Color Set ting ... ......... ......... ......... ......... ......... .................. ......... ......... .... 14
2 .8 Ou tput Ad just .. ......... ......... ......... ......... ......... ......... ......... ......... ......... .... 14
2 .9 Log out ... ......... ......... ......... ......... ......... ......... ......... ......... ......... ............. 14
3. M ain M enu .. ......... ......... ......... ......... ......... ......... ........................................ 15
3 .1 Record
3.1. 1 Record Co nfig
3.1. 2 Snap shot Storage ....... ......... .... 16
3 .1.3 P laybac k 3 .1.4 Ba ckup
3.2 Alarm ........ ......... ......... ......... ......... .... 17
3 .2.1 M otion Detect ........ ......... ......... ......... ......... ......... ......... ......... ......... .... 18
3 .2.2 V ideo B lind
3.2. 3 Vide o Loss
3 .2.4 Al arm In put.... ......... ......... .... 19
3 .2.5 A larm O utput 3.2. 6 Abnormality....... ......... ......... ......... ......... ......... .... 19
3 .2.7 C ar Sta tus 3.3 Sy stem 3.3.1 Gene ral 3 .3.2 E ncode ........ ......... .... 20
3 .3.3 N etwork
3 .3.4 Net Serv ice.... ......... ......... ......... ......... ......... ........ 21~22
3 .3.5 G UI Dis play 3.3.6 PTZ Config 3.3. 7 RS2 32 3.3.8 Tour................ .... 23
3 .4 Adv anced
3 .4.1 HDD Ma nage 3.4.2 Acco unt .... ......... ......... ......... .... 24
3 .4.3 O nline User 3.4.4 Outpu t Adjus t 3.4 .5 Aut o Main tain .. ......... ......... .... 25
3 .4.6 R estore
3. 4.7 Up grade 3.4 .8 Dev ice Inf o ....... ......... ......... ......... .... 25
3 .5 Info .
3.5.1 H DD In fo
3 .5.2 B PS .... ......... ......... ......... ......... ......... .... 26
3 .5.3 L OG 3.5.4 V ersion
3 .6 Log Out .................... ......... ......... ......... .... 26
Mou se ope ration ...................................................... ......... ............................. 27
Prev iew ... ......... ......... ......... ......... ......... ......... ............................................... 27
FAQ .......................................................................................... ................... 27
Disk Playe r........ ......... ......... ......... ......... ......... ......... ......... ......... ......... ...... 28 ~29
Qua lity Gu aranty ........ ......... ......... ......... ......... ......... .......................... b ack co ver
1
PDF 文件使用 "pdfFactory Pro" 试用版本创建 3www.fineprint.com.cn
V ehicle Movin g Stat us
D. Google Map Zone
If the "O pen N aviga tion" is selec ted, yo u will be able to se e the v ehicle positi on,
w hile playing video.
E. Calendar/Hour Bar/Minute Bar
Calendar
Hour Bar
M inute Bar
Double click the nu mber in Cale ndar, the Ho ur ba r and th e Min ute Ba r will
chang e corr espon dingly .
1. Red numb er in Calend ar means the re wa s reco rding d uring the co rrespo nding day;
2. Gre en in Hour Bar means the re wa s reco rding d uring the correspo nding hours;
3. Blu e in Mi nute B ar me ans the re wa s reco rding d uring the co rrespo nding minute .
30
DISKPLAYER
2. Edit
Instruction Before Use
Attentions
1 . Make sure all par ts are c onnec ted co rrectly before you turn on the Unit;
2 . Turn off the powe r when ever y ou nee d to c onnect or rem ove a Hard Drive;
3 . Keep the u nit awa y from water or any other kinds of liqu id;
4 . Do n ot rude ly stri ve, dro p, or h it the u nit for avoid ing dam age o f DVR or Hard Driv e;
5 . Read the m anual carefu lly bef ore yo u start opera ting th e unit.
a. Cu t file
Features
The V R880 0 Series (V3 .1) is a profe ssion al, rug ged, s olid s tate DVR de signed for in -vehi cle
recor ding. The VR8800 Serie s (V3.1) reco rds up to 4 c hann els Vid eo an d Aud io, loc ation d ata
from b uilt-i n GPS , supp orts u p to 2T B Ha rd Driv e as w ell as 32GB SD ca rd for memo ry
storage, co mbine d with built- in 3G (optio nal), Wi-Fi (option al) an d Ethe rnet. The VR8800
Serie s (V3. 1) can work with all CCD/CMO S cam eras, and ca n power 4 c amera s dire ctly; it is a
new in-veh icle re cordin g sys tem th at you can re ly on.
01. H.264 m ain profile V ideo c ompre ssion f ormat ;
02. Can wor k with power suppl y rang ing fro m DC8 V to DC36V ;
03. Supports Man ual Re cord, M otion Detec t and schedu led Record;
04. Video re soluti on: D1 /HD1/ CIF/Q CIF se lectab le for e ach ch annel ; framerate: 1-25fp s (PAL)
o r 1-30 fps (N TSC) f or eac h chan nel;
05. Supports 4 channels "Vide o & Au dio" re cordin g and playba ck sim ultan eously ;
06. Supports 4 channels "alarm input" and 2 chan nel "al arm ou tput";
No te: he re you can b ack up video to you r comp uter, select "Start Time", "End Time",
"C hanne l", and a path for sa ving fi les.
b. Mo dify Passwo rd
07. Video c lips ca n be s aved o nto ei ther SD card or HD D; Sup ports SD card up to 32G and
H ard Dr ive up to 2TB ;
08. Video file can be bac ked up in H.264 for mat o r AVI; a nd ca n be p layed with no rmal V ideo
pl ayer o r custo mized playe r on PC;
09. With "Po wer-o ff dela y" fun ction t o guarantee the DV R wou ld shu t down norm ally to keep
re corde d files safe w hen a n eme rgency occurs;
10. Can wor k with 4 cam eras, a nd po wer 4 camer as dire ctly;
11. Supports GPS , and w ireles s vide o transmissi on (WI FI and 3G op tional ) .
Applications
3. Na vigation Set ting
Sele ct "Op en Na vigation", yo u will see Go ogle M ap at the bo ttom right sh owing
the positio n of th e vehi cle.
29
PDF 文件使用 "pdfFactory Pro" 试用版本创建 香
www.fineprint.com.cn
2
DISKPLAYER
Packing List
Packing List
1. On e VR8 800 Se ries (V3.1) DVR
DiskPlayer
2. One User Manua l
A. Cont rol To ol B ar
2012-05-10 11: 10:00
2012-05-10 11:10: 00
B. Cont rol B utt ons
CAM01
3. Fou r AVP Comb ined Cables (for c amera )
CAM02
2012-05-10 11: 10:00
2012-05-10 11:10: 00
4. One AV Combin ded ca bles ( for TV )
C. Speed Dis play Bar
D. Goo gle Map Zone
CAM03
5. On e Pair of Key s
CAM04
6. On e IR Remote Control
E. Calendar /Hou r Bar/Minute B ar
A. Control Tool Bar
7. On e Pow er cab le
8. One Com bined Contro l Cabl e
( for Ala rm & C -Box )
1. File
9. On e Control Bo x (C-B ox)
*11. O ne 3G Antenna
*10. O ne GPS Ante nna
*12. O ne WiFi Ant enna
a. Ope n loca l files
13. m ountin g plate , scre ws bolts and nuts, etc.
3
Ac cessories with "*" are optional a ccording to the fea ture of the DVR.
PDF 文件使用 "pdfFactory Pro" 试用版本创建 3www.fineprint.com.cn
b. E xit
Exit Disk Player.
28
Mouse operation
Technical Parameters
Technical Parameters
Mouse operation
VR88 00 (V3 .1) supports Mouse Opera tion, h ere is the operation instru ction.
Oper ation
F unc tion
Dou ble c lick one i tem to pla y in the f iles l ist.
Doub le left cli ck
D oub le cl ick o ne ch ann el to show in f ull sc reen or 1 /4 screen
Mode l
VR8800N
(N o TFT, No GPS, No 3G, No W i-Fi)
VR8800
(With TFT, No GPS, No 3G, No Wi-Fi)
VR8800G
(With TFT, with GP S, No 3G, No Wi-Fi)
( With TFT, wit h GPS, with 3G, No Wi-Fi)
Le ft cl ick
Select o ne it em
VR8800-3G
R ight click
P op o ut Sh ortcut M enu
VR8800-3GW (With TFT, with GP S, with 3G, with Wi-Fi)
Rol l the whe e
Tour fr om one im age to a noth er at Preview Pag e
VR8800N
450 +- 20mA(Main fram e)
VR8800
500 +- 20mA(Main fram e)
VR8800G
550 +- 20mA(Main fram e)
VR8800-3G
700 +- 20mA(Main fram e)
VR8800-3GW
750 +- 20mA(Main fram e)
Preview
Max imum
201 2-05-1 0 11:10:00
201 2-05- 10 11:10 :00
Recor d Ic on
Current
Mot ion De tect Icon
Channe l I D
CAM01
C AM 0 2
201 2-05-1 0 11:10:00
201 2-05- 10 11:10 :00
Audio ou tput Icon
Snapshot Icon
Video Loss Icon
C AM 0 3
C AM 0 4
FAQ
1. Can not boot up n ormally
2. Can n ot detect Hard Drive
Possible r easons are as follows;
A. The power supply is not right;
B. The connection of power cable is bad;
C. Error happened dur ing firmware upgrade;
D. The Hard Drive is broken;
Possible reasons are as f ollows;
A. The Hard Drive is broken;
B. The Hard Driver is not properly connected;
C. The SATA connector on the main PCB
board is damaged.
3. Crash or reboot automaticallylly
4. No color/ distorted Image
Po ssible reas ons are as f oll ows;
A. The input power vol tage i s not stable or
too low ;
B. The Hard D rive is br ok en;
C. Bad heat radi at or o r too m uc h dust or bad
ru nni ng ci rcumstanc e;
D. Some prob lem with the D VR hard ware.
Possible reasons are as follows;
A. The color settings of the monitor is not right;
B. The video signal is too weak after long
distance transmission;
C. TV standard mismatched; check if DVR,
camera, and monitor are in the same TV
standard, PAL or NTSC;
5. No video output
Possible r easons are as follows;
A. Video output cable is broken or
not properly connected;
B. Ther e is no video input signal or the signal
is too weak;
C. The image brightness is set “0”;
D. TV channel mismatched; please switch
the monitor to AV channel.
27
PDF 文件使用 "pdfFactory Pro" 试用版本创建 3www.fineprint.com.cn
Power input
DC8V~DC36V
Power output
DC12V 3A
Working Tempreture
-10C~+50C
O ut put V ol ta ge(F or C am era)
DC 12V 3A
Pow er Suppl y
Car bat tery
Compression F orm at
H.264
Video Format
H .264/AVI
Record Signal
4 C hannel V ideo/Audi o
M ax Memory Capaci ty
2000GB H ard Drive Plus 32GB SD Card
Record Mode
Motion Detect/ S cheduled Record/ M anual Record
Video Resolution
D1/H D1/CIF/QC IF for each Channel;
Frame Rate
1-25fps (PA L) or 1-30fps (NTSC) for eac h channel;
US B Ports
US B 2.0 x 2
Fil e Store M ode
Ov erw rite/ Stop W hen Fu ll
Alarm Func ti on
4C H input and 2 C H output
Internet Interface
10M/ 100M RJ 45
Dimension
180mm (L) x 50 mm (W ) x 194mm ( H)
Note:
Spec ificatio ns giv en in t his ins tructio n are s ubjec t to tec hical c hange s with out no tices.
4
Main Menu
Structure Explanation
3.5 Info.
Structure Explanation
Ther e are 4 subm enu ite ms un der " I nfo. ": " HDD Info",
" BPS ", " LO G " and " Vers ion".
LOCK
Lock
USB Ports
IR Receiver
WiFi Antenna
3.5.1 HDD Info
WiF i
IR
Here you can s ee informati on of a ll Stor age Devices ,
including " Disk Type ", " Capacity ", " Lef t Capa city ",
an d " Sta tus ".
AV 2 input
TV output
AV 4 input
A V4
P OWER
A V3
A V2
AV1
TV
3G Anten na
GPS Antenna
Power input
VGA output
Note: If the dis k is in good condition, a c ircle" " wil l
be shown on the top corres pondi ngly; otherw ise, a
wrong mark " X " will be shown; if no disk connected,
then a dash mark " -" .
AV1 input
AV 3 input
3.5.2 BPS
Here you c an see real- time " Bit Stream I nfo" (Kb/S)
of ea ch ch annel and " M emory Take -up Rate"(M B/H).
10M/100M RJ45 Port
Connector for Combined Control Cable
3.5" TFT Display
3.5.3 LOG
Record
Here you can check all " Even Log Information " of this
device, including " Log Time ", " Log Type ", and " Log
Detaile d Info "
Stop
ESC
Play
Hard Drive
Housing
Menu
Up
Left
OK
Down
SD Card Slot
Right
3.5.4 Version
Here you c an che ck Ha rdware and F irmwa re
infor mation of the Devic e.
Show 4 Channels
Show C H1
Show CH2
Show CH3
Show CH4
No te: Th e pictu re is fo r refe rence only , p lease refer t o the a ctual produc t for a ppeara nce.
3.6 Logout
5
PDF 文件使用 "pdfFactory Pro" 试用版本创建 3www.fineprint.com.cn
Please refe r to 2.9 .
26
Connection Diagram
Main Menu
3.4.3 Online User
Connection Diagram
He re you can s ee all " Online Network Users " who are
vis iting t he DVR dev ices. S elect one on line u ser,
cli ck" Dis connect ", t he connectio n will be cu t, and the
us er will be blo cked until th e dev ice boot up n ext tim e.
White : audio
Yello w : video
Black : power
Camera
3.4.4 Output Adjust
Pleas e refe r to 2.8 "Out put Ad just".
3.4.5 Auto Maintain
He re you can s et " Au to Reb oot" a nd "Auto De lete
Fil es " tim e for t he dev ice.
White : audio
Yellow : video
Black : power
Camera
Video
3.4.6 Restore
.....
Here you can re store a ll sett ings to " Fact ory Se ttings ".
Sel ect the corre spond ing ite ms, an d click " OK " t o
exe cute.
Audio
TV/Mon itor
3G
3G Antenna
GP S
3.4.7 Upgrade
Plug in a U SB di sk with Upgra de Fir mware , the D VR
will detect the up grade file au tomat ically. Navig ate
to th is pag e, and click " Upgrade" to execute. Th e DVR
will reboot autom atically whe n the" Upgra de " is done.
GP S Antenna
11 pin
3.4.8 Device Info.
He re you can s ee the " Devi ce info rmat ion " of the
DVR, inc luding " Audio in C hanne ls ", "A larm in
Ch annels ", " Alarm o ut Channels ", " GU I Theme "
an d so o n.
VGA
Control Cable
5 pin
Connet C-Box
Power cable
25
PDF 文件使用 "pdfFactory Pro" 试用版本创建 www.fineprint.com.cn
ÿL
6
Power Cable Connection
Main Menu
3.4 Advanced
Power Cable Connection
There are 8 subme nu ite ms und er " Ad vance d ":
" HDD Mana ge ", " Accou nt ", " O nline User ", "
Outp ut Adj ust ", " Auto M ainta in", " R estor e ",
" Upg rade " and " D evice Info ".
Option A: Connect the green wire and the yellow wire to the en gine, s ee pic ture (1); when
the car is sta rted, the DVR will be turn ed on automatically;
Black-
Red+
-
+
Car Accumulator
Green-
-
Yellow+
picture (1)
+
3.4.1HDD Manage
Cigar Lighter
He re you can m anage all Me mory Storag e Dev ices. All
de vices (HDD, USB Disk or SD ca rd) info rmation will be
sh own in the fo rm on the left, inclu ding " H DD N o. ",
" Ty pe "," Status ", and so on .You c an def ine a d isk as
" Read & Write Disk", " Snap shot Disk", " Read only
Disk ", or " Redu ndant Disk" , you c an " Fo rmat "the Disk,
" Recove r " the Disk, o r " Partition" the di sk with those
bu ttons o n the right side.
Op tion B : Conn ect th e red wire an d the y ellow wire to the po sitive termin al, the black wire
and the g reen wire to the negotive termin al of y our ca r batte ry, see pictu re (2); the DV R will
be alway s on un til the battery ran o ut of its pow er.
Black-
Red+
+
-
Note : Make sure a t least there is one "Read Write Disk".
Green-
Yellow+
Car Accumulator
3.4.2 Account
Here you c an ma nage a ll Use r Acco unts. All Us er
Infor mation is sh own in the fo rm on the le ft, incl uding"
User Nam e ", " User Gr oup", " Use r Stat us ". Yo u can
" Mod ify U ser ", " Modif y Goup ", " Modify Password " ,
" Add Grou p ", " D elete User " , " Dele te Gr oup", or
" Upd ate U ser " w ith tho se bu ttons o n the right s ide.
picture (2)
How to Install Hard Drive
H DD
【Modify Pa ssword】
【Delete Gr oup】
【Ad d User】
【Add Group】
1. Lo osen t he scr ews on the c over o f the H ard Dr ive Ho using and op en it;
2. Ge ntly c onnec t the p lug to t he Ha rd Driv e and place it into t he hou sing;
3. Ti ghten the scr ews o n the h ousing and f inish t he inst allatio n of H ard Drive.
7
PDF 文件使用 "pdfFactory Pro" 试用版本创建 ²www.fineprint.com.cn
24
Main Menu
Control Cable Explanation
3.3.5 GUI Display
C-Box
REC Butt on
Here you ca n con figure the se ttings for OS D Item s,
Tran sparen cy, Re soluti on, an d so on .
Ca r Info: Enter an ID for the Device;
Ch annel Title: Enter a title n ame f or eac h chan nel;
[Choose OSD i tems] Click the squ are on the ri ght to
sh ow/ hid e the corres pondin g item , such as " Ti me
Display" , " Cha nnel T itle ", " Recor d Status ", " Alarm
Status " a nd so on;
Tran spare ncy : M ove th e hori zontal scroll bar to adjust the transparency o f the
Men u inter face;
Reso lution : Set video o utput resulo tion;
STOP Button
Power Ind ica tor
REC : Start rec ording;
IR Remote Re ceiver
Stop : Stop re cording.
Power Indicator : Red lights up when powere d on;
3.3.6 PTZ Config.
Cha nnel : Selec t the vi deo ch annel which is conn ected
to P TZ de vice;
Protocol : Set th e " Pro tocol " of the PTZ de vice;
Adr ess: E nter th e " Ad dress " of the PTZ d evice;
Bau drate : Selec t the " Baudr ate" u sed by the th e PTZ
dev ice;
Data Bits : Selec t " Dat a bits " for th e PTZ device ;
Sto p Bits : Set" S top B its "for the PT Z dev ice;
Sta tus Indicator
Status Indicator : Flashing gree n while reco rding;
Constant green in other cases.
Control Cable
16 pin
5 pin
Parity : Set " Pairty " for th e PTZ devic e, " Od d", " Even ", " Mark " , " Spa ce " or "None ".
150 cm
20cm
3.3.7 RS232
In g enera l, we use " S erial P ort " i nterfa ce for GPS f unctio n
only. Sel ect " G PS " in the fir st blank, enter Baudrate
" 96 00 ", Data B its " 8 ", Stop Bits " 1 " and Selec t Parity
" N one ", the GPS will work.
No te: the settin g is on ly vali d for the mod els w hich
sup port GPS fun ction .
12. Alarm in 1
13 . Ala rm out 1 NO
11. A larm in 2
14 . Connec t C-box
10. A larm in 3
15 . C onnec t C-box
9. A larm in 4
16 . C onnec t C-box
9
8
10 11 12 13 14 15 16
7
6
5
4
3
2
1
3.3.8 Tour
He re you can c onfigu re the " Tour " settin gs, fo r exam ple,
if in terva l is set "5 " se conds , CH1 , CH2 , CH3 , CH 4 are
sel ected, then the im age would cy cle among the 3
cha nnels , tour from o ne to anothe r eve ry 5 se conds ;
and you c an als o set " Inter val " fo r " Ala rm To ur " he re.
23
PDF 文件使用 "pdfFactory Pro" 试用版本创建 www.fineprint.com.cn
8. RS4 85 B
7 . RS 485 A
1. GND
2. Connect C-box
6.GND
3. Connect C -box
5.GND
4. Alarm o ut 1 C
8
IR Remote Explanation
Main Menu
c. IP FILTE R
Indicator Explanation
IR
You can put IP addr esses in the "Blacklist " or " White
List ". IP Addresses in the " Whit e List " are able to
access the device; on the contrary, IP Addresses in the
" Black List "Will be blocked; you can s et max imum 64
IP Addresses.
Power State
IR : IR Remo te Rec eiver
Powe r : Power Indicator
State : DVR workin g state indic ator; fl ashing while
durin g recording, playing or da ta bac kup.
d. DDNS
Remote Control
Button
Function
Button
Function
Button
Function
CH1
No use
Down
CH2
Record
ESC
CH3
Up
No use
CH4
Stop
No use
No use
Left
No use
No use
Confirm
No use
Quad Screen
Right
Menu
Play
e. FTP
" DDNS "is sh ort for "Dyna mic D omain Nam e Serv er ".If
" DDNS " setting is s ucces sfully configured, y ou can visit
the De vice vi a the Domain Nam e with the IE Brows er;
DDN S Typ e : Sel ect " D DNS T ype ";
Dom ain N ame : Enter t he " DD NS d omain name ";
Use r Nam e/ Pas sword : Enter the D DNS " User Name "
and " Password" .
" F TP" is for upl oading video files o r snap shot t o the
ap pointe d FTP Serve r when alarm s happen or
recording, snapshot trigger ed by a larms .
Serv er IP : Enter the IP addre ss of F TP Se rver;
Port : Ente r the Domain port o f FTP Server;
Use r Nam e : Ent er Use r Nam e;
Pass word : Ente r User Passw ord;
Max File L ength : Set M ax File Length for unloadng;
DirN ame : File D irector y for u ploadi ng.
f. Wirel ess Config
The D VR supports remot e mon itoring via 3G network.
here y ou can configure th e "3G " Setti ngs;
Memory Occupancy Calculation
1. V R880 0 (v3.1 ) Seri es pro ducts suppo rt 2.5" Sata HDD u p to 2TB, an d SD
me mory c ard up to 32 GB at the sa me tim e;
2. H ere are the formul as for Memo ry Occ upancy Cal culatio n;
A. O veral l Mem ory Oc cupan cy = T otal Record ing Ch annel s x Re cordin g Time x
Me mory Occup ancy f or 1 ho ur Re cordin g (sin gle ch annel) ;
B. R ecord ing Ti me = S torag e Dev ice Ca pacity / Mem ory O ccupa ncy fo r 1 hou r
Rec ordin g (sing le cha nnel) / Total Reco rding Chann els
3. T he fol lowing numb ers fo r 1 hou r reco rding memo ry occ upanc y are f or you r
refe rence ;
A. C IF: 45 -245M ega byte per cha nnel;
B. D 1: 13 0-355 Mega Byte p er cha nnel.
9
PDF 文件使用 "pdfFactory Pro" 试用版本创建 3www.fineprint.com.cn
Type : Sele ct 3G "Dial M ode";
Wire less AP : Enter 3G Acces sPoin t;
Dial Numb er : En ter 3G Dial N umbe r;
User Nam e : Enter 3G User Name;
Pass word : Enter 3G Us er Pas sword .
Note:1. Make sure th ere is a 3G module built-in the DVR;
2. Ask your 3 G Ser vice Pr ovider for th e abov e para meter s; for e xamp le, the settin gs for China
Unico m are a s follo ws:W ireless AP: 3 gnet; Dial Nu mber : *99# ; User Name : no; P asswo rd: no
g . Wifi
The DVR s upport s " rem ote m onito ring" v ia Wif i network,
here you ca n con figure the "W ifi" Se ttings;
Searc h: Sea rch W ireless Netw ork in local a rea, and
then double click to choose on e of th em;
Passw ord : Enter t he "Pa ssword" of t he Wir eless Router ;
IP Ad dress : Enter the IP addre ss of the Dev ice;
Subn et: En ter the Subne t Mas k of th e Devi ce;
Gatew ay : E nter th e Gat eway o f the Device .
Note:Ma ke sure there is a W ifi Module built-i n the DVR be fore y ou use this functio n.
22
Installation Diagram
Main Menu
Quality: Vide o Quality, 6 levels adjus table;
Bit Ra te : sel ect a b it rate value once " CBR" Bit Rate Type is selected; D1 (5 12~25 60kbp s)/
HD1 (384~2048kbps)/ CI F (64~ 1024k bps)/ Q CIF ( 64~51 2kbps );
Video / Audi o: Record"V ideo" or "Audio", or both.
How to Mount the DVR
sc rews for fix ing the plate
VR 880 0 Se ries DVR
l ong screw bolt for mounting DVR
3.3.3 Network
He re you can c onfigu re " Wi red N etwor k " sett ings if
yo u need to us e the interne t funct ion;
Ne t Card : Wire Netc ard;
DHCP Enable : Autom atically Atta in IP A ddres s (Not
re comm ended );
No te: please m ake sure the DHCP Serv er is b uilt in
ad vance if you need to use this fu nction .
IP Addre ss : se t IP ad dress for th e devic e;
M edia P ort: S et " TC P Port " for th e devi ce;
HTT P Port : Set " HTTP Port "for the device ;
HS Downl oad : H igh Sp eed D ownlo ad from Inter net;
Tran sfer P olicy: Trans fer Priority; Q uality Prefe rred, F luency Prefe rred o r Adap tive;
1
mo unti ng p late
anti -v ibratio n rubb er cus hi on
1.Pu hel ongs cr ewb ol tsi nt ot hemo un ngpl a tewi t hth epl ate' s smoo t hf a ceup t urned,
moun hep l at ei nt hep l ac ewa nt edwi ths crews , t henp ut a n -vi bra onrub ber c us hi ons
on the bolts and lay the DVR on it. See picture 1.
a nt i-vibrati on rubbe r plug
3.3.4 Net Service
Here you c an con figure Adva nced N etwor k Setti ngs
for t he dev ice. Double click each ite m and the
corr espon ding d ialog b ox would pop out.
2
2. Inser hea n -vibra onrub ber pl ugsi nt ot he rub ber c us hi ons. S eepi c t ur e2.
a. P PPoE
Enter the " U ser Name "a nd " Pa ssword " pro vided by ISP
(Inter net Se rvice Provider), reb oot th e DVR , it will build
the co nnect ion to t he Internet v ia " PP PoE " a nd att ain the
"IP ad dress " automatica lly.
screw nut
3
b. EMAIL
Enter the email inf ormation here, and the DVR wil l be
able t o send email s with alarm inform ation or snapshot
to the appoi nted re ceive rs (ma ximum 3 ema il addresses )
when alarms happ en.
3. Add met al gaskets and scr ew nuts, whirl the nut s clockwise t o t ighten the DV R
onto the m ount ing pl ate. See pict ure 3.
8
21
PDF 文件使用 "pdfFactory Pro" 试用版本创建 www.fineprint.com.cn
10
Shortcut Menu
Main Menu
3.2.7 Car Status
1. System Login
You will be requ ired to enter the Pa sswo rd while tryin g to a ccess the se tup menu. In itially ,
ther e are t hree u sers f rom th ree groups: " admi n ", " g uess ", and " defau lt ", an d all th ree us ers
hav e no passwo rds. Th e sup per us er " ad min " is able to ad d, mod ify or delete group s or
othe r user accou nts, c hange the p asswo rds, a nd eve n defi ne the " Auth ority " of oth er us ers
in th e setu p men u. Ple ase re fer to 3.4.2.
Here you ca n con figure the 4 a larm in puts a nd
conn ect the m to the doo rs or li ghts o f your vehicle ;
for ex ample , when the d oor is o pen, or the turn left
light is on, t he cor respon ding a larm i nput w ould b e
detec ted.
3.3 System
There are 8 subme nu ite ms un der "Sy stem ":
" Gene ral", " Encod e " , " N etwork " , " N et Service"
and " G UI Di splay " , " PTZ Config. ", " R S232 " and
2. Shortcut Menu
R ight c lick th e mou se afte r you enter " Previe w Mode ", a shortcut me nu
" Tour ".
w ill pop out a s shown; from here you c an go to Mai n Menu , Re cord M ode ,
P lay Back , P TZ Control , High - Spee d PTZ , Alarm Output ,
C olor Setting , Out put Adjust , or Log out p ages.
3.3.1 General
Here you c an con figure " Gen eral Setting s " for t he
DVR syste m;
Menu Language : 14 languages option al, English, French,
2.1 Main Menu
Click
in short cut me nu and go to " Main Menu " direc tly as s hown;
Portugueses, Russian, Italian, S-Chin ese, T-Chinese,
Spanish, Thai, Greek, Japanese, Germ an, and Polish;
HDD Full : Memory Storage Modes; " Stop When Full "or
" Overwrite When Full ";
Video Standard : PAL or NTSC;
Auto Logout: Set me nu auto log out time; "0" means "neve r logout auto matically".
3.3.2 Encode
2.2 Record Mode
Cli ck
in sh ortcut menu a nd go to " Re cord M ode" setup p age a s show n;
Sch edule : Start record ing acc ording to configura tion;
Man ual: S tart re cordin g rega rdless of con figurat ion;
Sto p : Stop recor ding.
Note : the s mall ci rcle w ould tu rn wh ite wh en sel ected.
11
PDF 文件使用 "pdfFactory Pro" 试用版本创建 3www.fineprint.com.cn
Here you can set v ideo/ audio " Encode " parameters.
There are 2 groups of " Encode " Settings; Generally
speaking, the first group is for high quality local video
storage and the other group called " Extra Strea m" is
for remote video trans mission which is relatively low
quality so as to ensure the fluency of the video stream ;
Channel : Select 1 channel or all 4 channels for settings;
Compression : Com pression format; the default
format is H.264;
R esolu tion : Video resolu tion, D 1/ HD1 / CIF/ QCIF adjust able;
F rame Rate : Adjus table; Maxim um Fra me Rate: 25 FPS ( NTSC) or 30 FPS (P AL);
B it Rate Typ e: VBR (Vari able B it Rate ) or CB R (Co nstan t Bit Rate) se lectab le;
20
Shortcut Menu
Main Menu
2.3 Playback
3.2.2 Video Blind
He re you can configu re " V ideo Blind " Alarm Setti ngs;
wh en the imag e is in fluenced by the enviroment or by
human b ehavior, the alarm woul d be a ctivat ed. For
settings of link age options , plea se refer to 3 .2.1
" M otion Detect ".
Click
in s hortcu t menu and g o to " P layba ck " int erface as sh own;
1. f iles lis t
2. file information
3.2.3 Video Loss
3 . search
He re you can c onfigu re" Vid eo Lo ss " alarm se ttings ;
wh en the video input signal is lost on the selec ted
ch annel (s), th e alarm woul d be a ctivate d. For
se ttings of link age op tions, pleas e refer to
3. 2.1 " M otion Detec t ".
4. back up
5. control buttons
Bu tton
3.2.4 Alarm Input
Here you can co nfigure" Alar m inp ut " alarm
sett ings; t he DVR supports when the vid eo
inpu t sign al is lo st on t he, the alarm woul d be
acti vated. For s ettings of lin kage o ptions ,
plea se ref er to 3 .2.1 " Motion Dete ct ".
F unctio n
Butto n
Fun ction
Bu tton
Fun ction
play/pause
ba ckwar d
stop
slow p lay
fa st play
prev ious f rame
next f rame
pr evious file
nex t file
circu lation
fu ll screen
2.31 File Searching
Click
, th e " Search Condition " d ialog box will pop
out; se t the s earch conditions and st art to search .
3.2.5 Alarm Output
2.32 File Backup
Plea se ref er to 2 .6.
3.2.6 Abnormality
When it is set in th is opt ion, th e DVR will a nalyz e the
hardw are an d software and re act to the ab norm al
pheno mena , show the a larm d ialog box or open the
buzze r.
19
PDF 文件使用 "pdfFactory Pro" 试用版本创建 www.fineprint.com.cn
Conne ct a s torage device (USB Disc or SD card) to the
DVR in advance, c lick
and then " Detec t "; select a
device , and click " Backup " to g o to t he nex t step,
please refer to 3.4.
12
Main Menu
Shortcut Menu
Choose " File T ype ", " Channel ", " Start T ime ", " End
Ti me ", " Backu p Form at ", a nd the n click " Star t" to
ex ecute.
3.2.1 Motion Detect
He re you can co nfigure the " Motio n Dete ct "setting
for every chann el.
Chann el: Se lect 1 c hanne l or al l 4 cha nnels f or
config uration ;
Enabl e: Ena ble/Dis able " Motio n Dete ct " fun ction;
Sensi tivity: Select " Sens itivity " Leve l; there are 6
option s;
2.4 PTZ Control
Click
in s hortcut menu and go to " PTZ Control " page a s show n;
Here you can a djust " Speed ", " Zoom ", " Focus ", " Iris ",
Change the dir ection , Chec k " PTZ Trace " or do more
by clicki ng
t o go to other pages .
N ote: pl ease m ake s ure the PTZ h as be en correctly
co nnect ed, an d all pa rameters properly set in " PTZ
C onfig" in adva nce.
In P icture 3.10
Click
shown;
, yo u will g o to " P TZ Config " p age a s
Here you ca n mod ify the settings of " Preset ", "
Tour " , " Patt er ", and "Bo rder ".
Region: Set " Motion Detect "area .
Pe riod : S et " Motion Detect " sche dules.
Int erval: Set "M otion Dete ct Inte rval"; only o ne mo tion ca n be d et ect ed dur ing the set
int erval;
Alarm ou tput: Start the external alarm e quipm ent which is conne cted to Alarm outp ut
on ce motions a re detected;
Alarm Delay : Set " Al arm" s ignal d uratio n;
Re cord C hann el : The selec ted ch annel (s) wo uld sta rt reco rding when m otion s are
de tected ;
To ur : Th e sele cted ch annel (s) wi ll be sh own in full s creen in turn, when motio ns are
de tected , refer s to 3.3 .8 for " Tour Interv al Setting " ;
Sn apsho t : The selec ted ch annel (s) would tak e snap shots when motion s are detected;
2.5 High Speed PTZ
Click
in sho rtcut m enu, the cam era w hich h as bee n conn ected to PTZ will b e
PT Z Acti vation : Activate th e PTZ equipm ent w hen m otions are detecte d; the PTZ
eq uipme nt wou ld wor k as se t, refe r to 3.3.6;
Re cord D elay: Set " R ecord Delay Time "after alarm ends;
shown in fu ll scree n; you can c hange the direction of the PTZ b y click ing the mous e or zo om
Sh own M essag e: Wh en motions a re detected, the ala rm dia log bo x wou ld pop out;
in/ou t the i mage b y rota ting th e mouse.
Se nd Em ail : When a motion is det ected, the DVR wo uld se nd an e mail t o the u ser, re fer
Note: Pl ease m ake s ure the PTZ c onnec ted su pport s high- speed oper ation.
to 3.3.4 f or "Email Se tting" ;
13
PDF 文件使用 "pdfFactory Pro" 试用版本创建 www.fineprint.com.cn
Bu zzer : o pen the buz zer wh en mo tions a re detected.
18
Shortcut Menu
Main Menu
A. Schedule : Enable " Sn apshop " fun ction during the time per iods set in th e below sche dules;
2.6 Alarm output
Regular : Sto re snapshots during the pe riod set
when "Regular" recording is happening ;
Detect : Sto re snapshots during the pe riod set when "
Detect" reco rding is happ ening, which a re triggered by
"Motion Dete ct", "Camera Mask" or"Vid eo Loss";
Alarm: Store snapshots d uring the pe riod set when
"Alarm" reco rding is happ ening, which are triggere d by externa l alarm signa l;
Cli ck
in sh ortcut menu and go to " Alarm O utput " setu p page as sh own;
Co nfiguration : Alarm on a ccording to c onfigu ration;
Manual : Open Alarm outpu t regardless of configuration;
Stop : Cl ose Al arm ou tput.
Note: the small c ircle w ould turn w hite w hen se lected .
B. Ma nual : Enable "Sna pshot" functi on in a ny cas es;
C. Stop : Dis able " Snaps hot" fu nction in any case s.
3.1.3 Playback
2.7 Color Setting
Pleas e refer to 2.3 .
Click
in s hortcu t menu and g o to " Color S ettin g " pag e as sh own;
3.1.4 Backup
Here you c an adj ust the " Brig htnes s ", " Co ntrac t ",
" Sat uratio n "," Hu e ", an d "Gain "of t he ima ge. Yo u
Here you can back up rec orded video files to external
storag e devic e, eith er a SD card or a Hard Drive.
Please make sure you have con nected the storage
devices to th e DVR in advance.
can s et two differ ent gro ups o f settin gs for differe nt
time period s.
Click " Detec t" to search Storage Devices,
Select one d isk for video backup;
2.8 Output Adjust
Click "Backup"to go to the next page to Choose
" File Type ", " Channel ", " Start Time " , " End Time " ,
" BackupFormat " as shown, and then click " Start "
to back up files.
Cli ck
in shortc ut men u and go to " Outpu t Adju st " pa ge as shown ;
Here y ou can adjus t the " Top Deflate ", " Bot tom
Deflate", " L eft Deflate " and " Right D eflate " of
video output .
Note: you can also do other operation while Video
Backup is being processed.
2.9 Logout
Click
3.2 Alarm
There are 7 subme nu items under " Ala rm":
" Mot ion De tect. ", " Video Blind ", " Video Loss "
and " Alarm Input " , " Alarm Out put ",
" Abn ormality " and " Car Status ".
17
PDF 文件使用 "pdfFactory Pro" 试用版本创建 www.fineprint.com.cn
ÿ²
in shortcut menu, the " Logout " dialog box will pop out as shown;
Logo ut : exit " Log out " m enu;
Shutdown : Turn off the DVR;
Rebo ot : Re start t he DVR.
14
Main Menu
Main Menu
3. Main Menu
Clic k
in sho rtcut m enu o r press "Men u" on I R remo te con trol; there a re six s ubme nu
item s: Re cord, A larm, Syste m, Adv anced , Info and Lo gout; see me nu na vigatio n as fo llows ;
Record
Co nf ig
play back
back up
Moti on
detecti on
Def en di ng time secti on, alarm outp ut, screen hint, r ecordi ng, PTZ,patrol
Set camer a mask alarm chan ne l, sensiti vity , linkag e par ameters :
defending time sec tio n, a larm output, scr een h int , reco rding, PTZ , patr ol
Alarm
Se t vid eo los s al arm channel, li nkage para meters: defending time
sectio n, alarm output, scr een hint, recordin g, PTZ, patrol
Set a larm inp ut c ha nn el, equi pment ty pe, linkag e par ameters :defending
time section, alarm ou tput, scr een hint , recording, PTZ, patrol
Al arm output Set alarm mode: configuration, m anual, s hut down
General Set s yst em tim e, data forma t, language, hard d isk f ull t ime op er ation,
conf iguration mach ine nu mber, video f ormat, output mod e, s um mer tim e, stay ti me
Set m ai n(as sist an t) codin g par am eter: code mode, r es olv ing ability,
Encode
fr am e r at e, c od e stream cont rol, image qua lity type, code st ream
configuration
value , fr ame between val ue, video/audio enabl e
N etwor k Set b as ic netw ork parameters, DH CP and DNS pa ramet er s, network
configur ation hi gh s peed downl oad
S ystem
configuration N etService PPPOE、N TP、Email、IP pu rview、DDN S pa ram eter
PTZ
configuration
Set channel nam e, p review hint icon state, transparency, cove r area,
t ime title, cha nnel time fold
Set cha nnel, P TZ pr otoco l, a ddress, baud rate, date bit, stop bit, check
Serial por t
Configuration S et serial po rt funct ion, baud rate, date bit, stop bit, c heck
Tour
Hard dis k
Set patrol mode and interv al t ime
Set appointed hard disk as read-writ e disc, read-only disc or
Management redundant disc, clear data, resume date and so on
U ser
Management M odify user, team or passw or d. Add user or team. Delete user or team .
Manage ment Online user
tools
TV adjust
A utomatic
Management
R estor e
There are 4 sub menu items under " Record ": "R ecord
Co nf. ", " Snaps hot St orage ", " Pla yback " and " Backu p ".
Set t he recording confi guration, recording typ e, r ecording time section
Set re cording look-up, r ec or din g play , vid eo file s torage
Detect or format back up e qu ipme nt, back t he s elect ive files
Set mot ion detect alar m channel, sen sit ivit y, are a, l inkage paramet er s:
Video
blind
Vide o
loss
Alarm
input
GUI display
3. 1 Record
B reak the connection with t he already login user. Lock the account after
break until booting u p a gain.
Adjust T V upsid e, downside, nearsi de, star board distance
S et automatic reboot system and autom atic deleti ng files.
Resume se tup state: comm on setup, code se tup, recording setup, alarm
setup, netw or k setup, network service, pr eview playback, serial por t
setup, user managemen t
Hard disk
Information Displa y ha rd disk capability and recording time
Codestr eam
Display code stream informa tion
Statistics
System
L og
i nfor mation
Cle ar all log informatio n accord ing to the log video and time
Information
Edit ion
Disp lay e dition inf ormation
i nfor mation
Logou t, s hut down or reboot
S hut down
15
PDF 文件使用 "pdfFactory Pro" 试用版本创建 www.fineprint.com.cn
ÿ3
3. 1.1 Record Config
Here you can config ure the recording setting for ev ery cha nnel. You can defi ne " Vi deo Clip
Length ", " Pre -Record Time ", " Record Mod e ", an d even set " R ecord ing Sc hedul e" for
everyday, 4 p eriods a day.
Cha nnel: Selec t 1 cha nnel o r all 4 chann els fo r
con figuration;
Red undancy: W hen two sto rage d evice s are i nstalle d,
sele ct "Re dunda ncy", the vide file s will b e bac ked up to
all two dis ks;
Len gth: D efine length of vid eo clip ; the d efaul t value is
60 m inute s;
Pre-Reco rd: De fine p re-recordin g time , 1-30 seconds
sele ctable ;
Record Mode: Define"Record Mode", ther e are 3 optio ns;
A. Sch edule : Start record ing du ring th e time perio ds set in the below sched ules
Regular : Start regular reco rding during the preriod
set; the video file type is "R ";
Detect : Start recording only when trigge red by
"MotionDetection", "Camera Mask", or "Video Loss"
during the period set; the video file type is "M";
Alarm : Start recording while triggered b y external ala rm
signal du ring the per iod set; the v ideo filetype is "A".
B. M anual : Start record ing no matte r how t he sch edule is set.
C. S top : S top rec ording .
Note: t he con figura tion is only v alid to the se lected chann el(s).
3.1.2 Snapshot Storage
Here you can co nfigure the " Snaps hot Storage " settin g
for every c hanne l. Plea se not e that there s hould be at
leas t one storag e devic e set a s "Snapshot Disk" if you
wan t to store sna pshot s, plea se refe r to 3. 4.1.
Cha nnel : Select 1 channel or all 4 c hanne ls for
con figuration;
Pre snap : Set "P re-sna pshot Pictur e Num ber"; th e DVR
will take s napshots as set bef ore recording happ ens;
Rec ord : d efine S napsh ot Modes; th ere are 3 opt ions;
16