1
SO-01D_English
SO-01D_(E).book
1 ページ
2011年10月20日 木曜日 午後1時6分
SO-01D
INSTRUCTION MANUAL
’11.10
SO-01D_English
SO-01D_(E).book
1 ページ
2011年10月20日 木曜日 午後1時6分
Introduction
Thank you for your purchase of "SO-01D".
For proper use of the SO-01D, read this manual carefully before and while you use the SO-01D.
Before using the terminal
● The SO-01D supports W-CDMA, GSM/GPRS and Wireless LAN Systems.
● Because the terminal operates using radio frequencies, it cannot be used inside a tunnel, underground, in
a building or other locations where radio waves do not reach the terminal, in locations with weak radio wave
condition, or outside of the FOMA's service area. The FOMA services may not be available on high upper
floors of high-rise apartments or buildings, even if you can see no obstructions around you. On occasion,
your calls may become disconnected even in areas with strong radio wave condition, even if you are not
moving, or even if there are 4-antenna marks in the terminal's display.
● Note that because the terminal operates on radio frequencies, your calls are at risk of being intercepted by
the third party. However, the W-CDMA, GSM/GPRS system automatically scrambles all calls through a
private call feature. Therefore, even if third party successfully intercepts your call, they will only hear noise.
● The terminal operates on radio frequencies by converting voice into digital signals. If the caller moves into
an area of adverse radio wave condition, the digital signal may not restored accurately, and the voice
received in the call may differ slightly from the actual voice.
● Always keep the information you save in the terminal in a separate note. Even if the data may be lost as a
result of malfunction, repair, change, or other handling of the terminal, under no condition will DOCOMO be
held liable for any lost data saved in the terminal.
● You are recommended to save important data to microSD card.
● As with PCs, some user-installed applications may disrupt the stability of the terminal performance, or
unexpectedly transmit information via the Internet causing improper use of your location information as well
as personal information recorded on the terminal. Therefore, verify the supplier and operating conditions of
the applications to be used before using them.
● This terminal has FOMA Plus-Area and FOMA HIGH-SPEED Area support.
● Descriptions in this manual are for the terminal with a DOCOMO's UIM inserted.
SIM unlock
This terminal supports SIM unlock. If you release SIM lock, you can use SIM by a carrier other than
NTT DOCOMO.
● The SIM unlock service is provided at a docomo Shop.
● A SIM unlock charge is separately required.
● If you use a SIM other than by DOCOMO, available services and functions will be limited. DOCOMO is not
liable to any failures or malfunctions.
● For details of SIM unlock, refer to NTT DOCOMO website.
SO-01D_English
SO-01D_(E).book
1 ページ
2011年10月20日 木曜日 午後1時6分
Accessories
・ Battery Pack SO04
Supplied accessories
・ SO-01D (with warranty and Back Cover
SO17)
・ AC Adapter Cable SO03 (with warranty)
<AC adapter>
・ Quick Start Guide (In Japanese only)
<microUSB cable>
・ microSDHC card (16GB)* (Sample)
(with instruction manual)
クイック
スタート
ガイド
* Inserted in the terminal when purchased.
・ Stereo Headset with Microphone (Sample)
(with instruction manual)
・ Notes on usage
Safety/Handling precautions (In Japanese
only)
For details on optional devices, see "Optional
and related devices" (P.193).
1
SO-01D_English
SO-01D_(E).book
2 ページ
2011年10月20日 木曜日 午後1時6分
About manuals of SO-01D
In addition to this manual, the operations of
SO-01D are described in "Quick Start Guide"
(in Japanese only) and "Instruction Manual"
application of the terminal.
"Quick Start Guide"
(Supplied accessories)
The initial operations and settings after
purchasing the terminal, screen view
contents and operations of main function are
explained. (In Japanese only)
"Instruction Manual"
(Application of the terminal)
Similarly to this manual, operations and
settings of each function are explained.
To use "Instruction Manual" application, from
the Home screen, tap
[Instruction
Manual]. For the first time using, download
and install it according to the onscreen
instructions. You can use the application as
an electronic book. You can also shift to
actual operations by tapping the description
in the contents or view reference contents.
❖ Cautions
・ For downloading or updating the application, a
high packet communication charge will be applied
because of a large amount data communication.
For this reason, subscription of packet flat-rate
service is highly recommended.
* If you use Wi-Fi function to download, packet
communication charges are not applied.
"Instruction Manual" (PDF file)
Operations and settings of each function are
explained.
It can be downloaded from NTT DOCOMO
website.
http://www.nttdocomo.co.jp/english/support/
trouble/manual/download/index.html
* The URL and contents are subject to
change without prior notice.
❖ Cautions
・ Reproduction or reprint of all or part of this manual
without prior permission is prohibited.
・ Important information for SO-01D is posted in the
following website. Be sure to check before using.
http://www.sonyericsson.co.jp/support/
use_support/product/so-01d/
2
SO-01D_English
SO-01D_(E).book
3 ページ
2011年10月20日 木曜日 午後1時6分
Operation descriptions
・ Please note that "SO-01D" is called the "the
terminal" in this manual.
In this manual, each key operations are
described with p, x, y, t,
s, m. And selection operations of
the icons or function items on the touch panel
are described as follows.
Description
Operation
From the Home
screen, press
t and tap
[Settings].
From the Home screen, press
t (Menu) key and tap
"Settings" on the screen.
Tap [Settings]
[Date & time]
[Set date].
Tap "Settings" displayed on the
screen, and then tap "Date &
time" on the next screen and
"Set date" on the following
screen in order.
Tap
to
zoom out or in.
Tap
displayed on the
screen to zoom out or in the
map.
Touch and hold
an icon.
Keep touching an icon on the
screen longer (1-2 seconds).
❖ Information
・ In this manual, the instructions are described with
the default Home screen. If you set the other
application to the home screen, the operations
may differ from the descriptions.
・ Display examples and illustrations used in this
manual are just images for explanations and may
be different from actual ones.
・ In this manual, the easier procedure is described
for the functions and settings which have multiple
operating procedures.
3
SO-01D_English
SO-01D_(E).book
4 ページ
2011年10月20日 木曜日 午後1時6分
Contents
Accessories . . . . . . . . . . . . . . . . . . . . . . . . . . . . . . . . . . . . . . . . . . . . . . . . . . . . . . . . . . . 1
About manuals of SO-01D . . . . . . . . . . . . . . . . . . . . . . . . . . . . . . . . . . . . . . . . . . . . . . . . 2
Safety Precautions (Always follow these directions) . . . . . . . . . . . . . . . . . . . . . . . . . . . . 9
Handling precautions . . . . . . . . . . . . . . . . . . . . . . . . . . . . . . . . . . . . . . . . . . . . . . . . . . . 18
Before Using the Handset
→P.25
Calling/Network Services
→P.71
・ Part names and functions ......................................................25
・ UIM.........................................................................................27
・ microSD card .........................................................................28
・ Charging ................................................................................29
・ Turning power on and off .......................................................34
・ Initial settings (Setup guide) ..................................................35
・ Status bar ...............................................................................36
・ Notification panel ...................................................................38
・ Notification LED......................................................................38
・ Basic operations ....................................................................39
・ Home screen ..........................................................................42
・ Searching information in the terminal and web pages ..........47
・ Applications screen ...............................................................48
・ Character entry ......................................................................56
・ Settings of entering characters ..............................................65
・ Settings of Japanese keyboard .............................................66
・ Making/Receiving calls ..........................................................71
・ Call log ...................................................................................75
・ Contacts .................................................................................76
・ Network Services ...................................................................85
Contents/Precautions
4
SO-01D_English
SO-01D_(E).book
5 ページ
Settings
→P.93
Mail/Internet
→P.122
File management
→P.138
Games
2011年10月20日 木曜日 午後1時6分
・ Viewing the setting menu .......................................................93
・ Wireless & networks ...............................................................93
・ Call settings..........................................................................102
・ Sound ...................................................................................103
・ Display .................................................................................105
・ Location & security...............................................................106
・ Applications .........................................................................111
・ Accounts & sync ..................................................................114
・ Privacy..................................................................................117
・ Storage.................................................................................118
・ Language & keyboard .........................................................119
・ Voice input & output .............................................................119
・ Accessibility .........................................................................120
・ Date & time...........................................................................120
・ About phone.........................................................................121
・ sp-mode mail .......................................................................122
・ Message (SMS)....................................................................122
・ Email.....................................................................................124
・ Using Gmail..........................................................................131
・ Google Talk (Chat) ...............................................................131
・ Early warning "Area Mail" .....................................................132
・ Using Browser ......................................................................133
・ Handling a file ......................................................................138
・ Transferring and moving data ..............................................138
・ Using Bluetooth function ......................................................143
・ Sharing files with DLNA devices via Connected devices
(Media server) ......................................................................147
・ Use the terminal as a gaming console.................................148
→P.148
Contents/Precautions
5
SO-01D_English
SO-01D_(E).book
6 ページ
Applications
→P.150
International roaming
→P.186
Appendix/Index
→P.193
2011年10月20日 木曜日 午後1時6分
・ Using the camera.................................................................150
・ Shooting screenshot ............................................................158
・ Playing multimedia content ..................................................158
・ Viewing photos/videos with Gallery .....................................160
・ Playing video with YouTube..................................................163
・ Music player.........................................................................165
・ TrackID .................................................................................168
・ Using Android Market ..........................................................168
・ Using docomo market..........................................................169
・ TimescapeTM ........................................................................170
・ About location services........................................................174
・ Calendar...............................................................................179
・ Clock/Alarm..........................................................................181
・ OfficeSuite ............................................................................183
・ Other applications................................................................183
・ Overview of International roaming (WORLD WING) ............186
・ Available Services ................................................................186
・ Before using .........................................................................187
・ Making/Receiving calls in the country you stay ...................190
・ Optional and related devices ...............................................193
・ Troubleshooting....................................................................193
・ Warranty and After Sales Services.......................................198
・ Updating software ................................................................201
・ Main specifications ..............................................................203
・ Specific Absorption Rate of Mobile Phone, etc. ..................206
・ End User Licence Agreement ..............................................219
・ About Open Source Software...............................................220
・ Export Controls and Regulations .........................................220
・ Intellectual Property Right ....................................................220
・ Index ....................................................................................224
Contents/Precautions
6
SO-01D_English
SO-01D_(E).book
7 ページ
2011年10月20日 木曜日 午後1時6分
Notes on usage
・ The terminal does not support i-mode sites
(programs) or i-αppli.
・ The terminal automatically performs
communication for synchronizing data,
checking the latest software version,
maintain connection with the server, etc. If
you transmit a large amount of data such
as downloading applications or watching
movie, a packet communication charge
becomes high. Subscription of packet flatrate service is highly recommended.
・ Public mode (Driving mode) is not
supported.
・ Setting the phone to silent mode does not
mute sounds (playback of video or music,
alarm, etc.) other than the ringtone,
operation sound, and notification sounds.
・ The names of the operators are displayed
on the key unlocking screen (P.35).
・ Your phone number (own number) can be
checked as follows:
From the Home screen, press t and
tap [Settings] [About phone] [Status].
・ The software version of your terminal can
be checked as follows:
From the Home screen, press t and
tap [Settings] [About phone].
・ You can perform software update by
downloading an update file with a PC via
Internet and connecting the PC to the
terminal. For details, see "Connecting to a
PC and updating" (P.202).
・ By some software updates, the operating
system (OS) may be version-upgraded for
improving the terminal quality. For this
reason, you always need to use the latest
OS version. And some applications that
used in the previous OS version may not
be available or some unintended bugs
may occur.
・ If you use the terminal with a part of FOMA
cards (green) inserted, voice calls and
packet communication may not be
available with some overseas network
operators or in some overseas networks.
For using overseas, please visit a docomo
Shop near you. DOCOMO exchanges UIM
(FOMA card) (green) free of charge.
・ Set the screen lock to ensure the security
of your terminal for its loss. For details, see
"Screen lock" (P.109).
Contents/Precautions
Continued on next page
7
SO-01D_English
SO-01D_(E).book
8 ページ
2011年10月20日 木曜日 午後1時6分
・ If your terminal is lost, change your each
account password to invalidate
authentication using a PC to prevent other
persons from using Google services such
as Google Talk, Gmail, Android Market,
etc., Facebook, Twitter and mixi.
・ The terminal supports only sp-mode,
mopera U and Business mopera Internet.
Other providers are not supported.
・ To use tethering, subscription of sp-mode
is required.
・ Packet communication charge when using
tethering varies depending on the
charging plan you use. Subscription of
packet flat-rate service is highly
recommended.
・ If you subscribe packet flat-rate service,
packet communication charge is treated
as "communications connected to an
external device such as a PC". If tethering
is enabled, all packet communication
charge is treated as "communications
connected to an external device such as a
PC" even if any external device is not
connected.
Make sure to deactivate tethering as soon
as communication with an external device
is completed.
・ In the initial settings for tethering, security
setting is not made. Make a security
setting as required.
・ For details on usage charge, etc., refer to
http://www.nttdocomo.co.jp/ .
Contents/Precautions
8
SO-01D_English
SO-01D_(E).book
9 ページ
2011年10月20日 木曜日 午後1時6分
Safety Precautions (Always
follow these directions)
■ For safe and proper use of the terminal, please
read the "Safety Precautions" prior to use.
Keep the Manual in a safe place for future
reference.
■ ALWAYS observe the safety precautions since
they intend to prevent personal injury or
property damage.
■ The following symbols indicate the different
levels of injury or damage that may result if the
guidelines are not observed and the terminal
is used improperly.
DANGER
Failure to observe
these guidelines may
immediately result in
death or serious injury.
WARNING
Failure to observe
these guidelines may
result in death or
serious injury.
CAUTION
Failure to observe
these guidelines may
result in injury and
property damage.
■ The following symbols indicate specific
directions.
Indicates prohibited actions.
Don’t
Indicates not to disassemble.
No disassembly
Indicates not to handle with wet hands.
No wet hands
No liquids
Do
Unplug
Indicates not to use where it could get
wet.
Indicates compulsory actions in
accordance with instructions.
Indicates to remove the power plug from
the outlet.
■ "Safety Precautions" are described in the
following categories:
1. Handling the terminal, Battery Pack, AC
Adapter cable, and UIM (general)................. 10
2. Handling the terminal.................................... 11
3. Handling the Battery Pack ............................ 13
4. Handling the AC Adapter cable..................... 14
5. Handling the UIM .......................................... 16
6. Handling the terminal near electronic medical
equipment ..................................................... 16
7. Material list ................................................... 17
Contents/Precautions
9
SO-01D_English
SO-01D_(E).book
10 ページ
2011年10月20日 木曜日 午後1時6分
1. Handling the terminal, Battery
Pack, AC Adapter cable, and UIM
(general)
DANGER
Don’t
Don’t
Do not use, store, or leave the terminal,
battery pack, AC adapter cable, or UIM in a
place subject to high temperature such as
close to fire, under direct sunlight, or in a car
on an extremely hot day.
Doing so may cause fire, burns or injury.
Do not place the terminal, battery pack, AC
adapter cable, or UIM inside cooking
appliance such as a microwave oven or highpressure containers.
Doing so may cause fire, burns, injury or
electric shock.
Do not disassemble or modify the terminal,
battery pack, AC adapter cable, or UIM.
Doing so may cause fire, burns, injury or
No disassembly electric shock.
WARNING
Don’t
Don’t
Don’t
Do
Do not let the terminal, battery pack, AC
adapter cable, or UIM get wet with water,
drinking water, urine of pet animals, etc.
No liquids Doing so may cause fire, burns, injury or
electric shock.
Do
Use the battery pack and AC adapter cable
for the terminal specified by DOCOMO.
Failure to do so may cause fire, burns, injury
or electric shock.
Do
Do not throw the equipment, put strong force
or give hard shock to it.
Doing so may cause fire, burns, injury or
electric shock.
Do not allow the microUSB connection jack
or headset connection jack to come in
contact with conducting foreign substances
(a piece of metal, pencil lead, etc.). Never
allow these objects to get into the connection
jack.
Doing so may cause fire, burns, injury or
electric shock.
Do not cover or wrap the terminal, battery
pack, AC adapter cable, or UIM with a cloth
or bedding in use or while charging.
Doing so may cause fire or burns.
Power off the terminal before you step into a
place where flammable gas can leak, such
as gas stations. Do not charge the battery.
Gas may catch fire.
If you notice anything unusual about the
terminal, battery pack, AC adapter cable, or
UIM such as an unusual odor, overheating,
discoloration or deformation during
operation, charging or storage, immediately
perform the following measures.
・Remove the power plug from the power
outlet.
・Power off the terminal.
・Remove the battery pack from the terminal.
Failure to do so may cause fire, burns, injury
or electric shock.
Contents/Precautions
10
SO-01D_English
SO-01D_(E).book
11 ページ
2011年10月20日 木曜日 午後1時6分
CAUTION
Don’t
Don’t
Do
Do
Do
2. Handling the terminal
WARNING
Do not place on an unstable or inclined
platform.
Doing so may cause the device to fall and
cause injury.
Do not keep in a place that is very humid,
dusty, or subject to high temperature.
Doing so may cause fire, burns or electric
shock.
If children use the terminal, parents or
guardians should give them the proper
instructions for use. Make sure that they use
the terminal as instructed.
Failure to do so may cause injury.
Keep the terminal, battery pack, AC adapter
cable, or UIM out of the reach of babies and
infants.
Failure to do so may cause accidental
swallowing or injury.
Don’t
Don’t
Don’t
Do not turn on the photo light with the
lighting luminescence part close to the eyes.
Especially to shoot infants or young children,
step away from them more than 1 m.
Doing so may cause blurred vision. Or injury
by dazzling eyes or surprising may occur.
Do not allow a foreign substance such as
water and other liquids, metal parts, or
flammables to get in the UIM or microSD
card insertion slot on the terminal.
Doing so may cause fire, burns, injury or
electric shock.
Do not turn on the light toward a driver of a
car etc.
Doing so may disturb driving and cause an
accident.
Be careful especially when you use the
terminal while it has been continuously
connected to the AC adapter cable for a long
period of time.
If you play a game, etc. for a long time while
charging, the temperature of the terminal,
battery pack and AC adapter cable may
rise.
If you are directly in contact with hot parts
for a long period of time, it may cause your
skin to become red, itchy, or develop a rash
depending on your physical condition and
also it may cause low-temperature burn.
Contents/Precautions
11
SO-01D_English
SO-01D_(E).book
12 ページ
2011年10月20日 木曜日 午後1時6分
WARNING
Do
Do
Power off the terminal in a place where the
use is prohibited such as in airplane or
hospital.
Failure to do so may affect electronic
equipment and electronic medical
equipment. If you set the automatic poweron function, cancel it before powering off the
terminal.
Follow the instructions of each medical
facility for the use of mobile phones on their
premises.
Prohibited acts such as mobile phone usage
on board an airplane may be punished by
law. If usage of mobile phones in an aircraft
is admitted by setting airplane mode, etc.,
use the terminal under the direction of the
airline.
If the microUSB cable is connected into the
microUSB connection jack for charging etc.,
the terminal is automatically powered on. Be
careful not to connect the microUSB cable in
a place where the use is prohibited such as
in airplane or hospital.
WARNING
Do
Do
Always keep the terminal away from your ear
when you talk setting the hands-free
function.
Also, when you play game, play back music,
etc. connecting the Earphone/Microphone,
etc. to the terminal, adjust the volume
adequately.
If the volume is too loud, it may cause
difficulty in hearing. Moreover, if you barely
hear the surrounding sounds, it may cause
an accident.
Do
Do
If you have a weak heart, set the vibrator or
ringtone volume carefully.
Failure to do so may affect your heart.
If you are wearing any electronic medical
equipment, check with the relevant medical
electronic equipment manufacturer or vendor
whether the operation may be affected by
radio waves.
The radio waves from the terminal may
affect electronic medical equipment.
Power off the terminal near electronic
devices or equipment operating on high
precision control or weak signals.
Failure to do so may interfere with the
operation of electronic devices or
equipment.
* The followings are some electronic devices
or equipment that you should be careful of:
Hearing aids, implantable cardiac
pacemaker, implantable cardioverter
defibrillator, other electronic medical
equipment, fire detector, automatic door,
and other automatically controlled devices
or equipment.
If you use an implantable cardiac
pacemaker, implantable cardioverter
defibrillator, or other electronic medical
equipment, check with the relevant
medical electronic equipment
manufacturer or vendor whether the
operation can be affected by radio waves.
Be careful about broken glasses or exposed
internal from the terminal if the display or the
camera lens is broken.
Shatterproof film-applied hardened glass is
used on the display surface and the acrylic
resin is applied on camera lens so as not to
be shattered when broken. But they may
cause injury if you touch a cut surface or
exposed portion mistakenly.
Contents/Precautions
12
SO-01D_English
SO-01D_(E).book
13 ページ
2011年10月20日 木曜日 午後1時6分
CAUTION
Don’t
Do not swing the terminal around by holding
the strap, etc.
The terminal may hit you or others and
cause accident such as injury.
Don’t
Do not use damaged terminal.
Doing so may cause fire, burns, injury or
electric shock.
Don’t
Do
Do
If the display is mistakenly damaged and
when the liquid crystal runs out, do not get it
on your skin such as face, hands, etc.
Doing so may cause blindness or injury on
your skin.
If the liquid crystal gets in your eye or
mouth, rinse with clean running water, and
get medical treatment immediately.
Also, if it gets on your skin or clothes, use
something such as alcohol to wipe off and
wash it with soap in clear water.
To use the terminal in car, check with
automobile manufacturer or dealer to
determine how the device is affected by radio
waves before using.
In rare cases, using the phone in some
vehicle models can cause the vehicle's
electronic equipment to malfunction. In that
case, stop using the terminal immediately.
The use of the terminal may cause itching,
rashes, eczema, or other symptoms
depending on the user's physical condition.
Immediately stop using and get medical
treatment in such a case.
For material of each part, →P.17 "Material
list".
CAUTION
When opening or closing the terminal, take
care not to have your fingers or strap caught
by the terminal.
Failure to do so may cause injury.
Do
When watching the display, take a certain
distance from the display in a fully bright
place.
Failure to do so may reduce visual acuity.
Do
3. Handling the Battery Pack
■ Check the type of the battery by the label on
the battery pack.
Display
Type of Battery
Li-ion 00
Lithium Ion Battery
DANGER
Don’t
Don’t
Don’t
Do not touch the battery pack terminal with a
metal object such as a wire. Also, do not
carry or keep the battery pack together with
metal objects such as a necklace.
Doing so may cause battery pack to ignite,
explode, overheat or leak.
Check the orientation of battery pack to
install it to the terminal, and do not forcibly
attach the battery pack to the terminal if you
are having trouble installing it.
Doing so may cause battery pack to ignite,
explode, overheat or leak.
Do not throw the battery pack into fire.
Doing so may cause battery pack to ignite,
explode, overheat or leak.
Contents/Precautions
13
SO-01D_English
SO-01D_(E).book
14 ページ
2011年10月20日 木曜日 午後1時6分
DANGER
Don’t
Do not stick a nail into the battery pack, hit it
with a hammer, or step on it.
Doing so may cause battery pack to ignite,
explode, overheat or leak.
Do
If the battery fluid gets into your eyes, do not
rub, rinse with clean running water, and get
medical treatment immediately.
Failure to do so may cause blindness.
CAUTION
Don’t
WARNING
Don’t
Do
Do
If the battery pack seems to have
abnormalities such as deformation or
scratches due to falling, never use it.
Doing so may cause battery pack to ignite,
explode, overheat or leak.
If the battery pack leaks or hears an unusual
odor, immediately stop using and move it
away from fire.
The leaking liquid may ignite fire, catch fire,
or explode.
Be careful about your pet not to bite the
battery pack.
Failure to do so may cause battery pack to
ignite, explode, overheat or leak.
Don’t
Do
Do not discard the battery pack together with
other garbage.
The battery pack may become the source of
fire or environmental destruction. Take the
used battery pack to our service counter
(docomo Shop, etc.) after insulating it by
affixing an adhesive tape on the terminal of it
or follow the instructions of the local
authorities in charge of collecting used
battery packs.
Do not use or charge the wet battery pack.
Doing so may cause battery pack to ignite,
explode, overheat or leak.
If fluid etc. leaks out from battery pack, do
not make the fluid contact with your skin of
face or hands.
Doing so may cause blindness or injury on
your skin.
If the fluid etc. put into your eyes or mouth,
or contacts skin or clothes, immediately
flush the contacted area with clean running
water.
If the fluid put into the eyes or mouth,
immediately see a doctor after flushing.
4. Handling the AC Adapter cable
WARNING
Don’t
Do not use the microUSB cable if it is
damaged.
Doing so may cause fire, burns or electric
shock.
Contents/Precautions
14
SO-01D_English
SO-01D_(E).book
15 ページ
2011年10月20日 木曜日 午後1時6分
WARNING
Don’t
Don’t
Don’t
Don’t
Don’t
WARNING
Do not use the AC adapter cable in a very
humid or steamy place such as bathroom.
Doing so may cause fire, burns or electric
shock.
Do not touch the AC adapter cable if you
hear thunder.
Doing so may cause electric shock.
Do not short-circuit the microUSB plug while
it is connected to the power outlet. Do not
touch the microUSB plug with your hands,
fingers, or any part of your body.
Doing so may cause fire, burns or electric
shock.
Do not place any heavy objects on the
microUSB cable.
Doing so may cause fire, burns or electric
shock.
When you insert and remove AC adapter
from power outlet, do not contact a metal
strap or other metal objects with the jack.
Doing so may cause fire, burns or electric
shock.
Do not touch the cord of the AC adapter
cable or the power outlet with wet hands.
Doing so may cause fire, burns or electric
No wet hands
shock.
Do
Do
Do
Do
Use the adapter only on the specified power
supply and voltage.
Use the AC adapter cable available overseas
when you charge the battery overseas.
Failure to do so may cause fire, burns or
electric shock.
AC adapter cable: AC 100 V to 240 V (Make
sure to connect the adapter to a household
AC power outlet.)
Clean dust from the power plug.
Failure to do so may cause fire, burns or
electric shock.
When you connect the AC adapter to the
power outlet, insert it firmly.
Failure to do so may cause fire, burns or
electric shock.
Hold the AC adapter, not the microUSB
cable, when you remove the power plug from
the power outlet.
Failure to do so may cause fire, burns or
electric shock.
Remove the power plug from the power
outlet when not used for a long period of
time.
Unplug Failure to do so may cause fire, burns or
electric shock.
If liquid such as water gets into the adapter,
immediately remove it from the power outlet.
Failure to do so may cause fire, burns or
Unplug
electric shock.
Contents/Precautions
15
SO-01D_English
SO-01D_(E).book
16 ページ
2011年10月20日 木曜日 午後1時6分
WARNING
WARNING
Before cleaning, remove the power plug from
the power outlet.
Failure to do so may cause fire, burns or
Unplug
electric shock.
5. Handling the UIM
CAUTION
Do
Do
Please be careful not to touch a cut surface
when you remove the UIM.
Failure to do so may cause injury.
6. Handling the terminal near
electronic medical equipment
■ The following instructions observe the
guidelines of the Electromagnetic
Compatibility Conference, Japan to protect
electronic medical equipment from radio
waves from mobile phones.
Do
Do
Please observe the following guidelines in
medical facilities.
・Do not take the terminal into the operating
rooms, ICU (Intensive Care Unit), or CCU
(Coronary Care Unit).
・Power off the terminal inside hospital
wards.
・Power off the terminal in the lobby and
other places if there are any electronic
medical equipment operating in the
vicinity.
・Follow the instructions of each medical
facility when they specify areas forbidding
to use and carrying a mobile phone.
・If you set the automatic power-on function,
cancel it before powering off the terminal.
Power off the terminal in crowded places
such as rush-hour trains. There may be a
person with an implantable cardiac
pacemaker or implantable cardioverter
defibrillator near you.
The radio waves from the terminal may
affect the operation of implantable cardiac
pacemaker or implantable cardioverter
defibrillator.
Wearers of electronic medical equipment
such as implanted pacemakers or
defibrillators must carry and use terminal at
least 22 cm away from the implanted device.
The radio waves from the terminal may
affect the performance of electronic medical
equipment.
Contents/Precautions
16
SO-01D_English
SO-01D_(E).book
17 ページ
2011年10月20日 木曜日 午後1時6分
WARNING
Do
If you need to use electronic medical
equipment other than implantable cardiac
pacemaker or implantable cardioverter
defibrillator outside medical facilities such as
treating at home, check with the relevant
medical electronic equipment manufacturer
whether the operation may be affected by
radio waves.
The radio waves from the terminal may
affect the performance of electronic medical
equipment.
7. Material list
Part
Material
Surface
treatment
Exterior case
(Front)
PC resin
(with glass)
Non-conductive
vacuum
metallization (tin)+
UV coating
Hardware key
(Back key,
Home key,
Menu key,
Search key)
PC resin
Non-conductive
vacuum
metallization (tin)+
UV coating
Transparent
plate (Display)
Hardened
glass+
PET resin
Hard coating
Inner
packaging
(panel part
when game
keypad open)
PC resin
UV coating
Part
Material
Surface
treatment
Inner
PC resin (with UV coating
packaging
glass)+SUS+
(front and back PET resin
part when game
keypad open)
Hardware key
(△ / □/ ○ / ×
keys, Direction
key)
PC resin
UV coating
Hardware key
(Game menu
button of the
game keypad,
Select button,
Start button)
PC resin
UV coating
Hardware key
(Touch pad)
PET resin
UV coating
Inner
packaging
(Slide rail)
PCM resin
None
Transparent
plate (Camera
lens cover)
PMMA resin
AR coating+
Non-conductive
vacuum
metallization (tin)+
UV coating
Transparent
plate (Photo
light cover)
PMMA resin
AR coating+
Non-conductive
vacuum
metallization (tin)+
UV coating
Contents/Precautions
Continued on next page
17
SO-01D_English
SO-01D_(E).book
Part
18 ページ
Material
2011年10月20日 木曜日 午後1時6分
Surface
treatment
Exterior case
(Lateral side of
body)
PC resin
(with glass)
Non-conductive
vacuum
metallization (tin)+
UV coating
Hardware key
(L button,
R button)
PC resin
(with glass)
Non-conductive
vacuum
metallization (tin)+
UV coating
Hardware key
(Volume key,
Power key)
PC resin
UV coating
Back Cover
PC resin
(with glass)
UV coating
Handling precautions
■ Common precautions
・ Do not expose to water.
The terminal, battery pack, AC Adapter cable,
and UIM are not waterproof. Do not use them in
a humid place such as bathroom or in the rain.
If you carry the terminal on your body,
perspiration may corrode the internal parts of
the terminal and cause malfunction. Note that if
a trouble is diagnosed as exposure to water or
other liquid, repairs of the terminal may not be
covered by the Warranty or it may not be
possible to repair such phones. In that case,
even if the terminal can be repaired, it is
repaired at the owner's expense.
・ Clean the terminal with a dry soft cloth
(such as used for cleaning eyeglasses).
- Do not rub it roughly with a dry cloth. The
display may be damaged.
- Drops of water or dirt left on the display may
cause stains.
- Do not use alcohol, thinner, benzene,
cleaning detergent, etc. to clean the
terminal. These chemicals may erase the
printing on the terminal or cause
discoloration.
Contents/Precautions
Continued on next page
18
SO-01D_English
SO-01D_(E).book
19 ページ
2011年10月20日 木曜日 午後1時6分
・ Clean the terminals occasionally with a
dry cotton swab.
If the jack is soiled, connection gets worse and
it may cause power to be turned off or
insufficient battery charge, so clean the jack
with a dry cotton swab etc. When cleaning, be
careful not to damage the terminals.
・ Do not leave the terminal near the air
conditioning vent.
Extreme temperature changes may produce
condensation and corrode the internal parts of
the terminal, causing it to malfunction.
・ Make sure to use the terminal or battery
pack without excessive force.
If you put the terminal in a bag full of items or sit
down with the terminal in the pocket of your
cloth, it may damage the display, and internal
circuit board, and the battery pack and cause
the terminal to malfunction.
Also, while the external device is connected to
the microUSB connection jack or headset
connection jack, it may damage the connector
and cause malfunction.
・ Do not rub or scratch the display with
metal.
The display may get scratched and it may
cause malfunction or damage.
・ Make sure to see the user's manuals
supplied with the battery pack and AC
adapter cable.
■ The terminal precautions
・ Do not press touch panel surface
forcibly, or not operate with a sharppointed objects such as nail, ballpoint
pen, pin, etc.
Doing so may cause damage of touch panel.
・ Do not use the terminal in extremely hot
or cold places.
Use the terminal within a temperature range of
5°C to 35°C and a humidity range of 45% to
85%.
・ Using the terminal near ordinary phone,
television or radio may cause
interference in these electric
appliances. Make sure to move far away
from them when using the terminal.
・ Note down the information saved in the
terminal in a separate note and keep it
safely.
Under no condition will DOCOMO be held
liable for any damaged or lost data saved in the
terminal.
・ Do not drop or give a strong impact to
the terminal.
Doing so may cause malfunction or damage.
・ Do not plug the connector of the external
device into the microUSB connection
jack or headset connection jack at the
slant or pull it while connecting.
Doing so may cause malfunction or damage.
Contents/Precautions
Continued on next page
19
SO-01D_English
SO-01D_(E).book
20 ページ
2011年10月20日 木曜日 午後1時6分
・ The terminal could become warm while
in use and charging. This condition is
not abnormal. You can continue
charging the battery.
・ Do not leave the camera under direct
sunlight.
If you do so, some of the elements may melt or
become faded.
・ Do not use the terminal without the back
cover.
Doing so may cause the battery pack fall,
malfunction, and damage.
・ Do not put extreme thick stickers etc. on
the keypad side.
Doing so may cause malfunction, damage or
erroneous operation.
・ Do not put labels or stickers on the back
side of the display.
Label or sticker may be hooked when opening/
closing the terminal and may cause
malfunction or damage.
・ Do not remove the microSD card or
power off the terminal while using the
microSD card.
Doing so may cause data loss or malfunction.
・ Do not let magnetic cards, etc. come
close to the terminal.
・ Do not bring strong magnetic objects
close to the terminal.
Strong magnetic objects may cause
misoperation.
■ Battery pack precautions
・ The battery pack is a consumable
accessory.
Even if the operating time of the terminal varies
depending on the operating conditions and
other factors, when the length of time you can
use the terminal with a fully charged battery
becomes unusually short, it is time to replace
the battery pack. Purchase the battery pack
specified in this manual.
・ Charge the battery pack in an
environment with the proper ambient
temperature (5°C to 35°C).
・ The operating time of the battery pack
varies depending on the operating
environment and the secular
degradation level of the battery pack.
・ Depending on the use condition, the
battery pack may be inflated as it comes
to the end of its life. This is not a
malfunction.
The magnetic data in cash cards, credit cards,
telephone cards, floppy disks, etc. may be
erased.
Contents/Precautions
Continued on next page
20
SO-01D_English
SO-01D_(E).book
21 ページ
2011年10月20日 木曜日 午後1時6分
・ Do not store the battery pack in the
following cases:
- The battery is fully charged (immediately
after the charging is complete)
- The battery has run out (the phone cannot
power on)
The performance and life of the battery pack
may deteriorate.
It is recommended that you store the battery
pack with the remaining battery level of about
40 percent as a guide.
■ AC adapter cable precautions
・ Charge the battery pack in an
environment with the proper ambient
temperature (5°C to 35°C).
・ Do not charge in the following places.
- Places that are very humid, dusty or exposed
to strong vibrations.
- Near ordinary phone or TV/radio.
・ The AC adapter cable could become
warm while charging. This condition is
not abnormal. You can continue using
the terminal.
・ When you use the power outlet with a
mechanism to prevent the plug from
being removed, follow the instructions
on the outlet's user's manual.
・ Do not give a strong impact to the
adapter. Also, do not bend or deform the
microUSB plug.
Doing so may cause malfunction.
■ UIM precautions
・ Do not use unnecessary force to insert/
remove the UIM.
・ Do not insert and use the UIM with
another IC card reader/writer. Please
note that you are wholly liable for any
damage or malfunction as a result of
such action.
・ Always keep the IC portion clean when
you use the card.
・ Clean the terminal with a dry soft cloth
(such as used for cleaning eyeglasses).
・ Note down the information saved in the
UIM in a separate note and keep it
safely.
Under no condition will DOCOMO be held
liable for any damaged or lost data saved in the
terminal.
・ Take an expended UIM to sales outlet
such as docomo Shop for proper
disposal in order to protect the
environment.
・ Do not carelessly damage, contact, or
short-circuit an IC.
Doing so may cause data loss or malfunction.
・ Do not drop a UIM or subject it to
impact.
Doing so may cause malfunction.
・ Do not bend a UIM or place a heavy
object on it.
Doing so may cause malfunction.
Contents/Precautions
Continued on next page
21
SO-01D_English
SO-01D_(E).book
22 ページ
2011年10月20日 木曜日 午後1時6分
・ Do not insert the UIM on which any label
or seal is stuck into the terminal.
Doing so may cause malfunction.
■ Bluetooth function precautions
・ To secure the Bluetooth communication
security, the terminal supports the
security function compliant with
Bluetooth standards, but the security
may not be sufficient depending on the
setting.
Concern about the communication
using the Bluetooth function.
・ Please be aware that DOCOMO is not
responsible for data leak when making
data communications using Bluetooth.
・ You can use a headset, handsfree, and
audio profiles on the terminal. The audio/
video remote control may be available
for audio profile. (only compatible
Bluetooth devices)
・ Frequency band
The frequency band used by the terminal's
Bluetooth/wireless LAN function is indicated on
the battery storage section. The following are
the descriptions:
2.4FH1/DS4/OF4
2.4: This radio equipment uses the 2400 MHz
band.
FH/DS/OF: Modulation scheme is the FH-SS,
DS-SS, or OFDM system.
1: The estimated interference distance is 10 m
or less.
4: The estimated interference distance is 40 m
or less.
: The full band between 2400 MHz
and 2483.5 MHz is used and the
band of the mobile identification
device can be avoided.
Available channels vary depending on the
country.
For use in an aircraft, contact the airline
beforehand.
・ Bluetooth cautions
The operating frequency band of the terminal is
used by industrial, scientific, consumer and
medical equipment including microwave
ovens, premises radio stations for identifying
mobile units used in the manufacturing lines of
plants (radio stations requiring a license),
specified low power radio stations (radio
stations requiring no license) and amateur
radio stations (hereinafter referred to as
"another station").
1. Before using the terminal, confirm that
"another station" is not being operated
nearby.
2. In the event of the terminal causing harmful
radio wave interference with "another
station", promptly change the operating
frequency or stop radio wave emission by
turning off the power, etc.
3. If you have further questions, contact
"General Inquiries" on the last page of this
manual.
Contents/Precautions
22
SO-01D_English
SO-01D_(E).book
23 ページ
2011年10月20日 木曜日 午後1時6分
■ Wireless LAN (WLAN) precautions
・ Wireless LAN (WLAN) exchanges
information using radio waves, and
allows you to freely establish LAN
connection if you are within an area
where radio wave reaches On the other
side, if you communicate without
appropriate security settings,
communications may be intercepted or
hacked by malicious parties. It is
recommended to make necessary
security settings on your responsibility
and expense.
・ Wireless LAN
Do not use wireless LAN near magnetic
devices such as electrical appliances or AV/OA
devices, or in radio waves.
- Magnetism or radio waves may increase
noises or disable communications
(especially when using a microwave oven).
- When used near TV, radio, etc., reception
interference may occur, or channels on the
TV screen may be disturbed.
- If there are multiple wireless LAN access
points nearby and the same channel is used,
search may not work correctly.
・ 2.4 GHz device cautions
The operating frequency band of the WLAN
device is used by industrial, scientific,
consumer and medical equipment including
home electric appliances such as microwave
ovens, premises radio stations for identifying
mobile units used in the manufacturing lines of
plants (radio stations requiring a license),
specified low power radio stations (radio
stations requiring no license) and amateur
radio stations (radio stations requiring a
license).
1. Before using the device, confirm that
premises radio stations for identifying
mobile units, specified low power radio
stations and amateur radio stations are not
being operated nearby.
2. If the device causes harmful radio
interference to premises radio stations for
identifying mobile units, immediately change
the frequency band or stop use, and contact
"General Inquiries" on the last page of this
manual for crosstalk avoidance, etc. (e.g.
partition setup).
3. If the device causes radio interference to
specified low power radio stations or
amateur radio stations, contact "General
Inquiries" on the last page of this manual.
Contents/Precautions
23
SO-01D_English
SO-01D_(E).book
24 ページ
2011年10月20日 木曜日 午後1時6分
■ Cautions
・ Do not use an altered terminal. Using an
altered device is a violation of the Radio
Law.
A "Technical Conformity Mark
" affixed on
the manufacturer's specification sticker
certifies that the terminal meets technical
regulations for specified radio equipment that
are based on the Radio Law.
If you remove the screws and alter the inside of
the terminal, the technical regulations
conformity certification becomes invalid.
Do not use the terminal with the certification
invalid, as it is a violation of the Radio Law.
・ Be careful when using the terminal while
driving.
Using a handheld mobile phone while driving
will result in a penalty.
However, absolutely necessary cases such as
rescue of a sick person or maintaining public's
safety are exempted.
・ Do not change basic software
maliciously.
Repair may be refused due to modification of
the software.
Contents/Precautions
24
SO-01D_English
Before Using the Handset
SO-01D_(E).book
25 ページ
2011年10月20日 木曜日 午後1時6分
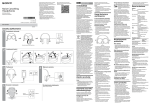
Part names and functions
j k
ab c
l
mn o
p
u
x
q
r
d
v
y
p
s
e fg hi
a In-camera lens
b Ear speaker
c Proximity sensor: Turn on or off the touch screen
to prevent misoperation during a call.
Light sensor: Used for auto controlling of the
screen brightness.
d Touch screen
e Back key
f Home key
g Menu key
h Search key
i Microphone
j Notification LED
k Power key/Screen lock key
l Second microphone: Reduce noise to make easy
to listen or used as a stereo microphone for
recording videos.
m Flash/Photo light
w
t
n Camera lens
o Wi-Fi/Bluetooth antenna section*
p Speaker
q Back Cover
r GPS antenna section*
s FOMA antenna section*
t Strap hole
u L button (for playing games)
v Volume key
w R button (for playing games)
x Headset connector
y Connector for microUSB cable
* The antenna is built into the main body. Covering
around the antenna with your hand may affect the
quality.
❖ Note
・ Do not put stickers etc. on each sensors.
Before Using the Handset
Continued on next page
25
SO-01D_English
SO-01D_(E).book
26 ページ
2011年10月20日 木曜日 午後1時6分
■ Game keypad
Slide the game keypad to use the
following game buttons.
j
i
h
g
a bc
k
d e f
l
a Direction keys (move the cursor up/down/left/
right)
b Menu button
c Touch pad L
d Touch pad R
e Select button
f Start button
g × button
h ○ button
i △ button
j □ button
k R button
l L button
* cdefijkl are dedicated buttons for
games. For details on how to use each button in
games, see the user's manual of each game.
* Operating, selecting setting items are available by
using the game keypad. Some items cannot be
operated or selected.
Before Using the Handset
26
SO-01D_English
SO-01D_(E).book
27 ページ
2011年10月20日 木曜日 午後1時6分
UIM
The UIM is an IC card recorded user
information such as your phone number etc.
When the UIM is not inserted to the terminal,
you cannot use some functions (phone
function, etc.) of the terminal.
・ In this terminal, the UIM (blue) is not
available. If you have the UIM (blue), bring it
to the nearest docomo Shop to replace.
・ When inserting/removing the UIM, make
sure to power off the terminal and remove
the back cover. Do not connect the AC
Adapter cable.
Inserting UIM
1
Put your tips of the third and fourth
fingers (nails) into the groove, hold
the back cover up in the direction
of the arrow ( ) to remove.
Back cover
Groove
■ Security codes of the UIM
The UIM has a Security code, namely
PIN. It is set "0000" at the subscription.
They can be changed by yourself. (P.109)
2
Insert straight the UIM all the way
into the holder with the metal part
(IC) facing down.
・ Insert it with the corner cut back side.
UIM
Corner cut
Before Using the Handset
27
SO-01D_English
SO-01D_(E).book
28 ページ
2011年10月20日 木曜日 午後1時6分
Removing UIM
1
Remove the back cover, press the
UIM with your fingertip and remove
it sliding outside.
❖ Information
・ Make sure to attach the back cover before using.
The microSD card cannot be recognized if the
back cover is not attached.
・ Do not touch the back cover detect switch. It may
cause malfunction or damage.
UIM
Inserting microSD card
1
2
❖ Information
・ Please be careful not to touch or scratch a metal
part (IC) when you handle the UIM. Doing so may
cause malfunction or damage.
Remove the back cover (P.27).
Make sure the inserting direction
and insert straight the microSD
card all the way into the holder
untill it clicks.
・ Insert the microSD card with metal
contacts side down.
microSD card
microSD card
You can use microSD card for any other
compatible devices.
・ When a microSD card is not inserted,
camera functions, playing or downloading
music or videos, communications using the
Bluetooth function, etc. are not available.
・ The terminal supports microSD card of up to
2GB, and microSDHC card of up to 32GB
(As of October, 2011).
Holder
Back cover
detect switch
Before Using the Handset
28
SO-01D_English
SO-01D_(E).book
29 ページ
2011年10月20日 木曜日 午後1時6分
Removing microSD card
1
Remove the back cover (P.27).
・ If the back cover is removed, "
SD
card safe to remove" appears on the
status bar. Make sure that the
microSD card is unmounted then
remove the microSD card.
2
Insert the microSD card straight
into the slot all the way until it
clicks.
3
Pull out microSD card slowly.
・ The icon in the status bar changes to
to notify that microSD card is
removed.
microSD card
Charging
The battery pack is not full charged when you
purchased the terminal.
Charging time
Charging time is an estimate of the time
required to charge a completely empty
battery pack. Charging under low
temperature requires longer time.
AC Adapter Cable SO03
(included accessory)
Approx. 200 min.
Operation time on full charge
(estimate)
The following time varies by the battery
condition or operating environment. For
details, see (P.204).
Continuous
stand-by time
FOMA/3G Stationary (Auto):
Approx. 480 hours
Moving (Auto):
Approx. 330 hours
Moving (3G static):
Approx. 440 hours
GSM
Approx. 300 hours
(stationary)
Continuous call FOMA/3G Approx. 340 min.
time
GSM
Approx. 450 min.
Before Using the Handset
29
SO-01D_English
SO-01D_(E).book
30 ページ
2011年10月20日 木曜日 午後1時6分
Battery pack life
・ The battery pack is a consumable
accessory. The usage duration of the
battery per one charge decreases gradually
each time the battery is recharged.
・ When the usage duration per one charge
becomes about half of a new battery pack,
the life if the battery pack is assumed to be
almost over. It is recommended that you
replace the battery pack ahead of time.
Depending on the usage condition, the
battery pack may be inflated as it comes to
be end of its life. This is not a malfunction.
・ Return all spent battery packs to
NTT DOCOMO or a dealer, or a
Li-ion 00
recycling shop to protect the
environment.
Charging
・ Make sure to charge with the Battery pack
S004 designed for the SO-01D attached.
・ The included AC adapter's power plug is
compatible with AC100V to 240V. For using
the terminal overseas, a plug adapter that
fits the electrical outlets in the country you
stay is needed. Do not use an electrical
transformer for overseas use to charge the
terminal.
・ Use the included AC Adapter cable for
charging.
・ When charging starts, the notification LED
turns on in red/orange/green. Green means
the remaining battery level reaches more
than 90%. To check the battery level, press
t from the Home screen, then tap
[Settings] [About phone] [Status] and
check "Battery level". When charging is
completed, "100%" is displayed in the
battery level.
・ When you start charging the battery with the
terminal powered off, the power turns on.
However, you cannot operate the terminal.
Do not charge the battery in a place where
the use is prohibited such as in airplane or
hospital.
Do not charge the battery pack for
a long time (several days)
・ If you remain charging the terminal for a
long time, the power supply starts from the
battery pack after completion of charging.
The usage time duration may be short. In
that case, please charge it again correctly.
For recharging, remove the terminal from
the AC Adapter cable and reconnect it
again.
Before Using the Handset
30
SO-01D_English
SO-01D_(E).book
31 ページ
2011年10月20日 木曜日 午後1時6分
3
Attaching the battery pack
・ When attaching/removing the battery pack,
make sure to power off the terminal.
1
2
Remove the back cover (P.27).
Check the orientation of charging
jack of the battery pack, insert it in
the direction of the arrow ( )
aligning the notches of the
terminal and battery pack.
Check the direction of the back
cover, and attach to the terminal
body ( ), press each
part
marked as shown and make sure
that there are not any spaces
between the body and cover ( ).
・ When attaching the back cover, be
aware not to get your finger caught in
the protrusion of the back cover rim.
Battery pack
Tab
Before Using the Handset
31
SO-01D_English
SO-01D_(E).book
32 ページ
2011年10月20日 木曜日 午後1時6分
Removing the battery pack
1
Remove the back cover, put your
tip of thumb (nail) under the
battery pack from the groove of the
terminal, hold the battery pack up
in the direction of the arrow ( ) to
remove.
Groove
2
Insert the microUSB cable
horizontally with the USB plug
engraved side facing up into the
connector for USB of the AC
Adapter, and insert the AC Adapter
plug to the power outlet.
3
When the charging is completed,
remove the microUSB plug of the
microUSB cable from the terminal.
4
Remove the AC Adapter from the
power outlet.
❖ Note
・ If the microUSB cable is connected into the
connector for external devices for charging etc,
the terminal is automatically powered on. Be
careful not to connect the microUSB cable in a
place where the use is prohibited such as in
airplane or hospital.
Charging with the AC Adapter
1
Insert the supplied microUSB
cable horizontally with the
microUSB plug
engraved side
facing up into the connector for
USB cable of the terminal.
Charging with a PC
1
Insert the microUSB cable
horizontally with the microUSB
plug
engraved side facing up
into the connector for USB cable of
the terminal.
Before Using the Handset
Continued on next page
32
SO-01D_English
SO-01D_(E).book
2
33 ページ
2011年10月20日 木曜日 午後1時6分
Insert the USB plug of the
microUSB cable horizontally into
the USB port of a PC.
microUSB plug
ill
・ When "PC Companion software"
screen appears on the terminal, tap
[Skip].
・ When a screen for new hardware
detection etc. appears on the PC,
select [Cancel].
3
When the charging is completed,
remove the microUSB plug of the
microUSB cable from the terminal.
4
Remove the USB plug of the
microUSB cable from the USB port
of the PC.
AC adapter
USB plug
microUSB cable
❖ Note
・ If the microUSB cable is connected into the USB
connection jack for charging etc, the terminal is
automatically powered on although the operations
are not available. Be careful not to connect the
microUSB cable in a place where the use is
prohibited such as in airplane or hospital.
・ Check the connecting direction to connect
correctly. Wrong connection may cause damage.
Before Using the Handset
33
SO-01D_English
SO-01D_(E).book
34 ページ
2011年10月20日 木曜日 午後1時6分
Turning power on and off
Turning power on
1
Press p for over a second.
・ The key unlock screen appears.
Turning power off
1
Press p for over a second.
2
3
Tap [Power off].
・ Phone options menu appears.
Tap [OK].
Setting Key lock
When the key lock is set, the screen light
turns off. You can avoid the touch screen or
button from false operations.
・ The terminal keys are locked with turning
the screen light off after the specified time
duration.
2
Deactivate the key lock.
・ For deactivating the key lock, see
"Unlocking the keys" (P.35).
❖ Information
・ The first time you turn ON, "Setup guide" (P.35)
appears.
・ If you activate the screen lock (P.109) or SIM card
lock (P.108), a PIN code entry screen appears
when turning power on. Enter the PIN code and
tap [OK]. To correct the wrong PIN entry, tap
/
.
1
Press p.
❖ Information
・ For details on settings for turning the backlight off
and the duration of time before the key lock
activation, see "Adjusting the idle time before the
screen turns off" (P.106).
・ There is no function to deactivate the key lock.
・ If you set the screen lock, entering the pattern, PIN
or password is needed before the screen unlock.
For details on the screen lock settings, see "Screen
lock" (P.109).
Before Using the Handset
34
SO-01D_English
SO-01D_(E).book
35 ページ
2011年10月20日 木曜日 午後1時6分
Unlocking the keys
A key unlocking screen appears when
turning the power on or the backlight on by
pressing p/y.
1
Touch
and drag
it laps over.
to
1
Press p for over a second.
2
Tap [English (United States)]
[Done].
・ "Welcome!" screen appears. You can
check the operations of functions and
make initial settings.
until
3
Tap
4
Tap
5
Tap
6
Tap
Key lock
❖ Information
・
appears on the right until you touch
. You
can switch the ringtone ON/OFF without unlocking
the keys and screen by touching
and
dragging to the left.
Initial settings (Setup guide)
When you turn on the terminal for the first
time, Setup guide appears to set up the
display language, wireless network, online
services, etc. and to import contacts.
❖ Information
・ You can set or change the items later as required.
To change the settings later, from the Home
screen, tap
, then tap [Settings] or [Setup
guide] to set up from the menu.
・ A screen for selecting language
appears.
.
・ The Internet connection screen
appears. Tap [Mobile network or WiFi] or [Wi-Fi only] to select.
.
・ The wireless network screen appears.
Tap [Search for networks] to add Wi-Fi
network.
.
・ The Services screen appears. Make
settings of "Google (P.114)"
"Facebook (P.115)" "Exchange
ActiveSync (P.124)".
.
・ Automatic synchronization screen
appears. Tap [Synchronize
automatically] or [No thank you] to
select.
Before Using the Handset
Continued on next page
35
SO-01D_English
SO-01D_(E).book
7
8
Tap
36 ページ
2011年10月20日 木曜日 午後1時6分
❖ Note
.
・ The import contacts screen appears.
If you have contacts saved in the UIM,
from the Home screen, tap
Tap
[Contacts] then [Import] in "Import
contacts" on the contacts import
screen Tap [SIM card]/[Memory
card] to select "account" Select
"contacts to be imported".
Tap
[Finish].
・ The Home screen appears.
❖ Information
・ Make sure to check if the data connection is
available (3G/GPRS) before setup online services.
For checking the data connection status, see
"Status icons" (P.36).
Status bar
A status bar appears at the top of the screen.
In the status bar, the terminal status and
notification are displayed. Notification icons
appear on the left side, and the terminal
status icons appear on the right side of the
status bar.
Status bar
・ If you cancel the "status bar" of application forcibly
(P.112), operations may not be performed
correctly.
Status icons
The main status icons displayed on the
screen are as follows.
Signal strength
Connecting to
Bluetooth device
During International
roaming
Postioning with GPS
No signal
During Data
synchronization
FOMA HIGHSPEED available
Airplane mode
activated
Sending and
downloading via
FOMA HIGHSPEED
Silent mode
(vibration) ON
GPRS available
Sound OFF
(Ringtone volume 0)
Sending and
downloading GPRS
data
Speakerphone ON
3G available
Microphone set to
mute
Sending and
downloading 3G
data
Alarm is set.
Connecting to Wi-Fi
Battery status
Before Using the Handset
Continued on next page
36
SO-01D_English
SO-01D_(E).book
37 ページ
2011年10月20日 木曜日 午後1時6分
Connecting to Wi-Fi
using AutoIP
function
The battery is
charging.
The Bluetooth
function is ON.
UIM is locked or not
inserted.
microSD card
unmounted
(disabled reading
and writing), ready
to remove
Media server
activated in
Connected devices
microSD card
removed
Media server
connection request
notification in
Connected devices
Bluetooth
connection request
notification
Red: Error
messages
Yellow: Warning
messages
Installation is
completed (when
installing
applications from
Android Market, etc).
Problem with sync
Software update
notification or
updating software
Setup guide
unchecked
Update notification
(when update of the
installed market
application is
notified)
More (undisplayed)
notifications
Outgoing,
receiving, or calling
Setting Wi-Fi
tethering
Calling with
Bluetooth device
Setting USB
tethering
Call on hold
Setting Wi-Fi
tethering/USB
tethering
Notification icons
The main notification icons displayed on the
screen are as follows.
New email
message
Missed call
New Gmail
message
New voice mail
New SMS message
Upcoming calendar
event
Problem with SMS
message delivery
Playing a track
New instant
message
USB connected
New Facebook
message
Data
communication
invalid
Uploading data to
Facebook
New Area Mail
Uploading data to
Facebook
completed
Wi-Fi open network
available
Receiving/
Downloading data
Connecting to a
VPN
Sending/Uploading
data
Not connected to a
VPN
Before Using the Handset
37
SO-01D_English
SO-01D_(E).book
38 ページ
2011年10月20日 木曜日 午後1時6分
Notification panel
Notification icons are displayed in the
Notification panel. You can open notifications,
such as messages, remainders, or event
notifications directly from the Notification
panel.
Opening/Closing the
Notification panel
❖ Information
・ Some notifications cannot be cleared.
Notification LED
Notification LED provides information on the
terminal status, incoming/receiving, etc.
LED status
Status
The battery is charging when
the remaining battery level is
less than 10 %.
Flashing red
The battery level is not enough
for activating the terminal for
turning ON.
Green
The battery is charging when
the remaining battery level is
more than 90 %.
Flashing green
While backlight is off, missed
calls/incoming messages
(SMS)/new email messages
exist.
Flashing white
A call is received.
Flashing blue
Received sp-mode mails while
backlight is off exist.
Orange
The battery is charging when
the remaining battery level is
11 % - 89 %.
Notification panel
1
Drag the status bar downwards.
・ Press x to close the Notification
panel.
Clearing the Notification panel
1
From the Notification panel, tap
[Clear].
Indication
Red
Before Using the Handset
38
SO-01D_English
SO-01D_(E).book
39 ページ
2011年10月20日 木曜日 午後1時6分
Basic operations
Basic hardware key operation
s Google ・ Display entry screen for the
Search
search box to search information
in the terminal or on the Internet.
(P.47)
* In this manual, each key operation is described with
x, y, t, s.
Using the touch screen
Precautions on using touch screen
x Back
・ Go back to the previous screen.
Or close a dialog box, options
menu, or the Notifications panel.
・ Close the software keyboard.
y Home
・ Go to the Home screen.
・ Press and hold down for over a
second to open a list of recently
used applications.
t Menu
・ Open a list of options available
in the Home screen or
application.
・ Touch and hold for 1 second or
more when entering characters
switches display/not display the
software keyboard.
・ From the Home screen, touch
and hold for 1 second or more to
display the software keyboard.
Tap any key to start Google
Search.
・ Touch screen is designed for being touched
lightly with fingers. Do not push it forcibly
with a finger or press it with sharp objects
(nail, ballpoint pen, pin, etc.).
・ Touching the touch screen may not work in
the following cases. Note that it may cause
malfunction.
- Operation with gloved hands
- Operation with tip of fingernail
- Operation with foreign object on the
screen
- Operation with protective sheet or seal on
the screen
Before Using the Handset
39
SO-01D_English
SO-01D_(E).book
40 ページ
2011年10月20日 木曜日 午後1時6分
Operations on the touch screen
■ Tap
Touch an item such as icon or menu with
your finger lightly and release it.
・ Double-tap means tapping twice
quickly.
■ Pinch
Touch the screen with two fingers and
widen (pinch-out) or narrow (pinch-in) the
fingers' distance.
On some screens, pinch-out to zoom in
and pinch-in to zoom out.
■ Touch
Touch and hold an icon or menu item
long.
■ Flick
Stroke the screen with your finger lightly
and flick up/down/left/right.
Flick operation is used to switch or scroll
the screen.
❖ Information
・ You can zoom in or out also by double-tapping or
by tapping the zoom control icons (
/
). The zoom control icons may appear when
you drag in any direction on the screen.
■ Drag
Touch the screen, drag to the desired
position and release the finger.
Before Using the Handset
40
SO-01D_English
SO-01D_(E).book
41 ページ
2011年10月20日 木曜日 午後1時6分
Selecting items quickly from a
list
Some lists have Japanese syllabary and
alphabetic index on the right side of the
screen.
・ Drag your finger along the index to scroll
through the list.
Marking or unmarking options
You can switch ON/OFF of the option settings
by marking or unmarking the checkboxes or
radio buttons.
・ To switch ON/OFF of the option setting, tap
the checkbox or radio button.
■ Checkboxes
Marked
Unmarked
■ Radio buttons
Marked
Unmarked
・ Tap the index character to move on the list.
Before Using the Handset
41
SO-01D_English
SO-01D_(E).book
42 ページ
2011年10月20日 木曜日 午後1時6分
Home screen
The Home screen consists of 5 screens: the center screen and 2 auxiliary screens on right
and left. The center screen is the starting point of the terminal operation. You can personalize
the Home screen by adding or moving, for example, application shortcuts and widgets, or
changing the wallpaper.
a
h i j
a
b
c
d
e
f
g
h
i
j
k
l
m
b
i
i k
c
d
e
l
i
f
i
g
m
Widget: (From the left) ON/OFF: Wi-Fi, ON/OFF: Bluetooth, ON/OFF: Sound, ON/OFF: Backlight
Widget: PlayStation®pocket (Large)
Widget: Google search (P.47)
Home screen position: Show your current position of 5 home screens.
Widget: Digital clock
Widget: Music player
Widget: Photos and videos
Media folder (Gallery, Music, Camera)
Shortcuts (applications)
Wallpaper
Widget: Get games
Widget: TimescapeTM
Application button
Before Using the Handset
42
SO-01D_English
SO-01D_(E).book
43 ページ
2011年10月20日 木曜日 午後1時6分
Switching the Home screen
1
Flick the Home screen to left or
right.
・ The Home screen switches.
❖ Information
・ You can check the current position of the Home
screen with
at the top of the screen.
Changing the Home screen
Adding a shortcut on the Home
screen
1
In "Add to home screen" menu, tap
[Shortcuts].
2
Select a shortcut you want to add.
・ The shortcut appears on the Home
screen.
❖ Information
1
From the Home screen, press
t.
2
Tap [Add].
・ You can add shortcuts of applications on the Home
screen also by the following operation.
- From the Home screen, tap
, touch and hold
down an icon until the Home screen appears
and release the finger where you want to place
the shortcut.
・ "Add to home screen" menu appears
to change the Home screen.
Adding widgets
■ Add to home screen
1
In "Add to home screen" menu, tap
[Widgets].
Shortcuts
Add shortcuts of applications or
setting screens. (P.43)
Widgets
Add widgets. (P.43)
Analog clock
Display the analog clock.
Folder
Add folders to collect shortcuts,
etc. (P.45)
Calendar
Display the calendar.
Data traffic
Switch ON/OFF of data
communication.
Digital clock
Display the digital clock.
Facebook
View comments of members.
Favorites and
call log
Display contacts registered to
Favorites and related call log.
Wallpapers
Change the wallpaper. (P.46)
Themes
Change the theme. (P.46)
❖ Information
・ "Add to home screen" appears also by touching
and holding anywhere on the Home screen without
icons.
・ A list of widgets appears.
Friends' games Sign in Facebook to acquire or
& applications check information on applications
friends use.
Before Using the Handset
Continued on next page
43
SO-01D_English
SO-01D_(E).book
44 ページ
2011年10月20日 木曜日 午後1時6分
Friends' music
& videos
Display lists of videos or music
tracks shared on Facebook.
FUN&
downloads
mini/normal
Display a list of games you can
play with XperiaTM PLAY. (Get
games)
Google Search Display the Quick search box.
Home screen
tips
Display tips of the Home screen
operation.
Latitude
View locations of members.
LiveWareTM
manager
Set to automatically activate
selected application when you
connect Stereo Headset with
Microphone (sample) or
commercially available stereo
earphone set, or connect to
charge with microUSB cable and
AC adapter.
On/Off: Wi-Fi
Switch on/off Wi-Fi function
Photos and
videos
Display photos and videos stored
on the microSD card.
Picture frame
Crop the shot photo to display on
the Home screen.
PlayStation®
pocket (Large)
Display the contents and tab
information of
PlayStation®pocket.
PlayStation®
pocket (Small)
Display the contents of
PlayStation®pocket.
Rate Places
Display information of nearby
stores or post word of mouth.
Status switch
Display the battery level (%),
setting buttons for turning on
Airplane mode, Bluetooth
function, GPS function, Wi-Fi
function, and for switching
speakerphone ON, vibrate, and
Mobile network settings.
Timer
Display Timer.
Display the latest Timescape tile.
Market
Display recommended
applications of Android Market.
Media
shortcuts
Display Music player and Gallery
(photos, videos).
Music player
Display Music player.
TimescapeTM
Widget
News &
Weather
Display news and weather.
TrackIDTM
Display TrackID.
Traffic
On/Off:
Backlight
Turn on/off the backlight.
On/Off:
Bluetooth
Switch on/off Bluetooth function
On/Off:GPS
Switch on/off GPS function
Enter widget name and
destination to display time
required to go to the destination
from the current location and
widget. Tap the widget to check
the traffic information provided.
On/Off:
Roaming
Display setting buttons for mobile
network setting.
Twitter (large)
View comments of members with
entry screen.
On/Off: Sound
Switch between speaker on and
vibrate.
Twitter (small)
View comments of members.
Before Using the Handset
Continued on next page
44
SO-01D_English
SO-01D_(E).book
45 ページ
2011年10月20日 木曜日 午後1時6分
Weather widget View weather in the specified
area.
World clock
YouTube
2
Select time zones to display date
and time of up to 3 cities in the
world.
1
In "Add to home screen" menu, tap
[Folder].
Display the list of frequently
played movies and
recommended.
2
Tap [Done].
Select an item.
❖ Information
・ If you install an application with widget from
Android Market, the installed widget is added to
the widget list.
Displaying widget on the Home
screen by a list
1
Adding a folder to the Home
screen
Adding items to a folder
1
From the Home screen, touch and
hold a shortcut icon until the
terminal vibrates.
2
Drag the shortcut icon over to the
folder.
3
Release your finger from the icon.
From the Home screen, pinch-in.
・ A list of the widgets on the Home
screen appears.
❖ Information
・ To return to the Home screen, pinch-out or tap [Exit
overview] or press x.
・ The folder appears on the Home
screen.
・ To change the folder name, tap
[Create new folder] entry box.
・ The shortcut is added in a folder.
Renaming a folder
1
2
Tap the folder to open it.
3
Tap entry box of [Folder name] and
enter a folder name, and tap
[Done].
Tap the title bar of the folder.
・ A dialog box for changing folder
settings appears.
Before Using the Handset
45
SO-01D_English
SO-01D_(E).book
46 ページ
2011年10月20日 木曜日 午後1時6分
Changing wallpaper
❖ Information
1
In "Add to home screen" menu, tap
[Wallpapers].
2
・ Alternatively, you can change theme from the
Home screen, press t and tap [Theme], or
from the Home screen, press t and tap
[Settings] [Display] [Theme].
Tap [Gallery]/[Live wallpapers]/
[Sony Ericsson wallpapers].
・ When you tap [Gallery], select an
image to set to the wallpaper, pinch
the cropping frame or drag it to area
you want to use as wallpaper, and tap
[Save].
・ When you tap [Live wallpapers],
select a content, tap [Set wallpaper].
You can also download and add Live
wallpaper content from a web page.
・ When you tap [Sony Ericsson
wallpapers], select an image to set to
the wallpaper, tap [Set wallpaper].
❖ Information
・ From the Home screen, you can also press t
and tap [Wallpaper].
Changing the theme
Set the background image for the Home
screen or settings menu from themes.
1
From "Add to home screen" menu,
tap [Themes].
2
Select a theme you want to
change.
Moving an icon on the Home
screen
1
From the Home screen, touch and
hold an icon until the terminal
vibrates.
2
Keep touching the icon and drag it.
3
Release your finger from the icon.
・ To move to another Home screen,
keep touching the icon and drag to
left or right.
Deleting an icon from the Home
screen
1
From the Home screen, touch and
hold an icon until
appears at
the bottom of the screen.
2
Drag the icon to
3
Release your finger from the icon.
.
・ The icon turns in red.
Before Using the Handset
46
SO-01D_English
SO-01D_(E).book
47 ページ
2011年10月20日 木曜日 午後1時6分
・ If you have set a Facebook account
and Facebook inside XperiaTM
account, the posting screen for
Facebook appears in Step 2 to post
on Facebook. You can select send
method by tapping "Other sharing
options".
Sharing shortcuts and widgets
on the Home screen
You can send application shortcuts and
widgets on the Home screen to someone with
an easy operation. You can send/post
download information (URL) of applications
or widgets you found without entering
manually.
1
Touch and hold a shortcut or
widget on the Home screen.
❖ Information
・ Some applications and widgets cannot be shared.
・ You cannot share them unless UIM is inserted.
・ "Share" appears in the status bar area.
2
3
Searching information in
the terminal and web pages
Drag the shortcut or widget to
"Share" without lifting your finger.
・ A selection screen for sending
method appears.
Enter a word in the search box to browse the
information in the terminal or on the Internet.
Select a sending method
(Bluetooth/Facebook/Gmail/
Twitter/message) to send.
1
・ For details on the sending methods,
see "Using Bluetooth function" (P.143),
"Using Gmail" (P.131), "Sending
message (SMS)" (P.122). To post on
Facebook or Twitter, set up each
account referring "Setting Facebook
account" (P.115) in advance to show
the posting screen.
Tap the search box (P.42 c) on the
Home screen.
・ The software keyboard appears.
2
Enter a search word.
3
Tap a search item or
・ Search suggestions appear as you
enter a character.
・ For character entry, see "Character
entry" (P.56).
.
・ To enter a search word again, press
x.
Before Using the Handset
Continued on next page
47
SO-01D_English
SO-01D_(E).book
48 ページ
2011年10月20日 木曜日 午後1時6分
❖ Information
・ Alternatively, from the Home screen, tap
, then
tap [Search] to display search screen.
・ Tap
at the left of the search box to set the
search range from "All", "Web" and "Apps".
・ Tap
at the right of the search box to enter a
search word by voice to browse the Internet.
Searchable
items
You can change the search
range by marking/unmarking
data categories (web, twitter,
Apps, Music, Messaging,
Contacts, Voice search) in the
terminal to search.
Clear shortcuts
You can set not to display
recently selected search results.
Search settings
You can set search engines to use for Quick
search box or set search objectives in the
terminal.
1
Tap the search box (P.42 c) on the
Home screen.
2
Press t, then tap [Search
settings].
Applications screen
You can access the applications installed in
the terminal using the Applications screen.
Displaying applications screen
・ A search settings screen appears.
You can set the following items.
Google search
You can set whether to display
search options when a search
word is entered, or whether to
reflect the previous search result
in the search options. You can
also open the web search log
settings page by Browser.
・ You need to create your
Google account.
Application button
1
From the Home screen, tap
.
・ On the Applications screen, flick left
or right to switch the Applications
screen.
❖ Information
・ To close the Applications screen, tap
x or y.
or press
Before Using the Handset
48
SO-01D_English
SO-01D_(E).book
49 ページ
2011年10月20日 木曜日 午後1時6分
Applications
The applications displayed on the Applications screen by default are as follows.
・ Some applications require separate subscriptions (charged) to use.
Icon
Application
Description
Page
iチャネル
(i-Channel)
An application to use i-Channel
-
Koe-no-Takuhaibin
Use "Koe-no-Takuhaibin" easily and conveniently on the
smartphone. You can record and play voice messages with a
simple operation.
-
melodycall
An application for using melodycall
-
BOOK ストア2Dfacto BOOK ストア 2DFacto is an electronic book store where you can
(BOOK Store 2Dfacto) buy to view e-books in many categories such as serious novels,
popular comics, hot business books, etc.
-
Contacts
Keep contacts of your friends and colleagues.
P.76
Phone
Make and receive calls, and switch between calls.
P.71
Messaging
Send and receive messages (SMS).
P.122
Browser
Browse Web and WAP sites (except for WML) and download
files.
P.133
TimescapeTM
View Social Network Service (SNS), missed calls, message
(SMS) history. You can make a call, send a message, etc. from
the history.
P.170
Settings
Make the terminal settings.
P.93
Setup guide
Display Setup guide.
P.35
Music
Playback music data stored on a microSD card.
P.165
Gallery
View photos and videos you took, and images posted on Picasa P.160
or Facebook.
Alarms
Set an alarm.
P.182
Before Using the Handset
Continued on next page
49
SO-01D_English
SO-01D_(E).book
Icon
50 ページ
Application
2011年10月20日 木曜日 午後1時6分
Description
Page
Camera
Take photos and record video clips.
P.150
Email
Send and receive emails (multiple accounts are also available).
P.124
Market
Access to the Android Market, download and buy new
applications.
P.168
Facebook
Activate Facebook client application.
P.115
Calendar
Display a calendar and manage schedule.
P.179
Video Unlimited
Connect to Video Unlimited to download favorite videos onto the P.185
terminal. you can enjoy watching them at any place.
Maps
Use Google map services, such as viewing current location,
finding another location and calculating routes.
P.176
Gmail
Send and receive mails from/to a Google account.
P.131
Talk
Chat with friends using Google Talk instant messaging.
P.131
Navigation
Display Google map navigation to receive detailed guides for
your destination.
P.178
Places
Use various information registered on Google map, such as
shops around the current location.
P.177
Latitude
Check and share the location information of specified friends.
P.179
Calculator
Perform basic calculations such as addition, subtraction,
multiplication, and division.
-
TrackIDTM
Use a service to check information on the currently played music. P.168
YouTube
Playback videos around the world or upload recorded videos.
P.163
Area Mail
Receive early warning "Area Mail" and view received Area Mail.
P.132
みんなのGOLF(R)2
(EVERYBODY'S
GOLF 2)
A game you can play with PlayStation®pocket.
P.148
Before Using the Handset
Continued on next page
50
SO-01D_English
SO-01D_(E).book
Icon
51 ページ
Application
2011年10月20日 木曜日 午後1時6分
Description
Page
SE Store
Display website introducing accessories for terminals.
P.184
News & Weather
Receive current location information to display weather forecast
or view news in categories.
Downloads
Display a list of downloaded items.
P.112
PlayNow
Access to PlayNow website to browse a variety of beneficial
information.
P.184
Instruction Manual
Display the terminal instruction manual. You can start a function P.2
you want to use from the explanation.
Asphalt 6
A game you can play with XperiaTM PLAY.
P.148
Google Search
Search information in the terminal and web pages from
keywords.
P.47
Connected devices
Set up and manage Media server in Connected devices.
P.147
PlayNow Game
Connect to the game information page in the PlayNow website.
Clock
Display clock and set an alarm, etc.
P.181
docomo market
Access to the docomo market in which you can search
applications and videos.
P.169
APPNAVI
Introduce applications for Android terminals. You can search
applications from categories, rankings, etc.
-
-
-
定型文 (Fixed phrase) Adding phrases, editing phrases such as changing, deleting are P.69
available.
PhoneBookCopy
Move or copy contacts data by using external storage media
such as a microSD card.
P.84
Bruce Lee Dragon Warrior
A game you can play with XperiaTM PLAY.
P.148
Music & Videos
Display lists of videos or music tracks shared on Facebook.
P.183
PlayStation®pocket
Display a list of games you can play with PlayStation®pocket to
buy, download, play some.
P.149
Before Using the Handset
Continued on next page
51
SO-01D_English
SO-01D_(E).book
Icon
52 ページ
Application
Get games
2011年10月20日 木曜日 午後1時6分
Description
Page
Display a list of games you can play with XperiaTM PLAY to buy,
download some.
P.148
OfficeSuite
Browse and read Office documents.
P.183
XperiaTM PLAY
Display a list of games you can play with XperiaTM PLAY to buy,
download, play some.
P.148
Voice Search
Use Google search by voice input.
P.47
SE Home
Website for smartphones where products of Sony Ericsson and
the campaign information are provided.
Update center
Acquire latest software and applications from the website of
Sony Ericsson.
Star Battalion HD
A game you can play with XperiaTM PLAY.
P.148
Games & apps
Sign in Facebook to acquire or check information on
applications friends use.
P.183
クラッシュ・
バンディクー ®
(Crash Bandicoot)
A game you can play with PlayStation®pocket.
P.148
mora touch
Access to mora touch, the music download site.
P.184
LiveWareTM manager
Set to automatically activate selected application when you
connect Stereo Headset with Microphone (sample) or
commercially available stereo earphone set, or connect to
charge with microUSB cable and AC adapter.
-
BeeTV
A broadcasting station for mobile terminals. You can watch
programs such as original dramas, music, variety shows.
-
Phonebook backup
Contacts data can be backed up automatically and regularly to
the contacts backup center. Data can be restored when you lose
the terminal or delete data by mistake.
-
eco モード
(eco mode)
An application to set eco mode which reduces battery
consumption by adjusting terminal setting such as screen
brightness.
-
P.201
Before Using the Handset
Continued on next page
52
SO-01D_English
SO-01D_(E).book
Icon
53 ページ
Application
2011年10月20日 木曜日 午後1時6分
Description
Page
Evernote Launcher
Save various information such as website contents, shot images,
idea memos to the server to search/view at any time you want it.
Saving or viewing information can be available not only from the
terminal but also PC or other devices.
-
書籍・コミック
E★エブリスタ
(Books, comics
E★ EVERYSTAR)
View high-profile electronic books, electronic comics, etc.
ranged from original works by professional authors/famous
people to general user posted popular works.
-
地図アプリ
(Map application)
Functions such as 地図 (Map), お店や施設検索(Shop and facility
search), ナビ(Navigation), 乗換 (Transfer function), 訪れた街
(Visited places) support your outing.
-
マクドナルド
(McDonald's)
You can use McDonald's coupons and shop search function.
-
Mobage
An application to enjoy contents produced by Mobage.
-
PS Store を始めよう
(Let's start PS Store)
Display website featuring "PS Store". Download games and enjoy
them with the terminal.
-
楽天オークション
(Rakuten auction)
An application to place or take bid on the Rakuten auction.
-
ドコモ海外利用
(International
roaming)
Support using packet communications overseas. Data roaming
setting or network operator settings when using Global Pakehodai (flat rate service for packet communication overseas) can
be easily made.
-
spモードメール
(sp-mode mail)
Send/Receive mails using DOCOMO mail address
(@docomo.ne.jp). You can use pictogram and Deco-mail. Mails
can be received automatically.
P.122
ToruCa
Acquire, display, search, and update ToruCa.
P.184
Twitter
Twitter official client application
-
Twonky Special
An application to connect home appliances and the terminal.
You can play back videos, pictures, music on the terminal or web
with TV or audio system wirelessly connected.
-
Before Using the Handset
Continued on next page
53
SO-01D_English
SO-01D_(E).book
Icon
54 ページ
Application
2011年10月20日 木曜日 午後1時6分
Description
Page
G ガイド番組表 (G
View ground-based broadcasting, BS digital broadcasting.
Guide program table) Searching programs by key words or categories and remote
recording from outside the home are available.
-
life.episodeTM
View the latest information such as news and music.
VirusScan
(docomo Anshin
Scan)
An application to protect the terminal from virus. Detect virus
hidden in installed applications or microSD card.
-
Campaign Navi
View campaign information for Xperia.
-
P.184
❖ Information
・ Some application names may not be displayed fully.
・ Some application icons are displayed with a number of missed calls or unread mails.
・ Downloading and installing are needed for some applications. If download does not get started even when
an application is tapped, mark "Unknown sources" (P.111) and then tap the application again.
Before Using the Handset
54
SO-01D_English
SO-01D_(E).book
55 ページ
2011年10月20日 木曜日 午後1時6分
Sorting applications
You can sort the applications displayed on
the Applications screen from the "Arrange
apps" menu.
1
On the Applications screen, tap
.
・ "Arrange apps" menu appears.
Own order
Select an application icon to
sort. (P.55)
Alphabetical
Sort in alphabetical order.
Most used
Sort in frequency order.
Recently installed Sort in install date order.
Selecting an application to move
1
2
On the Applications screen, tap
, then touch and hold an
application icon you want to move
to drag.
Release your finger from the
application icon.
Uninstalling applications
Some application icons can be deleted from
the Applications screen.
・ Before uninstalling application, back up
contents related to the application that you
want to save including data saved in the
application.
・ Some applications cannot be uninstalled.
1
On the Applications screen, tap
.
2
Tap an icon with
3
4
Tap [OK]
.
・ Uninstall screen appears.
Tap
[OK].
.
❖ Information
・ Some applications pre-installed in the terminal
cannot be uninstalled.
・ Application icons can be deleted from the
managing applications screen. For details, see
"Deleting an installed application" (P.113).
・ The application icon moves.
3
Tap
.
❖ Information
・ To move icons to another Applications screen,
drag the icon to the side edge of the screen.
・ To add the Applications screen, drag the icon to
the rightmost screen.
Before Using the Handset
55
SO-01D_English
SO-01D_(E).book
56 ページ
2011年10月20日 木曜日 午後1時6分
Opening the recently used
applications window
You can view and access recently used
applications from this window.
1
Press y for over a second.
・ A recently used applications appear
on a list.
1
On a character entry screen, touch
and hold the text box.
2
Tap [Input method] [International
keyboard]/[Japanese keyboard].
❖ Information
・ You can change Input method (keyboard type)
during character entry.
Software keyboard
Character entry
To enter characters, use the software
keyboard which appears when you tap the
character input box in a message, contacts,
etc.
❖ Information
For Japanese keyboard, there are 3 types of
software keyboards: QWERTY, 12 key and
Japanese syllabary.
❖ Information
・ The key display of software keyboard varies
depending on the entry screen, character mode or
settings.
・ Press x to return to the previous screen from
the character entry screen.
Selecting input method
In this terminal, you can select Input method
(keyboard type) from "International keyboard"
and "Japanese keyboard".
International
keyboard
Select a language for text entry.
Select to enter language other
than Japanese.
Japanese
keyboard
Select to enter Japanese.
Before Using the Handset
56
SO-01D_English
SO-01D_(E).book
57 ページ
2011年10月20日 木曜日 午後1時6分
■ QWERTY keyboard
■ Japanese syllabary keyboard
Japanese characters can be entered in
"Romaji input" mode.
Japanese characters can be entered in
"Kana input" mode using keys arranged
according to the Japanese syllabary.
Portrait
Portrait
Landscape
■ 12 key keyboard
Japanese characters can be entered in
"Kana input" mode.
Landscape
Switching the keyboard
Portrait
Landscape
1
On the character entry screen,
touch and hold the character mode
icon
.
2
Tap
/
/
/
/
.
・
・
・
: The 12 key keyboard appears.
: The QWERTY keyboard appears.
: The Japanese syllabary keyboard
appears.
・ Tap
to display Japanese keyboard
settings screen.
Before Using the Handset
Continued on next page
57
SO-01D_English
SO-01D_(E).book
58 ページ
2011年10月20日 木曜日 午後1時6分
・ Tap
to display plug-in applications
list. Tap [ 定型文 (Fixed phrase)] or
[Contact Picker 2.3] to quote.
❖ Information
・ The QWERTY keyboard is set by default. Also,
"Popup on key press", "Auto capitalization", "Word
suggestions" and "Error correction" are set to on.
Entering characters on the
QWERTY keyboard
Use the QWERTY keyboard to enter
Japanese characters in "Romaji input" mode.
The main functions of the touchkeys
・ To change character modes and other input
operations, tap the following icons on the
QWERTY keyboard.
Icon
/
Function
Each time you tap, the character mode
switches "Number" → "Hiragana/Kanji
→ "Alphabet" in order and a status
icon, → →
/ /
appears in
the status bar.
あ: Hiragana/Kanji
Aa: one-byte alphabet/A: two-byte
alphabet
12: one-byte number/1: two-byte
number
Icon
Function
Display a pop-up window.
/ : Keyboard switch
Touch and
(two-byte)/
(one-byte):
hold
Character mode switch
: Display the setting screen for
Japanese keyboard.
: Display plug-in applications list.
/
Tap to display one-byte symbols/twobyte symbols list and enter them.
Switch the tab to display smileys list
and enter them. (While entering an spmode mail, pictogram tab also
appears.)
A list of plug-in applications appears
Touch and and you can activate the plug-in
application.
hold
Enter punctuation marks such as ? and
!.
Flick from side to side and enter a
space, ・, ∼ , …, 「, 」, (, and ).
Move the cursor*1 to the left. Touch and
hold to move continuously. Or change
the range for conversion.
Move the cursor*1 to the right. Touch
and hold to move continuously. Or
change the range for conversion.
When there is an unfixed character
string with the cursor at the right end,
tap to enter the same character as the
one at the end.
Before Using the Handset
Continued on next page
58
SO-01D_English
SO-01D_(E).book
Icon
*2
59 ページ
2011年10月20日 木曜日 午後1時6分
Function
Fix input characters and converted
characters. When characters are
already fixed, enter a line feed at the
cursor position.
Delete the character before the cursor.
Touch and hold to delete characters
continuously.
1
On the character entry screen,
touch and hold the character mode
icon
.
2
3
Tap
.
Tap [On-screen keyboard settings]
[Select display keys].
・ If the assistant keyboard (P.60) is set
to "Off", "Select display keys" cannot
be selected and the displayed
keyboard cannot be changed.
Enter characters by voice. A candidate
list appears. Tap the character string
you want to enter.
Appears before conversion is fixed.
Tap to switch conversion methods to
" 直変換".
/
In alphabet input mode, tap to switch
upper case and lower case.
In number input mode, tap to switch
symbols possible to enter with the
keyboard.
*1 When any characters are entered, just tap the desired
position on the entered character string to move the
cursor.
*2 " 確定 (Fix)" is displayed before conversion is fixed. In
some screens such as the search box or mail account
registration screen, "次へ (Next)", "完了 (Done)",
" 実行 (Go)", etc. appear.
4
Unmark the checkbox of the key
you want to hide.
5
Tap [OK].
Changing display keys
・ You can change symbols (12) displayed in
(Symbol assistant area) to the ones
you use frequently.
・ For Japanese input, you can set not to
display less-frequent-used keys (Q, X, C,
etc.) on the QWERTY keyboard.
Changing symbols
1
On the character entry screen,
touch and hold the character mode
icon
.
Before Using the Handset
Continued on next page
59
SO-01D_English
SO-01D_(E).book
2
3
Tap
60 ページ
2011年10月20日 木曜日 午後1時6分
.
1
On the character entry screen,
touch and hold the character mode
icon
.
2
3
Tap
4
Tap any of [Static key resizing]/
[Key highlight while typing]/
[Dynamic key resizing with
highlight]/[Off].
Tap [On-screen keyboard settings]
[Change symbols].
・ A list of 12 symbols to be displayed
on QWERTY keyboard appears.
.
Tap [On-screen keyboard settings]
[Choose key type].
■ Static key resizing
Widen frequent using key for easy
tapping.
4
Tap a symbol you want to change
and delete character previously
set, then enter a character to
display.
5
Tap [OK].
❖ Information
・ In Step 3, press t and tap [Reset]
restore to the default.
■ Key highlight while typing
[OK] to
Widen frequent using key and highlight
the key that is predicted for the next entry.
Selecting an assistant keyboard
When you enter in Hiragana/Kanji input mode
using the QWERTY keyboard, you can
change the assistant keyboard to make the
frequent using keys to be displayed widely
for easy tapping.
Before Using the Handset
60
SO-01D_English
SO-01D_(E).book
61 ページ
2011年10月20日 木曜日 午後1時6分
■ Dynamic key resizing with highlight
Widen the key that is predicted for the
next entry much further and highlight it.
Entering characters on the
12 key keyboard
Use the numeric keyboard to enter Japanese
characters in "Kana input" mode.
The main functions of the touchkeys
■ Off
Display equally the width of each key.
・ To change character modes and other
entering operations, tap the following icons
on the 12 key keyboard.
Icon
/
Function
Each time you tap, the character mode
switches "Number" → "Hiragana/Kanji
→ "Alphabet" in order and a status
icon, → →
/ appears in the
status bar.
あ: Hiragana/Kanji
Aa: one-byte alphabet/A: two-byte
alphabet
12: one-byte number/1: two-byte
number
Display a pop-up window.
/
/ : Keyboard switch
Touch and
(two-byte)/
(one-byte):
hold
Character mode switch
: Display the setting screen for
Japanese keyboard.
: Display plug-in applications list.
Before Using the Handset
Continued on next page
61
SO-01D_English
SO-01D_(E).book
Icon
62 ページ
2011年10月20日 木曜日 午後1時6分
Function
Tap to display one-byte symbols/twobyte symbols list and enter them.
Switch the tab to display smileys list
and enter them. (While entering an spmode mail, pictogram tab also
appears.)
A list of plug-in applications appears
Touch and and you can activate the plug-in
application.
hold
Appears before conversion is fixed to
switch conversion methods
("予測変換", "直変換 "). And display
conversion candidates for
alphanumeric characters allocated to
the tapped key.
Appears after conversion is fixed to
return to text before conversion.
Move the cursor*1 to the left. Touch and
hold to move continuously. Or change
the range for conversion.
Move the cursor*1 to the right. Touch
and hold to move continuously. Or
change the range for conversion.
When there is an unfixed character
string with the cursor at the right end,
tap to enter the same character as the
one at the end.
*2
Icon
Function
Delete the character before the cursor.
Touch and hold to delete characters
continuously.
Select the candidates of direct
conversion. When no character is
entered, a space can be entered.
Touch and hold to enter spaces
continuously.
Enter characters by voice. A candidate
list appears. Tap the character string
you want to enter.
Display the previous character
(opposite order).
*1 When any characters are entered, just tap the desired
position on the entered character string to move the
cursor.
*2 " 確定 (Fix)" is displayed before conversion is fixed. In
some screens such as the search box or mail account
registration screen, "次へ (Next)", "完了 (Done)",
" 実行 (Go)", etc. appear.
Settings of key entry
■ Flick input
Flick up/down/left/right to enter
characters in each column of kana
syllabary.
Fix entered or converted characters.
When characters are already fixed,
enter a line feed at the cursor position.
Before Using the Handset
Continued on next page
62
SO-01D_English
SO-01D_(E).book
63 ページ
2011年10月20日 木曜日 午後1時6分
・ Ex: Entering characters in " な "
column
You can enter " な " only by tapping. Flick
left for "に ", up for " ぬ ", right for "ね " and
down for " の ".
Flick up ぬ
Flick left に
な
Tap
ね Flick right
の Flick down
・ To switch upper/lower case or change to
voiced sound, flick or tap
.
・ Flick input is available by default. You
can cancel by the following operation
beforehand.
a From the Home screen, press t
and tap [Settings].
b Tap [Language & keyboard] →
[Japanese keyboard] → [On-screen
keyboard settings].
c Unmark the checkbox of [Flick
input].
■ Toggle entry
Tap the same key continuously to enter
the assigned character.
To enter characters assigned to the same
key continuously, operate the followings.
・ Ex: To enter " あお"
a Tap " あ " once.
b Tap
, and tap " あ " 5 times.
・ Ex: To enter "ca"
a Tap "ABC" 3 times.
b Tap
, and tap "ABC" once.
❖ Information
・ When a certain time is passed after the key
tapped, the tapped key's highlighter goes off and
you can enter a character assigned to the same
key consecutively without tapping
.
・ To switch upper/lower case or change to
voiced sound, tap
.
・ Operate the following to enter
characters in the toggle entry while Flick
input is set.
a From the Home screen, press t
and tap [Settings].
b Tap [Language & keyboard] →
[Japanese keyboard] → [On-screen
keyboard settings].
c Mark [Multitap text input] checkbox.
Before Using the Handset
63
SO-01D_English
SO-01D_(E).book
64 ページ
2011年10月20日 木曜日 午後1時6分
Entering characters on the
Japanese syllabary keyboard
Icon
You can use the software keys arranged
according to the Japanese syllabary to enter
Japanese characters in "Kana input" mode.
The main functions of the touchkeys
A list of plug-in applications appears
Touch and and you can activate the plug-in
application.
hold
・ To change character modes and other input
operations, tap the following icons on the
Japanese syllabary keyboard.
Icon
/
Move the cursor*1 to the left.
Touch and hold to move continuously.
Or change the range for conversion.
Move the cursor*1 to the right.
Touch and hold to move continuously.
Or change the range for conversion.
When there is an unfixed character
string with the cursor at the right end,
tap to enter the same character as the
one at the end.
Function
Each time you tap, the character
mode switches "Alphanumeric" →
"Hiragana/Kanji in order and a status
icon,
/
/
→
appears in
the status bar.
Display a character mode switch
/
Touch and window.
/ : Keyboard switch
hold
(two-byte)/
(one-byte):
Character mode switch
: Display the setting screen for
Japanese keyboard.
: Display plug-in applications list.
Tap to switch upper/lower case or add
voiced sound.
Function
Tap to display one-byte symbols/twobyte symbols list and enter them.
Switch the tab to display smileys list
and enter them. (While entering an spmode mail, pictogram tab also
appears.)
Select the candidates of direct
conversion. When no character is
entered, a space can be entered.Touch
and hold to enter spaces continuously.
*2
Fix entered or converted characters.
When characters are already fixed,
enter a line feed at the cursor position.
Delete the character before the cursor.
Touch and hold to delete characters
continuously.
Input characters by voice. A
candidate list appears. Tap the
character string you want to enter.
Before Using the Handset
Continued on next page
64
SO-01D_English
SO-01D_(E).book
Icon
/
65 ページ
2011年10月20日 木曜日 午後1時6分
Function
Paste
In alphanumerics input mode, tap to
switch between upper case and lower
case or switch to symbols which can
be entered from the keyboard.
Appears in landscape view. Change
settings of Japanese keyboard.
*1 When any characters are entered, just tap the desired
position on the entered character string to move the
cursor.
*2 " 確定 (Fix)" is displayed before conversion is fixed. In
some screens such as the search box or mail account
registration screen, "次へ (Next)", "完了 (Done)",
" 実行 (Go)", etc. appear.
Editing text
While entering characters, touch and hold the
text box to display the "Edit text" menu and
edit entered text.
Select word
Drag the slider to select a part of
entered text.
Select all
Select all entered text.
Display when "Cut"/"Copy" is
selected. Paste the cut/copied text
by "Cut"/"Copy".
Settings of entering
characters
For each type of keyboard, you can make
settings related to character entry.
1
From the Home screen, press
t, then tap [Settings]
[Language & keyboard].
2
Tap [Japanese keyboard]/
[International keyboard].
・ The settings screen for each
keyboard appears. Tap an item
displayed on the screen to set.
❖ Information
・ The items vary depending on the keyboard type.
Input method P.56
Add "xx" to
dictionary
Add the entered text to the
dictionary.
Cut
Display when "Select word"/"Select
all" is selected. Cut the text selected
by "Select word"/"Select all".
Copy
Display when "Select word"/"Select
all" is selected. Copy the text
selected by "Select word"/"Select
all".
Before Using the Handset
65
SO-01D_English
SO-01D_(E).book
66 ページ
2011年10月20日 木曜日 午後1時6分
Settings of Japanese
keyboard
Common on-screen keyboard
settings
You can make keyboard settings such as Key
sound, Vibrate, etc.
1
From the Home screen, press t
and tap [Settings] [Language &
keyboard] [Japanese keyboard].
・ The setting screen for Japanese
keyboard appears.
2
Auto capitalization
Set to automatically capitalize the top letter
you enter in English input mode.
1
From the Home screen, press t
and tap [Settings] [Language &
keyboard] [Japanese keyboard].
2
Mark [Auto capitalization]
checkbox.
Keyboard skin settings
You can change keyboard skin.
1
From the Home screen, press
t, then tap [Settings]
[Language & keyboard].
2
Tap [Japanese keyboard]
keyboard skin].
Tap [Set skin] from the displayed
keyboard.
Tap [On-screen keyboard settings].
・ Tap (mark/unmark) to set an item in
[common on-screen keyboard
settings].
Key sound
Set whether to sound at the
time of key tapping.
3
Vibrate
Set whether to vibrate at the
time of key tapping.
❖ Information
Pop-up on key
press
Set to popup the key you have
tapped at the time of key
tapping.
Keep keyboard
type
Set to stabilize the last status of
keyboard by screen orientation
and kana/alphabet/number
input mode.
[Select
・ To download and add keyboard skins from a
website, tap [Search for skin] in Step 3.
Before Using the Handset
66
SO-01D_English
SO-01D_(E).book
67 ページ
2011年10月20日 木曜日 午後1時6分
Word suggestion settings
The Word suggestion function shows
predicted conversion candidates when you
enter Japanese/English characters. Mark the
checkbox of Word suggestion checkbox to
set options "Error correction" and "Auto
space" These options help you entering
characters with ease.
Setting Word suggestions
1
From the Home screen, press
t, then tap [Settings]
[Language & keyboard].
2
3
Tap [Japanese keyboard].
Mark [Word suggestions]
checkbox.
❖ Information
・ Flick or drag downward in the word suggestion
field to enlarge suggestion field in which you can
see more word suggestions and to hide the
keyboard. To show the software keyboard, tap [ 戻
る (Back)] or press x.
Setting Error correction
1
From the Home screen, press
t, then tap [Settings]
[Language & keyboard].
2
3
Tap [Japanese keyboard].
Mark [Error correction] checkbox.
Setting Auto space
・ When selecting English word suggestion,
Auto space enters a space next to the
entered character. However, space is not
entered automatically in the mail address or
URL input fields.
1
From the Home screen, press
t, then tap [Settings]
[Language & keyboard].
2
3
Tap [Japanese keyboard].
Mark [Auto space] checkbox.
User dictionary settings
To display the word as the preferred
candidate when entering characters, set the
user dictionary beforehand.
・ Error correction corrects mistyped
characters and shows conversion
candidates before conversion in one-byte
alphabet input mode when entering
characters with QWERTY keyboard.
Before Using the Handset
67
SO-01D_English
SO-01D_(E).book
68 ページ
2011年10月20日 木曜日 午後1時6分
Registering words in user
dictionaries
There are 2 types of user dictionaries: "My
words Japanese" (Kana/Kanji) and "My words
English" (one-byte alphabet).
1
From the Home screen, press
t, then tap [Settings]
[Language & keyboard].
Editing user dictionary
1
On the user dictionary screen,
select a word you want to edit.
2
3
Press t, then tap [Edit].
Edit the content and tap [Save].
Deleting words from user
dictionary
2
3
Tap [Japanese keyboard].
Tap [My words Japanese]/[My
words English].
1
On the user dictionary screen,
select a word you want to delete.
4
5
Press t, then tap [Add].
2
Press t, then tap [Delete]
[OK].
6
Enter words in the input box for
"Word" and tap [完了 (Done)].
7
Tap [Save].
Tap the character input box for
"Reading" and fill it out, then tap
[次へ (Next)].
❖ Information
・ Up to 50 characters (regardless of one-byte or
two-byte characters) can be stored for a "Reading"
and "Word", and up to 500 items can be stored in
the user dictionary.
・ When entering characters, tapping [ 直変換 (Direct
conversion)] in the word suggestion field may give
priority to some registered words.
・ Tap [Delete all] [OK] to delete all
words in the list.
Setting Words by learning
1
From the Home screen, press
t, then tap [Settings]
[Language & keyboard].
2
Tap [Japanese keyboard]
words].
3
Mark [Save word while typing]
checkbox.
[Learn
・ To reset all learning, tap "Delete saved
words" [OK].
Before Using the Handset
Continued on next page
68
SO-01D_English
SO-01D_(E).book
69 ページ
2011年10月20日 木曜日 午後1時6分
❖ Information
・ To delete learned words individually, touch and
hold a word you want to delete and tap [ 学習デー
タ削除 (Delete learned word)].
Backing up and restoring
dictionary
User dictionary and Words by learning can
be backed up onto a microSD card and
restored when needed.
1
From the Home screen, press t
and tap [Settings] [Language &
keyboard].
2
Tap [Japanese keyboard]
[Backup & restore].
3
4
Tap [Backup]/[Restore].
5
Tap [Go].
Mark a dictionary you want to back
up or restore from among [My
words Japanese], [My words
English], or [Learn words].
・ If a backed up file exists on the
microSD card when backing up, a
screen asking whether to overwrite
appears. When restoring, a screen
asking whether to overwrite the user
dictionary in the terminal appears.
6
Tap [OK]
[OK].
・ The data is backed up or restored.
❖ Information
・ If restoring data is failed, user dictionary in the
terminal restores to the default.
Using plug-in application "定型
文 (Fixed phrase)", "Contact
Picker 2.3"
When entering characters, touch and hold
or character mode icon
and tap
to
view plug-in applications list. Tap a plug-in
application, " 定型文 (Fixed phrase)" or
"Contact Picker 2.3" to quote. Phrases are
saved in 5 categories of "インターネット
(Internet)", " あいさつ (Greeting)", " ビジネス
(Business)", "返事 (Reply)", " プライベート
(Private)" in advance. You can add, delete
and edit categories and phrases.
If contacts are saved in Contacts, you can
use "Contact Picker 2.3" when entering
character. From the saved contents (name of
contact, phone number, mail address, etc.) in
Contacts, mark items you want to quote. On
the contacts list screen, tap [History] or
[Favorites] to display selected contacts.
Before Using the Handset
69
SO-01D_English
SO-01D_(E).book
70 ページ
2011年10月20日 木曜日 午後1時6分
Adding a category of phrases
3
On the Info screen, tap [OK].
4
5
Tap [Download new applications].
Add a new category and register a phrase.
1
From the Home screen, tap
,
then tap [ 定型文 (Fixed phrase)].
A list of categories appears.
2
Press t, then tap [ カテゴリー追
加 (Add category)].
3
Enter the category name and tap
[OK].
4
Tap [新規追加 (Add phrase)] and
enter a phrase.
5
Tap [OK].
❖ Information
・ When you tap each category, a list of registered
phrases appears. Tap a phrase to edit/delete.
・ To restore the default phrases, in the category list,
press t, then tap [ 初期化 (Reset)].
Adding a plug-in application
You can install and add plug-in applications
to use when entering characters.
1
From the Home screen, press
t, then tap [Settings]
[Language & keyboard].
2
Tap [Japanese keyboard]
[Manage applications].
The plug-in setting screen appears.
Tap an application and follow the
onscreen instructions.
❖ Information
・ Marked plug-in applications in the plug-in setting
screen can be activated in the character entry
screen. Checkboxes for preinstalled plug-in
applications, " 定型文 (Fixed phrase)" and "Contact
Picker 2.3" are marked by default.
POBox Touch User Guide
You can view the detailed explanations on the
high performance Japanese keyboard from
the basic to application. The latest
information can be obtained from the
websites for plug-in applications or keyboard
skins.
1
From the Home screen, press t
and tap [Settings] [Language &
keyboard].
2
Tap [Japanese keyboard]
[POBox Touch User Guide].
Before Using the Handset
70
SO-01D_English
Calling/Network Services
SO-01D_(E).book
71 ページ
2011年10月20日 木曜日 午後1時6分
Making/Receiving calls
Making a call
Entering pause (,)
This function allows you to operate voice mail
at home, to reserve tickets or to check the
balance of a bank account, etc.
1
From the Home screen, tap
[Phone].
1
From the Home screen, tap
[Phone].
2
Enter the number of the recipient
and tap [Call].
2
Enter the number of the recipient
and touch and hold the asterisk (*)
key until a comma (,) appears.
・ If a wrong number is entered, tap
on the right of the phone number field
to delete the number.
❖ Information
・ If the screen orientation does not change
automatically when you turn the terminal sideways,
from the Home screen, press t and tap
[Settings] [Display], then mark [Auto-rotate
screen] checkbox.
Emergency call
When the terminal is within range of the
service area, you can make an emergency
call of 110 (Police), 119 (Fire and ambulance)
or 118 (Japan Coast Guard).
1
From the Home screen, tap
[Phone].
2
Enter the emergency number and
tap [Call].
・ If a wrong number is entered, tap
on the right of the phone number field
to delete the number.
Calling/Network Services
Continued on next page
71
SO-01D_English
SO-01D_(E).book
72 ページ
2011年10月20日 木曜日 午後1時6分
❖ Note
・ In Japan, when UIM is not inserted to the terminal,
the emergency numbers of 110, 119, 118 are not
available.
・ This terminal supports "Emergency call location
information". If you make a call to emergency
numbers such as 110, 119, or 118, the information
of a location where you are calling from (location
information) is automatically notified to the
Emergency call acceptance organization such as
the Police Station.
The Emergency call acceptance organization may
not be able to figure out your exact location
depending on the location where you place a call
or radio wave condition.
If you make a call without the caller ID, such as by
entering a phone number with "184" for each call,
the location information and phone number are not
notified. However, the Emergency call acceptance
organization may decide to obtain the location
information and phone number regardless of your
settings when they consider it is necessary for
lifesaving, etc. Note that the areas/time for which
the "Emergency call location information" is ready
to be used vary depending on the preparatory state
of each Emergency call acceptance organization.
・ When you call the Police (110), Fire/Ambulance
(119), or Maritime rescue (118) from the terminal,
clearly indicate that you are calling from a mobile
phone, give your phone number and your current
location precisely for checking callback from the
police/fire department. Also, make a point to call in
a stationary position to prevent the call from being
dropped. Do not power off the terminal for at least
10 minutes after the emergency call just in case
the Police or Fire/Ambulance may have to get in
contact with you.
・ Note that you may not connect to the local Fire
Department or Police Station depending on where
you are calling from. In this case, try to call from a
public phone or an ordinary phone in the
neighborhood.
Emergency call during SIM card
lock
1
2
Tap [Emergency call].
Enter the emergency number and
tap [Call].
・ If a wrong number is entered, tap
on the right of the phone number field
to delete the number.
❖ Note
・ In Japan, while entering PIN code on the screen
(P.108) or during PUK lock (P.109), the emergency
numbers of 110, 119, 118 are not available.
Ending a call
1
Tap [End call].
Making an international call
(WORLD CALL)
For details on WORLD CALL, refer to
DOCOMO International Services website.
1
From the Home screen, tap
[Phone].
Calling/Network Services
Continued on next page
72
SO-01D_English
SO-01D_(E).book
2
73 ページ
2011年10月20日 木曜日 午後1時6分
Touch and hold [0] key until "+"
sign appears.
・ When making an international call, "+"
is replaced by an international access
code.
3
Enter the country code Area
code A phone number of
recipient and tap [Call].
・ If the area code begins with "0", omit
"0". However, "0" may be required to
dial to some countries or areas such
as Italy.
❖ Information
・ The icon appears even during the screen lock or
key lock, and you can decline a call by the same
operation.
Using Stereo Headset with
Microphone
You can make or answer a call with Stereo
Headset with Microphone (Sample)
connecting to the terminal.
Microphone
Receiving a call
1
While receiving a call, touch
(left) and drag it to
(right).
Switch
❖ Information
・ If you are using regular headphones without a
microphone, you need to speak to the microphone
of the terminal.
・ The icon appears even during the screen lock or
key lock, and you can answer a call by the same
operation.
Headset connection jack
Declining a call
1
While receiving a call, touch
(right) and drag it to
(left).
Calling/Network Services
73
SO-01D_English
SO-01D_(E).book
74 ページ
2011年10月20日 木曜日 午後1時6分
■ Making a call
1
Make a call with Stereo Headset
with Microphone connected.
・ An operation of making call is the
same as usual operation. (P.71)
2
Press the switch to end the call.
Adjusting the ear speaker
volume
1
Press m during a call.
❖ Information
・ You can adjust the ear speaker volume only during
a call.
■ Receiving a call
1
While receiving a call, press the
switch of Stereo Headset with
Microphone.
・ The call is connected.
・ When receiving a call, you can
decline the call by pressing the switch
for over a second.
2
To end a call, press the switch
again.
Muting the ringtone for an
incoming call
1
Press m when a call is
received.
❖ Information
・ You can also press p to mute the ringtone for
an incoming call.
・ Press up or down of m on the Home screen
to adjust the ringtone volume.
❖ Information
・ Even when you listen to music with Stereo Headset
with Microphone connecting to the terminal, you
can answer a call by pressing the switch. Music
pauses on calling, and restarts when ending the
call.
・ Connecting and removing Stereo Headset with
Microphone repeatedly during a call may
disconnect a call.
Calling/Network Services
74
SO-01D_English
SO-01D_(E).book
75 ページ
2011年10月20日 木曜日 午後1時6分
i End call
Operations during call
t: During a call, press t and tap [Hold],
while a call is on hold, press t and tap [Retrieve
call].
・ To set a call on hold, "Call waiting" subscription
is required. (P.88)
■ Calling screen
a
e
b
c
f
g
d
h
❖ Note
・ Do not bring the terminal close to your ear with the
speakerphone ON to avoid hearing damage.
Call log
i
a A photo saved in Contacts
b Name of the other party
c Speaker: Set speakerphone on/off.
・ Other party's voice can be heard from the
speaker and handsfree call can be made.
・ When the speakerphone is on, a speakerphone
icon
appears in the status bar.
d Contacts: View contacts list screen.
e Call duration time
f Number of the other party
g Mute: Set muting on/off of the microphone during
a call.
・ When the microphone is muted, a mute icon
appears in the status bar.
h Dial key: Enter the phone number you want to add
to make a call.
・ The ongoing call is automatically on hold.
・ To add a call, "Call waiting" subscription is
required. (P.88)
In the call log, missed (
), received ( ),
and dialed (
) calls are displayed in the list
in chronological order.
Displaying missed calls
When you have missed calls,
the status bar.
1
2
appears in
Drag the status bar downwards.
Tap [Missed call].
Calling a number from the call
log
1
From the Home screen, tap
[Phone] [Call log].
2
Tap
next to the desired number.
Calling/Network Services
75
SO-01D_English
SO-01D_(E).book
76 ページ
2011年10月20日 木曜日 午後1時6分
Adding a number from the call
log to your contacts
1
From the Home screen, tap
[Phone] [Call log].
2
Tap and hold the number, then tap
[Add to Contacts].
・ You can select [Add to Contacts] from
the menu displayed when you tap the
number.
3
Tap desired contact, or tap [Create
new contact].
・ Tap [Create new contact] to display a
screen for selection of the saving
locations appears. You can select
Phone contact or docomo account as
the saving location.
4
Edit the contact details and tap
[Done].
Deleting the call log
1
From the Home screen, tap
[Phone] [Call log].
2
Press t, and tap [Clear call
log].
❖ Information
・ You can delete only one contact by touching and
holding a contact to delete on the call log list, then
tapping [Delete from call log].
Contacts
In Contacts, you can enter various
information for contacts, for example, phone
numbers, email addresses and web service
accounts. When you view a contact, you get
quick access to all communication with that
contact.
Opening Contacts
1
From the Home screen, tap
then tap [Contacts].
,
・ The contacts list screen appears.
・ You can also open Contacts from the
Home screen, tap [Phone]
[Contacts].
❖ Information
・ The first time you open Contacts, a setup wizard
starts. In the setup wizard, you can load contacts
from UIM or microSD card, or synchronize contacts
with the account that you specified in advance. To
use Contacts, tap [Done].
Calling/Network Services
Continued on next page
76
SO-01D_English
SO-01D_(E).book
77 ページ
2011年10月20日 木曜日 午後1時6分
・ If the screen orientation does not change
automatically when you turn the terminal sideways,
from the Home screen, press t and tap
[Settings] [Display], then mark [Auto-rotate
screen] checkbox.
* Depending on the usage, it may be different from online
display of Google Talk.
Managing contacts
Adding a contact
Contacts list screen
On the contacts list screen, you can view
details of your contacts. You can add a
contact picture, and display updating status
information of Social Networking Service
(SNS).
a
c
d
b
e
f
1
On the contacts list screen (P.77),
tap
at the top right.
2
Tap [docomo]/[Phone contact].
3
4
Enter a name.
h
a
b
c
d
e
f
Contact search field
A picture saved in Contacts
Icon for adding a new contact
Myself (your own phone number)
A contact saved in Contacts
Japanese syllabary or alphabetical index for
browsing contacts
g Online status* of Google Talk (Chat) (P.131)
h Updating status information for the Social
Networking Service (SNS)
i Screen tabs (Phone/Call log/Contacts/Favorites)
Enter or select the desired
additional information for the
contact.
・ You can add items other than phone
number, email address and ringtone
by tapping [Add field].
g
i
・ When you set Google account etc., it
appears as a saving location.
5
Tap [Done].
❖ Information
・ For using "Send calls directly to voicem.", a
subscription of Voice Mail service is required. For
details, see "Voice Mail Service" (P.86).
・ When you save " ふりがな(姓/名)(Reading
(Last name/First name))", contacts list is displayed
according to Japanese syllabary order or
alphabets (only when Select language is set to 日
本語 (Japanese)).
Calling/Network Services
77
SO-01D_English
SO-01D_(E).book
78 ページ
2011年10月20日 木曜日 午後1時6分
Using shortcuts of Contacts
When you tap the photo (image) part on
contacts list screen, shortcuts for phone
number, mail, etc. appear. Tap the shortcut to
make a call, or create and send a mail.
Make a call to saved phone number.
"Info" filter (P.82) screen of the contact
appears.
Changing display conditions for
contacts
Press t and tap [Filter] on the contacts
list screen to set display items, saving
location (docomo, phone contact) and
whether to show or hide for each account.
■ Filter contacts
Mark the following items to set.
Create and send message (SMS).
Select an email application to create and send
an email.
Contacts with
phone numbers
Show only contacts with phone
numbers registered.
* You can also use the registered Google Talk account,
addresses, etc.
Online contacts Show only the contacts of online
Google talk users.
❖ Information
■ Setting to show/hide contacts
・ When you tap a part other than photo (image) on
the contacts list screen, "Info" filter (P.82) screen of
the contact appears instead of shortcuts.
・ Email shortcut appears when email address is
saved in the selected contact and you have set
your email account. If you have not set your email
account, shortcut for Gmail
/
appears.
*
Tap a Social Networking Service (SNS)
name which is made contacts saving
location setting or account setting (P.115)
and mark [All contacts] checkbox to show
synchronized contacts. Unmark to hide
the contacts.
cannot be used.
Searching for a contact
Editing a contact
1
1
On the contacts list screen (P.77),
enter searching name or reading in
the search field.
・ All contacts beginning with those
letters appear.
On the contacts list screen (P.77),
tap the name part of contact you
want to edit.
・ "Info" filter (P.82) screen of the contact
appears.
Calling/Network Services
Continued on next page
78
SO-01D_English
SO-01D_(E).book
79 ページ
2011年10月20日 木曜日 午後1時6分
・ When you tap the image (photo) part
of the contact, contact shortcuts
appear (P.78). Tap
to display "Info"
filter screen.
2
3
Tap [Edit].
・ By tapping
(Add field) on the
editing screen, you can add
information to enter.
Edit the desired information and
tap [Done].
Deleting contacts
1
On the contacts list screen (P.77),
press t, then tap [Delete
contacts].
2
Mark the contacts you want to
delete.
・ If you want to delete all contacts, tap
[Mark all].
3
Tap [Delete]
[OK].
Linking contacts
❖ Information
You can bind multiple contacts together into
one.
・ You can also delete the contacts by touching and
holding a contact on the contacts list screen, then
tapping [Delete contact] [OK].
1
Calling a contact
On the contacts list screen (P.77),
touch and hold the desired
contact, then tap [Join contacts].
・ The link candidates appear.
2
3
Tap the contact to link.
Tap [OK].
❖ Information
・ To cancel link of contacts, on Contact edit screen,
press t, then tap [Separate] [OK].
1
On the contacts list screen (P.77),
tap a name of contact to call to.
2
Tap a desired phone number.
Checking Myself and editing
contact information
1
On the contacts list screen (P.77),
tap [XXX-XXXX-XXXX] (Myself) at
the top of the contact list.
2
Tap [Edit].
・ The "Myself" edit screen appears.
Calling/Network Services
Continued on next page
79
SO-01D_English
SO-01D_(E).book
3
4
80 ページ
2011年10月20日 木曜日 午後1時6分
Enter the new information or make
the changes you want.
4
・ By tapping
(Add field) on the
editing screen, you can add
information to enter.
❖ Information
When you are done, tap [Done].
❖ Information
・ In "Myself", you can add multiple phone numbers,
emails, etc. The history of dialed/received calls to/
from the registered phone numbers is displayed in
"Calls" of "Info" filter (P.82) screen.
・ If you set an email account by "Email" application,
your email account is shown on the "Myself"
detailed screen but not on the "Myself" edit screen.
Sending your contact via
Bluetooth/Email/Gmail
You can send the saved contacts or "Myself"
information by using Bluetooth function
(P.143), email attachment, etc.
1
2
On the contacts list screen (P.77),
press t, then tap [Send
contacts].
Mark the contacts you want to
send.
Select sending method and follow
the onscreen instructions.
・ To use Bluetooth function, tap [Turn on] to activate
Bluetooth function, search destination Bluetooth
devices, and send data.
・ If you want to send data as files attached to email/
Gmail, send from the compose screen for the mail
service in which you have set an account. If you
select "Gmail" when you have not set an account,
setup wizard appears. You can create and send
email after settings are done.
Marking a contact as a favorite
You can mark a contact as a favorite. The
favorite list provides quick access to the
contacts you have marked.
1
On the contacts list screen (P.77),
touch and hold the contact you
want to mark.
2
Tap [Add to Favorites].
❖ Information
・ You can also add the contacts to favorites by
tapping [Favorite] on "Info" filter (P.82) screen.
・ On the contacts list screen, tap [Favorites] to
display contacts registered to Favorites.
・ If you want to mark all contacts, tap
[Mark all].
3
Tap [Send]
[OK].
Calling/Network Services
80
SO-01D_English
SO-01D_(E).book
81 ページ
2011年10月20日 木曜日 午後1時6分
Setting a photo to a contact
1
On the contacts list screen (P.77),
tap the contact.
2
3
4
Tap [Edit].
5
Tap
1
・ The screen for basic settings for
synchronization and account
management appears. If you do not
have an account yet, you can tap
[Add account] to set. (P.115)
.
Tap [Gallery]/[Take new photo].
・ Select [Gallery] to select a saved
photo and add it.
・ Select [Take new photo] to shoot a
photo and save it.
Tap [Done].
2
Tap an account name.
3
Tap [Sync Contacts].
❖ Information
・ You can also set photo to a contact by the
following operation.
- From the Home screen, [メディア (Media)]
Tap [Gallery]. Select an image to set, press t
and tap [Set as]
[Contact picture]. Select a
contact you want to register to and tap [Save].
Displaying contacts
information for the Social
Networking Service (SNS)
If you have an account set for a Social
Networking Service (SNS) (P.115), you can
synchronize contacts to display contacts
information such as "Friends" on the contacts
list screen. You can also display updating
status information of each service.
On the contacts list screen (P.77),
press t, and tap [Settings]
[Accounts & sync].
・ Items which can be synchronized
appear.
・ After synchronization is complete,
contacts information such as "Friends"
appears on the contacts list screen.
・ You can mark [Activate auto-sync]
checkbox in Step 2 to synchronize.
For information on automatic
synchronization, see "Setting
automatic synchronization" (P.116).
■ Setting to show or hide updating
status information
1
On the contacts list screen (P.77),
press t, and tap [Settings]
[Show status updates].
・ A selection screen of the service to
display updating status information
appears.
Calling/Network Services
Continued on next page
81
SO-01D_English
SO-01D_(E).book
2
82 ページ
2011年10月20日 木曜日 午後1時6分
Tap an item you want to display.
・ Tap [All] to show updating status
information of all networking services.
If 2 or more service links are set,
single information of the most recently
updated account can be seen.
・ Tap [Off] not to display status
updating information.
Dialing Service dial number
1
On the contacts list screen (P.77),
press t, and tap [Settings]
[Service dial number].
・ Service dial number ( ドコモ総合案
内・受付 (General Inquiries), ドコモ
故障問合せ (Repairs), etc.) saved on
the UIM appear.
2
Tap a contact you want to call.
Filter
Information
Photos
Image posted by "Friends" in
contacts or tagged image
Interests
" いいね! (like)" information posted
by "Friends" in contacts
Facebook
Facebook status updates for the
contact
・ Appears if you have connected to
update information from Facebook
account in Timescape.
Messages
Message (SMS) conversations
history with the contact
Calls
Call history with the contact
Exporting/Importing contacts
You can export/import contacts from/to
microSD card or UIM. This is useful, for
example, when you want to transfer the
contact information to another phone.
❖ Information
The contact information filter
When you are viewing a contact details
screen, you can flick the filter at the bottom of
the screen right or left to show the following
information.
Filter
Info
Information
・ You can also use a synchronization service for
synchronizing your contacts. For details, see "Data
synchronization" (P.116).
・ When contacts are imported to other mobile
phone, phone number type "Home:/H", "Mobile:/M"
or "Work:/W" may appear at the next to the name of
the contacts backed up from the terminal to UIM. If
there is no corresponding item, "/O" may appear.
Contact phone numbers, mail
addresses, Facebook profile, latest
status information, etc.
Calling/Network Services
82
SO-01D_English
SO-01D_(E).book
83 ページ
2011年10月20日 木曜日 午後1時6分
Exporting all contacts on microSD
card
4
1
On the contacts list screen (P.77),
press t, then tap [Back up
contacts] [Memory card].
・ Some part of data may not be imported or
exported depending on the contacts.
2
Tap [OK].
❖ Information
・ If display conditions for contacts (P.78) are set,
only contacts to be displayed are exported.
Importing contacts from microSD
card
1
2
3
On the contacts list screen (P.77),
press t, then tap [Import
contacts] [Memory card].
Tap [docomo]/[Phone contact].
・ When you set Google account etc., it
appears as an import destination.
Select the vCard file to import.
・ If there is only one vCard file, vCard
file selection screen does not appear.
The file is imported immediately.
・ If a vCard file has multiple contacts,
they are imported all at once.
・ If there are 2 or more vCard files, tap
any of [Import vCard file]/[Import
vCard files]/[Import all vCard files] to
select.
Tap [OK].
❖ Information
Exporting names and numbers on
UIM
1
On the contacts list screen (P.77),
press t, then tap [Back up
contacts] [SIM card].
2
Mark the contacts you want to
copy.
・ If you want to mark all contacts, tap
[Mark all].
3
4
Tap [Back up].
Tap [Add contacts]/[Replace all
contacts].
・ If you select [Replace all contacts], all
existing UIM information is replaced.
❖ Information
・ When you copy a contact to the UIM, only the
contact name and the first number is saved. This is
due to limited memory on a UIM.
・ Contacts without phone number cannot be saved
to the UIM.
Calling/Network Services
83
SO-01D_English
SO-01D_(E).book
84 ページ
2011年10月20日 木曜日 午後1時6分
Importing contacts from UIM
1
On the contacts list screen (P.77),
press t, then tap [Import
contacts] [SIM card].
2
Tap [docomo]/[Phone contact].
3
To import one contact, tap the
contact you want to import.
・ When you set Google account etc., it
appears as an import destination.
・ To import all contacts, tap [Import all].
・ If there is a contact whose name is
matched with the imported contact,
the contact is imported as a
separated one.
❖ Information
・ Names and phone numbers can be imported.
Using PhoneBookCopy
You can copy the Contacts data to or from
another terminal by using microSD card. You
can also copy the Contacts data registered in
Google account to docomo account.
1
From the Home screen, tap
then tap [PhoneBookCopy].
Exporting contacts to microSD
card
1
Attach a microSD card to the
terminal.
2
On the " エクスポート (Export)" tab
screen, tap [開始 (Start)].
・ The Contacts data saved in docomo
account is saved onto the microSD
card.
Importing contacts on microSD
card
1
Attach a microSD card contains
the Contacts data to the terminal.
2
On the " インポート (Import)" tab
screen, tap a file you want to
import.
3
Tap [上書き (Overwrite)]/
[追加 (Add)].
・ Imported Contacts data is saved in
docomo account.
,
・ For the first time of use, agree to "使用
許諾契約書 (License Agreement)".
Calling/Network Services
84
SO-01D_English
SO-01D_(E).book
85 ページ
2011年10月20日 木曜日 午後1時6分
Copying contacts registered in
Google account to docomo
account
1
On the "docomoアカウントへコ
ピー (Copy to account)" tab
screen, tap a Google account you
want to copy.
2
Tap [上書き (Overwrite)]/
[追加 (Add)].
・ Copied Contacts data is saved in
docomo account.
・ You can also copy the Contacts data
saved in "Phone contact" to docomo
account as well as Google account.
❖ Information
・ If contact item names (e.g. Phone number, etc.) of
the other terminal are different from ones of your
terminal, the item names may be changed or
deleted. Also, some text may be deleted in copied
destination, because savable characters in a
contact vary by terminal.
・ Group information cannot be imported.
・ When exporting contacts to microSD card, data
without Name cannot be copied.
・ When importing contacts from microSD card, files
created by "all backup" cannot be loaded.
Network Services
Available Network Services
You can use the following DOCOMO network
services on the terminal. For details on the
outline and how to use each service, see the
relevant pages indicated in the following table.
・ You cannot use the network services when
you are outside of the service area or in a
location without the radio wave.
・ "Stop of service" does not mean canceling
the subscription such as Voice Mail service,
Call Forwarding Service, etc.
・ For details, see the "Mobile Phone User's
Guide [Network Services]".
・ For subscription and inquiry, contact
"General Inquiries" on the last page of this
manual.
Service name
Monthly
charge
Application Page
Voice Mail
Service
Paid
Required
P.86
Call Waiting
Service
Paid
Required
P.88
Call Forwarding
Service
Free
Required
P.90
Caller ID
Notification
Service
Free
Not required
P.91
Calling/Network Services
Continued on next page
85
SO-01D_English
SO-01D_(E).book
86 ページ
2011年10月20日 木曜日 午後1時6分
❖ Information
・ In this manual, the outlines of each network service
are described with menu operations.
Voice Mail Service
The Voice Mail Service takes messages for
you, as long as it answers a call with the
answering message, if there is an incoming
call when you are in a location without the
radio wave, while the terminal is powered off,
or when you cannot answer a call within the
preset ring time.
・ When the Voice Mail Service is set to
"Activate" and if you do not answer an
incoming call, the call is saved in "Call log"
as a "Missed call" and
(Missed call)
appears in the status bar.
・ The terminal does not support Voice Mail
service of videophone call. Call "1412" to set
"Not support".
❖ Information
・ This terminal does not have Record message
function which records voice messages on internal
memory. Use the Voice Mail Service.
・ The message can be recorded up to 3 minutes for
1 message, up to 20 messages, and stored up to
72 hours.
・ The number of Voice Mail messages appears until
you have played all messages.
Basic flow of the Voice Mail
Service
Activate the Voice Mail Service.
▼
Your terminal receives a call.
▼
If you do not answer the call, it is
connected to the Voice Mail service
center.
▼
The caller leaves a message.
If you are in a hurry and wish to leave a
message without listening to the Voice
Mail answering message, you can
interrupt the answering message and
switch to message recording mode
immediately by tapping [Dialpad] → [#].
▼
The receiver is notified that the Voice
Mail service center has taken the voice
message.
▼
Play the voice message.
Calling/Network Services
86
SO-01D_English
SO-01D_(E).book
87 ページ
2011年10月20日 木曜日 午後1時6分
Setting Voice Mail Service
1
From the Home screen, press t
and tap [Settings].
2
Tap [Call settings]
service setting].
3
Tap [Voicemail].
[Network
Check messages* Check if a new message is
stored. After checking, the
completion message appears.
Notification
settings
Set whether to alert you of a
new message with the tone or
vibration.
Activate Missed
Call Notif.
When it is received while the
terminal is powered off or
outside of the service area, an
SMS is sent to notify you of the
information about the call (date,
time and the caller ID) once you
turn the terminal back on or
move back in to the service
area.
Select [All Calls] to notify you of
all received calls.
Select [Calls with Caller ID] to
notify you of only the calls with
the caller ID.
Deactiv. Missed
Call Notif.
While starting the notification,
tap [OK] to deactivate the
notification.
Check setting
Check the notification settings.
・ Select items you want to use from the
following.
Activate
Voicemail
Tap [OK] to activate the Voice
Mail Service.
Set ring time
Enter the ring time (0 to 120
seconds).
It changes only the ring time.
If the ring time is set to 0
seconds, an incoming call is
not saved in "Call log".
Deactivate
Voicemail
Tap [OK] to deactivate the
Voice Mail Service.
Check Voicemail
setting
Check the current service
settings.
Play messages*
Tap [OK] to call the Voice Mail
service center. After this step,
follow the voice prompts to play
the message.
Voicemail
setting*
Tap [OK] to change the Voice
Mail setting with the voice
prompts. The call is connected
to the Voice Mail service center.
After this step, follow the voice
prompts to operate.
* After operation is finished, you receive the "NTT
DoCoMo VM:XX" SMS.
❖ Information
・ If you have the recorded messages stored at the
Voice Mail service center,
(New arrival SMS
message) and
(Voice Mail message) appear
on the status bar.
(Voice Mail message)
disappears when you delete all messages.
・ The notification setting and notifications (message
(SMS) reception) are not charged.
Calling/Network Services
87
SO-01D_English
SO-01D_(E).book
88 ページ
2011年10月20日 木曜日 午後1時6分
Playing the voice message
Setting Call Waiting
1
1
From the Home screen, press t
and tap [Settings].
2
Tap [Call settings]
service setting].
3
Tap [Call Waiting].
When the SMS notification "NTT
DoCoMo VM:XX" appears, tap
[New message] from the
Notification panel (P.38).
・ A recorded message plays.
2
Follow the voice prompts to
operate.
Call Waiting
When there is another incoming call while you
are on a call, the in-call ringtone notifies you
of the second call. You can answer the
second call by putting the first call on hold.
You can also put your current call on hold and
place a call to another party.
❖ Information
・ Even when the call is on hold, the caller is charged
for a call fee.
[Network
You can select the following operations.
Activate Call
Waiting
Tap [OK] to activate the Call
Waiting Service.
Deactivate Call
Waiting
Tap [OK] to deactivate the Call
Waiting Service.
Check settings
You can check the current
service settings.
Putting the current call on hold and
answering an incoming call
1
When you hear the beep during a
call, tap [Answer].
The first call is put automatically on hold
and the incoming call is received.
・ The terminal does not support
Conference call.
・ Tap [Busy] to connect the incoming
call to the Voice Mail service center.
Activating Voice Mail service is
required beforehand.
Calling/Network Services
Continued on next page
88
SO-01D_English
SO-01D_(E).book
2
89 ページ
2011年10月20日 木曜日 午後1時6分
Switch to the first call.
・ To end the later call, tap [End call].
The later call is terminated and
switched to the first call.
・ To put the later call on hold, tap
[Switch to this call].
The later call is put on hold and
switched to the first call. Tapping
[Switch to this call] switches to the
other party.
Ending the current call and
answering an incoming call
1
When you hear the beep during a
call, tap [End current call and
answer].
・ The first call is terminated and the
incoming call is received.
Putting the current call on hold and
making a call to another party
1
During a call, tap [Contacts]/
[Dialpad].
2
Enter the other party's phone
number, then tap .
・ The first call is automatically on hold
and switched to the new call you
made. You can also search for a
contact by tapping [Contacts] and
[Call log].
3
Switch to the first call.
・ To terminate the new call, tap [End
call].
The new call is terminated and
switched to the first call.
・ To put the new call on hold, tap
[Switch to this call].
The new call is put on hold and
switched to the first call. Tapping
[Switch to this call] switches to the
other party.
Calling/Network Services
89
SO-01D_English
SO-01D_(E).book
90 ページ
2011年10月20日 木曜日 午後1時6分
Call Forwarding Service
Call charge for the Call Forwarding
Service
The Call Forwarding Service forwards a voice
call to a preset forwarding number when you
are in a location without the radio wave, the
terminal is powered off, or you do not answer
the call within the preset ring time.
・ When the Call Forwarding Service is set to
"Activate Call Forwarding" and if you do not
answer an incoming voice call, the call is
saved in "Call log" as a "Missed call" and
(Missed call) appears in the status bar.
Caller
The caller is charged for a call fee.
Call Forwarding Service subscriber
The Call Forwarding Service
subscriber is charged for a call
fee.
Basic flow of the Call Forwarding
Service
Forwarding party
❖ Information
Save the forwarding number.
▼
Activate the Call Forwarding Service.
▼
Your terminal receives a call.
▼
If you do not answer the call, it is
automatically forwarded to the specified
forwarding number.
・ Even when the Call Forwarding Service is set to
"Activate Call Forwarding", you can answer the call
during a ringtone sounds.
Setting Call Forwarding Service
1
From the Home screen, press t
and tap [Settings].
2
Tap [Call settings]
service setting].
[Network
Calling/Network Services
Continued on next page
90
SO-01D_English
SO-01D_(E).book
3
91 ページ
2011年10月20日 木曜日 午後1時6分
Tap [Call Forwarding].
・ Select items you want to use.
Activate Call
Forwarding
Enter the forwarding number and
ring time, then tap [OK] to
activate the Call Forwarding
Service.
Change
forwarding
number
Mark the checkbox and enter the
forwarding number.
Register
ring time
Mark the checkbox and enter the
ring time (0 to 120 seconds).
If the ring time is set to 0
seconds, an incoming call is not
saved in "Call log".
Deactivate Call Tap [OK] to deactivate the Call
Forwarding
Forwarding Service.
Register the
forwarding
number
Change the forwarding number.
Enter the forwarding number and
tap [OK].
Activate Call Mark the checkbox to change the
Forwarding forwarding number and to
activate the Call Forwarding
Service simultaneously.
If fwd number
busy*
When the forwarding number is
busy, an incoming call is
connected to the Voice Mail
service center. Tap [Connect] to
turn on the setting; tap [Do not
connect] to turn off the setting.
Check setting
Check the current service
settings.
* A subscription of Voice Mail service is required.
Setting on/off of the Call
Forwarding guidance
1
From the Home screen, tap
[Phone].
2
[1] [4] [2] [9]
Tap [Call].
・ Follow the voice prompts to operate.
For details, see the "Mobile Phone
User's Guide [Network Services]".
Caller ID Notification
When making a call, your phone number can
be shown in the display of the recipient's
phone you are calling. The caller ID is
important personal information. Carefully
decide whether you notify a recipient of your
caller ID.
・ You cannot set the Caller ID notification
where the terminal indicates the outside of
service area ( ).
・ The setting is available only the other party's
phone can display the caller ID.
・ If an announcement requesting caller ID is
heard when making a call, set Caller ID
notification or add prefix 186 to the phone
number to call again.
1
From the Home screen, press t
and tap [Settings].
Calling/Network Services
Continued on next page
91
SO-01D_English
SO-01D_(E).book
92 ページ
2011年10月20日 木曜日 午後1時6分
2
Tap [Call settings]
service setting].
3
Tap [Caller ID Notification].
[Network
・ Select items you want to use.
Activate Caller Enter the Network security code,
ID Notification then tap [OK].
Your phone number is notified to
the other party.
Deactivate
Caller ID
Notification
Enter the Network security code,
then tap [OK].
The caller ID notification is
deactivated.
Check
settings
Check the current settings.
Calling/Network Services
92
SO-01D_English
Settings
SO-01D_(E).book
93 ページ
2011年10月20日 木曜日 午後1時6分
Viewing the setting menu
1
From the Home screen, press
t.
2
Tap [Settings].
・ Alternatively, from the Home screen, tap
tap [Settings].
, then
Wireless & networks
You can make network settings such as Wi-Fi,
Bluetooth function, etc.
■ Setting menu
Sony Ericsson
❖ Information
Set Facebook
synchronization function
for the terminal (P.115), or
make settings for
connecting the terminal to
a PC or another device via
USB connection or Wi-Fi
(P.138).
Wireless & networks
P.93
Call settings
P.102
Sound
P.103
Display
P.105
Location & security
P.106
Applications
P.111
Accounts & sync
P.114
Privacy
P.117
Storage
P.118
Airplane mode
P.95
Wi-Fi/Wi-Fi settings
P.96
Bluetooth/Bluetooth settings
P.143
Tethering & portable hotspot
P.100
VPN settings
P.101
Mobile networks
P.93, P.190
Setting an access point
An access point for connecting to the Internet
(sp-mode, mopera U) is already registered.
You can add or change it if necessary.
By default, sp-mode (P.95) is set for the usual
access point.
Language & keyboard P.119
Voice input & output
P.119
Accessibility
P.120
Date & time
P.120
About phone
P.121
Settings
93
SO-01D_English
SO-01D_(E).book
94 ページ
2011年10月20日 木曜日 午後1時6分
Press t, then tap [Save].
Checking the access point you use
7
1
❖ Information
From the Settings screen (P.93),
tap [Wireless & networks]
[Mobile networks] [Access Point
Names].
・ Available access points (APN)
appear.
・ It is recommended that you use the
displayed access point without editing.
❖ Information
・ If you have several available connections, a
marked radio button to the right indicates the
active network connection.
・ Do not change the MCC/MNC. If you change MCC/
MNC to other than the default value (440/10), the
settings do not appear on the APNs screen. When
the MCC/MNC settings do not appear on the APNs
screen, make APN settings with [Reset to default]
or [New APN] again.
・ Note that, when using the prediction conversion by
one-byte alphabet entry mode (English mode) with
mark in [Auto space] checkbox on Japanese
keyboard settings screen (P.67), spaces may be
entered automatically. In this case, delete spaces.
Initializing an access point
Setting an access point
additionally
By initializing an access point, the default
state is restored.
1
From the Settings screen (P.93),
tap [Wireless & networks]
[Mobile networks] [Access Point
Names].
1
From the Settings screen (P.93),
tap [Wireless & networks]
[Mobile networks] [Access Point
Names].
2
3
4
Press t.
2
Press t, then tap [Reset to
default].
5
Tap [APN] and enter the access
point name and tap [OK].
6
Tap and enter all other information
required by your network operator.
Tap [New APN].
Tap [Name], enter a name and tap
[OK].
Settings
94
SO-01D_English
SO-01D_(E).book
95 ページ
2011年10月20日 木曜日 午後1時6分
sp-mode
sp-mode is ISP for NTT DOCOMO
smartphone. In addition to accessing
Internet, you can use the mail service using
the same address as i-mode mail
(@docomo.ne.jp), etc. sp-mode is a service
requiring subscription. For details on
sp-mode, refer to NTT DOCOMO website.
mopera U
mopera U is ISP of NTT DOCOMO's Internet
connection. If you have subscribed to
mopera U, you can use Internet after making
the simple settings. mopera U is a service
requiring subscription.
Setting mopera U
1
2
From the Settings screen (P.93),
tap [Wireless & networks]
[Mobile networks] [Access Point
Names].
Mark [mopera U ( スマートフォン定
額 )] (mopera U (Smartphone flatrate))/[mopera U 設定 ] (mopera U
settings) radio button.
・ Return to the Home screen and open
the Browser. You can enjoy the nice
Internet access.
❖ Information
・ "mopera U設定 " (mopera U settings) is an access
point for setting mopera U. When you use the
access point for setting mopera U, packet
communication charges for setting do not apply.
Note that you can set only the initial setting screen
or the change setting screen. For details on
mopera U settings, refer to mopera U website.
・ Subscription to packet flat-rate service is required
for using "mopera U ( スマートフォン定額)
(mopera U (Smartphone flat-rate))". For details on
mopera U (Smartphone flat-rate), refer to NTT
DOCOMO website.
Airplane mode
In this mode, the functions of using radio
wave transmissions such as calling,
accessing to the Internet (including sending/
receiving mails), etc. are disabled. It can be
useful when you want to operate the terminal
with no interruption of incoming calls or mails.
Turning on Airplane mode
1
From the Settings screen (P.93),
tap [Wireless & networks].
2
Mark [Airplane mode] checkbox.
・ When you unmark [Airplane mode]
checkbox, the Airplane mode turns
off.
Settings
Continued on next page
95
SO-01D_English
SO-01D_(E).book
96 ページ
2011年10月20日 木曜日 午後1時6分
❖ Information
❖ Information
・ You can also switch on/off of the Airplane mode by
pressing and holding p for over a second to
switch to the Phone options menu, then tapping
[Airplane mode].
・ Even if Airplane mode is on, Wi-Fi and Bluetooth
function can be turned on.
・ Make sure to receive enough signal strength for
using Wi-Fi. The signal strength of the Wi-Fi
network varies by the location of the terminal.
Moving closer to the Wi-Fi router might enhance
the signal strength.
About Wi-Fi
Using the Wi-Fi function, you can connect to
an access point for your home, company
network or public wireless LAN services to
use mail and Internet.
・ Even when Wi-Fi is on, packet
communication is available. However, while
you connect Wi-Fi network, Wi-Fi comes
first.
・ When a Wi-Fi network is disconnected,
connection is automatically switched to a
3G/GPRS network. Note that packet
communication fee applies for using 3G/
GPRS network.
・ Turn the Wi-Fi function to off when you do not
use Wi-Fi to cut battery power consumption.
■ Reception interference caused by
Bluetooth devices
Bluetooth devices and wireless LAN
(IEEE802.11b/g/n) use the same
frequency band (2.4GHz). If you use
Bluetooth devices near a wireless LAN
device, reception interference may occur
or the communications speed may lower.
Also, you may hear noise or have a
connection problem. Communication may
be interrupted or sound may be lost while
streaming data, etc. In these cases, do
the following:
・ Keep the terminal and Bluetooth device
to be connected wirelessly over 10
meters away from a wireless LAN
device.
・ Within 10 meters, turn off the Bluetooth
device to be connected.
Before using Wi-Fi
To use Wi-Fi, turn on Wi-Fi and search
available Wi-Fi network, then connect it.
・ To access the Internet using Wi-Fi, connect
to Wi-Fi network in advance.
Settings
96
SO-01D_English
SO-01D_(E).book
97 ページ
2011年10月20日 木曜日 午後1時6分
Turning on Wi-Fi
1
From the Settings screen (P.93),
tap [Wireless & networks].
2
Mark [Wi-Fi] checkbox.
❖ Information
・ The next time you connect to a Wi-Fi network, the
security key is saved in the terminal.
■ Wi-Fi network status icons on status
bar
The following icons appear according to
the Wi-Fi network connection status.
・ The terminal scans for available Wi-Fi
networks.
❖ Information
Appears when connected to Wi-Fi network.
Appears when connected to Wi-Fi network
using AutoIP function.
・ It may take a few seconds before the Wi-Fi
connection is on.
Connecting to a Wi-Fi network
1
From the Settings screen (P.93),
tap [Wireless & networks] [Wi-Fi
settings].
・ Available Wi-Fi networks are
displayed under "Wi-Fi networks". The
available networks may be open or
secured. This is indicated by
or
next to the Wi-Fi network name.
2
Select Wi-Fi network you want to
connect, tap [Connect].
・ If you are trying to connect to a
protected Wi-Fi network, you are
asked to enter the security key for that
Wi-Fi network before you can connect
to it.
Appears when any open network within the
service area is detected*.
* Without connected to Wi-Fi network, you need to set WiFi Network notification to ON beforehand. (P.98)
Disconnecting a Wi-Fi network
1
From the Settings screen (P.93),
tap [Wireless & network] [Wi-Fi
settings].
2
Touch and hold the Wi-Fi network
that you are connected to.
3
Tap [Forget network].
Settings
97
SO-01D_English
SO-01D_(E).book
98 ページ
2011年10月20日 木曜日 午後1時6分
Wi-Fi network status
When you are connected to a Wi-Fi network
or when there are Wi-Fi networks available in
your vicinity, you can see the status of these
Wi-Fi networks. You can also set the terminal
to notify you when an unsecured Wi-Fi
network is detected.
Setting the Wi-Fi network
notification to ON
1
2
4
Tap a Wi-Fi network in the list to
connect to it.
Advanced Wi-Fi settings
Before you add a Wi-Fi network manually, you
need to turn on the Wi-Fi setting. (P.97)
Adding a Wi-Fi network manually
1
Confirm that Wi-Fi is turned on,
and then on the Settings screen
(P.93), tap [Wireless & networks]
[Wi-Fi settings].
From the Settings screen (P.93),
tap [Wireless & networks] [Wi-Fi
settings].
2
3
Tap [Add Wi-Fi network].
Mark [Network notification]
checkbox.
4
Tap [Security] field, then mark a
radio button of security type for
the Wi-Fi network you want to add.
Scanning for Wi-Fi networks
manually
1
From the Settings screen (P.93),
tap [Wireless & networks] [Wi-Fi
settings].
2
3
Press t.
Tap [Scan].
Enter [Network SSID] name of the
Wi-Fi network you want to add.
・ 4 options, "Open", "WEP", "WPA/WPA2
PSK", or "802.1x EAP", appear.
5
If required, enter security
information for the Wi-Fi network
you want to add.
6
Tap [Save].
・ Scanning for Wi-Fi networks is started,
and they are displayed under "Wi-Fi
networks".
Settings
98
SO-01D_English
SO-01D_(E).book
99 ページ
2011年10月20日 木曜日 午後1時6分
Viewing detailed information on a
connected Wi-Fi network
1
2
From the Settings screen (P.93),
tap [Wireless & networks] [Wi-Fi
settings].
Tap the Wi-Fi network that you are
currently connected to.
・ The detailed network information is
displayed.
❖ Information
・ To check MAC address and IP address, [Wireless
& networks] on the Settings menu screen (P.93)
Tap [Wi-Fi settings], press t, and tap
[Advanced] .
2
3
4
5
❖ Information
1
From the Settings screen (P.93),
tap [Wireless & networks] [Wi-Fi
settings].
Tap [Wi-Fi sleep policy].
Tap any of [When screen turns off]/
[Never when plugged in]/[Never].
You can set up the terminal to connect to a
Wi-Fi network using a static IP address.
Setting up a static IP address
1
From the Settings screen (P.93),
tap [Wireless & networks] [Wi-Fi
settings].
2
3
4
Press t.
5
Tap an item to enter necessary
information.
Tap [Advanced].
Mark [Use static IP] checkbox.
・ Item of IP settings can be selected.
・ Enter "IP address", "Gateway",
"Netmask", "DNS 1" to use a static IP
address.
・ When a Wi-Fi network is disconnected, connection
is automatically switched to a 3G/GPRS network.
Adding a Wi-Fi sleep policy
Tap [Advanced].
Using a static IP address
Wi-Fi sleep policy
By changing a Wi-Fi sleep policy, you can
choose to disable the Wi-Fi function in the
terminal when the screen backlight turns off.
You can also set the terminal to always turn
ON the Wi-Fi function or to turn it ON when
the terminal is charged.
Press t.
6
7
Press t.
Tap [Save].
Settings
99
SO-01D_English
SO-01D_(E).book
100 ページ
2011年10月20日 木曜日 午後1時6分
Using tethering function
Tethering stands for using mobile devices
such as smartphone as modem to allow USB
compatible devices or wireless LAN devices
to access the Internet.
1
From the Settings screen (P.93),
tap [Wireless & networks]
[Tethering & portable hotspot].
2
Connect the terminal to a PC with a
microUSB cable (P.33).
・ When you connect a USB cable for
the first time, driver software for the
terminal is installed to the PC. Wait for
a while until installation is completed.
A confirmation screen for installation
of PC Companion software appears
when the driver software installation is
completed.
❖ Information
・ Packet communication charge when using
tethering varies depending on the charging plan
you use. Subscription of packet flat-rate service is
highly recommended.
If you subscribe packet flat-rate service, packet
communication charge is treated as
"communications connected to an external device
such as a PC". If tethering is enabled, all packet
communication charge is treated as
"communications connected to an external device
such as a PC" even if any external device is not
connected.
Make sure to deactivate tethering as soon as
communication with an external device is
completed.
For details on usage charge, etc., refer to
http://www.nttdocomo.co.jp/english/
・ For the details on tethering, from the Settings
screen (P.93), tap [Wireless & networks]
[Tethering & portable hotspot] [Help].
Setting USB tethering
Connecting the terminal to the included
microUSB cable, and using it as a modem,
you can connect USB device to the Internet.
3
Tap [Skip].
4
5
Tap [USB tethering].
・ The terminal is connected to a PC in
"Media transfer mode (MTP)", USB
connection mode set by default.
Check the cautions displayed, tap
[OK].
・ [USB tethering] is marked.
❖ Information
・ System requirements (OS) for USB tethering are as
follows. A required driver is automatically installed.
- Microsoft Windows 7
- Microsoft Windows Vista
- Microsoft Windows XP
・ Set USB connection mode to "Media transfer mode
(MTP)" when connecting the terminal and a PC
using microUSB cable.
Settings
100
SO-01D_English
SO-01D_(E).book
101 ページ
2011年10月20日 木曜日 午後1時6分
Setting up a portable Wi-Fi hotspot
You can use the terminal as Wi-Fi access
point to connect up to 5 wireless LAN devices
to the Internet simultaneously.
1
From the Settings screen (P.93),
tap [Wireless & networks]
[Tethering & portable hotspot].
2
3
Tap [Port. Wi-Fi hotspot settings].
Enter [Network SSID] of the Wi-Fi
hotspot to set.
3
Check the cautions displayed, tap
[OK].
・ [Portable Wi-Fi hotspot] is marked.
❖ Information
・ If Wi-Fi tethering starts while connecting to Wi-Fi
network, Wi-Fi network is disconnected and
automatically connected when Wi-Fi tethering ends.
Alternatively, when the terminal and DLNA device
are connected via Wi-Fi network, starting/ending WiFi tethering affects Wi-Fi connection.
・ USB tethering and Wi-Fi tethering can be used at
the same time.
・ By default, "SO-01D" is set.
4
Tap [Security] field and mark the
radio button for the security type
of Wi-Fi hotspot to set.
・ Either "WPA2 PSK" or "Open" appears.
5
Enter security information of the
Wi-Fi hotspot to set as required.
6
Tap [Save].
Using Wi-Fi tethering
1
From the Settings screen (P.93),
tap [Wireless & networks]
[Tethering & portable hotspot].
2
Tap [Portable Wi-Fi hotspot].
Connecting to a VPN (Virtual
Private Network)
Virtual Private Network (VPN) is a technology
to connect to the information in a protected
local network from another network.
Generally, VPNs are provided to companies,
schools and other facilities. A user can
access to the information in the local network
from outside of the premises.
To set up a VPN access from the terminal,
you need to retrieve the information related to
security from your network administrator. For
details, refer to
http://www.sonyericsson.co.jp/support/
❖ Information
・ If you set sp-mode as an ISP, you cannot use PPTP.
Settings
101
SO-01D_English
SO-01D_(E).book
102 ページ
2011年10月20日 木曜日 午後1時6分
Adding a VPN
1
From the Settings screen (P.93),
tap [Wireless & networks] [VPN
settings].
2
3
4
Tap [Add VPN].
5
Press t, then tap [Save].
3
・ When you are connected to a VPN,
the connecting notification appears in
the status bar. When you are
disconnected, the notification
indicating to return to the VPN setting
screen appears, so that you can
reconnect to. For details, see "Status
bar" (P.36).
Tap a VPN type to add.
If a setting screen appears, follow
the instruction of the network
administrator to set required items
of VPN settings.
・ A new VPN is added in the list on VPN
settings screen.
❖ Information
・ Added VPNs can be edited or deleted.
To edit VPNs, touch and hold a desired VPN, then
tap [Edit network]. Change the VPN settings, as
required, press t and tap [Save].
To delete, touch and hold a VPN to be removed,
then tap [Delete network] [OK].
If the dialog box appears, enter the
desired authentication information
and tap [Connect].
Disconnecting a VPN
1
Open the Notification panel, tap
the VPN connecting notification.
・ Tap a connecting VPN to disconnect.
Call settings
You can use the network services and search
for available networks.
Connecting to a VPN
Network service
setting
P.85
1
Service providers
When you start using
overseas or move out of
your operator's network, the
terminal searches another
available network and
reconnects to it.
From the Settings screen (P.93),
tap [Wireless & networks] [VPN
settings].
・ Added VPNs are displayed in the list
on the VPN setting screen.
2
Tap a VPN to connect to.
Settings
Continued on next page
102
SO-01D_English
SO-01D_(E).book
103 ページ
2011年10月20日 木曜日 午後1時6分
Noise suppression
Make the voice clear to
understand for the other
party during a call.
Accounts
Set Internet phone (SIP)
account.
Use Internet calling
Set Internet phone (SIP) call
method.
Setting the terminal to silent
mode
1
Press p for over a second.
2
Tap [Silent mode].
・ Phone options menu appears.
❖ Information
Sound
Set ringtones, operation sound, vibrator, etc.
xLOUDTM
Set audio playback level
enhancement technology
("xLOUD") to enjoy powerful
sounds with the built-in
speaker when playing
music, YouTube, Gallery,
etc.
Silent mode
P.103
Vibrate
P.103
Volume
P.104
Phone ringtone
P.104
・ Alternatively, you can set silent mode from the
Settings screen (P.93), tap [Sound] and mark
[Silent mode] checkbox.
・ Setting the phone to silent mode does not mute
sounds (playback of video or music, alarm, etc.)
other than the ringtone, operation sound, and
notification sounds.
Setting the vibrator
1
2
From the Settings screen (P.93),
tap [Sound] [Vibrate].
Tap any of [Always]/[Never]/[When
sound is off]/[When sound is on].
Notification ringtone P.105
Audible touch tones P.105
Audible selection
P.105
Screen lock sounds Set sound ON/OFF when
unlocking the screen.
Haptic feedback
Set whether to vibrate for
some operations such as
specified software key
operation.
Settings
103
SO-01D_English
SO-01D_(E).book
104 ページ
2011年10月20日 木曜日 午後1時6分
Adjusting the volume
1
From the Settings screen (P.93),
tap [Sound] [Volume].
・ Adjust the volume of following items.
- Ringtone
- Media (sounds of the Music player
and Gallery)
- Alarm
- Notification
2
Drag the slider left or right to
adjust the level.
・ Drag the slider to the left for volume
down, or to the right for volume up.
3
Tap [OK].
❖ Information
・ By default, Notification volume is adjusted to the
same as Ringtone volume. To adjust Ringtone and
Notification separately, unmark [Use incoming call
volume for notifications] checkbox in Step 1.
Ringtone and Notification volume adjustment
sliders appear, then drag each slider to the right or
left to adjust volume.
Adjusting the ringer volume
with the volume key
1
From the Home screen, press up
or down of m.
・ The volume adjustment bar appears,
you can adjust the volume up or
down.
❖ Information
・ You can also press m or p to mute the
ringtone for an incoming call.
Setting a ringtone
1
2
From the Settings screen (P.93),
tap [Sound] [Phone ringtone].
Select a ringtone and tap [Done].
・ You can set voice file in ".wav", ".m4a"
or in other format which is transferred
from Media Go (P.142) or downloaded
from the Internet as a ringtone. (P.167)
❖ Information
・ To set a ringtone other than the ones stored by
default, you can also set from "Music library".
Settings
104
SO-01D_English
SO-01D_(E).book
105 ページ
2011年10月20日 木曜日 午後1時6分
Selecting a notification
ringtone
1
2
From the Settings screen (P.93),
tap [Sound] [Notification
ringtone].
Select a ringtone and tap [Done].
❖ Information
・ To set a notification sound other than the ones
stored by default, you can also set from "Music
library".
Setting touch tones to ON
1
2
From the Settings screen (P.93),
tap [Sound].
Mark [Audible touch tones]
checkbox, [Audible selection]
checkbox.
・ If you unmarked them, any operation
tone does not sound when you touch
or tap.
❖ Information
・ "Audible touch tones" is a tone for numeric key
operations. "Audible selection" is a tone when
selecting menu item.
・ To set the key sound of software keyboard, from
the Settings screen (P.93), tap [Language &
keyboard], and select a type of software keyboard.
Display
Set brightness, orientation of the screen, etc.
Brightness
P.105
Auto-rotate screen
P.105
Animation
P.106
Screen timeout
P.106
Theme
P.46
Adjusting the screen
brightness
1
From the Settings screen (P.93),
tap [Display] [Brightness].
2
Drag the slider to the right or left.
3
Tap [OK].
・ Drag the slider to the left for dimmer
screen, or to the right for brighter
screen.
Changing orientation of the
screen
You can set the screen orientation to change
automatically between landscape and
portrait view when you turn the terminal
sideways/paleways.
Settings
Continued on next page
105
SO-01D_English
SO-01D_(E).book
106 ページ
2011年10月20日 木曜日 午後1時6分
❖ Information
❖ Information
・ Even when you change the orientation of the
terminal, the screen may not change to landscape
view depending on the screen such as Home
screen, etc.
・ To turn the screen backlight off immediately, press
p.
Setting to change to landscape
view
1
From the Settings screen (P.93),
tap [Display].
2
Mark [Auto-rotate screen]
checkbox.
Location & security
Set options related to location information
and security.
Use wireless networks P.175
Use GPS satellites
P.175
Set up screen lock
P.109
Set up SIM card lock
P.108
Visible passwords
Set whether to show the
input character before
"・" appears on the
password entry screen.
Set animation effect which shows transition of
screen smoothly.
Select device
administrators
Set whether to enable
device administrators.
1
From the Settings screen (P.93),
tap [Display] [Animation].
2
Select an animation option.
Use secure credentials Allow applications to
access secure
certificates and other
credentials.*1
Setting animation effect to
transition
Adjusting the idle time before
the screen turns off
1
From the Settings screen (P.93),
tap [Display] [Screen timeout].
2
Select a time option before the
screen backlight turns off.
Install from SD card
Install encrypted
certificates from microSD
card.
Set password
Set or change the
credential storage*2
password.
Settings
Continued on next page
106
SO-01D_English
SO-01D_(E).book
Clear storage
107 ページ
2011年10月20日 木曜日 午後1時6分
Delete all certificates and
credential information
from the credential
storage*2 and reset its
password.
*1 Set the password to the credential storage in advance.
*2 Save certificates and credential information in the
credential storage.
Protecting the UIM
Some functions provided for convenient use
of the terminal require the security code to
use them. Besides the security code for
locking the terminal, the network security
code necessary for the network services etc.
are available. Make use of the terminal using
an appropriate security code according to
the purpose.
■ Notes on the security codes
・ Avoid using a number that is easy to
guess, such as "birth date", "part of your
phone number", "street address number
or room number", "1111", and "1234".
Make sure to make a note of the security
code you set lest you should forget it.
・ Be very careful not to let others know
your security code. If your security code
is known by anyone else, DOCOMO
shall have no liability for any loss due to
any unauthorized use of it.
・ If you forget any of your security codes,
you must bring your official identification
(such as driver's license), the terminal,
and UIM with you to the nearest docomo
Shop. For details, contact the "General
Inquiries" on the last page of this
manual.
・ The PUK code is written on the
subscription form (copy for customer)
handed at the subscription in the
docomo Shop. If you did not subscribe
other than docomo Shop, you must
bring your official identification (such as
driver's license), the UIM with you to the
nearest docomo Shop or contact the
"General Inquiries" on the last page of
this manual.
Network security code
The network security code is a 4-digit number
necessary for identification or using the
docomo Network Services at reception of
your request in docomo Shop or at docomo
Information Center. It can be set any number
at the subscription and also changed later by
yourself.
You can change your network security code
to the new one using the PC if you have the
"docomoID"/"Password" for the "My docomo"*
General support site for PC.
Settings
Continued on next page
107
SO-01D_English
SO-01D_(E).book
108 ページ
2011年10月20日 木曜日 午後1時6分
* For information on "My docomo", see the
previons page of the last page of this
manual.
PIN code
You can set a security code called PIN code
to the UIM. The code is set to "0000" at the
time of subscription. It can be changed by
yourself.
PIN code is a 4- to 8-digit number (code) that
must be entered for user confirmation to
prevent unauthorized use by a third party
every time you insert the UIM into the terminal
or when the terminal is powered on. Entering
the PIN code enables making/receiving calls
and terminal operation.
・ When you purchase a new terminal and use
the UIM that you have used on the current
terminal by inserting to the new one, use the
set PIN code on the former terminal. If you
did not change the setting, the code is
"0000".
・ If you enter a wrong PIN code 3 times
consecutively, the PIN code is locked and
cannot be used anymore. In this case,
unlock with "PUK". (P.108)
PUK code
The PUK code is an 8-digit number for
canceling the locked PIN1/PIN2 code. The
PUK code cannot be changed by yourself.
・ If you enter a wrong PUK code 10 times
consecutively, the UIM is locked. Please
contact a docomo Shop.
Enabling the UIM PIN
By setting PIN (security code) and enter PIN1
code when powered on, you can protect the
UIM from improper use.
1
From the Settings screen (P.93),
tap [Location & security] [Set up
SIM card lock] [Lock SIM card].
2
Enter the PIN code of the UIM and
tap [OK].
・ [Lock SIM card] is marked.
Entering the PIN code when
powered on
1
On the PIN code entry screen,
enter the PIN code of the UIM.
2
Tap [OK].
Settings
Continued on next page
108
SO-01D_English
SO-01D_(E).book
109 ページ
2011年10月20日 木曜日 午後1時6分
❖ Information
・ Even if you do not unlock the SIM card lock, you
can make an emergency call by tapping
[Emergency call] on the unlock SIM card lock
screen displayed after unlocking the screen. For
details, see "Emergency call" (P.71).
Changing the PIN code
・ You can change the PIN code when the UIM
PIN is enabled.
Screen lock
You can secure your data by requiring a
screen unlock pattern every time the terminal
is turned on or every time it is activated from
sleep mode.
There are 3 types of screen lock settings:
"Pattern", "PIN" and "Password". (P.109)
❖ Information
1
From the Settings screen (P.93),
tap [Location & security] [Set up
SIM card lock] [Change SIM PIN].
・ You can use Key lock (P.34) to prevent unintended
operation or save the power consumption of the
terminal without setting screen lock.
2
Enter the current PIN code of the
UIM and tap [OK].
Setting screen unlock pattern
3
Enter the new PIN code of the UIM
and tap [OK].
4
Enter the new PIN code and tap
[OK].
Unblocking the locked UIM
1
On the PUK code entry screen,
enter the PUK code and tap [OK].
2
Enter the new PIN code of the UIM
and tap [OK].
3
Enter the new PIN code and tap
[OK].
1
From the Settings screen (P.93),
tap [Location & security] [Set up
screen lock].
2
Tap [Pattern]/[PIN]/[Password].
・ When you tap [Pattern], follow the
onscreen instructions to enter screen
unlock pattern.
Set security question and answer in
case you forget the pattern.
・ When you tap [PIN], follow the
onscreen instructions to enter 4 or
more numbers. This "PIN" code is
different from a PIN code to be set to
UIM (P.108).
Settings
Continued on next page
109
SO-01D_English
SO-01D_(E).book
110 ページ
2011年10月20日 木曜日 午後1時6分
・ When you tap [Password], follow the
onscreen instructions to enter 4 or
more characters including alphabets.
Changing the screen unlock
method
1
From the Settings screen (P.93),
tap [Location & security]
[Change screen lock].
・ Enter current screen unlock pattern,
PIN or password.
・ If you should fail 5 times when you
enter the unlock pattern, wait
30 seconds and then try again.
2
Tap [Pattern]/[PIN]/[Password].
・ Select items you want to change into.
For setting procedure, see Step 2
(P.109) of "Setting screen unlock
pattern".
Locking the screen
Once screen unlock pattern (P.109) is set,
keys and screen are locked when the
terminal enters in the sleep mode or when
p is pressed.
Unlocking the screen
1
Press y or p to activate the
terminal.
2
Unlock the key lock, then enter the
screen unlock pattern.
・ Enter preset screen unlock pattern,
PIN or password.
❖ Information
・ Even if you do not unlock the screen lock, you can
make an emergency call by tapping [Emergency
call] on the unlock the screen lock screen
displayed after unlocking the screen. For details,
see "Emergency call" (P.71).
If you forget how to unlock
■ If you set "Pattern"
"Incorrect pattern" appears when you
enter incorrect unlock pattern 5 times
consecutively.
・ Tap [Next], then mark [Answer
question], then tap [Next], and then
answer the question made when the
unlock pattern was set so that you can
unlock screen.
・ If you registered Google account, on the
"Incorrect pattern" screen, tap [Next],
then mark [Enter Google account
details], then tap [Next], and then enter
Google account and password to unlock
screen.
Settings
Continued on next page
110
SO-01D_English
SO-01D_(E).book
111 ページ
2011年10月20日 木曜日 午後1時6分
❖ Information
・ Tap [Try again] to retry entering pattern in 30
seconds.
・ Alternatively, when you tap [Try again] [Forgot
pattern?], the question screen that you set unlock
pattern appears.
・ You can set multiple Google accounts. To unlock
the screen with Google account and password,
enter one of those accounts.
Running services
Display/Manage the currently
running services.
Storage use
Display size of all applications,
usage condition, etc.
Battery use
Display operations which has
been using the battery.
Development
Set options for application
development.
■ If you set "PIN"/"Password"
Please contact a docomo Shop.
Canceling screen lock
You can cancel screen lock pattern after you
set.
1
From the Settings screen (P.93),
tap [Location & security]
[Change screen lock].
・ Enter preset screen unlock pattern,
PIN or password.
2
Permitting downloading
unknown source's application
Before you can download unknown source's
applications, set the terminal to enable
downloading.
Applications you download may be of
unknown origin. To protect your terminal and
personal data, only download applications
from trusted sources such as the Android
Market etc.
Tap [None].
1
From the Settings screen (P.93),
tap [Applications].
Applications
2
3
Tap [Unknown sources].
You can set options related to application
display and management.
Unknown sources P.111
Manage
applications
Read the cautions appeared, tap
[OK].
・ [Unknown sources] checkbox is
marked.
P.112
Settings
111
SO-01D_English
SO-01D_(E).book
112 ページ
2011年10月20日 木曜日 午後1時6分
Checking downloaded applications
You can check data downloaded from
websites, such as unknown source's
applications, in the following steps.
1
From the Home screen, tap
[Browser].
2
Press t, tap [More]
[Downloads].
1
From the Settings screen (P.93),
tap [Applications] [Manage
applications].
2
3
Tap an application to view.
Scroll down the screen to view
permitted operations.
・ If all permitted operations do not
appear, tap [All].
❖ Information
Shutting down an application
・ Alternatively, you can tap
from the home
screen [Downloads] to check applications.
・ Applications downloaded from Android Market do
not appear.
If a pop-up window that indicates the
application does not reply appears, you can
force quit the application.
Managing your applications
Manage and delete installed applications,
display memory usage condition, etc. or
change the settings.
Viewing permitted operation of the
applications in the terminal
You can check functions which are permitted
to each application to access in the progress
of performing, such as network
communication function or location
information function of the terminal.
1
From the Settings screen (P.93),
tap [Applications] [Manage
applications].
2
3
4
Tap an application to force-quite.
Tap [Force stop].
Read the cautions displayed, tap
[OK].
❖ Information
・ If you do not want to shut down the application, tap
[Cancel] and wait for a reply of the application.
❖ Note
・ If you cancel the "status bar" of application forcibly,
operations may not be performed correctly.
Settings
112
SO-01D_English
SO-01D_(E).book
113 ページ
2011年10月20日 木曜日 午後1時6分
Deleting all data of the application
・ Before deleting all installed application
data, back up contents related to the
application that you want to save including
data saved in the application.
1
From the Settings screen (P.93),
tap [Applications] [Manage
applications].
2
Tap an application to delete the
data.
3
4
Tap [Clear data].
Tap [OK].
Deleting an installed application
・ Before deleting installed application, back
up contents related to the application that
you want to save including data saved in the
application.
・ Some applications cannot be deleted.
1
From the Settings screen (P.93),
tap [Applications] [Manage
applications].
2
3
4
Tap an application to be deleted.
5
When uninstallation is completed,
tap [OK].
❖ Information
・ You may not uninstall the applications pre-installed
in the terminal.
・ Applications can be deleted from the Applications
screen. For details, see "Uninstalling applications"
(P.55).
Deleting cache of the application
1
From the Settings screen (P.93),
tap [Applications] [Manage
applications].
2
3
Tap an application to delete cache.
Tap [Clear cache].
Keeping the screen ON while
charging
1
From the Settings screen (P.93),
tap [Applications]
[Development].
2
Mark [Stay awake] checkbox.
Tap [Uninstall].
Tap [OK].
Settings
113
SO-01D_English
SO-01D_(E).book
114 ページ
2011年10月20日 木曜日 午後1時6分
Accounts & sync
You can manage (add or delete) online
service accounts or synchronize contacts,
messages, etc. saved in online services with
the terminal.
Background data All the applications installed to
traffic
the terminal perform automatic
data communications.
Activate autosync
Synchronize online information
such as your Gmail, calendar,
contacts, etc. automatically.
(P.116)
Manage accounts P.114
Managing accounts
You can add or delete an online service
account.
2
Follow the registration wizard, set
a Google account.
・ If you have no Google account, create
an account.
・ If you have already the Google
account, sign in.
❖ Information
・ You can use the terminal without creating your
Google account, however the services such as
Google Talk, Gmail, Android Market, etc. are not
available.
・ To sign in, you need a Google account and a
password.
・ If you set a Google account, you can tap your
Google account displayed on the "Accounts &
sync" screen in the setting menu to manually
synchronize data from the following items.
Sync Contacts Synchronize contacts stored in
Gmail with the phonebook stored
in the terminal.
Sync Gmail
Setting Google account
You can create a Google account on your
terminal and use Google services such as
Gmail, Google Talk, Google Calendar,
Android Market, etc.
You can set multiple Google accounts on the
terminal.
1
From the Settings screen (P.93),
tap [Accounts & sync] [Add
account] [Google].
Synchronize Mail logs used in
Gmail account with Gmail on the
terminal.
Sync Calendar Synchronize calendar information
such as schedule, etc., stored in
Google account with Calendar in
the terminal.
・ If you set a Google account and use Picasa in it,
"Sync Picasa Web Albums" appears. Tapping to
synchronize displays Picasa Web Album in the
Gallery on the terminal.
Settings
Continued on next page
114
SO-01D_English
SO-01D_(E).book
115 ページ
2011年10月20日 木曜日 午後1時6分
・ Make sure to check if the data connection is
available before sign-in to the Google account. For
checking the data connection status, see "Status
icons" (P.36).
2
Setting Facebook account
❖ Information
When you register or sign in Facebook, you
can synchronize (register/update) profile
information published by "Friend" online to
Contacts.
You can display image posted on Facebook
by "Friends" onto the Gallery or Photo filter in
Contacts, display information stored in " いい
ね (Like)" on the Interests filter in Contacts,
and display Facebook updates of "Friends" in
Timescape.
・ If you have set a Facebook account, 2 Facebook
icons and set mail address are displayed on the
"Accounts & sync" screen in the setting menu. Tap
a Facebook icon,
(Sony Ericsson Facebook for
mobile), and tap the following items to synchronize
and display corresponding data.
❖ Information
・ If you do not have a Facebook account, you can
also create a new account at
http://www.facebook.com.
・ If you download and install client applications for
Twitter, mixi, you can setup accounts and
synchronize contacts information in the same
manner as Facebook.
1
From the Settings screen (P.93),
tap [Accounts & sync] [Add
account] [Facebook].
Enter your login information.
・ If you have no Facebook account,
register an account.
・ If you have Facebook account, login.
Sync Calendar Synchronize events such as
Friends' birthdays, etc., stored in
Facebook with Calendar in the
terminal.
Sync Albums
in Gallery
Display images posted on
Facebook onto Photo filter in the
contact information filter or onto
the album in Gallery of the
terminal.
Sync Contacts Synchronize profile of Friends
stored in Facebook with the
phonebook stored in the terminal.
・ If synchronizing process is not completed, follow
the onscreen instructions to drag the status bar
downward and tap the notification, then tap [OK]
on the connection screen. Synchronization will
complete.
・ If you already have a Facebook
account and set account from
Phonebook or Timescape of the
terminal, you need not add a new
account.
Settings
115
SO-01D_English
SO-01D_(E).book
116 ページ
2011年10月20日 木曜日 午後1時6分
Setting other account
Data synchronization
■ Exchange Active Sync account
・ If you have Exchange ActiveSync
account, on the settings screen (P.93),
tap [Accounts & sync] [Add account]
[Exchange Active Sync], and then set
the settings according to the onscreen
instructions.
■ docomo account
・ docomo account helps you to use
"Phonebook backup" service (P.52)
provided by NTT DOCOMO. a docomo
account is set by default.
Synchronize online information such as your
Gmail, calendar, contacts, etc. to the
terminal. You can display and edit information
on the terminal or a PC.
❖ Information
・ You need to set your online service account such
as Google account, etc. on the terminal to
synchronize. You can set to synchronize manually
or automatically through use of background data.
Setting automatic synchronization
1
From the Settings screen (P.93),
tap [Accounts & sync].
2
Mark [Background data traffic]
checkbox.
3
4
Tap [Activate auto-sync].
Deleting a service account
1
2
From the Settings screen (P.93),
tap [Accounts & sync] and select a
service account you want to
delete.
Tap [Remove account]
account].
[Remove
❖ Information
・ The first set Google account cannot be removed
from "Remove account". To remove the first set
Google account, reset the terminal. For details on
how to reset, see "Resetting the terminal" (P.117).
Read the cautions displayed, tap
[OK].
・ [Activate auto-sync] checkbox is
marked.
5
Tap an online service whose
account is set.
Settings
Continued on next page
116
SO-01D_English
SO-01D_(E).book
6
117 ページ
2011年10月20日 木曜日 午後1時6分
Tap to mark an item for automatic
synchronization.
・ If the items to be synchronized are
marked and checkboxes are led by
, synchronization starts. If no
appears, press t and tap [Sync
now] to start synchronization.
❖ Note
・ If you mark [Background data traffic] checkbox, all
the applications installed to the terminal are
permitted automatic data communications to
online services whose accounts are set. And, if you
mark [Activate auto-sync] checkbox, your Gmail,
calendar, contacts, and profile information
published by "Friend", etc. are permitted automatic
data communications by Google account. These
communications may cause you to pay packet
communications charges.
・ If you do not mark [Activate auto-sync] checkbox,
you can synchronize manually. On the settings
screen (P.93), tap [Accounts & sync], tap the
service where your account is set to display the
synchronizing items, then tap items you want to
synchronize.
Privacy
Restore the terminal to default.
Factory data
reset
Resetting the terminal
Resetting the terminal deletes all data,
including downloaded applications and
Google accounts, and resets the terminal
back to the initial (default) state. Make sure to
back up important data you have on the
terminal before you reset the terminal.
For the initial settings, see "Initial settings
(Setup guide)" (P.35).
1
2
During synchronization
(
appears in the status bar),
press t.
Tap [Cancel sync].
From the Settings screen (P.93),
tap [Privacy] [Factory data reset]
[Reset phone].
・ Mark [Erase SD card] checkbox to
delete all contents on the microSD
card.
・ Enter your screen unlock method as
required.
Canceling synchronization
1
Reset the terminal.
2
Tap [Erase everything].
・ By tapping [Erase everything], the
terminal restarts automatically.
Settings
Continued on next page
117
SO-01D_English
SO-01D_(E).book
118 ページ
2011年10月20日 木曜日 午後1時6分
❖ Note
・ While restarting or resetting the terminal, wait for a
while. Note that, if you remove the battery pack
while restarting or resetting, it may cause
malfunction of the terminal.
Managing memory
Formatting a microSD card
1
Storage
You can check memory space of microSD
card and terminal, and initialize microSD
card.
From the Settings screen (P.93),
tap [Storage] [Unmount SD
card].
・ If the confirmation screen appears,
tap [OK].
Total space
Check memory of microSD card.
2
3
Available
space
Check memory space of microSD
card.
❖ Information
Unmount SD
card*
Cancel recognition of microSD
card to remove it safely.
Mount SD
card*
Recognize microSD card.
Erase SD card P.118
Available
space
Check memory space of the
terminal.
* Display changes depending on condition of microSD
card recognition.
Tap [Erase SD card].
Tap [Erase SD card] again, and tap
[Erase everything].
・ Formatting a microSD card deletes all the data in it.
Confirming how much space left is
on a microSD card and the terminal
1
From the Settings screen (P.93),
tap [Storage].
・ The total volume and free space of the
microSD card appear at the top of the
screen, and the free space of the
terminal appears at the bottom of the
screen.
Settings
118
SO-01D_English
SO-01D_(E).book
119 ページ
2011年10月20日 木曜日 午後1時6分
Increasing the free volume of the
terminal and a microSD card
If the terminal has a small memory, you can
do the following to increase the available
memory:
・ In the browser, you can clear all temporary
Internet files and browser history
information. For details, see "Clearing
history" (P.137).
・ Uninstall programs that you no longer use.
For details, see "Deleting an installed
application" (P.113).
Language & keyboard
You can select language and keyboard input.
Select language
P.119
User dictionary
Register words.
International keyboard
P.65
Japanese keyboard
Changing the phone language
1
From the Settings screen (P.93),
tap [Language & keyboard]
[Select language].
2
Select a language.
❖ Information
・ If you choose the wrong language and cannot read
the menu texts, go to
http://www.sonyericsson.co.jp/so-01d/faq.html
for help.
Voice input & output
You can set Google voice recognizer and
Text-to-speech settings.
■ Voice recognizer settings
Language
Select language used for Google
voice search.
SafeSearch
Set filter explicit.
Block
offensive
words
Set whether to display recognized
offensive voice results.
■ Text-to-speech settings
Listen to an Playback sample of audio synthesis.
example
Always use
my settings
Overwrite application settings with
content of "Default Engine", "Install
voice data", "Speech rate",
"Language" and "Pico TTS".
Default
Engine
Set audio synthesis engine to read
out text. By default, "Pico TTS" is set.
Install voice Install voice data required to voice
data
synthesis. If voice data is not
installed, connect to Android Market
to search voice data.
Speech rate Set speed at reading out text.
Settings
Continued on next page
119
SO-01D_English
SO-01D_(E).book
120 ページ
2011年10月20日 木曜日 午後1時6分
Language
Set language for reading out text.
Pico TTS*
Make settings for installed voice
synthesis engine.
* Japanese is not supported.
Accessibility
You can set call end operation and user
support service which sounds or vibrates
according to user's operation.
Date & time
You can change the date and time in the
terminal.
To set date, time zone and time manually,
unmark "Automatic" time setting (Use
network-provided values) under Date & time
settings.
Automatic
Adjust date, time zone, and
time automatically by using
network-provided
information.
Set date
P.120
Select time zone
P.121
Set time
P.121
Use 24-hour format
P.121
Select date format
P.121
❖ Information
・ A user support application is not installed by
default. For the first time of use, install a screen
reader for terminal from the Android Market
according the onscreen instructions.
・ To use Android Market, you need to set Google
account (P.114).
Accessibility
Set user support service ON/OFF.
Power button
ends call
Set to end a call by pressing p.
Setting the date
1
From the Settings screen (P.93),
tap [Date & time] [Set date].
2
3
Tap numbers to adjust the date.
Tap [Set].
❖ Information
・ Correction of the time differences may not be
performed correctly depending on the overseas
telecommunication carrier. In that case, set time
zone manually (P.121).
Settings
120
SO-01D_English
SO-01D_(E).book
121 ページ
2011年10月20日 木曜日 午後1時6分
Setting the time zone
Setting the date format
1
From the Settings screen (P.93),
tap [Date & time] [Select time
zone].
1
From the Settings screen (P.93),
tap [Date & time] [Select date
format].
2
Tap an item to set.
2
Tap an item to set.
Setting the time
About phone
1
From the Settings screen (P.93),
tap [Date & time] [Set time].
2
Tap numbers to adjust the hour
and minute.
Software update
P.201
・ When you unmark [Use 24-hour
format] checkbox, you can change
AM/PM. When you tap [AM], it
changes to [PM] (or vice versa).
Status
Check your own phone
number, signal level, etc.
Battery use
Display operations which
have been using the battery.
Legal information
Check license agreement,
terms of use, etc.
Model number
Check version and number.
3
You can check your own phone number,
signal level, legal information, etc.
Tap [Set].
Android version
Setting the time format
1
From the Settings screen (P.93),
tap [Date & time] and mark/unmark
[Use 24-hour format] checkbox.
Baseband version
Kernel version
Build number
・ Mark the checkbox to shift to 24-hour
format, and unmark to shift to 12-hour
format.
Settings
121
SO-01D_English
Mail/Internet
SO-01D_(E).book
122 ページ
2011年10月20日 木曜日 午後1時6分
3
sp-mode mail
You can send/receive mails using i-mode
mail address (@docomo.ne.jp).
You can use pictogram and Deco-mail. Mails
can be received automatically. For details on
sp-mode mail, refer to "ご利用ガイドブック
(spモード編) Mobile Phone User's Guide [spmode] (in Japanese only)".
1
From the Home screen, tap [sp モー
ドメール (sp-mode mail)].
・ After this step, follow the onscreen
instructions.
・ If a name or phone number is entered
in the box at the top of the screen, a
list of contacts beginning with the
entered numbers or letters appears.
・ Alternatively, you can enter a phone
number in the box at the top of the
screen, then tap [Add] to add a
recipient.
4
5
1
2
Tap [New message]
recipient].
[Add
Tap [Write message] field and
enter a message.
6
Tap [Send].
❖ Information
Sending message (SMS)
From the Home screen, tap
then tap [Messaging].
Tap [Done].
・ When the number of entered
characters comes close to a limit, a
counter appears on the upper left of
the text box and you can check the
remaining entry space.
Message (SMS)
Using a mobile phone number as the
recipient address, you can send and receive
text messages up to 70 two-byte characters
(160 one-byte characters).
Mark the checkbox of the recipient
you want to send a message from
the contact list.
,
・ For the character entry, see "Character entry"
(P.56).
・ You can also send/receive text messages to/from
customers of overseas network operators. See
"Mobile Phone User's Guide [International
Services]" or the DOCOMO International Services
website.
Mail/Internet
Continued on next page
122
SO-01D_English
SO-01D_(E).book
123 ページ
2011年10月20日 木曜日 午後1時6分
・ To send SMS to users of overseas network
operators, enter "+", "Country code" and then "the
recipient mobile phone number". Enter the phone
number without a leading "0", if any. You can also
enter "010", "Country code" and "the recipient
mobile phone number" to send messages (To reply
to the received SMS overseas, enter "010").
Receiving and reading
messages (SMS)
1
From the Home screen, tap
then tap [Messaging].
2
Tap someone whose messages
you want to read from the recipient
list.
❖ Information
・ When you receive a message (SMS),
appears
on the status bar. To read the message, drag the
status bar downwards, then tap the notified
message (SMS) item.
Saving a number in a received
message to a contact
From the Home screen, tap
then tap [Messaging].
2
Select a thread whose phone
number you want to save.
Press t, then tap [Edit
recipients].
4
Tap the phone number you want to
add to a contact.
5
On the Sending screen, tap
, then tap [Create new
contact].
6
Tap [docomo]/[Phone contact].
7
Enter required items and tap
[Done].
,
・ A received message appears.
1
3
,
・ When you set Google account etc., it
appears as a saving location.
Adjusting messages (SMS)
settings
1
From the Home screen, tap
then tap [Messaging].
2
Press t, then tap [Settings].
,
・ You can set the following options.
Delivery report Mark to mark a message thread
you sent each time a recipient
receives the message.
Notifications
Mark if you want to receive a
notification in the status bar when
a new message arrives.
Notification
tone
Set if you want to receive a
notification in selected ringtone
when a new message arrives.
Mail/Internet
Continued on next page
123
SO-01D_English
SO-01D_(E).book
124 ページ
2011年10月20日 木曜日 午後1時6分
Notification
vibration
Set if you want to receive a
notification by vibration when a
new message arrives.
SIM messages
Manage messages saved to UIM.
Push settings
Reports of message settings can
be received from the provider.
2
Press t, then tap [Delete
several].
3
Tap [Mark all]
[Delete].
・ After tapping [Mark all], you can tap
individual thread to unmark. Tap
[Unmrk all] to unmark all of the
threads.
Deleting a message
1
From the Home screen, tap
then tap [Messaging].
2
3
Tap a thread to select.
4
Tap [Delete message]
Touch and hold a message you
want to delete.
[Yes].
1
From the Home screen, tap
then tap [Messaging].
2
3
Touch and hold a thread to delete.
,
[Yes].
Deleting all threads
1
From the Home screen, tap
then tap [Messaging].
You can create an email account provided by
mopera U mail, a POP3 or IMAP compatible
email account provided by general service
providers, or an Exchange ActiveSync
account to send or receive email.
Setting up an email account
Deleting thread
Tap [Delete conversation]
Email
,
,
Email setup wizard appears. Set according
the onscreen instructions. Multiple email
accounts can be set.
1
From the Home screen, tap
then tap [Email].
2
Enter your email address and
password.
3
Tap [Next].
,
・ To make the email account settings
manually, tap [Manual setup] and
follow the onscreen instructions.
Mail/Internet
Continued on next page
124
SO-01D_English
SO-01D_(E).book
4
125 ページ
2011年10月20日 木曜日 午後1時6分
Enter account name and a name
you want to display on outgoing
mails.
3
・ Tap
to display the Contacts list
screen to select among the registered
contacts.
・ If you enter an alphabet or a name,
email address options appear from
the contacts beginning with the
entered character.
・ To add a Cc or Bcc, press t and
tap [Add Cc/Bcc].
・ If you enter characters directly for
multiple email addresses, separate
with a comma (,) and then enter the
next email address.
・ The sender name of a received email
is the name set on sender's terminal.
・ If "What type of account is this?"
appears, tap an email account type
and follow the onscreen instructions to
set.
・ If you set an Exchange ActiveSync
account, name to be displayed on
outgoing messages cannot be set.
5
Tap [Done].
・ Inbox for set email account appears.
❖ Information
・ If you need to make the settings manually, contact
your email service provider or system administrator
for the correct email account settings.
・ If you set an Exchange ActiveSync account as
email account, and if server manager sets Remote
wipe, the data saved in the terminal may be
deleted.
・ Emails are not displayed in Timescape.
Creating and sending an email
message
1
From the Home screen, tap
then tap [Email].
2
Tap [New mail].
Enter the email address of
recipient.
4
5
6
Enter a subject.
Enter a message text.
To attach a file, tap [Add
attachment] and attach a file in the
following steps.
Add picture
Select a file from the saved image
file list.
Take photo
Start the camera to take a photo
and attach it.
Add video
Select a file from the saved video
file list.
,
Record video Start the camera to record a video
and attach it.
Mail/Internet
Continued on next page
125
SO-01D_English
SO-01D_(E).book
Add sound
126 ページ
2011年10月20日 木曜日 午後1時6分
Select music: Select a saved
music file.
Sound Recorder: Record a voice
message and attach it.
・ Only image/video/music file (up to 5
MB) can be attached to email.
7
Tap [Send].
❖ Information
・ You can save the message as a draft by tapping
[Save draft]. Also, when you move to the other
screen while creating a mail, the mail is
automatically saved as draft.
・ In sent/received emails, a communication data is
also included other than text and image displayed
on the screen and charges will apply to the data.
・ Email is handled as an email from a PC. You
cannot send or receive email if "Reject emails from
PCs" is set on a recipient terminal.
Receiving and reading the
email
1
From the Home screen, tap
then tap [Email].
,
・ When an account list appears, tap
and select an email account to
receive.
2
3
On the inbox, press t, then tap
[Refresh].
❖ Information
・ If you set "Email notifications" in Account settings
(P.128) and set "Inbox check frequency" to an item
other than "Manual",
appears in the status bar
when you receive a new message. Drag the status
bar downwards to read the message.
・ If you set "Inbox check frequency" in Account
settings (P.128) to an item other than "Manual", and
if you are using the pay-as-you-go data
communication, you may be charged every time
you check your email.
・ If you tap the address of a received email, you can
register it in a contact. If it has been already
registered, you can display the details.
・ Tap
(gray) to turn
(yellow) on the mail
message screen to add the marked mail to
"Starred" on the email screen. From "Starred", you
can quickly access to the mail you have marked.
If
is not shown on the mail message screen,
tap
to show.
・ When phone memory becomes low, a message
indicating low memory space appears and
receiving emails is not available. Delete saved
messages etc. to make available memory space.
Changing Inbox view
1
From the Home screen, tap
and then tap [Email].
,
・ When an account list appears, tap an
email account you want to use for
receiving mail to select.
Tap the email.
Mail/Internet
Continued on next page
126
SO-01D_English
SO-01D_(E).book
2
127 ページ
2011年10月20日 木曜日 午後1時6分
Press t, then tap [Preview
pane].
・ You can set the following options.
Off
Inbox is not shown piecewise.
On
Tap
in portrait view or
in
landscape view to cut the Inbox to
show the selected mail body.
❖ Information
・ If you have two or more accounts, change made in
any of the accounts applies to all accounts.
Saving email message
attachment
1
From the Home screen, tap
then tap [Email].
,
・ When an account list appears, tap
and select an email account whose
attachment you want to save.
2
Tap an email.
3
Tap [Save] of a file you want to
save.
・ The attachment list appears
underneath the message field.
・ The attached file is saved on the
microSD card.
・ You can display attachment files by
tapping [Open].
Replying to or forwarding
emails
1
From the Home screen, tap
then tap [Email].
,
・ When an account list appears, tap
and select an email account whose
email you want reply or forward.
■ Replying
Tap an email Press t and tap
[Reply] or [Reply all] Enter text, then
tap [Send].
■ Forwarding
Tap an email Press t and tap
[Forward] Enter recipient email
address Enter text, then tap [Send].
❖ Information
・ On the mail message screen, you can also tap
(Reply)/
(Reply all)/
(Forward) to reply
or forward an email.
・ When you reply or forward an email, the original
message contents for replying or forwarding is
quoted. To delete the quoted message text, tap
.
・ When you forward an email, the attachment file of
the original message is quoted. To cancel quoting
attached file, tap
.
・ You can also touch and hold the email to reply or
forward an email.
Mail/Internet
127
SO-01D_English
SO-01D_(E).book
128 ページ
2011年10月20日 木曜日 午後1時6分
2
Deleting an email message
1
From the Home screen, tap
then tap [Email].
,
・ When an account list appears, tap
and select an email account whose
email you want to delete.
2
Touch and hold an email, then tap
[Delete].
❖ Information
・ To delete multiple emails at the same time, tap
checkboxes at the left of the mails you want to
delete and then tap
at the bottom of the
screen.
・ To delete email while sending, press t and tap
[Folders] [Outbox], touch and hold a mail you
want to delete and then tap [Discard].
Changing the settings for an
email account
1
From the Home screen, tap
then tap [Email].
,
・ When an account list appears, touch
and hold an account that you want to
change the settings and tap [Account
settings], then go to Step 2.
Press t, then tap [Account
settings].
・ You can set the following options.
Account
name
Change account name.
Your name
Change your name (sender name).
Signature
Change your signature.
Inbox check
frequency
Set whether to check new
messages automatically and
intervals of automatic check.
Default
account
Set to the default account to send
email, if you set two or more email
accounts.
Email
notifications
Set whether to show email arrival
notification in the status bar.
Select
ringtone
Set ringtone when receiving an
email.
Vibrate
Set whether to vibrate when
receiving an email.
Incoming
settings
Set mail server for receiving.
Outgoing
settings
Set mail server for sending.
❖ Information
・ You can also set "Inbox check frequency", "Sync
contacts", and "Sync calendar" for an Exchange
ActiveSync account. "Outgoing settings" cannot be
set.
・ If you set "Inbox check frequency" to other than
"Manual", and if you are using the pay-as-you-go
data communication, you may be charged every
time you check your email.
Mail/Internet
128
SO-01D_English
SO-01D_(E).book
129 ページ
2011年10月20日 木曜日 午後1時6分
Adding an extra email account
1
From the Home screen, tap
then tap [Email].
,
・ When a screen other than account list,
press t and tap [Accounts].
2
3
Press t, tap [Add account].
Enter your email address and
password.
・ If required, mark [Send email from this
account by default.] checkbox.
4
5
Tap [Next].
・ To make the email account settings
manually, tap [Manual setup] and
follow the onscreen instructions.
Enter an account name and name
you want to display on outgoing
messages.
・ If "What type of account is this?"
appears, tap an email account type
and follow the onscreen instructions to
set.
・ If you set an Exchange ActiveSync
account, name to be displayed on
outgoing messages cannot be set.
6
❖ Information
・ If you need to make the settings manually, contact
your email service provider or system administrator
for the correct email account settings.
・ If you set an Exchange ActiveSync account as
email account, and if server manager sets Remote
wipe, the data saved in the terminal may be
deleted.
・ Press t on the inbox and tap [Accounts] to
display the email screen and set account list.
・ All received mails for the set accounts are shown in
the "Combined Inbox" on the email screen.
・ Tap an account name to open the inbox for
selected account alone.
・ Emails are not displayed in Timescape.
Removing an email account
from the terminal
1
From the Home screen, tap
then tap [Email].
,
・ When a screen other than account list,
press t and tap [Accounts].
2
Touch and hold the account to be
removed, then tap [Delete account]
[OK].
Tap [Done].
・ Inbox for set email account appears.
Mail/Internet
129
SO-01D_English
SO-01D_(E).book
130 ページ
2011年10月20日 木曜日 午後1時6分
4
Using mopera U mail
mopera U users (for the setting, see "Setting
mopera U" (P.95)) can use mopera U Mail.
In mopera U Mail, POP mail and IMAP mail
are available. The mail box supports 50 MB.
Also, the Web mail system is available.
■ POP mail
1
From the Home screen, tap
then tap [Email].
2
・ If you tap [Next] in Step 2,
"mail.mopera.net" is entered in the
POP3 server field.
5
Select the security type.
6
On the security selection screen,
mark the security radio button to
be used.
7
8
Confirm the entry, then tap [Next].
,
・ If you have already set an email
account, operate the following
operations.
- When an account list appears,
press t and tap [Add account].
- When a screen other than account
list appears, press t and tap
[Accounts], and then press t
and tap [Add account].
Tap [POP3] from the type of the
mail account.
・ If you do not select it, tap [Next] to go
to Step 8.
Enter [mail.mopera.net] for the
SMTP server and confirm the entry
of [User name] and [Password] for
mopera U.
・ If you tapped [Next] in Step 2, to
confirm the entry of [User name] and
[Password] for mopera U, mark
[Require sign-in].
・ If you tap [Next] in Step 2,
"mail.mopera.net" is entered in the
SMTP server field. Set "587" in the Port
field.
Enter mopera U mail address and
mopera U password, then tap
[Manual setup]/[Next].
・ If you tap [Next], it changes
automatically to POP3 account. Go to
Step 4.
3
Check that you have entered [User
name] and [Password] for mopera
U correctly, and [mail.mopera.net]
for the POP3 server.
9
Tap [Next].
Mail/Internet
Continued on next page
130
SO-01D_English
SO-01D_(E).book
131 ページ
2011年10月20日 木曜日 午後1時6分
10
On the option setting screen, set
frequency of checking Emails etc.
and tap [More].
11
On the mail account registration
screen, enter a name you want to
display on outgoing messages,
then tap [Done].
・ The mailer is displayed and the set
mail account is available.
2
On the inbox, press t and tap
[Refresh].
・ Synchronizing Gmail application in
the terminal with your Gmail account
starts, and the Inbox is refreshed.
❖ Information
・ For details of Gmail, press t on the Gmail
screen, then tap [More] [Help] to view the
mobile help.
❖ Information
・ If [Require sign-in] is not marked on the SMTP
server setting screen, mail cannot be sent. Mark
[Require sign-in].
Using Gmail
If you have a Google account, you can send/
receive emails by using Gmail on your
terminal. If you have no Google account, see
"Setting Google account" (P.114).
❖ Information
・ Gmail messages are not displayed in Timescape.
Refreshing Gmail
1
From the Home screen, tap
then tap [Gmail].
,
Google Talk (Chat)
You can use Google Talk instant messaging
to chat with friends. To use Google Talk, you
need to make settings of your Google
account. For details, see "Setting Google
account" (P.114).
Sign in and online chat
Signing in Google Talk
Signing in is unnecessary if you have already
set a Google account.
1
From the Home screen, tap
then tap [Talk].
2
Tap [Next] [Sign in], enter your
user name and password.
3
Tap [Sign in].
Mail/Internet
Continued on next page
,
131
SO-01D_English
SO-01D_(E).book
132 ページ
2011年10月20日 木曜日 午後1時6分
❖ Information
・ For details of Google Talk, on the Google Talk
screen, press t, then tap [Settings]
[Terms & privacy] [Help Center] (Talk Help is
displayed in English).
Early warning "Area Mail"
Early warning "Area Mail" is a service with
which you can receive earthquake early
warning, etc. delivered by the Meteorological
Agency.
・ Area mail is a free service for which
subscription is not required.
・ You cannot receive Area Mails in the
following case.
- During a voice call
- Out of service area
- When power OFF
- During International roaming
- In Airplane mode
- During updating software
- When using UIM by a carrier other than
NTT DOCOMO
- During sending or receiving messages
(SMS)
・ You may not be able to receive Area Mails
while tethering is set or if packet
communications are used.
・ Area Mail that could not be received cannot
be received later.
Receiving Early warning "Area
Mail"
When terminal is in service area, Area Mail is
sent automatically.
1
Receive an Area Mail
automatically.
2
When you receive an Area Mail,
dedicated ringtone sounds and the
notification LED blinks.
・ Dedicated ringtone sounds for 10
seconds.
・ Ringtone and ringtone volume cannot
be changed.
3
An Area Mail message appears
automatically.
Viewing received Area Mail later
1
From the Home screen, tap
then tap [Area Mail].
2
Select an Area Mail you want to
view from the Area Mail list.
,
・ You can view the Area Mail message.
Setting Early warning "Area
Mail"
1
From the Home screen, tap
then tap [Area Mail].
Mail/Internet
Continued on next page
,
132
SO-01D_English
SO-01D_(E).book
2
133 ページ
2011年10月20日 木曜日 午後1時6分
Press t, then tap [Settings].
Receive Area
Mail
Set whether to receive Area Mails.
Register Area
Mail
To receive Area Mails other than
early warning, register the name
of Area Mail about which you
want to receive information and
Message ID. Up to 20 items can
be registered.
t and tap [Settings] [Display], then mark
[Auto-rotate screen] checkbox.
Moving to a web page
1
2
Sound in silent Set whether to sound a dedicated
mode
ringtone even in silent mode.
Sample screen Check the ringtone when an
& sound
earthquake early warning or Area
Mail for disaster/evacuation
information is received.
Using the keyboard, enter the web
page address or keyword to be
searched for.
・ As you enter an address or
characters, retrieved web pages list
appears.
3
❖ Information
・ If the UIM is not inserted, you cannot set Area Mail.
On the Browser screen, press
s.
Tap the displayed candidates list
or
.
・ You can move the web page.
❖ Information
・ You can tap
to enter search words by voice
and search a web page.
Using Browser
Opening Browser
1
From the Home screen, tap
[Browser].
❖ Information
・ You can view the browser screen turning the
terminal sideways. If the screen orientation does
not change automatically when you turn the
terminal sideways, from the Home screen, press
Going back to the previous page
1
Press x.
Exiting Browser
1
Press y.
・ All open windows are closed and
Browser ends.
Mail/Internet
133
SO-01D_English
SO-01D_(E).book
134 ページ
2011年10月20日 木曜日 午後1時6分
Displaying web pages
Browser offers advanced features that let you
view web pages like on a PC.
Opening a new browser window
You can open up to 8 browser windows.
1
While viewing a web page, press
t, and tap [New window].
・ A new browser window opens in the
default home page.
Switching between browser
windows
Zooming in/out a web page
To zoom in/out a webpage, perform any of
the following operations.
・ Double-tap at the point you want to zoom in/
out.
・ Pinch-out at the point you want to zoom in or
pinch-in at the point you want to zoom out.
・ Tap the zoom control icon (the zoom control
icon may appear when you drag in any
direction on the screen).
Zoom out
Zoom in
❖ Information
You can easily switch from one website to
another by opening several windows.
・ Web pages created to fit to the screen cannot be
zoomed in/out.
1
On the Browser screen, press
t, then tap [Windows].
Searching for text within a web
page
2
Tap a browser window you want to
view.
1
Closing a browser window
1
On the Browser screen, press
t, then tap [Windows].
2
Tap
on the browser window
you want to close.
While viewing a web page, press
t, then tap [More] [Find on
page].
・ The search bar appears in the upper
part of the screen.
2
Enter the search item.
・ As you enter, matching characters are
highlighted in green.
Back to the previous matched item
Go to next matched item
Mail/Internet
Continued on next page
134
SO-01D_English
SO-01D_(E).book
3
Tap
135 ページ
2011年10月20日 木曜日 午後1時6分
to close the search bar.
Auto-fitting a web page
Copying text from a web page
Adjust display size of web pages
automatically to fit the screen.
1
While viewing a web page, press
t, then tap [More] [Select
text].
1
2
Place your finger at the start of the
text you want to copy and then
drag to the end of the text you want
to copy.
❖ Information
・ Copied text is highlighted in orange.
3
Take your finger away from the
screen and tap the selected text.
・ After copying text is completed, a
message "Text copied to clipboard."
appears.
4
To paste text in an email, text
message or multimedia message,
touch and hold the text box on a
message or email and tap [Paste]
in the menu.
❖ Information
・ On some web pages, selecting characters may not
available.
On the Browser screen, press
t, tap [More] [Settings]
Mark [Auto-fit pages] checkbox.
・ Some web pages cannot be adjusted
automatically.
Adjusting Browser settings
1
On the Browser screen, press
t, tap [More] [Settings] to set
Browser settings and options.
Setting the home page
1
On the Browser screen, press
t, tap [More] [Settings].
2
Tap [Set home page], enter URL
you want to set as the home page,
tap [OK].
❖ Information
・ The URL set as the home page appears when
opening a new browser window.
Mail/Internet
135
SO-01D_English
SO-01D_(E).book
136 ページ
2011年10月20日 木曜日 午後1時6分
Operating links
Operating links in web pages
1
Open the web page you want to
operate the links.
2
To open the web page, tap the link.
・ The links get enclosed in an orange
box when selected.
・ If you touch and hold the link, the
menus, "Open", "Open in new
window", "Bookmark link", "Save link",
"Share link" and "Copy link URL",
appear. When you touch and hold an
image or a link contained image,
"Save image", "View image" and "Set
as wallpaper" also appear. To share
the link via email, Bluetooth function,
Gmail or message, tap "Share the
link".
・ Browser recognizes some phone
numbers that allow you to call the
phone number. Tap the phone number
to call.
・ When you download a file by "Save
link" from websites which require
Basic authentication or SSL session,
the downloading may be failed.
Managing bookmarks and
history
You can check history and store many
bookmarks on the terminal.
Bookmarking a web page
1
On the Browser screen, go to the
web page you want to bookmark.
2
Press t, then tap [Bookmarks].
・ A list of bookmarks appears.
・ You can also access the list screen by
tapping
on the right side of the
URL.
・ You can switch thumbnail view and
List view by pressing t on the
bookmark list screen.
■ Thumbnail view
Tap [ ★ Add] on the upper left of the
screen Edit the name of bookmark, if
required, and tap [OK].
■ List view
Tap [Add bookmark...] on the top of the
screen Edit the name of bookmark, if
required and tap [OK].
Mail/Internet
Continued on next page
136
SO-01D_English
SO-01D_(E).book
137 ページ
2011年10月20日 木曜日 午後1時6分
❖ Information
・ You can also bookmark the page by pressing t
and tapping [Bookmark last-viewed page] in the
bookmark list screen.
・ Tap [Most visited]/[History] tab in the bookmark list
screen and tap on the right side of the record.
turns into
and the web page is added to the
bookmark list.
Checking browsing history
1
On the Browser screen, press
t, then tap [Bookmarks]
[History] tab.
2
Tap the time you browsed the web
page, such as [Today], [Yesterday],
etc.
Opening a bookmark
1
On the Browser screen, press
t, then tap [Bookmarks].
2
Tap the bookmark you want to
open.
・ If you do not tap a bookmark but
touch and hold it, the menus, "Open",
"Open in new window", "Edit
bookmark", "Add shortcut to Home",
"Share link", "Copy link URL", "Delete
bookmark" and "Set as homepage",
appear. Tap "Add shortcut to Home" to
create a shortcut on the Home screen.
To share the link via email, Bluetooth
function, Gmail or message, tap
"Share link".
・ To open the web page, tap an item.
・ To check your most visited web
pages, tap [Most visited] tab.
❖ Information
・ You can also press and hold x over a second
on the Browser screen to check the history.
Clearing history
1
On the Browser screen, press
t, then tap [Bookmarks]
[History] tab.
2
Press t, then tap [Clear
history].
・ When you delete the history, a list in
"Most visited" tab is also deleted.
❖ Information
・ To delete temporary internet file such as cache, on
the Browser screen, press t and tap [More]
[Settings] and then set each item from "Privacy
settings" menu on the appeared screen.
Mail/Internet
137
SO-01D_English
File management
SO-01D_(E).book
138 ページ
2011年10月20日 木曜日 午後1時6分
Handling a file
Files in the terminal should be operated on
the file handling application. For example, to
delete files saved in the microSD card, use
the deletion function of the applications such
as Music player or Gallery.
With "Share" function of each application, you
can exchange the files via Bluetooth or by
email file attachment sending to/receiving
from the other compatible devices.
In addition, with the terminal connected to a
PC, you can move or delete files in the
microSD card mounted on the PC. With PC
Companion and Media Go, you can manage
files between a PC and the terminal mutually.
With "Sync Zone" of PC Companion, you can
synchronize contacts in the terminal and
calendar with Outlook of a PC.
Transferring and moving
data
You can transfer and move images, music
data and some other data. Sharing some
data may not be permitted due to copyright.
Using microUSB cable
By connecting the terminal and a PC with the
supplied microSD cable, you can exchange
data between the microSD card of the
terminal and the PC.
Using a microUSB cable to
connect the terminal to a PC
1
Connect the terminal to a PC using
a microUSB cable (P.33).
・ When you connect microUSB cable
for the first time, the driver software for
the terminal is installed to a PC. Wait
for a while until installation is
completed. A confirmation screen for
installation of PC Companion software
appears when the driver software
installation is completed.
File management
Continued on next page
138
SO-01D_English
SO-01D_(E).book
2
139 ページ
2011年10月20日 木曜日 午後1時6分
Tap [Skip].
・ The terminal is connected to a PC in
"Media transfer mode (MTP)", USB
connection mode set by default. Follow
the onscreen instructions on the PC to
access "Memory Card" in the terminal.
❖ Information
・ Drag the status bar when connecting and tap
[Connected in Media transf. mode]
[Connectivity settings] to check connectivity or
change the following connection settings.
・ If you switch the USB connection mode to "Mass
storage mode (MSC)" and connect to a PC, you
can access the microSD card in the terminal as a
removable disc. However accessing microSD card
on the terminal is not available and you may not use
functions or applications on the terminal such as
Camera, Gallery and music player.
・ If you install PC Companion, you can use the
following applications on a PC for managing media
files, creating backup files, etc. when connecting
the terminal and the PC. For details, check on the
PC Companion screen after installation.
Media Go
P.142
Install PC
Companion
Display PC Companion
installation wizard when
connected to a PC.
Support Zone
Update software of the
terminal connecting to a PC.
(P.202)
USB connection
mode
Select USB connection mode
from "Media transfer mode
(MTP)"/"Mass storage mode
(MSC)" when connected to a
PC.
Sync Zone
Synchronize calendar and
contacts between Outlook
and the terminal.
File Manager
Check file type, update time,
location, etc. of microSD
card.
Auto connect in
MSC
Automatically set USB
connection mode to "MSC"
when connected to a PC.
Tethering &
portable hotspot
Set terminal data
communication via USB
cable or as portable Wi-Fi
hotspot. (P.100)
Trusted devices
for wireless
media transf.
Connect the terminal and a
host device in a pair via Wi-Fi
network. (P.141)
・ When the terminal is connected to a PC, charging
starts automatically.
File management
139
SO-01D_English
SO-01D_(E).book
140 ページ
2011年10月20日 木曜日 午後1時6分
Disconnecting the microUSB cable
safely
Dragging and dropping data on the
terminal and a PC
・ Do not disconnect the microUSB cable
during data transferring. Otherwise, data
may be damaged.
・ If you connect the terminal in the Media
transfer mode (MTP), make sure that data
transfer is not in progress and just
disconnect the microUSB cable.
■ Media transfer mode (MTP)
1
・ "Connected in Media transf. mode"
appears in the status bar.
2
■ Mass storage mode (MSC)
1
Drag the status bar downwards.
・ When "Connect your phone" is
displayed, go to Step 4. When "Phone
memory card connected" is
displayed, go to Step 2.
2
Tap [Phone memory card
connected].
3
Tap [Disconnect].
4
Disconnect the microUSB cable.
・ "Connect your phone" appears in the
status bar.
Connect the terminal to a PC using
a microUSB cable.
Drag and drop data that you have
selected between the terminal and
a PC.
■ Mass storage mode (MSC)
1
Connect the terminal to a PC using
a microUSB cable.
・ "Phone memory card connected"
appears in the status bar.
2
Drag and drop data that you have
selected between the terminal and
a PC.
❖ Information
・ You can transfer files using a microUSB cable on
most devices and the following operating systems
(OSs) that supports the USB mass-storage
memory interface.
- Microsoft Windows 7
- Microsoft Windows Vista
- Microsoft Windows XP
File management
140
SO-01D_English
SO-01D_(E).book
141 ページ
2011年10月20日 木曜日 午後1時6分
Connecting the terminal to a PC
on a Wi-Fi network
If the terminal and a PC*1 are connected in a
pair on a Wi-Fi network, automatic
connection/disconnection of microSD card
and a PC is enabled when the terminal user
comes in and out of the Wi-Fi area, You can
easily access to a microSD card inserted in
the terminal from a connected PC.
*1 Use Microsoft Windows 7 to make a pair
setting. Pair setting cannot be made under
Microsoft Windows XP, Microsoft Windows
Vista or other OS.
1
Connect a PC you want to set in a
pair to a Wi-Fi network.
2
Set USB connection mode of the
terminal to "Media transfer mode
(MTP)".
3
Connect the terminal to a Wi-Fi
network (P.97).
4
Connect the terminal to a PC using
a microUSB cable.
6
Right click the portable device
icon, then click " ネットワーク構成
(network composition)".
7
8
9
Click [ 次へ (Next)].
10
11
Disconnect the microUSB cable.
12
Tap [Connect].
On the terminal, tap [Pair].
On the network composition of the
portable device screen of the PC,
click " 完了 (Done)".
From the Home screen of the
terminal, press t and tap
[Settings], [Sony Ericsson]
[Connectivity] "Host name" (PC
name) in the "Trusted devices..."
field.
・ The terminal and a PC are connected
in "Media transfer mode (MTP)" on a
Wi-Fi network, and you can exchange
data files.
・ When a confirmation screen for
installation of PC Companion software
appears on the terminal, tap [Skip].
5
Make sure that "SO-01D" is
displayed as a portable device on
the explorer of the PC.
File management
Continued on next page
141
SO-01D_English
SO-01D_(E).book
142 ページ
2011年10月20日 木曜日 午後1時6分
❖ Information
・ From the Home screen of the terminal, press t
and tap [Settings], [Sony Ericsson]
[Connectivity] to display "Host name" (PC name) in
the "Trusted devices for wireless media transfer"
field. Tap the host name and tap [Forget] to cancel
connection setting. Until "Forget" is tapped, the
connection setting retains even if you connect/
disconnect repeatedly by coming in and out of a
Wi-Fi area.
Using Media Go
The Media Go computer application helps
you transfer and manage media content in
the terminal and computer.
With Media Go, you can load music from a
CD to a PC and transfer to the terminal.
You need one of these operating systems to
use the Media Go application:
・ Microsoft Windows 7
・ Microsoft Windows Vista
・ Microsoft Windows XP, Service Pack 3 or
higher
Installing Media Go
1
Connect the terminal to a PC using
a microUSB cable.
・ "PC Companion software" screen
appears.
2
Tap [Install].
3
On the Installer screen of PC,
select "English (U.K.)" or "English
(U.S.)" Click "Install".
・ An Installer screen appears on the PC
screen.
・ After this step, follow the instructions
on the screen.
4
After the installation, on the "Sony
Ericsson PC Companion" screen
of the PC, install "Media Go".
❖ Information
・ You can also download Media Go from
http://www.sonyericsson.co.jp/mediago/.
❖ Information
・ To transfer files, set USB connection mode to
"Media transfer mode (MTP)" in advance when
connecting the terminal and a PC using microUSB
cable.
・ To learn more about how to use the Media Go
application, see the help section in the main menu
of the Media Go application.
File management
142
SO-01D_English
SO-01D_(E).book
143 ページ
2011年10月20日 木曜日 午後1時6分
Transferring data using Media Go
1
Connect the terminal to a PC using
a microUSB cable.
2
Drag the status bar down to check
the USB connection mode.
・ When "Connected in Media transf.
mode" is displayed, go to Step 5.
When "Phone memory card
connected" is displayed, go to Step 3.
3
Tap [Phone memory card
connected].
4
Tap [Connectivity settings] [USB
connection mode] [Media
transfer mode (MTP)] [OK].
5
Select Media Go from the PC's
start menu and activate Media Go.
・ Using Media Go, you can move files
between the terminal and the PC.
Using Bluetooth function
The Bluetooth function creates a wireless
connection to other Bluetooth devices, for
example, handsfree devices. A range within
10 m, with no solid objects in between, is
recommended. You must turn on the
Bluetooth function to communicate with
Bluetooth devices. You may also have to
make pair setting for your phone and
Bluetooth devices.
❖ Information
・ By default, Bluetooth function is OFF. If you turn
Bluetooth on and then turn off the terminal,
Bluetooth function turns off. When you turn on the
terminal again, Bluetooth function turns on
automatically.
・ If you do not use Bluetooth function, turn it off to
save the battery.
■ Reception interference caused by
wireless LAN devices
The terminal's Bluetooth function and
wireless LAN devices use the same
frequency band (2.4GHz). If you use the
terminal near a wireless LAN device,
reception interference may occur or the
communications speed may lower. Also,
you may hear noise or have a connection
problem. In these cases, do the following:
File management
Continued on next page
143
SO-01D_English
SO-01D_(E).book
144 ページ
2011年10月20日 木曜日 午後1時6分
・ Keep the Bluetooth device over 10
meters away from a wireless LAN
device.
・ Within 10 meters, turn off either the
Bluetooth device or the wireless LAN
device.
* The terminal does not communicate
wirelessly with all types of Bluetooth
devices. Bluetooth DUN is not
supported.
Making the terminal detectable
with the Bluetooth function ON
1
From the Home screen, press
t.
2
Tap [Settings]
networks].
3
Mark [Bluetooth] checkbox.
4
5
・
[Wireless &
appears on the status bar and
Bluetooth function turns ON.
Tap [Bluetooth settings].
Mark [Discoverable] checkbox.
・ Bluetooth devices can detect the
terminal for 120 seconds.
Entering the terminal's name
You can name the terminal. The name
appears on Bluetooth devices when you use
the Bluetooth function.
1
Confirm that the Bluetooth
function is ON.
2
From the Home screen, press
t.
3
Tap [Settings] [Wireless &
networks] [Bluetooth settings]
[Device name].
4
5
Enter a name.
Tap [OK].
Making pair setting for the
terminal and Bluetooth device
By making pair setting for the terminal and
another Bluetooth device, you can use the
device such as Bluetooth handsfree headset
etc. connecting to the terminal to make and
receive calls.
File management
Continued on next page
144
SO-01D_English
SO-01D_(E).book
145 ページ
2011年10月20日 木曜日 午後1時6分
Once you have made pair setting for your
terminal and a Bluetooth device, the setting is
saved. When making pair setting for the
terminal and a Bluetooth device, you may
need to enter a pass code (PIN). Your
terminal will automatically try the generic
pass code 0000. If this does not work, see
the documentation of your Bluetooth device
for the pass code used by your Bluetooth
device. You do not need to re-enter the pass
code the next time you connect to a paired
Bluetooth device already set.
You cannot make pair setting for the terminal
and two Bluetooth headsets. However, you
can set it with two or more Bluetooth devices
if the same profile is not in use. The terminal
supports the following Bluetooth profiles:
A2DP, AVRCP, HFP, HSP, OPP, PBAP and
SPP.
1
From the Home screen, press
t.
2
Tap [Settings] [Wireless &
networks] [Bluetooth settings].
3
Tap [Scan for devices].
4
Tap a Bluetooth device name to
pair with the terminal.
・ A list of Bluetooth devices detected
appears.
5
If necessary, enter the pass code
(PIN).
・ You can use a Bluetooth device that
has been paired. The pairing and
connection status appear below the
device name in the Bluetooth device
list.
・ Some Bluetooth devices make
connections continuously after
making pair setting.
❖ Information
・ Make sure that the Bluetooth function of the device
for making pair setting is ON, and that the
Bluetooth detection function is on.
・ When you make pair setting with the Bluetooth
device supporting Secure Simple Pairing (SSP)
function, a passkey appears on the screen. After
checking the appeared passkey is correct, the pair
setting is mode.
Connecting the terminal with
another Bluetooth device
1
From the Home screen, press
t.
2
Tap [Settings] [Wireless &
networks] [Bluetooth settings].
File management
Continued on next page
145
SO-01D_English
SO-01D_(E).book
3
146 ページ
2011年10月20日 木曜日 午後1時6分
Touch and hold a Bluetooth device
name that you are going to
connect.
4
・ Touch and hold a device with "Pair
with this device" displayed under the
device name.
4
Tap [Pair].
・ Depending on the device type,
connection status is displayed under
the device name when pair setting is
completed. While connecting to a
device,
appears in the status bar.
Deactivating the connection of
a Bluetooth device
Tap [Disconnect].
・ Tap the device name and tap [OK] on
the confirmation screen for
disconnecting to disconnect. The
display under the device name
changes to "Paired but not connected"
while the pair setting remains set. To
reconnect, tap the device name.
Deactivating the pair setting of
a Bluetooth device
1
From the Home screen, press
t.
2
Tap [Settings] [Wireless &
networks] [Bluetooth settings].
1
From the Home screen, press
t.
3
Touch and hold the currently
connected Bluetooth device name.
2
Tap [Settings] [Wireless &
networks] [Bluetooth settings].
4
Tap [Disconnect & unpair].
3
Touch and hold the currently
connected Bluetooth device name.
・ The device displayed under the
device name is paired with the
terminal and connected.
・ Connection disconnects and the pair
setting is canceled.
❖ Information
・ When the terminal is only set to pair with Bluetooth
device (not connected), "Unpair" appears.
File management
146
SO-01D_English
SO-01D_(E).book
147 ページ
2011年10月20日 木曜日 午後1時6分
Sharing files with DLNA
devices via Connected
devices (Media server)
With Media server, you can share media files
with other client (DLNA: Digital Living
Network Alliance) devices using Wi-Fi
function.
Set Wi-Fi connection (P.96) with another client
device.
Setting Connected devices
(Media server)
1
2
From the Home screen, tap
,
then tap [Connected devices].
Server
information
Rename the terminal (server)
on a client device.
Share
contents
Set to connect from client
devices to the terminal via
Wi-Fi.
Pending
devices
Manage pending client
devices.
Registered
devices
Manage client devices
registered to the terminal.
❖ Information
・ Press t to set Wi-Fi connection or confirm
Help.
File management
147
SO-01D_English
Games
SO-01D_(E).book
148 ページ
2011年10月20日 木曜日 午後1時6分
Use the terminal as a
gaming console
Use XperiaTM PLAY or PlayStation®pocket to
enjoy playing games with the terminal.
・ Some games require downloading a large
volume of data before using, they may be
downloadable only via Wi-Fi connection. In
that case, turn Wi-Fi connection to ON and
then download it.
・ When you try to download games from other
than Android Market, downloading may be
blocked because of security protection. To
continue downloading, mark [Unknown
sources] in the settings menu and then
download again. (P.111)
・ Because content files for a lot of games are
saved to the microSD card, do not the
following operations while playing a game.
Playing the game may be interrupted.
- Unmounting microSD card
- Removing the back cover of the terminal
- Connecting the terminal to a PC and read/
write the microSD card
・ Content files for some games preinstalled in
the terminal are saved in the microSD card
attached at the time of purchase. If you
erase data in the microSD card or attach
another microSD card to the terminal,
downloading content files may start
automatically when activating a game.
・ The terminal could become warm if you play
games for a long time. This condition is not
abnormal.
・ The game keypad is designed for use of
games. If you use the game keypad for
applications other than games, the
operations may be different from those of
games.
Using XperiaTM PLAY
Use XperiaTM PLAY to enjoy playing many
kinds of games with the terminal.
1
Slide out the gaming keypad.
2
Tap [XperiaTM PLAY Games].
3
Tap a game you want to play.
・ XperiaTM PLAY is activated, and the
game list screen appears.
・ The list of preinstalled games or
downloaded games appear.
・ Or press the directional buttons to
select a tab or game, and press the ○
button to start a game.
Games
Continued on next page
148
SO-01D_English
SO-01D_(E).book
149 ページ
2011年10月20日 木曜日 午後1時6分
・ Press the × button to go back to the
previous screen.
・ Tap [More games] tab to display the
list of downloadable games.
For the first time to tap [More games],
a message confirming whether to
agree to the privacy policy appears.
Tap [Agree].
・ Tap
to search games for XperiaTM
PLAY in the Android Market.
4
Using PlayStation®pocket
Use PlayStation®pocket to enjoy playing
games for PlayStation with the terminal.
1
・ A list of PlayStation®pocket games
appears.
2
Operate a game.
・ The operation of the gaming keypad
varies by games. For details, refer to
Help etc. of each game.
Tap [All]/[Recently Played]/
[Recently Added] tab, and then tap
a game you want to play.
・ Or press the directional buttons to
select a tab or game, and press the ○
button to start a game.
・ Press the × button to go back to the
previous screen.
・ Tap
to display website featuring
"PS Store".
❖ Information
・ When there is an incoming call, a game pauses
automatically and an incoming call screen
appears. When a message (SMS) is received
during a game, you are notified with notification
sound or vibration (only when notification settings
are set).
・ To set whether to activate XperiaTM PLAY
automatically when you slide the gaming keypad,
press the menu button or t on the game list
screen and tap [Settings].
・ Tap [More games] tab and press the menu button
or t, and then tap [Refresh], the list of
downloadable games is updated to the latest one.
・ Alternatively, from the Home screen, tap
, then
tap [Get games] to display the downloadable
game list.
From the Home screen, tap
[PlayStation®pocket].
3
Operate a game.
・ The operation of the gaming keypad
varies by games. For details, refer to
Help etc. of each game.
❖ Information
・ When there is an incoming call, a game pauses
automatically and an incoming call screen appears.
When a message (SMS) is received during a game,
you are notified with notification sound or vibration
(only when notification settings are set).
・ To set the background theme, operation sound,
etc., press the menu button or t on the game
list screen and tap [Settings].
Games
149
SO-01D_English
Applications
SO-01D_(E).book
150 ページ
2011年10月20日 木曜日 午後1時6分
Using the camera
You can take a photo or record a video by
tapping the screen. You can hold the camera
horizontally or vertically. Photos and videos
are saved automatically in the microSD card.
Before using the camera
・ You must install a microSD card before you
use the camera. All pictures or videos that
you capture on your terminal are stored on
the microSD card. You cannot take a photo
while the microSD card reads/writes data,
for example transferring a file from Media
Go.
・ If you insert the microSD card used in the
terminal into an i-mode compatible mobile
phone, photos and videos shot by the
terminal cannot be viewed.
・ Avoid copyright infringements when you
handle photos taken with your terminal, e.g.
copy/edit. In addition, avoid rights
infringements of portraits by using these
photos without consent, altering them or by
other means. Note that capturing or
recording a stage performance,
entertainment or exhibition may be
prohibited even if for personal use.
■About the Copyright and Portrait rights
Objects, such as movies, still images, and sounds,
recorded using the terminal are prohibited by the
copyright law from use without consent of the
copyright holders, unless intended for personal use
or any other purpose permitted by law. Also, using
or transformation of other person's portrait or name
without his or her permission may violate the portrait
right. When you present recorded images or sounds
in a public place such as on an Internet home page,
make sure to be aware of the copyright and portrait
right. Note that some performances, shows, and
exhibitions may not allow photography, movie
shooting, or sound recording even for personal use.
Transmission of images related to copyright or
beyond the scope provided in the copyright law is
not available.
Please be considerate of the privacy of
individuals around you when taking and
sending photos using camera-equipped
mobile phones.
If you cause the public any trouble using the
terminal, you may be punished under law or
regulations (for example, nuisance prevention
ordinance).
Applications
150
SO-01D_English
SO-01D_(E).book
151 ページ
2011年10月20日 木曜日 午後1時6分
f Shutter (Photo)
Start/Stop recording (Video)
g Flash mode
h Select camera
i Video quality (Video)
j Recording time for video (Video)
Shooting screen and key
operations
■ Still image shooting screen
ab c
d
❖ Information
・ Tap x to turn off the camera.
e
f
Taking photos
Taking photos
g h
1
■ Video shooting screen
ga c
・ If the still image shooting screen does
not appear, tap
.
d
e
f
j
a
b
c
d
i h
White balance
Record of location information (photo)
Settings
Recently shot log
・ Tap to switch to the playback screen for
recently shot photos or videos.
・ Press t on the playback screen to display
[Slideshow], [Share], [Delete], [Details],
[Set as]*1, [More]*1, [Edit movie]*2.
From the Home screen, tap [ メディ
ア (Media)] [Camera].
2
Tap
.
・ The photo is taken as soon as focus is
set. The photo is automatically saved
in the microSD card.
❖ Information
・ To take a photo using auto-focus function, touch
and hold
and release your finger when the
focus frame turns green and a beep sounds. The
photo is taken as soon as you release the finger. If
the focus frame turns red, auto-focus does not
operate correctly.
・ Auto-focus cannot be operated if "Focus mode"
(P.153) is set to "infinity".
*1 Appears only on the photo viewing screen.
*2 Appears only on the video playback screen.
e Switch between still and video camera
Applications
Continued on next page
151
SO-01D_English
SO-01D_(E).book
152 ページ
2011年10月20日 木曜日 午後1時6分
・ When you connect Stereo Headset with
Microphone (sample), commercially available
earphone set or other Bluetooth device, shutter
sound may be softer.
Taking a photo using in-camera
1
2
On the shooting screen, tap
(Select camera), and then tap
[Front].
Tap
Changing the capturing
settings
1
・ If the still image shooting screen does
not appear, tap
.
2
.
・ When using the in-camera, "Picture quality", "Color
effect", "Camera setting", "Store location" and
"Select camera" can be set. The in-camera does
not support other still camera settings (P.153).
On the shooting screen, tap a
setting item icon.
・ The displayed setting icon changes
depending on the setting conditions.
・ For setting items and icons, see "Still
camera settings" (P.153).
・ The photo is taken as soon as focus is
set. The photo is automatically saved
in the microSD card.
❖ Information
From the Home screen, tap [ メディ
ア (Media)] [Camera].
3
Tap one of the options in the
setting that you have selected.
・ The setting option icon displayed on
the shooting screen is changed to the
selected one (Except for
).
Adjusting Exposure value
1
On the shooting screen, tap
(Settings), and then tap a value
(+2 - -2) in [Exposure].
Applications
152
SO-01D_English
SO-01D_(E).book
153 ページ
2011年10月20日 木曜日 午後1時6分
Still camera settings
Item
Focus
Settings mode
Icon/Value
Item
Description
Scene
Settings mode
Icon/Value
Portrait
Set focus controls.
Auto
Infinity
Macro
The camera
automatically
focuses on a
selected subject.
The focus frame
turns to green
when focus is on.
Use when
shooting at a
distance. Focus on
subjects far away.
Subjects close to
the camera may
be blurred.
Landscape Shoot landscape
depicting trees
with vivid color
and focusing on
distant objects.
Night
Shoot a crisp and
clear night scene.
Due to long
exposure time, be
careful not to
shake camera.
Night
portrait
Suitable for
shooting persons
against the
nightscape
background. Due
to long exposure
time, be careful
not to shake
camera.
Beach
Reconstruct beach
brightly and
vividly.
Snow
Reconstruct snowy
scene brightly and
vividly.
Auto focus for
close-up photos.
Exposure P.152
Scene
mode
Use Scenes to quickly set up
the camera for various scene
conditions.
Auto
Adjust color shade
or brightness
automatically.
Action
To shoot fastmoving object,
shorten exposure
time to minimize
motion blurring.
Description
Settings are
optimized to give
brighter and
warmer skin tones.
Applications
Continued on next page
153
SO-01D_English
SO-01D_(E).book
Item
Picture
Settings size
154 ページ
Icon/Value
2011年10月20日 木曜日 午後1時6分
Description
Select image sizes before
shooting. An image with a
higher resolution requires
more memory.
・ Aspect ratio is 4:3 only.
・ For in-camera, VGA (0.3
megapixel) only.
Item
Icon/Value
Color
Settings effect
5M Pixels Approx. 5
megapixel image
size (2592 × 1944)
3M Pixels Approx. 3
megapixel image
size (2048 × 1536)
2M Pixels Approx. 2
megapixel image
size (1600 × 1200)
1M Pixels Approx. 1
megapixel image
size (1024 × 768)
VGA
Picture
quality
Approx. 0.3
megapixel image
size (640 × 480)
Select the image quality
(compression rate for
recording image). An image
with a higher image quality
requires more memory.
Super fine Shoot in super
high quality.
Fine
Shoot in high
quality.
Normal
Shoot in standard
quality.
Camera
settings
Description
Set special effect for shooting.
None
Shoot without
special effect.
Mono
Shoot in
monochrome.
Sepia
Shoot in sepia
tone.
Negative
Shoot negative/
positive in reverse.
Solarize
Shoot with
solarization effect.
Restore
defaults
Reset the camera
settings to the
default.
Store
Tag photos location information for the
location detail shooting spot.
You need to mark "Use wireless networks"
(P.175) or "Use GPS satellites" (P.175)
checkboxes in "Location & security"
settings beforehand. For details on
location information, see "About location
services" (P.174).
・ Location information enables to specify
the shooting spot of the photo.
Off
Shooting location cannot be
viewed on a map.
On
When On is set, location
information is added to the
taken photo.
Applications
Continued on next page
154
SO-01D_English
SO-01D_(E).book
Item
155 ページ
Icon/Value
2011年10月20日 木曜日 午後1時6分
Description
White
The white balance setting adjusts the
balance color balance according to the light
source.
Auto
Adjust the color balance for a
sunny place.
Adjust the color balance for
Fluorescent lighting like fluorescent.
Cloudy
Flash
mode
Adjust the color balance for a
cloudy sky or shaded area.
Set whether to turn on the flash when
shooting when lighting conditions are
poor or when there is a backlight.
Auto
Turn on the flash automatically
according to the shooting
condition.
On
The Flash turns on.
Off
The flash does not turn on.
Sometimes the video quality
can be better without a flash,
even if lighting conditions are
poor. Shooting a good photo
without using the flash
requires a steady hand.
Icon/Value
Description
Switch shooting camera between outcamera (Back)/in-camera (Front).
Back Shoot with out-camera on rear
side of the terminal.
Adjust the color balance
automatically to the light
source.
Adjust the color balance for
Incandescent lighting like incandescent
bulb.
Daylight
Item
Select
camera
Front P.152
❖ Note
・ Some settings cannot be used in combination with
one another.
Recording videos
Recording videos
1
From the Home screen, tap [ メディ
ア (Media)] [Camera].
・ If the movie recording screen does
not appear, tap
.
2
3
Tap
to start recording.
Tap
to stop the recording.
・ The recording data is automatically
saved in the microSD card.
❖ Information
・ When you connect Stereo Headset with
Microphone (sample), commercially available
earphone set or other Bluetooth device, starting/
stopping sound for recording may be smaller.
Applications
155
SO-01D_English
SO-01D_(E).book
156 ページ
2011年10月20日 木曜日 午後1時6分
Recording videos using in-camera
1
2
3
On the shooting screen, tap
(Select camera), and then tap
[Front].
Tap
to start recording.
Tap
to stop the recording.
・ The recording data is automatically
saved in the microSD card.
❖ Information
・ When using the in-camera, "Color effect", "Camera
settings", "Video quality", and "Select camera" can
be set. The in-camera does not support other
video recording settings (P.157).
Cropping video
Tap the recently recorded history displayed
on the shooting screen to display video, and
then press t and [Edit video] to crop the
video partially.
1
On the recording screen, tap the
shooting history to display video.
2
Press t, then tap [Edit video].
・
(Progress
bar) appears at the bottom of the
screen.
3
Drag
at the left of the progress
bar to the right for starting point of
cropping.
4
Drag
at the right of progress bar
to the left for ending point of
cropping.
・ Tap the screen to play the cropped
part for check.
5
Tap [Save].
・ Tap [Cancel] to return to the video
playback screen without saving the
edited video.
❖ Information
・ Cropped videos are stored in the album in
"Camera" (P.160).
Changing the recording
settings
1
From the Home screen, tap [ メディ
ア (Media)] [Camera].
・ If the video recording screen does not
appear, tap
.
2
On the shooting screen, tap a
setting item icon.
・ The displayed setting icon changes
depending on the setting conditions.
・ For setting items and icons, see
"Video recording settings" (P.157).
Applications
Continued on next page
156
SO-01D_English
SO-01D_(E).book
3
157 ページ
2011年10月20日 木曜日 午後1時6分
Tap an option in the selected
setting.
・ The setting option icon displayed on
the shooting screen changes to the
set one (Except for
).
Item
Color
Settings effect
Camera
settings
Icon/Value
Description
Flash
mode
Shoot without
special effect.
Mono
Shoot in
monochrome.
Sepia
Shoot in sepia
tone.
Negative
Shoot negative/
positive in reverse.
Solarize
Shoot with
solarization effect.
Restore
defaults
Reset the camera
settings to the
default.
White
The white balance setting adjusts the
balance color balance according to the light
source.
Auto
Cloudy
Set special effect for shooting.
None
Video
quality
Adjust the color balance for a
cloudy sky or shaded area.
Use the photo light (flash) to shoot when
lighting conditions are poor or when
there is a backlight.
On
The photo light turns on.
Off
The photo light does not turn
on. Sometimes the video
quality can be better without a
photo light, even if lighting
conditions are poor. Shooting
a good photo without using
the photo light requires a
steady hand.
Select video size and maximum
recording time before recording video.
An image with a higher resolution
requires more memory.
High
(30m)
Adjust the color balance
automatically to the light
source.
Adjust the color balance for
Incandescent lighting like incandescent
bulb.
Description
Adjust the color balance for a
sunny place.
Adjust the color balance for
Fluorescent lighting like fluorescent.
Video recording settings
Item
Icon/Value
White
balance Daylight
Low
(30m)
HD 720p format with 16:9
aspect ratio, 1280×720 pixels
(Maximum recording time:
Approx. 30 min.)
・ For in-camera, VGA format
with 4:3 aspect ratio (640 ×
480 pixels).
QCIF format with 4:3 aspect
ratio, 176 ×144 pixels
(Maximum recording time:
Approx. 30 min.).
Applications
Continued on next page
157
SO-01D_English
SO-01D_(E).book
Item
Select
camera
158 ページ
Icon/Value
2011年10月20日 木曜日 午後1時6分
Description
Switch shooting camera between outcamera (Back)/in-camera (Front).
Back Shoot with out-camera on rear
side of the terminal.
Front P.156
❖ Note
・ Some settings cannot be used in combination with
one another.
Playing multimedia content
You can play music files on "Music" and view
photos and video files on "Gallery".
You can play photos and videos shot by the
terminal, transfer files to a microSD card by
connecting to a PC, and play multimedia
content of the following file formats
downloaded from the Internet.
Type
Shooting screenshot
You can shoot a current displayed screen as
an image (screen shot).
Shot screen shot can be displayed in
"Pictures" album in the Gallery.
1
On the screen you want to shoot a
screen shot, press p for over a
second.
File format
Sound
MP3, 3GPP, MP4, AMR, AMRWB,
SMF, XMF, WAV, iMelody, RTTTL/RTX,
OTA, Ogg vorbis
Still image
JPEG, GIF, PNG, BMP
Video
3GPP, MP4
For details on operations for copying files by
connecting to a PC, see "Transferring and
moving data" (P.138).
・ Phone options menu appears.
2
Tap [Take screenshot].
・ A screen shot is taken and a
notification message for saving
location appears on the screen.
❖ Information
・ By tapping [Share]/[Set as] on the shooting
completion screen, you can share (send) the
image via Bluetooth or email, or register as
wallpaper or contact image.
Applications
158
SO-01D_English
SO-01D_(E).book
159 ページ
2011年10月20日 木曜日 午後1時6分
Copyright protected content
Avoid copyright infringements when you
handle photos taken with the terminal, e.g.
copy/edit. In addition, avoid rights
infringements of portraits by using these
photos without consent, altering them or by
other means. Note that capturing or
recording a stage performance,
entertainment or exhibition may be prohibited
even if for personal use.
Please be considerate of the privacy of
individuals around you when taking and
sending photos using camera-equipped
mobile phones.
Using Stereo Headset with
Microphone
1
Connect the plug of Stereo
Headset with Microphone
(Sample) to headset connector of
the terminal.
・ Check the connecting direction to
connect correctly. Wrong connection
may cause damage.
Microphone
Switch
Headset connection jack
Applications
Continued on next page
159
SO-01D_English
SO-01D_(E).book
160 ページ
2011年10月20日 木曜日 午後1時6分
❖ Information
・ When you listen to Music player with Stereo
Headset with Microphone connecting to the
terminal, you can switch ON/OFF by pressing the
switch of Stereo Headset with Microphone.
However, operation may differ depending on the
conditions of use.
・ If receiving a call when using Stereo Headset with
Microphone, music stops, and resumes when the
call ends.
1
・ The following album list screen
appears by default.
Camera
Viewing photo/video album
Photos and videos that you took or saved in
the microSD from a PC are displayed in an
album.
Photos and videos taken with the
terminal
・ It does not appear when no photo
nor video is taken.
・ If you signed in an online service
available to be synchronized such as
Facebook and Picasa, online album
appears after synchronization.
Viewing photos/videos
with Gallery
Use Gallery to view/play pictures, photos or
videos you take. Also, use Media Go to
transfer content to the terminal's microSD
card and to take content from an external
device. For details, see "Using microUSB
cable" (P.138).
From the Home screen, tap [ メディ
ア (Meida)] [Gallery].
2
Tap an album you want to view.
・ A screen listing Photo/Video files in
album appears.
❖ Information
・ When you tap an album, then tap
in
to the upper right of the screen, the
albums sorted by date appear.
When you tap the date album, the list of all files
appears. However, the files of selected date
appear with the thicker frame than the other files.
・ To display only videos in the list, set a widget on
the Home screen and then tap
of "Media
shortcuts".
Videos recorded by the terminal appear on the list
screen.
・ Depending on the number of photos saved, it may
take some times to load all photos on the screen.
Applications
160
SO-01D_English
SO-01D_(E).book
161 ページ
2011年10月20日 木曜日 午後1時6分
2
■ Album list screen
b
Press t and tap the displayed
menu.
・ You can perform the following
operations.
a
Share
Select a transfer method and send
photos/videos.
Delete
Delete selected photos/videos.
Details
xDisplay title, type, date, album name,
location, etc.
Select all
Select all files in album.
c
a Camera album
b Camera button: Tap to activate the camera.
c Album list
Deselect All Cancel all files in the album.
More
Rotate Left: Rotate a picture 90
degrees counterclockwise.
Rotate Right: Rotate a picture 90
degrees clockwise.
Show on map: Display location
information included in the image on
the map.
The items vary depending on the
selected file.
Edit video
Crop the video partially to save.
Operating Photo/Video files in
album
On the photo/video file list screen, you can
select files in the album to operate them at a
time.
1
On the photo/video file list screen,
touch and hold a file.
・ The checkbox is marked and file is
selected. Tap another file in a row to
select two or more files.
・ Tap a selected file to unmark the
checkbox.
・ The items vary depending on the
selected file.
・ Some items cannot be operated in
some files.
Applications
Continued on next page
161
SO-01D_English
SO-01D_(E).book
162 ページ
2011年10月20日 木曜日 午後1時6分
❖ Information
・ Press t while selecting a file, tap [Share]
[Play on Device] [OK] to display Play on Device
setting screen (if you do not connect to the Wi-Fi
network, tap [Not connected] to open Wi-Fi setting
screen). Connect to the Wi-Fi network, select a
searched device from the list on the player device
selection screen and tap [Play] to share the file
between a DLNA device and the terminal.
・ For shared files, file size and the file type are not
particularly limited, but may be limited by the
application to transfer. DRM content cannot be
shared.
・ When you press t before selecting a file, a file
near the center among several files displayed on
the screen is marked automatically. Note that once
you select a file, a file near the center may not be
marked.
・ Press t on the photo viewing screen to operate
photo files individually.
Viewing photos
■ Photo viewing screen of Gallery
a
b
c
a Album information
b Zoom out.
c Zoom In.
❖ Information
・ Press t on the playback screen to display
"Slideshow", "Share", "Delete", "Details", "Set as",
"More", "Set as wallpaper".
* "Set as wallpape" only appears in the albums
provided by an online service such as Facebook and
Picasa.
・ The items vary depending on the selected file.
・ From the photo viewing screen for the Facebook
album, you can post comments or " いいね (Like)"
onto Facebook.
1
From the Home screen, tap [ メディ
ア (Media)] [Gallery].
2
Tap an album.
・ A list screen of files in the album
appears.
Starting a slideshow
3
Tap a photo to view it.
1
While viewing photo, press t
and tap [Slideshow].
・ A slideshow of the photos or first
frames of videos in the album starts.
Applications
162
SO-01D_English
SO-01D_(E).book
163 ページ
2011年10月20日 木曜日 午後1時6分
Playing a video
1
From the Home screen, tap [ メディ
ア (Media)] [Gallery].
2
Tap an album.
3
・ The file list screen in the album
appears.
appears on the moving
picture file.
b Progress bar: Display the playback position in the
playback duration.
c Marker: Playback position. Drag to change the
playback position.
d [Play/Pause] key
e [Fast forward] key: Fast-forward the playing
position.
Adjusting the volume of a video
1
Tap a video to play it.
❖ Information
・ If the screen orientation does not change
automatically when you turn the terminal sideways,
from the Home screen, press t and tap
[Settings] [Display], then mark [Auto-rotate
screen] checkbox.
On the video playback screen,
press m up or down.
Fast forwarding and rewinding a
video
1
Drag the progress bar marker right
or left.
・ Tap
/
to rewind/forward.
■ Video viewing screen of Gallery
Playing video with YouTube
d
a
e
YouTube is a free online video streaming
service. You can play, search for and upload
videos.
・ A packet communication charge is applied
when downloading or uploading video
content using 3G network.
b
c
a [Rewind] key: Move the frame to be played
backward.
Applications
163
SO-01D_English
SO-01D_(E).book
164 ページ
2011年10月20日 木曜日 午後1時6分
Playing YouTube video
1
From the Home screen, tap
then tap [YouTube].
,
・ When you use for the first time, agree
to "Terms of Service".
・ YouTube playback screen and list
screen of videos appear.
・ You can also press t and tap
[Browse] to select a video from each
category.
2
Tap a video to play it.
・ While playing a video, tap the screen
to display the play control keys which
you can switch Play/Pause. Doubletap to switch landscape/portrait. In
landscape, drag the marker on the
progress bar at the bottom of the play
screen left or right to change playing
point.
・ Press x to stop the playback, and
return to list screen of videos.
・ To exit YouTube, press y.
Playing YouTube videos in high
quality
1
While playing a video, double-tap
the screen to switch to the
landscape screen.
2
Tap the screen to display the play
control keys, then tap [HQ].
❖ Information
・ A video plays in high quality when Wi-Fi is
connected.
・ To play video in high quality on 3G network, on
YouTube screen, press t, then tap [Settings]
and mark [High quality on mobile] checkbox.
Searching for a video with
keywords
1
On YouTube screen, press t
and tap [Search].
2
3
Enter the search keyword.
❖ Information
・ For movies with caption function which can display
subtitles, "CC" appears on the playback screen in
the landscape mode. For your first activation, tap
"CC" to tap language for the subtitles.
Scroll the result and tap a video
you want to play it.
Deleting search history
1
On YouTube screen, press t
and tap [Settings].
2
Tap [Clear search history]
[OK].
Applications
164
SO-01D_English
SO-01D_(E).book
165 ページ
2011年10月20日 木曜日 午後1時6分
Music player
You can browse and listen to your music,
playlists and podcasts using Music.
Playing music
Tap
on the Music player screen, you can
browse and play audio content saved in
microSD by detailed category.
e
a
b
f
g
h
c
d
i
❖ Note
・ Do not perform "Unmount SD card" while a track is
playing.
1
■ Music player screen
From the Home screen, tap [ メディ
ア (Media)] [Music].
・ The Music player screen appears.
2
3
Tap
4
Tap a track to play it.
.
Browse to a track by tapping
Artists/Albums/Tracks/Playlists by
category.
j
k
a Artist name, song title
b Album art
c [Previous] key: Go to the previous track, or to the
beginning of the track in the current playlist.
d Progress bar: Resume playback from the
specified point by dragging or tapping.
e Select/Cancel "いいね (Like)" on Facebook.
・ Appears if you login to Facebook.
f Play/Pause key
g [Next] key: Go to the next track in the current
playlist.
h Track play time
i Display the track list of artist/album/track/playlist.
j Infinite button: Connect to Google, wikipedia or
YouTube to display related information of the
current track.
k Display playing track and the list contains the
track.
・ You can switch to play/pause the playing track,
and change the track by tapping other track in
the list.
Applications
Continued on next page
165
SO-01D_English
SO-01D_(E).book
166 ページ
2011年10月20日 木曜日 午後1時6分
・ Touch and hold a track to display menu for
sharing the track, adding to a playlist,
registering incoming ringtone, deleting, etc.
・ Tap [Save] to save the tracks displayed in the
list to a playlist.
・ Drag
at the left side of tracks to change the
order of tracks in the list.
・ To add a track to the list, touch and hold a track
you want to add from Artists/Albums/Tracks/
Playlists categories and then tap [Queue artist].
m: Adjust the volume.
t: Select "Sound settings"/"Equalizer"/"Set as
ringtone"/"Extensions" from the menu by pressing on
the Music player screen.
・ On the track list of each category, tap to select
"Send several"/"Delete several" from the menu.
Sharing a track
You can share (send) files by Bluetooth or
email attachment.
1
On the Music player screen, tap
.
2
Tap a category in Artists, Albums,
Tracks or Playlists.
3
Touch and hold a track you want to
share.
・ To share two or more tracks, on the list
screen, press t, tap [Send
several] and mark taracks you want to
share (send).
❖ Information
・ You can return to the Home screen to perform
another operation while listening to the Music
player in the background. To return to the playback
screen of the Music player, from the Home screen,
tap [ メディア (Media)] [Music], or drag down
the status bar and tap the current track name in the
ongoing item.
・ If the Music player widget is displayed on the
Home screen, tap Play/Pause/ / . Tap the
album art to display the playback screen of the
Music player.
4
5
Adjusting the volume
1
On the Music player screen, tap
.
2
Tap a category in Artists, Albums,
Tracks or Playlists.
1
While playing a track, press m
up or down.
Tap [Send].
Select sending method and send.
❖ Information
・ For shared (to be sent) files, file size and the file
type are not particularly limited, but may be limited
by the application to transfer. DRM content cannot
be shared.
Deleting a track
Applications
Continued on next page
166
SO-01D_English
SO-01D_(E).book
3
4
167 ページ
2011年10月20日 木曜日 午後1時6分
Touch and hold a track you want to
delete.
Creating a playlist
・ To delete two or more tracks, on the
list screen, press t, tap [Delete
several], then mark tracks you want to
delete.
1
On the Music player screen, tap
.
2
Tap [Playlists]
playlist].
Tap [Delete]
3
Mark a track you want to add to the
playlist and then tap [Create].
4
Tap [Name] entry box and enter a
playlist name, and tap [OK].
[Delete].
Using a track as a ringtone
1
On the Music player screen of the
Music player, press t.
2
Tap [Set as ringtone].
Playlist
In Music player, playlists named "Newly
added", "Most played" and "Never played",
are automatically created. You can also
create new playlists with your desired tracks.
You can use Media Go (P.142) to maintain
your music library and create your own
playlists. Playlists that you create yourself are
stored on microSD in the terminal in the m3u
format.
You can connect the terminal to a PC using
the included microUSB cable to use a
microSD card as a removal disk. For details,
refer to "Using microUSB cable" (P.138).
[Create new
Playing Playlists
1
On the Music player screen, tap
.
2
Tap [Playlists].
・ The following playlists appear by
default.
Newly added
Display the list of tracks newly
added.
Most played
Display the list of frequently played
tracks.
Never played
Display the list of available tracks
which have not played wholly.
3
Tap a playlist you want to play
Tap a track.
・ The playlist plays from the track you
tap.
Applications
167
SO-01D_English
SO-01D_(E).book
168 ページ
2011年10月20日 木曜日 午後1時6分
Using TrackID results
TrackID
TrackID is a music recognition service. You
can search for title, artist and album name for
a track you hear playing through a
loudspeaker. For best results, use TrackID in
a quiet area. You can recommend tracks to
others. You can also search for and view
related content on YouTube. If you cannot use
TrackID, see "Wireless & networks" (P.93) to
check the Internet connection.
Starting TrackID
1
From the Home screen, tap
then tap [TrackIDTM].
,
Searching for the track
information
1
Start TrackID, then hold the
terminal towards the music source.
2
Tap [Record].
・ The track information appears in the
result screen.
・ To return to the TrackID start screen,
press x.
When a track has been recognized by
TrackID, you can recommend it, search for
related content for the track on YouTube, or
do some others. The track information
appears when a track is recognized after a
search, but also in a history list.
To use TrackID results
・ When a recorded track is recognized, the
track information appears. Tap one of the
keys in the track information screen to
recommend to others, or view the track on
YouTube.
・ To view the track information, tap the
desired track in the history list, or tap
[Charts] and view the optional chart.
Using Android Market
With Android Market, you can access to
useful applications or fun games directly
which you can download and install on the
terminal. And you can send feedback and
comments about an application, or report
objectionable application or incompatible
application with the terminal as an
inappropriate content.
Applications
Continued on next page
168
SO-01D_English
SO-01D_(E).book
169 ページ
2011年10月20日 木曜日 午後1時6分
・ To use Android Market, you need to set
Google account (P.114).
・ Some applications and games are free of
charge, and the others are paid. In the
applications list of Market, distinction
between free and paid is clearly specified.
For details on purchasing, returning and
refunding of paid applications, see "Help"
(P.169).
・ Some applications automatically perform packet
communications. Packet communication is kept
active unless you disconnect it or the time-out is
occurred. To disconnect packet communication
manually, from the Home screen, press t and
tap [Settings] [Wireless & networks] [Mobile
networks], then unmark [Data enabled] checkbox
by tapping.
・ Some applications may be updated automatically.
Help
Opening Android Market
1
From the Home screen, tap
then tap [Market].
,
・ When you open Android Market for
the first time, the Terms of Service for
Android Market window appears. Tap
[Accept].
❖ Information
・ Be sure to check the security of application, then
install it at your own risk. The terminal may be
infected with a virus and the data may be
damaged.
・ NTT DOCOMO is not liable for malfunctions, if any,
caused by the application you installed. In such
case, the repair is charged even during the
warranty period.
・ NTT DOCOMO is not liable for any disadvantage
brought to you or any third party due to an
application you installed.
When you need help or have any questions
about Android Market, open Android Market,
press t then tap [Help]. The Browser
opens the Android Market Help web page.
Using docomo market
In the docomo market, you can quickly
access DOCOMO recommended sites and
useful applications.
Opening the docomo market
1
From the Home screen, tap
then tap [docomo market].
,
・ The browser is activated and docomo
market is displayed.
Applications
Continued on next page
169
SO-01D_English
SO-01D_(E).book
170 ページ
2011年10月20日 木曜日 午後1時6分
❖ Information
・ To use docomo market, Internet connection by
packet communication (3G/GPRS) or Wi-Fi is
required.
・ For accessing docomo market or downloading
applications introduced in docomo market, a
packet communication charge is applied
separately. Some downloaded applications
automatically perform packet communications.
・ The introduced applications on docomo market
include charged ones.
・ NTT DOCOMO is not liable for any disadvantage
caused by introduced websites on docomo market
or the acquired information from the website.
・ And NTT DOCOMO is not liable for contents,
adequateness to purpose of use, reliability, etc. of
applications introduced on the docomo market.
・ Some applications that you perform installation
may give the terminal instability of the operation, or
may send your location information or personal
information registered to the terminal to outside via
the Internet and the information may be used
improperly. Please thoroughly check a provider
and operation status of the application etc. which
you want to use beforehand and then use it.
・ The copyrights of materials (documents,
photographs, illustrations, animations, sounds,
software, etc.) on this Site are the possession of
DOCOMO or other third parties and are protected
by the Copyright Act as well as other laws and
agreements. Excluding the extent of quotation and
reproduction for private use that is approved in the
Copyright Act, without the consent of the party
owing the copyright, the reproduction, adapting or
public transmission of copyrighted material is
prohibited.
TimescapeTM
Sony Ericsson TimescapeTM (hereinafter
referred to as Timescape) displays various
information such as received messages
(SMS), Facebook, Twitter or mixi updates,
etc. in chronological order. You can see a tile
preview of events before choosing to view the
full content. With
(infinite button), you can
view all communication information related to
the registered contacts. (P.173)
❖ Information
・ To make best use of Timescape, you can set up
your social networking service (SNS) account.
・ Note that, you cannot view emails of Gmail or other
Email application accounts in Timescape.
・ If you do not have a Facebook account, you can
create a new account at http://www.facebook.com.
・ If you do not have a Twitter account, you can
create a new account at http://www.twitter.com.
・ If you do not have a mixi account, you can create a
new account at http://mixi.jp.
・ You can check the update of set Facebook, Twitter
or mixi by Timescape.
Applications
170
SO-01D_English
SO-01D_(E).book
171 ページ
2011年10月20日 木曜日 午後1時6分
Setting up Timescape
Timescape screen
・ The first time you start Timescape, a setup
wizard will guide you the necessary steps to
set up account.
1
From the Home screen, tap
then tap [TimescapeTM].
a
,
b
・ The Timescape screen appears.
2
3
Tap a tile.
4
Tap [Done].
If you want, enter your Facebook/
Twitter/mixi account information.
❖ Information
・ Timescape also can be started by tapping
under the Timescape widget.
・ In the setup wizard, tap [Extension search] on the
account registration screen to connect to Android
Market and search new services for Timescape.
・ After completion of setup wizard, you can change
the settings. On the Timescape screen, press
t and tap [Settings].
・ If the screen orientation does not change
automatically when you turn the terminal sideways,
from the Home screen, press t and tap
[Settings] [Display], then mark [Auto-rotate
screen] checkbox.
・ If the automatic update of Facebook/Twitter/mixi is
set, you can check information update sooner;
however, the battery runs out quickly. To save the
battery, set to manual update.
c
a Latest comment: Display the latest comments
posted to Facebook/Twitter/mixi.
・ To narrow the services to post down, use filter.
b Tile: Display various information such as missed
calls, received SMS, Facebook, Twitter or mixi
friend's updates are displayed in chronological
order.
c Filter: Tap a filter item to narrow the information
down to a certain type.
・ Display order of filters may differ.
Scrolling through tiles in
Timescape
1
Drag a tile up and down.
Previewing tiles in Timescape
Select a tile to view the content on the tile.
1
Tap a tile.
Applications
171
SO-01D_English
SO-01D_(E).book
172 ページ
2011年10月20日 木曜日 午後1時6分
Posting to Facebook, Twitter, mixi
from Timescape
Filter icons
Filter Icon
Displayed tile
All tiles
Received SMS
Missed calls
1
In the Timescape screen, press
t and tap [Update status].
2
Mark the service you want to post
and tap [Continue].
3
Enter the text and tap [Post].
Updates from your Twitter contacts
Updates from your Facebook contacts
Updates from your mixi contacts
Filtering the displayed tile
1
Tap the filter icons on the
Timescape screen.
Tile icons
The following icons on a tile indicate a type of
event.
Icon
Event
Refreshing the start screen in
Timescape
A missed call: Tap the tile to call the
caller.
When you refresh the start screen, the
terminal connects to the Internet to update
information from your Twitter, Facebook and
mixi account set in Timescape.
A Twitter update: Tap the tile to display
the update.
1
An SMS message: Tap the tile to
display the message.
A Facebook update: Tap the tile to
display the update.
In the Timescape screen, press
t and tap [Refresh].
A mixi update: Tap the tile to display
the update.
Viewing a tile information
1
On the Timescape screen, tap a
tile.
Applications
172
SO-01D_English
SO-01D_(E).book
173 ページ
2011年10月20日 木曜日 午後1時6分
Calling back from Timescape when
you have a missed call
Viewing the registered information
of contacts in Timescape
1
On the Timescape screen, tap
tile.
1
On the Timescape screen, tap a
tile.
2
3
Tap the tile again.
2
Tap
Tap [Return call XXXXXXXX].
Replying to an SMS message in
Timescape
1
On the Timescape screen, tap
tile.
2
3
4
Tap the tile again.
Enter a message text.
Tap [Send].
The infinite button in
Timescape
When you tap a tile,
(infinite button) may
appear in the upper right corner. By tapping
, you can view the communication log by
registered information in the contacts or tile
filter event.
.
・ Communication logs and information
related to the selected tile by event
appear. Flick the filter at the bottom of
the screen to switch displayed
information.
Setting Timescape
Displaying the Timescape setting
screen
1
On the Timescape screen, press
t, then tap [Settings].
・ You can set the following operations.
Update mode
Set your Twitter/Facebook/mixi
account information to be updated
manually/automatically when
Timescape is activated.
TimescapeTM
content
Change a content type displayed
in Timescape.
Set up
services
Set Facebook/Twitter/mixi account
and search new services for
Timescape.
Applications
173
SO-01D_English
SO-01D_(E).book
174 ページ
2011年10月20日 木曜日 午後1時6分
About location services
There are two ways to find your location,
using Mobile networks with Wi-Fi (Wireless
network) or GPS. Wireless network
technology determines your position fast but
accuracy may vary. If you use GPS
technology it may take a little longer, but it will
find your exact position. You can enable both
Wireless network and GPS to benefit from
both technologies when trying to find your
position.
GPS Function
The terminal has a GPS receiver that uses
satellite signals to calculate your location.
Some GPS features use the Internet. Data
rates and charges may apply.
When you use functions that require the GPS
receiver to find your location, make sure you
have a clear view of the sky. If the GPS
receiver does not find your location after a
few minutes, you should move to another
location. To help the search, stand still and do
not cover the GPS/Wi-Fi/Bluetooth antenna
section (P.25). The first time you use the GPS
it may take up to 10 minutes before your
location is found.
・ Use the GPS system with great care.
DOCOMO is not liable for any damage
caused by abnormality of the system.
・ Note that DOCOMO shall have no liabilities
for any purely economic loss including
those due to missing a chance to check the
measurement (communication) results
because of external factors (including the
running out of the battery), such as a failure,
malfunction, or any other problems of the
terminal or the power failure.
・ You cannot use the terminal as a navigation
device for an aircraft, vehicle, and person.
Note that DOCOMO shall have no liabilities
whatsoever even if you suffer damage or
loss while performing a navigation using the
location information.
・ You cannot use the terminal as a highaccuracy measurement GPS. Note that
DOCOMO shall have no liabilities
whatsoever even if you suffer damage or
loss due to a deviation of the location
information.
・ The GPS signals cannot be easily received
near a vehicle's sun visor with metal parts.
Applications
Continued on next page
174
SO-01D_English
SO-01D_(E).book
175 ページ
2011年10月20日 木曜日 午後1時6分
・ GPS is operated by the U.S. Department of
Defense. The department controls the
accuracy of the system, and manages the
system. Therefore, GPS radio wave
condition may be controlled (degradation of
accuracy, suspension of radio wave
transmission, etc.) at the discretion of the
U.S. Department of Defense.
・ Some wireless communications products
(mobile phone, data detectors and some
others) block satellite signals and also
causes instability of signal reception.
・ Some map displays based on location
information (latitude/longitude information)
may be not accurate due to some countries'
or regions' regulations.
■ Where radio waves are difficult to
receive
Note that radio waves may not be received or
it may be difficult to receive radio waves in
the following conditions, since GPS uses
radio waves from a satellite.
・ Inside or immediately under a building
・ Inside a bag or box
・ Inside or under a thick covering of trees
・ In a car, inside a train compartment
・ When there are obstructions (people or
objects) near the terminal
・ Inside a basement or tunnel, and below the
ground or water
・ In buildings-clustered or residential area
・ Near a high-voltage cable
・ Bad weather such as heavy rain or snow
❖ Note
・ If some of the GPS functions are not available, or if
none of them are, check that your contract
includes the use of the Internet, and see "Wireless
& networks" (P.93).
・ NTT DOCOMO is not liable for navigation services
or for the accuracy of location services.
Enabling GPS function
1
From the Home screen, press t
and tap [Settings].
2
3
Tap [Location & security].
4
Read the note and tap [Agree].
Mark [Use GPS satellites]
checkbox.
Enabling Wireless network to find
your position
・ Enable to search a current location using
mobile network and Wi-Fi.
1
From the Home screen, press t
and tap [Settings].
2
3
Tap [Location & security].
Mark [Use wireless networks]
checkbox.
Applications
Continued on next page
175
SO-01D_English
SO-01D_(E).book
4
5
176 ページ
2011年10月20日 木曜日 午後1時6分
Read the note and tap [Agree].
Read the note on location
information and tap [Agree].
・ Wireless network users' location
information is stored without
specifying who they are. Some
location information is stored even
when the application is not running.
Using Google Map
The Google Maps application lets you view
your current location, find other locations and
calculate routes. When you start the Google
Maps application, your approximate location
is shown using information from nearby
mobile towers. Your location is updated with a
more precise position when the GPS receiver
finds your location.
❖ Information
・ Make sure you enable the current location
information setting before trying to get your
position.
・ If the screen orientation does not change
automatically when you turn the terminal sideways,
from the Home screen, press t and tap
[Settings] [Display], then mark [Auto-rotate
screen] checkbox.
・ To use Google Map, enable data connection (3G/
GPRS) or connect to Wi-Fi.
・ Google Map does not cover the whole world.
・ Only using 3G/Wi-Fi connection may not detect
some locations.
・ Google may provide updated service or function.
1
2
From the Home screen, tap
.
Tap [Maps].
Detecting the current location on a
map
1
On the map screen, tap
.
・ The blinking blue arrow shows the
current location.
Using Street View
・ Street View does not cover some areas.
1
Touch and hold a spot on the map
that you are going to look at in
Street View.
2
3
Tap the displayed balloon.
Tap
(Street View).
・ When Street View is operating, press
t and tap [Compass mode], and
then the compass in Street View
shows the same direction as the
terminal's geomagnetic compass.
・ Uncovered area for Street View
appears in gray.
Applications
176
SO-01D_English
SO-01D_(E).book
177 ページ
2011年10月20日 木曜日 午後1時6分
Searching for a location you want
to look at
1
On the map screen, press t
and tap [Search].
2
Fill out the search box.
3
4
・ You can enter addresses, city names,
business types and institution names
(for example, London and art
museum).
・ You can tap the search box to shows
a list of all places entered and referred
to previously. Tap an address, etc. on
the list to check the location on the
map. If you tap an address on the
menu, you can check the location on
the map.
Tap [実行 (Execute)]/
.
・ Search result appears on the map.
・ If
appears, tap
to select the
place to display.
・ When "Do you mean..." appears at the
top of the map, you can tap "Do you
mean..." to select the place.
Tap a destination.
・ A detailed information screen
appears.
❖ Information
・ You can use
(Show on map),
(Get
directions),
(Call XXXXXXXX),
(More
options), etc. on the detailed information screen.
The options you can use vary depending on the
location.
・ With
(Places) on the map, select a category
such as "Restaurants", "Cafe", etc. to search and
show it on the map. You can add the search
categories.
Zooming in or out on a map
1
Tap
map.
to zoom in or out on a
❖ Information
・ Alternatively, double-tap or pinch on the screen to
zoom in/out.
Changing the layer
You can select information to overlay on the
map.
1
2
On the map screen, tap
.
Tap an item you want to see.
・ Traffic information and routes are not
available in all locations.
Traffic
Show traffic condition.
Satellite
Display satellite photo.
Terrain
Display geological formation.
Transit Lines Show route information.
Latitude
Join Latitude.
Applications
Continued on next page
177
SO-01D_English
SO-01D_(E).book
178 ページ
2011年10月20日 木曜日 午後1時6分
My Maps
View My Maps that you create on a
PC. Only viewing: You cannot create
My Maps on the terminal.
Wikipedia
appears.
Tap
to display a Wikipedia article
related to the location.
Receiving guides
Google Map helps you receive detailed
guides for your destination.
1
On the map screen, press t,
then tap [Directions].
2
Enter a departure point in the
upper text box, and a destination in
the lower text box.
・ Alternatively, tap
at the right of the
text box to select a Start point and
End point from [My current location]/
[Contacts]/[Point on map].
3
Select a transportation device from
(Driving)/
(Transit)/
(Walking).
4
Tap [Go].
5
If your search type is Transit, tap a
route in the list.
・ A route is displayed if you search in
car or walk option. Tap
to display a
route on the map.
❖ Information
・ With "Navigation" application, you can use easy
route search with current location as a departure
point.
Clearing the Maps
Clear deleted layers, route search results and
some others.
1
On the map screen, press t,
then tap [Clear Map].
・ If there is nothing to clear, you cannot
tap [Clear Map].
・ A list of guides for your destination
appears.
Applications
178
SO-01D_English
SO-01D_(E).book
179 ページ
2011年10月20日 木曜日 午後1時6分
Confirming your friend's
current location with Google
Latitude
Google Latitude enables you to check where
a friend is on the map, and to share status
messages. Latitude also enables you to send
messages (SMS) and emails, to make phone
calls, and to find the route to where a friend
is.
Location information cannot be automatically
shared. You need to join Latitude and invite a
friend who gives his or her location
information, or to receive an invitation from
him or her.
Joining Latitude
1
While a map is displayed, press
t, and tap [Join Latitude].
・ For the first time to join Latitude, a
message confirming whether to allow
friends and Google to share location
information may appear.
・ Once you join Latitude, your menu
item changes into [Latitude].
Opening Latitude
If you join Latitude, you can confirm where a
friend is, and check update with opening the
screen.
1
When a map is displayed, press
t, and tap [Latitude].
❖ Information
・ For details of Latitude, press t on the map
screen, then tap [More] [Help] [Latitude] to
view the mobile help.
Calendar
The terminal has a built-in calendar for the
schedule. If you have a Google account, you
can synchronize the terminal's calendar and
web calendar. See "Accounts & sync" (P.114).
・ You need to create a Google account
(P.114) before activating the calendar.
After Google account registration, tap the
Google account displayed in "Accounts &
sync" and a sync item "Sync Calendar". You
can create schedule etc.
❖ Information
・ To set Latitude or log out, press t on the map
screen, then tap [Latitude], press t and tap
[Settings] to display the screen to operate.
Applications
179
SO-01D_English
SO-01D_(E).book
180 ページ
2011年10月20日 木曜日 午後1時6分
Setting the calendar view
1
From the Home screen, tap
then tap [Calendar].
2
Press t, tap [Day]/[Week] to
select.
,
・ In "Day" view, [Week] and [Month] can
be selected, and in "Week" view, [Day]
and [Month] can be selected.
7
Enter a place and some others of
schedule.
8
Tap [Save].
❖ Information
・ Tap [More] and scroll the screen to set "Time zone",
"Guests (Email addresses)", "Show me as",
"Privacy".
Displaying a calendar schedule
Creating a calendar schedule
1
From the Home screen, tap
then tap [Calendar].
To create a schedule in Calendar, register
Google account and synchronize Google.
2
Tap a schedule you want to
display.
1
From the Home screen, tap
then tap [Calendar].
2
Tap [New event].
3
4
Enter a schedule name and date.
5
If necessary, select the repetition
intervals of the calendar.
6
Select the notification intervals of
the schedule.
・ Flick from side to side to display the
next or previous month/day/week
according to the view mode.
,
・ In Day view or Week view, press t
and tap [New event].
If you have two or more calendar
accounts, select one.
・ Tap
to add a new notification into
the schedule.
,
❖ Information
・ If you login to Facebook, events in Facebook
appear on the calendar.
Releasing the reminder of a
schedule or setting the snooze
1
If a reminder icon ( ) appears in
the status bar, drag the bar
downward.
・ The notification panel opens.
・ The reminder icon appears at set
notification time.
Applications
Continued on next page
180
SO-01D_English
SO-01D_(E).book
2
3
181 ページ
2011年10月20日 木曜日 午後1時6分
Tap a schedule.
Tap [Snooze all]/[Dismiss all].
・ If you have any schedules on hold,
they appear on the same screen.
・ If you tap [Snooze all], all the
calendars can be put on snooze 5
minutes later. (Snooze is a function
that sounds the alarm some time later
even though you stop it.)
1
2
From the Home screen, tap
.
Tap [Clock].
The Clock screen appears.
a
b
c
d
Changing the calendar settings
Set Calendar view, reminder notifications,
ringtone, vibration, reminder time.
1
From the Home screen, tap
then tap [Calendar].
2
Press t, tap [More]
[Settings].
3
Select an item to change.
,
Clock/Alarm
With "Clock" application, you can set an
alarm; additionally, you can set to show the
clock or photo slideshow on the display or to
play with the Music player.
e
f g h
a Alarm display
・ Appear when there is a set alarm.
b
: Turn off the backlight.
・ Tap the screen to light up.
c Clock display
・ When 5 minutes are passed without touching
the display, the day and time view appears.
d News & Weather
・ Tap to activate "News & Weather".
* To view the weather of current location, set to
position the current location (P.175).
e
f
g
h
: Set alarm.
: Set to slideshow display.
: Display the Music player screen.
: Go to the Home screen.
Applications
181
SO-01D_English
SO-01D_(E).book
182 ページ
2011年10月20日 木曜日 午後1時6分
Turning the alarm ON/OFF
Setting the alarm
1
From the Home screen, tap
then tap [Alarms].
,
1
・ The alarm list screen appears.
・ Alternatively, tap
on the clock
screen to display the alarm clock list.
2
Tap [Add alarm].
3
Tap numbers to adjust the time and
then tap [Set].
・ A new alarm time setting screen
appears.
・ An edit new alarm screen appears
and you can set the following items.
On the alarms list screen, tap
.
・ If you set the alarm on, green line
under
lights on and
appears in
the status bar.
・ When you set the alarm off, the line
under
turns off.
Setting the alarm settings
Make common settings such as alarm
volume etc.
1
From the alarms list screen, press
t.
2
Tap [Settings].
Turn alarm
on
Mark to set the alarm on.
Time
When changing the time, tap to
return to Step 3.
Repeat
Set a day of the week for the alarm.
・ No repetition without setting
Alarm in silent
mode
Set not to sound the ringtone in
silent mode.
Ringtone
Select ringtone.
Alarm volume
Set alarm volume.
Vibrate
Mark to vibrate at the alarm time.
Snooze duration
Label
Name the alarm.
Set time interval to sound the
ringtone again after stopping
the ringtone.
4
Tap [Done].
・ Return to the alarms list screen.
・ The alarm common settings screen
appears and you can set the following
items.
Side key behavior Set operation when side key
(m) is pressed while
alarm is sounding.
Applications
182
SO-01D_English
SO-01D_(E).book
183 ページ
2011年10月20日 木曜日 午後1時6分
Deleting the alarm
Other applications
1
On the alarms list screen, tap an
alarm to delete.
2
3
Tap [Delete].
Tap [OK].
Stopping an alarm while the alarm
is sounding
1
The following applications are preinstalled in
the terminal to use the various services on the
Web.
On the dialog box for the alarm
sounding, tap [Dismiss] or
[Snooze].
・ [Dismiss] stops the alarm. [Snooze]
stops the alarm in a given time and
sounds again.
Friends' music & videos
Friends' music & videos is an application for
viewing the list of music and videos that are
shared on Facebook. You can also view a list
of videos and tracks shared by Friends on
Facebook. In addition, you can select a video
or track to post or to view comments and "い
いね! (Like)".
To use the application, login to Facebook,
then from the Home screen, tap
and tap
[Music & videos].
OfficeSuite
With OfficeSuite, you can view files of Word,
Excel, etc. from the terminal or the microSD
card.
Activating OfficeSuite
1
2
From the Home screen, tap
Tap [OfficeSuite].
OfficeSuite is activated.
.
Friends' games & applications
Friends' games & applications is an
application for viewing the list of games or
applications that are shared on Facebook.
You can download games and applications
that are not installed on the terminal from
here.
To use the application, login to Facebook,
then from the Home screen, tap
and tap
[Games & apps].
Applications
183
SO-01D_English
SO-01D_(E).book
184 ページ
2011年10月20日 木曜日 午後1時6分
SE Store
SE Store displays Sony Ericsson Store.
You can view information on accessories
compatible the terminal and purchase them.
To use SE Store, from the Home screen, tap
and then tap [SE Store].
PlayNow
PlayNow is a web application which allows
you to use news flash, dictionary service, etc.
To use the application, from the Home
screen, tap
and then tap [PlayNow] to
connect the dedicated site. For membership
registration etc., operate following the
onscreen instructions.
mora touch
mora touch is an application which allows
you to access music downloading service for
Android terminal.
To use the application, from the Home
screen, tap
and then tap [mora touch] to
connect the dedicated site. You can operate
after creating a new account or using your
existing account.
life.episode
life.episode application is a new
entertainment which allows you to discover
the latest information for wide ranged
categories such as news, music, animation,
photos, gourmet, shopping, etc.
corresponding specified age and gender.
Use "Pocket" function, you can clip favorite
information easily and take it out any time.
To use life.episode, from the Home screen,
tap
and then tap [life.episode] to
download the application. Set age and
gender to complete installation.
ToruCa
ToruCa is an electronic card that can be
obtained to mobile terminals. It can be
obtained from the site as store information,
coupon ticket, etc. Obtained ToruCa is saved
to the "ToruCa" application. Use the "ToruCa"
application to display, search or update.
For details on ToruCa, refer to " ご利用ガイド
ブック (spモード編 ) (Mobile Phone User's
Guide [sp-mode]) (in Japanese only)" or
DOCOMO Market.
Applications
Continued on next page
184
SO-01D_English
SO-01D_(E).book
185 ページ
2011年10月20日 木曜日 午後1時6分
❖ Information
・ For obtaining, displaying or updating ToruCa, a
packet communication charge may be applied.
・ Some ToruCa provided to i-mode terminal may not
be obtained/displayed/updated.
・ Depending on the settings of IP (Information
Provider), the following functions may not be
available.
- Updating, sending attaching email, moving to
microSD card, copying/displaying map
・ Some ToruCa which can be displayed in a map
from ToruCa (details) may not be displayed in a
map from the ToruCa list depending on the IP
settings.
・ If you set 重複チェック (Duplication check) to
"ON", obtaining the same ToruCa redundantly is not
available. To obtain the same ToruCa redundantly,
set it to "OFF".
・ When you send ToruCa attaching to email, it is sent
in the condition before obtaining ToruCa (details).
・ Depending on email application, ToruCa received
via the emails may not be saved.
・ Depending on browser, ToruCa cannot be
obtained.
・ When ToruCa is moved/copied to the microSD
card, it is moved/copied in the condition before
obtaining ToruCa (details).
Video Unlimited
This application allows you to use the online
service "Video Unlimited" providing new
entertainment world via Sony's internet
compatible devices. You can download your
favorite videos to the terminal to enjoy
watching everywhere.
To use the application, tap
from the Home
screen, tap [Video Unlimited] to install the
application, and then back to the Home
screen,
Tap [Video] to connect to the
dedicated website.
Applications
185
SO-01D_English
International roaming
SO-01D_(E).book
186 ページ
2011年10月20日 木曜日 午後1時6分
Overview of International
roaming (WORLD WING)
With the international roaming (WORLD
WING), you can use without changing phone
number or mail address in the service area of
the overseas network operator affiliated with
DOCOMO. You do not need to change the
settings of call and SMS.
■ Service area
The terminal works in a 3G roaming area
and GSM/GPRS service area. Services
are also available in countries and areas
supporting 3G850MHz/GSM850MHz.
Check available area.
■ Before using the terminal overseas,
refer to the followings.
・ "Mobile Phone User's Guide
[International Services]"
・ DOCOMO International Services
website
・ " ドコモ海外利用 (International
roaming)" application help
❖ Information
・ For Country code, International call access code,
Universal number international prefix, supported
countries/area and network operator, refer to
"Mobile Phone User's Guide [International
Services]" or DOCOMO International Services
Website.
Available Services
Main communication
service
3G
GSM/
GPRS
GSM
Call
○
○
○
Message (SMS)
○
○
○
Email*1
○
○
×
Browser*1
○
○
×
Position location of
GPS*2
○
○
×
*1 To use data communication during roaming, mark
[Data roaming] checkbox in Mobile network settings.
(P.190)
*2 For GPS positioning (Positioning location), a packet
communication charge is applied.
・ Some services are not available depending
on the overseas network operator or
network.
International roaming
186
SO-01D_English
SO-01D_(E).book
187 ページ
2011年10月20日 木曜日 午後1時6分
Before using
Advance preparation
Network service settings
Before leaving Japan
To use the terminal overseas, check the
following in Japan.
■ Subscription
・ Check the subscription of WORLD
WING. For details, contact "General
Inquiries" on the last page of this
manual.
■ Usage charge
・ Overseas usage charges (call and
packet communication) differ from those
in Japan.
・ Some applications automatically
perform communications. Your packet
communication charges may be higher
even in Japan. For operation status of
each application, please check it to the
application provider.
If you subscribe to network services, you can
use network services such as Voice Mail
Service, Call Forwarding Service, Caller ID
Notification Service, etc., even overseas.
However, some network services cannot be
used.
・ To use network services overseas, you need
to set "Remote access" to activate. You can
set "Remote access" in the country you stay.
・ Even if the setting/canceling operation is
available, some network services cannot be
used depending on overseas network
operators.
After arriving overseas
When you arrive overseas and turn on the
terminal, an available network is
automatically set.
International roaming
187
SO-01D_English
SO-01D_(E).book
188 ページ
2011年10月20日 木曜日 午後1時6分
Connectivity
Date & time settings
When you have set search mode of "Available
networks" to "Select automatically" in
"Network operators" settings, optimized
network is automatically selected.
When you connect to the network operator
conducted in flat-rate service manually, you
can use the service with flat-rate packet
communication charges overseas up to the
specified upper limit per day. To use this
service, subscription of packet flat-rate
service is required. For details, refer to
"Mobile Phone User's Guide [International
Services]" or DOCOMO International
Services Website.
When "Date & time" is set to "Automatic", the
date, time and time differences of the
terminal clock are corrected by receiving the
information related to time and time
differences from the network of overseas
network operator you connect to.
・ Correction of the time/time differences may
not be performed correctly depending on
the network of overseas network operator. In
that case, set time zone manually.
・ Timing of correction varies by the overseas
network operator.
・ Date & time (P.120)
About inquiries
Display
In the status bar, the type of your operator's
network are displayed.
: During International roaming
/ : Connecting/Using GPRS
/ : Connecting/Using 3G (packet)
/ : Connecting/Using HSDPA
・ You can confirm the name of the connected
network operator on the Notification panel.
・ For loss or theft of the terminal or UIM,
immediately contact DOCOMO from the
spot to take the necessary steps for
suspending the use. For inquiries, see the
last page of this manual. Note that you are
still liable for the call and communication
charge incurred after the loss or theft
occurred.
・ For using from land-line phone, entering
"International call access code" or
"Universal number international prefix" for
the country is needed.
International roaming
188
SO-01D_English
SO-01D_(E).book
189 ページ
2011年10月20日 木曜日 午後1時6分
After returning to Japan
When you return to Japan, the terminal is
connected to DOCOMO's network
automatically. If connection is failed, perform
the following operations.
・ Set "Preferred network mode" of "Network
Mode" to "GSM/WCDMA preferred". (P.190)
・ Set "Search mode" to "Select automatically"
in "Network operators" settings. (P.189)
Making a call to outside country
you stay (including Japan)
When you start the international roaming or
move out of your operator's network, you
need to reconnect the terminal to another
available network.
❖ Information
・ Some applications automatically perform packet
communications. To disconnect packet
communication manually, from the Home screen,
press t and tap [Settings] [Wireless &
networks] [Mobile networks] [Data enabled]
to unmark.
Confirming and switching the
network search mode
By default, network search mode is set to
"Select automatically". When you connect
manually to an overseas network operator
conducted in flat-rate service, confirm the
search mode with the following operations
and switch to "Select manually".
1
From the Home screen, press t
and tap [Settings].
2
Tap [Call settings]
providers].
[Service
3
Tap [Search mode]
manually].
[Select
4
From "Available networks", tap to
unmark a network to use.
・ To display available networks, tap
[Search networks].
❖ Information
・ If you set a network manually, the terminal is not
reconnected to another network automatically even
if you move out of the network area.
・ To return to "Select automatically", tap [Select
automatically] in Step 3.
International roaming
189
SO-01D_English
SO-01D_(E).book
190 ページ
2011年10月20日 木曜日 午後1時6分
Changing network mode
You can change network mode settings
according to the network mode
(communication method) adopted by the
overseas network operator.
1
From the Home screen, press t
and tap [Settings].
2
Tap [Wireless & networks]
[Mobile networks] [Network
Mode].
3
Select your preferred network
mode.
・ You can select from [WCDMA only],
[GSM only] or [WCDMA preferred/
GSM]. If you select [WCDMA
preferred/GSM], you can use both
GSM and WCDMA.
Activating data roaming
1
From the Home screen, press t
and tap [Settings].
2
Tap [Wireless & networks]
[Mobile networks].
3
4
Tap [Data roaming].
Making/Receiving calls in
the country you stay
When you arrive overseas and turn on the
terminal, an available network is
automatically set.
・ Check that the battery and signal levels are
high enough.
・ Depending on the network operator, even if
the Caller ID notification is active, the caller
ID may not be notified or appear properly.
In this case, calls cannot be made from the
call log screen.
Making a call to outside country
you stay (including Japan)
You can make a call from overseas using the
international roaming service.
・ You can easily make international calls from
the country you stay to Japan or to other
countries by entering prefix "+" and then the
country code and phone number.
1
From the Home screen, tap
[Phone].
Read the cautions displayed, tap
[Yes].
・ [Data roaming] checkbox is marked.
International roaming
Continued on next page
190
SO-01D_English
SO-01D_(E).book
2
191 ページ
2011年10月20日 木曜日 午後1時6分
Dial + (press and hold [0])
Country code Area code (City
code) Enter a phone number.
・ If the area code begins with "0", omit
"0". However, "0" may be required to
dial to some country or area such as
Italy.
・ To call an overseas "WORLD WING"
user, enter "81" (Japan) for the country
code.
3
Tap [Call].
Making a call to WORLD WING
user overseas
When the other party uses international
roaming service, make a call as an
international call to Japan even when you
stay in the same country as the other party.
Receiving a call in the country
you stay
You can receive a call using the international
roaming service.
Making a call within the country
you stay
You can make a call by entering the phone
number of the other party's land-line phone or
mobile phone in the same way you do in
Japan.
1
From the Home screen, tap
[Phone].
2
Enter the other party's phone
number.
1
While receiving a call, touch
(left) and drag it to
(right).
2
When the conversation is finished,
tap [End call].
❖ Information
・ When you received a call during the international
roaming, regardless of which country the call is
from, it is forwarded internationally from Japan. A
caller is charged for a call fee to Japan, and the
receiver is charged for a reception fee.
・ To make a call to land-line phone,
enter the area code (city code) +
other party's phone number.
3
Tap [Call].
International roaming
191
SO-01D_English
SO-01D_(E).book
192 ページ
2011年10月20日 木曜日 午後1時6分
■ Having the other party call you
・ To have the other party in Japan call you
overseas
To have the other party make a call from
a land-line phone or mobile phone in
Japan to the terminal in the country you
stay, the other party only needs to dial
the phone number as in Japan.
・ To have the other party make a call from
the outside Japan to the terminal in the
country you stay
You have to receive a call through Japan
no matter where you are; therefore, the
other party needs to enter the
international call access code and "81"
(Country code of Japan).
International access code - 81 - 90
(or 80) - XXXX - XXXX
International roaming
192
SO-01D_English
Appendix/Index
SO-01D_(E).book
193 ページ
2011年10月20日 木曜日 午後1時6分
Optional and related
devices
A variety of commercially available optional
devices allows you to expand the terminal's
capabilities by supporting a wide range of
purpose, including personal and business
uses.
Some accessories are only available in some
areas.
For details, please contact a sales outlet such
as docomo Shop.
For details on optional devices, see the user's
manual of each device.
・ Back Cover SO17
・ Battery Pack SO04
・ AC Adapter cable SO03
・ FOMA Portable Charging Adapter 02*
・ Carry Case 02
・ Pocket charger 01
* To charge the terminal, use the supplied
microUSB cable.
Troubleshooting
Troubleshooting
・ First, check if the software update is
necessary for the terminal. If necessary,
perform the software update (P.201).
・ When checking the following items not to
improve the state, contact the phone
number given in "Repairs" the last page of
this manual (in Japanese only) or
DOCOMO-specified repair office.
■ Power supply
Cannot power on the terminal.
・ Check if the battery pack is attached
properly.
P.31
・ Check if the battery pack is not run out.
P.29
■ Charging
Cannot charge the terminal.
(The notification LED does not turn on, or the
icon that means charging does not appear.)
・ Check if the battery pack is attached
properly.
P.31
・ Check if the AC adapter cable's power
plug is correctly inserted to an outlet.
P.32
・ Check if the AC adapter cable and the
terminal are set correctly.
P.32
Appendix/Index
Continued on next page
193
SO-01D_English
SO-01D_(E).book
194 ページ
2011年10月20日 木曜日 午後1時6分
・ If you execute calls, communications
or other function operations while
charging, the terminal may become hot
and the battery status icon may not
indicate charging. In this case, wait
until the temperature of the terminal
drops and charge again.
-
The notification LED blinks in red and cannot
operate the terminal.
・ When the battery level is low, charge
the battery pack.
P.29
P.30
・ The battery pack is a consumable
accessory. The usage duration of the
battery per one charge decreases
gradually each time the battery is
recharged.
Even the full charge state, when the
operation time is too short, purchase a
new battery pack of the specified type.
-
Turning the power off or restarting automatically
happens.
■ Terminal operation
Become hot while operating/charging.
・ While calling, depending on the radio
wave condition or call duration time,
the terminal may become hot. This
condition is not abnormal.
-
・ While operating or charging, or if you
record video, etc. for a long time while
charging the battery, the terminal,
battery pack and adapter may become
hot. There is no problem about safety
and continue to use it.
-
・ If the jack of battery pack is dirty, the
contact may become poor and the
power may shut OFF. When it is dirty,
clean the battery pack with a dry
cotton swab etc.
-
No operations are performed even by pressing
the keys on the terminal.
・ Check if you activate the screen lock.
P.109
The screen reacts slowly when a button is
pressed.
The operation time provided by the battery pack
is short.
・ Is your terminal left for a long time
under the state of out of service area?
Out of service area, many powers are
consumed to search available radio
waves.
・ The operating time of the battery pack
varies depending on the operating
environment and the secular
degradation of the battery pack.
-
・ When large amount of data is saved in
the terminal or transferring large-size
data between the terminal and
microSD card, the reactions on the
screen may be delayed.
-
The UIM is not recognized.
・ Check if the UIM installed in the right
direction.
P.27
Appendix/Index
Continued on next page
194
SO-01D_English
SO-01D_(E).book
195 ページ
2011年10月20日 木曜日 午後1時6分
The clock is not on time.
・ The clock time may become wrong
while turning on the power for a long
time. Check if "Auto" time adjust (auto
time adjust via network) is set to on and
turn the power off and on in a place
with strong radio wave conditions.
P.120
・ Due to the crossing of radio waves, at
the crowded public places, calls/mails
are crossed and the connection status
may not be good. Move to other place
or call again at other time.
-
■ Display
The display is dim.
■ Phone call
・ Check if the backlight time-out is set.
P.106
Cannot make a call even if you press the dial
button.
・ Check if the brightness of screen is
changed.
P.105
・ Check if you activate the SIM card
lock.
P.108
・ Check if you activate eco mode.
P.52
・ Check if you activate Airplane mode.
P.95
■ Sound
・ Is the call alert volume of volume
setting set to silent?
P.104
During a voice call, the distant party's voice is
hard to listen to or too loud.
・ Check if the silent mode is active.
P.103
・ Check if the listening volume of the
sound volume setting is changed.
・ Is the ring time for Voice Mail service or
Call Forwarding Service "0 Sec."?
P.87
P.91
■ Display data
The ringtone does not sound.
Calls are not connected.
(Even when moving "圏外 (out of service area)"
does not disappear, or although radio waves are
enough, making/receiving calls is unavailable).
・ Turn the power off and on, or remove
and attach battery pack or UIM.
・ Due to the nature of radio waves,
making/receiving calls may be
unavailable even when "not out of
service area" or "
appears on the
display for the radio wave condition".
Move to the other place and call again.
P.27
P.31
P.34
-
P.74
Images or ringtones set in each feature do not
work and the terminal operates in the default
data.
・ Is the UIM currently inserted is the
same one which is set when the
images or ringtones are obtained?
-
■ Camera
Photos and video taken with the camera are
blurred.
・ When shooting an object nearby,
switch to macro shooting.
P.153
Appendix/Index
Continued on next page
195
SO-01D_English
SO-01D_(E).book
196 ページ
2011年10月20日 木曜日 午後1時6分
・ Check if clouds or dirt attach to the
lens of camera.
-
■ International roaming
Cannot use the terminal overseas.
■ When antenna mark is displayed
・ Do you subscribe WIRLD WING?
Check if you subscribe WORLD WING.
-
■ Out of service area indicator
appears
・ Check if you are out of the international
roaming service area or in an area with
poor signal strength.
Check if the service area and network
operator are available, referring to
"Mobile Phone User's Guide
[International Services]" or DOCOMO
International Services website.
・ Try to change the network settings or
overseas network operator settings.
Set "Search mode" of "Network
operators" to "Select automatically".
Set "Network Mode" to "GSM/WCDMA
preferred".
・ Turning off the terminal and then
turning on again may work for the
restoration.
P.187
P.190
P.34
・ Check if usage amount exceeds the
limit of maximum charges for use.
For use of "International roaming
(WORLD WING)", the limit of maximum
charges for use is set in advance. If
exceeding the limit of maximum
charges for use, pay the charges.
-
Cannot receive calls overseas.
・ Is "Incoming Call" se to "active"?
-
No caller ID is notified/A notified caller ID is
different from that of the caller/Functions for
using contents saved in phonebook or those
using Caller ID notification do not operate.
・ Even when a caller notifies its caller ID,
it is not displayed on the terminal
unless notified from the network or
network operator used. And, a notified
caller ID is different from that of the
caller by some networks or networks
operators you use.
-
■ Data management
Data transfer is not performed.
Cannot perform data communication overseas.
Mark the data roaming checkbox.
Cannot use the terminal suddenly while using
overseas.
P.190
・ Check if USB hub is used. If you use
USB hub, operations may not be
performed correctly.
-
Data saved in microSD card is not displayed.
・ Remove the microSD card and insert it
again.
P.28
Appendix/Index
Continued on next page
196
SO-01D_English
SO-01D_(E).book
197 ページ
2011年10月20日 木曜日 午後1時6分
When trying to display an image, " ×" appears
instead of it.
Or "×" appears for the demo play or the preview
function.
・ " ×" may appear instead of destroyed
image data.
-
■ Bluetooth function
The terminal cannot be connected to a Bluetooth
communication device/A Bluetooth
communication device cannot be found from the
terminal.
・ Make Bluetooth communication device
(commercial item) registering stand-by
state and then register the device on
the terminal. If you delete already
registered device and register the
device again as a new device, delete
the registrations on both Bluetooth
communication device (commercial
item) and the terminal and then
perform registration of the devices.
P.144
No service
・ The terminal is out of service area, or the
received signal is too weak. Move to a
location where radio signal can be reached.
・ The UIM is not working properly.
Insert the UIM in another terminal. If this
works, it is probably the terminal that is
causing the problem. In this case, contact
"Repairs" on the last page of this manual (in
Japanese only).
Removing and inserting UIM may improve
the problem.
SIM card is locked
Enter your PIN code (P.108) correctly.
SIM card is PUK-locked
Enter your PUK (Personal Unblocking Key)
(P.108) correctly.
Calls cannot be made from the terminal
connecting to external device such as car
navigation or handsfree devices.
・ If calls are made several times when
the other party does not answer or is
out of service, the call to this number
may be disabled. In this case, turn
terminal off and on.
Error messages
-
The phone storage is full
There is no memory space. Delete
unnecessary applications (P.113) to obtain
memory space.
Appendix/Index
197
SO-01D_English
SO-01D_(E).book
198 ページ
2011年10月20日 木曜日 午後1時6分
Warranty and After Sales
Services
Warranty
・ Make sure that the warranty is received with
the terminal upon purchase. Check to be
sure that " 販売店名・お買い上げ日 (the
name of the retailer, date of purchase)", and
other items have been filled out on the
warranty before storing it in a safe place. If
any necessary information is not provided,
immediately contact the retailer and request
to complete the warranty. The terminal
comes with a year's free warranty starting
from the date of purchase.
・ Specifications of this product and its
accessories are subject to change for
improvement without prior notice.
・ Data saved in the Contacts etc. may be
changed/lost due to the trouble/repairs or
handling of the terminal. Note down the data
such as the contacts on a separate memo
and keep it safely to prevent such problems.
* You can save contents data in a microSD
card inserted to the terminal.
After Sales Services
If you have problems with the
terminal
Before asking repair, see "Troubleshooting"
(P.193) in this manual to check the problem. If
the problem still persists, contact "Repairs" on
the last page of this manual (in Japanese
only).
If repair is required resultingly
Bring the terminal to the DOCOMO-specified
repair office. However, it must be taken
during business hours of the repair office.
Make sure to bring a warranty card with the
product when you visit the shop. Note that
repair may take some days depending on the
problem.
Appendix/Index
198
SO-01D_English
SO-01D_(E).book
199 ページ
2011年10月20日 木曜日 午後1時6分
■ Within the warranty period
・ We repair the terminal free of charge
based on the terms documented in the
warranty.
・ When requesting a repair, make sure to
bring the warranty card with the
terminal. Repair requests that are not
accompanied by the warranty or that
involve malfunction and damage due to
incorrect handling by the owner
(damage of liquid crystal, connector,
etc) will only be repaired at the owner's
expense, even if the warranty period is
still effective.
・ Malfunction due to use of devices and
consumable parts other than those
specified by DOCOMO will only be
repaired at the owner's expense, even if
the warranty period is still effective.
■ Note that repair may be refused in
the following cases:
・ When some water problem is
acknowledged by the repair office (e.g.
water leak seal is reacted).
・ When the terminal has corrosion due to
wet by liquid, condensation,
perspiration, etc. or the internal circuit
board is damaged or deformed (we may
not be able to repair when the microUSB
connector, headset connection jack,
liquid crystal, etc. is damaged or the
frame itself is cracked) based on the
result of our examination.
- Even if repair is possible, it will be
done at the owner's expense, as this
type of corrosion or damage is not
covered by the warranty.
■ If the warranty period expires
We will repair the terminal at the owner's
expense.
Appendix/Index
199
SO-01D_English
SO-01D_(E).book
200 ページ
2011年10月20日 木曜日 午後1時6分
■ Parts stock period
The functional parts necessary to repair
the terminal will be basically available for
a minimum of six years after the
manufacture is discontinued.
However, depending on the defective
portion, repair may not be possible
because of a shortage of repair parts.
Note that repair may still be possible
depending on the defective portion even
if the stock period has expired. Contact
"Repairs" on on the last page of this
manual (in Japanese only).
Precautions
● Never modify the terminal or
accessories.
・ Doing so may result in fire, injuries or
malfunctions.
・ The modified terminal may be repaired
only if the owner agrees on that all the
modified parts are restored to the original
conditions.
However, repairs may be refused
depending on the modifications.
The following cases may be considered
as modifications.
- Put a seal etc. on the liquid crystal or
keypad.
- Glued decorations on the terminal
using adhesion bond, etc.
- Change the parts such as exterior to
other than DOCOMO standard parts.
・ Malfunction and damage due to
modifications will be repaired at the
owner's expense, even if the warranty
period is still effective.
● The model plate must not be removed
from the terminal.
The model plate certifies that the terminal
satisfies technical standards. It should be
noted that if the plate is removed or is
replaced with a different plate, and the
original model plate cannot be verified, it
may disqualify the unit from repairs due to
not being able to determine the technical
standards of that particular phone.
● Note that the settings and other
information may be reset (cleared) as a
result of malfunction, repair or other
handling. In this case, make the settings
again.
● After the repair, Wi-Fi MAC address or
Bluetooth address may be changed
regardless of the repaired parts.
Appendix/Index
Continued on next page
200
SO-01D_English
SO-01D_(E).book
201 ページ
2011年10月20日 木曜日 午後1時6分
● A material that generates a magnetic
field is used in the following parts of the
terminal.
Do not hold an object that is easily
affected by magnetism, such as a cash
card, close to the terminal. You may not
be able to use the card any more.
Where it is used: Speaker, earpiece
● If the terminal has gotten wet or moist,
immediately power off the terminal and
remove the battery pack from it, and
then bring it to the DOCOMO-specified
repair office as soon as possible.
However, note that we may not repair the
terminal depending on the extent of the
damage.
Precautions on memory dial
(Contacts function) and
downloaded data
Note that data you created or data you
retrieved or downloaded from sources other
than your terminal may be changed or lost
when you change the model or have repairs
done to the terminal. DOCOMO shall have no
liability for any change or loss of any kind.
Under some circumstances, DOCOMO may
replace your terminal with its equivalent
instead of repairing it.
Updating software
You can update the terminal to the most
recent software for optimal performance and
to get the latest enhancements.
❖ Note
・ When the terminal is connected to the Internet
using the mobile network connection, data
communication fee is applied.
・ Make sure you back up and save all data
contained in the terminal before you start updating
the terminal.
・ For the first time activating the terminal after
software update, the operation may be slower from
several minutes to several ten minutes due to data
update. The required time varies by the data in the
terminal. Do not turn the power off until usual
operation speed comebacks.
❖ Information
・ For details, refer to http://www.sonyericsson.co.jp/
support/.
Downloading software updates
wirelessly
Downloading software to update
Latest software can be downloaded
wirelessly directly from your terminal via the
Internet by using mobile network connection
or by using a Wi-Fi network connection.
Appendix/Index
Continued on next page
201
SO-01D_English
SO-01D_(E).book
202 ページ
2011年10月20日 木曜日 午後1時6分
Press t, then tap [Settings].
1
From the Home screen, tap
then tap [Update center].
2
Press t, then tap [Refresh].
2
3
・ The terminal searches for software
updates.Note
❖ Note
,
❖ Note
・ To download software updates by using Wi-Fi only,
from the Home screen, tap
, tap [Update
center] t, then tap [Settings] [Automatic
update] [Via Wi-Fi only]. Note that if you select
[Via 3G/Wi-Fi], a Wi-Fi connection automatically
switches to 3G connection when the Wi-Fi
connection is unstable and packet communication
fee may apply.
・ For software update via mobile network, a high
packet communication charge will be applied
because of a large amount data communication.
For this reason, subscription of packet flat-rate
service is highly recommended.
・ While you are using roaming service overseas, you
cannot search for or download update software
through the mobile network.
Updating software with the latest
information automatically
You can update the software with the latest
information automatically on regular basis. If
software update is searched,
appears on
the status bar.
1
From the Home screen, tap
then tap [Update center].
Tap [Automatic update] [Via WiFi only]/[Via 3G/Wi-Fi] [OK].
・ Note that packet communication fee may apply for
searching automatically.
Connecting to a PC and
updating
You can update software by using PC
Companion that can be installed into a PC
from the terminal.
❖ Information
・ To install PC Companion on a PC, an Internet
connection is required.
When PC Companion is not
installed on your PC
1
Use the supplied microUSB cable
to connect the terminal to a PC.
2
On the terminal, tap [Install].
・ Installer of PC Companion starts on
the PC.
,
Appendix/Index
Continued on next page
202
SO-01D_English
SO-01D_(E).book
3
203 ページ
2011年10月20日 木曜日 午後1時6分
Follow the onscreen instructions
on the PC to install.
・ After installation, PC Companion
starts on the PC. If further software
update is searched, it is automatically
notified. Follow the onscreen
instructions on the PC.
When PC Companion is installed
on your PC
1
Check if PC Companion is
activated on the PC. If not, activate
PC Companion from the Start
menu.
2
Connect the terminal to a PC using
a microUSB cable.
3
Follow the onscreen instructions
on the PC.
・ If software update is searched, it is
automatically notified.
Main specifications
■ The terminal
Product name
SO-01D
Size
Approx. 120 mm (H) ×
approx. 62 mm (W)×
approx. 16.4 mm (T)
Weight
Approx. 175 g (with
battery pack attached)
Storage
ROM 1,024MB
(Flash memory)
RAM 512MB (SRAM)
External memory
microSD card: Up to
2GB
microSDHC: Up to 32GB
(as of October, 2011)
Continuous FOMA/3G
stand-by
time
GSM
Approx. 480 hours
(Stationary)
Continuous FOMA/3G
call time
GSM
Approx. 340 min.
Charging time with AC
adapter cable
Approx. 200 min.
Display
Type
TFT16,777,217 colors
Size
Approx. 4.0 inches
Approx. 300 hours
(stationary)
Approx. 450 min.
Number of 480 dots×854 dots
(Full wide VGA)
dots
Appendix/Index
Continued on next page
203
SO-01D_English
SO-01D_(E).book
Image
pickup
device
204 ページ
2011年10月20日 木曜日 午後1時6分
Type
Camera: CMOS sensor
In-camera: CMOS
sensor
Size
Camera: 1/4 inches
In-camera: 1/13 inch
Radio
power
Camera: Effective
pixels: Approx. 5.1 mill.
pixels
(Recorded pixels:
Approx 5.1 mill. pixels)
In-camera: Effective
pixels: Approx. 300,000
pixels (Recorded pixels:
Approx 300,000 pixels)
Available
Within Approx. 10 m
communic
ation
distance*2
Camera pixels
Still image capture size Camera:
2592×1944 (5MP)
2048×1536 (3MP)
1600×1200 (2MP)
1024×768 (1MP)
640×480 (VGA)
In-camera: 640×480
(VGA)
Video recording size
Camera:
1280×720 (HD 720p)
In-camera: 640×480
(VGA)
Frame rate
Max.: 30 fps
Music
playback
MP3 file
Wireless LAN (WLAN)
Continuous playback
time
Approx. 1900 min.
(Background playback
supported)
Compliant with
IEEE802.11b/g/n
(Corresponding
frequency band to
IEEE802.11n: 2.4 GHz)
Bluetooth
Supported Compliant with Bluetooth
Bluetooth standard Ver. 2.1 +
EDR*1
version
Bluetooth standard
Power Class 1
Supported A2DP, AVRCP, HFP, HSP,
Bluetooth OPP, PBAP, SPP
profile*3
*1 It is confirmed that the terminal and all Bluetooth
devices are compliant with Bluetooth standards
designated by Bluetooth SIG, and they are
authenticated. However, procedures may differ or data
transfer may not be possible depending on the
device's characteristics or specifications.
*2 May vary by the signal status and/or whether there is
an interference between communications devices.
*3 Bluetooth standards for Bluetooth device connection
procedure according to the product's applications.
・ Continuous call time is an estimate of the
operation time for calling when radio signal
reception is normal.
・ Continuous stand-by time is an estimate of
the stand-by time when radio signal
reception is normal.
In certain circumstances, the stand-by time
may drop to as low as half the time shown
due to the battery charge, function settings,
temperature, or radio signal reception in the
area (no reception or weak).
Appendix/Index
Continued on next page
204
SO-01D_English
SO-01D_(E).book
205 ページ
2011年10月20日 木曜日 午後1時6分
・ A use of the Internet reduces the actual call
(communication)/stand-by time.
Composing messages or activating the
camera or applications also reduces call
(communication)/stand-by time even if you
do not call or use the Internet.
・ Stationary continuous stand-by time is the
estimated average operation time when
radio signal reception is normal.
・ Moving continuous stand-by time is the
estimated average operation time when the
terminal remains in the combined conditions
of "stationary" or "moving" in a service area
when radio signal reception is normal and
the condition of "out of area".
・ Charging time is an estimate of the time
required to charge a completely empty
battery pack.
■ Battery pack
File format
The terminal supports the display or
playback of the following file format:
Type
MP3, 3GPP, MP4, AMR, AMRWB,
SMF, XMF, WAV, iMelody, RTTTL/RTX,
OTA, Ogg vorbis
Still image
JPEG, GIF, PNG, BMP
Video
3GPP, MP4
Still images are saved in the following file
format:
Type
Still image
Battery Pack SO04
Battery type
Lithium Ion Battery
Voltage
DC 3.6V
Current
1500mAh
File format
JPEG
■ Numbers of still images (Estimation)
Resolution
Product name
File format
Sound
640× 480
(VGA)
Savable number of shot images to
microSD card (2GB)
Approx. 20,000
■ Time length of shooting video
(Estimation)
Resolution
640× 480
(VGA)
Recordable time of videos to
microSD card (2GB)
Per video: Up to approx. 30 min.
Total: Up to approx. 134 min.
Appendix/Index
205
SO-01D_English
SO-01D_(E).book
206 ページ
2011年10月20日 木曜日 午後1時6分
Specific Absorption Rate
of Mobile Phone, etc.
Mobile Phone GSM/GPRS/EGPRS 850/900/
1800/1900&UMTS JP/EU/US
Specific Absorption Rate (SAR)
of Mobile Phones
This model SO-01D mobile phone complies
with Japanese technical regulations and
international guidelines regarding exposure
to radio waves.
This mobile phone was designed in
observance of Japanese technical
regulations regarding exposure to radio
waves *1 and limits to exposure to radio
waves recommended by a set of equivalent
international guidelines. This set of
international guidelines was set out by the
International Commission on Non-Ionizing
Radiation Protection (ICNIRP), which is in
collaboration with the World Health
Organization (WHO), and the permissible
limits include a substantial safety margin
designed to assure the safety of all persons,
regardless of age and health condition.
The technical regulations and international
guidelines set out limits for radio waves as
the Specific Absorption Rate, or SAR, which
is the value of absorbed energy in any 10
grams of tissue over a 6-minute period. The
SAR limit for mobile phones is 2.0 W/kg. The
highest SAR value for this mobile phone
when tested for use at the ear is 0.28 W/kg.
There may be slight differences between the
SAR levels for each product, but they all
satisfy the limit.
The actual SAR of this mobile phone while
operating can be well below that indicated
above. This is due to automatic changes to
the power level of the device to ensure it only
uses the minimum required to reach the
network. Therefore in general, the closer you
are to a base station, the lower the power
output of the device.
This mobile phone can be used in positions
other than against your ear. This mobile
phone satisfies the international guidelines
when used with a carrying case or a
wearable accessory approved by NTT
DOCOMO or the manufacturer *2. In case you
are not using the approved accessory,
please use a product that does not contain
any metals, and one that positions the mobile
phone at least 1.5 cm away from your body.
Appendix/Index
Continued on next page
206
SO-01D_English
SO-01D_(E).book
207 ページ
2011年10月20日 木曜日 午後1時6分
The World Health Organization has stated
that "a large number of studies have been
performed over the last two decades to
assess whether mobile phones pose a
potential health risk. To date, no adverse
health effects have been established as
being caused by mobile phone use."
Please refer to the WHO website if you would
like more detailed information.
http://www.who.int/docstore/peh-emf/
publications/facts_press/fact_english.htm
Please refer to the websites listed below if
you would like more detailed information
regarding SAR.
Ministry of Internal Affairs and
Communications Website:
http://www.tele.soumu.go.jp/e/sys/ele/
index.htm
Association of Radio Industries and
Businesses Website:
http://www.arib-emf.org/index02.html (in
Japanese only)
NTT DOCOMO, INC. Website:
http://www.nttdocomo.co.jp/english/product/
sar/
Sony Ericsson Mobile Communications
Japan, Inc. Website:
http://www.sonyericsson.co.jp/product/SAR/
*1 Technical regulations are defined by the
Ministerial Ordinance Related to Radio
Law (Article 14-2 of Radio Equipment
Regulations).
*2 Regarding the method of measuring SAR
when using mobile phones in positions
other than against the ear, international
standards (IEC62209-2) were set in March
2010. On the other hand, technical
regulation is currently being deliberated on
by national council. (As of October, 2011)
Radio Wave Exposure and
Specific Absorption Rate (SAR)
Information
United States & Canada
THIS PHONE MODEL HAS BEEN CERTIFIED
IN COMPLIANCE WITH THE
GOVERNMENT'S REQUIREMENTS FOR
EXPOSURE TO RADIO WAVES.
The SO-01D mobile phones have been
designed to comply with applicable safety
requirements for exposure to radio waves.
Your wireless phone is a radio transmitter and
receiver. It is designed to not exceed the
limits* of exposure to radio frequency (RF)
energy set by governmental authorities.
These limits establish permitted levels of RF
energy for the general population. The
Appendix/Index
Continued on next page
207
SO-01D_English
SO-01D_(E).book
208 ページ
2011年10月20日 木曜日 午後1時6分
guidelines are based on standards that were
developed by international scientific
organizations through periodic and thorough
evaluation of scientific studies. The standards
include a safety margin designed to assure
the safety of all individuals, regardless of age
and health.
The radio wave exposure guidelines employ
a unit of measurement known as the Specific
Absorption Rate (SAR). Tests for SAR are
conducted using standardized methods with
the phone transmitting at its highest certified
power level in all used frequency bands.
While there may be differences between the
SAR levels of various phone models, they are
all designed to meet the relevant guidelines
for exposure to radio waves. For more
information on SAR, please refer to the safe
and efficient use chapter in the User Guide.
The highest SAR value as reported to the
authorities for this phone model when tested
for use by the ear is 0.60 W/kg*, and when
worn on the body is 1.06 W/kg* for speech
and 1.44 W/kg* for data calls. For body-worn
operation, the phone has been tested when
positioned a minimum of 15 mm from the
body without any metal parts in the vicinity of
the phone or when properly used with an
appropriate Sony Ericsson accessory and
worn on the body.
For devices which include "WiFi hotspot"
functionality, body-worn SAR measurements
for operation of the device operating in WiFi
hotspot mode were taken using a separation
distance of 10mm.
Use of third-party accessories may result in
different SAR levels than those reported.
** Before a phone model is available for sale
to the public in the US, it must be tested and
certified by the Federal Communications
Commission (FCC) that it does not exceed
the limit established by the governmentadopted requirement for safe exposure*. The
tests are performed in positions and locations
(i.e., by the ear and worn on the body) as
required by the FCC for each model. The
FCC has granted an Equipment Authorization
for this phone model with all reported SAR
levels evaluated as in compliance with the
FCC RF exposure guidelines. While there
may be differences between the SAR levels
of various phones, all mobile phones granted
an FCC equipment authorization meet the
government requirement for safe exposure.
SAR information on this phone model is on
file at the FCC and can be found under the
Display Grant section of http://
transition.fcc.gov/oet/ea/fccid/ after
searching on FCC ID PY7A3880087.
Additional information on SAR can be found
on the Cellular Telecommunications &
Appendix/Index
Continued on next page
208
SO-01D_English
SO-01D_(E).book
209 ページ
2011年10月20日 木曜日 午後1時6分
Internet Association (CTIA) website at http://
www.ctia.org/.
* In the United States and Canada, the SAR
limit for mobile phones used by the public
is 1.6 watts/kilogram (W/kg) averaged over
one gram of tissue. The standard
incorporates a margin of safety to give
additional protection for the public and to
account for any variations in
measurements.
** This paragraph is only applicable to
authorities and customers in the United
States.
Europe
This mobile phone model SO-01D has been
designed to comply with applicable safety
requirements for exposure to radio waves.
These requirements are based on scientific
guidelines that include safety margins
designed to assure the safety of all persons,
regardless of age and health.
The radio wave exposure guidelines employ
a unit of measurement known as the Specific
Absorption Rate, or SAR. Tests for SAR are
conducted using standardized methods with
the phone transmitting at its highest certified
power level in all used frequency bands.
While there may be differences between the
SAR levels of various phone models, they are
all designed to meet the relevant guidelines
for exposure to radio waves.
For more information on SAR, please refer to
the safety chapter in the User's Guide.
SAR data information for residents in
countries that have adopted the SAR limit
recommended by the International
Commission of Non-lonizing Radiation
Protection (ICNIRP), which is 2 W/kg
averaged over ten (10) gram of tissue (for
example European Union, Japan, Brazil and
New Zealand):
The highest SAR value for this model phone
tested by Sony Ericsson for use at the ear is
0.37 W/kg (10g).
Radio Frequency (RF)
Exposure and SAR
Your mobile phone is a low-power radio
transmitter and receiver.
When it is turned on, it emits low levels of
radio frequency energy (also known as radio
waves or radio frequency fields).
Governments around the world have adopted
comprehensive international safety
guidelines, developed by scientific
organizations, e.g. ICNIRP (International
Commission on Non-Ionizing Radiation
Protection) and IEEE (The Institute of
Appendix/Index
Continued on next page
209
SO-01D_English
SO-01D_(E).book
210 ページ
2011年10月20日 木曜日 午後1時6分
Electrical and Electronics Engineers Inc.),
through periodic and thorough evaluation of
scientific studies. These guidelines establish
permitted levels of radio wave exposure for
the general population. The levels include a
safety margin designed to assure the safety
of all persons, regardless of age and health,
and to account for any variations in
measurements.
Specific Absorption Rate (SAR) is the unit of
measurement for the amount of radio
frequency energy absorbed by the body
when using a mobile phone. The SAR value is
determined at the highest certified power
level in laboratory conditions, but the actual
SAR level of the mobile phone while
operating can be well below this value.
This is because the mobile phone is
designed to use the minimum power required
to reach the network.
Variations in SAR below the radio frequency
exposure guidelines do not mean that there
are variations in safety. While there may be
differences in SAR levels among mobile
phones, all Sony Ericsson mobile phone
models are designed to meet radio frequency
exposure guidelines.
Before a phone model is available for sale to
the public, it must be tested and certified to
the FCC that it does not exceed the limit
established by the government-adopted
requirement for safe exposure. The tests are
performed in positions and locations (that is,
at the ear and worn on the body) as required
by the FCC for each model. For body worn
operation, this phone has been tested and
meets FCC RF exposure guidelines when the
handset is positioned a minimum of 15 mm
from the body without any metal parts in the
vicinity of the phone or when used with the
original Sony Ericsson body worn accessory
intended for this phone. Use of other
accessories may not ensure compliance with
FCC RF exposure guidelines.
SAR information for this mobile phone model
is included with the material that comes with
this mobile phone. This information can also
be found, together with more information on
radio frequency exposure and SAR, on:
http://www.sonyericsson.co.jp/product/SAR/
(Japanese only)
Guidelines for Safe and
Efficient Use
Please follow these guidelines. Failure
to do so might entail a potential health
risk or product malfunction. If in doubt
as to its proper function, have the product
checked by a certified service partner before
charging or using it.
Appendix/Index
210
SO-01D_English
SO-01D_(E).book
211 ページ
2011年10月20日 木曜日 午後1時6分
■ Recommendations for care and safe
use of our products
・ Handle with care and keep in a clean
and dust-free place.
・ Warning! May explode if disposed of in
fire.
・ Do not expose to liquid or moisture or
excess humidity.
・ For optimum performance, the
product should not be operated
in temperatures below +5°C
(+41°F) or above +35°C(+95°F). Do not
expose the battery to temperatures
above +60°C(+140°F).
・ Do not expose to flames or lit
tobacco products.
・ Do not drop, throw or try to bend
the product.
・ Do not paint or attempt to
disassemble or modify the
product. Only Sony Ericsson
authorised personnel should perform
service.
・ Consult with authorised medical staff
and the instructions of the medical
device manufacturer before using the
product near pacemakers or other
medical devices or equipment.
・ Discontinue use of electronic devices, or
disable the radio transmitting
functionality of the device, where
required or requested to do so.
・ Do not use where a potentially explosive
atmosphere exists.
・ Do not place the product, or install
wireless equipment, in the area above
an air bag in a car.
・ Caution: Cracked or broken displays
may create sharp edges or splinters that
could be harmful upon contact.
・ Do not use the Bluetooth Headset in
positions where it is uncomfortable or
will be subject to pressure.
■ Children
Warning! Keep out of the reach of
children. Do not allow children to
play with mobile phones or accessories.
They could hurt themselves or others.
Products may contain small parts that
could become detached and create a
choking hazard.
Appendix/Index
211
SO-01D_English
SO-01D_(E).book
212 ページ
2011年10月20日 木曜日 午後1時6分
■ Power supply (Charger)
Connect the charger to power sources as
marked on the product. Do not use
outdoors or in damp areas. Do not alter or
subject the cord to damage or stress.
Unplug the unit before cleaning it. Never
alter the plug. If it does not fit into the
outlet, have a proper outlet installed by an
electrician. When a power supply is
connected there is a small drain of power.
To avoid this small energy waste,
disconnect the power supply when the
product is fully charged. Use of charging
devices that are not Sony Ericsson
branded may pose increased safety risks.
■ Battery
New or idle batteries can have short-term
reduced capacity. Fully charge the
battery before initial use. Use for the
intended purpose only. Charge the
battery in temperatures between
+5°C(+41°F) and +35°C(+95°F). Do not
put the battery into your mouth. Do not let
the battery contacts touch another metal
object. Turn off the product before
removing the battery. Performance
depends on temperatures, signal
strength, usage patterns, features
selected and voice or data transmissions.
Only Sony Ericsson service partners
should remove or replace built-in
batteries. Use of batteries that are not
Sony Ericsson branded may pose
increased safety risks. Replace the
battery only with another Sony Ericsson
battery that has been qualified with the
product per the standard IEEE-1725. Use
of an unqualified battery may present a
risk of fire, explosion, leakage or other
hazard.
Appendix/Index
212
SO-01D_English
SO-01D_(E).book
213 ページ
2011年10月20日 木曜日 午後1時6分
■ Personal medical devices
Mobile phones may affect implanted
medical equipment. Reduce risk of
interference by keeping a minimum
distance of 22 cm(8.7 inches) between
the phone and the device. Use the phone
at your right ear. Do not carry the phone in
your breast pocket. Turn off the phone if
you suspect interference. For all medical
devices, consult a physician and the
manufacturer.
■ Driving
Some vehicle manufacturers forbid the
use of phones in their vehicles unless a
handsfree kit with an external antenna
supports the installation. Check with the
vehicle manufacturer's representative to
be sure that the mobile phone or
Bluetooth handsfree will not affect the
electronic systems in the vehicle. Full
attention should be given to driving at all
times and local laws and regulations
restricting the use of wireless devices
while driving must be observed.
■ GPS/Location based functions
Some products provide GPS/Location
based functions. Location determining
functionality is provided "As is" and "With
all faults". Sony Ericsson does not make
any representation or warranty as to the
accuracy of such location information.
Use of location-based information by
the device may not be uninterrupted or
error free and may additionally be
dependent on network service availability.
Please note that functionality may be
reduced or prevented in certain
environments such as building interiors or
areas adjacent to buildings.
Caution: Do not use GPS functionality in
a manner which causes distraction from
driving.
■ Emergency calls
Calls cannot be guaranteed under all
conditions. Never rely solely upon mobile
phones for essential communication.
Calls may not be possible in all areas, on
all networks, or when certain network
services and/or phone features are used.
Appendix/Index
213
SO-01D_English
SO-01D_(E).book
214 ページ
2011年10月20日 木曜日 午後1時6分
■ Antenna
Use of antenna devices not marketed by
Sony Ericsson could damage the phone,
reduce performance, and produce SAR
levels above the established limits. Do not
cover the antenna with your hand as this
affects call quality, power levels and can
shorten talk and standby times.
■ Radio Frequency (RF) exposure and
Specific Absorption Rate (SAR)
When the phone or Bluetooth handsfree is
turned on, it emits low levels of radio
frequency energy. International safety
guidelines have been developed through
periodic and thorough evaluation of
scientific studies. These guidelines
establish permitted levels of radio wave
exposure. The guidelines include a safety
margin designed to assure the safety of
all persons and to account for any
variations in measurements.
Specific Absorption Rate (SAR) is used
to measure radio frequency energy
absorbed by the body when using a
mobile phone. The SAR value is
determined at the highest certified power
level in laboratory conditions, but
because the phone is designed to use the
minimum power necessary to access the
chosen network, the actual SAR level can
be well below this value. There is no proof
of difference in safety based on
difference in SAR value.
Products with radio transmitters sold in
the US must be certified by the Federal
Communications Commission (FCC).
When required, tests are performed when
the phone is placed at the ear and when
worn on the body. For body-worn
operation, the phone has been tested
when positioned a minimum of 15 mm
from the body without any metal parts in
the vicinity of the phone or when properly
used with an appropriate Sony Ericsson
accessory and worn on the body.
For more information about SAR and
radio frequency exposure, go to: http://
www.sonyericsson.co.jp/product/SAR/
(Japanese only)
■ Flight mode
Bluetooth and WLAN functionality, if
available in the device, can be enabled in
Flight mode but may be prohibited
onboard aircraft or in other areas where
radio transmissions are prohibited. In
such environments, please seek proper
authorisation before enabling Bluetooth or
WLAN functionality even in Flight mode.
Appendix/Index
214
SO-01D_English
SO-01D_(E).book
215 ページ
2011年10月20日 木曜日 午後1時6分
■ Malware
Malware (short for malicious software) is
software that can harm the mobile phone
or other computers. Malware or harmful
applications can include viruses, worms,
spyware, and other unwanted programs.
While the device does employ security
measures to resist such efforts, Sony
Ericsson does not warrant or represent
that the device will be impervious to the
introduction of malware. You can however
reduce the risk of malware attacks by
using care when downloading content or
accepting applications, refraining from
opening or responding to messages from
unknown sources, using trustworthy
services to access the Internet, and only
downloading content to the mobile phone
from known, reliable sources.
■ Accessories
Use only Sony Ericsson branded original
accessories and certified service
partners. Sony Ericsson does not test
third-party accessories. Accessories may
influence RF exposure, radio
performance, loudness, electric safety
and other areas. Third-party accessories
and parts may pose a risk to your health
or safety or decrease performance.
■ Disposal of old electrical and
electronic equipment
Electronic equipment and
batteries should not be included as
household waste but should be left at an
appropriate collection point for recycling.
This helps prevent potential negative
consequences for the environment and
human health. Check local regulations by
contacting your local city office, your
household waste disposal service, the
shop where you purchased the product or
calling a Sony Ericsson Contact Center.
Do not attempt to remove internal
batteries. Internal batteries shall be
removed only by a waste treatment facility
or trained service professional.
■ Disposing of the battery
Check local regulations or call a
Sony Ericsson Contact Center for
information. Never use municipal waste.
Appendix/Index
215
SO-01D_English
SO-01D_(E).book
216 ページ
2011年10月20日 木曜日 午後1時6分
■ Memory card
If the product comes complete with a
removable memory card, it is generally
compatible with the handset purchased
but may not be compatible with other
devices or the capabilities of their
memory cards. Check other devices for
compatibility before purchase or use. If
the product is equipped with a memory
card reader, check memory card
compatibility before purchase or use.
Memory cards are generally formatted
prior to shipping. To reformat the memory
card, use a compatible device. Do not
use the standard operating system format
when formatting the memory card on a
PC. For details, refer to the operating
instructions of the device or contact
customer support.
Warning!
If the device requires an adapter for insertion
into the handset or another device, do not
insert the card directly without the required
adapter.
・ Do not strike, bend, or drop the memory
card.
・ Do not attempt to disassemble or modify
the memory card.
・ Do not use or store the memory card in
humid or corrosive locations or in
excessive heat such as a closed car in
summer, in direct sunlight or near a
heater, etc.
・ Do not press or bend the end of the
memory card adapter with excessive
force.
・ Do not let dirt, dust, or foreign objects
get into the insert port of any memory
card adapter.
・ Check you have inserted the memory
card correctly.
・ Insert the memory card as far as it will go
into any memory card adapter needed.
The memory card may not operate
properly unless fully inserted.
・ We recommend that you make a backup
copy of important data. We are not
responsible for any loss or damage to
content you store on the memory card.
■ Precautions on memory card use
・ Do not expose the memory card to
moisture.
・ Do not touch terminal connections with
your hand or any metal object.
Appendix/Index
Continued on next page
216
SO-01D_English
SO-01D_(E).book
217 ページ
2011年10月20日 木曜日 午後1時6分
・ Recorded data may be damaged or lost
when you remove the memory card or
memory card adapter, turn off the power
while formatting, reading or writing data,
or use the memory card in locations
subject to static electricity or high
electrical field emissions.
■ Protection of personal information
Erase personal data before disposing of
the product. To delete data, perform a
master reset. Deleting data from the
phone memory does not ensure that it
cannot be recovered. Sony Ericsson does
not warrant against recovery of
information and does not assume
responsibility for disclosure of any
information even after a master reset.
Loudness warning!
Avoid volume levels that may be harmful to
your hearing.
FCC Statement for the USA
This device complies with Part 15
of the FCC rules. Operation is
subject to the following two
conditions:
(1) This device may not cause harmful
interference, and
(2) This device must accept any interference
received, including interference that may
cause undesired operation.
Any change or modification not expressly
approved by Sony Ericsson may void the
user's authority to operate the equipment.
This equipment has been tested and found to
comply with the limits for a Class B digital
device, pursuant to Part 15 of the FCC Rules.
These limits are designed to provide
reasonable protection against harmful
interference in a residential installation. This
equipment generates, uses and can radiate
radio frequency energy and, if not installed
and used in accordance with the instructions,
may cause harmful interference to radio
communications. However, there is no
guarantee that interference will not occur in a
particular installation.
Appendix/Index
Continued on next page
217
SO-01D_English
SO-01D_(E).book
218 ページ
2011年10月20日 木曜日 午後1時6分
If this equipment does cause harmful
interference to radio or television reception,
which can be determined by turning the
equipment off and on, the user is encouraged
to try to correct the interference by one or
more of the following measures:
・ Reorient or relocate the receiving antenna.
・ Increase the separation between the
equipment and receiver.
・ Connect the equipment into an outlet on a
circuit different from that to which the
receiver is connected.
・ Consult the dealer or an experienced radio/
TV technician for help.
Industry Canada Statement
This Class B digital apparatus complies with
Canadian ICES-003.
Cet appareil numérique de la classe B est
conforme á la norme NMB-003 du Canada.
This device complies with RSS-210 of
Industry Canada.
Operation is subject to the following two
conditions: (1) this device may not cause
interference, and (2) this device must accept
any interference, including interference that
may cause undesired operation of the
device.
Declaration of Conformity for
SO-01D
We, Sony Ericsson Mobile
Communications AB of Nya Vattentornet
SE-221 88 Lund, Sweden declare under our
sole responsibility that our product
Sony Ericsson type AAD-3880087-BV
and in combination with our accessories, to
which this declaration relates is in conformity
with the appropriate standards EN 301
511:V9.0.2, EN 301 908-1:V3.2.1, EN 301
908-2:V3.2.1, EN 300 328:V1.7.1, EN 300
440-2:V1.3.1, EN 301 489-7:V1.3.1, EN 301
489-17:V2.1.1, EN 301 489-24:V1.4.1, EN 301
489-3:V1.4.1 and EN 60 9501:2006+A11:2009 following the provisions of,
Radio Equipment and Telecommunication
Terminal Equipment directive 1999/5/E.
Lund, February 2011
Dan Redin,
Corporate Vice President, Head of
Development
Appendix/Index
Continued on next page
218
SO-01D_English
SO-01D_(E).book
219 ページ
2011年10月20日 木曜日 午後1時6分
We fulfill the requirements of the R&TTE
Directive (1999/5/EC).
End User Licence
Agreement
End User Licence Agreement
Software delivered with this device and its
media is owned by Sony Ericsson Mobile
Communications AB, and/or its affiliated
companies and its suppliers and licensors.
Sony Ericsson grants you a non-exclusive
limited licence to use the Software solely in
conjunction with the Device on which it is
installed or delivered. Ownership of the
Software is not sold, transferred or otherwise
conveyed.
Do not use any means to discover the source
code or any component of the Software,
reproduce and distribute the Software, or
modify the Software. You are entitled to
transfer rights and obligations to the Software
to a third party, solely together with the
Device with which you received the Software,
provided the third party agrees in writing to
be bound by the terms of this Licence.
This licence exists throughout the useful life
of this Device. It can be terminated by
transferring your rights to the Device to a third
party in writing.
Failure to comply with any of these terms and
conditions will terminate the licence
immediately.
Sony Ericsson and its third party suppliers
and licensors retain all rights, title and interest
in and to the Software. To the extent that the
Software contains material or code of a third
party, such third parties shall be beneficiaries
of these terms.
This licence is governed by the laws of
Sweden. When applicable, the foregoing
applies to statutory consumer rights.
In the event Software accompanying or
provided in conjunction with your device is
provided with additional terms and
conditions, such provisions shall also govern
your possession and usage of the Software.
Appendix/Index
219
SO-01D_English
SO-01D_(E).book
220 ページ
2011年10月20日 木曜日 午後1時6分
About Open Source
Software
About Open Source Software
This product includes certain open source or
other software originating from third parties
that is subject to the GNU General Public
License (GPL), GNU Library/Lesser General
Public License (LGPL) and different and/or
additional copyright licenses, disclaimers
and notices. The exact terms of GPL, LGPL
and some other licenses, disclaimers and
notices are reproduced in the about box in
this product and are also available at http://
opensource.sonyericsson.com.
Sony Ericsson offers to provide source code
of software licensed under the GPL or LGPL
or some other open source licenses allowing
source code distribution to you on a CD-ROM
for a charge covering the cost of performing
such distribution, such as the cost of media,
shipping and handling, upon written request
to Sony Ericsson Mobile Communications AB,
Open Source Software Management, Nya
Vattentornet, SE-221 88 Lund, Sweden. This
offer is valid for a period of three (3) years
from the date of the distribution of this
product by Sony Ericsson.
Export Controls and
Regulations
This product and its accessories may be
covered and controlled by Japan's export
control regulations ("Foreign Exchange and
Foreign Trade Law" and related laws and
regulations). If you wish to export this product
and/or its accessories, you must complete
the necessary procedures at your own
responsibility and cost. For details about the
procedure, contact the Ministry of Economy,
Trade and Industry.
Intellectual Property Right
About the Copyright and Portrait
rights
Copyrighted contents you recorded or
obtained from sites or Internet home pages
using this product by downloading or other
means, such as documents, images, music
data, software, are prohibited from
reproduction, transformation and
transmission over public lines without
consent of the copyright holders, unless
intended for personal use or any other
purpose permitted by law.
Appendix/Index
Continued on next page
220
SO-01D_English
SO-01D_(E).book
221 ページ
2011年10月20日 木曜日 午後1時6分
Note that some performances, shows, and
exhibitions may not allow photography, movie
shooting, or sound recording even for
personal use.
You should also refrain from taking a picture
of other people and disclosing it by such
means as posting it on a site on the Internet
without their consent because of possible
infringement of their right of portrait.
Trademarks
The company names and product names
appearing in this manual are trademarks or
registered trademarks of their respective
holders.
・ "FOMA", "i-mode", "i-αppli", "Deco-mail", "spmode", "WORLD WING", "WORLD CALL",
"ToruCa", "mopera" and "mopera U" are
trademarks or registered trademarks of NTT
DOCOMO, INC.
・ "Bluetooth" is a registered trademark of
Bluetooth SIG. INC., and Sony Ericsson is
licensed to use them.
・ "Wi-Fi" is a registered trademark of Wi-Fi
Alliance.
・ "Catch Phone (Call waiting service)" is a
registered trademark of Nippon Telegraph
and Telephone Corporation.
・ Rovi, G-GUIDE, G-GUIDE MOBILE and their
logos are registered trademarks in Japan of
U.S. Rovi Corporation and/or its affiliates.
・ "Liquid Identity" logo, "Xperia", "PlayNow",
"Timescape" and "TrackID" are trademarks
or registered trademarks of Sony Ericsson
Mobile Communications AB.
・ "APPNAVI" is a registered trademark of Sony
Ericsson Mobile Communications Japan,
Inc.
・ A technology of Gracenote Mobile
MusicID is used for "TrackID".
"Gracenote" and "Gracenote Mobile
MusicID" are trademarks or registered
trademarks of Gracenote, Inc.
・ "Media Go" is a trademark or registered
trademark of Sony Electronics Inc.
・ "PlayStation" is a registered trademark of
Sony Computer Entertainment Inc.
・ "POBox" and "Sony" are trademarks or
registered trademarks of Sony Corporation.
・ "POBox" is a co-developed technology of
Sony Computer Science Laboratories, Inc.
and Sony Ericsson Mobile Communications
Japan, Inc.
・ "xLOUD" is a trademark of Sony
Corporation.
・ microSDHC logo is a trademark of
SD-3C, LLC.
・ "Twitter" is a trademark or registered
trademark of Twitter, Inc.
・ "3GPP" is a trademark or registered
trademark of ETSI.
Appendix/Index
Continued on next page
221
SO-01D_English
SO-01D_(E).book
222 ページ
2011年10月20日 木曜日 午後1時6分
・ "Google", "Google Maps", YouTube" and
"YouTube" logo are trademarks or registered
trademarks of Google, Inc.
・ "Facebook" is a trademark or registered
trademark of Facebook, Inc.
・ "Ericsson" is a trademark or registered
trademark of Telefonaktiebolaget LM
Ericsson.
・ mixi and mixi logo are registered
trademarks of mixi, Inc.
・ DLNA is a trademark or
registered trademark of the
Digital Living Network Alliance.
・ "Microsoft", "Windows", "Outlook", "Windows
Vista", "Windows Server", "Windows Media"
and "ActiveSync" are trademarks or
registered trademarks of Microsoft
Corporation in the United States and other
countries.
・ This product is protected by certain
intellectual property rights of Microsoft. Use
or distribution of such technology outside of
this product is prohibited without a license
from Microsoft.
・ Contains Adobe® Flash® Player technology
by Adobe Systems Incorporated. All rights
reserved.
Adobe Flash Player Copyright© 1996-2011
Adobe Systems Incorporated. All rights
reserved.
Adobe, Flash and Flash logo are either
registered trademarks or trademarks of
Adobe Systems Incorporated in the United
States and/or other countries.
・ This product is licensed under the MPEG-4
visual and AVC patent portfolio license for the
personal and non-commercial use of a
consumer for (i) encoding video in
compliance with the MPEG-4 visual standard
("MPEG-4 video") or the AVC standard ("AVC
video") and/or (ii) decoding MPEG-4 or AVC
video that was encoded by a consumer
engaged in a personal and non-commercial
activity and/or was obtained from a video
provider licensed by MPEG LA to provide
MPEG-4 and/or AVC video. No license is
granted or shall be implied for any other use.
Additional information including that relating
to promotional, internal and commercial uses
and licensing may be obtained MPEG LA,
L.L.C. ("See http://www.mpegla.com"). MPEG
Layer-3 audio decoding technology licensed
from Fraunhofer IIS and Thomson.
Appendix/Index
Continued on next page
222
SO-01D_English
SO-01D_(E).book
223 ページ
2011年10月20日 木曜日 午後1時6分
・ Java, JavaScript and Java-based
trademarks and logos are trademarks or
registered trademarks of Sun Microsystems,
Inc. in the U.S. and other countries.
・ End-user license agreement for Sun Java
Platform, Micro Edition.
1. Restrictions: Software is confidential
copyrighted information of Sun and title to all
copies is retained by Sun and/or its licensors.
Customer shall not modify, decompile,
disassemble, decrypt, extract, or otherwise
reverse engineer Software. Software may not
be leased, assigned, or sublicensed, in
whole or in part.
・ Other product and company names
mentioned herein may be the trademarks of
their respective owners.
In context, TM and ® mark are omitted.
・ Any rights not expressly granted herein are
reserved. All other trademarks are property
of their respective owners.
Appendix/Index
223
SO-01D_English
SO-01D_(E).book
224 ページ
2011年10月20日 木曜日 午後1時6分
Index
A
B
About phone .................................................. 121
Access point
Initialize ........................................................ 94
Settings ........................................................ 93
Accessibility ................................................... 120
Account settings
Facebook ................................................... 115
Google ....................................................... 114
Accounts & sync ............................................ 114
Activate auto-sync ............................. 114, 116
Airplane mode.................................................. 95
Alarm.............................................................. 181
Set an alarm ............................................... 182
Android Market .............................................. 168
Uninstall ............................................... 55, 113
Application button............................................ 48
Applications ............................................. 48, 111
Icon .............................................................. 49
Manage ...................................................... 112
Sort............................................................... 55
APPNAVI .......................................................... 51
Area Mail ........................................................ 132
Auto-rotate screen ......................................... 105
Backlight
Turn off ........................................................106
Turn on ..................................................35, 113
Battery pack .....................................................31
BeeTV ...............................................................52
Bluetooth.........................................................143
Device name...............................................144
Pair setting ..................................................144
BOOK Store 2Dfacto ........................................49
Bookmark........................................................136
Bookmark a web page ...............................136
Edit..............................................................137
Open ...........................................................137
Books, comics E ★ EVERYSTAR .......................53
Browser...........................................................133
Adjust settings ............................................135
Auto-fit a web page ....................................135
Close...........................................................134
Copy text ....................................................135
Display ........................................................134
Exit ..............................................................133
Go back to the previous page ....................133
Move ...........................................................133
Open ...........................................................133
Open a new browser window .....................134
Search for text.............................................134
Set the home page .....................................135
Switch between browser windows..............134
Zoom in/out .................................................134
Browsing history .............................................137
Appendix/Index
224
SO-01D_English
SO-01D_(E).book
225 ページ
2011年10月20日 木曜日 午後1時6分
C
Calculator......................................................... 50
Calendar ........................................................ 179
Create a schedule...................................... 180
Display a schedule .................................... 180
Call ................................................................... 71
Decline ................................................... 73, 74
End............................................................... 72
Make ...................................................... 71, 74
Mute ............................................................. 75
On hold ........................................................ 75
Receive .................................................. 73, 74
Speaker........................................................ 75
Call Forwarding Service................................... 90
Call log ............................................................. 75
Add to contacts............................................ 76
Delete........................................................... 76
Make a call................................................... 75
Call settings ................................................... 102
Call Waiting ...................................................... 88
Caller ID Notification ........................................ 91
Camera .......................................................... 150
In-camera........................................... 152, 156
Record videos ............................................ 155
Settings (Still camera) ................................ 153
Settings (Video recording) ......................... 157
Take photos................................................ 151
Campaign Navi ................................................ 54
Character entry
Character mode ............................... 58, 61, 64
Input method.................................... 58, 61, 64
Settings ........................................................ 65
Charge ............................................................. 29
Use AC Adapter........................................... 32
Use PC..........................................................32
Chat ................................................................131
Checkbox .........................................................41
Clock...............................................................181
Connected devices (Media server) ................147
Contact Picker 2.3 ......................................58, 69
Contacts
Add a contact ...............................................77
Delete ...........................................................79
Edit................................................................78
Export .....................................................83, 84
Favorites .......................................................80
Import .....................................................83, 84
Information filter ............................................82
Link contacts ................................................79
Make a call ...................................................79
Myself ...........................................................79
Search...........................................................78
Send a contact .............................................80
Set a photo ...................................................81
D
Data synchronization ......................................116
Activate auto-sync ......................................116
Date & time .....................................................120
Display............................................................105
docomo market...............................................169
E
Ear speaker volume..........................................74
Early warning "Area Mail"................................132
eco mode..........................................................52
Email ...............................................................124
Delete .........................................................128
Appendix/Index
225
SO-01D_English
SO-01D_(E).book
226 ページ
2011年10月20日 木曜日 午後1時6分
Forward ...................................................... 127
Receive ...................................................... 126
Reply .......................................................... 127
Save attachment file................................... 127
Send........................................................... 125
Setup.......................................................... 124
Email account
Add ............................................................ 129
Change ...................................................... 128
Remove ...................................................... 129
Emergency call ................................................ 71
Evernote Launcher........................................... 53
F
Facebook ....................................................... 115
Delete......................................................... 116
Fixed phrase .............................................. 58, 69
G
G Guide program table.................................... 54
Gallery............................................................ 160
Play (video) ................................................ 163
Slideshow (Photo) ...................................... 162
View (Photo) ............................................... 162
Games............................................................ 148
Games & apps ............................................... 183
Gmail.............................................................. 131
Google Map ................................................... 176
Current location.......................................... 176
Directions ................................................... 178
Google Latitude ......................................... 179
Layer .......................................................... 177
Street view.................................................. 176
Google Talk .................................................... 131
GPS Function..................................................174
Enable GPS function...................................175
Enable Wireless networks to find position
....................................................................175
H
Home screen ....................................................42
I
i-Channel ..........................................................49
Index letter........................................................41
Initial settings....................................................35
International call ...............................................72
International roaming................................53, 186
J
Japanese keyboard..........................................56
Japanese syllabary keyboard ..........................64
K
Key....................................................................39
Key lock ............................................................35
Koe-no-Takuhaibin............................................49
L
Landscape view .............................................106
Language & keyboard ....................................119
life.episode .....................................................184
Link .................................................................136
LiveWareTM manager ........................................52
Location ..........................................................174
Location & security .........................................106
Appendix/Index
226
SO-01D_English
SO-01D_(E).book
227 ページ
2011年10月20日 木曜日 午後1時6分
M
N
Map Application............................................... 53
McDonald’s ...................................................... 53
Media Go ....................................................... 142
Install.......................................................... 142
Playlist ........................................................ 167
Transfer data .............................................. 143
melodycall........................................................ 49
Message (SMS).............................................. 122
Add new contact........................................ 123
Delete message ......................................... 124
Delete threads............................................ 124
Receive ...................................................... 123
Send........................................................... 122
Settings ...................................................... 123
microSD card ................................................... 28
Format ........................................................ 118
microUSB cable ............................................. 138
Missed calls ..................................................... 75
mixi................................................................. 170
Mobage............................................................ 53
mopera U ......................................................... 95
mopera U mail................................................ 130
mora touch ..................................................... 184
Move data ...................................................... 138
Music player................................................... 165
Play ............................................................ 165
Playlist ........................................................ 167
Share .......................................................... 166
Myself............................................................... 79
Network connection settings ............................93
Network mode ................................................190
News & Weather ...............................................51
Notification icon ................................................37
Notification LED ................................................38
Notification panel..............................................38
Notification ringtone........................................105
O
OfficeSuite ......................................................183
Own number .........................................7, 79, 121
P
PC Companion ...............................................139
Phone language .............................................119
Phonebook........................................................76
PhoneBookCopy...............................................84
PIN code.........................................................108
PlayNow..........................................................184
PlayStation pocket ....................................51, 149
POBox Touch User Guide.................................70
Privacy ............................................................117
PS Store ............................................................53
PUK (PIN Unblocking Key).............................108
Q
QWERTY keyboard ...........................................58
R
Radio button .....................................................41
Rakuten auction................................................53
Record videos ................................................155
Appendix/Index
227
SO-01D_English
SO-01D_(E).book
228 ページ
2011年10月20日 木曜日 午後1時6分
Remaining battery level ........................... 30, 121
Reset .............................................................. 117
Ringtone settings ........................................... 104
Ringtone volume ...................................... 74, 104
S
Schedule
Create ........................................................ 180
Display ....................................................... 180
Screen brightness.......................................... 105
Screen lock .................................................... 109
Change ...................................................... 110
Settings ...................................................... 109
Screenshot ..................................................... 158
SE Store ......................................................... 184
Search.............................................................. 47
Security code
Network security code ............................... 107
PIN code .................................................... 108
Setting menu .................................................... 93
Setup guide...................................................... 35
Shortcut............................................................ 43
Silent mode .................................................... 103
Software keyboard ........................................... 56
Software update............................................. 201
Sound............................................................. 103
Specific Absorption Rate (SAR)..................... 206
Specifications................................................. 203
sp-mode........................................................... 95
sp-mode mail ................................................. 122
Status bar......................................................... 36
Status icon ....................................................... 36
Stereo Headset with Microphone............. 73, 159
Storage........................................................... 118
T
Take photos ....................................................151
Theme...............................................................46
Timescape ......................................................170
Filter ............................................................172
Reply to an SMS message .........................173
Settings ...............................................171, 173
Tiles ............................................................171
View a tile....................................................172
ToruCa ............................................................184
Touch screen ....................................................39
Drag ..............................................................40
Flick ..............................................................40
Pinch .............................................................40
Tap ................................................................40
Touch ............................................................40
Touch tone ......................................................105
TrackID............................................................168
Transfer data...................................................138
Troubleshooting ..............................................193
Turn power on/off ..............................................34
Twitter........................................................53, 170
Twonky Special .................................................53
U
UIM .............................................................21, 27
PIN ..............................................................108
Update center.................................................201
USB connection........................................32, 138
USB tethering .................................................100
User dictionary .................................................67
Back up and restore .....................................69
My words English..........................................68
My words Japanese......................................68
Appendix/Index
228
SO-01D_English
SO-01D_(E).book
229 ページ
2011年10月20日 木曜日 午後1時6分
V
Vibrate.................................... 103, 124, 181, 182
Video Unlimited.............................................. 185
VirusScan (docomo Anshin Scan) ................... 54
Voice input & output....................................... 119
Voice Mail Service............................................ 86
Volume adjust................................................. 104
VPN ................................................................ 101
W
Wallpaper ......................................................... 46
Widget.............................................................. 43
Wi-Fi ................................................................. 96
Wi-Fi tethering ................................................ 101
Wireless & networks......................................... 93
Word suggestion .............................................. 67
Words by learning............................................ 68
WORLD CALL .................................................. 72
WORLD WING................................................ 186
X
Xperia PLAY ............................................. 52, 148
Y
YouTube ......................................................... 163
Numerics
12 key keyboard .............................................. 61
Appendix/Index
229
SO-01D_English
SO-01D_(E).book
1 ページ
2011年10月20日 木曜日 午後1時6分
Make various applications or charge your billing plan, check your charges and points, and
more online.
My docomo (http://www.mydocomo.com/) ⇒ 各種お申込・お手続き (Various applications/procedures) *In
Japanese only.
* "docomo ID and password" are required for use.
* Please contact "General Inquiries" described on the last page of this manual if you forget or do not have "docomo
ID and password".
* May not be available in some cases depending on the conditions of your subscription.
* There are cases where the site may not be available due to system maintenance, etc.
Don't forget your mobile phone ... or your manners!
Remember to be courteous to others when you use your terminal.
Turn the power off when you are:
Keep your voice and ring tone down
■ In places where use is prohibited
Be sure to switch the power off in an aircraft or a
hospital.
* Turn off your terminal even in hospital lobbies
and waiting rooms as well as hospital wards if
electronic medical devices may be in use near
you.
■ In crowded places such as peak-hour trains if
implanted electronic medical devices may be in
use near you
Radio waves emitted by the terminal may
adversely affect implanted pacemakers and ICDs
when used in close proximity.
■ Driving
Using a handheld mobile phone while driving will
result in a penalty.
However, absolutely necessary cases such as
rescue of a sick person or maintaining public's
safety are exempted.
■ In places such as theaters, cinemas, and art
galleries
Using the terminal in a public place, where you
need to be quiet, annoys people around you.
■ Keep your voice down in quiet places like
restaurants and hotel lobbies.
■ If you are in an outdoor public place, make sure
you do not disturb others.
Respect privacy
Please be considerate of the privacy of
individuals around you when taking and
sending photos using camera-equipped
mobile phones.
Have good manners
The terminal is equipped with useful functions
not to answer an incoming call or to mute the
sound.
[Vibrate] (P.103)
Vibrates when there is an incoming call.
[Silent mode] (P.103)
Silent mode mutes the sounds of the terminal such
as the keypad sounds and the ring tone.
* Shutter sound cannot be muted.
You can also use optional services such as the
Voice Mail Service (P.86) and Call Forwarding
Service (P.90).
SO-01D_English
SO-01D_(E).book
1 ページ
2011年10月20日 木曜日 午後1時6分
General Inquiries
<docomo Information Center>
0120-005-250 (toll free)
*Service available in: English, Portuguese, Chinese, Spanish, Korean.
*Unavailable from part of IP phones.
(Business hours: 9:00 a.m. to 8:00 p.m.)
■From DOCOMO mobile phones (In Japanese only)
(No prefix) 151 (toll free)
*Unavailable from land-line phones, etc.
Repairs
■From DOCOMO mobile phones (In Japanese only)
(No prefix) 113 (toll free)
*Unavailable from land-line phones, etc.
■From land-line phones (In Japanese only)
0120-800-000 (toll free)
*Unavailable from part of IP phones.
(Business hours: 24 hours (open all year round))
■From land-line phones (In Japanese only)
0120-800-000 (toll free)
*Unavailable from part of IP phones.
(Business hours: 9:00 a.m. to 8:00 p.m. (open all year round))
●Please confirm the phone number before you dial.
●For Applications or Repairs and After-Sales Service, please contact the above-mentioned information center or the docomo
shop etc. near you on the NTT DOCOMO website.
NTT DOCOMO website http://www.nttdocomo.co.jp/english/
Loss or theft of the terminal or payment of cumulative cost overseas
Failures encountered overseas
<docomo Information Center>
<Network Support and Operation Center>
(available 24 hours a day)
(available 24 hours a day)
From DOCOMO mobile phones
International call access code
-81-3-6832-6600* (toll free)
for the country you stay
From DOCOMO mobile phones
*You are charged a call fee to Japan when calling from a land-line phone, etc.
*If you use SO-01D, you should dial the number +81-3-6832-6600
(to enter '+', touch and hold '0').
*You are charged a call fee to Japan when calling from a land-line phone, etc.
*If you use SO-01D, you should dial the number +81-3-6718-1414
(to enter '+', touch and hold '0').
From land-line phones
From land-line phones
<Universal number>
<Universal number>
Universal number international
prefix
-8000120-0151*
*You might be charged a domestic call fee according to the
call rate for the country you stay.
*For international call access codes for major countries and
universal number international prefix, refer to DOCOMO
International Services website.
International call access code
for the country you stay
Universal number international
prefix
-81-3-6718-1414* (toll free)
-8005931-8600*
*You might be charged a domestic call fee according to the
call rate for the country you stay.
*For international call access codes for major countries and
universal number international prefix, refer to DOCOMO
International Services website.
●If you lose your terminal or have it stolen, immediately take the steps necessary for suspending the use of the terminal.
●If the terminal you purchased is damaged, bring your terminal to a repair counter specified by DOCOMO after returning to Japan.
Don’t forget your mobile phone・・・or your manners!
٧When using your mobile phone in a public place, don’t forget to show
common courtesy and consideration for others around you.
Li-ion 00
To prevent damage to the environment, bring used battery packs to a
docomo service counter, a docomo agent or a recycle center.
Sales: NTT DOCOMO, INC.
Manufacturer: Sony Ericsson Mobile
Communications Japan, Inc
’
11. October (1st Edition) 1255-3782.1


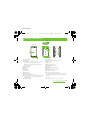
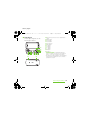
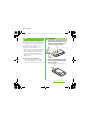
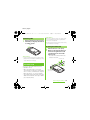
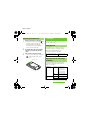


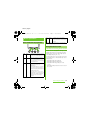


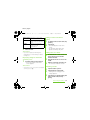

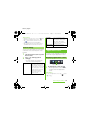


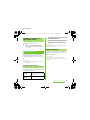

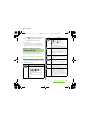

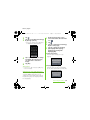
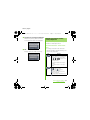
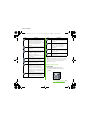
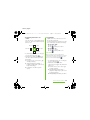
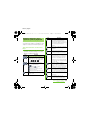

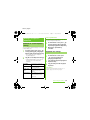


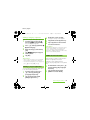
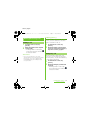

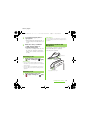


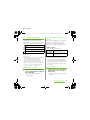
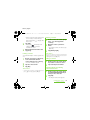

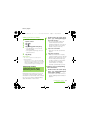
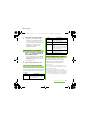


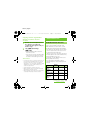
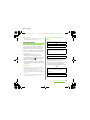

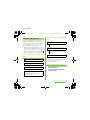
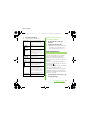

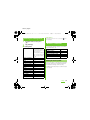


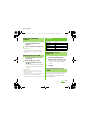


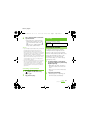


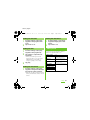


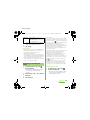

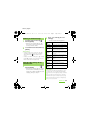
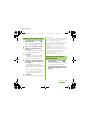
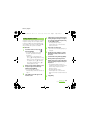
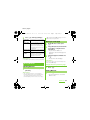

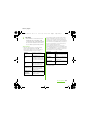


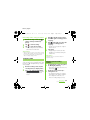
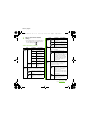


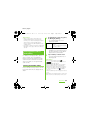
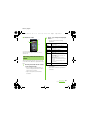

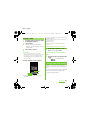

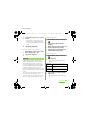


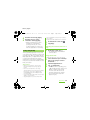


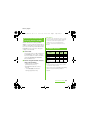

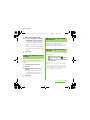

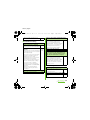
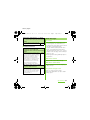


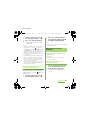
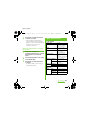


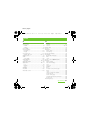
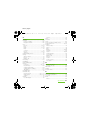


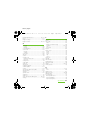
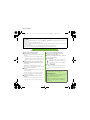

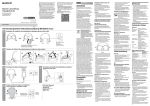


![取扱説明書 [SC-01D]](http://vs1.manualzilla.com/store/data/005959699_1-0f2252ea3ae3eaa3bd318f5696531d67-150x150.png)