Download Dual Disc II
Transcript
OPERATION & TROUBLESHOOTING
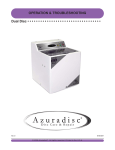
Dual Disc II • • • • • • • • • • • • • • • • • • • • • • • • • • • • • • • • •
Ver 4.2
July-01-2012
© 2012 Azuradisc R . All rights reserved. Printed in the U.S.A.
SAFETY
When using the Azuradisc Dual Disc II disc repair machine, the following basic safety precautions should always be
followed to reduce the risk of fire, electric shock, or injury to persons:
•
Read this manual before assembling or using the machine.
•
Use this machine only for its intended use as described in this manual.
•
Use only with Azuradisc-recommended accessories and repair materials. (The use of repair materials not approved by Azuradisc may damage discs permanently or cause injuries.)
•
Pay close attention when the machine is used near children. The machine is not intended for use by
children or infirm persons.
•
Do not operate the machine if the cord or plug is damaged, is not working properly, has been damaged, or immersed in water. If these conditions are present, return the machine to Azuradisc for
examination, repair, or adjustment.
•
Do not drop or insert objects into any openings.
•
To disconnect, turn off the machine, then remove plug from the electrical outlet.
•
Use a grounded plug when using an extension cord.
•
Keep fingers and all body parts away from moving parts and openings.
•
Disconnect electrical supply before cleaning.
© 2012 Azuradisc R All rights reserved. Printed in the U.S.A.
This manual may not be copied, in whole or in part, without written consent of Azuradisc. Use of the Azuradisc
logo without the prior written consent of Azuradisc may constitute trademark infringement and unfair competition
in violation of federal and state laws.
Every effort has been made to ensure that the information in this manual is accurate. Azuradisc is not responsible for printing or clerical errors.
Azuradisc Inc.
7307 South 89th Place
Mesa, Arizona 85212
480.827.8786
www.azuradisc.com
Azuradisc Inc. is not responsible or liable for damage, of any type, to discs inserted into an Azuradisc machine.
If you believe that an Azuradisc machine is malfunctioning, discontinue use and contact Azuradisc or an authorized representative.
2
Ver 4.2
July-01-2012
TABLE OF CONTENTS
SAFETY . . . . . . . . . . . . . . . .
OUT OF THE BOX . . . . . . . .
PART IDENTIFICATION . . . .
IMPORTANT INFORMATION .
SET UP . . . . . . . . . . . . . . . .
BASIC OPERATION . . . . . . .
.
.
.
.
.
.
.
.
.
.
.
.
.
.
.
.
.
.
.
.
.
.
.
.
.
.
.
.
.
.
.
.
.
.
.
.
...................
...................
...................
. . . . . . . . . . . . . . . . . .
...................
...................
WALKTHROUGH . . . . . . . . . . . . . . . . . .
SELECT TO START . . . . . . . . . . . . . . . .
ABOUT REPAIR . . . . . . . . . . . . . . . . . .
POLICOOL LOW & LID OPEN SCREEN:
TROUBLE SHOOTING
INFO MENU . . . . . . . .
MAINTENANCE. . . . . .
EDUCATION . . . . . . . .
.
.
.
.
.
.
.
.
.
.
.
.
.
.
.
.
.
.
.
.
.
.
.
.
.
.
.
.
.
.
.
.
.
.
.
.
.
.
.
.
.
.
.
.
.
.
.
.
.
.
.
.
.
.
.
.
....................
....................
. . . . . . . . . . . . . . . . . . .
....................
.
.
.
.
.
.
.
.
.
.
.
.
HOW DISCS ARE MADE . . . . . . . . . . . . . . . . . . . .
HOW A DVD IS MADE . . . . . . . . . . . . . . . . . . . . . .
Single Layer DVDs . . . . . . . . . . . . . . . . . .
Double Layered DVDs . . . . . . . . . . . . . . .
Double Sided DVDs . . . . . . . . . . . . . . . . . .
Double Sided/Double Layered DVDs . . . . .
IDENTIFYING SCRATCHES . . . . . . . . . . . . . . . . . .
Reading Side Scratches - CDs, CD-ROMs &
Top Side Scratches . . . . . . . . . . . . . . . . . .
Top Side Foil Dents . . . . . . . . . . . . . . . . . .
.
.
.
.
.....
.....
.....
.....
.....
.....
.....
DVDs
.....
.....
.
.
.
.
.
.
.
.
.
.
.
.
.
.
.
.
.
.
.
.
.
.
.
.
.
.
.
.
.
.
.
.
.
.
.
.
.
.
.
.
.
.
.
.
.
.
.
.
.
.
.
.
.
.
.
.
.
.
...................
...................
...................
. . . . . . . . . . . . . . . . . .
...................
...................
.2
.4
.4
.5
.6
.7
.
.
.
.
.
.
.
.
.
.
.
.
.7
.7
.7
.7
.
.
.
.
.
.
.
.
.
.
.
.
.
.
.
.
.
.
.
.
.
.
.
.
.
.
.
.
.
.
.
.
.
.
.
.
.
.
.
.
....................
....................
. . . . . . . . . . . . . . . . . . .
....................
.
.
.
.
.
.
.
.
.
.
.
.
.
.
.
.
.
.
.
.
.
.
.
.
.
.
.
.
.
.
.
.
.
.
.
.
.
.
.
.
.
.
.
.
.
.
.
.
.
.
.
.
.
.
.
.
.
.
.
.
.
.
.
.
.
.
.
.
.
.
.
.
.
.
.
.
.
.
.
.
.
.
.
.
.
.
.
.
.
.
.
.
.
.
.
.
.
.
.
.
.
.
.
.
.
.
.
.
.
.
.
.
.
.
.
.
.
.
.
.
.
.
.
.
.
.
.
.
.
.
.
.
.
.
.
.
.
.
.
.
.
.
.
.
.
.
.
.
.
.
.
.
.
.
.
.
.
.
.
.
.
.
.
.
.
.
.
.
.
.
.
.
.
.
.
.
.
.
.
.
.
.
.
.
.
.
.
.
.
.
.
.
.
.
.
.
.
.
.
.
.
.
.
.
.
.
.
.
.
.
.
.
.
.
.
.
.
.
.
.
.
.
.
.
.
.
.
.
.
.
.
.
.
.
.
.
.
.
.
.
.
.
.
.
.
.
.
.
.
.
.
.
.
.
.
.
.
.
.
.
.
.
.
.
.
.
.
.
.
.
.
.
.
.
.
.
.
.
.
.
.
.
.
.
.
.
.
.
.
.
.
.
.
.
.
.
.
.
.
.
.
.
.
.
.
.
.
.
.
.
.
.
.
.
.
.
.
.
.
.
.
.
.
.
.
.
.
.
.
.
.
.
.
.
.
.
.
.
.
.
.
.
.
.
.
.
.
.
.
.
.
.
.
.
.
.
.
.
.
.
.
.
.
.
.
.
.
.
.
.
.
.
.
.
.
.
.
.
.
.
.
.
.
.
.
.
.
.
.
.
. . . .9
. . .10
. . .16
. . .18
.
.
.
.
.
.
.
.
.
.
.
.
.
.
.
.
.
.
.
.
.
.
.
.
.
.
.
.
.
.
.18
.18
.18
.19
.19
.19
.19
.19
.20
.20
AZURADISC ONE-YEAR/100,000 DISC LIMITED WARRANTY . . . . . . . . . . . . . . . . . . . . . . . . . .21
WARRANTY COVERAGE . . . . . . . . . . . . . . . . . . . . . . . . . . . . . . . . . . . . . . . . . . . . . . . . . . . . . . . . . . .21
EXCLUSIONS AND LIMITATIONS . . . . . . . . . . . . . . . . . . . . . . . . . . . . . . . . . . . . . . . . . . . . . . . . . . . .21
OBTAINING WARRANTY SERVICE . . . . . . . . . . . . . . . . . . . . . . . . . . . . . . . . . . . . . . . . . . . . . . . . . . .21
3
Ver 4.2
July-01-2012
ACCCESSORY CHECK LIST
After unpacking the Dual Disc 2, verify the following items, in the quantities shown, are included. Contact
Azuradisc, or the local representative if any items are missing. Place the machine on sturdy surface. Ensure there
are no obstructions of air circulation around the bottom and rear of the machine. Ensure that unused cartridges are not stored
directly behind the Dual Disc.
1 ea. - Base Plate Assy - 1/8 inch Composite Plate with Velcro attached
Used with the black 1/4 inch Polishing Pad.
Item # ph_02577_6
1/8 inch
fiberglass
TM
v3.1 Cartridge Kit
1 ea. - PoliCool
Includes 64oz of PoliCool, and 2 Pads.
Item # dd_02557_8 (Sold as a Kit)
(Note additional pad(s) or other items may be included as a free samples, quantities and free sample items may change from time to time and are not considered a standard item included with the machine starter kit)
(Combo Item)
1 ea. - Micro-Fiber Wiping Cloths 6x6 - Hand washable and reusable super soft
material to clean optical surfaces.
1 ea. - Optical SprayCleaner 2oz.- Laser clear anti-static formula spray cleaner.
Item # CK 00262 3
1 ea. - Maintenance Kit - Small Brush and 2 Hex Wrenches.
Item # CK 00262 3
1 ea. - Power Cord (Item number varies depending on intended country of use)
1 ea. Scratch Removal Poster
Item # adv_00222_7
PART IDENTIFICATION
A Access Door:
CAUTION!
• PolicoolTM Cartridge
• Easy access to PoliCoolTM pump
• Easy access to PoliCoolTM radiator
B
F
Make sure there is adequate room
for air flow behind and underneath the machine AT ALL TIMES!
B Safety Lid:
• Automatic shut-off when open
C Fiberglass Casing
C
• Will not conduct electricity
• Waterproof
• Easy to clean
D Rear mounted cooling fans
C
D
D
D
E AC recepticle
• Industrial Strength
• Fused
• On/Off Switch
D
C
E
A
F Electronic Controller
E
4
Ver 4.2
July-01-2012
Important Information
About PoliCoolTM & Smart Tag Technology
What is PoliCoolTM ?
PoliCoolTM is an advanced formula of micro-abrasives particles, along with a cooling solution and other
proprietary ingredients mixed together in a single liquid to provide maximum scratch removal and polishing properties.
Performance
PoliCoolTM outperforms polish compounds in both cut rate & finish. PoliCoolTM lasts longer than most
fixed abrasives. One of the greatest benefits of PoliCoolTM is that it can be recycled over and over (with
screening) until it has reached the end of its useable life. This creates the benefits of cooling a disc
during repair without creating wastewater, or having a complex recirculation system. There is no need
to add water, or clean up messy polish compound splatter or dust from the machine similar to those
used in "water based" or "dry process" machines. PoliCoolTM is automatically recycled back into the cartridge at the end of the cycle.
Usable Life
The performance and life of this product is measured in seconds run time. Different size containers and
mixtures contain a smart chip with the information containing the maximum "seconds of run time" per
cartridge. If PoliCoolTM were used beyond this life, poor performance would result, and disc damage
could occur. Since product life is critical to performance, PolicoolTM is only sold in containers called cartridges that contains a smart chip. This combination greatly improves the repeatability of good results.
About the Smart Tag IMPORTANT MUST READ INFORMATION
Each PoliCoolTM cartridge is outfitted with a smart tag that carries the information about the maximum
useable life (run time) of each individual cartridge. Azuradisc disc repair machines that use PoliCoolTM
technology are outfitted with a smart tag reader that reads and transfers the "run time" information
from the cartridge to the disc repair machine. Once transferred, the runtime information cannot be
transferred back to the PoliCoolTM cartridge (smart chip), nor can it be transferred to a different
machine. To get maximum life out of each PoliCoolTM cartridge, it must be completely used before
replacement. Once a cartridge has been mated with a machine (time is transfered from the bottle to
the machine), only the machine (not the cartridge) keeps track of the time remanining. This design
requires that the same cartridge stays in the same machine to be used until all of the policool time is
used-up from the machine. Once a bottle of Policool has been loaded onto a machine (time transfers
from the cartridge to the machine) The cartridge itself no longer has time on it, and the smart tag will
have a recorded value of “depleted” on the smart tag, and the machine will display the time that was
“loaded onto it” Once this process has been complete, it cannot be reversed, and the time that resides
on the machine cannot be moved from the machine back to a bottle, or to another machine, it can
only be used up through operating the machine, or by purposely erasing the time in a special screen
that will ask if you are intending on erasing time. The feature which allows a user to purposefully erase
time could come in handy if you spilled all of your policool, and need to load a new bottle. Azuradisc
does not provide credits for erased or used time and cannot restore time deleted or depleted.
While it is possible to remove a partially used cartridge from the machine (for transportation or to
shake and mix the liquid) it is important that the same cartridge is reinserted in the same machine to
be able to use-up the remaining credits.
PLEASE NOTE:
- Inserting a new cartridge in a machine that still has credits left from a previous cartridge
may ERASE the original credits left from the previous cartridge and replace them with the credit for the
new cartridge, this is rare, and is only possible on software versions earlier than 6.2 that had an automatic approach to loading policool. Loading of policool is now an interactive process, eliminating accidental overwrites.
- Inserting a partially used cartridge in another machine will not transfer any credit.
Azuradisc does not provide refunds or credits for losses due to premature replacement of PoliCoolTM
cartridges or the improper exchange of cartridges between machines.
Ver 4.2
July-01-2012
SET UP - SUPPLIES - CARTRIDGE & PAD PLACEMENT
To be performed initially and each time you replace the consumables.
IMPORTANT! Always change the abrasive pad when starting a new cartridge. Even if the
pad appears to be in good condition visually.
1
2
Turn PoliCool upside down..Shake vigorously
making sure all sediment is mixed.
Load bottle before opening.
3
4
Remove PoliCool Cap and insert the pickup
tube (with filter & weight on the end) making
sure filter is fully sub-merged. Align bottle
opening under drain with color label side
facing Smart Tag Reader.
Turn
power on. Follow the instructions to load
a new bottle of policool. PoilCool Time will
appear on the screen, once it has been successfully transfered. 64 oz Bottlesize will show
12,000 seconds. Other size bottles with different
time values may be available to purchase.
Prime lines until PoliCool is flowing and no air
bubbles are present. It may take more than
one priming sequence to get the liquid flowing all the way through the system.
Press the “i” button, use the arrow
buttons to scroll to the prime pump screen.
Pressing the enter button turns on the
PoliCool pump for 10 seconds.
Press “i” to stop and return to main screen.
Scroll Forward
Pump Prime
f : Start Sec: 00
Information
Enter
Scroll Back
5
Installing a new Pad
Be sure to REMOVE OLD OR EXISTING BLACK PAD
from base spindle before installing a new one.
Align holes and press the velcro
side of the pad on to the basehead.
Verify the base-head has been
installed on the unit’s turntable hook
side up.
For Best Results Shake PoliCoolTM every 30-45 Minutes of use!
6
Ver 4.2
July-01-2012
BASIC OPERATION
Never operate the
machine with only one
disc in place
Correct
Place CDs or DVDs on both
sides. Combining disc
types is ok, such as one
blu-ray one dvd
Close the lid, press and turn latch
clockwise until it moves passed
resistence.
Incorrect
(Figure 2.2)
(Figure 2.1)
For the lid to be closed the top latch has to be in
the configuration shown in Figure 2.1
For the lid to be sealed the edge
must be flush with the interior bevel
of the cabinet as shown above.
Select Repair Cycle
PoliCool Time
Sec: 1858 AD:On
Time Remaining
Sec: 59 AD:On
Number = Length of time in seconds
After pressing selected amount the screen will
show time remaining
After repair cycle is finished remove
CD’s or DVD’s from spindles.
7
Ver 4.2
July-01-2012
Select to start
PoliCool Time
Sec: 1858 AD:On
Press enter to stop process
& return to main screen
Select the length of repair and
press the corresponding button.
Near the end of the cycle, your
discs will be dried by the
AutoDry process if the AutoDry
feature is turned on.
Time Remaining
Sec: 27 AD:On
Number = Length of time in seconds
After pressing selected amount the
screen will show time remaining
ABOUT THE REPAIR / POLISHING PROCESS - The Dual Disc II uses a single polishing pad &
PoliCool TM to remove scratches. Choose the desired level of repair using the indicator buttons. This
will vary the total amount of time used in the repair /polishing process. Occassionally a pad may be
prematurely damaged or worn out if it is overheated, or damaged by sharp edge scratches on a disc,
causing the need to replace the pad before the policool time is used up. It is a good idea to have a
spare pad on hand to allow a quick change of the pad, so you may continue to repair discs without
interuption.
Lid Open Screen
PoliCool Low Screen
Policool Time is deducted
only from actual run time
useage.
PoliCool Low !
f :Reset Warning
Erasing or Loading a new
cartridge will reset the
counter. Once it reaches
1500 seconds the screen
will indicate a warning.
Once it reaches 0 seconds,
the machine will no longer
start. Install new cartridge as shown in steps 1
through 5 - SET UP SUPPLIES - CARTRIDGE &
PAD PLACEMENT.
Dual Disc II
Lid Open
8
Ver 4.2
July-01-2012
TROUBLESHOOTING
No power
• Verify the power cord is properly inserted in a working outlet; test the outlet with another device.
• Check the fuse (by the power connector) on the machine. 110 -230V
machines: 15A (1 spare fuse can be found in the AC outlet)
• Check On/Off switch is in the “On” position.
Caution: To avoid electrical shock, ensure the outlet is properly equipped
Fuse Removal
with a ground connection.
Little or No water flow
• Is the hose inserted into the PoliCoolTM container?
• Are there any kinks in the hose(s)?
• Is the pump turning? (try priming pump)
• Check and clean filter if needed.
Machine overheating
• Verify the machine is on a flat sturdy surface. A carpeted surface may block the air outlet on
the bottom of the machine.
• Leave space behind the machine to allow air flow for the cooling fans.
• PoliCoolTM liquid is not flowing correctly. Verify proper flow of liquid with no air bubbles by using
the pump prime feature. Look for constant flow under the lid during the priming process.
Cartridge not reading
• Remove cartridge and reinstall it behind the access door making sure to position cartridge label
side in. (step 2)
• Make sure that the cartridge is new and that it has not already been inserted in this or another
machine and has already transferred its credits.
• Test cartridge in test mode (Refer to smart tag test mode)
Not responding to
Control Panel
• Power machine down. Turn machine back on and check for display on the front control panel.
• Wait for the screen to be on.
Has power but will not
run
•
•
•
•
Preamature wear on
the pad
• Never run the machine with one disc. If this happens, the rubber pad from the handle will damage the polish pad which will then have to be replaced. The PoliCoolTM will still be useable, but
the pad must be replaced with a new one. The handle pad may also need to be replaced if it has
been damaged.
Make sure there are no obstructions under the lid and reclose.
Make sure the prime pump sequence has completed, and press the start button again.
Check for indicators on the screen. A new PoliCoolTM cartridge may be required.
Make sure controller is displaying main screen.
9
Ver 4.2
July-01-2012
INFO MENU
Forward Scroll
Button
Press “i” from the
main screen to get to
main info shown at
right.
Info
Button
Info>:NextScreen
f:Smart Tag Test
Enter
Button
Press “i” at any time
to return to the main
screen
Reverse Scroll
Button
• Prime Pump
Press the “i” button, use the arrow buttons to scroll to the prime pump screen. Pressing the enter button turns on the policool pump
for 10 seconds. Press “i” to stop and return to main screen.
• PoliCool TM Loads
Press the “i” button, use the arrow buttons to scroll to the PoliCoolTM Loads screen to see the number of cartridges used.
Pressing the enter button activates the screen.
• Total Runtime Meter
Press the “i” button, use the arrow buttons to scroll to the Runtime Meter screen to see the total
amount of cycle run time. Pressing the enter button activates the screen.
• Auto Dry On/Off
Press the “i” button, use the arrow buttons to scroll to the auto dry screen. Pressing the Enter Button turns auto dry on or off.
• Dry Time 1-10 Seconds
Pressing the enter button activates (or deactivates) the Auto Dry cycle timer settings. Use the Arrow buttons to amount of dry time.
• Dry Time 5 Seconds- This is the default setting.
Pressing the enter button activates (or deactivates) the Auto Dry cycle timer settings if you need to change the time.
• Dry Time 7 Seconds
Set the time to 7 seconds to remove more of the liquid, keep in mind over drying may cause excessive heat and prematurely wear out pads.
• Dry Time 10 Seconds
Only set the dry time to 10 seconds if you will not be running the machine hard, or if you are using a chiller to cool the policool.
• Pump Tube Runtime
Press the “i” button, use the arrow buttons to scroll to the pump tube runtime screen. Pressing the enter button resets the runtime to “0”.
Pump Prime
f :Start Sec:00
PoliCool Loads
Total:
9
Dry Time 5 sec
f = On/Off On
Total Runtime
Minutes:
33
Dry Time 7 sec
f = On/Off On
Auto Dry On.Off
Auto Dry = Off
Dry Time 10 sec
f = On/Off On
Dry Time 3 sec
f = On/Off On
PumpTube Runtime
f :Reset : 23
10
Ver 4.2
July-01-2012
INFO MENU
Press “i” from the
main screen to get to
main info shown at
right.
Forward Scroll
Button
Info>:NextScreen
f:Smart Tag Test
Info
Button
Enter
Button
Press “i” at any time
to return to the main
screen
Reverse Scroll
Button
• 180 Second Cycle Count
Press the “i” button, use the arrow buttons to scroll to the count screen. Displays recipe tracking.
• 120 Second Cycle Count
Press the “i” button, use the arrow buttons to scroll to the count screen. Displays recipe tracking.
• 90 Second Cycle Count
Press the “i” button, use the arrow buttons to scroll to the count screen. Displays recipe tracking.
• 60 Second Cycle Count
Press the “i” button, use the arrow buttons to scroll to the count screen. Displays recipe tracking.
• 30 Second Cycle Count
Press the “i” button, use the arrow buttons to scroll to the count screen. Displays recipe tracking.
180 Second Recipe
Count:
3
120 Second Recipe
Count:
2
60 Second Recipe
Count:
4
90 Second Recipe
Count:
2
30 Second Recipe
Count:
18
11
Ver 4.2
July-01-2012
INFO MENU
Press “i” from the
main screen to get to
main info shown at
right.
Forward Scroll
Button
Info>:NextScreen
f:Smart Tag Test
Info
Button
Enter
Button
Press “i” at any time
to return to the main
screen
Reverse Scroll
Button
• PoliCool Load Screen
Press the “i” button, use the arrow buttons to scroll to the count screen. Displays reload totals.
• Recipe Count Screen
Press the “i” button, use the arrow buttons to scroll to the count screen. Displays recipe totals.
• Total Runtime in Minutes
Press the “i” button, use the arrow buttons to scroll to the count screen. Displays total in minutes.
PoliCool Loads
Total:
9
Recipe Count
Total:
3
Total Runtime
Minutes:
33
12
Ver 4.2
July-01-2012
INFO MENU
Press “i” from the
main screen to get to
main info shown at
right.
Forward Scroll
Button
Info>:NextScreen
f:Smart Tag Test
Info
Button
Enter
Button
Press “i” at any time
to return to the main
screen
Reverse Scroll
Button
• PoliCool Time Clear
WARNING! This permanently erases PoliCool Credits.
Press the “i” button, use the arrow buttons to scroll to the PoliCoolTM Time Clear screen. Press enter to proceed to confirmation screen.
• Are You Sure?
Press the “enter” (yes) to confirm or “i” to cancel.
• PoliCool Count Clearance
Hold the “Enter” button down for 5 seconds to zero out PoliCoolTM credits. Use the “i” button to cancel.
Are You Sure?
f: Yes i:Cancel
Are You Sure?
f: Yes i:Cancel
Press f 5Sec=Clr
i:Cancel 05.00
Press f 5Sec=Clr
i:Cancel 03.45
13
Ver 4.2
July-01-2012
INFO MENU
Press “i” from the
main screen to get to
main info shown at
right.
Forward Scroll
Button
Info>:NextScreen
f:Smart Tag Test
Info
Button
Enter
Button
Press “i” at any time
to return to the main
screen
Reverse Scroll
Button
• Test Screen
Press the “i” button, to return to the main screen.
• Test Screen Smart Tag Loaded
• Test Screen Smart Tag Depleted
Test Reset: 00.00
Sec Loaded:
0
Test Reset: 01.38
Sec Loaded: 12000
Smart Tag Reset
Depleted 02.46
14
Ver 4.2
July-01-2012
Step 1: To start testing, press the
enter button. (Figure 3.1 ) This will
take you to the testing screen. To
return to the main screen press the “i”
button. ( Figure 3.2 )
When you are at the testing screen
you will see a time value.
( Figure 3.2 )
Step 2: Place
the PoliCoolTM
next to the
Smart Tag
Reader.
( Figure 4.1 )
( Figure 4.1 )
Step 4: If the PoliCoolTM has been
depleted you see a message showing
you that it is depleted. When the test is
complete it will automatically reset the
test Screen. ( Figure 6.1 )
Info>:NextScreen
f:Smart Tag Test
Test Reset: 00.00
Sec Loaded: 0
( Figure 3.1 )
( Figure 3.2 )
Step 3: If the
PoliCoolTM is valid you
will see the amount of
credits in seconds.
The timer will auto
reset after the test is
completed to retest,
press the enter button
again.
( Figure 5.1 )
Test Reset: 01.38
Sec Loaded:12000
( Figure 5.1 )
Step 5: If the PoliCoolTM Tag is Corrupt
( BAD ) you will remain on the Test Screen and
nothing will occur. The screen will continue to
display zero.
( Figure 7.1 ) Remember if you need to return to
the Main Test Screen you can do this by pushing
the “i” button.
Test Reset: 00.00
Sec Loaded: 0
Smart Chip Reset
Depleted 02.46
( Figure 6.1 )
( Figure 7.1 )
15
Ver 4.2
July-01-2012
MAINTENANCE
CHANGE PUMP TUBE
Step 1:
Step 2:
Step 3:
Turn pump assembly
counter clockwise to
remove outer cover.
Remove and replace hose.
Align pins and turn pump
clockwise to replace outer
cover.
LUBE SQUEAKY HINGES
Step 1:
Step 2:
Step 3:
Clean, lubricate or Adjust
hinges
Open lid approximately 45
Degrees - Spray Silicone
Lubricant on hinge pin.
Tighten center adjustment
screws to desired resistance.
NOTE:
Only loosen or tighten the rear center
adjustment screw Removing the hinge is irreversible.
LUBE QUICK LOAD SLIDERS VERSION 2
Step 1:
Step 2:
Step 3:
Remove set screw by turning
counter clockwise.
Separate clean, and lightly
lubricate rings to assist in
reassembly. The Copper colored ring is oil impregnated
is self lubricating.
To reassemble, HOLES MUST ALIGN
with slot or damage will result during set
screw tightening. Do NOT over tighten
set screw, this will prevent the mechanism from sliding up and down.
16
Ver 4.2
July-01-2012
MAINTENANCE
NOTE THIS SECTION APPLIES ONLY TO OLDER MODEL MACHINES THAT HAVE
THE ORIGINAL SLIDER VERSION 1 QUICK LOAD ASSEMBLIES. CALL US TO
Upgrade to the new lid design.
Step 1:
Note: Remove only one
side at a time.
Step 2:
Step 3:
Spray Silicone Lubricant on
the slide mechanism.
Reinstall the handle mechanism.
Remove the 3 screws that
attach the handle to the lid.
REPLACE BEARINGS IN QUICK LOAD SPINNERS VERSION 1
Step 1:
Note: Remove only one
side at a time.
Step 2:
Step 3:
Remove disc plate by
extracting the 4 attached
screws.
Separate bearing case
from “T” block.
Remove the 3 screws that
attach the handle to the lid.
Use pin to re-align
Step 6:
Step 4:
Step 5:
Remove slide screws and
extract slide from bearing
case.
Remove set screw and
bearings
To re-Install simply follow
steps 5 through 1
(Reverse the instructions)
17
Ver 4.2
July-01-2012
MAINTENANCE
IMPORTANT MAINTAINENCE HOW TO FLUSH THE FLUID COOLING SYSTEM
IT IS RECOMMENDED TO FLUSH YOUR COOLING SYSTEM OCCASIONALLY TO PREVENT BUILDUP IN
THE RADIATOR AND SUPPLY LINES, OR JUST PRIOR TO STORING THE MACHINE. HI VOLUME USERS
WILL NEED TO PERFORM THIS ON MORE REGULAR SCHEDULE DEPENDING VOLUME OF USEAGE.
Step 1:
Step 2:
Begin by gathering 2 clean empty
containers. Set the 1st empty
container under drain to catch
waste fluid and debris.
Fill the second container with clean Warm Distilled
Water, Do not use boiling hot water for flushing, as this
may damage the lines. Place the pickup tube with the
filter installed at the end into the container. (clean filter)
Scroll Forward
Information
Enter
Pump Prime
f : Start Sec: 00
Scroll Back
Step 3:
Step 4:
Run “Prime Cycle” until
fluid runs clear.
Verify you are getting full flow of clear water out of the
nozzles on the lid.
If needed, remove and clean fittings under warm water.
If clogged, use a paperclip to clear holes of debris
Scroll Forward
Information
Step 5:
Remember to run Mixer
and “Prime Cycle” when a
new PoliCool is inserted.
(Also run if machine has
been left unused for any
period of time.)
Enter
Pump Prime
f : Start Sec: 00
Scroll Back
TM
18
Ver 4.2
July-01-2012
Mix, Prime & Verify Policool flow
Drain
2
1
Filter &
Tube
3
Pump Prime
f : Start Sec: 10
1
Scroll Forward
Enter
Info
2
1
Press the
Scroll Back
Use the
3
2
Pump Prime
f : Start Sec: 10
to scroll to the
Turn your PoliCool upside down and
shake vigorously for a minimum of
30 seconds or until mixed completely.
Insert tube and filter. Load
PoliCool into your Dual Disc II
making sure to align under drain
Repeat as needed until
PoliCool flow is consistent
and smooth.
Verify PoliCool flow at tips and NO
air bubbles in the PoliCool lines.
3
screen.
button turns on
the PoliCool pump for 10 seconds.
Press the
1
to exit.
6
5
4
Pressing the
Note the Quick Load Assemblies
Are factory locked and will not
compress unless unlocked
Clean-up procedure if Pad fails, creating excessive lint or debris
3
2
1
Remove PoliCool from machine.
Remove any debris from
machine and basin.
6
5
4
Wipe machine down thoroughly.
Filter &
Tube
Clean and flush system
completly(sp). See page 18 in
User’s Manual.
7
Scroll Forward
Pump Prime
f : Start Sec: 00
Press the
1Info
2
1
Check hose fittings for obstructions.
Enter
Scroll Back
Use the
Verify filter is clean before inserting
into a clean bottle of PoliCool.
8
3
2
Pump Prime
f : Start Sec: 00
to scroll to the
Pressing the
3
button turns on
the PoliCool pump for 60 seconds.
Press the
1
screen.
to exit.
Verify PoliCool flow at tips and NO
air bubbles in the PoliCool lines.
19
Ver 4.2
July-01-2012
EDUCATION
HOW DISCS ARE MADE
CDs consist of 99% clear polycarbonate plastic. The reflective layer, protective layer and screen print comprise
the remaining 1% of the disc.
1. A disc is created from molten polycarbonate and digital information
is stamped on the top of the disc, while it is still near melting point,
using a die with microscopic bumps. These bumps are known as
“pits and lands”.
4
3
2. After the information is molded into the polycarbonate, a reflective
foil layer is applied using a process called sputtering or wet silvering. This layer reflects the laser back to the player, so it’s integrity
is extremely important. The layer is usually silver, but can be made
of gold or platinum.
2
3. A clear lacquer coating is applied to seal the reflective layer and
prevent oxidation. This layer is very thin and offers little protection
from top side scratches.
1
4. Finally the artwork is screen-printed on the top of the disc.
Pits and Lands are imprinted into the disc to indicate a one or a zero. A laser beam is sent from the player to the
disc and the reflective layer reflects it back to the reader and the ones and zeros are translated by the player.
Recordable discs have a photosensitive dye type layer instead of the stamped information layer. This layer, when
exposed to a certain light, will make an impression of a pit into the layer.
Re-recordable discs use a layer that allows the laser to polarize the photosensitive layer back and forth between
a visible pit to an invisible pit.
Label
Pit
Land
Reflective Layer
Laser
Polycarbonate
HOW A DVD IS MADE
DVDs are made in different ways depending on the amount of information that is recorded on the disc. DVDs may
be single or double layered and single or double layered double sided.
NOTE: DVDs cannot be repaired as many times as CDs because the read side polycarbonate layer is thinner.
Single Layer DVDs ( DVD-5 - 4.7GB)
These DVDs are made the same way as a CD with one additional polycarbonate layer added between the label
and the pits and lands.
Thickness: 1.2mm
Label
0.6mm
Polycarbonate
0.6mm
Reflective Layer
Polycarbonate
Laser
20
Ver 4.2
July-01-2012
Double Layered DVDs ( DVD-9 - 8.5GB)
Double layered DVDs have a semi reflective layer and a reflective layer giving two layers to store information.
Thickness: 1.2mm
Label
Polycarbonate
0.6mm
Reflective Layer
Bonding Layer
Semi Reflective Layer
0.6mm
Polycarbonate
Laser
Double Sided DVDs ( DVD-10 - 9.4GB)
Double sided DVDs consist of two discs bonded back to back with the reflective layers in the middle and both
sides are repairable. Double sided DVDs require the use of smaller of micro-abrasive polishing papers to prevent
the manufacturer’s label area from being removed during the repair process.
Laser
Polycarbonate
Thickness: 1.2mm
0.6mm
Reflective Layer
Bonding Layer
Reflective Layer
0.6mm
Polycarbonate
Laser
Double Sided/Double Layered DVDs (DVD-18 - 17.1GB)
Double sided/double layered DVDs are simply two double layered discs bonded back to back.
Laser
Thickness: 1.2mm
Polycarbonate
Semi Reflective Layer
0.6mm
Reflective Layer
Bonding Layer
Reflective Layer
0.6mm
Semi Reflective Layer
Polycarbonate
Laser
IDENTIFYING SCRATCHES
The three basic types of scratches on CDs are: topside, reading side, and top side foil dents. DVDs are not subject to top side scratches and foil dents as the manufacturing process is different from CDs.
Reading Side Scratches - CDs, CD-ROMs & DVDs
Reading side scratches are the most common type, the easiest to identify, and the
only type of scratch that can be repaired.
Scratch
If the scratch has a double Image, as shown in the figure to the right, it is a reading
side scratch and can be repaired by using an Azuradisc scratch repair machine. The
double image is the result of the actual scratch and a reflection made by the reflective foil layer.
Reflection
21
Ver 4.2
July-01-2012
Top Side Scratches
Note:
Light passes
through the disc.
The scratches shown below are not found on DVDs
Top side scratches are caused by a sharp object damaging the top or label side of a disc.
In this case, the information just below the printed label area is damaged and causes a
skip. Top side scratches cannot be repaired, however they can be prevented by using an
Azuradisc Scratch Guard.
The easiest way to identify a top side scratch is to hold the suspected scratch up to a light
source and verify that light will pass through the disc in that area.
Note:
If light does not pass through, check the reading or bottom side of the disc for a scratch without a “double
image”. If a double image is not visible, it is a topside foil dent or a top side scratch that did not damage any
of the label.
Top Side Foil Dents
No double image
Top side foil dents are not scratches but look like a scratch on the reading side of the disc.
The dent is made by a large amount of pressure put on the label side of the disc, causing
the foil layer to dent. This dent will cause skips and cannot be repaired, however they can
be prevented using an Azuradisc Scratch Guard.
The easiest way to identify the top side foil dent is to see if there is a “double image” produced. There should not be a second image because the damage is to the inner foil layer.
There may not be any evidence on the label side of the disc because the pressure did not
cause any of the label to be removed.
ACCESSORIES
VISIT AZURADISC.COM FOR UPDATED LIST
Base Head Assy.
with velcro
Polishing Pad
Double Sided DVD
with velcro
Replacement pad
(Do NOT install until old pad
has been removed)
Item # st2_02579_0
Used with the Polishing Pad
Item # ph_02577_6
Reinforced plastic spindles
Game Cube Adapter Ring
for in-plant handling and storage of
compact discs
Fits Dual Disc II & Uno
Item # gca_02508_0
Item # spn_01677_4
22
Ver 4.2
July-01-2012
WARRANTY COVERAGE
Azuradisc warranty obligations for its products are limited to the terms set forth below:
Azuradisc, Inc. ("Azuradisc") warrants its standard products (the "Warranted Products"), against defects in materials and workmanship for a period ("Warranty
Period") defined as follows:
The Warranty Period for disc repair machines and disc testers is a period of one (1) year from the date of original purchase or until 100,000 repairs have been
processed using that Warranted Product, whichever comes first. Unless otherwise specified, the Warranty Period applicable to machines and disc testers purchased from Azuradisc as "factory refurbished" products is 6 months or 50,000 repairs, whichever comes first.
The Warranty Period applicable to supplies, normal wear items and replacement machines, assemblies, and parts provided under this Limited Warranty against
defects in materials and workmanship is ninety (90) days from their date of delivery by Azuradisc.
Replacement machines, assemblies, and parts, excluding supplies and normal wear items, are also covered for the remaining portion of the original machine's
warranty, if that provides longer coverage for you.
If a defect is discovered and a valid claim received by Azuradisc within the Warranty Period, at its option, Azuradisc will (1) repair the Warranted Product using
new or refurbished replacement parts, (2) exchange the Warranted Product with one that is new or that has been manufactured from new or serviceable used
parts and is at least functionally equivalent to the Warranted Product, or (3) refund the purchase price of the Warranted Product.
When a Warranted Product is exchanged or repaired, any replacement item becomes your property and the replaced item becomes Azuradisc's property. When
a refund is given, the Warranted Product becomes Azuradisc's property.
EXCLUSIONS AND LIMITATIONS
This Limited Warranty applies only to the Warranted Products. This Limited Warranty does not apply to any other products, whether or not packaged or sold
with the Warranted Products.
This Limited Warranty can be redeemed only by the original purchaser at the original location where Azuradisc shipped the Warranted Product. If you wish to
transfer this Limited Warranty, please contact Azuradisc for more information.
Any Software distributed by Azuradisc, whether or not incorporated into the Warranted Products, is not covered under this Limited Warranty. Refer to
Azuradisc's Software License Agreement, reviewable at www.azuradisc.com or by calling +1.480.827.8786 for more information.
This Limited Warranty does not apply to the following:
• Normal wear or deterioration (follow preventative maintenance schedules to minimize wear and tear on your machine);
•
•
Improper installation or maintenance including but not limited to failure to follow any preventative maintenance schedule;
•
Warranted Products that have been used with non-Azuradisc products;
•
Damage caused by service performed by anyone other than Azuradisc or an Azuradisc-certified service technician;
•
A Warranted Product that has been modified without the written permission of Azuradisc;
•
If any Azuradisc serial number, date stamp or other marking has been removed or defaced;
•
Any item concerning the Warranted Product's appearance that is not due to a defect in material or workmanship.
Damage caused by accident, abuse, misuse, misapplication, or failure to follow usage directions;
TO THE MAXIMUM EXTENT PERMITTED BY LAW, THIS LIMITED WARRANTY AND THE REMEDIES SET FORTH ABOVE ARE EXCLUSIVE AND IN LIEU
OF ALL OTHER WARRANTIES, REMEDIES AND CONDITIONS, WHETHER ORAL OR WRITTEN, EXPRESS OR IMPLIED. AZURADISC SPECIFICALLY
DISCLAIMS ANY AND ALL IMPLIED WARRANTIES, INCLUDING, WITHOUT LIMITATION, WARRANTIES OF MERCHANTABILITY AND FITNESS FOR A
PARTICULAR PURPOSE. IF AZURADISC CANNOT LAWFULLY DISCLAIM OR EXCLUDE IMPLIED WARRANTIES UNDER APPLICABLE LAW, THEN TO
THE EXTENT POSSIBLE ANY CLAIMS UNDER SUCH IMPLIED WARRANTIES SHALL EXPIRE ON EXPIRATION OF THE WARRANTY PERIOD. No
Azuradisc reseller, agent, or employee is authorized to make any modification, extension, or addition to this warranty.
IN NO EVENT SHALL AZURADISC BE LIABLE, WHETHER IN CONTRACT, TORT (INCLUDING NEGLIGENCE), STRICT PRODUCT LIABILITY OR OTHERWISE, FOR DAMAGES IN EXCESS OF THE PURCHASE PRICE OF THE WARRANTED PRODUCT WITH RESPECT TO WHICH SUCH DAMAGES ARE
ASSERTED, PLUS ANY FREIGHT CHARGES ACTUALLY PAID ATTRIBUTABLE TO SUCH WARRANTED PRODUCT, OR FOR ANY INDIRECT, SPECIAL,
INCIDENTAL , PUNITIVE OR CONSEQUENTIAL DAMAGES OF ANY KIND, INCLUDING LOSS OF PROFITS, LOSS OF USE, INTERRUPTION OF BUSINESS, OR ANY COSTS OF RECOVERING OR REPRODUCING ANY PROGRAM OR DATA STORED IN AN OPTICAL DISC, ARISING OUT OF OR IN CONNECTION WITH THE USE OF OR INABILITY TO USE THE WARRANTED PRODUCT OR AZURADISC'S PERFORMANCE OF ITS OBLIGATIONS HEREUNDER, TO THE FULL EXTENT THESE DAMAGES MAY BE DISCLAIMED BY LAW.
This Limited Warranty gives you specific legal rights and you may also have other rights that vary from jurisdiction to jurisdiction.
OBTAINING WARRANTY SERVICE
If you have a problem with one of the Warranted Products, DO NOT SHIP THE PRODUCTS DIRECTLY TO AZURADISC. Instead, please contact our
Technical Support personnel at +1 (480) 827-8786 for a Return Materials Authorization (RMA) number and instructions.
For all warranty service, the Warranted Product must be returned to Azuradisc or an Azuradisc-designated repair center with all transportation and insurance
charges prepaid all the way to AZURADISC warehouse. RMA number, dated proof of purchase and whom it was purchased from, as well as an explanation of
the problem, must accompany the Warranted Product. You are responsible for any shipping costs, import/export duties, taxes and other such fees.
If Azuradisc determines that some of the necessary repairs are not covered under this Limited Warranty, you may request an estimate and the opportunity to
confirm whether you agree to pay for these repairs. If you decline, Azuradisc obligations for that machine or product under this Limited Warranty end.
23
Ver 4.2
July-01-2012
Azuradisc
7307 South 89th Place
Mesa, Arizona 85212
Phone (480) 827-8786 Fax (480) 827-1104
24
Ver 4.2
July-01-2012


