1
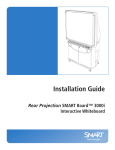
Installation
Guide
TM
SMART Board 3000i
Interactive Whiteboard
Registration Benefits
In the past, we've made new features such as handwriting recognition
and SMART Recorder available as free software upgrades. Register
your Rear Projection SMART Board 3000i interactive whiteboard to be
notified of free upgrades like these.
Keep the following information available in case you need to contact
Technical Support:
Serial Number
Date of Purchase
Register online at: www.smarttech.com/registration
FCC Warning
This equipment has been tested and found to comply with the limits for a Class A digital device, pursuant to Part 15 of
the FCC Rules. These limits are designed to provide reasonable protection against harmful interference when the
equipment is operated in a commercial environment. This equipment generates, uses, and can radiate radio frequency
energy and, if not installed and used in accordance with the manufacturer's instructions, may cause harmful
interference to radio communications. Operation of this equipment in a residential area is likely to cause harmful
interference in which case the user will be required to correct the interference at his own expense.
Trademark Notice
SMART Board, DViT, X-Port, Notebook and the SMART logo are trademarks of SMART Technologies Inc. CalliGrapher
is either a registered trademark or a trademark of Microsoft Corporation in the U.S. and other countries. CalliGrapher
6.3 is an independent product not affiliated with Microsoft Corporation. Windows is either a registered trademark or a
trademark of Microsoft Corporation in the U.S. and/or other countries. All other third-party product and company names
are mentioned for identification purposes only and may be trademarks of their respective owners.
U.S. Patent Nos. 5,448,263; 6,141,000; 6,326,954; 6,337,681; 6,741,267; 6,747,636 and 6,803,906.
Canadian Patent No. 2,058,219. Other U.S., Canadian and foreign patents pending.
Copyright Notice
© 1997–2005 SMART Technologies Inc. All rights reserved. No part of this publication may be reproduced, transmitted,
transcribed, stored in a retrieval system or translated into any language in any form by any means without the prior
written consent of SMART. Information in this guide is subject to change without notice and does not represent a
commitment on the part of SMART.
Portions of the software that ship with this product are copyrighted by Intel Corporation.
Portions of the software that ships with this product are copyrighted by ParaGraph, a business unit of Vadem.
CalliGrapher® Copyright © 1997–2005 ParaGraph, a business unit of Vadem.
Printed in Canada 01/2005
Important Information
Please read this manual carefully before setting up and using the Rear Projection SMART
Board™ 3000i interactive whiteboard. With proper care, your 3000i will provide years of
trouble-free service.
WARNING
The projector inside the unit is a high brightness light source. Do not look
directly into the beam of light. Prevent children from staring directly into the
beam of light.
Le projecteur qui se trouve à l’intérieur de l’armoire est une source de lumière
à luminosité élevée. Ne fixez pas et ne regardez pas dans la direction du
faisceau lumineux. Empêchez les enfants de regarder dans la direction du
faisceau lumineux.
El proyector que se encuentra en el interior de la cabina es una fuente de luz
de alta luminosidad. No mire fija ni directamente al haz de luz. Evite que los
niños fijen la vista en el haz de luz.
Der Projektor im Schrank stellt eine Lichtquelle mit hoher Intensität dar.
Blicken Sie nicht direkt in den Lichtstrahl. Verhindern Sie, dass Kinder direkt in
den Lichtstrahl blicken.
WARNING
Make sure an AC outlet is near the 3000i and remains easily accessible during
use.
Assurez-vous qu’une prise secteur se trouve à proximité du 3000i et demeure
facilement accessible durant l’utilisation.
Asegúrese de que hay una toma de corriente alterna cerca del 3000i y que es
fácilmente accesible para su uso.
Stellen Sie sicher, dass sich in der Nähe des 3000i eine Steckdose befindet
und sie während der Verwendung auch leicht zugänglich bleibt.
3000i
WARNING
To reduce the risk of fire or electric shock, do not expose this product to rain or
moisture.
Pour réduire le risque d'incendie ou de choc électrique, évitez d'exposer ce
produit à la pluie ou à l'humidité.
Para reducir el riesgo de incendio o de descarga, no exponga este producto a
la lluvia o la humedad.
Um das Risiko eines Feuers oder eines Stromschlags zu reduzieren, darf das
Produkt weder Regen noch Nässe ausgesetzt werden.
Important Information
i
WARNING
for European
Customers
The 3000i should be used only with European TN and TT power
distribution systems.
The 3000i is not suitable for older, IT-type power distribution systems
found in some European countries. “This system (IT-type) is widely used
isolated from earth, in some installations in France, with impedance to
earth, at 230/400V, and in Norway, with voltage limiter, neutral not
distributed, at 230V line-to-line.” (IEC 60950:1999)
Contact qualified personnel if you’re uncertain of the type of power
system available where you’re installing your 3000i.
AVERTISSEMENT
pour les clients
européens
Le 3000i doit être utilisé uniquement avec les systèmes de distribution
d’alimentation européens TN et TT.
Le 3000i ne convient pas aux systèmes de distribution d’alimentation
plus anciens de type IP utilisés dans certains pays européens. “Ce
système (type IT) est largement utilisé isolé de la terre, dans certaines
installations en France, avec une impédance à la terre, à 230/400V, et
en Norvège, avec limiteur de tension, neutre non distribué, à 230V ligne
à ligne.”(IEC 60950:1999)
Si vous avez des doutes sur le type de système d’alimentation
disponible lors de l’installation de votre 3000i, contactez un personnel
qualifié.
ADVERTENCIAS
Para los clientes
europeos
La 3000i sólo se podrá utilizar con los sistemas eléctricos TN y TT
europeos.
Este modelo no está disponible para antiguos sistemas eléctricos de
tipo IT que aún se utilizan en algunos países europeos. “Este sistema
(IT) tiene una utilización muy extendida como núcleo aislado de tierra;
en algunas instalaciones en Francia, con impedancia de tierra, a 230/
400 V; y en Noruega, con limitador de tensión, a 230 V entre
conductores.” (CEI 60950:1999)
Si no está seguro del tipo de sistema eléctrico que posee, póngase en
contacto con personal cualificado a la hora de instalar su modelo 3000i.
WARNUNG für
europäische
Kunden
Das 3000i darf nur mit europäischen TN- und TT-Netzverteilern
verwendet werden.
Das 3000i eignet sich nicht für ältere Netzverteiler vom Typ IT, die in
manchen europäischen Ländern zu finden sind. “Dieses System (ITTyp) wird, von der Erdung isoliert, in einigen Installationen in Frankreich
mit Impedanz zu Erde bei 230/400 V und in Norwegen mit
Spannungsbegrenzer, neutral, nicht verteilt, bei 230 V Leitung zu
Leitung verwendet.” (IEC 60950:1999)
Wenden Sie sich an qualifiziertes Personal, wenn Sie sich nicht sicher
sind, welches Stromsystem dort zur Verfügung steht, wo Sie Ihr 3000i
installieren.
ii
Important Information
3000i
3000i
3000i
CAUTION
The projector inside the 3000i has been designed for use under normal
operating conditions only. Normal operating conditions are defined as product
use that does not exceed 8 hours per day and 260 days per year. Exceeding
these operating conditions could cause projector damage. Damage caused by
such extended use will not be covered by the product warranty.
To maintain normal operating conditions, make sure the projector is in standby
mode outside of normal, daily (8 hour) operation. In standby mode, the lamp is
turned off, while the projector remains on. Be sure to press the Lamp Off
button in the Control Panel at the end of the day, and your projector will remain
in standby mode until you press the Lamp On button the next day.
NOTE: You can also configure the computer’s power management settings so
that after a period of idle time it stops sending out a video signal, turning off the
projector lamp (page 24).
Lamp Off Button
(Press for Standby Mode)
Lamp On Button
(Press to Resume Operation)
Other Precautions
For operating safety and to avoid damage to the cabinet and its parts, please read the
following information carefully.
•
Move the unit with care. Quick stops, excessive force, and movement over uneven
surfaces can overturn the unit.
•
When you transport the 3000i, only ship it in an upright position and never lay the
interactive whiteboard face down. In addition, ensure that the projector is secure, or
remove and repackage it in the original projector’s packaging.
Important Information
iii
iv
•
If you transport the 3000i over a distance, we strongly urge you to completely
repackage it using the original packaging. This packaging was designed with optimal
shock and vibration protection. If the original packaging is no longer available, pack all
components with as much padding as reasonably possible to ensure that they are not
exposed to excessive vibration or shock.
•
Clean the interactive whiteboard surface regularly so dust doesn’t build up on the
surface and adversely affect the operation of the 3000i.
•
Do not touch the rear surface of the screen or apply isopropyl alcohol, water or
acetone. If any of these fluids come into contact with this surface, the diffusion coating
will be damaged, resulting in a permanent deterioration in display quality.
•
If you inadvertently smudge the rear surface of the screen, dab it carefully with a soft
cloth and alcohol-free glass cleaner. Do not spray glass cleaner directly on the back of
the screen; spray it lightly on the cloth and then gently dab the rear surface until the
marks are removed.
•
The 3000i uses digital cameras located inside the screen frame. Do not allow excess
glass cleaner to flow into the crack between the frame and the writing surface
because the cleaner could damage these cameras.
•
Avoid setting up and using the 3000i in an area with excessive levels of dust, humidity
or smoke.
•
Lock the casters after you set up the cabinet so it remains stationary while in use.
•
Avoid exposing the 3000i to extreme heat or cold. The operating temperature range is
from 41°F to 85°F (5°C to 29°C) with up to 80% humidity (non-condensing). The
shipping and storage range is from -4°F to 95°F (-20°C to 35°C) with up to 80%
humidity (non-condensing).
•
If possible, unplug the unit before thunderstorms. However, do not touch the unit or
the unit's power plug during a thunderstorm as there is a risk of electrical shock.
•
Unplug the unit if you won’t use it for an extended period.
•
Use safe practices when you’re plugging in the power cable. For example, make sure
your hands are dry and don’t insert the plug into a dusty outlet. Unplug the cabinet
before you install or service any components.
•
This product has a three-wire grounding-type plug, which will only fit into an AC
grounding-type power outlet. Make sure an AC outlet is near the 3000i and remains
easily accessible during use. If the outlet can’t accommodate the plug, have your
electrician replace the obsolete outlet. Do not circumvent the safety features of the
grounding-type plug. Do not modify the power cord.
•
Handle the power cord carefully and avoid excessive bending. Route the power cord
so it’s unlikely to be walked on or pinched by items placed upon or against it. If you
must run a cable over the floor, lay it in a flat, straight line and secure it to the floor with
tape or a cable management strip of contrasting color.
•
If you require replacement parts, ensure the service technician uses the replacement
parts specified by SMART Technologies Inc. or parts with the same characteristics as
the original.
Important Information
Contents
Important Information ............................................................................................ i
Other Precautions ................................................................................................ iii
About the 3000i ..................................................................................................... 1
3000i Features ...................................................................................................... 1
Getting to Know Your 3000i .................................................................................. 2
Pen Tray Features ................................................................................................ 3
The NEC VT670 Projector .................................................................................... 4
Control Panel ........................................................................................................ 6
Rear Features ....................................................................................................... 8
Connection Panel ................................................................................................. 9
Main Power Input and Power Outputs ................................................................ 10
Installation ........................................................................................................... 11
Positioning the 3000i .......................................................................................... 11
Removing the Rear Access Panel ...................................................................... 12
Installing and Connecting the Internal Computer ............................................... 13
Turning on the Projector and the Computer ....................................................... 14
Connecting to a VCR and/or DVD Player ........................................................... 15
Connecting to a Printer ....................................................................................... 18
Connecting to a Network .................................................................................... 18
Connecting to an External Sound System .......................................................... 19
Connecting to an External Monitor or Projector .................................................. 19
Finalizing the Installation ................................................................................... 21
Adjusting the Projected Image ............................................................................ 21
Configuring the Computer Settings .................................................................... 24
Installing SMART Board Software ...................................................................... 25
Configuring the Computer Port ........................................................................... 26
Orienting the Interactive Whiteboard .................................................................. 26
Basic Operations ................................................................................................. 29
Turning on the 3000i ........................................................................................... 29
Putting the 3000i into Standby ............................................................................ 31
Adjusting the Volume .......................................................................................... 32
Changing the Display Source for the Internal Projector ...................................... 33
Using the SMART Board Interactive Whiteboard ............................................... 34
Maintenance and Troubleshooting .................................................................... 37
Cleaning the Screen and other Components ..................................................... 37
Cleaning the Projector ........................................................................................ 37
Contents
Replacing the Projector Lamp and Filter ............................................................ 38
Troubleshooting .................................................................................................. 39
Calibrating the Cameras ..................................................................................... 40
Customer Support ............................................................................................... 43
Contacting SMART Technical Support ............................................................... 43
General Inquiries ................................................................................................ 43
Returning Defective Merchandise ...................................................................... 43
Registration ........................................................................................................ 44
Sending Feedback .............................................................................................. 44
Obtaining More Information on SMART Products .............................................. 44
Appendix A: Removing the Side Panel, Screen and Cabinet Top .................. 45
Appendix B: Removing and Replacing the Projector ...................................... 51
Appendix C: Connecting Rack-Mount Equipment to the Projector Platform 61
Appendix D: Installing the Optional Videoconferencing Shelf ....................... 63
Appendix E: Connecting a Guest Laptop ......................................................... 67
Installing the Guest Laptop Shelf ........................................................................ 67
Installing the J-hook ............................................................................................ 69
Connecting the Laptop Umbilical to the 3000i Cabinet ....................................... 70
Connecting the Laptop Umbilical to a Guest Laptop .......................................... 71
Changing the Display Source ............................................................................. 72
Index ..................................................................................................................... 75
Contents
About the 3000i
The 3000i is a slim Rear Projection SMART Board interactive whiteboard cabinet with an
integrated LCD projector and a 66" (167.6 cm) diagonal interactive SMART Super Screen.
The Super Screen is an interactive whiteboard designed for enhanced rear-projection clarity.
The interactive whiteboard includes DViT™ (Digital Vision Touch) technology, which uses
digital cameras to track objects that interact with the interactive whiteboard. Each camera is
calibrated to recognize the position of a pen tray tool or your finger on the whiteboard surface
and to translate that position to a computer point.
To enable rear-projection capability, a mirror system in the cabinet redirects the projected
image from your computer, VCR, DVD player or guest laptop onto the back of the interactive
whiteboard screen. Without the distracting shadows of a front-projection system, you can then
perform any normal computer operation, such as opening or closing an application, scrolling
through a file or opening your browser, just by touching the screen surface.
3000i Features
•
A touch-sensitive interactive whiteboard that enables you to do everything you can do
at a computer workstation—open files, conference with others, create new or edit
existing documents, visit Internet sites, play video clips, and so on—simply by
touching the interactive whiteboard. You can also write over any live application in
digital ink using a pen tray pen or your finger, and then save your notes to a SMART
Notebook™ file for future reference and distribution.
•
An integrated XGA projection system
•
An audio system, a SMART pen tray (including four pens and an eraser) and a
wireless keyboard
•
A Control Panel with easily accessible projector and volume controls
•
A Connection Panel at the rear of the cabinet that you can use easily to connect a
network cable, printer, second projector and room audio system
•
Locking front doors for enhanced security
•
Minimal floor space requirements. Fits easily through any standard doorway for true
room-to-room mobility.
About the 3000i
1
Getting to Know Your 3000i
Lockable Doors
Lockable Casters (x 4)
SMART Super Screen
SMART Pen Tray
Control Panel
Manual Pocket
Your Computer
Projector Platform
(with round-hole, rack-mounting rails)
2
About the 3000i
Pen Tray Features
Eraser
Black Pen
Blue Pen
Red Pen
Green Pen
Pen Tray
Buttons
Using a Pen Tray Pen
To write on top of the computer image with digital ink, just pick up a pen from the pen tray and
write on the interactive whiteboard.
You can use SMART Board software to change any of these pens to highlighters, change their
colors or alter their width. You can also change the size of the area erased by the pen tray
eraser.
To reconfigure the pens or eraser, press the SMART Board icon in the system tray (Windows
computers) or in the Dock (Macintosh computers), select Control Panel, and press on Pen
Tray Settings.
NOTE: The pens provided with your 3000i have black tips because the digital cameras in the
bezel can more readily detect dark objects. If you need to use a different object to point at the
screen, choose one that has a dark tip but which won’t mark or damage the interactive screen.
Using the Pen Tray Buttons
Press the top pen tray button to make the SMART Keyboard appear for on-screen typing and
handwriting recognition. Press the bottom button to make the next contact with the interactive
whiteboard a right-mouse click.
You can reconfigure these default behaviors so that either button can initiate any of the
following events:
•
Print the current page
•
Move to the preceding or the following Notebook file page
•
Clear all notes from the current page
•
Produce a floating mouse
To reconfigure the pen tray buttons, press the SMART Board icon in the system tray
(Windows computers) or in the Dock (Macintosh computers), select Control Panel, and press
on Pen Tray Settings.
About the 3000i
3
The NEC VT670 Projector
CAUTION
Do not move the white ring that surrounds the short-throw, customized
projector lenses, even though the NEC VT470/570/670 User’s Manual states
that you should use this ring to obtain the best focus. You must disregard this
information.
Instead, use the Zoom lever on the projector, which has been modified to
adjust the image focus. Again, contrary to the NEC VT470/570/670 User’s
Manual, the Zoom lever will not adjust the image size on the screen.
The NEC projector featured in the 3000i rear projection cabinet is an NEC VT670. The VT670
projector has XGA resolution (1024 × 768).
The NEC VT670 projector is secured on the projector platform. The projector is adapted for
use in the 3000i and, consequently, its behavior differs in two significant ways from the
description in the NEC VT470/570/670 User’s Manual:
•
The Zoom lever does not change the size of the projected image. Instead, it adjusts
image focus.
•
The white ring no longer adjusts focus and you should not move it under any
circumstances.
Zoom Lever
Do not move this ring
Bottom View
Do not move this ring
Side View
NOTE: For more information on adjusting the projected image, turn to page 21.
4
About the 3000i
To set or restore the optimal settings for the NEC VT670 projector
We’ve configured your projector settings for optimal performance with the 3000i. However, if
these settings are accidentally altered, follow the procedure below to restore them.
1. Press the Menu button on the projector remote control or the Menu button on the
projector.
2. Select Setup > Orientation > Ceiling Rear Projection to orient the projected image
for rear projection.
3. Select Image > Auto Keystone > Off to ensure optimal image quality.
4. Select Advanced > Fan Mode > Auto. Although this is a default setting, it’s important
enough to warrant special mention.
5. Select Advanced > Page2 > Auto Adjust > Normal to automatically determine the
best resolution for the current RGB input signal and to compensate for resolution
differences among various input devices (such as guest laptops).
6. Press OK.
NOTE: All other settings are the NEC factory default settings. See pages 40–50 of the
NEC VT470/570/670 User’s Manual for a full description of all default settings.
For information on projector maintenance and instructions on replacing the projector lamp and
filter, turn to page 38.
To adjust projector focus
1. Locate the zoom lever.
NOTE: Use this lever rather than the white focus ring to adjust focus. See the
previous page for more information on why you can’t adjust the focus with the focus
ring.
2. Using a 5/32" or 3/16" flat screwdriver, loosen the slot-head screw in the center of the
focus lever.
Loosen this screw,
adjust focus and then
tighten
3. Adjust the focus by moving the lever and then tighten the slot-head screw you
loosened in the previous step.
About the 3000i
5
Control Panel
Use the Control Panel to turn the projector lamp on and off, change the display source for the
projector, open Notebook software, and adjust the volume of the internal sound system.
Lamp On
Volume Up
Internal Computer
Guest Laptop (with optional X-Port 20 kit)
Lamp Off
On LED
Volume Down
VCR/DVD
Player
Notebook
Software
Off LED
Control Panel
The Lamp On and Lamp Off Buttons
During normal operation, you should keep the projector turned on all the time. However, to
conserve the lamp, put the projector into standby mode at the end of your session (or at the
end of the day). In standby mode the projector lamp is turned off but the projector itself
remains on.
To put the projector into standby mode, press the Lamp Off button on the Control Panel. For
the next three minutes, the lamp is in a reversible standby mode. The screen appears black,
even though the projector lamp remains on, allowing you to quickly restore the display by
pressing any button on the Control Panel.
After three minutes, the lamp cools down for 60 seconds and is then turned off.
You can skip this three-minute reversible standby period by pressing and holding the Lamp
Off button for three seconds. To turn on the projector lamp, press the Lamp On button.
CAUTION
The projector inside the 3000i has been designed for use under normal
operating conditions only. Normal operating conditions are defined as product
use that does not exceed 8 hours per day and 260 days per year. Exceeding
these operating conditions could cause projector damage. Damage caused by
such extended use will not be covered by the product warranty.
To maintain normal operating conditions, make sure the projector is in standby
mode outside of normal, daily (8 hour) operation. In standby mode, the lamp is
turned off, while the projector remains on. Be sure to press the Lamp Off
button in the Control Panel at the end of the day, and your projector will remain
in standby mode until you press the Lamp On button the next day.
NOTE: You can also configure the computer’s power management settings so
that after a period of idle time it stops sending out a video signal, turning off the
projector lamp (page 24).
6
About the 3000i
To determine the current status of the lamp, check the LEDs beside the Lamp On and Lamp
Off buttons and then check the table below.
Lamp On LED
Lamp Off LED
Lamp Status
Flashing quickly
Off
Lamp is turning on. During this 60-second
period, the Lamp On and Lamp Off buttons are
disabled.
Solid
Off
Lamp is on
Flashing
occasionally (short
flashes followed by
long pauses)
On
Lamp is off
Off
Flashing very
quickly
Lamp is in three-minute reversible standby
mode. In this mode, the screen appears black
but the projector lamp remains on, allowing you
to quickly restore the display by pressing any
button on the Control Panel. After three
minutes, the lamp cools down for 60 seconds
before turning off.
Off
Flashing slowly
Lamp is cooling down. This 60-second
cool-down follows the three-minute reversible
standby period. During this time, all Control
Panel buttons are disabled.
Volume Control Buttons
Press the Volume Up (+) button to increase the volume and the Volume Down (–) button to
decrease the volume.
The default volume is 0. To restore this default, press the Volume Up (+) and Volume Down
(–) buttons simultaneously.
Source Buttons
Use the source buttons to switch the video and audio sources for the projector and cabinet
audio amplifier.
Button
Source
VCR/DVD player
Internal computer
Guest laptop (only with the optional Guest Laptop Support kit)
Notebook software.
About the 3000i
7
Rear Features
1
8
3
7
4
6
5
9
Close-up of Connection Panel
8
2
About the 3000i
Connection Panel
The Connection Panel allows you to make a variety of external connections to the 3000i
cabinet:
•
A printer (1), dedicated to the internal computer
•
A network (2), making the full resources of the network available to the internal
computer
•
An external projector (3), allowing projection of the internal computer or guest laptop
(RGB output only) onto an auditorium-sized display for presentation to a large group
•
A guest laptop (5, 6 and 9). Press the Guest Laptop button on the Control Panel to
display the guest laptop input on the interactive whiteboard. If the SMART Board
driver is installed, you can control the laptop by touching the board.
NOTE: You can only connect to a guest laptop if you have installed the optional Guest
Laptop Support kit.
•
An external sound system (8), allowing audio rebroadcast to the room’s sound
system. The external sound system is then controlled by the Volume buttons on the
Control Panel.
Getting to Know Your Connectors
1. Printer (Female) – Use a DB25 printer cable (not provided) to connect an external
printer that is dedicated solely to the internal computer.
2. Network – Use a standard male-to-male RJ45 network cable (not provided) to enable
10/100 BaseT networking with the internal computer.
3. Video OUT (Female) – Use an HD DB15 video cable (not provided) to connect an
external projector or monitor to this video port (RGB output only).
4. VCR/DVD Audio OUT – These connectors are already linked via an RCA-to-RCA
cable to the Audio IN jacks on the connection panel. These connectors are part of the
link that connects the audio output of a VCR or DVD player to the projector. Keep the
right and left channel connections correct for stereo sound.
5. Computer 2 Video IN (Female) – Only used if the optional Guest Laptop Support kit
is installed. Connect the supplied DB15 video cable to this 15-pin connector (female).
At the laptop end, connect the Computer 2 Video cable to the laptop’s own 15-pin
video port.
6. Computer 2 Audio IN (Female) – Only used if the optional Guest Laptop Support kit
is installed. Connect the supplied 3.5 mm audio cable to this 3.5 mm jack. At the
laptop end, connect the Computer 2 Audio cable to the laptop’s 3.5 mm audio OUT.
7. Audio IN – These connectors are already linked via an RCA-to-RCA cable to the
VCR/DVD Audio jacks on the connection panel. These connectors are part of the link
that connects the audio output of a VCR or DVD player to the projector. Keep the right
and left channel connections correct for stereo sound.
8. Room Audio OUT – Use standard RCA audio cables (not provided) to deliver
unamplified sound mixed from the internal computer, guest laptop and VCR/DVD
player to an external room sound system. Volume buttons on the Control Panel will
control the volume of sound from the external speakers.
About the 3000i
9
9. Computer 2 Serial IN (Male) – Only used if the optional Guest Laptop Support kit is
installed. Connect the serial end of the Serial/USB adapter to this port. Connect the
USB end of this adapter to the laptop’s USB port. This connection enables touch
control of the projected laptop contents on the interactive whiteboard.
Main Power Input and Power Outputs
The Main Power IN and Power OUT connections are located to the right of the Connection
Panel (as you face the rear of the cabinet).
•
The Main Power IN provides power to the 3000i unit.
•
The Laptop Power OUT may be used in conjunction with the optional Guest Laptop
Support kit to provide power to a guest laptop.
•
The four Computer and Peripherals Power OUT connections are for the internal
computer and its peripherals. The cables from these four connections are fed inside
the cabinet, where they are used for the internal computer and the projector, and the
two spare cables may be used for peripherals such as VCRs, DVD players, and
printers.
Main Power IN
Laptop Power
OUT
Computer and
Peripherals Power
OUT (x4)
Power Connections
Main Power IN – Connect the supplied IEC country-specific power cord to the Main Power
Input and then connect the pronged end to an appropriate wall outlet.
Laptop Power OUT – Only used if the optional Guest Laptop Support kit is installed.
Computer and Peripherals Power OUT (x4) – The internal computer and connected
peripherals can draw power from this series of IEC outlets, located inside the rear access
panel. The supplied power cable for the internal computer is connected to one of these outlets.
Connect the other end to the computer after you’ve installed it.
10
About the 3000i
Installation
This section of the manual describes how to:
•
position the 3000i (this page)
•
remove the rear access panel in preparation for computer installation (page 12)
•
install and connect the internal computer (page 13)
•
connect to a VCR and/or DVD player (page 15)
•
connect to a printer (page 18)
•
connect to a network (page 18)
•
connect to an external sound system (page 19)
•
connect to an external projector or monitor (page 19)
NOTE: If you have the optional Guest Laptop Support kit installed, you can also connect the
3000i to a guest laptop.
After you have installed the peripherals you require, you must finalize your installation before
you can use the 3000i (page 21).
Positioning the 3000i
1. Remove the unit from its shipping carton (following the Unpacking Instructions).
2. Unpack the contents of the shipping carton and wheel the system to an appropriate
location within reach of a power source.
NOTE: Leave sufficient space around the entire cabinet so you can comfortably
access it as you perform the following assembly and connection procedures.
NOTE: Unlock the casters by pressing up on the caster-lock tab; lock the casters by
pressing down on this tab, as shown in the figure below. As a safety precaution and
for greater ease of use, the casters should remain locked while the 3000i is in use.
3. Open the front doors and then unbuckle and remove the strap that secures the small
mirror. You’ll find this strap in the middle of the speaker panel and below the projector
platform.
Installation
11
The small mirror is strapped securely in place to protect it during shipment. You must
remove this strap prior to use.
Remove this strap
Location of Small Mirror Strap
Removing the Rear Access Panel
You must remove the rear access panel before you install your internal computer. Once
you’ve turned on the projector and internal computer, you should replace the rear access
panel—as well as lock the cabinet front doors—as a security precaution.
Rear Access
Panel
12
Installation
To remove the rear access panel
1. Loosen the two captive thumbscrews at the top of the rear access panel.
Captive
Thumbscrew
Captive
Thumbscrew
2. Rotate the top of the rear access panel toward you and then pull it upwards, releasing
it from the cabinet.
Installing and Connecting the Internal Computer
NOTE: If you ordered the optional Guest Laptop Support kit, and you’re installing the Guest
Laptop shelf on the computer side of the cabinet, install the shelf (page 67) before you install
the computer. The plastic hole covers are much easier to remove when the computer is not
inside.
To position, secure and connect the computer
1. Slide the computer into place above the computer straps and then use the straps to
secure it.
NOTE: The straps allow you to roll the cabinet from room to room without removing
the computer. However, these straps will not secure the computer in place during
cabinet shipment. If you ship the cabinet, remove the computer first.
Installation
13
2. Locate the tie-wrapped bundle of labeled cables dangling inside the cabinet. In
addition to this cable bundle, AC power, keyboard and mouse cables are located
nearby.
Network
Mouse
Computer 1
Video
Computer 1
Audio
Printer
Keyboard
Computer 1
Serial
A
3000i Computer Cables
3. Connect the Computer 1 Video cable to the Monitor Video connector.
4. Connect the Computer 1 Audio cable to the Audio Line OUT.
5. Connect the Computer 1 Serial cable to an available port.
6. Connect the Printer cable to the 25-pin parallel port (printer) connector.
7. Connect the Network cable to the network card (if applicable).
8. Connect the Mouse and Keyboard cables to the PS/2 mouse port (identified by a
mouse symbol) and the PS/2 keyboard port (identified by a keyboard symbol).
To connect the power cable
Connect the AC cord in the accessory box to the power inlet at the rear of the 3000i. Then
connect this AC cord to an available power outlet or power bar (not supplied).
Turning on the Projector and the Computer
1. If the projector is not on, press the main power switch on the projector.
Main Power Switch
14
Installation
2. Turn on the computer.
3. Turn on the projector lamp by pressing the Lamp On button on the Control Panel (to
the right of the pen tray).
The LED indicator beside this button flashes quickly for 60 seconds and then remains
steadily illuminated when the projector lamp has turned on.
On LED
Lamp On
Button
The Control Panel
NOTE: For more information about turning on the 3000i, see page 29.
4. When an image displays, adjust the computer power settings and the image
alignment on the interactive screen. Then install the SMART Board software CD,
configure the COM port, and perform a brief orientation procedure. All these
procedures are described in Finalizing the Installation on page 21.
NOTE: You should leave the computer and the projector on at all times (so the
projector is either in use, with the lamp illuminated, or in standby mode). However, you
can set the computer to save power during periods of inactivity (page 31).
Connecting to a VCR and/or DVD Player
To connect a VCR to the projector, use either the composite video cable or the S-video cable
bundled inside the cabinet. To connect a DVD player to the projector, use the S-video cable
bundled inside the cabinet. You can then switch the display source to the VCR or DVD player
by pressing the VCR/DVD Player button on the control panel.
NOTE: If you wish to connect both a VCR and a DVD player to the projector, you must use the
composite video cable for the VCR and the S-video cable for the DVD player. If both are
connected, pressing the VCR/DVD Player button alternates the display source between the
VCR and the DVD player. There is a three-second delay before the alternate display source
appears.
Although you can’t connect the audio cables bundled inside the cabinet to both the VCR and
the DVD player, you can “daisy chain” the audio connections—that is, you can connect audio
cables between the DVD player and the VCR, and then between the VCR and the projector
(page 17). This linked audio connection makes the audio source switch automatically when
you switch the video sources.
NOTE: When you switch to another source (such as the internal computer), and then press
the VCR/DVD Player button, the last active video source will always appear.
Installation
15
To connect to a VCR
1. Turn off the VCR.
2. Connect the RCA composite video cable bundled inside the cabinet to the Video OUT
jack on the VCR. This jack may be labeled “To Monitor”.
NOTE: If your VCR has an S-video output, you can connect the S-video cable
bundled inside the cabinet to the VCR. However, if you use the S-video cable to
connect to the VCR, you won’t be able to use it to connect to a DVD player.
3. Connect the red and white RCA stereo audio cables bundled inside the cabinet to the
RCA Audio (or Audio OUT) outputs on the VCR. Keep your right and left channel
connections correct for stereo sound.
NOTE: You can’t connect these audio cables to both the VCR and the DVD player.
However, you can link the audio connections of the DVD player and VCR (page 17).
4. Connect the power cable to an available outlet or power bar.
5. Turn on the projector.
6. Press the VCR/DVD Player button on the Control Panel.
VCR/DVD Player Button
7. Turn on the VCR and press the Play button.
To connect to a DVD player
1. Turn off the DVD player.
2. Connect the S-video cable bundled inside the cabinet to the S-video OUT port on the
DVD player.
NOTE: Alternatively, you can connect the RCA composite video cable bundled inside
the cabinet to the DVD player. However, the S-video cable gives better quality images
than the composite video cable.
3. Connect the red and white RCA stereo audio cables bundled inside the cabinet to the
RCA Audio (or Audio OUT) outputs on the DVD player. Keep your right and left
channel connections correct for stereo sound.
NOTE: You can’t connect these audio cables to both the VCR and the DVD player.
However, you can link the audio connections of the DVD player and VCR (page 17).
4. Connect the power cable to an available outlet or power bar.
5. Turn on the projector.
16
Installation
6. Press the VCR/DVD Player button on the Control Panel.
VCR/DVD Player Button
7. Turn on the DVD player and press the Play button.
To link VCR and DVD player audio connections
NOTE: Make sure there is no tape in the VCR before you proceed.
1. Connect standard red and white RCA stereo audio cables (not provided) from the
RCA Audio (or Audio OUT) outputs on the DVD player to the RCA Audio (or Audio
IN) inputs on the VCR. Keep your right and left channel connections correct for stereo
sound.
2. Connect the red and white RCA stereo audio cables bundled inside the cabinet to the
RCA Audio (or Audio OUT) outputs on the VCR. Keep your right and left channel
connections correct for stereo sound.
RCA Outputs
RCA Inputs
DVD Player
RCA Outputs
VCR
Bundled Audio Cables
Inside Cabinet
Installation
17
Connecting to a Printer
To connect to a printer
Connect a standard DB25 printer cable (not provided) from the printer’s parallel port to the
Printer Connector on the Connection Panel.
Printer
Network
Printer Connector
Audio OUT
Output
Audio IN
L
R
VCR/DVD Audio OUT
Computer 2 Serial
Computer 2 Inputs
Connecting to a Network
To connect to a network
Connect a standard male-to-male RJ45 network cable (not provided) from the network cable
wall outlet to the Network IN connector on the Connection Panel.
Network IN
Printer
Network
Audio OUT
Output
Audio IN
L
R
VCR/DVD Audio OUT
Computer 2 Serial
Computer 2 Inputs
18
Installation
Connecting to an External Sound System
To connect to an external room sound system
Connect standard red and white RCA audio cables (not provided) from the RCA Audio Inputs
on the external sound system to the two Audio OUT (L/R) jacks on the Connection Panel.
Keep your right and left channel connections correct for stereo sound.
Audio OUT Red
Printer
Network
Audio OUT White
Audio OUT
Output
Audio IN
L
R
VCR/DVD Audio OUT
Computer 2 Serial
Computer 2 Inputs
Connecting to an External Monitor or Projector
To connect to an external projector or monitor
Connect an HD DB15 video cable (not provided) from the external projector or monitor to the
Video OUT port in the Connection Panel.
NOTE: This connection is for RGB output only.
Printer
Video OUT
Network
Audio OUT
Output
Audio IN
L
R
VCR/DVD Audio OUT
Computer 2 Serial
Computer 2 Inputs
Installation
19
20
Installation
Finalizing the Installation
With your computer and projector on, finish setting up your 3000i by:
•
adjusting the projected image (this page)
•
configuring the computer settings (page 24)
•
installing SMART Board software on any connected computer (page 25)
•
configuring the computer port (page 26)
•
orienting the interactive whiteboard (page 26)
After you’ve made these adjustments and configurations, your 3000i is ready to use.
Adjusting the Projected Image
CAUTION
Do not adjust the white ring that surrounds the short-throw, customized
projector lenses, even though the NEC VT470/570/670 User’s Manual states
that you should use this ring to obtain the best focus. You must disregard this
information.
Rather, use the Zoom lever on the projector, which has been modified to adjust
the image focus. Again, contrary to the NEC VT470/570/670 User’s Manual,
the Zoom lever will not adjust the image size on the screen.
You may need to make a few final adjustments to the projector to ensure a focused image that
fits on the interactive whiteboard screen. While making these adjustments, check both the
reflection in the small mirror and the actual image on the screen. For the best image, the
reflection must be in the center of the small mirror and each side must be symmetrical.
To adjust roll
1. Locate the screws and knobs on the projector plate.
2. Loosen the three screws identified in the figure below.
Finalizing the Installation
21
3. Tighten or loosen the knobs on the left of the projector plate until you have the
required roll adjustment. Adjust these knobs by the same amount or else you will
change the vertical adjustment of the image (page 23).
NOTE: If you can’t tighten the knobs on the left of the projector plate, you can adjust
the roll by loosening the knobs on the right of the projector plate
4. Tighten the three screws that you loosened in step 2.
To adjust the image laterally
1. Locate the screws and knobs on the projector plate.
2. Loosen the three screws identified in the figure below.
3. Loosen the four knobs identified in the figure below.
4. Slide the projector laterally to the required position.
22
Finalizing the Installation
5. Tighten the four knobs.
6. Tighten the three screws that you loosened in step 2.
To change the image size
1. Locate the three security screws in the projector plate. These are illustrated in the
figure below.
2. Loosen these screws using the TORX® key in the accessory kit.
3. Slide the projector backward or forward.
4. When your image is the correct size, tighten the security screws.
To move the image up or down
1. Locate the screws and knobs on the projector plate.
2. Loosen the three screws identified in the figure below.
3. Tighten or loosen the knobs at the front of the projector plate until you have the
required vertical adjustment. Adjust these knobs by the same amount or else you will
change the roll adjustment of the image (page 21).
Finalizing the Installation
23
NOTE: If you can’t tighten the front knobs any further, you can change the vertical
adjustment by loosening the knobs at the back of the projector plate.
4. Tighten the three screws that you loosened in step 2.
Configuring the Computer Settings
For optimal configuration of the 3000i, use these recommended settings for the computer
inside the 3000i. With these settings, you can balance ease of use with conservation of energy
and preservation of projector lamp life.
For example, you can configure the power management and energy saving settings of your
computer so that it stops sending out a video signal and turns off the hard drive(s) after a
period of inactivity. Your projector goes into standby mode if it doesn’t receive a video signal
for 30 minutes. Even though the projector and the 3000i are in standby mode, you can press
the Lamp On button to quickly return both units to their normal operating states.
Recommended Settings
You should keep the internal computer on all the time, but set it to turn off the monitor after 1
hour of inactivity, and to put the hard disk(s) into standby mode after 2 hours. This extended
time period avoids an unexpected computer shutdown during presentations, videoconferences or lengthy meetings with gaps in computer activity.
When the computer is the 3000i’s active display source and this period of inactivity for the
monitor is reached, the computer stops sending an RGB video signal to the projector. This
lack of a video signal triggers the projector to wait for 30 minutes, and then go into standby
mode.
NOTE: If the input source for the projector is the video source (either composite or S-video),
the projector will not go into standby mode.
To change the settings on a Windows computer, access the Properties dialog box for your
display and adjust the energy saving features and the power management properties.
For Macintosh computers, adjust the settings in your System Preferences application. For
precise instructions on changing these settings, read the documentation that came with your
operating system.
TIP
If you decide to keep your computer on all the time, you should occasionally
restart it to reload the operating system.
NOTE: Windows NT 4.0 doesn’t support these power settings, so you must leave the
computer on with full power or shut it down at the end of the day.
Matching the Computer Resolution to the Projector Resolution
It's very important that the computer and projector resolutions match so the projected image
properly fills the screen. The projector resolution is 1024 × 768 (XGA) and you must ensure
the computer’s resolution matches this.
24
Finalizing the Installation
NOTE: If the computer resolution is set to anything other than this optimal resolution, you may
not see the entire image or the image may be too small to fill the screen, even with further
adjustments.
Use the information here as a guideline when you adjust your computer. For precise
instructions, read the documentation for your operating system. Also, if the image on the
interactive whiteboard is too distorted to see, use a computer monitor to adjust this setting.
To adjust the resolution setting for your Windows computer
1. Select Start > Settings > Control Panel and then double-press Display.
2. In the Display Properties dialog box, press the Settings tab.
3. Move the slider to a screen resolution of 1024 × 768 and then press OK.
To adjust the resolution setting for your Macintosh computer (Mac OS X
operating system)
1. Press the System Preferences icon in the Dock.
2. Double-press Displays.
3. Select 1024 × 768 and close the dialog box.
Installing SMART Board Software
The installation should start automatically after you insert the SMART Board software CD into
your CD drive.
To install SMART Board software for Windows operating systems
1. Insert the SMART Board software CD into your CD drive.
The SMART Board software setup program should start automatically. If it doesn’t,
select Start > Run and enter x:\autorun.exe (where x: is your CD drive). Follow the
on-screen instructions to install SMART Board software.
NOTE: At the end of the SMART Board software installation, you’ll be asked if you
want to put the SMART Board icon in your Startup Folder. We recommend that you
say yes. The SMART Board tools will always be open, and your interactive whiteboard
will be fully functional without any further action whenever you turn on your system.
2. Press Yes to install the SMART Board icon in the Startup folder, or press No to
prevent SMART Board software from starting whenever you turn on your system.
To install SMART Board software for Macintosh computers
1. Insert the SMART Board software CD into your CD drive.
2. Double-press the SMART Installer icon.
The SMART Installer window appears.
3. Press the Continue button and then follow the instructions on your screen.
Finalizing the Installation
25
Configuring the Computer Port
After installing SMART Board software, you must specify which port on the internal computer
is occupied by the interactive whiteboard serial or USB connection. If you’re running SMART
Board driver 6.0 (or later), the COM port configuration process is entirely automatic.
However, you may need to manually configure the COM port if:
•
the Windows operating system you’re running does not perform plug and play (e.g.,
Windows NT 4.0 or ME)
•
the Windows operating system fails to announce that it has Found New Hardware
To select a COM port for the interactive whiteboard
1. Press the SMART Board icon in the system tray (Windows computers) or in the Dock
(Macintosh computers), and select Control Panel.
2. Select SMART Board Settings.
The SMART Board Settings dialog box appears.
3. Press the Add SMART Board arrow button and select Manually choose COM port.
The Select COM Port dialog box appears.
4. If you know which port you connected the interactive whiteboard to, select it from the
list and press Select.
OR
If you’re unsure of the correct port, click the Detect SMART Hardware button.
SMART Board software locates the correct port for the attached interactive
whiteboard.
The Ready Light in the pen tray should change to green to indicate that the interactive
whiteboard is now touch sensitive.
Orienting the Interactive Whiteboard
By orienting the interactive whiteboard, you ensure that the computer accurately tracks your
contact with the screen. Although SMART Board software assigns a default orientation to your
interactive whiteboard that is normally adequate, you may want to perform an orientation to
ensure the greatest possible level of accuracy.
The default orientation level is a 9-point, Standard orientation. If you find this level isn’t precise
enough, use the Fine orientation level. You may also use the Quick, 4-point orientation level.
To orient your interactive whiteboard (default Standard orientation)
1. Press the SMART Board icon in the system tray (Windows computers) or in the Dock
(Macintosh computers), and select Orient.
The orientation screen appears.
2. Follow the on-screen instructions, pressing your finger squarely on each cross.
NOTE: If you press on the crosses out of sequence or inaccurately, a Bad Orientation
Point dialog box appears. Use the mouse to click OK, because touch awareness isn’t
available.
26
Finalizing the Installation
3. When the orientation screen disappears, test the orientation by moving your finger
across the interactive whiteboard. The pointer should track your finger very closely
and appear directly beneath the center of your fingertip.
NOTE: If the pointer doesn’t accurately track your finger, you may need to calibrate
the digital cameras (page 40).
To orient using the Fine (20-point) or Quick (4-point) orientation levels
1. Press the SMART Board icon in the system tray (Windows computers) or in the Dock
(Macintosh computers), and select Control Panel.
2. Select SMART Board Settings.
3. From the Hardware Info & Settings drop-down list, select Alignment/Orientation
Precision.
4. Press Quick (4 points) or Fine (20 points).
5. Press OK.
6. Perform the 4-point or 20-point orientation.
NOTE: This setting will remain in effect for all subsequent orientations until you
perform steps 1–5 again and restore the default (Standard) orientation or otherwise
change the orientation level.
Finalizing the Installation
27
28
Finalizing the Installation
Basic Operations
This section describes the following 3000i operations:
•
Turning on the 3000i (this page)
•
Putting the 3000i into standby (page 31)
•
Adjusting the volume (page 32)
•
Changing the projector display source (page 33)
•
Using the interactive whiteboard (page 34)
Turning on the 3000i
You should keep the projector on at all times. However, to conserve the projector lamp, press
the Lamp Off button on the Control Panel at the end of your session (or at the end of the day).
For ease of operation, you should also keep the computer on all the time. By doing this, you
can turn on the 3000i by restoring power to the projector lamp (press the Lamp On button on
the Control Panel) and then entering your user name and password at the logon screen.
NOTE: To preserve the computer’s hard drive(s) and the projector lamp, you may want to put
the computer hard drive and the monitor (interactive screen) into standby mode (page 31).
To turn on the 3000i
1. If the screen is black, press the Lamp On button on the Control Panel to turn on the
projector lamp. The Lamp On LED indicator should blink quickly for approximately 60
seconds and then remain illuminated when the lamp is fully powered up.
Lamp On
Lamp On LED
2. If you see a logon screen, use the connected keyboard to enter your logon ID and
password and then press the OK button.
OR
If the screen turns from black to blue—and no logon screen appears—you may need
to turn on the computer or restore it from a standby setting. Turn the computer on or
press the computer’s reset button.
Basic Operations
29
Startup Scenarios
The following table describes what you may need to do to restore the 3000i to a fully
operational state.
What You See
What You Should Do
• Screen is black
The projector is in standby mode (with the lamp off).
• On LED is blinking
intermittently (short
flashes between
long pauses)
• Press the Lamp On button on the Control Panel. The Lamp On
LED indicator blinks quickly as the lamp warms up and, after
approximately 60 seconds, either a blue No Input screen appears
(see immediately below) or the screen is restored to its last active
state.
• Blue No Input
screen
The projector lamp is turned on, but the computer is either off or in
standby mode, or you’ve selected an inactive display source.
• On LED is steadily
illuminated
• Press a key on the computer’s keyboard to activate the computer.
The logon screen appears.
OR
Press a source button on the Control Panel to change to an active
source.
If the blue No Input screen remains:
1. Turn the computer on (or press the computer’s reset button). The
logon screen appears.
2. Log on as usual (using the connected keyboard).
• Screen is black
• On LED is blinking
slowly
• Screen is black
• Off LED is blinking
rapidly
30
No action is necessary. The projector lamp is turning on, and the
logon screen will appear after approximately 60 seconds.
The projector lamp is in reversible standby mode. If you don’t press
a button to restore the image, after three minutes the On LED
indicator will blink slowly for 60 seconds as the lamp turns off and
cools down. At this point, follow the first set of instructions in this
table to restore the 3000i to an operational state.
• Logon Screen
The projector lamp is still on, so you can log on as usual (using the
keyboard)
• Lamp On LED
continues to blink
intermittently, even
though it’s been
pressed to start the
system
Projector problems are preventing a normal projector lamp warmup. Examine the projector status LED indicator, and then consult the
troubleshooting section of the NEC VT470/570/670 User’s Manual.
• The Lamp Off and
On LEDs are both
flashing constantly
The 3000i can’t detect a projector. Check the NEC VT470/570/670
User’s Manual to make sure the projector is connected properly.
Basic Operations
Putting the 3000i into Standby
For normal operation, you don’t need to turn off the computer or the projector at the end of a
session or at the end of the day. Just log off the computer (for security) and then turn off the
projector lamp (to conserve its life) by pressing the Lamp Off button on the Control Panel.
CAUTION
The projector inside the 3000i has been designed for use under normal
operating conditions only. Normal operating conditions are defined as product
use that does not exceed 8 hours per day and 260 days per year. Exceeding
these operating conditions could cause projector damage. Damage caused by
such extended use will not be covered by the product warranty.
To maintain normal operating conditions, make sure the projector is in standby
mode outside of normal, daily (8 hour) operation. In standby mode, the lamp is
turned off, while the projector remains on. Be sure to press the Lamp Off
button in the Control Panel at the end of the day, and your projector will remain
in standby mode until you press the Lamp On button the next day.
NOTE: You can also configure the computer’s power management settings so
that after a period of idle time, it stops sending a video signal, turning off the
projector lamp (page 24).
NOTE: If you won’t use the 3000i for an extended period of time, you should turn off the
computer and the projector.
To put the 3000i into standby
1. Log off by selecting Start > Shut Down.
NOTE: Logging off enhances system security. It also gives users a consistent initial
interface—the system logon screen—when they turn on the projector lamp.
2. Press the Lamp Off button to put the projector into reversible standby mode for three
minutes.
Lamp Off
Lamp Off Button on the Control Panel
While the screen appears black, the projector lamp remains on for three minutes so
you can immediately restore the image (if necessary) by pressing any button on the
Control Panel. After three minutes have elapsed, the lamp cools down for 60 seconds
and then turns off.
To skip the three-minute reversible standby period, press and hold the Lamp Off
button for three seconds. Release the button and the lamp enters a 60-second cool
down period and then turns off.
Basic Operations
31
Perform this procedure at the end of a meeting or presentation and at the end of the
day. If you prefer, you can also shut down the computer. However, for greater ease of
use, we recommend simply logging off rather than shutting down the computer.
To turn off the projector (if unused for an extended period)
1. Log off (as described above) and turn off the computer.
2. Press the Lamp Off button on the Control Panel.
The Lamp Off LED indicator blinks rapidly for three minutes (reversible standby), and
then slowly for approximately 60 seconds while the lamp cools down. When the lamp
is off, the Lamp On LED indicator blinks very slowly.
OR
Press and hold the Lamp Off button for three seconds. The lamp immediately turns
off and enters a 60-second cool-down period.
3. When the cooling fan stops, flip the power switch on the back of the projector.
4. Disconnect the 3000i power cable from the wall power outlet.
Adjusting the Volume
Volume adjustments are made for the active display source and are made independently of
other sources. When you switch to another input source, the 3000i retains the settings you
made for the first input source (for when you switch back).
To adjust the volume
Press and hold the Volume Up (
the current source.
Press and hold the Volume Down (
for the current source.
+) button on the Control Panel to increase the volume for
–) button on the Control Panel to decrease the volume
Volume Up
Volume Down
To restore default volume level (no sound)
Press and hold both Volume buttons simultaneously.
32
Basic Operations
To fine-tune the projected image
When you first connect the projector, you may need to fine-tune the image. To automatically
optimize the image in RGB mode, press the Auto Adjust button on the projector’s remote
control. This will eliminate vertical banding, flickering, video noise, dot interference and cross
talk.
Changing the Display Source for the Internal Projector
You can change the video and audio input source for the internal projector using the three
source buttons on the Control Panel. Choose from:
•
the host computer
•
a connected guest laptop or external computer (with the optional Guest Laptop
Support kit)
•
a VCR or DVD player
When the internal computer source is active, you can also make Notebook software instantly
appear by pressing the Notebook Software button on the Control Panel.
Internal (Host) Computer
Guest Laptop
VCR/DVD Player
Notebook Software
NOTE: Switching sources takes a few seconds and during that time all buttons on the Control
Panel are disabled.
To switch to the connected VCR or DVD player
Press the VCR/DVD Player button
on the Control Panel.
If both a VCR (composite video connection) and a DVD player (S-video connection) are
connected to the projector, pressing this button switches the display between the two. There is
a three-second delay before the alternate display source appears.
When you switch to another source (for example, the internal computer) and then press the
VCR/DVD Player button, the video source that was last active appears. For example, if you
were viewing a DVD and then switched to the computer, the DVD player will be the display
source the next time you press the VCR/DVD Player button.
To switch to the internal computer
Press the Internal Computer button
on the Control Panel.
Basic Operations
33
To switch to a guest computer
Press the Guest Laptop button
Support kit).
on the Control Panel (with the optional Guest Laptop
To launch Notebook software
Press the Notebook Software button
on the Control Panel.
NOTE: For Notebook software to appear, SMART Board software must first be installed and
running on the internal computer (page 25). The internal computer must also be the active
source. For information on using Notebook software, see Using Notebook Software on
page 34.
To open Floating Tools
Press the Notebook Software button
on the Control Panel and hold for three seconds.
OR
Press the SMART Board icon in the system tray (Windows computers) or in the Dock
(Macintosh computers), and select Floating Tools.
NOTE: Before the Floating Tools can appear, SMART Board software must first be installed
and running on the internal computer (page 25). The internal computer source must also be
the active source. For more information on using the Floating Tools, see Using the Floating
Tools on page 35.
Using the SMART Board Interactive Whiteboard
Touch control is enabled when you’ve connected your computer to the 3000i and installed
SMART Board software. However, to get the most from your 3000i, open the SMART Board
tools. You’ll know that the tools are active if you can see the SMART Board icon in the system
tray (Windows computers) or in the Dock (Macintosh computers). SMART Board software lets
you customize the pen tray tools. This includes changing the eraser size and the color and
transparency of the pen tools. To do this, read the applicable Help topic, which you can access
in the SMART Board Control Panel by pressing the Help button.
SMART Board Tools
Use the SMART Board tools for all the SMART Board features beyond basic touch control and
pen tray button use. These features include annotation and tool-configuration capabilities,
video player, recorder and the on-screen keyboard.
NOTE: The SMART Board tools must be running before you can use the pen tray pens and
eraser. If you want to write on your interactive whiteboard with a pen tray pen, make sure the
SMART Board icon appears in the system tray (Windows operating system) or Dock
(Macintosh computer).
34
Basic Operations
To summarize, the SMART Board tools include:
•
Notebook software, an application for organizing and sharing your annotations
•
Recorder, an application for recording a video file of everything you do on a computer
•
Video Player, a Windows-only application for annotating over video and graphics
•
Keyboard, a virtual keyboard for entering text in an application
•
the Floating Tools, a virtual palette of annotation tools
•
the SMART Board Control Panel, a utility that lets you configure the interactive
whiteboard, including the pen tray tools
SMART Notebook software
Notebook software lets you create a variety of annotations and import graphics, text, clip art
and entire files from any other application. But Notebook software is much more than just an
electronic flip chart for displaying presentations or capturing notes in a brainstorming session.
It can also capture anything you write on the interactive whiteboard over any application.
If you want to capture what you’ve written with a pen tray pen over another program, just
select Screen Capture Toolbar from the View menu and then minimize the Notebook
software window. A three-button Screen Capture toolbar floats on top of all your applications.
You can now capture your annotation with a press of a button: the captured image is
automatically placed on a new page of the Notebook file. Macintosh computer users can
access the same annotation-capture capability from the SMART Board Tools menu.
To write into Notebook software, leave the Notebook window open and maximized. If you want
an even larger area for writing or brainstorming, select Full Screen from the View menu.
Using the Floating Tools
The Floating Tools are a virtual version of the pen tray tools. Press the Pen button, for
example, and the next time you touch and drag on the screen, you’ll produce a line of digital
ink. The Floating Tools also include a number of tools that you won’t find in your pen tray, such
as tools for displaying a large pointer, producing a spotlight, capturing your annotations and
restoring cleared annotations. You can customize and save your palette in a user profile that
you can activate each time you use the interactive whiteboard.
Basic Operations
35
36
Basic Operations
Maintenance and Troubleshooting
Cleaning the Screen and other Components
Clean the screen surface regularly so dust buildup doesn’t disrupt the operation of the 3000i.
Do not spray glass cleaner directly onto the screen surface. Instead, spray it lightly on a cloth
and then gently wipe. The 3000i uses digital cameras that are located inside the frame. If
excess glass cleaner flows into the crack between the frame and the writing surface, the fluid
could damage the cameras.
Before you clean the screen, log off the computer. If you touch the screen when the computer
is in any other state (for example, with a program open or at the desktop), you may activate
program components or scramble desktop icons. After you log off, put the projector into
standby mode so you can easily see dirt and streaks.
Remove marks made with a permanent marker by completely covering them with the ink from
a dry-erase marker (not a low-odor marker). Then wipe with a soft cloth. Dry-erase ink
contains solvents that remove permanent ink. If any trace of the original permanent ink
remains, spray the area with standard glass or whiteboard cleaner and wipe clean.
The back of the screen is well protected from handling by its location on the inside of the unit.
However, if it must be dusted, or if a mark has been made on its surface, dab it gently with a
soft cloth that’s been sprayed with standard, alcohol-free glass cleaner. Do not apply the
cleaner directly to the surface.
CAUTION
Do not, under any circumstances, apply isopropyl alcohol, water or acetone to
the rear surface of the interactive screen. Any of these fluids could damage the
diffusion coating, resulting in a permanent deterioration in display quality.
Periodically dust the mirrors and unit components using a soft cloth. To clean the mirrors, use
a standard, alcohol-free glass cleaner.
Cleaning the Projector
Before you clean the projector, turn it off, wait at least one minute and then unplug it.
Periodically clean the projector casing with a damp cloth. If it is heavily soiled you can use a
mild detergent, but don't use strong detergent or a solvent, such as alcohol or thinner. Use a
blower or lens paper to clean the lens, being careful not to scratch or mar the lens.
Cleaning the filter and clearing the filter-cleaning message
Clean the air-filter sponge with a vacuum after every 100 hours of operation (more often in
dusty conditions), as described on page 51 of the NEC VT470/570/670 User’s Manual.
A “Please Clean Filter” message from the projector will appear on the bottom of the screen
after every 100 hours of operation. However, after cleaning the filter this message will not
automatically disappear, so you must use the projector remote control to clear the filter usage
meter, as follows:
1. Press the Menu button on the projector remote control.
Maintenance and Troubleshooting
37
2. Select Default > Clear Filter Usage.
The meter returns to zero. You won’t receive another “Please Clean Filter” message for
another 100 hours.
Replacing the Projector Lamp and Filter
Even though the lamp may still be working, you should replace your projector lamp after 2,000
hours of normal mode operation or 3,000 hours of eco mode operation to maintain optimal
performance. You should also replace the air filter with the new one that you’ll receive with the
replacement lamp.
Order the standard lamp from NEC. Alternatively, you can order the same lamp from your
SMART dealer. Ask for SMART P/N 01-00161. Do not use any other lamps.
NOTES
•
The projector will turn off and go into standby mode after 2,100 hours (3,100 hours in
eco mode). If this happens, you should replace the lamp immediately.
•
You should always replace the lamp when you see this message: “The lamp has
reached the end of its usable life. Please replace the lamp.”
To find out how many hours of lamp use remain, go to the projector menu (press the Menu
button on the remote control or projector) and select Information > Page 1 > Remaining
Lamp Time. Replacing the used lamp with a new lamp automatically clears the lamp usage
hours.
To replace the lamp and filters, complete the following procedures.
1. Remove the projector from the cabinet, following the instructions on page 51.
2. Replace the lamp, following the instructions on page 53 of the NEC VT470/570/670
User’s Manual.
3. Return the projector to the cabinet by performing the steps on page 55.
4. Reset the lamp hour meter as described on page 50 of the NEC VT470/570/670
User’s Manual.
WARNING
After you turn off the projector, wait at least one minute before you unplug it.
Do not touch or replace the projector lamp (which will be very hot) for at least
an hour.
Après avoir éteint le projecteur, attendez au moins une minute avant de le
débrancher. Attendez au moins une heure avant de toucher ou de remplacer la
lampe du projecteur (qui sera très chaude).
Stecken Sie den Projektor für mindestens eine Minute nach dem Abschalten
nicht aus. Berühren oder ersetzen Sie die Projektorlampe (die sehr heiß sein
wird) nicht vor Ablauf einer Stunde.
38
Maintenance and Troubleshooting
CAUTION
Never touch the back of the screen or brush against it with your head while
you're examining internal unit components. If you do smudge this surface,
lightly spray alcohol-free glass cleaner onto a soft cloth and dab the affected
area to remove the marks. Never apply isopropyl alcohol, water or acetone, as
these fluids will damage the diffusion coating and permanently reduce the
display quality.
WARNING
To avoid an electric shock, do not remove any screws except the two lampcase screws.
Pour éviter tout risque de choc électrique, ne retirez aucune vis, à l’exception
des deux vis d’accès aux lampes.
Para evitar descargas eléctricas, no quite ningún tornillo excepto los de las dos
lámparas.
Um einen elektrischen Schlag zu vermeiden, dürfen Sie mit Ausnahme der
beiden Lampengehäuseschrauben keine Schrauben entfernen.
Troubleshooting
Most problems result from incorrect cabling, an incorrect computer setting or improperly
installed or configured software. The 3000i works properly only when its major components
are functioning correctly. These components include the computer, projector and the
interactive screen. To determine if they’re functioning properly, refer to the LEDs on the 3000i
and the tables in this section.
For information about the normal behavior of the LEDs in the Control Panel and what they tell
you about the status of the projector lamp, see the table on page 6.
As you begin troubleshooting, record the problems that you observe and what you did to
resolve them. These notes will help if you need to contact SMART Technical Support
(page 43). Also try these general tips:
•
Substitute hardware that you know is functioning with any hardware that you suspect
may be malfunctioning. For example, substitute the computer with another that you
know is working properly.
•
Check all cable connections and system settings. Check the LEDs for the presence of
power or for the indication of a display problem.
•
Completely shut down the system and then restart it. First, shut down the computer.
Then press the Lamp Off button on the Control Panel to turn off the projector lamp.
Allow it to cool for three minutes, and then disconnect the main AC power cable from
the room outlet. To restore power to the 3000i, wait another 15 seconds and then plug
the AC power back in. Then turn on the computer and projector.
Maintenance and Troubleshooting
39
The following table may help you resolve some of the more common 3000i problems.
Problem
Cause
There’s no touch control on Software
the interactive screen
problem
Possible Resolution
Make sure SMART Board software is
running. Is there a SMART Board icon
in the System Tray or the Dock? If not,
you’ll need to start the program.
If SMART Board software is running,
click the SMART Board icon in the
system tray (Windows computers) or in
the Dock (Macintosh computers), and
select Control Panel. Now check the
status of the interactive whiteboard.
You may have to reestablish
communications.
Touch control isn’t
accurate
Orientation
problem
Orient the screen (page 26)
The pen tray tools and
buttons aren’t responding
properly
Pen tray
problem
Check that nothing is obscuring the
sensors on the pen tray. Clean the
sensor or remove any blockage.
There’s no touch control or Power
electronic ink
problem
Check that the main power cable is
connected to a functioning room outlet
Call Technical Support (page 43)
No electronic ink appears
on the interactive screen
Software
problem
Make sure SMART Board software is
running
Also, make sure SMART Board
software is in Projected Mode. Press
the SMART Board icon in the system
tray (Windows computers) or in the
Dock (Macintosh computers), select
Control Panel and then make sure
Projected is selected under Mode.
You see gaps in the
electronic ink or specific
areas of the screen are
unresponsive to touch
Camera
calibration
problem
Calibrate the cameras (see below)
Calibrating the Cameras
Digital cameras in the corners of the interactive screen track objects like your finger or a pen
tray pen. Each camera is calibrated to recognize the position of a pen tray tool or your finger
on the screen’s surface and to send this information to the SMART Board software. The
software then interprets the information as mouse clicks or electronic ink in the appropriate
location.
Here’s how the system works. The cameras constantly scan the screen surface. When a
camera detects a target, its processor identifies the affected pixel and calculates the angle at
which it occurs. The cameras are all carefully calibrated before they leave the factory so that
these angles will intersect.
40
Maintenance and Troubleshooting
If the cameras become misaligned for any reason, those angles will no longer intersect at all
points, targets will not be detected, and you may experience “broken ink” (gaps in your writing)
or an area of the screen that’s unresponsive to touch.
Fortunately, this problem is easily fixed by performing a simple calibration procedure, as
described below.
To calibrate the cameras
1. Press the SMART Board icon in the system tray (Windows computers) or in the Dock
(Macintosh computers), and select Control Panel.
2. Press SMART Board Settings.
3. From the Hardware Info & Settings drop-down list, select Advanced Settings.
The Edit Advanced Board Settings dialog appears.
4. In DViT Settings, press the Calibrate button.
The four-point calibration screen appears.
5. Press the center of each target and hold until the target moves.
After you press the final target, the orientation screen appears.
6. Complete the 4-point orientation.
7. Press OK.
Maintenance and Troubleshooting
41
42
Maintenance and Troubleshooting
Customer Support
Contacting SMART Technical Support
SMART’s Technical Support team welcomes your call. However, you may first want to contact
your local reseller if you experience any difficulty with your 3000i, as they may be able to solve
the problem without delay.
All SMART products include free telephone, fax and e-mail support.
Telephone: 1.866.518.6791 (toll-free in Canada/U.S) or
+1.403.228.5940 (all other countries)
(Available 7 a.m. – 6 p.m. Mountain time from Monday to Friday)
Fax: +1.403.802.1256
E-mail: [email protected]
Web Site: www.smarttech.com/support
When you phone Technical Support, it will be helpful if you have access to your 3000i during
the call. The support representative may ask you for the following information:
•
the serial number of the unit
•
the version of the software that’s causing the problem and the version of your
computer’s operating system (if applicable)
General Inquiries
Main Switchboard: 1.888.42.SMART (toll-free in Canada/U.S.) or +1.403.245.0333
(all other countries)
Fax: +1.403.228.2500
E-mail: [email protected]
Address: SMART Technologies Inc.
Suite 300, 1207 – 11th Avenue SW
Calgary, AB CANADA T3C 0M5
Returning Defective Merchandise
Your Rear Projection SMART Board 3000i interactive whiteboard (including the integrated
projector) is covered by a two-year limited equipment warranty. To return defective
merchandise, call SMART Technical Support. You will receive the appropriate Return of
Merchandise authorization and instructions for transporting your 3000i to an authorized
service center.
Customer Support
43
Warranty Shipping Charges
Transportation charges that are incurred from warranty service are paid as follows. You are
responsible for transporting the system to the service center, and SMART pays return
shipping via ground service on any product that’s returned for service within the warranty
period. If you request a rush order, any associated charges are billed to you. Read the
warranty that was included with your 3000i for details.
NOTE: After the warranty period, you are responsible for transporting the product to and from
the service center.
Registration
A User Registration card was included with your 3000i. To help us serve you, fill in and mail
this card to SMART Technologies Inc. or register online at www.smarttech.com/registration.
Sending Feedback
You can help us improve our technical documentation by e-mailing your comments to
[email protected].
Obtaining More Information on SMART Products
Visit www.smarttech.com/support to:
44
•
download PDF versions of our user guides, installation instructions and more
•
read technical bulletins, FAQs and tips
•
troubleshoot a problem
•
explore our resource centers to learn about conferencing and room control systems
Customer Support
Appendix A: Removing the Side Panel, Screen and
Cabinet Top
Remove the side panel to access a number of important components such as the projector,
SC8 controller and the Communications Hub.
CAUTION
Never touch the back of the screen or brush against it with your head while
you’re examining internal cabinet components. If you do smudge this surface,
lightly spray alcohol-free glass cleaner on a soft cloth and dab the affected
area to remove the marks. Never apply isopropyl alcohol, water or acetone, as
these fluids will damage the diffusion coating and permanently reduce the
display quality.
NOTE: Don’t remove both side panels at the same time. If you do, the back panel will not be
supported and will slide off.
Removing the right side panel (as you face the front of the cabinet) is also a preliminary step
for removing the screen and the top of the cabinet.
NOTE: You only need to remove the top of the cabinet if you need to move the cabinet
through a low doorway, or if a cabinet component requires replacement or repair.
CAUTION
You’ll need assistance with several of the steps in this procedure.
To remove the right side panel
1. Detach the infrared (IR) receiver and leave it temporarily dangling.
2. If the optional guest laptop shelf is attached to the cabinet, loosen the captive
thumbscrew underneath the shelf, lift the shelf up and pull it away from the cabinet.
Captive Thumbscrew Hole
Removing Guest Laptop Shelf
Appendix A: Removing the Side Panel, Screen and Cabinet Top
45
3. On the left side of the cabinet (as you face the rear), use the provided 5/32" hex key
(located in the accessory kit) to remove the hex screw on the top corner of the
interactive whiteboard.
4. Using the same hex key, remove the hex screw underneath the bottom corner of the
interactive whiteboard. Be careful to remove the hex screw shown in the following
figure, as there is another safety hex screw closer to the inside corner, which you
should not remove at this time.
Do not remove
this screw
46
Remove this
screw
Appendix A: Removing the Side Panel, Screen and Cabinet Top
5. Remove the two hex screws on the rear of the cabinet.
6. Grip the side handle and the top of the cabinet and pull the side panel off.
NOTE: To remove the screen, continue with the remaining numbered steps.
Appendix A: Removing the Side Panel, Screen and Cabinet Top
47
To remove the screen (continued from previous procedure)
1. Reach inside the cabinet to disconnect the MOD8 and power cables at the bottom of
the screen. Don’t touch the back of the screen.
MOD8 Cable
Power Cable
Disconnecting MOD8 and Power Cables
2. Loosen the four captive fasteners on the back corners of the interactive whiteboard
using a Phillips® No. 2 screwdriver. Start with the two bottom fasteners; then loosen
the two at the top (you may require a step stool to reach these fasteners).
NOTE: Maintain constant pressure on the screwdriver to avoid damaging the screw
heads.
Corner
Captive
Fasteners
NOTE: Even after you completely loosen the captive fasteners, the screen remains
suspended on two keyhole slots near the top of the cabinet.
48
Appendix A: Removing the Side Panel, Screen and Cabinet Top
3. With one person on each side, grasp the screen by the top and bottom corners. Lift
the screen up and then out to free it from the two keyhole slots that support it. Set the
screen down in a safe location.
Removing the Screen
CAUTION
Never touch the back of the screen or brush against it with your head.
If you do smudge this surface, lightly spray alcohol-free glass cleaner
on a soft cloth and dab the affected area to remove the marks. Never
apply isopropyl alcohol, water or acetone, as these fluids will damage
the diffusion coating.
NOTE: To remove the top half of the cabinet, continue with the remaining numbered
steps.
To remove the top half of the cabinet (continued from previous procedure)
1. Using the provided 5/32" hex key, remove the safety screw that’s located inside each
side handle. With the screen removed, you’ll find it easiest to reach inside the cabinet
and remove the hex key through the hole above the handhold.
Hex Key
Location of Side-Handle Safety Screw
Appendix A: Removing the Side Panel, Screen and Cabinet Top
49
2. Using the same hex key, loosen and then remove the two safety screws located on
the underside of the top half of the cabinet, on either side of the pen tray and Control
Panel.
Location of Underside Safety Screw
3. With each person gripping a side handle with one hand and supporting the top of the
cabinet with the other, carefully lift the top half of the cabinet off the base and then
place it carefully on the floor.
50
Appendix A: Removing the Side Panel, Screen and Cabinet Top
Appendix B: Removing and Replacing the Projector
To remove the projector (for example, to replace the lamp), you must remove the 3000i’s left
side panel and its rear access panel, disconnect the projector’s cables and detach the
projector from the projector plate.
This appendix also includes information on returning the projector to the 3000i.
CAUTION
Never touch the back of the screen or brush against it with your head while
you're examining internal unit components. If you do smudge this surface,
lightly spray alcohol-free glass cleaner onto a soft cloth and dab the affected
area to remove the marks. Never apply isopropyl alcohol, water or acetone, as
these fluids will damage the diffusion coating and permanently reduce the
display quality.
To remove the projector
1. Turn off the projector (page 32) and shut down the computer.
CAUTION
After you turn off the projector, wait at least one minute before you
unplug it.
2. If the optional guest laptop shelf is attached to the left side of the cabinet (as you face
the front), loosen the captive thumbscrew underneath the shelf, lift the shelf up and
pull it away from the cabinet.
Captive
Thumbscrew
Hole
Appendix B: Removing and Replacing the Projector
51
3. On the right side of the cabinet (as you face the rear), use the provided 5/32" hex key
(located in the accessory kit) to remove the hex screw on the top corner of the
interactive whiteboard.
4. Using the same hex key, remove the hex screw underneath the bottom corner of the
interactive whiteboard. Be careful to remove the hex screw shown in the following
figure, as there is another safety hex screw closer to the inside corner, which you
should not remove at this time.
Remove this
screw
52
Do not remove
this screw
Appendix B: Removing and Replacing the Projector
5. Remove the two hex screws on the rear of the cabinet.
6. Grip the side handle and the top of the cabinet and pull the side panel off. Put the side
panel in a safe place.
7. Reach inside the cabinet and unfasten the two projector straps.
CAUTION
Never touch the back of the screen or brush against it with your head while
you're examining internal unit components. If you do smudge this surface,
lightly spray alcohol-free glass cleaner onto a soft cloth and dab the affected
area to remove the marks. Never apply isopropyl alcohol, water or acetone, as
these fluids will damage the diffusion coating and permanently reduce the
display quality.
Appendix B: Removing and Replacing the Projector
53
8. At the rear of the cabinet, loosen the two captive thumbscrews at the top of the rear
access panel.
Captive
Thumbscrew
Captive
Thumbscrew
9. Rotate the top of the rear access panel toward you and then pull it upwards, releasing
it from the cabinet. Put the rear access panel in a safe place.
10. Disconnect all of the cables from the projector, including the power cable.
NOTE: The projector cables are labeled so that you can easily restore these
connections.
11. Using a pencil, mark the projector plate with the current position of the three screws
that attach the projector to the plate.
12. Loosen but do not remove these three screws using the TORX key in the accessory
kit. Carefully allow the projector to slide backwards until it stops.
54
Appendix B: Removing and Replacing the Projector
NOTE: Do not change the position of the four height adjustment knobs.
13. Reach into the cabinet through the side panel, slide the projector forward, lift it off the
plate and remove it from the cabinet.
CAUTION
Never touch the back of the screen or brush against it with your head
while you're examining internal unit components. If you do smudge this
surface, lightly spray alcohol-free glass cleaner onto a soft cloth and
dab the affected area to remove the marks. Never apply isopropyl
alcohol, water or acetone, as these fluids will damage the diffusion
coating and permanently reduce the display quality.
14. Set the projector on a flat surface.
NOTE: If you have removed the projector in order to replace the lamp, follow the
instructions on page 53 of the NEC VT470/570/670 User’s Manual.
WARNING
Do not touch or replace the projector lamp (which will be very hot) for
at least an hour after turning off the 3000i.
To replace the projector
1. Lift the projector into the cabinet through the side panel. Lower it onto the projector
plate so that the screws go through the keyhole slots. Then carefully allow the
projector to slide backwards until it comes to a halt.
CAUTION
Never touch the back of the screen or brush against it with your head
while you're examining internal unit components. If you do smudge this
surface, lightly spray alcohol-free glass cleaner onto a soft cloth and
dab the affected area to remove the marks. Never apply isopropyl
alcohol, water or acetone, as these fluids will damage the diffusion
coating and permanently reduce the display quality.
Appendix B: Removing and Replacing the Projector
55
2. From the rear of the cabinet, slide the projector forward until the three screws are in
the three marked positions. You made these marks on the projector plate before you
removed the projector. Tighten the three screws using the TORX key in the accessory
kit.
3. Connect all of the projector cables.
NOTE: The projector cables are labeled, so you can easily restore these connections.
3
4
6
7
5
2
1
Video IN
S-Video IN
Computer 1 IN
RGB OUT
PC Control
Projector
AC
1
AC Power
2
PC Control
3
Computer 2 IN
4
Computer 1 IN
5
RGB OUT
6
Video IN
7
S-Video IN
3
56
Appendix B: Removing and Replacing the Projector
Computer 2 IN
4. Fasten the two projector straps.
5. Reattach the rear access panel to the rear of the cabinet. Tighten the two
thumbscrews at the top of the rear access panel.
Captive
Thumbscrew
Captive
Thumbscrew
6. Reattach the side panel to the side of the cabinet.
Appendix B: Removing and Replacing the Projector
57
7. Attach and then tighten the two hex screws on the rear of the cabinet using the
provided 5/32" hex key.
8. Attach and then tighten the hex screw underneath the bottom corner of the interactive
whiteboard using the same hex key.
58
Appendix B: Removing and Replacing the Projector
9. Attach and then tighten the hex screw on the top corner of the interactive whiteboard
using the same hex key.
10. If you removed the guest laptop from the left side of the cabinet, reinstall it following
the instructions on page 67.
Appendix B: Removing and Replacing the Projector
59
60
Appendix B: Removing and Replacing the Projector
Appendix C: Connecting Rack-Mount Equipment to the
Projector Platform
Use the provided clip-on nuts to secure the rack-mount equipment to the sides of the projector
platform, just below the projector itself. The projector platform can accommodate rack-mount
equipment with a width of 19" (48.3 cm).
To connect rack-mount equipment to the projector platform
1. Attach the provided clip-on nuts (located in the accessory kit) to the sides of the
projector platform as required.
2. Connect your rack-mount equipment to the clip-on nuts using 10-32 × 1/2" fasteners
(not provided).
19" rack-mount
equipment
Clip-on nuts
Appendix C: Connecting Rack-Mount Equipment to the Projector Platform
61
62
Appendix C: Connecting Rack-Mount Equipment to the Projector Platform
Appendix D: Installing the Optional Videoconferencing
Shelf
You can install the optional 3000i videoconferencing shelf on either side of the cabinet. The
mounting arm of the shelf provides a convenient hidden channel for the camera cabling.
Installed Videoconferencing
Shelf
To install the videoconferencing shelf
1. Choose the side on which you want to mount the shelf. Using the supplied hex key,
remove the three 1/4-20 × 1/2" fasteners as shown. Note that one safety screw will be
removed.
Safety Screw
WARNING
Do not move the cabinet until the safety screw is replaced in step 4.
Appendix D: Installing the Optional Videoconferencing Shelf
63
2. Remove the four caps and plugs from the mounting arm at the location where you
want to mount the shelf. Feed the cables for the videoconferencing camera through
the large hole, down the channel and through the lower mounting point.
NOTE: The cables shown here may not match those required by your
videoconferencing camera.
3. If you’re installing the mounting arm on the same side as the IR receiver, detach the
receiver and leave it temporarily dangling. Carefully slide the mounting arm onto the
side of the cabinet, ensuring that the cables remain in the channel and are not
pinched.
64
Appendix D: Installing the Optional Videoconferencing Shelf
4. Use the three supplied 1/4-20 × 3/4" fasteners in place of the 1/4-20 × 1/2" fasteners
(removed in step 1) to secure the mounting arm to the cabinet. The safety screw is
now replaced.
NOTE: Now that you’ve replaced the safety screw, you can safely move the cabinet.
5. Hook the shelf to the keyholes in the mounting arm and tighten the thumbscrew to
secure the shelf.
Appendix D: Installing the Optional Videoconferencing Shelf
65
6. Use the J-hook to manage the cables along the side of the cabinet. Clip the J-hook
onto the handle on the side of the 3000i and route the cables through that hook to the
Connection Panel at the rear of the cabinet.
7. If you detached the IR receiver in step 3, use the hook-and-loop fastener included in
the accessory kit to reattach it to the bottom of the mounting arm.
Installation is complete. Follow the instructions in reverse order to uninstall.
66
Appendix D: Installing the Optional Videoconferencing Shelf
Appendix E: Connecting a Guest Laptop
The ability to connect to a guest laptop is only available if the optional Guest Laptop Support
kit has been installed with the 3000i. This kit connects your laptop to a multimedia switch
inside the 3000i called an X-Port 20. Once your laptop is connected in this manner, you can
switch the source of the 3000i’s data input between the 3000i’s internal computer and the
guest laptop.
The Guest Laptop Support kit includes a laptop umbilical (which connects the 3000i to the
guest laptop), a country-specific AC adapter or cable, and a guest laptop shelf.
The shelf is specifically designed to support a guest laptop, although it can be used to support
a VCR or DVD player. You can mount this shelf on either side of the cabinet (see below).
Installing the Guest Laptop Shelf
You can install the shelf on either side of the cabinet.
NOTE: If you’re installing the shelf on the computer side of the cabinet, install the shelf before
the computer. The plastic hole covers are much easier to remove when the computer is not
inside.
Guest Laptop Shelf
Appendix E: Connecting a Guest Laptop
67
To install the guest laptop shelf
1. Locate the two laptop shelf keyholes and the single thumbscrew hole on the upper
right (or left) side of the cabinet. Remove the plastic hole covers.
2 Keyholes
Thumbscrew
Hole
2. Push the two protruding bolts on the edge of the shelf into the two keyholes, and then
push the shelf firmly down.
3. Push the captive thumbscrew at the bottom of the shelf into the thumbscrew hole and
tighten.
68
Appendix E: Connecting a Guest Laptop
Installing the J-hook
You can attach the J-hook to the handle recess so you can route the umbilical cables through
this hook to the guest laptop shelf. You’ll find this hook in the accessory kit.
To attach the J-hook
1. Insert the J-hook into the handle recess that’s on the same side of the cabinet as the
guest laptop shelf, and flip it into place.
NOTE: For clarity, this illustration
doesn’t show the guest laptop shelf.
2. Route the laptop umbilical cables through the hook.
Umbilical Cables
J-hook
Appendix E: Connecting a Guest Laptop
69
Connecting the Laptop Umbilical to the 3000i Cabinet
To attach the laptop umbilical to the cabinet, use the following instructions.
To connect the laptop umbilical to the 3000i cabinet
1. Connect the serial end of the laptop umbilical’s Serial/USB adapter to the Computer
2 Serial IN connector on the Connection Panel at the rear of the cabinet.
Computer 2 Network
Computer 2 Audio
Computer 2 Video
Country-Specific AC
Adapter (or cable)
Computer 2 Serial
2. Connect the laptop umbilical’s Computer 2 Video cable to the Computer 2 Video IN
(female) connector on the Connection Panel.
3. Connect the laptop umbilical’s Computer 2 Audio cable to the Computer 2 Audio IN
connector on the Connection Panel.
4. Connect the laptop umbilical’s Computer 2 Network adapter to a room network
outlet.
Network
Printer
Audio OUT
Output
Audio IN
L
R
VCR/DVD Audio OUT
Computer 2 Serial
Computer 2 Inputs
Computer 2
Serial IN
Computer 2
Audio IN
Connection Panel
70
Appendix E: Connecting a Guest Laptop
Computer 2
Video IN
5. Connect the AC Power cable from the laptop umbilical to the Laptop Power OUT,
located just below and to the right of the Connection Panel.
Laptop
Power OUT
Connecting the Laptop Umbilical to a Guest Laptop
To connect the 3000i to the guest laptop, use the laptop umbilical that you have already
connected to the cabinet.
To connect the laptop umbilical to a guest laptop
1. Extend the laptop end of the umbilical from the rear of the 3000i cabinet until it
reaches the laptop shelf.
Computer 2 Network
Computer 2 Audio
Computer 2 Video
Computer 2 USB
Country-Specific AC
Adapter (or cable)
2. Connect the country-specific power adapter to the end of the AC power cable.
Appendix E: Connecting a Guest Laptop
71
3. Connect the five cables that make up the laptop end of the umbilical—the Computer
2 Network, Computer 2 Audio, Computer 2 Video, Computer 2 USB and AC
Power cables—to the appropriate connectors on the guest laptop.
If the guest laptop is already turned on, the desktop image will appear on the 3000i
screen.
4. If the laptop is off, turn it on.
5. Press the Guest Laptop button on the Control Panel to switch to the guest-laptop
video source.
The initialization screen appears on the 3000i screen.
–
If the initialization screen does not appear on the interactive whiteboard:
Try activating the external video port on your laptop computer. Some laptop
computers can’t display their internal screens and activate the external video at
the same time. You may need to deactivate the internal video port on your laptop
or put the internal and external video ports into simultaneous display mode before
the laptop displays on both the laptop monitor and the interactive whiteboard.
With newer laptops, you can synchronize the internal and external video ports at
the software level as follows.
From the Start menu, select Settings > Control Panel > Display. Select the
Refresh (or Monitor Refresh) tab. Press the CRT/Panel option to activate
simultaneous monitor and external video port display
This may not be possible with older laptop models, so you may need to switch
back and forth between the internal and external video port. If you aren’t sure
which commands or keyboard combinations are required to do this, check the
laptop owner’s manual.
You can now display any data stored on the laptop or external computer.
–
If the image on the screen is too large or too small:
The projector and external computer resolution may not match. To adjust your
computer resolution to match the projector resolution, press the Start button, and
select Settings > Control Panel > Display. Press the Settings tab, and move
the sliding bar in Screen Area to match the projector’s resolution.
6. Install SMART Board software on the guest laptop. After installing the software, you
should perform an orientation (page 26) to ensure that the pointer tracks your finger
and the pen tray tools accurately.
Changing the Display Source
You can change the video and audio input source for the internal projector using the source
buttons on the Control Panel.
To switch to a guest computer, press the Guest Laptop button
72
Appendix E: Connecting a Guest Laptop
on the Control Panel.
To switch to a different display source, press the Internal Computer button
VCR/DVD Player button
or press the
on the Control Panel.
Internal (Host) Computer
Guest Laptop
VCR/DVD Player
NOTE: Switching sources takes a few seconds and, during that time, all buttons on the
Control Panel are disabled.
Appendix E: Connecting a Guest Laptop
73
74
Appendix E: Connecting a Guest Laptop
Index
Numerics
3000i
Features 1
Introduction 1
Orienting 26
Putting the 3000i into Standby 31
Setting up 11
Turning on 29
Using 34
A
Adjusting
Projected Image 21
Projector Focus 5
Resolution Setting for a Macintosh Computer
25
Resolution Setting for a Windows Computer 25
Volume 32
B
Bad Orientation Point 26
Basic Operations 21, 29
Buttons
Lamp Off Button 6
Lamp On Button 6
Source Buttons 7
C
Cabinet Top
Removing 45
Calibrating the Cameras 40
Cameras
Calibrating 40
Changing
Display Source for the Internal Projector 33, 72
Cleaning
Other Components 37
Projector 37
Screen 37
Computer Settings
Configuring 24
Power Management 24
Configuring
Computer Port 26
Computer Settings 24
Connecting
DVD Player 15
External Monitor 19
External Projector 19
External Sound System 19
Guest Laptop 71
Internal Computer 13
Network 18
Power Cables 14
Printer 18
Rack Mount Equipment 61
VCR 15
Connection Panel 9
Contacting SMART Technical Support 43
Control Panel 6
Customer Support 43
D
Default
Right-Click Behavior 3
Detect SMART Hardware 26
Digital Vision Touch Technology 1
Display Source
Changing 33, 72
DVD Player
Connecting 15
Linking VCR and DVD Player Audio
Connections 17
Switching to the Connected DVD Player 33
DViT Technology 1
E
External Sound System
Connecting 19
F
Feedback 44
Fine Orientation 26
Index
75
Floating Tools
Opening 34
Using 35
Focus
Adjusting Projector Focus 5
G
General Inquiries 43
Getting to Know the 3000i 2
Guest Laptop
Connecting 71
Switching 34, 72
Guest Laptop Shelf
Installing 67
I
Image
Adjusting 21
Important Information i
Installing
Guest Laptop Shelf 67
Internal Computer 13
Introduction 11
SMART Board Software 25
Videoconference Shelf 63
Interactive Whiteboard See 3000i 1
Internal Computer
Connecting 13
Installing 13
L
Lamp Off Button 6
Lamp On Button 6
Laptop
Umbilical Connections 70
Laptop Power OUT 10
Linking VCR and DVD Player Audio Connections
17
Locating
More Information 44
Projector’s Resolution 24
Monitor
Connecting an External Monitor 19
Monitor Settings 24
N
NEC VT670 4
Network
Connecting 18
Normal Operating Conditions iii
Notebook Software 35
Starting 34
O
Opening Floating Tools 34
Orienting
3000i 26
Bad Orientation Point 26
Fine Orientation 26
Orientation Screen 26
Quick Orientation 26
Orienting the 3000i 26
P
Pen Tray
Buttons 3
Features 3
Pens 3
Power Connections 10
Power Input 10
Power Management Settings 24
Power Output 10
Printer
Connecting 18
Projected Image
Adjusting 21
M
Main Power IN 10
Maintenance 37
Matching the Computer Resolution to the
76
Index
Projector
Adjusting the Focus 5
Changing the Display Source 33, 72
Cleaning 37
Connecting an External Projector 19
Introduction 4
Optimal Projector Settings 5
Removing 51
Replacing 51
Replacing the Filter 38
Replacing the Lamp 38
Restoring Optimal Projector Settings 5
Turning off 32
Turning on 14
Putting the 3000i into Standby 31
Q
Quick Orientation 26
R
Rack Mount
Connecting Rack Mount Equipment 61
Rear Access Panel
Removing 12
Rear Features 8
Registration 44
Removing
Cabinet Top 45
Projector 51
Rear Access Panel 12
Screen 45
Side Panel 45
Replacing
Projector 51
Projector Filter 38
Projector Lamp 38
Resolution
Adjusting the Resolution for a Macintosh
Computer 25
Adjusting the Resolution for a Windows
Computer 25
Matching the Computer Resolution to the
Projector’s Resolution 24
Restoring
Default Volume Levels 32
Optimal Projector Settings 5
Returning Merchandise 43
Right-Clicking 3
S
Screen
Cleaning 37
Removing 45
Setting up
3000i 11
Settings
Computer Power Management Settings iii
Shelf
Videoconference Shelf 63
Side Panel
Removing 45
SMART Board Interactive Whiteboard See 3000i 1
SMART Board Software
Installing 25
SMART Board Tools 34
SMART Notebook Software 35
Using 35
SMART Technical Support
Contacting 43
Source Buttons 7
Standby
Putting the 3000i into Standby 31
Startup Scenarios 30
Switching to
Connected DVD Player 33
Connected VCR 33
Guest Laptop 34, 72
Notebook Software 34
T
Tools
Floating Tools 35
Opening Floating Tools 34
SMART Board Tools 34
Troubleshooting 39
Turning off the Projector 32
Turning on the 3000i 29
Turning on the Computer 14
Turning on the Projector 14
U
Using the 3000i 34
Index
77
V
VCR
Connecting 15
Linking VCR and DVD Player Audio
Connections 17
Switching to the Connected VCR 33
Videoconference Shelf
Installing 63
Volume
Adjusting 32
Restoring Default Settings 32
78
Index
Suite 300, 1207 – 11th Avenue SW
Calgary, AB CANADA T3C 0M5
Main Switchboard: 1.888.42.SMART (Canada/U.S.) or +1.403.245.0333 (all other countries)
Support Tel.: 1.866.518.6791 (Canada/U.S.) or +1.403.228.5940 (all other countries)
Support Fax: +1.403.806.1256
[email protected] www.smarttech.com
99-00224-06 REV A0