1
26 March 2013
3) RS232 (DB9 serial port)
a. Configurable Bit Rate
b. Configurable for Start/Stop Bits, Flow Control, and Parity
c. Local and remote Telnet Access
d. TCP/UDP Packet Assembly and Disassembly (PAD) function.
e. PPP Interface
4) RS485 Auxiliary Serial Port
a. Configurable Bit Rate
b. Configurable for Start/Stop Bits, Flow Control, and Parity
c. TCP/UDP Packet Assembly and Disassembly (PAD) function.
5) USB Host Connection
6) Relay Contact Closure (detection and operation)
a. NO/NC detection
b. SMS or email cry out alarm
7) Relay Driver Output ( Maximum sink current 200ma @24V)
a. SMS Activation
b. Web Activation
8) Tunneling
a. GRE Tunneling
b. IPsec
9) General Administration
a. Modify User and Password
10) Status – Ethernet Status
a. Currently Assigned IP Address
b. Current MAC Address
11) Wireless Status – CDMA or HSPA/UMTS Status
a. ESN or IMSI
b. Network Assigned IP Address
c. Telephone Number (MIN) or MSISDN
d. Current Network Status Active/Inactive
e. Signal Level (RSSI)
2 Connectors, Lights, Switches, and Jumpers
2.1
Switches
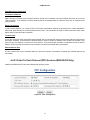
Referring to Figure 1, there are two switches on the front of the Z Series router. S1 (Reset) causes a hard reset of unit.
S2 (DFLT) is used to completely restore the firmware settings that were included when the product was shipped from the
factory. To restore factory defaults, the unit must be running. You should wait a full two (2) minutes after booting or
powering on the unit before restoring factory defaults. After waiting two minutes press and continue to hold down the
Restore Defaults (inner) switch until the lights begin blinking (about 10 seconds). Release the DFLT switch as soon as the
lights begin to blink. The unit will restore its factory defaults and reboot itself. There is no need to restart or power cycle
the unit.
2