1
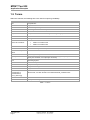
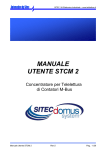
Multimedia and Control
Networking Technology
MOST Tool Kit
Application Examples
V4.0.X
Application Note
Document Information
Version: V4.0.X-1
Date: 2012-08-24
MOST®
Media Oriented Systems Transport
Copyright © 2006 - 2012 SMSC
MOST Tool Kit
Application Examples
Further Information
For more information on SMSC’s automotive products, including integrated circuits, software, and
MOST development tools and modules, visit our web site: http://www.smsc-ais.com. Direct contact
information is available at: http://www.smsc-ais.com/offices.
SMSC Europe GmbH
Bannwaldallee 48
76185 Karlsruhe
GERMANY
SMSC
80 Arkay Drive
Hauppauge, New York 11788
USA
Technical Support
Contact information for technical support is available at: http://www.smsc-ais.com/contact.
Legend
Copyright © 2006 - 2012 SMSC. All rights reserved.
Please make sure that all information within a document marked as ‘Confidential’ or ‘Restricted Access’ is
handled solely in accordance with the agreement pursuant to which it is provided, and is not reproduced or
disclosed to others without the prior written consent of SMSC. The confidential ranking of a document can be
found in the footer of every page. This document supersedes and replaces all information previously supplied.
The technical information in this document loses its validity with the next edition. Although the information is
believed to be accurate, no responsibility is assumed for inaccuracies. Specifications and other documents
mentioned in this document are subject to change without notice. SMSC reserves the right to make changes to
this document and to the products at any time without notice. Neither the provision of this information nor the sale
of the described products conveys any licenses under any patent rights or other intellectual property rights of
SMSC or others. There are a number of patents and patents pending on the MOST technology and other
technologies. No rights under these patents are conveyed without any specific agreement between the users and
the patent owners. The products may contain design defects or errors known as anomalies, including but not
necessarily limited to any which may be identified in this document, which may cause the product to deviate from
published descriptions. Anomalies are described in errata sheets available upon request. SMSC products are not
designed, intended, authorized or warranted for use in any life support or other application where product failure
could cause or contribute to personal injury or severe property damage. Any and all such uses without prior
written approval of an officer of SMSC will be fully at your own risk. MediaLB, SMSC and MOST are registered
trademarks of Standard Microsystems Corporation (“SMSC”) or its subsidiaries. Other names mentioned may be
trademarks of their respective holders.
The Microchip name and logo, and the Microchip logo are registered trademarks of Microchip Technology
Incorporated in the U.S.A. and other countries.
SMSC disclaims and excludes any and all warranties, including without limitation any and all implied warranties of
merchantability, fitness for a particular purpose, title, and against infringement and the like, and any and all
warranties arising from any course of dealing or usage of trade. In no event shall SMSC be liable for any direct,
incidental, indirect, special, punitive, or consequential damages; or for lost data, profits, savings or revenues of
any kind; regardless of the form of action, whether based on contract; tort; negligence of SMSC or others; strict
liability; breach of warranty; or otherwise; whether or not any remedy of buyer is held to have failed of its essential
purpose, and whether or not SMSC has been advised of the possibility of such damages.
Application Note
Page 2
Copyright © 2006 - 2012 SMSC
Document Version: V4.0.X-1 Date: 2012-08-24
MOST Tool Kit
Application Examples
MOST Tool Kit
Application Examples
V4.0.X
Copyright © 2006 - 2012 SMSC
All rights reserved
Copyright © 2006 - 2012 SMSC
Document Version: V4.0.X-1 Date: 2012-08-24
Application Note
Page 3
MOST Tool Kit
Application Examples
Document History
Version
V4.0.X-1
Date
2012-08-24
V3.8.X-1
2011-09-26
Section
All
All
5.1.2.2
5.1.2.3
All
V3.6.X-1
2010-11-22
1.6
All
5 (old)
V3.4.X-2
V3.4.X-1
2010-06-10
5
5.1
5.1.2.2
All
2009-08-20
5
5.1.2.2,
6.1.2.3
All
All
1.2
2009-05-12
5
All
V1.3.0-1
2008-03-10
1.1
1.4
3.3
All
V1.2.0-1
2007-10-24
All
V1.0.X-2
2007-06-29
All
V3.2.X-1
V1.0.X-1
2006-12-13
Application Note
Page 4
1.5
1.6
Comment on changes
Microchip logo added.
Sections adapted for new version
Description of selection adapted in Figure 5-2
Video transmission via DTCP added.
Totally revised: description adapted as NSV2Example has
been removed, replaced by MOST Interface Control.
Section ‘Naming Conventions’ removed.
Description of mbtest, mbstream improved: They are
command line reference applications.
Chapter describing synchronous transmission of video
stream removed.
Description adapted (ffdshow is used now).
Description improved; mbstream and video file added.
Description revised, referring to a demo video file.
NSV2Example figures adapted according to the new GUI.
New start of the NSV2Example introduced.
Title renamed.
Sections merged (i.e., section 6.1.2.3 removed) and
revised.
Examples adapted due to the new MOST NetServices
Example.
NIC related sections removed.
New section: AN valid only for INIC related MOST PC
Interfaces.
New chapter added about isochronous transmission.
Examples adapted due to the new MOST NetServices
Example.
Content adapted.
New section: Information Sources
New section: Setting up a Gateway via MOST
MOST PCI Interface 150o added. Examples adapted
accordingly.
MOST PCI Interface 25o NIC added. Examples adapted
accordingly.
Document completely revised:
Examples also adapted for MOST PCI Interface 25o NIC.
Step by step instructions split in INIC and NIC specific
steps.
Title adapted.
Section added.
First version
Copyright © 2006 - 2012 SMSC
Document Version: V4.0.X-1 Date: 2012-08-24
MOST Tool Kit
Application Examples
Table of Contents
1
PREFACE .........................................................................................................................................7
1.1
1.2
1.3
1.4
1.5
Intended Use ............................................................................................................................. 7
Validity ....................................................................................................................................... 7
Scope of Delivery ...................................................................................................................... 7
Information Sources .................................................................................................................. 7
Terms ........................................................................................................................................ 8
2
INTRODUCTION ...............................................................................................................................9
3
THE MOST PC INTERFACE AS A NETWORK CARD .................................................................10
3.1
Folder Sharing......................................................................................................................... 10
3.1.1
Requirements................................................................................................................... 10
3.1.2
Step by Step Instructions ................................................................................................. 12
3.2
Sharing Printers ...................................................................................................................... 20
3.2.1
Requirements................................................................................................................... 20
3.2.2
Step-by-Step Instructions ................................................................................................ 21
3.3
Setting up a Gateway via MOST............................................................................................. 29
3.3.1
Requirements................................................................................................................... 29
3.3.2
Step-by-Step Instructions ................................................................................................ 30
4
THE MOST PC INTERFACE AS A SOUND CARD .......................................................................35
4.1
Playing Audio Using Winamp.................................................................................................. 35
4.1.1
Requirements................................................................................................................... 35
4.1.2
Step-by Step Instructions ................................................................................................. 36
4.2
Recording Audio Using Sound Recorder ................................................................................ 40
4.2.1
Requirements................................................................................................................... 40
4.2.2
Step-by Step Instructions ................................................................................................. 41
5
THE MOST PC INTERFACE AS A VIDEO CARD (ISOCHRONOUS TRANSMISSION) .............48
5.1
Playing a Video File ................................................................................................................ 48
5.1.1
Requirements................................................................................................................... 48
5.1.2
Step-by Step Instructions ................................................................................................. 49
5.1.2.1
Hook Up the MOST Network and Check Transmission ........................................... 49
5.1.2.2
Transmit and Display Video Stream ......................................................................... 53
5.1.2.3
DTCP Extension ....................................................................................................... 55
6
TROUBLESHOOTING ....................................................................................................................56
6.1
MOST Interface Control Cannot Be Started ........................................................................... 56
APPENDIX A: LIST OF FIGURES ........................................................................................................57
APPENDIX B: LIST OF TABLES ..........................................................................................................58
Copyright © 2006 - 2012 SMSC
Document Version: V4.0.X-1 Date: 2012-08-24
Application Note
Page 5
MOST Tool Kit
Application Examples
Application Note
Page 6
Copyright © 2006 - 2012 SMSC
Document Version: V4.0.X-1 Date: 2012-08-24
MOST Tool Kit
Application Examples
1 Preface
1.1 Intended Use
This SMSC product is intended to be used for developing, testing, or analyzing MOST based
multimedia products and systems by persons with experience in developing multimedia devices.
The operation of SMSC products is only admitted with original SMSC devices.
1.2 Validity
This application note is valid only for INIC based MOST PC Interfaces.
1.3 Scope of Delivery
This product is delivered with:
•
MOST PC Interface
•
Cables
•
USB stick: MOST Tool Kit Software containing
o
MOST Device Drivers
o
MOST Tool Foundation
o
User manuals
Check your shipment for completeness.
If you have any complaints direct them to [email protected] (Europe and Asia) or to
[email protected] (America). Providing the delivery note number eases the handling.
1.4 Information Sources
1. MOST Tool Kit Application Examples (this document) [1]
It offers a series of “recipes” to provide an understanding of some of the possibilities available
when using a MOST PC Interface.
2. MOST Driver Utilities [2]
It describes small utilities installed together with the MOST Driver stack:
• MOST Control Panel
• MOST Video Viewer
• mbtest
3. MOST Tool Kit Installation Guide [3]
It covers:
• a software overview for INIC based MOST PC Interfaces
• the installation of the MOST PC Interfaces
• the installation of the drivers
• the installation of the MOST Tool Foundation
• the removal of the software installations
Copyright © 2006 - 2012 SMSC
Document Version: V4.0.X-1 Date: 2012-08-24
Application Note
Page 7
MOST Tool Kit
Application Examples
1.5 Terms
Within this manual, the following terms are used for improving readability:
Terms
Description
CD
Compact Disc
DTCP
Digital Transmission Content Protection
ePHY
electrical Physical Layer
FPGA
Field Programmable Gate Array
FW
Firmware
GraphEdit
GraphEdit is a visual tool for building and testing filter graphs.
HW
Hardware
INIC
Intelligent Network Interface Controller
INIC based
MOST PC Interfaces
•
•
•
MOST PCI Interface 150o
MOST PCI Interface 50e
MOST PCI Interface 25o
MediaLB
Media Local Bus
MOST
Media Oriented Systems Transport
MOST NDIS adapter /
driver
Driver for network device on a MOST PC Interface
oPHY
optical Physical Layer
OptoLyzer OL3XXX
This is the hardware of the OptoLyzer G2 3XXX (e.g., an OptoLyzer OL3025o, an
OptoLyzer OL3050e, or an OptoLyzer OL3150o).
OS
Operating System
PC
Personal Computer
PCI
Peripheral Component Interconnect
PS
Program streaming
Quadlet
4 byte-wide units on the MOST Frame
Schwan.ts,
SchwanHD1.ts,
SchwanHD2.ts,
smsc_demo.mpg
Special video streams. They can be found on the MOST Tool Foundation CD. Click
“Browse CD”, and then browse to the folder Data/Add_ons/Demo Files.
SW
Software
TS
Transport streaming
Table 1-1: Terms
Application Note
Page 8
Copyright © 2006 - 2012 SMSC
Document Version: V4.0.X-1 Date: 2012-08-24
MOST Tool Kit
Application Examples
2 Introduction
This application note offers a series of “recipes” to provide an understanding of some of the
possibilities available when using a MOST PC Interface. A MOST PC Interface refers to either a
MOST PCI Interface 25o, a MOST PCI Interface 50e or a MOST PCI Interface 150o. Each of them
can be used in the examples provided in this documentation.
The MOST PC Interface is addressed to different kinds of users:
1. Users who run only their applications (network functionality, sound and video) using the MOST PC
Interface. Several examples demonstrate by using the MOST Interface Control how the MOST PC
Interface can be used.
2. MOST NetServices developers interested in using the MOST NetServices V2.x Basic Example as
a reference for their own MOST NetServices application development have to contact the
technical support to get the sources and for specific licenses. Addresses can be found on page 2.
The application note provides typical examples for:
•
The MOST PC Interface as a Network Card (chapter 3) – This section contains examples that
show how to use the MOST Interface Control to build network connections on separate PCs.
•
The MOST PC Interface as a Sound Card (chapter 4) – This section contains examples for
streaming synchronous data to and from the MOST network using Winamp and Sound
Recorder.
•
The MOST PC Interface as a Video Card (Isochronous Transmission) (chapter 5) – This
section shows an example how video files can be transferred and played over the MOST
network using a MOST PC Interface.
Right now the recipes are described if a MOST PCI Interface 150o, MOST PCI Interface 50e, or a
MOST PCI Interface 25o is used. All steps that are necessary are described for executing the recipes.
In addition, the sections provide information about which tools (both hardware and software) are
necessary to execute an example (i.e., a recipe). Some software that is used in the following
examples can be downloaded from the Internet, found on the CD or purchased from the company that
produces the suggested software.
Copyright © 2006 - 2012 SMSC
Document Version: V4.0.X-1 Date: 2012-08-24
Application Note
Page 9
MOST Tool Kit
Application Examples
3 The MOST PC Interface as a Network Card
The MOST PC Interface acts similar to a network card. Thus it can be used to network PCs. The PCs
equipped with a MOST PC Interface can share folders, printers, files, Internet connection etc. The
following section outlines some of the possibilities available for networking using the MOST PC
Interface.
3.1 Folder Sharing
This section outlines how to use the MOST PC Interface as a network card in order to share folders of
the operating system across the MOST network.
3.1.1 Requirements
1. 2 PCs running Windows 7 or Windows XP with administrator rights, and a MOST PC Interface
installed on each PC.
2. MOST Driver Stack is installed.
3. The MOST PC Interfaces have to be switched to static IP address as described in the user
manual “MOST Tool Kit Installation Guide”.
4. INIC based MOST PC Interface (see page 8):
Installation of MOST Tool Foundation inclusive the MOST Interface Control delivered on
an USB stick.
Notice
If the MOST Interface Control connected to a MOST PC Interface starts the
MOST network for the first time, the OS installs the MOST NDIS Adapter. For
the installation of the MOST NDIS Driver switch to the MOST Tool Kit
Installation Guide [3].
5. The Windows firewall has to be switched off for this example. Therefore start Control Panel,
double-click Windows Firewall and select “Off”.
Application Note
Page 10
Copyright © 2006 - 2012 SMSC
Document Version: V4.0.X-1 Date: 2012-08-24
MOST Tool Kit
Application Examples
Figure 3-1: Firewall Switched Off
Copyright © 2006 - 2012 SMSC
Document Version: V4.0.X-1 Date: 2012-08-24
Application Note
Page 11
MOST Tool Kit
Application Examples
3.1.2 Step by Step Instructions
1. Hook up the MOST network as follows:
Figure 3-2: MOST Network Setup - Share Folder
2. On the PCs, make sure to log on to an account with administrator privileges.
Application Note
Page 12
Copyright © 2006 - 2012 SMSC
Document Version: V4.0.X-1 Date: 2012-08-24
MOST Tool Kit
Application Examples
3. On both PCs: Start the MOST Interface Control. Click “Start | Programs | SMSC | MOST Tool
1
Foundation | MICtrl”.
4. Ensure all MOST nodes in the MOST system have a unique node address. On both PCs
switch to the Node tab and set e.g., on PC1 node address 0x0100 and e.g., on PC2 node
address 0x0101.
5. PC1: Switch back to the Mode tab and select “Master”. The MOST network should have light
and lock. The status bar shows the status of the connection, the network state and the lock
state. When switching back to the Node tab the MOST Interface Control shows the current
values of the Node Address, the Group Address, the Node Position Address and the
Boundary.
6. Verify the modifications are valid. Open a Command Prompt window on each PC (PC1 and
PC2 as shown in Figure 3-2 on page 12). Determine the IP address of each MOST PC
Interface by typing “ipconfig /all” at the command prompt and press the “Enter” key.
Afterwards a list of the current interfaces is displayed.
2
Find the entry for e.g., “Network Device on MOST PC Interface ” (Windows XP) and locate the
“IP Address” entry. The values for IP address and Subnet Mask have to match the values
entered during the installation of the MOST NDIS driver (described in the user manual “MOST
Tool Kit Installation Guide”). The “Physical Address” has to show the node address that has
been changed in the Node tab of the MOST Interface Control.
If there are other entries, disable them prior to continuing (see Windows XP help files for
instructions on disabling Network adapters).
1
2
If the MOST Interface Control cannot be started refer to chapter 6 on page 32.
MOST PC Interface stands for the assembled interface.
Copyright © 2006 - 2012 SMSC
Document Version: V4.0.X-1 Date: 2012-08-24
Application Note
Page 13
MOST Tool Kit
Application Examples
Figure 3-3: Ipconfig Command for PC1, Showing 192.168.1.1 for IP Address
Figure 3-4: Ipconfig Command for PC2, Showing 192.168.1.2 for IP Address
7. Now use the ping command to assure that each PC can reach the other.
Figure 3-5: Send Ping from PC2 to PC1
Application Note
Page 14
Copyright © 2006 - 2012 SMSC
Document Version: V4.0.X-1 Date: 2012-08-24
MOST Tool Kit
Application Examples
Figure 3-6: Send Ping from PC1 to PC2
8. Open the Windows Explorer on PC1 and create a new folder that will be shared with PC2.
Name the new folder as desired. Create a file (e.g., a text file).
9. Right-click on the newly created folder and choose “Sharing and Security…” from the menu.
Figure 3-7: Right Click Menu for the New Folder Named ShareFolderViaMOST
10. The following dialog window will be presented:
Copyright © 2006 - 2012 SMSC
Document Version: V4.0.X-1 Date: 2012-08-24
Application Note
Page 15
MOST Tool Kit
Application Examples
Figure 3-8: ShareFolderViaMOST Properties Dialog Box
11. Click on the “Share this folder” radio button and enter a name (e.g., ShareFolderViaMOST).
Application Note
Page 16
Copyright © 2006 - 2012 SMSC
Document Version: V4.0.X-1 Date: 2012-08-24
MOST Tool Kit
Application Examples
Figure 3-9: Share Folder via MOST Properties Dialog Box 2
12. Click Permissions . A new window opens.
Copyright © 2006 - 2012 SMSC
Document Version: V4.0.X-1 Date: 2012-08-24
Application Note
Page 17
MOST Tool Kit
Application Examples
Figure 3-10: Set Permissions
13. Select “Everyone” and then select “Full Control: Allow”. Afterwards click OK . Now it is possible
to read or to change data on the shared folder from another PC.
14. On PC2 open the Windows Explorer. Enter the IP of PC1 in the address e.g., \\192.168.1.1. If
a password is requested, type in the local administrator log in and password for that PC1 (as
stated in the “Requirements” section, access to the administrator account is necessary).
Figure 3-11: Shared Folder on PC2
Application Note
Page 18
Copyright © 2006 - 2012 SMSC
Document Version: V4.0.X-1 Date: 2012-08-24
MOST Tool Kit
Application Examples
15. Double-click the folder “ShareFolderViaMOST”.
16. The file (e.g., the test file) created on PC1 should be available on PC2.
Figure 3-12: Shared Folder on PC2 - File
Copyright © 2006 - 2012 SMSC
Document Version: V4.0.X-1 Date: 2012-08-24
Application Note
Page 19
MOST Tool Kit
Application Examples
3.2 Sharing Printers
This section outlines how to share a printer inside the Windows operating system with another PC
connected to the MOST network using the MOST PC Interface as a network card.
3.2.1 Requirements
1. 2 PCs running Windows 7 or Windows XP with administrator rights, and a MOST PC Interface
installed on each PC.
2. MOST Driver Stack is installed.
3. The MOST PC Interfaces have to be switched to static IP address as described in the user
manual “MOST Tool Kit Installation Guide”.
4. INIC based MOST PC Interface (see page 8):
•
Installation of MOST Tool Foundation inclusive the MOST Interface Control delivered
on an USB stick.
Notice
If the MOST Interface Control connected to a MOST PC Interface starts the
MOST network for the first time, the OS’s hardware wizard detects the MOST
NDIS Adapter. For the installation of the MOST NDIS Driver switch to the
MOST Tool Kit Installation Guide [3].
5. It is assumed all MOST nodes in the MOST system have a unique node address. Check it
according to step 4 on page 13.
Application Note
Page 20
Copyright © 2006 - 2012 SMSC
Document Version: V4.0.X-1 Date: 2012-08-24
MOST Tool Kit
Application Examples
3.2.2 Step-by-Step Instructions
1. Hook up the MOST network as follows:
Figure 3-13: MOST Network Setup - Share Printer
2. On the PCs, make sure to log on to an account with administrator privileges.
3. On both PCs: Start the MOST Interface Control. Click “Start | Programs | SMSC | MOST Tool
3
Foundation | MICtrl” .
4. PC1: Switch to the Mode tab if necessary and select “Master”. The MOST network should
have light and lock. The status bar shows the status of the connection, the network state and
the lock.
5. Open a Command Prompt window on each PC (PC1 and PC2 as shown in Figure 3-13 on
page 21). Determine the IP address of each MOST PC Interface by typing “ipconfig /all” at the
command prompt and press the “Enter” key.
3
If the MOST Interface Control cannot be started refer to chapter 6 on page 32.
Copyright © 2006 - 2012 SMSC
Document Version: V4.0.X-1 Date: 2012-08-24
Application Note
Page 21
MOST Tool Kit
Application Examples
6. Afterwards a list of the current interfaces is displayed. Find the entry for e.g., “Network Device
4
on MOST PC Interface ” (Windows XP) and locate the “IP Address” entry. The values for IP
address and Subnet Mask have to match the values entered during the installation of the
MOST NDIS driver (described in the user manual “MOST Tool Kit Installation Guide”). If there
are other entries, disable them prior to continuing (see Windows XP help files for instructions
on disabling Network adapters).
Figure 3-14: Ipconfig Command for PC1, Showing 192.168.1.1 for IP Address (e.g., for INIC)
Figure 3-15: Ipconfig Command for PC2, Showing 192.168.1.2 for IP Address (e.g., for INIC)
4
MOST PC Interface stands for the assembled interface.
Application Note
Page 22
Copyright © 2006 - 2012 SMSC
Document Version: V4.0.X-1 Date: 2012-08-24
MOST Tool Kit
Application Examples
7. Now use the ping command to assure that each PC can reach the other.
Figure 3-16: Send Ping from PC2 to PC1
Figure 3-17: Send Ping from PC1 to PC2
8. Connect a printer to PC1, and load the appropriate drivers. Once the printer is fully installed,
rename it e.g., to “Printer on PC1”. Then go to the “Start” menu and click on “Settings”
followed by “Printers and Faxes” (if the “Printers and Faxes” window is not already available).
Figure 3-18: Printers Window Displaying Newly Installed Printer
Copyright © 2006 - 2012 SMSC
Document Version: V4.0.X-1 Date: 2012-08-24
Application Note
Page 23
MOST Tool Kit
Application Examples
9. Right-click on the printer that was just installed and select “Sharing…”.
Figure 3-19: Right Click Menu for Installed Printer
10. Click on the “Share this printer” radio button. Type in a name (e.g., PC1Printer), or leave the
suggested sharing name. Select “List in the directory”.
Application Note
Page 24
Copyright © 2006 - 2012 SMSC
Document Version: V4.0.X-1 Date: 2012-08-24
MOST Tool Kit
Application Examples
Figure 3-20: Sharing Properties for “Printer on PC1”
11. If PC1 is running on a different operating system from that of PC2, use the “Additional Drivers”
button (shown in Figure 3-20) to install the necessary additional driver. By default the
operating system Windows XP is supported immediately.
12. Click OK to finish sharing the printer. This printer is now available to any other PC on the
MOST network.
13. To establish a connection among PC1 and PC2 open the Windows Explorer on PC2. Enter
the IP of PC1 in the address e.g., \\192.168.1.1. If a password is requested, type in the local
administrator login and password for that PC1.
Copyright © 2006 - 2012 SMSC
Document Version: V4.0.X-1 Date: 2012-08-24
Application Note
Page 25
MOST Tool Kit
Application Examples
14. On PC2, open the Control Panel, and then double-click “Printers and Faxes”.
Figure 3-21: Printers Window
15. Double-click on the “Add Printer” icon.
Figure 3-22: Add Printer Wizard Window 1
16. Select “A network printer, or a printer attached to another computer” and click Next .
Application Note
Page 26
Copyright © 2006 - 2012 SMSC
Document Version: V4.0.X-1 Date: 2012-08-24
MOST Tool Kit
Application Examples
Figure 3-23: Add Printer Wizard Window
17. Select “Connect to this printer…” and enter the server and printer name separated by a back
slash e.g., \\192.168.1.1\Printer on PC1 on 192.168.1.1 and click Next .
18. Specify in the next window whether the printer shall be the default printer or not and click Next .
Figure 3-24: Add Printers Wizard, Final Step
Copyright © 2006 - 2012 SMSC
Document Version: V4.0.X-1 Date: 2012-08-24
Application Note
Page 27
MOST Tool Kit
Application Examples
19. Click Finish .
Figure 3-25: Printers Window Showing the PC1 Printer
20. The printer is now available and ready for printing through the MOST network from any
application.
Application Note
Page 28
Copyright © 2006 - 2012 SMSC
Document Version: V4.0.X-1 Date: 2012-08-24
MOST Tool Kit
Application Examples
3.3 Setting up a Gateway via MOST
This section specifies how to set up a PC as a gateway and how the PC’s Internet connection is used
from another PC connected via MOST PC Interfaces acting as network cards.
3.3.1 Requirements
1. 2 PCs running Windows 7 or Windows XP with administrator rights, and a MOST PC Interface
installed on each PC.
2. MOST Driver Stack is installed.
3. The MOST PC Interfaces have to be switched to static IP address as described in the user
manual “MOST Tool Kit Installation Guide”.
4. INIC based MOST PC Interface (see page 8):
Installation of MOST Tool Foundation inclusive the MOST Interface Control delivered on
an USB stick.
Notice
If the MOST Interface Control connected to a MOST PC Interface starts the
MOST network for the first time, the OS’s hardware wizard detects the MOST
NDIS Adapter. For the installation of the MOST NDIS Driver switch to the
MOST Tool Kit Installation Guide [3].
5. It is assumed all MOST nodes in the MOST system have a unique node address. Check it
according to step 4 on page 13.
Copyright © 2006 - 2012 SMSC
Document Version: V4.0.X-1 Date: 2012-08-24
Application Note
Page 29
MOST Tool Kit
Application Examples
3.3.2 Step-by-Step Instructions
1. Hook up the MOST network as follows:
Figure 3-26: MOST Network Setup – Share Internet Connection
2. On the PCs, make sure to log on to an account with administrator privileges.
3. On both PCs: Start the MOST Interface Control. Click “Start | Programs | SMSC | MOST Tool
5
Foundation | MICtrl” .
4. PC1: Switch to the Mode tab if necessary and select “Master”. The MOST network should
have light and lock. The status bar shows the status of the connection, the network state and
the lock.
5. Open a Command Prompt window on each PC (PC1 and PC2 as shown in Figure 3-26 on
page 30). Determine the IP address of each MOST PC Interface by typing “ipconfig /all” at the
command prompt and press the “Enter” key.
5
If the MOST Interface Control cannot be started refer to chapter 6 on page 32.
Application Note
Page 30
Copyright © 2006 - 2012 SMSC
Document Version: V4.0.X-1 Date: 2012-08-24
MOST Tool Kit
Application Examples
6. Afterwards a list of the current interfaces is displayed. Find the entry for e.g., “Network Device
6
on MOST PC Interface2 ” (Windows XP) and locate the “IP Address” entry. The values for IP
address and Subnet Mask have to match the values entered during the installation of the
MOST NDIS driver (described in the user manual “MOST Tool Kit Installation Guide”). If there
are other entries, disable them prior to continuing (see Windows XP help files for instructions
on disabling Network adapters).
Figure 3-27: Ipconfig Command for PC1, Showing 192.168.1.1 for IP Address (e.g., for INIC)
Figure 3-28: Ipconfig Command for PC2, Showing 192.168.1.2 for IP Address (e.g., for INIC)
6
MOST PC Interface stands for the assembled interface.
Copyright © 2006 - 2012 SMSC
Document Version: V4.0.X-1 Date: 2012-08-24
Application Note
Page 31
MOST Tool Kit
Application Examples
7. Now use the ping command to assure that each PC can reach the other.
Figure 3-29: Send Ping from PC2 to PC1
Figure 3-30: Send Ping from PC1 to PC2
8. In a next step the Ethernet connection of PC1 is shared i.e., a gateway is set up. Go to the
Control Panel.
Notice
9.
10.
11.
12.
If the steps described below do not match due to differences to the corporate network (e.g.,
the input of the IP address), please ask the system administrator for help.
PC1: Double-click Network Connections.
PC1: Double-click the Ethernet connection.
PC1: Click Properties .
PC1: Switch to the tab ‘Advanced’.
Application Note
Page 32
Copyright © 2006 - 2012 SMSC
Document Version: V4.0.X-1 Date: 2012-08-24
MOST Tool Kit
Application Examples
Figure 3-31: Sharing Internet Connection
13. PC1: Select “Allow other network users to connect through this computer’s Internet
connection”.
14. PC1: Click OK .
15. PC2: Go to the Control Panel.
16. PC2: Double-click Network Connections.
17. PC2: Double-click the MOST network connection having the device name “Network Device on
MOST PC Interface” where MOST PC Interface stands for one of these interfaces:
o MOST PCI Interface 25o
o MOST PCI Interface 50e
o MOST PCI Interface 150o
18. PC2: Click Properties.
19. PC2: Choose ‘Internet Protocol (TCP/IP)’ and click Properties .
20. PC2: Enter the MOST network IP address of PC1 in “Default gateway” (e.g., 192.168.1.1).
21. PC2: Select “Use the following DNS server addresses:”.
22. PC2: Enter the MOST network IP address of PC1 in “Preferred DNS server” (e.g.,
192.168.1.1).
Copyright © 2006 - 2012 SMSC
Document Version: V4.0.X-1 Date: 2012-08-24
Application Note
Page 33
MOST Tool Kit
Application Examples
Figure 3-32: Specifying DNS Server
23. Click OK .
24. Start the Internet Explorer on PC2 and test the gateway connection.
Application Note
Page 34
Copyright © 2006 - 2012 SMSC
Document Version: V4.0.X-1 Date: 2012-08-24
MOST Tool Kit
Application Examples
4 The MOST PC Interface as a Sound Card
This section describes how to stream synchronous data onto and off of the MOST network. The goal
of this section is to show how a MOST PC Interface can have the same functionality as that of a sound
card, or even multiple sound cards.
4.1 Playing Audio Using Winamp
The example in this section uses the following applications: MOST Interface Control and the software
Winamp. It is part of the MOST Tool Foundation installation. It controls startup and shutdown of the
MOST network and manages the channel allocation for INIC related MOST PC Interfaces. Winamp
streams audio data to the MOST network using a MOST PC Interface. This software can be
downloaded from the Internet at www.winamp.com.
4.1.1 Requirements
1. A PC running Windows 7 or Windows XP with administrator rights, and a MOST PC Interface
installed on each PC.
2. MOST Driver Stack is installed.
3. INIC based MOST PC Interface (see page 8):
•
Installation of MOST Tool Foundation inclusive the MOST Interface Control delivered
on an USB stick.
Notice
If the MOST Interface Control connected to a MOST PC Interface starts the
MOST network for the first time, the OS’s hardware wizard detects the MOST
NDIS Adapter. For the installation of the MOST NDIS Driver switch to the
MOST Tool Kit Installation Guide [3].
4. Winamp (used version in this application note: v5.5)
5. Optional: OptoLyzer OL3XXX. Use it (e.g.) to listen to the allocated quadlets.
6. Optional: Another PC running Windows 7 or Windows XP with administrator rights, and a
MOST PC Interface installed with the current driver version.
Copyright © 2006 - 2012 SMSC
Document Version: V4.0.X-1 Date: 2012-08-24
Application Note
Page 35
MOST Tool Kit
Application Examples
4.1.2 Step-by Step Instructions
1. Hook up the MOST network as follows:
Figure 4-1: MOST Network Setup - Use Winamp
2. When logging on to PC1, be sure to log in as administrator on that particular machine.
Application Note
Page 36
Copyright © 2006 - 2012 SMSC
Document Version: V4.0.X-1 Date: 2012-08-24
MOST Tool Kit
Application Examples
3. On both PCs: Start the MOST Interface Control. Click “Start | Programs | SMSC | MOST Tool
7
Foundation | MICtrl” .
4. PC1: Switch to the Mode tab if necessary and select “Master”. The MOST network should
have light and lock. The status bar shows the status of the connection, the network state and
the lock.
5. PC1: Switch to the Media tab and click Add Stream In and select the preset ‘4 Byte Stereo’. In
the ‘Add Connect Stream Details’ window insert a friendly name, set the connection type to
‘Synchronous Connection’, select direction ‘In’ and a channel width of ‘4’. The offset is
adapted automatically. Click OK . Now the MOST PC Interface allocates a channel (a data
quadlet assuming a bandwidth “4” is specified) on the MOST network and is ready for
streaming data. The corresponding connection label is displayed, e.g., “Label: 0000” for a
MOST25 system or a “Label: 0042” for a MOST50 system or “Label: 0043” for a MOST150
system (Figure 4-2). Sinks (e.g., Winamp in this example) can connect to this channel and
process streamed data.
Figure 4-2: Settings in the MOST Interface Control
6. Start Winamp.
7. In the menu bar click “Options | Preferences” to open the “Preferences” window.
8. Choose “Output” in the left hand column, select the current version of “DirectSound output” in
the “Output plug-ins” range and then click the Configure . (The selection of “waveOut output” is
also supported).
7
If the MOST Interface Control cannot be started refer to chapter 6 on page 32.
Copyright © 2006 - 2012 SMSC
Document Version: V4.0.X-1 Date: 2012-08-24
Application Note
Page 37
MOST Tool Kit
Application Examples
Figure 4-3: Winamp Output Preferences
9. Under Windows XP, click on the drop down button on the “Device” tab to display the available
channels. They are labeled “MOST Audio Channel 0 (or MOST Render 0)”, “MOST Audio
Channel 1 (or MOST Render 1)”, etc. Choose “MOST Audio Channel 0” (or MOST Render 0).
In case you have assembled more than one MOST PCI Interface you can assign a friendly
name to the channels. Therefor refer to the description of the MOST Control Panel in MOST
Driver Utilities [2].
Application Note
Page 38
Copyright © 2006 - 2012 SMSC
Document Version: V4.0.X-1 Date: 2012-08-24
MOST Tool Kit
Application Examples
Figure 4-4: Winamp DirectSound Output Settings
10. Click OK , and click Close in the “Preferences” window to continue.
11. Winamp is now configured to output the played audio data onto the MOST network. Open any
audio file in Winamp (to learn how to do this, utilize the Winamp help) and click the play
button.
12. The audio is now being streamed to the MOST network.
The audio data on the MOST network can be listened e.g., using an OptoLyzer OL3XXX. If listening
via the OptoLyzer OL3XXX is desired refer to OptoLyzer OL3XXX’s user manual. Recording of
transferred audio data is described in the next section.
Copyright © 2006 - 2012 SMSC
Document Version: V4.0.X-1 Date: 2012-08-24
Application Note
Page 39
MOST Tool Kit
Application Examples
4.2 Recording Audio Using Sound Recorder
In this example Winamp plays audio data on PC1 onto the MOST network, while a Sound Recorder
started on PC2 records the data coming from the MOST network to a file.
4.2.1 Requirements
1. 2 PCs running Windows 7 or Windows XP with administrator rights, and a MOST PC Interface
installed on each PC.
2. MOST Driver Stack is installed.
3. INIC based MOST PC Interface (see page 8):
•
Installation of MOST Tool Foundation inclusive the MOST Interface Control delivered
on an USB stick.
Notice
If the MOST Interface Control connected to a MOST PC Interface starts the
MOST network for the first time, the OS’s hardware wizard detects the MOST
NDIS Adapter. For the installation of the MOST NDIS Driver switch to the
MOST Tool Kit Installation Guide [3].
4. Winamp (this software can be downloaded from the Internet at www.winamp.com)
5. Sound Recorder has to be installed (normally found under ‘Start | All Programs |
Accessories’).
6. It is assumed all MOST nodes in the MOST system have a unique node address. Check it
according to step 4 on page 13.
7. It is assumed a consecutive allocation of channels is possible without any gap.
Application Note
Page 40
Copyright © 2006 - 2012 SMSC
Document Version: V4.0.X-1 Date: 2012-08-24
MOST Tool Kit
Application Examples
4.2.2 Step-by Step Instructions
1. Hook up the MOST network as follows:
Figure 4-5: MOST Network Setup - Use Sound Recorder
2. On the PCs, make sure to log on to an account with administrator privileges.
Copyright © 2006 - 2012 SMSC
Document Version: V4.0.X-1 Date: 2012-08-24
Application Note
Page 41
MOST Tool Kit
Application Examples
3. On both PCs: Start the MOST Interface Control. Click “Start | Programs | SMSC | MOST Tool
8
Foundation | MICtrl” .
4. PC1: Switch to the Mode tab if necessary and select “Master”. The MOST network should
have light and lock. The status bar shows the status of the connection, the network state and
the lock.
5. PC1, PC2: Use the ping command to assure that each PC can reach the other according to
step 7 in section 3.1.2 on page 12.
Figure 4-6: Settings in the MOST Interface Control (PC1)
6. PC1: Switch to the Media tab, click Add Stream In and select the preset ‘4 Byte Stereo’. In the
‘Add Connect Stream Details’ window insert a friendly name, set the connection type to
‘Synchronous Connection’, select direction ‘In’ and a channel width of ‘4’. The offset is
adapted automatically. Click OK. Now the MOST PC Interface allocates a channel (a data
quadlet assuming a bandwidth “4” is specified) on the MOST network and is ready for
streaming data. The corresponding connection label is displayed, e.g., “Label: 0000” for a
MOST25 system or a “Label: 0042” for a MOST50 system or “Label: 0043” for a MOST150
system (Figure 4-2). Sinks (e.g., Winamp in this example) can connect to this channel and
process streamed data.
7. PC2: Start the MOST Interface Control. Switch to the Media tab, click Add Stream Out and
select the preset ‘4 Byte Stereo’. In the ‘Add Connect Stream Details’ window insert a friendly
name, set the connection type to ‘Synchronous Connection’, select direction ‘Out’ and a
channel width of ‘4’. Add the Channel Label according to the source specified on PC1. The
offset is adapted automatically. Only for a MOST25 network check ‘Label Bytes’ and enter
them. Click OK .
8
If the MOST Interface Control cannot be started refer to chapter 6 on page 32.
Application Note
Page 42
Copyright © 2006 - 2012 SMSC
Document Version: V4.0.X-1 Date: 2012-08-24
MOST Tool Kit
Application Examples
Figure 4-7: MOST Interface Control: Settings on PC2
8. Start Winamp on PC1.
9. In the menu bar click “Options | Preferences” to open the “Preferences” window.
10. Choose “Output” in the left hand column, select the current version of “DirectSound output” in
the “Output plug-ins” range and then click Configure .
Copyright © 2006 - 2012 SMSC
Document Version: V4.0.X-1 Date: 2012-08-24
Application Note
Page 43
MOST Tool Kit
Application Examples
Figure 4-8: Winamp Output Preferences
11. Under Windows XP, choose “MOST Audio Channel 0” from the drop down menu on the
“Device” tab. Under Windows XP, the selections are labeled “MOST Audio Channel 0 (or
MOST Render 0)”, “MOST Audio Channel 1 (or MOST Render 1)”, etc.
Application Note
Page 44
Copyright © 2006 - 2012 SMSC
Document Version: V4.0.X-1 Date: 2012-08-24
MOST Tool Kit
Application Examples
Figure 4-9: Winamp DirectSound Output Settings
12. Click OK in Figure 4-9, and click Close in the “Preferences” window to continue.
13. Winamp is now configured to output the audio data played onto the MOST network. Open any
audio files in Winamp (to learn how to do this, utilize the Winamp help) and click the play
button.
14. The audio is now being streamed to the MOST network.
15. On PC2 start the Sound Recorder by clicking on “Start | Programs | Accessories |
Entertainment | Sound Recorder”.
Figure 4-10: Sound Recorder
16. Click on the “Edit” menu, and select “Audio Properties” from the menu.
Copyright © 2006 - 2012 SMSC
Document Version: V4.0.X-1 Date: 2012-08-24
Application Note
Page 45
MOST Tool Kit
Application Examples
Figure 4-11: Sound Recorder Edit Menu
17. In the “Sound recording” section, choose “MOST Audio Channel 0 (or MOST Capture 0)” from
the drop down list.
Figure 4-12: Audio Properties for the Sound Recorder
Application Note
Page 46
Copyright © 2006 - 2012 SMSC
Document Version: V4.0.X-1 Date: 2012-08-24
MOST Tool Kit
Application Examples
18. Click OK .
19. Restart the Sound Recorder. Now it is ready for recording.
20. Now click on the record button to start recording.
Figure 4-13: Sound Recorder Recording Audio from the MOST Network
21. The recorded file can be saved, played, or analyzed depending on the desired application.
Copyright © 2006 - 2012 SMSC
Document Version: V4.0.X-1 Date: 2012-08-24
Application Note
Page 47
MOST Tool Kit
Application Examples
5 The MOST PC Interface as a Video Card
(Isochronous Transmission)
This chapter describes how a video program stream is created and transferred isochronously over a
MOST network and finally can be displayed on another PC. This example can be only executed in a
MOST150 network i.e., MOST PCI Interfaces 150o have to be installed.
5.1 Playing a Video File
The example in this section uses the following applications: MOST Interface Control, mbtest and
mbstream. The MOST Interface Control is provided on the CD. It controls startup and shutdown of the
MOST network and manages the channel allocation for INIC related MOST PC Interfaces. Mbtest and
mbstream are applications started in the Command Prompt window. They are installed together with
the MOST Driver Stack. Mbtest is used to send an isochronous data stream to the MOST network.
Started on a second PC mbtest receives the transferred isochronous data stream and checks by using
a counter whether the transmission is complete. Mbtest uses a fixed bandwidth i.e., timestamps are
not considered (see section 5.1.2.1 on page 49). If an optimized transmission shall be tested, i.e., the
timestamps have to be considered, mbstream has to be used instead. It adjusts the payload data to
send (see section 5.1.2.2 on page 53). This means mbtest is used to check whether the transmission
is possible whereas mbstream is used to transmit real videos. In the example beneath the MPEG
decoder functionality of the ffdshow (revision 3119) is taken for verifying. ffdshow is a free media
encoder and decoder that supports a lot of video and audio formats.
5.1.1 Requirements
1. 2 PCs running Windows 7 or Windows XP with administrator rights, and a MOST PCI
Interface 150o installed on each PC.
2. MOST Driver Stack is installed.
3. MOST150 network
4. MOST PCI Interface 150o V2:
•
Installation of MOST Tool Foundation inclusive the MOST Interface Control delivered
on an USB stick.
Notice
If the MOST Interface Control connected to a MOST PC Interface starts the
MOST network for the first time, the OS’s hardware wizard detects the MOST
NDIS Adapter. For the installation of the MOST NDIS Driver switch to the
MOST Tool Kit Installation Guide [3].
5. mbtest and mbstream applications installed together with the MOST Driver Stack.
6. Transport stream video files, examples can be found on the CD in the folder Add_ons\Demo
Files.
7. ffdshow (rev. 3119 is used in this example) is installed and configured, i.e., the video and
audio formats that are needed are enabled. The used revision can be downloaded from the
Internet.
8. It is assumed all MOST nodes in the MOST system have a unique node address. Check it
according to step 4 on page 13.
Application Note
Page 48
Copyright © 2006 - 2012 SMSC
Document Version: V4.0.X-1 Date: 2012-08-24
MOST Tool Kit
Application Examples
5.1.2 Step-by Step Instructions
5.1.2.1 Hook Up the MOST Network and Check Transmission
1. Hook up the MOST network as follows:
Figure 5-1: MOST Network Setup - Use MOST Video Viewer
2. On both PCs, make sure to log on to an account with administrator privileges.
3. On both PCs: Start the MOST Interface Control. Click “Start | Programs | SMSC | MOST Tool
9
Foundation | MICtrl” .
4. PC1: Switch to the Mode tab if necessary and select “Master”. The MOST network should
have light and lock. The status bar shows the status of the connection, the network state and
the lock.
9
If the MOST Interface Control cannot be started refer to chapter 6 on page 32.
Copyright © 2006 - 2012 SMSC
Document Version: V4.0.X-1 Date: 2012-08-24
Application Note
Page 49
MOST Tool Kit
Application Examples
Figure 5-2: Settings in the MOST Interface Control (PC1)
5. PC1: Switch to the Media tab, click Add Stream In and select the preset ‘16 Byte Video’. In the
‘Add Connect Stream Details’ window insert a friendly name, set the connection type to
‘Isochronous Connection’, select direction ‘In’ and the channel index ‘00’ (alternatively ‘01’
e.g., if ‘00’ is already used or vice versa). Select a channel width of ‘16’ and use the ‘Default’
packet width. Click OK. This allocates four isochronous source data quadlets (16 byte-wide
unit on the MOST frame) to the MOST PC Interface. The corresponding label is assigned
automatically e.g., “Label: 004F” in Figure 5-2.
6. PC2: Start the MOST Interface Control. Switch to the Media tab, click Add Stream Out and
select the preset ‘16 Byte Video’. In the ‘Add Connect Stream Details’ window insert a friendly
name, set the connection type to ‘Isochronous Connection’, select direction ‘Out’ and the
same channel index as on PC1. Adapt the channel width to ‘16’. Add the Channel Label and
the packet width (‘Default’) according to the source specified on PC1. This routes the four
isochronous source data quadlets (16 byte-wide unit on the MOST frame) from the MOST PC
Interface.
7. PC1: Open a Windows Explorer. Navigate to the installation folder specified during the
installation of the MOST Driver Stack (described in the user manual “MOST Tool Kit
Installation Guide”). Assuming default settings have been accepted the path is as follows:
“C:\Program Files\SMSC\MOST Driver Stack\bin”.
8. PC1: Create a shortcut and adapt the properties for the target e.g., to:
C:\WINDOWS\system32\cmd.exe. Add the installation folder in “Start in” (e.g., “C:\Program
Files\SMSC\ MOST Driver Stack \bin”).
9. PC1: Double-click the shortcut. A Command Prompt window opens.
Figure 5-3: Command Prompt Window - Starting Mbtest for Sending
Application Note
Page 50
Copyright © 2006 - 2012 SMSC
Document Version: V4.0.X-1 Date: 2012-08-24
MOST Tool Kit
Application Examples
10. PC1: Enter “mbtest –d0 isopackettx 0”
where
mbtest is a small command line reference application designated to test the transmission
over the MOST network,
d is an optional parameter indicating a device number is following. In the case only one MOST
PC Interface is installed this optional parameter can be omitted. By default a device number
“0” is taken. If e.g., two MOST PC Interfaces are installed in PC2, it depends on the sequence
of the devices whether this parameter needs to be added or not. Use MOST Control Panel to
find out how many devices are installed on your PC. Click “Start | Programs | SMSC |
MOST Driver Stack | MOST Control Panel”.
0 is the number of the device (e.g., a MOST PCI Interface 150o device)
isopackettx is a command that sends a continuous isochronous data stream to the MOST
network,
0 is the first instance (there are two instances available).
11. PC1: Press the “Enter” key. This starts sending a continuous isochronous data stream to the
MOST150 network. Beneath the sent buffers are counted and displayed. (The action can be
stopped by pressing the “Q” and the “Enter” keys.)
12. PC2. Open a Windows Explorer. Navigate to the installation folder specified during the
installation of the MOST Driver Stack. Assuming default settings have been accepted the path
is as follows: “C:\Program Files\SMSC\MOST Driver Stack\bin”.
13. PC2: Create a shortcut and adapt the properties for the target e.g., to:
C:\WINDOWS\system32\cmd.exe. Add the installation folder in “Start in” (e.g., “C:\Program
Files\SMSC\MOST Driver Stack\bin”).
14. PC2: Double-click the shortcut. A Command Prompt window opens.
15. PC2: Enter “mbtest –d0 isopacketrx 0 –c”
where
d is an optional parameter indicating a device number is following. In the case only one MOST
PC Interface is installed this optional parameter can be omitted. By default a device number
“0” is taken. If e.g., two MOST PC Interfaces are installed in PC2 as in this example, it
depends on the sequence of the devices whether this parameter needs to be added or not.
0 is the number of the device (e.g., a MOST PCI Interface 50e device)
isopacketrx is a command that receives a continuous synchronous data stream to the MOST
network,
0 is the first instance (there are two instances available),
c checks receiving frames, a continuous 16 bit counter is expected.
Figure 5-4: Command Prompt Window - Starting Mbtest for Receiving
Copyright © 2006 - 2012 SMSC
Document Version: V4.0.X-1 Date: 2012-08-24
Application Note
Page 51
MOST Tool Kit
Application Examples
16. PC2: Press the “Enter” key. This starts receiving an isochronous data stream from the MOST
network. Beneath the received buffers are counted and displayed followed by the number of
TotalErrors. If the counter for the errors shows zero the transmission over the MOST network
is working properly. If a completion error occurs, the driver receives more data than it can
process. Add –n64 to the command (this parameter adapts the buffer to be used for the
transmission in case the default of 4 bytes is not enough to handle the transmission), i.e.:
Enter “mbtest –d0 isopacketrx 0 –c –n64”
If there are other problems, check the cables’ connections and check whether the MOST
network is in stable lock. The instance number (0) has to match on PC1 (transceiver) and PC2
(receiver). Further on Windows activities can have influence.
17. PC2: Press the “Q” and the “Enter” key in the Command Prompt window (PC2) to finish
receiving the data stream coming from the MOST network.
18. PC1: Press the “Q” and the “Enter” key in the Command Prompt window to finish sending a
continuous data stream to the MOST network.
Application Note
Page 52
Copyright © 2006 - 2012 SMSC
Document Version: V4.0.X-1 Date: 2012-08-24
MOST Tool Kit
Application Examples
5.1.2.2 Transmit and Display Video Stream
1. PC2: Select the Media Stream Connection in the Media tab and click X . The routing of the
channel label is removed.
2. PC1: Select the Media Stream Connection in the Media tab and click X .
3. PC1: Open an Explorer, switch to the CD and open the “readme.rtf” (folder “Add_ons/Demo
Files” on the CD). The “readme.rtf” lists some video demo files that are delivered together with
the MOST Tool Kit. It also contains all details for the video demo files that are required for
decoding of the video stream e.g., Video PID and Audio PID.
4. PC1: Decide which video demo file you want to transmit over MOST. This decision influences
the choice of the bandwidth you have to enter in the Media tab of the MOST Interface Control
and defines the corresponding settings that have to be inserted on PC2 later when
customizing the MOST Video Viewer.
5. PC1: Click Add Stream In and select a preset. In the ‘Add Connect Stream Details’ window
insert a friendly name, set the connection type to ‘Isochronous Connection’, select direction
‘In’ and the channel index ‘00’. Select a channel width according to your decision reserving
enough bandwidth for transmitting the video demo file (transport stream). In addition select
‘Default’ as packet width. Click OK. The corresponding label is assigned automatically.
6. PC2: Switch to the Media tab, click Add Stream Out and select a preset. In the ‘Add Connect
Stream Details’ window insert a friendly name, set the connection type to ‘Isochronous
Connection’, select direction ‘Out’ and the same channel index, channel width and packet
width (‘Default’) as on PC1. Add the Channel Label according to the source specified on PC1.
7. PC1: Open an Explorer again, switch to the CD and copy one of the video demo files (folder
“Add_ons/Demo Files” on the CD) into the installation folder (e.g., “C:\Program
Files\SMSC\MOST Driver Stack\bin”). This means the video demo file and the application
mbstream should be located in the same folder.
8. PC1: Switch to the Command Prompt window.
10
9. PC1 : Enter “mbstream ts2iso –d0 –i0 –l example.ts”
where
mbstream is a utility that is able to transmit e.g., packet data over a MOST network and that
reads and provides the Video and Audio PIDs,
ts2iso is a command that reads TS packets from file and sends the packets to MOST,
d0 is a command that must be entered in case multiple MOST INIC devices are installed but
can be omitted in this case as there is only one MOST PC Interface installed.
i0 is a command that describes the zero-based index of the isochronous hardware ports,
l is a command that loops i.e., that restarts from the beginning when the end of the file is
reached,
example.ts is a demo video file used in this example. Use one of the files you have copied
into your installation folder some steps previously (source folder “Add_ons/Demo Files” on the
CD).
10. PC1: Refer to the “readme.rtf” file and view the settings of the video demo file you have
transmitted.
10
To view a live stream from MOST, replace PC1 with the real video source and use MOST
bandwidth, Video PID and Audio PID like defined in the source device.
Copyright © 2006 - 2012 SMSC
Document Version: V4.0.X-1 Date: 2012-08-24
Application Note
Page 53
MOST Tool Kit
Application Examples
11. PC2: Open a Windows Explorer. Navigate to the installation folder specified during the
installation of the MOST Driver Stack. Assuming default settings have been accepted the path
is as follows: “C:\Program Files\SMSC\MOST Driver Stack\bin”.
12. PC2: Double-click MOSTVideoViewer.exe. The MOST Video Viewer starts. On page “MOST
Settings” choose the used MOST adapter of the MOST network.
13. PC2: Select “Iso Packet” as stream type.
Figure 5-5: Example of Video Viewer Settings
14. PC2: Ensure the values shown in “MOST ISO Packet Streaming” match the values specified
in the Media tab of the MOST Interface Control: “ISO Port Index” must match the channel
index, i.e., “0” in this example. “ISO Packets per Buffer” must match the channel width that is
associated with the index.
15. PC2: Switch to page “TS Settings”.
16. PC2: Enter the following settings: video PID, video type (e.g., H264 or MPG2), audio PID,
audio type (e.g., Dolby AC3 or MPEG Audio). Enter them according to your choice of the
video demo file. Refer to the “readme.rtf” that has been opened on PC1 in a previous step
(folder “Add_ons/Demo Files” on the CD).
17. PC2: Switch to page “DirectShow”.
11
18. PC2: Ensure a video and an audio decoder are installed that are capable to view the video
demo file. Select these decoders on tab DirectShow.
19. PC2: Then click “Start”. The MOST Video Viewer plays the video stream using the selected
decoders.
Note: Via the application GraphEdit – a developer tool, which allows working with DirectX filter drivers
– you can view the video stream on PC2. For more details please contact [email protected].
11
Use e.g., ffdshow but of course all decoders that are capable to handle the files are allowed.
Application Note
Page 54
Copyright © 2006 - 2012 SMSC
Document Version: V4.0.X-1 Date: 2012-08-24
MOST Tool Kit
Application Examples
5.1.2.3 DTCP Extension
MOST Tool Kit offers some additional features regarding DTCP streams. In comparison to the default
TS-mode providing 188 bytes, MOST also defines an extended stream using 8 bytes DTCP header for
encrypted audio/video transmissions. For complete description of DTCP on MOST, please refer to
DTCP specifications available via the MOST Cooperation. All use cases described in section 5.1
Playing a Video File that are using the applications mbtest, mbstream or VideoViewer are also
available including DTCP header handling.
As there is only one standard 188 bytes TS format, the MOST Tool Kit extends some features to
combine both worlds MOST and DTCP with standard video codecs like ffdshow.
The following separate use cases can be handled via the applications mbtest, mbstream or
VideoViewer for test purposes:
1. A MOST PC Interface streams a standard TS file (188 byte as source) that is either streamed by a
mbtest command or transformed by a mbstream command into a DTCP format (196 byte).
2. A MOST PC Interface streams a MOST DTCP file (196 byte as source) over the MOST network
by using an mbtest command.
3. A MOST PC Interface receives a MOST DTCP file (196 byte as sink) that is processed by the
VideoViewer which prepares the file for the use with ffdshow.
4. A MOST PC Interface receives a MOST DTCP file (196 byte as sink) that is prepared by
mbstream for use with VLCViewer.
5. A MOST PC Interface receives a MOST DTCP file (196 byte as sink) that is prepared by
mbstream commands for use either again as MOST DTCP file (196 bytes) or as standard TS file
(188 bytes).
Refer to the MOST Driver Utilities [2] that include specific sections describing commands available for
these use cases.
Copyright © 2006 - 2012 SMSC
Document Version: V4.0.X-1 Date: 2012-08-24
Application Note
Page 55
MOST Tool Kit
Application Examples
6 Troubleshooting
6.1 MOST Interface Control Cannot Be Started
If a MOST PC Interface is installed and can be seen in the device manager but the MOST Interface
Control cannot be started it can help to stop and restart the MOST Services. A reason can be a MOST
PC Interface has been installed or exchanged and the MOST Services have been started before
completing the installation (e.g., the MOST NDIS Driver). Follow these steps:
1.
2.
3.
4.
Click: “Start | Programs | SMSC | MOST Tool Foundation | MOST Tool Kit Configurator”.
Click”Stop Service” to stop the MOST Services.
Click “Start Service” to start the MOST Services.
Start the MOST Interface Control.
Application Note
Page 56
Copyright © 2006 - 2012 SMSC
Document Version: V4.0.X-1 Date: 2012-08-24
MOST Tool Kit
Application Examples
Appendix A: List of Figures
Figure 3-1: Firewall Switched Off .......................................................................................................... 11
Figure 3-2: MOST Network Setup - Share Folder ................................................................................. 12
Figure 3-3: Ipconfig Command for PC1, Showing 192.168.1.1 for IP Address..................................... 14
Figure 3-4: Ipconfig Command for PC2, Showing 192.168.1.2 for IP Address..................................... 14
Figure 3-5: Send Ping from PC2 to PC1 ............................................................................................... 14
Figure 3-6: Send Ping from PC1 to PC2 ............................................................................................... 15
Figure 3-7: Right Click Menu for the New Folder Named ShareFolderViaMOST ................................. 15
Figure 3-8: ShareFolderViaMOST Properties Dialog Box ..................................................................... 16
Figure 3-9: Share Folder via MOST Properties Dialog Box 2 ............................................................... 17
Figure 3-10: Set Permissions ................................................................................................................ 18
Figure 3-11: Shared Folder on PC2 ...................................................................................................... 18
Figure 3-12: Shared Folder on PC2 - File ............................................................................................. 19
Figure 3-13: MOST Network Setup - Share Printer .............................................................................. 21
Figure 3-14: Ipconfig Command for PC1, Showing 192.168.1.1 for IP Address (e.g., for INIC) ........... 22
Figure 3-15: Ipconfig Command for PC2, Showing 192.168.1.2 for IP Address (e.g., for INIC) ........... 22
Figure 3-16: Send Ping from PC2 to PC1 ............................................................................................. 23
Figure 3-17: Send Ping from PC1 to PC2 ............................................................................................. 23
Figure 3-18: Printers Window Displaying Newly Installed Printer ......................................................... 23
Figure 3-19: Right Click Menu for Installed Printer ............................................................................... 24
Figure 3-20: Sharing Properties for “Printer on PC1” ............................................................................ 25
Figure 3-21: Printers Window ................................................................................................................ 26
Figure 3-22: Add Printer Wizard Window 1 ........................................................................................... 26
Figure 3-23: Add Printer Wizard Window .............................................................................................. 27
Figure 3-24: Add Printers Wizard, Final Step ........................................................................................ 27
Figure 3-25: Printers Window Showing the PC1 Printer ....................................................................... 28
Figure 3-26: MOST Network Setup – Share Internet Connection ......................................................... 30
Figure 3-27: Ipconfig Command for PC1, Showing 192.168.1.1 for IP Address (e.g., for INIC) ........... 31
Figure 3-28: Ipconfig Command for PC2, Showing 192.168.1.2 for IP Address (e.g., for INIC) ........... 31
Figure 3-29: Send Ping from PC2 to PC1 ............................................................................................. 32
Figure 3-30: Send Ping from PC1 to PC2 ............................................................................................. 32
Figure 3-31: Sharing Internet Connection ............................................................................................. 33
Figure 3-32: Specifying DNS Server ..................................................................................................... 34
Figure 4-1: MOST Network Setup - Use Winamp ................................................................................. 36
Figure 4-2: Settings in the MOST Interface Control .............................................................................. 37
Figure 4-3: Winamp Output Preferences ............................................................................................... 38
Figure 4-4: Winamp DirectSound Output Settings ................................................................................ 39
Figure 4-5: MOST Network Setup - Use Sound Recorder .................................................................... 41
Figure 4-6: Settings in the MOST Interface Control (PC1) .................................................................... 42
Figure 4-7: MOST Interface Control: Settings on PC2 .......................................................................... 43
Figure 4-8: Winamp Output Preferences ............................................................................................... 44
Figure 4-9: Winamp DirectSound Output Settings ................................................................................ 45
Figure 4-10: Sound Recorder ................................................................................................................ 45
Figure 4-11: Sound Recorder Edit Menu ............................................................................................... 46
Figure 4-12: Audio Properties for the Sound Recorder ......................................................................... 46
Figure 4-13: Sound Recorder Recording Audio from the MOST Network ............................................ 47
Figure 5-1: MOST Network Setup - Use MOST Video Viewer.............................................................. 49
Figure 5-2: Settings in the MOST Interface Control (PC1) .................................................................... 50
Figure 5-3: Command Prompt Window - Starting Mbtest for Sending .................................................. 50
Figure 5-4: Command Prompt Window - Starting Mbtest for Receiving ............................................... 51
Figure 5-5: Example of Video Viewer Settings ...................................................................................... 54
Copyright © 2006 - 2012 SMSC
Document Version: V4.0.X-1 Date: 2012-08-24
Application Note
Page 57
MOST Tool Kit
Application Examples
Appendix B: List of Tables
Table 1-1: Terms ..................................................................................................................................... 8
Application Note
Page 58
Copyright © 2006 - 2012 SMSC
Document Version: V4.0.X-1 Date: 2012-08-24