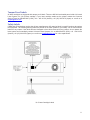
1
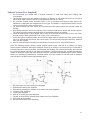
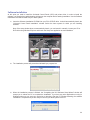
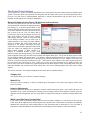
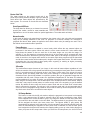
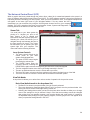
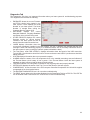
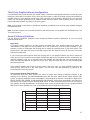
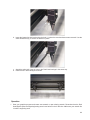
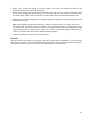
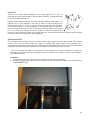
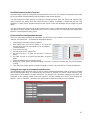
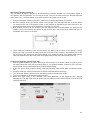
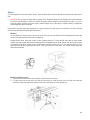
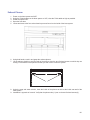
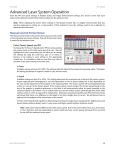
Raster Sub-Tab
The raster sub-tab on the manual control tab of the
printer driver setting interface displays a group of settings
which affect how raster objects are processed by the
laser system. The controls in the sub-tab are described
below:
Print Special Effects
The drop down list allows you to choose from several
special print modes, normal for most materials and
applications or one of the other modes for special applications. The modes work as follows:
Normal mode:
In this mode all single color raster data is mapped to the closest color in the color table and processed
using the job settings attached to that color. All grayscale or multicolor bitmaps are converted to
grayscale and then a dither pattern is applied to them and the black color job settings are used. This is
the default recommended mode of operation.
Frame Rasters
A Frame Rasters feature is available in normal mode which affects the way rastered object are
processed in the laser system. When this switch is off the raster strokes the X axis makes when
laying down the pattern of dots on each line of the raster image can vary with the image. For
example, if you are engraving a triangular shape the tip of the triangle will be engraved with short
raster strokes and the strokes will get longer as the wider parts of the triangle are engraved. If this
mode is turned on, the longest raster stroke for the raster object being engraved will be determined
and all other raster strokes will be made equal in length to the longest raster stroke. This will increase
processing time, but can improve edge quality when engraving or marking at higher processing
speeds. Use this mode only if necessary.
3D mode
This mode affects raster elements of your image. In this mode all raster objects regardless of color
will be converted to 256 color grayscale and then during processing the laser power level is varied on
the fly in accordance with the grayscale levels in the image. Lighter parts of the image will receive
less laser power and darker parts more laser power resulting in a contoured depth and a three
dimensional look. Special 3D software is required to produce the type of grayscale images that are
compatible with this mode. Please contact our Applications Department for the latest 3D software
recommendations. If you select 3D mode, you can adjust the grayscale to laser power level mapping
table using the 3D Setup button. See the description of the 3D Setup button for more details. Keep in
mind that it may require several passes to create enough relief in the engraving to get the desired
results. By default all other colors are forced to raster mode and are not used since colored raster
data is converted to grayscale. The red pen is left in rast/vect mode and it is recommended that all
vector cut lines in the graphic being printed be colored red so that they will be interpreted as vectors.
Any black vector lines will be converted to raster objects.
3D Setup Button
This button is used with the 3D print mode to adjust the grayscale to laser power level mapping
table. It only appears when 3D mode is selected. When 3D mode is selected the laser power
levels mapped to the various shades of gray in the image are scaled from the laser power level
you entered for the color black in the color table. The darkest shade of gray (black) in the image
will be assigned the black color laser power level. The lightest shade of gray (white) will
automatically be assigned a 0% laser power. All other shades of gray that fall between black and
white will automatically be mapped to a laser power level in between 0% and the laser power
level assigned to the black color based on the mapping table you set up in the window brought up
when you press the 3D setup button. When you select the 3D setup button, the ULS 3D Power
48