1
Chipster technical manuals
This Wiki contains technical manuals for all versions of Chipster. They cover issues related setting
up your own Chipster server, adding your own tools into Chipster, and more.
●
●
Technical manual
❍
Latest version (3.1)
❍
Older versions are available from archived Sourceforge wiki
Miscellaneous
❍
R script integration tutorial
❍
Setting up SSH mount tutorial
❍
Chipster command line client
For more documentation, including end user documentation, please see documentation page.
Technical manual for Chipster
The manual covers Chipster platform version 3.1 and later. It instructs in setting up your own
Chipster server, adding your own tools into Chipster, and more. For the user manual, please see
http://chipster.csc.fi/manual/.
Table of contents
●
Technical manual for Chipster
❍
●
●
●
●
Introduction
System installation
❍
Virtual machine installation
❍
System installation in Linux
❍
Tool installation in Linux
❍
Client installation in Linux
❍
Installation in Mac OS X
❍
Installation in Windows
System administration
❍
Chipster architecture
❍
Running components
❍
Upgrading server installation
❍
Directory layout
❍
Configuration system
❍
Firewalls and proxies
❍
NAT
❍
Secure communications
❍
Authentication
❍
Message broker
❍
File broker
❍
Compute service
❍
Authentication service
❍
Manager service
Tool development
❍
Writing Chipster tools
❍
Describing tools with SADL
❍
Tool conventions
Troubleshooting
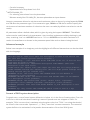
Introduction
In the basic setup, Chipster is a client-server system. Chipster server can be run on a single server
computer or even a laptop. The Chipster server itself actually contains multiple independent
services, so it can be scaled across a cluster of servers to distribute computational and data
transfer load.
The system consists of compute, authentication and management services. The services are
independent and connected by message and file brokers.
System installation
The recommended way to get Chipster server running is virtual machine installation, as it comes
with all dependencies bundled.
Virtual machine installation
Chipster is packaged as complete virtual machine images that can be deployed to a variety of
virtualisation platforms. The images are based on Ubuntu Linux 12.04 (Precise Pangolin). Images
are available in ova, vmdk and qcow2 format, supporting essentially all virtualisation platforms.
Image formats
It's advisable to use ova format in VirtualBox and VMware Player. In ova format, a single image file
is all that is needed.
Vmdk and qcow2 are useful for making custom server installations. Chipster virtual machine
consists of three disk images:
1. Root
2. Tools
3. Data
In vmdk and qcow2 format, these three images are in separate files.
Root image contains the Ubuntu operating system and the Chipster software without any external
tools. Both tools and data images are initially only empty disks. Tools image will be used for
installing the external tools package, in step 4 below. The data image will be used for storing users'
datasets.
To use the Chipster virtual machine, you need to:
1.
2.
3.
4.
5.
Install virtualisation software such as VirtualBox or VMware Player
Download Chipster virtual machine
Start the Chipster virtual machine
Download tools package
Start Chipster client
These steps are now described in detail.
Installing virtualisation software
To run a virtual machine, you need a virtualisation software installed on the computer, which is
going to run the virtual machine. VirtualBox and VMware Player are two common virtualisation
software products, which work with Chipster.
●
VirtualBox for Linux, Mac and Windows, free
●
VMware Player for Linux and Windows, free for personal non-commercial use
KVM, OpenNebula and VMware Enterprise are also supported.
Instructions for VirtualBox (online)
Download Chipster virtual machine
Download file Chipster.ova under the desired version from:
●
http://www.nic.funet.fi/pub/sci/molbio/chipster/dist/virtual_machines/
Add Chipster virtual machine to VirtualBox
●
Open VirtualBox
●
Select "File"->"Import appliance..."
●
Click the folder icon and go to the folder where you downloaded Chipster virtual machine files
and select chipster.ova and "Open"
●
Click "Next" and "Import"
VirtualBox won't let you to import the same machine again with the same name "Chipster". You can
find the existing virtual machines in folder "VirtualBox VMs" under your home directory. In this case,
repeat the steps above and rename the machine before clicking "Import".
Configure Chipster virtual machine
●
Select "Settings" and "Network" and change the Attached to: Bridged Adapter (it's NAT by default,
VirtualBox NAT does not allow connections to Chipster virtual machine)
❍
If you need to run Chipster server without any network, you can use "Host-only" network mode.
Depending on your environment, you might need to first create a new host only network in
VirtualBox Preferences.
Start Chipster virtual machine
●
Select "Start"
Instructions for VirtualBox (offline)
Please follow online version of the VirtualBox instructions above always when your installation
machine has a decent internet connection. The instructions above download an empty tools image,
and the tools package is later downloaded over the internet.
These instructions demonstrate how to create a virtual machine with a tools image, which already
contains the tools. Handling this kind of big image file is not always easy, but it makes it possible to
install virtual machine also when the internet connection is not available.
Download Chipster virtual machine
Download files root.vmdk, data.vmdk and tools.vmdk from the misc directory under the desired
version from:
●
http://www.nic.funet.fi/pub/sci/molbio/chipster/dist/virtual_machines/
Add Chipster virtual machine to VirtualBox
●
Open VirtualBox
●
Select "Machine"->"New..."
●
Give a name for the machine
●
For type, select "Linux"
●
For version, select "Ubuntu (64 bit)"
●
Click "Next" twice
●
Select "Use an existing virutal hard drive file"
●
Click the folder icon and go to the folder where you downloaded Chipster virtual machine files
and select root.vmdk and "Open"
●
Click "Create"
●
Select "Machine"->"Settings" and "Storage"
●
Right-click on "Controller: SATA" and choose "Add hard disk"
●
Click "Choose existing disk", locate the data.vmdk file you downloaded and click "Open"
●
Repeat previous two steps for file tools.vmdk
Configure Chipster virtual machine
●
Select "Settings" and "Network" and change the Attached to: Bridged Adapter (it's NAT by default,
VirtualBox NAT does not allow connections to Chipster virtual machine)
❍
If you need to run Chipster server without any network, you can use "Host-only" network mode.
Depending on your environment, you might need to first create a new host only network in
VirtualBox Preferences.
Start Chipster virtual machine
●
Select "Start"
You can skip the later section of Download tools package and continue at Start Chipster Client.
Instructions for VMware Player
Download Chipster virtual machine
Download files chipster.vmx, root.vmdk, data.vmdk and tools-empty.vmdk from misc directory
under the desired version from:
●
http://www.nic.funet.fi/pub/sci/molbio/chipster/dist/virtual_machines/
Add Chipster virtual machine to VMware Player
●
Run VMware Player
●
Select "Open a virtual machine"
●
Select chipster.vmx and 'Open'
●
If the import fails because of OVF specification checks, just click "Retry"
Start Chipster virtual machine
●
Click "Play virtual machine"
Instructions for KVM (libvirt)
Unless you consider yourself a hacker, we recommend VirtualBox or VMware instead of KVM.
Download Chipster virtual machine
Download files root.qcow2, data.qcow2 and tools-empty.qcow2 from misc directory under the
desired version from:
●
http://www.nic.funet.fi/pub/sci/molbio/chipster/dist/virtual_machines/
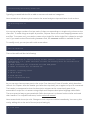
Add Chipster virtual machine
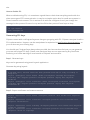
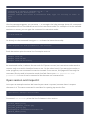
We are going to use bridged network. If you are using RedHat or Fedora Linux, you first need to
disable NetworkManager, as it does not support bridged mode:
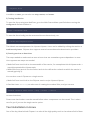
sudo service NetworkManager stop
sudo service network restart
Now we can add Chipster virtual machine, or domain, as it is called in virsh lingo.
sudo virsh iface-bridge <YOUR NETWORK DEVICE> brv
Next edit chipster.xml and update paths to disk images to the directory where you have put them.
Paths need to be full.
Now we can add the virtual machine (define domain):
sudo virsh define chipster.xml
Start Chipster virtual machine
Start the virtual machine:
sudo virsh start chipster
Depending on your setup, you might get error stating that disk images cannot be read (Permission
denied).
To fix this, edit /etc/libvirt/qemu.conf and set user=root and group=root, then restart libvirtd:
sudo nano /etc/libvirt/qemu.conf
sudo service libvirtd restart
Now you should able to start the domain
Access Chipster virtual machine
To access Chipster server console, use VNC:
vncviewer 0.0.0.0:27277
Shutdown Chipster virtual machine
To shutdown the server, use:
sudo virsh shutdown chipster
To restore your original unbridged network configuration, use:
sudo virsh iface-unbridge brv
And in Red Hat or Fedora, restart NetworkManager:
sudo service NetworkManager start
sudo service network restart
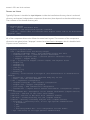
Instructions for OpenNebula
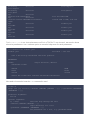
To get you started with OpenNebula integration, here is .vmdef template file to use as a reference:
NAME = chipster
CPU
= 8
VCPU
= 8
MEMORY = 8000
CONTEXT = [
# INIT_SCRIPT_URL = "http://yourhost.com/init.sh",
HOSTNAME = "chipster",
AUTHORIZED_KEYS = ""
]
OS = [
BOOT
ARCH
]
= "hd",
= "x86_64"
DISK = [
TYPE
TARGET
SOURCE
DRIVER
]
=
=
=
=
"disk",
"vda",
"root.qcow2",
"qcow2"
DISK = [
TYPE
TARGET
SOURCE
DRIVER
]
=
=
=
=
"disk",
"vdb",
"data.qcow2",
"qcow2"
DISK = [
TYPE
TARGET
SOURCE
DRIVER
]
=
=
=
=
"disk",
"vdc",
"tools-empty.qcow2",
"qcow2"
NIC = [
network_id = "1",
# ip
= "",
model
= "virtio"
]
GRAPHICS = [
TYPE
= "vnc",
# KEYMAP = <your keymap>,
LISTEN = "0.0.0.0"
]
Unlike in previous example, here we have less conservative CPU and memory settings.
You can also specify full URL's as SOURCE of the disk images. That way machines can be booted
from a centralised file server.
Instructions for cloud (OpenStack)
Download Chipster virtual machine
These instructions are written for OpenStack cloud using its Horizon user interface, but the process
should be very similar also in other clouds. The key difference from the VirtualBox or VMware
installation is that only the root image is used and user data and tools are stored on volumes.
Download root.qcow2 from misc directory under the desired version from:
●
http://www.nic.funet.fi/pub/sci/molbio/chipster/dist/virtual_machines/
Add Chipster virtual machine to OpenStack
●
Log in to Horizon
●
Select "Image & Snapshots" -> "Create image"
●
Give a name for the image
●
Click the "Browse..." and select root.qcow2 file you downloaded. Select qcow2 format and click
"Create image"
●
It will take a while until the image is uploaded
Configure Chipster virtual machine
Security group * Select "Access & Security" and create a security group which allows you to access
ports 8080, 8081 and 61616
Instance * Select "Instances" -> "Launch instance" * Select the image you just created * Give a
name for the instance * On "Access & Security" tab, select the security group you created * On
"Networking" tab, add a network for your instance * Click "Launch"
Volumes * Select "Volumes" * Create two volumes: tools and data. The size of the tools volume
must be at least 200 GB and the size of the data volume depends on the datasets you are going to
analyze. Setting both disks to 500 GB is a good start and leaves some space for updates.
* On data volume, click "Edit attachments", select your instance, give a device name (e.g. /dev/vdc/)
and click "Attach Volume". Repeat on the tools volume (device name e.g. /dev/vdd) * Log in to your
instance using ssh or Instant Console ("Instances" -> your instance -> "Console"). Username ubuntu,
password chipster.
Move existing data directories (even if they are empty) and create a mount point
sudo mv /mnt/data /mnt/data_old
sudo mkdir /mnt/data
Create filesystems
sudo mkfs.xfs -f -L data /dev/vdc
sudo mkfs.xfs -f -L tools /dev/vdd
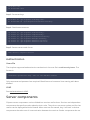
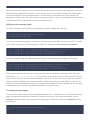
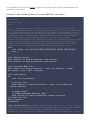
Labels "data" and "tools" are defined in /etc/fstab and should be automatically mounted in a few
seconds. Run commnad df -h and it should print something like this:
Filesystem
/dev/vda1
udev
tmpfs
none
none
/dev/vdc
/dev/vdd
Size
9.4G
1.7G
344M
5.0M
1.7G
500G
500G
Used Avail Use% Mounted on
6.5G 2.5G 73% /
8.0K 1.7G
1% /dev
236K 343M
1% /run
0 5.0M
0% /run/lock
0 1.7G
0% /run/shm
33M 500G
1% /mnt/data
33M 500G
1% /mnt/tools
Move data directories back in place
sudo chown chipster:chipster /mnt/data
sudo mv /mnt/data_old/* /mnt/data
sudo rmdir /mnt/data_old
Chown tools for ubuntu
sudo chown ubuntu:ubuntu /mnt/tools
Floating IP
●
Usually a floating IP address has to be added to make the instance visible outside of the cloud
network
●
Select "Access & Security" and tab "Floating IPs"
●
You can use any floating IP which isn't yeat associated with an instance, or click "Allocate IP To
Project" to add a new one
●
Click "Associate Floating IP", select your instance and click "Associate"
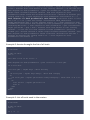
Configure the new floating IP in Chipster. Give your floating IP when the configuration tool asks for
your public host/ip. It's the first question it asks and you can leave all other questions to default
values.
cd /opt/chipster
sudo bash configure.sh
Restart Chipster's server components
sudo service chipster restart
Wait for couple seconds and check that all of them are running
sudo service chipster status
Download tools package
The Chipster virtual machine images contains only the Chipster installation. The analysis tools,
databases, genomes and indexes are installed in a separate package:
●
Login to VM using username: ubuntu, password: chipster
●
Go to chipster directory: cd /opt/chipster
●
Download tools: bash download-tools.sh
This downloads about 120 GB from servers in Finland. This step is needed, because it would be
impractical to handle that big virtual machine images. Restart comp to load the new tools.
sudo service chipster-comp restart
If you skip this download step, you can only run a few tools implemented in Java or Python, like sort
tools.
Start Chipster client
Chipster servers are configured to start when the virtual machine is started. After you have the
Chipster virtual machine running, start the Chipster client by pointing your web browser to
http://<hostname or IP address of the virtual machine>:8081
and clicking on the Launch Chipster link. Login with chipster/chipster. To get started, you can open
an example session (link in Datasets panel).
If you don't know the hostname or IP address of the virtual machine you have started, see
instructions in the next section.
If you fail to start the client, there is typically something wrong in the network settings. See next
section on how to automatically reconfigure the network as a quick fix.
Before starting to actually use Chipster, it is highly recommended to update the installation to get
latest bug fixes. See Upgrading server installation.
Configuring Chipster
●
Login to VM using username: ubuntu, password: chipster
●
Check the IP address of the vm
●
❍
IP address is printed in the "message of the day" when you login
❍
Or you can use:hostname -I
❍
or ifconfig
For convenience, it is recommended to set the keyboard layout and time zone
❍
Instructions are printed in "message of the day" when you login
●
Configure Chipster to use the given IP address: cd /opt/chipster;./configure.sh
●
You can also use cd /opt/chipster;./configure.sh auto
which auto detects the IP address and uses default values for other settings.
●
Restart Chipster: service chipster restart
●
Using a web browser go to the Chipster start page: http://<vm ip address>:8081
There are two accounts by default:
●
Username: ubuntu, password: chipster
❍
●
has sudo rights for administering the OS installation of the virtual machine
Username: chipster, password: chipster
❍
for running the chipster service
❍
su or sudo rights are not required for running Chipster
System installation in Linux
Chipster is easy to install also without using the virtual machine version. However that holds only
for the system itself, as the large collection of analysis tools and their dependencies need quite a lot
of work to set up.
0) Requirements
Following software needs to be installed:
●
Java 1.6
●
R statistical environment 3.0 (optional)
The following TCP ports need to be open in the firewall:
●
61616 for message broker service
●
8080 for file broker service
●
8081 for webstart service (optional)
●
8082 for admin web console (optional)
See Firewalls and proxies for more information.
1) Downloading and extracting
Installation packages can be obtained from http://chipster.sourceforge.net/downloads.shtml.
After downloading extract the tar archive. It contains directory "chipster", where all components are
in their own subdirectories. It can be placed anywhere, but usually /opt/chipster is used.
Downloading and extraction can be done easily on command line:
cd /opt
wget
http://www.nic.funet.fi/pub/sci/molbio/chipster/dist/versions/<version>/chipster-<v
ersion>.tar.gz
tar -xzf chipster-<version>.tar.gz
2) Installing external tools
No external tools are needed to start the server environment, but for analysis tools to work, they
are needed. You can skip this step if you just want to get the system running first. For instruction on
installing the tools, see Tool_installation_in_Linux.
3) Configuring Chipster services
To configure the Chipster services, run the following two scripts. Both scripts will ask for
confirmation before writing changes to files. Defaults should be fine for a local installation.
./configure.sh
./genpasswd.sh
configure.sh configures all the components, and genpasswd.sh generates secure passwords that
server components use to authenticate each other.
4) Starting and stopping services
To start all the Chipster services, run:
./chipster start
In addition to start, you can also use stop, restart, and status.
5) Testing installation
To start the client using Java Web Start, go to the Web Start address specified when running the
configure.sh. Default address is:
http://<hostname>:8081
To start the client locally (on the same machine as the services), run:
./client/bin/chipster-client
The default username/password is chipster/chipster. Users can be added by editing the userlist at
auth/security/users. Chipster also supports several more advanced authentication providers.
6) Starting services at boot time
The steps needed to make services start at boot time are somewhat system dependent. In most
Linux systems two steps are needed:
●
Make link from /etc/init.d/ to the executable of the service, for example/etc/init.d/chipster-auth ->
/opt/chipster/auth/bin/chipster-auth
●
Make links from /etc/rcX.d to the link at /etc/init.d to define the runlevels at which the service is
started (typically 3).
You can also control Chipster as a single service
●
Make link from /etc/init.d/ to the Chipster service script chipster/chipster
In Red Hat Linux chkconfig can take care of creating the runlevel links, and you can use
service <service name> start | stop | status | console
to control services.
Please note that brokers must be started before other components can be started. This is taken
care for you if you use the single service option.
Tool installation in Linux
One of the key ideas behind Chipster is to take all the high quality tools in the relevant field of data
analysis and integrate them together. For the end user, this is great. Unfortunately for the person
installing the system the situation is not that optimal. We really wish that substantial amount of the
best data analysis algorithms were available in some clean, platform independent format and we
could simply distribute them just like we distribute Chipster itself. But it is not reality, at least yet. So
we have to face the facts and install different analysis applications the way the original author had
in mind.
For these reasons, we strongly recommend you to choose the virtual machine based
distribution. There you have everything integrated and ready to run. You can also use the virtual
machine images as a template for customising your own images.
Manual tool installation
It is also possible to install external applications and datasets by yourself. By external applications
we mean the computational environment needed to run Chipster compute service. Chipster itself is
plain Java and does not have any dependencies to external applications other than Java Runtime
Environment. We do package Chipster with Tanuki Software's free Java Service Wrapper for
convenience, but using the wrapper is not even required. So, without the external applications in
place your compute service will boot up, but will not be able to run successfully any analysis jobs. If
external applications are partially available, then you can use some of the tools, etc.
External dependencies can be divided to 3 layers.
1. OS level packages
2. external applications and databases (R and others)
3. R packages
Level 1 contains a collection of operating system packages that are required for applications at
levels 2 and 3 to work. Naturally level 1 is OS specific and so the packages are installed into OS
specific locations using OS specific tools (typically apt-get or yum). Levels 2 and 3 are contained in
the Chipster tools directory. The most important application at level 2 is R, as it hosts most of the
analysis functionality and is also the basis for layer 3. There are also some simple databases, i.e.
plain files, that reside on layer 2. The R specific layer 3 consist mostly of CRAN and Bioconductor
packages, with some additional third party packages. They are installed using the standard R
installation methods and will be located in chipster/tools/R-/library. There is a setup tool for
installing layer 3 automatically.
Chipster tool directory or tool home is the place to store all external dependencies (except for OS
packages). By default it is /opt/chipster/tools. Analysis scripts have access to tool directory path via
a variable so that they can access external applications and databases. You need to configure tool
home to chipster/comp/conf/runtimes.xml if you change it.
Up-to-date steps for installing all external applications and datasets can be found from the VM
distribution installation script:
https://github.com/chipster/chipster/blob/master/src/main/admin/vm/install-chipster.sh
Follow steps onwards from Install external applications and datasets.
Client installation in Linux
Chipster client is fully Linux compatible and supported on Linux platforms. It installs automatically
with Java Web Start.
Installation in Mac OS X
Chipster client is fully Mac OS X compatible and supported on Mac platforms. It installs
automatically with Java Web Start.
Chipster server supports is not supported on Mac OS X. We recommend virtual machine installation
for the server environment in Mac OS X.
Installation in Windows
Chipster client is fully Windows compatible and supported on Windows platforms. It installs
automatically with Java Web Start.
Chipster server supports is not supported on Windows. We recommend virtual machine installation
for the server environment in Windows.
System administration
Chipster architecture
The shortest description for Chipster architecture would be that it is very flexible. The Chipster
environment is based on message oriented architecture (called also message passing architecture
or message oriented middleware architecture). Components are connected using message broker
(ActiveMQ). This results in a loosely coupled distributed system. Chipster is designed to be based
on the idea of broadcast, allowing components to be unaware of each other. Also the system does
not depend on the protocol used for communication.
The Chipster environment consists of the following components:
●
message broker (1 to many)
●
file broker (1)
●
compute service (1 to many)
●
authentication service (1)
●
manager service (1 to many)
●
client (many)
All components can be added or removed dynamically. In case there are multiple instances of a
same component running there's no need for extra configuration, because, for example, multiple
compute services can function without being aware of each other. This allows system administrator
to add compute components on the fly if there is need for extra processing power. Currently the
exception is that there can be only one authentication service.
One of the key ideas in designing Chipster architecture was to carefully consider where each bit of
the system's state is managed. Chipster client follows thick client paradigm where client is
functionally rich. This decision was made to keep server environment simple and lightweight, to
reduce number of messages, to distribute processing load (especially data visualisation) to clients
and to allow improved user experience as client application is mostly independent of server
components.
Server components explained
Message broker (ActiveMQ) acts as the central point of the system, passing messages between
components. ActiveMQ supports broker distribution for improving scalability and reliability, so
multiple brokers can be used simultaneously.
File broker distributes files to other components, acting as a supplement to message broker. File
distribution is based on pull mechanism, where components go and retrieve files from the file
broker. This way compute servers and clients can be behind firewalls. Using separate file broker
also allows compute servers to use minimal disk space as files are cached at file server.
Authenticator processes requests from clients. Each request is examined, and if valid session exists
for that client it is allowed to continue. Otherwise a request is made for user to authenticate and
after a successful authentication session is created. Authentication service supports many types of
authentication sources (Unix passwd, JAAS, LDAP...), and can use them simultaneously. Server
components authenticate to broker using server specific keys, and are allowed to communicate
directly without going through the authenticator. Authentication service is a separate component
so that it can be deployed inside intranet, as it might need access to sensitive information such as
user databases.
Compute service listens for computation requests. When client initiates a new task, all compute
services with free resources reply and client decides which service gets to process the task. This
way there is no single point of failure in distribution of tasks to server environment and compute
services can be modified easily on fly.
Simple server installation
The simple way to install Chipster environment is to deploy all components to a single server and to
distribute clients by using Java Web Start.
All server components run inside their own directories, so having them on a single server does not
require any special arrangements. Message broker and file broker are running in their respective
ports, and other components connect to them using local network.
Advanced server installation
A good guideline for setting up advanced installation is to dedicate an untrusted server for message
broker and file broker components, as they are the only components that have open server ports.
That server should not be inside organisations firewall, i.e., be in DMZ network. To secure user
credentials, authenticator should be installed separately on a strongly protected machine.
It is possible to deploy multiple compute servers. All of them should have same tools descriptions,
but it is possible to select active tools per server. It is also possible to configure maximum job
counts. If you have many nodes available but they have also other use besides Chipster it is
recommended to deploy compute servers on as many nodes as possible but limit the per server
job count to keep Chipster from hogging all the resources. If there are memory intensive tools, it
might be a good idea to deploy dedicated node for them with large memory and low maximum job
count. Independent compute services can also be deployed to a batch processing system (LSF etc.),
following a worker paradigm.
Running components
To start all the Chipster services, run switch to /opt/chipster and run:
./chipster start
In addition to start, you can also use stop, restart, and status. Restart runs stop and start
consecutively and status reports if the services are running (and what are their process ids).
Script chipster is a high level tool for managing all services. It will check for each service the
corresponding subdirectory and pass on the command. If subdirectory does not exist, then it will
be skipped. This means that components can be removed from a certain node and chipster script
can be still used to run the remaining ones.
To control individual services, say restart compute service, use:
./comp/bin/chipster-comp restart
So the script to run is in bin directory under the component directory and has component specific
postfix.
If you are using the virtual machine environment or otherwise configured Chipster as daemon, you
can use service command from anywhere:
service chipster start
Or to restart the compute service, use:
service chipster-comp restart
So the service name is
chipster-<component directory name>
If any of these give you error "Could not detect hardware architecture, please set platform
manually.", it means that hardware architecture (which binary to run) was not detected
automatically. It can be set manually by editing all instances of chipster-generic.sh. Architecture is
configured by changing the PLATFORM line to match your hardware architecture (see comment
above the line for options). To just get things running, you can use the architecture specific scripts
under
<component>/bin/<architecture>/chipster-<component>
Upgrading server installation
Upgrading VM bundled installation
Chipster VM bundle comes with an automatic update tool that allows you to update the installation
without downloading everything again. Updates do not happen automatically, but must be initiated
manually. Before the update, you should stop Chipster services.
./chipster stop
./update.sh
./chipster start
update.sh script is just a bootstrap script that downloads the actual update script and executes it.
This way the update system itself also gets updated when needed.
The actual update script is called update-exec.sh and is located at
http://www.nic.funet.fi/pub/sci/molbio/chipster/dist/virtual_machines/updates/
When run, update-exec.sh downloads files, unpacks them, moves things around when needed and
does other required setup steps.
Chipster update system only manages Chipster installation and tool dependencies. You should also
take care of keeping the operating system of the VM installation up to date, using normal Debian
tools, such as aptitude.
sudo aptitude upgrade
Operating system packages get updated and a reboot might be necessary.
Upgrading other installations
If you installed Chipster yourself, then the automatic update mechanism is not available. The
recommended approach is to make a fresh install of Chipster and move relevant functionality over
from the previous installation. You should check at least these locations for things to move over:
●
chipster/*/conf/chipster-config.xml - custom configuration
●
chipster/comp/conf/runtimes.xml - custom analysis tool runtimes
●
chipster/comp/modules - custom tool scripts
●
chipster/webstart/web-root/manual - custom manual pages
When Chipster is upgraded, also tool dependencies need updating. For exact details on changes
between versions, look at the update-exec.sh script at
http://www.nic.funet.fi/pub/sci/molbio/chipster/dist/virtual_machines/updates/.
Directory layout
Chipster directory layout is different on client and server sides. On client side the goal has been to
make placement of files and directories compatitible with operating system specific conventions.
On server side the goal has been to make the layout as coherent as possible (especially to integrate
well into Java Service Wrapper that wraps all server components).
Client
Application data (logs, SSL keys, user preferences) is stored in a one place and user data (sessions,
workflows) in another.
●
Windows
❍
Application data stored in Local Settings\Application Data\Chipster inside user's home
directory (in Windows XP?)
●
●
❍
Application data stored in AppData\Local\Chipster inside user's home directory (in Windows 7)
❍
User data stored in My Documents inside user's home directory
Mac OS X
❍
Application data stored in Library/Application Support/Chipster inside user's home directory
❍
User data stored in My Documents inside user's home directory
Linux/Unix
❍
Application data stored in .chipster inside user's home directory
❍
User data stored in home directory, or Document or My Documents inside the home directory
if they exist
If operating system is not recognised, we fall back to Linux/Unix. This is because most often
esoteric OS's are Unix variants.
Server on Linux
Typically Chipster is installed to /opt/chipster. Inside the installation directory there is a shared
directory and several independent component directories (that depend on the shared directory).
The contents of the shared directory are:
* chipster/shared
* bin - generic executable files
* lib - Java JAR and platform specific libraries
* lib-src - source codes for libraries that require source code to be distributed
together (LGPL)
All of the component directories follow the same basic layout. The contents of the component
directories are given below. "Wrapper" means here Java Service Wrapper, which is bundled with
Chipster server installation.
* chipster/<component name>
* bin - executable files and utility scripts
* chipster-<component name> - main executable script (use this)
* linux-x86-<32 | 64> - platform specific executables
* chipster-<component name> - platform specific executable script
* wrapper - wrapper binary
* logs - log files for wrapper (console output) and Chipster itself
* wrapper.log
* chipster.log
* messages.log
* jobs.log
* security.log
* status.log
* security - files related to encryption (and authentication on authentication
service)
* keystore.ks - automatically generated dummy key for SSL
* users - flat file user database
* conf - component's configuration
* chipster-config.xml - main Chipster configuration
* wrapper.conf - wrapper configuration
* jaas.config - JAAS authenticator configuration
* runtimes.xml - compute service runtime environments' configuration (compute
service)
* environment.xml - description of tool runtime environment (compute service)
* file-root - www-root of file cache (file broker)
* web-root - www-root of Web Start files (webstart service)
* jobs-data - working directory for jobs (compute service)
* modules - directory containing analysis tools (compute service)
* microarray - microarray tools, in tool type specific subdirectories
* R-<version>
* bsh
* java
* microarray-module.xml - tool configuration for this module
* ngs - NGS tools, in tool type specific subdirectories
* R-<version>
* java
* ngs-module.xml - tool configuration for this module
* sequence - sequence analysis tools, in tool type specific subdirectories
* shell
* sequence-module.xml - tool configuration for this module
* <third party modules>
* database - monitoring database (manager)
* database-backups - backups for monitoring database (manager)
ActiveMQ uses it's own directory layout. See ActiveMQ documentation for more information.
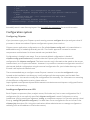
Configuration system
Configuring Chipster
If you just want to get your Chipster up and running, execute configure.sh script and your done! If
you want to know more about Chipster configuration system, then read on.
Chipster stores application configuration to a file called chipster-config.xml. It is located either in
conf subdirectory or loaded dynamically via URL. The former approach is meant for server
components and the latter for clients started over Java Web Start.
Configuration is loaded in two steps. First an internal default configuration is loaded (
chipster-config-specification.xml, located inside the Chipster JAR) and then the normal
configuration file chipster-config.xml. The latter contains only information that needs to be set per
instance basis, so it is quite minimalistic. However it is possible to overwrite configuration entries of
the internal default configuration using the normal configuration file. Just include the entry in the
file and it will replace the default one.
The recommended way to configure a new Chipster instance is to use the configure.sh script
located at the installation root directory. It will configure all the components and the Web Start
client descriptor. You can also modify the configuration files manually. For information on meaning
of the different configuration entries, please refer to
https://github.com/chipster/chipster/blob/master/src/main/resources/chipster-config-specification.
xml in the code repository.
Loading configuration over URL
Each Chipster component (client, analysis server, file broker etc.) has its own configuration file. If
configuration file is not explicitly specified, chipster-config.xml is used. Configuration can be
loaded over URL by passing an argument -config at component startup. You can also specify a local
file (e.g. -config file:/path/to/config.xml). For Web Start clients configuration file can be set in the
chipster.jnlp descriptor file. Using this mechanism allows administrator to manage configuration
centrally (such as the address of the broker server).
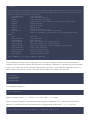
The configuration file
The configuration file chipster-config.xml contains all configuration entries that different
components require. See below for an example configuration file of a file broker component.
<configuration content-version="3">
<configuration-module moduleId="messaging">
<entry entryKey="broker-host">
<value></value>
</entry>
<entry entryKey="broker-protocol">
<value></value>
</entry>
<entry entryKey="broker-port">
<value></value>
</entry>
</configuration-module>
<configuration-module moduleId="security">
<entry entryKey="username">
<value>filebroker</value>
</entry>
<entry entryKey="password">
<value>filebroker</value>
</entry>
</configuration-module>
<configuration-module moduleId="filebroker">
<entry entryKey="url">
<value>http://chipster.example.com:8080</value>
</entry>
<entry entryKey="port">
<value>8080</value>
</entry>
</configuration-module>
</configuration>
The file contains several modules (XML element configuration-module), and the selection of
modules varies between different components. Modules security and messaging are related to
how Chipster node connects to messaging fabric and are always required. Additionally, there are
node specific modules, such as filebroker in the example.
Inside the module, there are configuration entries (XML element entry). Every entry has a key (XML
attribute entryKey) and it contains one or more values (XML element value).
Firewalls and proxies
In a typical setup, the following TCP ports need to be open in the firewall:
●
61616 for message broker service (Openwire or Openwire/SSL)
●
8080 for file broker service (HTTP or HTTP/SSL)
●
8081 for webstart service, optional (HTTP or HTTP/SSL)
●
8082 for admin web console, optional (HTTP or HTTP/SSL)
One of the design guidelines in Chipster was to make it easily adaptable to various firewall
configurations. Even though there are many server components, only message and file brokers are
listening to open ports. In other words, they act as a hub to which other components connect to.
Both of the components are designed so that they can be installed on a "untrusted" machine
located in the DMZ. Compute and authentication services often have to be located inside intranet,
which is not a problem as they do not act as servers from a networking point of view.
Client uses TCP or SSL to connect to message and file brokers. This communication can be
configured to ports 80 and 443 to bypass strict firewalls. In some high security environments
practically all network access is disabled, except for HTTP using local proxy. Currently Chipster does
not use HTTP, so in this extreme case deployment is not possible without changes to firewall
configuration. However routing messages through HTTP is supported by ActiveMQ message broker,
so in future these scenarios might also be supported directly.
By default Chipster ignores Java proxy settings and always uses direct connection. Is is so because
many proxies are not truly HTTP/1.1 compatible and mess up communication. It is possible the
disable the override and make Chipster to use Java proxy settings. In chipster-config.xml, add the
following under the module messaging:
<entry entryKey="disable-proxy" type="boolean" description="should we ignore Java
proxy settings and connect directly">
<value>false</value>
</entry>
The change needs to made to chipster-config.xml of clients. In normal setups it is served by
webstart server and will be in effect when clients are restarted.
NAT
Sometimes the server environment needs to be installed behind NAT (network address translation).
This usually happens when the server environment connects to internal network, which is not
visible to public internet. To make the system accessible externally, NAT host is added that directs
traffic between internal and external networks. Nowadays such a setup if typical especially for
cloud installation (e.g. OpenStack based environment).
Operating through NAT makes network configuration more complicated, because servers need to
bind to different addresses that they should be connected to. Chipster supports operation through
NAT, but needs some manual tweaks to configuration after running the automatic configuration
script.
Required steps are:
●
●
Run configure.sh
❍
Use internal address for message broker (ActiveMQ) host
❍
Use external address for file broker host
Edit webstart/web-root/chipster.jnlp and change all occurrences of internal address to external
address
●
Edit webstart/web-root/chipster-config.xml and change all occurrences of internal address to
external address
Internal address is the actual IP or host name of the node that the server is running on. External
address is the NAT'ed externally visible IP or host name that is mapped to the internal address.
Same port numbers must be used internally and externally.
Secure communications
Setting up SSL
By default Chipster virtual machine is configured to use SSL encrypted communication with
self-signed keys. These keys are generated when the virtual machine is started for the first time. All
the communication is encrypted, but you should get your keys signed by a Certificate Authority (CA)
to make sure you are connecting to an authentic server. There are two components that need keys:
message broker and file broker and you may want to create own key for both of them. See Java
Security documentation for how to get your keys signed by a CA.
Step 1. Locate keystore
You can either use the self-signed keystores and truststore generated in the virtual machine boot,
generate your own (see Generating SSL keys) or use the keys signed by CA. Use of CA signed keys is
more secure and easier to configure, at least after you have acquired the signed certificate.
There are two parts in SSL: encryption and authentication. Encryption ensures the confidentiality of
the communication and is based on private keys. Message broker and file broker have keystore
files that contains their private keys. These files must be kept secret and must be available only to
these two server processes.
Authentication ensures that the clients are communicating with an authentic server. When using CA
signed keys, the client can check that server has an authentic certificate for that hostname.
Authenticity of the CA signed certificates is verified using the the certificate chain stored in server's
keystore and the root CA certificates included in the Java. This verification happens automatically
always when a client connects to a SSL secured server.
As the name suggests, self-signed keys aren't signed by any CA and thus the authenticity of the
server can be verified only by having a certificate of the self-signed key on the client side. In
Chipster, these certificates are saved in a single truststore file called client.ts, which is copied to all
other components.
Step 2. Configure message broker
By default, message broker's keystore is called broker.ks.
●
copy broker.ks to chipster/activemq/conf
●
open chipster/activemq/bin/<platform>/wrapper.conf and edit the following settings
(uncomment if needed)
●
❍
javax.net.ssl.keystorePassword=password (or whatever you have used)
❍
javax.net.ssl.keystore=%ACTIVEMQ_BASE/conf/broker.ks
open chipster/activemq/conf/activemq.xml and check that the protocol is "ssl" (you can change
port also)
Step 3. Configure file broker
When you have done step 2, then all confidential information and metadata (including file names
and owners) will be encrypted. You can also encrypt the payload of file transfers, though it will have
impact on performance. To do so, you need to also configure the file broker to use SSL.
First, you need to have SSL keystore set up (step 1). Then you just have to * copy filebroker.ks to
chipster/fileserver/security * open chipster/fileserver/conf/chipster-config.xml and in module
"filebroker" within entry "url" change protocol from http to https (you can change port also)
By default, file broker's keystore file is called filebroker.ks and its password is password. If you
have used something else, copy these configuration items to
chipster/fileserver/conf/chipster-config.xml and edit accordingly.
<entry entryKey="filebroker-keystore" type="string" description="filebroker
keystore file for SSL">
<value>${chipster_security_dir}/filebroker.ks</value>
</entry>
<entry entryKey="storepass" type="string" description="keystore password for SSL">
<value>password</value>
</entry>
Step 4. Configure Chipster components
All components communicating with message broker and file broker must check the identity of
these servers. The configuration is little bit different depending on whether you are using CA signed
or self-signed certificate.
For a CA signed certificate, the virtual machines' default configuration for self-singed certificates
must be removed. This is easiest to do with the configure.sh tool, but you can also manually
remove these configuration items in each confguration file. The default values for these
configuration items, when not overridden by the virtual machine configuration, are compatible with
CA singed certificate: no truststore is used and hostname verification is enabled.
cd /opt/chipster
bash configure.sh edit client remove security/client-truststore
bash configure.sh edit servers
remove security/server-truststore
bash configure.sh edit client remove security/verify-hostname
bash configure.sh edit servers
remove security/verify-hostname
In case of a self-signed certificate, the virtual machine already has a suitable configuration. By
default, the trusstore file is called client.ts, it has a password password and a hostname verification
is disabled. For reference, these are commands for making this default configuration in case you
want to edit any of these default values.
cd /opt/chipster
bash configure.sh edit client set security/client-truststore client.ts
bash configure.sh edit servers
set security/server-truststore
'${chipster_security_dir}/client.ts'
bash configure.sh edit client set security/verify-hostname false
bash configure.sh edit servers
set security/verify-hostname false
Restart all server components.
sudo service chipster restart
Restart also the client and that's it.
If the client application fails to start with UnknownHostException, the problem is that hostname
cannot be resolved on the workstation. Java SSL requires that hostnames can be resolved for both
endpoints. This can happen in Linux, so try "host foobar" on shell. If it says "host not found" your
network is a bit problematic. You can add "foobar" to your /etc/hosts after localhost, like "127.0.0.1
localhost foobar", and it should work. You can also contact system administrator to find out why
your hostname cannot be resolved.
Some international versions of the Java Runtime do not have all the strong security components in
place. If this is the case, you will get "RSA premaster secret error" when trying to run Chipster server.
Installing "Java Cryptography Extension (JCE) Unlimited Strength Jurisdiction Policy Files" should fix it.
They can be installed using your system's package manager (if available there) or from Oracle Java
site.
How to disable SSL
When troubleshooting SSL, it is sometimes a good idea to check that everything works with the
plain unencrypted TCP communication. It may be a simpler option also for small test systems in
closed network environment. This is easiest to do with the configure.sh tool. Just change the
message broker protocol from ssl to tcp and the file broker protocol from https to http.
cd /opt/chipster
bash configure.sh
Generating SSL keys
Chipster comes with a self-signed keystore that gets you going with SSL. Chipster uses Java's built-in
SSL implementation. Keystore can be manipulated as explained in Java Security documentation, so
you can also use your existing keys.
You should use CA signed keys always when possible, but here we describe how you can generate
your own self-singed SSL keys. Please note that these keys are not approved by any Certificate
Authority, and cause warnings if used outside of Chipster environment.
Step 1. Generate keys
Keys can be generated using Java's keytool-application.
Generate key using keytool:
# use RSA certs, because there has been problems with DSA in Jetty according to
Jetty docs
keytool -genkeypair -alias broker -dname "cn=chipster activemq self-signed"
-validity 1800 -keypass password -storepass password -keyalg RSA -keystore
broker.ks
keytool -genkeypair -alias filebroker -dname "cn=chipster filebroker self-signed"
-validity 1800 -keypass password -storepass password -keyalg RSA -keystore
filebroker.ks
Step 2. Export certificates and create truststore
keytool -exportcert -alias broker -storepass password -file broker-cert -keystore
broker.ks
keytool -exportcert -alias filebroker -storepass password -file filebroker-cert
-keystore filebroker.ks
keytool -importcert -alias activemq -storepass password -file broker-cert -keystore
client.ts -noprompt
keytool -importcert -alias filebroker -storepass password -file filebroker-cert
-keystore client.ts -noprompt
rm broker-cert
rm filebroker-cert
Step 3. Set server keys
mv broker.ks /opt/chipster/activemq/conf/
mv filebroker.ks /opt/chipster/fileserver/security/
Step 4. Distribute truststores
cp
cp
cp
cp
cp
cp
client.ts
client.ts
client.ts
client.ts
client.ts
client.ts
/opt/chipster/auth/security/
/opt/chipster/comp/security/
/opt/chipster/fileserver/security/
/opt/chipster/manager/security/
/opt/chipster/webstart/security/
/opt/chipster/webstart/web-root/
Step 5. Restart servers and clients
sudo service chipster restart
Authentication
Users file
The simplest supported authentication mechanism is the user file in auth/security/users. The
format is:
<username>:<password>:<exp. date as YYYY-MM-DD>:comment
Only username and password are required. Blank lines and comment lines starting with # are
allowed.
LDAP
See Authentication via LDAP.
Server components
Chipster server components can be divided into services and brokers. Services are independent
components that perform tasks related to their roles. They do not use server socket and for that
reason can be deployed behind a firewall. When services are started, they "call back" to broker
components that take care of communication between the services. Broker components do use
server sockects.
Look at Directory layout to see where each of the components is located on the Chipster
installation.
Message broker
Message broker is the hub of the system. It is based on the ActiveMQ server that implements the
JMS standard.
Message broker is required. Logically there is only one message broker. ActiveMQ also supports
clusters of brokers, so that the message broker can be run on multiple servers for improved
performance and fault tolerance.
File broker
File broker is the central file repository of the system. It is based on the Jetty server and uses HTTP
or HTTPS protocols for communication.
File broker is required. There can be only one of them in the installation.
Metadata database backups
Metadata database is part of file broker starting from Chipster 3.0.
By default metadata database is backed up 10 past midnight everyday and 100 backups are kept by
deleting oldest backups as needed. This results in having daily backups for about 3 months time.
You can change metadata backup settings in fileserver/conf/chipster-config.xml.
Restoring metadata database backup
●
Stop chipster filebroker service chipster-fileserver stop or
/opt/chipster/fileserver/bin/linux-x86-64/chipster-fileserver stop
●
Delete corrupted or old database db-root/ChipsterFilebrokerMetadataDatabase
●
Copy backed up database
metadata-backups/filebroker-metadata-db-backup-yyyy-mm-dd_hh-mm:ss/ChipsterFilebroker
MetadataDatabase to db-root
●
Restart chipster filebroker service chipster-fileserver start or
/opt/chipster/fileserver/bin/linux-x86-64/chipster-fileserver start
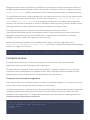
It is also possible to restore a backup by using certain connection URL attributes, but at the
moment that requires changing the java code. See Apache Derby backup documentation for more
information.
Example sessions
Example sessions make it possible to try different client features and tools even when there isn't
suitable dataset at hand. Example sessions are stored on filebroker. There is a special username
example_session_owner, whose cloud sessions are shown for all other users as example sessions.
To modify these sessions, create a password for this special account just like for any other account
and log in to client with this username. The file menu contains Open cloud session, Save cloud
session and Manage cloud sessions for managing these sessions. It is always safe to add new
sessions, but removal of datasets or sessions should be made only during a service break to avoid
causing problems for users that are accessing those dataset at the same time.
For programmatical access, its easier to handle example sessions as zip files in
/opt/chipster-beta/fileserver/file-root/example-session/. Any modifications to these files will be
updated to example sessions when the filebroker is started. Also all modifications done by
example_session_owner are exported to this directory.
Additionally, example sessions can be published over http by setting configuration item
example-session-path to public/example-session. After that it's possible to download all example
session in a single tar archive at
http://<filebroker host>:<port>/public/example-session/all-example-sessions.tar
Compute service
Compute service takes care of all processing (tools in the client). It calls various backend
applications and runtimes to do the actual computation.
Compute service is required. There can be many of them. Typically compute service is the only
component that is distributed over multiple servers. When multiple services are added, clients
negotiate with them and take care of load distribution over the services.
Compute service state management
The simplest way to run compute service is to make it completely stateless. For each job, it fetches
inputs, does the processing and uploads outputs to file broker.
For better performance, compute service can access file broker repository directly (both inputs and
outputs). By default the service will access files on the file broker directly from disk if they are
installed on the same server. To disable the optimisation, you can clear the following entry from
chipster/comp/config/chipster-config.xml:
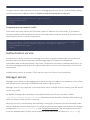
<entry entryKey="local-filebroker-user-data-path" type="string" description="path
to local filebroker's user data directory">
<value></value>
</entry>
Compute service cleans up after each job. For debugging purposes this can be disabled by adding
the following entry to comp module in chipster/comp/config/chipster-config.xml:
<entry entryKey="sweep-work-dir" type="boolean">
<value>false</value>
</entry>
Compute service network traffic
Both clients and comp server use file broker's public IP address for file transfers. If you want to
optimize network traffic between file broker and comp servers and use internal IP instead, set this
internal file broker IP in comp configuration:
<entry entryKey="overriding-filebroker-ip" type="string" description="connect to
filebroker using this ip address instead of its public address">
<value>INTERNAL_IP</value>
</entry>
Authentication service
Authentication service checks each message from client, requests authentication if needed and
forwards them to authenticated area. JMS message topics in Chipster are divided into
unauthenticated and authenticated. Only server components can write to authenticated topics, so
all client messaging needs to pass through authentication service to be picked up by other server
components.
Authentication service is required. There can be only one of them in the installation.
Manager service
Manager server listens to the logging topics and writes log information to a database. It also offers
web interfaces for accessing the database and monitoring the system.
Manager service is not required. In principle there can be multiple services running, but that would
not be very useful.
By default, manager takes a backup of the database daily at 0:05 am and saves it under
/opt/chipster/manager/database-backups. Daily backups are stored for 30 days, after which only
the first backup of each month is retained.
When the service is monitored by automatically running jobs, these test jobs will eventually make
the job database unnecessarily large. This can be avoided by defining the test accounts in manager
configuration admin-test-account-list (see Configuration system). This will delete the test jobs
from the database after 30 days and exclude also those jobs from the statistics in admin-web by
default.
Admin web
Admin web is a web user interface for administration of the Chipster servers. It is disabled by
default, by can be enabled in manager configuration:
<entry entryKey="start-admin" type="boolean" description="start admin web console">
<value>true</value>
</entry>
<entry entryKey="admin-username" type="string" description="admin web console
username">
<value>chipster</value>
</entry>
<entry entryKey="admin-password" type="string" description="admin web console
password">
<value>chipster</value>
</entry>
Restarting manager will start the Admin web in
http://<manager host>:8083/admin-web/
Features of admin web include:
●
list of connected servers and clients
●
view storage usage and delete cloud sessions
●
view list of running jobs
●
view, sort and filter content of a job database
●
view various job statistics
●
maintenance tools, like stop comp server gracefully
If your installation is visible to the internet, set firewall rules to restrict access to this port.
H2 console
Admin web has a user interface for viewing, sortin and filtering a job database and various job
statistics. Alternatively, H2 console allows you to write SQL queries directly to the database. H2
console can be enabled in manager configuration:
<entry entryKey="database-username" type="string" description="username for JDBC">
<value>chipster</value>
</entry>
<entry entryKey="database-password" type="string" description="password for JDBC">
<value></value>
</entry>
<entry entryKey="start-web-console" type="boolean" description="is web console
enabled">
<value>true</value>
</entry>
Restarting manager after these changes will start the H2 console in
http://<manager host>:8082/
On the login page, set connection url to ´jdbc:h2:database/chipster-manager´ and enter the
default credentials mentioned in the above config. If your installation is visible to the internet, set
firewall rules to restrict access to this port.
Tool development
Writing Chipster tools
Basically, you have to do three things:
●
provide the tool itself (command line executable, R script, Java class etc.)
●
write a tool description in [SADLFormat], so that the script can be run and shown in the client
application
●
make compute service aware of the tool
You should also follow conventions for Chipster analysis tools.
Adding and modifying tools
Chipster tools are divided into modules. Modules are high level packages that cover some specific
area of data analysis, such as next generation sequencing. At compute server, modules are stored
in chipster/comp/modules directory. Each module has its own subdirectory, where the tools are
located in tool type specific subdirectories. Tools can be R scripts, BeanShell scripts, or header
stubs that define how command line tools are invoked etc. Besides the tools themselves, each
module has a configuration file -module.xml that lists all tools, maps them to runtimes (configured
at compute service level) and gives tool specific parameters, if needed.
To get started, go and have a look at the modules directory. Changes to tool files are detected
dynamically, so you can make a change and see what happens when you run the tool in the client.
Changes to tool code do not require any restarting, allowing you to write and test tools
simultaneously. However, please note that changes to tool headers and module configuration files
require client and compute service restart.
Writing SADL header
SADL (Simple Analysis Description Language) is a simple notation for describing analysis tools so
that they can be used in Chipster environment. SADL describes what input files the tool takes, what
output files it produces, and what parameters are needed for running it. For the syntax of SADL
please see Describing tools with SADL.
The way how SADL is embedded into script is script type specific. For example, in R scripts you start
each line with hash (#), the comment notation of R. The SADL snippet must be the first thing in the
script and there must not be any empty lines in it.
Making R scripts Chipster compatible
Chipster uses regular R scripts. The only thing to remember is that interactive functions can not be
used.
Before running the script, the system runs the following initialisation snippet:
setwd(".")
The script should output results in table format to a file specified in description header. So, for
example like this:
write.table(mytable, file="results.txt", quote=FALSE, col.names=FALSE,
row.names=FALSE)
Creating manual pages
Manual pages are being delivered from the webstart server:
/opt/chipster/webstart/web-root/manual/
Chipster client maps manual pages to tools by using the ID of the tool. Postfix, if present, is
removed and replaced with ".html". So if you have a tool with ID "example_tool.R", you need to
create manual page called "example_tool.html" to the manual folder. Pages are shown in user's
default browser, so all available web tricks can be used. Supporting material, like images, can be
stored in the same directory or a subdirectory can be created.
Describing tools with SADL
SADL (Simple Analysis Description Language) is a simple notation for describing analysis tools so
that they can be used in the Chipster framework. SADL describes what input files the tool takes,
what output files it produces, and what parameters are needed to run it. In Chipster inputs are
selected by user, clicking on datasets at the GUI. Parameters are used to create the parameter
panel, and outputs are the datasets produced by the tool.
In SADL, each line describes one thing. General format of a line is: 1) what it is 2) optionality 3)
internal name 4) display name 5) type 6) type details 7) description. By default inputs and
parameters are required to be set by the user, but they can also be declared optional. All display
names are in quotes and descriptions are in parentheses, but they can be omitted when the string
does not contain whitespace or operator characters. The required order of the lines is: TOOL,
INPUT*, OUTPUT*, PARAMETER*. Example of a SADL description for an simple concatenation tool is
given below.
TOOL concat.R: "Concatenate tool" (Concatenates two files.)
INPUT file1.txt: "First input" TYPE GENERIC (First file to concatenate.)
INPUT file2.txt: "Second input" TYPE GENERIC (Second file to concatenate.)
OUTPUT concatenated.txt: "Concatenated file" (The concatenated result file.)
The concatenation tool is very simple. It defines the tool name and description and then the two
inputs we are going to concatenate and, finally, the single output. Read further to understand the
syntax that is used to define names (first there is the technical name, a colon and then the human
readable name).
Names
All names in SADL have same syntax. They can have two parts: ID (technical name) and human
readable name (shown in GUI). ID's should not be changed without a very good reason, as they are
used to identify tools, parameters etc. in the Chipster framework. Especially for users' workflows to
remain valid it is best to not change the ID's. Human readable names can be changed freely.
Example of name without and with human readable part:
p_value
p_value: "The P-value"
The ID part of the name can be followed by colon and human readable name. ID is required, but
human readable name is not. Both parts are typically in parentheses, but they can be omitted, if the
name is a simple string without spaces or operator characters.
Input and output files
Inputs are the data files that are being processed, and outputs are the results that are returned to
user as data files. Input and output definition formats are:
INPUT (META) (OPTIONAL) name TYPE type (description)
OUTPUT (META) (OPTIONAL) name TYPE type (description)
File names follow the normal conventions, with one addition. File name can contain the special
string {...}, which makes it an input file set. Chipster binds all matching inputs and gives them
names with numbering 1... replacing the special string.
Type information is not currently used, except for backwards compatibility in some older tools.
Currently type GENERIC should be used always. In future it will be replaced by a more fine grained
and flexible system (type tagging).
Parameters
Parameters allow user to tune behavior of an analysis tool. They are shown in the graphical
parameter panel in the Chipster user interface and stored to variables or given as arguments when
running the tool.
Parameter definition format is:
PARAMETER (OPTIONAL) name TYPE type FROM min_value TO max_value DEFAULT def_value
(description)
FROM, TO and DEFAULT are optional. Description can be left blank.
Valid parameter types are:
●
●
●
●
●
INTEGER
❍
For integer values
❍
Represented as a text box in GUI
DECIMAL
❍
For decimal values
❍
Represented as a text box in GUI
PERCENT
❍
For percentages (integer from between 0 - 100)
❍
Might be removed in future, if there is no need for this
❍
Represented as a slider in GUI
STRING
❍
For free string values
❍
Represented as a text box in GUI
[key1:val1, key1:val2, key1:val3]
❍
For enumerated values (selection from a predefined list)
❍
Valid values are given in block parenthesis
❍
Represented as a drop-down list in GUI
❍
First part of the name is the actual technical value of the selection, is second part is given it is
used in the GUI
●
COLUMN_SEL
❍
For selecting one column from the input dataset
❍
Possible values are read from the input dataset
■
In case of multiple inputs, present in all of them
●
❍
Can also be empty
❍
Represented as a drop-down list in GUI
METACOLUMN_SEL
❍
For selecting one column from the phenodata
❍
Behaves exactly like COLUMN_SEL, but uses phenodata as input dataset
Numeric parameters allow also minimum and maximum values to be set, by using keywords FROM
and TO after the parameter type. For enumeration type, FROM and TO can be used to specify the
minimum and maximum number of selections the user can make (by default one selection can be
made).
All parameters allow a default value, which is given by using the keyword DEFAULT. The default
value must be a valid value for the parameter. User interface implements validity checking in real
time, so writing "one" to a INTEGER text box or "10" to a INTEGER text box with maximum of 5
results in immediate error shown in the parameter panel side and run button being blocked.
Advanced example
Below is an example of an imaginery tool that highlights all different features that can be described
with the language.
TOOL util-test.R: "Test tool" (This tool description is shown to the user in the
GUI (note that certain operators must be escaped\).)
INPUT microarray{...}.tsv: "Raw data files" TYPE CDNA (A set of 1 or more raw data
files that are given as input.)
INPUT META phenodata.tsv: "Experiment description" TYPE GENERIC (Meta-level
description of the input files.)
OUTPUT result.txt: "Result file" (The output file that this tool always produces.)
OUTPUT OPTIONAL warnings.txt: "Warning file" (The tool might produce warnings while
running and then they are returned also.)
PARAMETER value1: "The first value" TYPE INTEGER FROM 0 TO 200 DEFAULT 10
(Description of this parameter)
PARAMETER OPTIONAL value2: "The second value" TYPE DECIMAL FROM 0 TO 200 DEFAULT
20.2 (Description of this parameter)
PARAMETER method: "The method" TYPE [linear: "Linear scale", logarithmic:
"Logarithmic scale"] DEFAULT logarithmic (Description of this parameter)
PARAMETER genename: "Gene name" TYPE STRING DEFAULT at_1234 (Description of this
parameter)
PARAMETER key: "Key column" TYPE COLUMN_SEL (Which column is used as a key)
Format of SADL syntax description
For geek users, a more formal syntax defination is below. It is in the form of rewrite rules. First rule
in the list is the initial rule where rewriting is started. Quoted texts are snippets of SADL. For
example, TOOL is a term that is rewritten using the given rules, but "TOOL" is a string that should
be found in the source code. Operators ?, +, * and | have their common semantics. The canonical
syntax definition in maintained in the Javadoc documentation of the class SADLSyntax.
-> TOOL+
TOOL -> "TOOL" NAME DESCRIPTION INPUT* OUTPUT* PARAMETER*
INPUT -> "INPUT" META? OPTIONALITY? NAME "TYPE" TYPE_NAME DESCRIPTION
OUTPUT -> "OUTPUT" META? OPTIONALITY? NAME DESCRIPTION
PARAMETER -> "PARAMETER" OPTIONALITY? NAME "TYPE" PARAMETER_TYPE PARAMETER_FROM?
PARAMETER_TO? PARAMETER_DEFAULT? DESCRIPTION
PARAMETER_TYPE -> TOKEN | PARAMETER_TYPE_ENUM
PARAMETER_TYPE_ENUM -> "[" PARAMETER_TYPE_ENUM_ELEMENTS "]"
PARAMETER_TYPE_ENUM_ELEMENTS -> NAME | NAME "," PARAMETER_TYPE_ENUM_ELEMENTS
PARAMETER_FROM -> "FROM" TOKEN
PARAMETER_TO -> "TO" TOKEN
PARAMETER_DEFAULT -> "DEFAULT" PARAMETER_DEFAULT_ELEMENT
PARAMETER_DEFAULT_ELEMENT -> TOKEN | TOKEN "," PARAMETER_DEFAULT_ELEMENT
OPTIONALITY -> "OPTIONAL"
META -> "META"
NAME -> TOKEN | TOKEN ":" TOKEN
DESCRIPTION -> TOKEN
TYPE_NAME -> TOKEN (see SADLSyntax.InputType for declaration, implementations
pluggable)
TOKEN -> any single token produced by tokeniser
Tool conventions
The goal in Chipster is to always produce a coherent user experience. Here are some conventions
that can be useful when integrating tools into Chipster and should be followed when writing tools
that are to be integrated into Chipster main repository.
NGS analysis module
●
Tools should accept and produce read data in FASTQ and BAM format when possible
Microarray analysis module
●
The default data format is TSV (tab separated values), with one row for each gene or probeset
●
The first column should be unnamed or "identifier" and contain the gene/probeset name
●
Tool should not remove any existing columns unless the row structure is changed. In other words,
inputs can have annotation etc. data that just passes through analysis steps
●
See AnalysisToolInputsAndOutputs for more information
Sequence analysis module (Embster)
●
Follow EMBOSS conventions
Troubleshooting
For getting support, we recommend using the chipster-tech mailing list. You don't need to
subscribe to send or view messages.
R script integration tutorial
This tutorial will show how to modify or add new analysis tool to a Chipster server. Integrating
analysis tools is a straightforward process, allowing you to use Chipster as a medium for serving
and supporting large number of users not experienced in data analysis and programming. Here we
focus on tools written using the R programming language, but the process is pretty much the same
also with other flavours of analysis tools.
To be able to work with tool scripts you need to be able to log into the Chipster server. This is an
important restriction to guarantee security of the server: analysis tools are essentially unrestricted
pieces of code that will be run on the server, meaning that the ability to add or modify tools is equal
to the ability to log into the system.
In practice, developing R scripts for Chipster means editing files on the comp/modules subdirectory
of the Chipster installation inside the server. This can be done either by logging into the Linux
command line and running the file editor there, or connecting the server filesystem and editing the
files using the file editor you normally use. Let's first have a look at the command line option, as
you always need the command line for some server administration tasks anyway.
Working in command line
Once you have started a fresh Chipster server using the virtual machine images that are provided,
you need to login there for the first time. To do this, you typically use the virtual console of your
virtualisation software (e.g. VirtualBox or VMware). This virtual console corresponds to a physical
console (display and keyboard) of a real server machine. It opens up when you start the virtual
machine.
Login using the username "chipster". If you haven't already changed the password, then it is
"chipster" by default.
Now you are at the console command line. Virtual consoles are not very user friendly, so it is
recommended to use SSH to connect to the server. When you logged in, you were provided with a
"message of the day" that contains some useful bits of information, including the IP address of the
virtual server. Record the IP address and log out.
Next open up your favourite SSH client and point it to the IP address of the server. Login using the
"chipster" account again. Switch into directory that contains analysis tool modules and list them.
cd /opt/chipster/comp/modules/
ls
There you can see the analysis modules, typically common, microarray and ngs. Module common
contains utility functions that can be used by the actual tool scripts in the other modules.
Each module has a configuration file that describes the tools inside the module.
cat microarray/microarray-module.xml
Typically you would edit the file to add or remove tools and tool categories.
Next we switch to a directory that contains the actual analysis scripts and have a look at there.
cd microarray/R-2.12
ls
You can see a large number of scripts, each of them corresponding to a single tool you have on the
client GUI. To make things as simple as possible, Chipster has a one-to-one mapping between tools
and files. To create a tool, you need to create only a single file. And a single file is related to a single
tool. If you need to share functionality between tools, the common module is available for that.
To modify a tool, you can just edit it with a text editor:
nano na-omitted.R
The tool should look like the following:
# TOOL na-omitted.R: "Remove missing values" (Removal of missing values. All
observations, i.e., genes that have at least one missing value are excluded from
the data set.)
# INPUT normalized.tsv: normalized.tsv TYPE GENE_EXPRS
# OUTPUT na-omitted.tsv: na-omitted.tsv
# Removal of missing values
# JTT 22.6.2006
# Loads the file
file<-c("normalized.tsv")
As you can see, there are two parts in the script. First there are 3 lines of header, which describes
the tool for Chipster. After the header you have the script itself, just a regular script of R commands.
The header is commented so that the description snippet can be conveniently part of the
executable R script file. It is written using simple and compact description language called SADL.
The most practical way to get started with SADL descriptions is to have a look at similar tools and
their headers. For complete reference, look at technical manual.
Next we work with the script a bit. Changes to tool scripts are visible immediately. You can try this
out by adding this to the end of the script (and saving it):
# I was here!
When you open the Chipster client and click Show sourcecode for Remove missing values tool, you
should see your additional line there. If you remove the line, save and hit Show sourcecode again,
you will see that the line has disappeared. It is important to remember that if you change the
header part of the script, then you need to restart your client so that it can recreate its internal data
structures and GUI components to match the updated tool.
Adding and removing tools
To add or remove a tool, edit the corresponding module configuration file, e.g.:
cd /opt/chipster/comp/modules/microarray/
nano microarray-module.xml
Tool can be removed by simply removing or commenting out the XML entry from the file. To add a
tool, create a new entry. As an example, consider this snippet from microarray-module.xml:
<tool runtime="R-2.12"><resource>filter-expression.R</resource></tool>
<tool runtime="R-2.12"><resource>filter-flags.R</resource></tool>
<tool runtime="R-2.12"><resource>filter-sd.R</resource></tool>
To remove flag filtering and add p-value filtering, you would change the snippet to following:
<tool runtime="R-2.12"><resource>filter-expression.R</resource></tool>
<tool runtime="R-2.12"><resource>filter-sd.R</resource></tool>
<tool runtime="R-2.12"><resource>filter-pvalue.R</resource></tool>
The runtime attribute defines the runtime environment to use when running the tool. They are
specified in comp/config/runtimes.xml. For R scripts, you need to pick the correct version of the R
environment for your script (in these examples, it is R 2.12). As we have seen, scripts are stored in
runtime specific subdirectories of the module. It means that tools can have different versions for
different runtimes, allowing to cater for e.g. differences between R syntax. Mostly this functionality
is used when a set of scripts is gradually updated to a later R version.
Creating manual pages
The client has a More help button associated with each tool. It takes user to a tool specific manual
page, assuming the page exists. Manual is hosted in the server, and more particularly, on the
webstart component that also serves the startup page. In the server, switch to manual directory
and check it:
cd /opt/chipster/webstart/web-root/manual
ls
You can see a long list of HTML pages. Their names match tool names, but manual pages are not
organised into module and runtime hierarchies.
To create a manual page for a tool saved in foobar.R, create a file called foobar.html and fill it in by
e.g. using this template:
<!DOCTYPE HTML PUBLIC "-//W3C//DTD HTML 4.01 Transitional//EN">
<html lang="en">
<head><title>Tool name</title></head>
<body>
<h2>Category / Tool name</h2>
<h3>Description</h3>
<p>Short description of the tool...</p>
<h3>Parameters</h3>
<ul>
<li>Parameter 1: description</li>
</ul>
<h3>Details</h3>
<p>More detailed description...</p>
<h3>Output</h3>
<ul>
<li>Output 1: description</li>
</ul>
</body>
Manual pages are stored to webstart/web-root/manual.
Mounting server filesystem via SSH
When running Chipster server in a virtual machine, the host system can not see directly the
filesystem inside the "virtual box". Logging into the system and running text editors inside the
virtual machine quickly becomes tedious.
There are several ways to access files at the server more conveniently, including shared folders,
NFS, rsync and deploy scripts. However SFTP is often the easiest solution. The idea is to use SFTP
(SSH file transfer protocol) to browse the server, just like you would browse files on your own
workstation. To get started, you need to log into the server and check the IP address it is using.
Following steps depend on your host operating system.
Setting up SFTP access in Linux
Setting up SFTP is dead easy in Linux. Of course this should not come as a surprise, as there is
Ubuntu Linux running inside the virtual machine as well.
●
Open file explorer
●
Type into location bar: ssh://<IP ADDRESS>/opt/chipster
Then you're done. Double click on files to edit them like you would do with local files.
Setting up SFTP access in Mac OS X
In OS X you can mount server filesystem (SSHFS), after you have added two additional packages.
●
Download and install OSXFuse from http://osxfuse.github.com
❍
When installing, select MacFUSE Compatibility Layer option
●
Download and install Macfusion from http://macfusionapp.org
●
Open Macfusion application.
●
Click on plus sign and select SSHFS.
●
Set host to IP address of the virtual machine, username to chipster and path to /opt/chipster. Click
Ok.
Now you are set. Click Mount to connect, give the password and right-click then select Reveal to
open the server folder /opt/chipster in Finder.
Setting up SFTP access in Windows
Windows has multiple different SSH/SFTP clients available. You are probably using one already, so it
might be best to stick with it and connect following instruction below.
●
Open your SFTP client
●
When connecting, set host to IP address of the virtual machine, username to chipster and path to
/opt/chipster
If you don't have SSH/SFTP client installed yet, a good one is WinSCP (http://winscp.net).
Chipster command line client
Getting started
Chipster bundles analysis tools and visualisations and therefore a graphical user interface is an
obvious choice. However, sometimes it's easier to work on the comand line, for example when you
* want to automate analysis steps with shell scripts * have big data files on a server to which you
only have a command line access * want to produce Chipster sessions in your custom data pipeline
* have a pile of chipster sessions and want to extract what tools were run in them and with what
parameters
Chipster command line client is tested only on Linux and OS X. For the time being, it should be
considered experimental, so make sure you have good backups of your data. If you encounter any
problems with the command line client, please let us know.
Let's start by donwloading the startup script. You have to do this only once.
wget http://chipster.csc.fi/chipster-cli.bash
Run it.
bash chipster-cli.bash
Program's help text is printed.
usage: Chipster command line client
[-h] [-c CONFIG] [-u USERNAME] [-p PASSWORD] [-W WORKING-COPY] [-v] [-q] [-y]
{list-datasets,dataset,print,history,rename,delete,import,export,list-tools,tool,ru
n,save-workflow,run-workflow,open-session,save-session,clear-session,list-sessions,
delete-session,interactive,exit,quit}
...
optional arguments:
-h, --help
show this help message and exit
-c CONFIG, --config CONFIG
chipster client configuration file
-u USERNAME, --username USERNAME
chipster username
-p PASSWORD, --password PASSWORD
chipster password
-W WORKING-COPY, --working-copy WORKING-COPY
name of the working copy session, either zip or cloud
session
-v, --verbose
more verbose output
-q, --quiet
uppress status messages and print only requested data
-y, --yaml
output in yaml format for programmatical access
commands:
{list-datasets,dataset,print,history,rename,delete,import,export,list-tools,tool,ru
n,save-workflow,run-workflow,open-session,save-session,clear-session,list-sessions,
delete-session,interactive,exit,quit}
list-datasets
list datasets
dataset
view dataset details
print
output dataset contents
history
view history, set verbose to view also source codes
rename
rename dataset
delete
delete dataset
import
import file
export
export dataset to file
list-tools
list tools, search term is optional
tool
show tool details, set verbose to view parameter help
texts.
run
run tool
save-workflow
save workflow
run-workflow
run workflow
open-session
open zip session or cloud session
save-session
save zip session or cloud session
clear-session
delete all datasets of the working copy session
list-sessions
list cloud sessions
delete-session
delete cloud session
interactive
enter interactive mode
exit (quit)
quit interactive mode
use 'COMMAND -h' to show command arguments
Client needs your username and password to connect to Chipster server. The help text above
mentions also config file, but we don't have to care about it, because it is already set by the startup
script. You could enter the username and password directly in command line arguments, but it's
better idea to save those in a file. Use your favorite editor to create a file like this:
--username
YOUR_USERNAME
--password
YOUR_PASSWORD
For example, using nano:
nano credentials
Type in content. Press Ctrl-O and Enter to save and Ctrl-X to quit.
Now, let's start Chipster in interactive mode using the credentials file. It takes a few seconds to
connect. If you want to see how connecting is proggressing, enable also --verbose option.
bash chipster-cli.bash @credentials --verbose interactive
Connecting to broker at chipster.csc.fi... ok
Fetching analysis descriptions... ok
Chipster command line client in interactive mode, type '-h' for help or 'exit' to
quit
>>>
Like the message suggests, you can enter -h to see again the help message above. All commands
are available both on command line and in the interactive mode. For example to list the available
sessions on server, you can type the command in interactive mode:
>>>list-sessions
Or directly on the command line (type exit to leave the interactive mode):
bash chipster-cli.bash @credentials list-sessions
Both alternatives print the same list of example sessions.
Example sessions/
Example sessions/NGS
Example sessions/microarray
As mentioned earlier, it takes a few seconds for Chipster to start, but interactive mode needs to
connect only once and is therefore faster to use. On the other hand, if you want pipe results to
other programs, use command line version instead. From now on, this page will show only the
command, like its used in interactive mode, but feel free to put bash chipster-cli.bash
@credentials in front of each command to do the same on command line.
Open session and inspect it
Let's open an example session. We have the put name in quotes, because there is a space
character in it. The same command is used also for opening zip session files.
open-session "Example sessions/NGS"
Command list-datasets prints the list of datasets in this session.
h1-hESC_RNAseq.fastq
per_base_sequence_content.png
per_base_quality.png
PrinseqReport-viewInExternalBrowser.html
GM12878_RNAseq.fastq
per_base_sequence_content.png
per_base_quality.png
trimmed.fastq
trimmed.fastq
insertions.bed
GM12878.bam
junctions.bed
GM12878.bam.bai
deletions.bed
insertions.bed
h1-hESC.bam
junctions.bed
h1-hESC.bam.bai
deletions.bed
de-genes-cufflinks.tsv
cufflinks-log.txt
de-isoforms-cufflinks.tsv
de-genes-cufflinks.bed
de-isoforms-cufflinks.bed
Command dataset shows more details about the dataset. You can also view the content of the
dataset using command print.
>>>dataset de-isoforms-cufflinks.tsv
Dataset
de-isoforms-cufflinks.tsv
Date
2014-05-21T13:20:14.290+03:00
Size
3023 bytes
Notes
Produced by tool
cuffdiff2.R
Using inputs
h1-hESC.bam GM12878.bam
Parameters
output.type=concise internalgtf=hg19 chr=chr1 fdr=0.05 mmread=no
bias=no genome=hg19
INPUT OF
SortTsv.java
OUTPUT DATASETS
sorted.tsv sorted.tsv
>>>print de-isoforms-cufflinks.tsv
chr start
end test_id gene_id symbol locus
sample_1
sample_2
status
FPKM_1 FPKM_2 log2_FC test_stat
p_value q_value significant
1
chr19
2476122 2478257 ENST00000215631 ENSG00000099860 GADD45B
chr19:2476122-2478257
q1 q2 OK 020971.3
Inf NA 5e-05
0.00118333 yes
2
chr19
2754711 2783354 ENST00000221566 ENSG00000104969 SGTA
chr19:2754711-2783354
q1 q2 OK 06756.25
Inf NA 5e-05
0.00118333 yes
...
Running a tool
Next we are going to sort this file. Command list-tools prints all available tools, but often it is
more practical to make the list shorter with a search term. For example, see what sort tools are
available.
>>>list-tools sort
microarray
Utilities
Sort samples
microarray
Utilities
Sort genes
ngs
Utilities
samtools-sort-index-BAM.R
ngs
Utilities
samtools-convert-SAMtoBAM-sort-index.R
index
ngs
Utilities
Sort BED
ngs
Utilities
Sort GTF
ngs
Utilities
Sort TSV
ngs
Utilities
Sort VCF
sort-samples.R
sort-genes.R
Sort and index BAM
Convert SAM to BAM, sort and
SortBed.java
SortGtf.java
SortTsv.java
SortVcf.java
Tool SortTsv.java is our choice because our file is a TSV file. To run the tool, we need to know
about its parameters. Use --verbose option to see also help texts for each parameter.
>>>--verbose tool SortTsv.java
SortTsv.java
Utilities / Sort TSV
Sort a TSV file by chromosome and start position.
PARAMETERS
column
Chromosome column
single selection, default
OPTION
first
second
NAME
First
Second
Select the column that contains chromosome information.
We need to know also how the run command is used.
>>>run -h
usage: run [-h] tool-id [--dataset [DATASET [DATASET ...]]] [--parameter [PARAMETER
[PARAMETER ...]]]
positional arguments:
tool-id
optional arguments:
-h, --help
show this help message and exit
--dataset [DATASET [DATASET ...]]
input dataset(s) for a tool
--parameter [PARAMETER [PARAMETER ...]]
set parameters for a tool, e.g. parameter=VALUE
Now we know enough to actually run the tool. When the next command prompt >>> appears, the
job is completed.
>>>run SortTsv.java --dataset de-isoforms-cufflinks.tsv --parameter column=second
Running....
>>>
Save changes
Finally, we can export the file and save everything in a zip session.
>>>export sorted.tsv
>>>save-session tutorial.zip
>>>exit
Next time you start Chipster command line client in this same directory, it will continue where you
left it. It saves its state in a file called cli-working-copy.zip. When you want to remove all datasets
and start from the scratch again, use command clear-session or delete this file.
Programmatical access and scripting
Yaml output
The default output of the program is ment for humans and might be changed whenever we found
out a better way to present that information. For scripts you should use output in yaml format,
which presents the data itself and which we try to keep more stable.
bash chipster-cli.bash @credentials --yaml tool SortTsv.java
help: ''
description: Sort a TSV file by chromosome and start position.
name: Utilities / Sort TSV
tool: SortTsv.java
parameters:
- min: 0
default: ''
max: 1
parameter: column
description: Select the column that contains chromosome information.
name: Chromosome column
type: ENUM
options:
- name: First
option: first
- name: Second
option: second
In command lines scripts, use shyaml to parse these yaml outputs. See its documentation for
installation instructions.
Example 1: Run SortBed.java tool for each BED file in a session
#!/bin/bash
# exit on error
set -e
if [[ -z #!/bin/bash # exit on error set -e if [[ -z $2 ]] then echo "usage:
sort-bed.bash INPUT_SESSION.ZIP OUTPUT_SESSION.ZIP" exit 1 fi echo "Opening session
$1..." bash chipster-cli.bash @credentials clear-session bash chipster-cli.bash
@credentials open-session $1 echo "Searching BED files..." bash chipster-cli.bash
@credentials --yaml list-datasets | shyaml get-values | grep ".bed" > datasets
while read dataset do echo "Sorting $dataset..." # run sort tool bash
chipster-cli.bash @credentials --quiet run SortBed.java --dataset $dataset # rename
output filename=$(basename $dataset .bed) bash chipster-cli.bash @credentials
rename sorted.bed $filename-sort.bed done < datasets rm datasets echo "Saving
session $2..." bash chipster-cli.bash @credentials save-session $2 ]]
then
echo "usage: sort-bed.bash INPUT_SESSION.ZIP OUTPUT_SESSION.ZIP"
exit 1
fi
echo "Opening session ..."
bash chipster-cli.bash @credentials clear-session
bash chipster-cli.bash @credentials open-session
echo "Searching BED files..."
bash chipster-cli.bash @credentials --yaml list-datasets | shyaml
get-values | grep ".bed" > datasets
while read dataset
do
echo "Sorting $dataset..."
# run sort tool
bash chipster-cli.bash @credentials --quiet run SortBed.java
--dataset $dataset
# rename output
filename=$(basename $dataset .bed)
bash chipster-cli.bash @credentials rename sorted.bed
$filename-sort.bed
done < datasets
rm datasets
echo "Saving session #!/bin/bash # exit on error set -e if [[ -z $2 ]] then echo
"usage: sort-bed.bash INPUT_SESSION.ZIP OUTPUT_SESSION.ZIP" exit 1 fi echo "Opening
session $1..." bash chipster-cli.bash @credentials clear-session bash
chipster-cli.bash @credentials open-session $1 echo "Searching BED files..." bash
chipster-cli.bash @credentials --yaml list-datasets | shyaml get-values | grep
".bed" > datasets while read dataset do echo "Sorting $dataset..." # run sort tool
bash chipster-cli.bash @credentials --quiet run SortBed.java --dataset $dataset #
rename output filename=$(basename $dataset .bed) bash chipster-cli.bash
@credentials rename sorted.bed $filename-sort.bed done < datasets rm datasets echo
"Saving session $2..." bash chipster-cli.bash @credentials save-session $2 ..."
bash chipster-cli.bash @credentials save-session #!/bin/bash # exit on error
set -e if [[ -z $2 ]] then echo "usage: sort-bed.bash INPUT_SESSION.ZIP
OUTPUT_SESSION.ZIP" exit 1 fi echo "Opening session $1..." bash chipster-cli.bash
@credentials clear-session bash chipster-cli.bash @credentials open-session $1 echo
"Searching BED files..." bash chipster-cli.bash @credentials --yaml list-datasets |
shyaml get-values | grep ".bed" > datasets while read dataset do echo "Sorting
$dataset..." # run sort tool bash chipster-cli.bash @credentials --quiet run
SortBed.java --dataset $dataset # rename output filename=$(basename $dataset .bed)
bash chipster-cli.bash @credentials rename sorted.bed $filename-sort.bed done <
datasets rm datasets echo "Saving session $2..." bash chipster-cli.bash
@credentials save-session $2
Example 2: Iterate throught the list of all tools
#!/bin/bash
# exit on error
set -e
echo "Get a list of all tools..."
bash chipster-cli.bash @credentials --yaml list-tools > tools.yaml
rm -f tool-list
cat tools.yaml | shyaml keys | while read key
do
cat tools.yaml | shyaml keys "$key" | while read category
do
cat tools.yaml | shyaml get-values-0 "$key.$category" | while read -r -d $'\0'
tool
do
echo "$tool" | shyaml get-value tool
echo ""
done
done
done
Example 3: List all tools used in the session
#!/bin/bash
# exit on error
set -e
if [[ -z
]]
then
echo "usage: extract-tools.bash INPUT_SESSION.ZIP"
exit 1
fi
echo "Opening session ..."
bash chipster-cli.bash @credentials clear
bash chipster-cli.bash @credentials open-session
echo "Listing datasets..."
bash chipster-cli.bash @credentials --yaml list-datasets | shyaml get-values >
datasets
rm -f tools
while read dataset
do
tool=$(bash chipster-cli.bash @credentials --yaml dataset $dataset | shyaml
get-value tool)
echo $tool >> tools
echo "Dataset $dataset was produced by tool $tool"
done < datasets
echo "Sorted list of all tools:"
cat tools | sort | uniq
rm datasets tools
Example 3.1: List all tools used in the session
The previous example is easy to understand, but it takes quite a while to run. If you think about
abusing interactive mode to make it faster, here it is. However, the speed problem should really be
fixed in the client itself to keep the scripts as clear as possible and not like this.
#!/bin/bash
# exit on error
set -e
if [[ -z ]]
then
echo "usage: extract-tools2.bash INPUT_SESSION.ZIP"
exit 1
fi
echo "Opening session..."
bash chipster-cli.bash @credentials clear
bash chipster-cli.bash @credentials open-session
echo "Listing datasets..."
bash chipster-cli.bash @credentials --yaml list-datasets | shyaml get-values >
datasets
# this will be used to separate yaml outputs
echo "---" > yaml-delimiter
# prepare a list of commands
rm -f commands
echo "--quiet import yaml-delimiter" >> commands
while read dataset
do
echo "--quiet print yaml-delimiter" >> commands
echo "--yaml --quiet dataset $dataset" >> commands
done < datasets
echo "exit" >> commands
echo "Getting a list of tools..."
cat commands | bash chipster-cli.bash @credentials --yaml --quiet interactive >
tool-yamls
# split the multi-document yaml to separate files
awk '/---/{n++}{print >"tool-" n ".yaml" }' tool-yamls
rm -f tools
for f in tool-*.yaml
do
cat $f | shyaml get-value tool >> tools
echo "" >> tools
done
echo "Sorted list of all tools:"
cat tools | sort | uniq
rm datasets commands tools yaml-delimiter tool-yamls tool-*.yaml
Chipster authentication via LDAP and JNDI
Revision history
●
24.11.2008: Original version (Oliver Heil)
●
24.07.2009: Minor changes in chipster version 1.3.0 (Oliver Heil)
●
11.7.2014: Small update to new wiki (Aleksi Kallio)
Problem description
Every user with an account in our Active Directory Domain should be able to log into chipster using
the Active Directory login credentials.
Remarks
●
JNDI is the Java Naming and Directory Interface
●
Java contains a class LdapLoginModule, which does not support initial binding with a special LDAP
user who has search rights in the directory. Therefore the class LdapExtLoginModule of JBOSS is
utilized.
●
JBOSS at http://www.jboss.org/ provides the source of the community release of the J2EE
application server. Here jboss-4.2.3.GA-src.tar.gz was used.
●
This solution was developed with
❍
debian linux 4.0 (etch)
❍
linux kernel 2.6.18-6-amd64
❍
java version 1.5.0
❍
apache ant version 1.7.1
❍
J2EE application server version 4.2.3
❍
chipster version 1.2.0, 1.3.0
Solution:
1. Download and build a current release of the J2EE application server from http://www.jboss.org/
Build works very straightforward. For our purpose it is sufficient to move the build result, which
resides in build/output, to some directory on the chipster server.
2. Edit wrapper.conf of Chipster auth component (chipster/auth/conf/wrapper.conf)# Java
Classpath (include wrapper.jar) Add class path elements as
# needed starting from 1
wrapper.java.classpath.1=../shared/lib/*.jar
wrapper.java.classpath.2=/YOUR_JBOSS_DIR/jboss-4.2.3.GA/server/default/lib/*.jar
wrapper.java.classpath.3=/YOUR_JBOSS_DIR/jboss-4.2.3.GA/lib/*.jar
3. Edit jaas.config of Chipster auth component (chipster/auth/conf/jaas.config) / **Login
Configuration for Chipster**
Chipster {
/* fi.csc.microarray.auth.SimpleFileLoginModule sufficient passwdFile="users"; */
/* fi.csc.microarray.auth.UnixCryptLoginModule sufficient
passwdFile="chipster_shadow"; */
org.jboss.security.auth.spi.LdapExtLoginModule REQUIRED
java.naming.provider.url="ldap://your.ldap.server:389"
bindDN="your_active_directory_name\\your_ldap_search_user"
bindCredential="your_ldap_search_user_password"
baseCtxDN="OU=your_ou,DC=some_more,DC=your_domain,DC=com"
baseFilter="(&(objectClass=user)(cn={0}))"
rolesCtxDN="OU=your_ou,DC=some_more,DC=your_domain,DC=com"
roleFilter="(&(objectClass=user)(cn={0}))"
roleAttributeID="memberOf"
allowEmptyPasswords="false";
};
The above LDAP information is very specific. You need to know your information to access your
LDAP service. To explore and learn about the required LDAP search strings and DNs the tool
"LDAP Browser" from LDAPSOFT (http://www.ldapsoft.com) showed to be of great help.
4. Replace all Chipster log4j.jar occurrences with the log4j.jar of JBOSS This will propably not be
necessary in future when chipster uses the newer files itself. cd /opt/chipster
find . -name "log4*"
./shared/lib/log4j-1.2.9.jar
./activemq/example/conf/log4j.properties
./activemq/lib/optional/log4j-1.2.14.jar
./activemq/conf/log4j.properties
cp ./shared/lib/log4j-1.2.9.jar ./shared/lib/log4j-1.2.9.jar.bck
cp /YOUR_JBOSS_DIR/jboss-4.2.3.GA/client/log4j.jar ./shared/lib/log4j-1.2.9.jar
cp ./activemq/lib/optional/log4j-1.2.14.jar
./activemq/lib/optional/log4j-1.2.14.jar.bck
cp /YOUR_JBOSS_DIR/jboss-4.2.3.GA/client/log4j.jar
./activemq/lib/optional/log4j-1.2.14.jar
5. Restart Chipster
Relevant Chipster log files to look for errors and problems are
auth/logs/wrapper.log
auth/logs/chipster.log
auth/logs/security.log