1
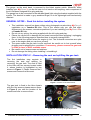
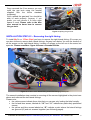
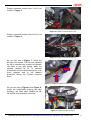
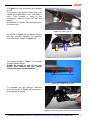
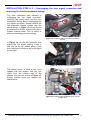
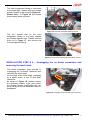
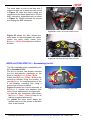
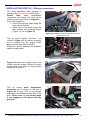
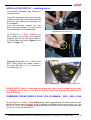
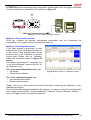
INSTALLATION STEP # 7 – Installing the kit.
The seventh installation step consists in
installing the kit.
Once the connector has been correctly
installed, please place the black anodized
aluminium box between the bracket and
the headlight.
Once the channels interface box has
been correctly installed, you may mount
the assembled kit on the head light.
Figure 26: the aluminum box.
To fix MyChron 3 Plus / Gold to the
bike, please use screws and washers
supplied with the kit and screw them in
the holes yellow circled in Figure 21, as
shown in Figure 27.
Figure 27: fixing MyChron 3 Plus / Gold to the bike.
Figure 28 shows MyChron 3 fixed to the
bike. Fixing points are yellow circled in
the figure and MyChron 3 connector is
not connected yet.
Figure 28: MyChron 3 correctly installed (rear view)
PLEASE NOTE: before re-mounting the fairing, the mirror, the seat and the gas tank,
we suggest You to turn on the bike in order to check the system’s integrity and its
correct working.
FIRMWARE FOR MYCHRON 3 PLUS / GOLD YAMAHA – 2002 – 2003 - 2004
As your MyChron 3 Plus / Gold Yamaha has been designed both for street and track use,
and as the information the driver wants to display are different for street and track use, your
MyChron 3 Plus / Gold Yamaha is equipped with a special firmware version which provides
you a second virtual dashboard.
Installation documentation: MyChron 3 Plus/Gold plug and play kit - Yamaha R1 - R6 – Version 1.00
10