1
N-01D
INSTRUCTION MANUAL ’11.11
Introduction
Thank you for your purchase of "N-01D".
For proper use of the N-01D, read this
manual before and while you use the N-01D.
Before using the FOMA terminal
N-01D supports W-CDMA, GSM/GPRS,
The
and wireless LAN connectivity.
a FOMA terminal operates using radio
Because
frequencies, it cannot be used inside a tunnel,
underground, in a building or other locations
where radio waves do not reach the FOMA
terminal, in locations with weak radio wave
condition, or outside of the FOMA's service
area. The FOMA services may not be available
on high upper floors of high-rise apartments
or buildings, even if you can see no
obstructions around you. On occasion, your
calls may become disconnected even in areas
with strong signal, even if you are not moving,
or even if all four antenna icons are displayed.
that because the FOMA terminal operates
Note
on radio frequencies, your calls are at risk of
being intercepted by the third party. However,
the W-CDMA, GSM/GPRS system automatically
scrambles all calls through a private call feature.
Therefore, even if the third party successfully
intercepts your call, they will only hear noise.
FOMA terminal operates on radio
The
frequencies by converting voice into digital
signals. If the caller moves into an area of
adverse radio wave condition, the digital
signal may not be restored accurately, and the
voice received in the call may differ slightly
from the actual voice.
FOMA terminal has FOMA Plus-Area and
The
FOMA HIGH-SPEED Area support.
keep a separate record of the
Please
information (e.g., Phonebook) you have saved
in your FOMA terminal. Even if the data may
be lost as a result of malfunction, repair,
changing, or other handling of the FOMA
terminal, under no condition will DOCOMO be
held liable for any lost data saved in the FOMA
terminal.
is recommended that you save your
It
important data into microSD cards.
FOMA terminal is the same as a PC.
Your
Depending on the applications or other items
that you install, the operation of your FOMA
terminal may become unstable and your location
or personal information saved on the FOMA
terminal may be disseminated on the Internet
and used improperly. You should therefore
thoroughly check the provider and operation
status of an application before using it.
SIM unlocking
Your FOMA terminal supports SIM
unlocking. Unlocking the SIM enables use of
other-brand SIM cards.
unlocking can be requested at any
SIM
DOCOMO shop.
charges apply for SIM unlocking.
Separate
functions, etc. are limited when
Services,
using other-brand SIM cards. DOCOMO does
not guarantee operation under such
conditions.
details on SIM unlocking, refer to the NTT
For
DOCOMO website.
Supplied Accessories
N-01D (with warranty and
back cover N55)
N-01D Quick Start Guide
(Japanese)
Battery Pack N29
Contents/Notes
Wireless Charger N01 (with warranty)
< Wireless Charger >
< Special AC Adapter >
microSD card (2 GB)*
(sample)
microUSB cable for PC
connection (sample)
*This has been attached to the
FOMA terminal when
purchased.
to Options and Related Devices" → P.169
"Introduction
1
Contents/Notes
About This Manual
Viewing the operations manual in
the FOMA terminal
Notes When Reading
Tap "Instruction Manual" and launch the
instruction manual application to see
operation methods in the FOMA terminal.
Some functions can be activated from the
screen explaining about it.
this manual, operations are simplified as
In
follows.
Description
Operation
On the Home
Tap m on the Home
screen, m ▶ screen, tap "Settings", and
"Settings" ▶
then tap "Call settings"
"Call settings"
note that "N-01D" is called the "FOMA
Please
terminal" in this manual.
examples used in this manual are
Display
images for explanation only and may be
different from the actual display.
manual assumes the settings configured
This
when you purchased the terminal, so the
views and operation on your FOMA terminal
may differ if you have changed the settings.
screens shown as examples in this manual
The
are displayed when "English" is set for m
▶ "本体設定" (Settings) ▶ "言語とキーボード"
(Language & keyboard) ▶ "言語を選択" (Select
language). Set "English" for "言語を選択"
(Select language) in advance.
reproduction or reprinting of all or part of
The
this manual without prior permission is
prohibited.
contents of this manual are subject to
The
change without prior notice.
2
The latest information on this manual can
be downloaded at the NTT DOCOMO
website.
•User's Manual (PDF file) Download
http://www.nttdocomo.co.jp/support/
trouble/manual/download/index.html
*The URL and manual contents are subject to
change without prior notice.
Getting
Started
P.41
docomo
Palette UI
P.72
Part Names and Functions ······41
miniUIM ·································43
microSD Card ························44
Battery Pack ···························46
Charging ·······························48
Turning Power ON and OFF ····53
Switching the Screen Display
Orientation ····························54
Basic Operations ····················54
Initial Settings ························56
Reading the Status Bar ···········62
Text Entry ·······························65
Home Screen ·························72
Managing the Home screen
···············································72
Application List Screen ···········75
Using the Search Function ······82
Task Manager ························83
Checking the Home application
···············································83
Calling/
Network
Services
P.84
Making/Receiving Calls ··········84
Call Log ·································87
Phonebook ····························88
Available Network Services ·····91
Settings
P.99
Wireless & Networks ··············99
Call Settings ·························107
docomo service ····················108
Sound ··································108
Display ·································109
eco mode ····························110
Location & Security ··············111
Applications ·························114
Accounts & Sync ··················115
Privacy ·································116
Storage ································116
Search ·································117
Language & Keyboard ··········117
Voice Input & Output ···········117
Accessibility ·························118
Date & Time ························118
About Phone ·······················119
3
Contents/Notes
Contents
Supplied Accessories ························································· 1
About This Manual ··························································· 2
Notes on using N-01D ······················································· 5
Precautions (Always follow these directions) ······················ 6
Handling Precautions ······················································ 26
Waterproof/Dustproof Function ······································ 34
Email/
Browser
P.120
Contents/Notes
sp-mode Mail ·······················120
SMS ·····································120
Email ···································122
Gmail ···································123
Early Warning "Area Mail" ···126
Google Talk ··························127
Browser ·······························128
Using
Overseas
P.163
Overview of International
Roaming (WORLD WING) ·····163
Services Available Overseas ··163
Check Before Using Your
Terminal Overseas ················164
Network Settings for Use
Overseas ······························166
Making/Receiving Calls while at
Destination ··························166
Configuring settings for
international roaming ··········168
Appendix/
Index
P.169
Introduction to Options and
Related Devices ····················169
Troubleshooting (FAQs) ········169
Warranty and After-Sales Service
·············································176
Updating Software ···············179
Major Update ······················184
Main Specifications ··············186
Specific Absorption Rate (SAR),
etc. of Mobile Phones ··········189
Export Administration
Regulations ··························193
Intellectual Property Right ····193
Index ···································198
Infrared Data Exchange ········132
File
Management Bluetooth Communication ···133
Connecting to a PC ··············134
P.132
Using PC Link ·······················135
Applications Camera ································137
Gallery ·································141
P.137
Media Player ························142
Android Market ···················144
GPS ·····································146
1Seg ····································151
Osaifu-Keitai ························155
ToruCa ·································157
Clock ···································158
Calendar ······························159
Schedule ······························160
Memo ··································161
Calculator ····························161
Quickoffice ··························161
iD設定アプリ (iD appli) ··········162
MEDIAS BEAUTY ··················162
4
Notes on using N-01D
5
Contents/Notes
a miniUIM can be used on your FOMA
Only
terminal. Exchange your UIM or FOMA
card at a docomo Shop Service Counter.
FOMA terminal does not support
The
accessing i-mode sites (programs), i-αppli,
etc.
applications and service content
Google
may change in the future without prior
notice.
FOMA terminal automatically performs
The
communication for synchronizing data,
checking the latest software version,
maintaining connection with the server,
etc. Also, operations such as downloading
applications and viewing videos cause a
large volume of packet to be transmitted
and incurs high communication charges.
Subscription to packet flat-rate service is
highly recommended.
mode (Drive mode) is not supported.
Public
the phone to Silent mode does not
Setting
mute sounds (playback of video or music,
1Seg, alarm, etc.) other than the ringtone
and notification sounds.
can check your phone number with
You
the following procedure:
From the Home screen, m ▶ "Settings"
▶ "About phone" ▶ "Status"
can update the software of your
You
FOMA terminal. → P.179
for quality improvement of FOMA
Updates
terminals and operating system (OS)
upgrades may be applied. Such an update
or upgrade may cause applications you are
using to be unusable or have unexpected
errors.
the memory capacity of a microSD
When
card or the FOMA terminal become nearly
full, running applications may not function
correctly. If this happens, delete some of
your saved data.
the screen lock password to ensure the
Set
security of your FOMA terminal for its loss.
→ P.111
to the Google Inc. terms of usage
Refer
regarding services that Google provides.
Also refer to the respective terms of usage
for other web services.
your FOMA terminal is lost, change your
If
password of each account using a PC to
prevent other persons from using Google
services such as Google Talk, Gmail,
Android Market, as well as Twitter and
mixi.
FOMA terminal does not support
The
service providers other than sp-mode,
mopera U or ビジネスmoperaインターネッ
ト (Business mopera Internet).
subscription to sp-mode is required to
A
use tethering.
Contents/Notes
default, security is not configured for
By
Wi-Fi tethering. Configure security if
required.
communication charges for using
Packet
tethering differ depending on your fee
plan. A flat-rate packet rate is strongly
recommended.
details on charges during use, refer to:
For
http://www.nttdocomo.co.jp/english/
Precautions (Always follow
these directions)
■ ensure that you use your FOMA
■To
terminal correctly, read "Precautions"
carefully before use. Keep this manual
after reading for future reference.
■
precautions must be observed at
■The
all times since they contain
information intended to prevent the
bodily injury or damage to property.
■
following symbols indicate the
■The
different degrees of injury and damage
that may occur if the information
provided is not observed and the
FOMA terminal is used incorrectly:
6
DANGER
Indicates that death or
serious bodily injury
may result directly and
immediately from
improper use.
WARNING
Indicates that death or
serious bodily injury
may result from
improper use.
CAUTION
Indicates that death or
serious bodily injury
may result from
improper use.
■
following symbols indicate specific
■The
directions:
Indicates that it is prohibited.
No disassembly
Indicates that it must not be
disassembled.
No wet hands
Indicates that you must not
touch it with wet hands.
No liquids
Do
Unplug
Indicates that it must not be used
near water, which means that
you must not let it become wet.
1. Precautions for the FOMA terminal,
Battery Pack, Adapter, Wireless
Charger and miniUIM (Common)
DANGER
Don't
Indicates that it is an
instructionbased compulsory
conduct (must be acted).
Indicates that you must unplug
the power cord from the
outlet.
■■Safety precautions are explained in the
following categories:
1.Precautions for the FOMA terminal,
Battery Pack, Adapter, Wireless Charger
and miniUIM (Common).......................... P.7
2.Precautions for the FOMA terminal...... P.10
3.Precautions for the Battery Pack.......... P.13
4.Precautions for the Adapter and Wireless
Charger .................................................. P.15
Don't
Do not use, keep or leave the
devices in locations subject to high
temperatures, such as near fire,
indirect sunlight or inside a car on
a hot day.
Doing so may cause fire, burns, or
injury.
Do not put the devices in a
microwave oven or pressurized
container.
Doing so may cause fire, burns, injury
or electric shock.
Do not disassemble or modify the
equipment.
No disassembly
Doing so may cause fire, burns, injury
or electric shock.
7
Contents/Notes
Don't
5.Precautions for the miniUIM ................ P.17
6.Precautions for Use Near Electronic
Medical Devices .................................... P.18
7.Precautions for the microUSB Cable for PC
Connection (Sample) ............................ P.21
8.Precautions for the microSD Card
(Sample) ................................................. P.24
No liquids
Contents/Notes
Do
Do not allow the devices to
become wet with liquids, such as
water, drinking water or pet urine.
Doing so may cause fire, burns, injury
or electric shock.
For waterproof function, refer to the
following:
→ P.34 "Waterproof/Dustproof
Function"
Use the battery pack and adapter
specified by NTT DOCOMO for the
FOMA terminal.
Failure to observe this precaution may
cause fire, burns, injury or electric
shock.
WARNING
Don't
Don't
8
Do not throw the FOMA terminal
or subject it to strong shocks/force.
Doing so may cause fire, burns, injury
or electric shock.
Do not place electrically conductive
objects (wires, pencil leads, etc.) in
contact with the charging terminals
or external connector terminal. Do
not insert those materials inside
the terminal.
Doing so may cause fire, burns, injury
or electric shock.
Don't
Don't
Do not cover or wrap the devices
with bedding, etc. while in use or
charging.
Doing so may cause fire or burns.
Please do not use near electronic
equipment that contains highprecision mechanisms or handles
delicate signals.
The terminal may interfere with the
operation of sensitive electronic
equipment.
* Electronic equipment to watch out
for:
Hearing aids, implanted pacemakers,
ICDs and other electronic medical
devices; fire alarms, automatic doors,
and other automatically controlled
apparatus.
Users of implanted pacemakers, ICDs,
and other electronic medical devices
are advised to ask the manufacturer or
sales agent whether or not these
devices can be affected by radio
waves.
Do
If something unusual happens,
such as unusual odor, overheating,
discoloration or deformation
during use, charge or storage, be
sure to:
•Unplug the power cord from the
power outlet or the cigarette
lighter socket.
•Turn off the power.
•Remove the battery pack from
the FOMA terminal.
Failure to observe these precautions
may cause fire, burns, injury or electric
shock.
CAUTION
Don't
Don't
Do
Do
Do not leave the devices on a slope
or unstable surface.
The devices may fall and cause injury.
Do not leave the devices in humid,
dusty or hot places.
Doing so may cause fire, burns or
electric shock.
If your child uses the FOMA
terminal, instruct him/her on how
to use it. Check if he/she always
uses the FOMA terminal correctly
as you instruct.
Improper usage could result in bodily
injury.
Keep the FOMA terminal out of
young children's reach.
A young child may try to swallow it or
suffer injury.
9
Contents/Notes
Do
Make sure to turn off the FOMA
terminal and stop charging before
you get close to the places like a
gas station where a flammable gas
is generated.
Doing so may cause the gas to ignite.
Turn off the power, when you use
Osaifu-Keitai at a gas station (if the
Osaifu-Keitai lock is set, turn the
power off after the lock is released).
Do
Contents/Notes
Pay special attention when you use
the FOMA terminal connected to
the adapter for a long period.
If you use a game or watch 1Seg
programs for a long time while
charging, the temperature of the
FOMA terminal, battery pack or
adapter may rise.
If you touch the warm part of these
devices for a long period of time, it
may cause redness, itch, skin irritation
or low temperature burns depending
on your constitution or physical
condition.
2. Precautions for the FOMA terminal
WARNING
Don't
Don't
Don't
Don't
10
Do not direct the infrared data port
towards your or another person's
eyes.
Doing so may cause eye injury.
Do not direct the infrared data port
towards consumer equipment with
infrared devices during infrared
communication.
Doing so may cause malfunction of
the infrared devices and result in an
accident.
Do not turn on the light near a
person's eyes. Especially when
photographing infants, maintain at
least 1 m.
The light may affect eyesight. Also, this
may dazzle or surprise him/her and
cause injury.
Do not put fluids such as water or
substances such as pieces of metal
or flammable materials into the
miniUIM slot or microSD card slot
inside of the FOMA terminal.
Doing so may cause fire, burns, injury
or electric shock.
Don't
Do
Please turn off your FOMA terminal
when inside an airplane, hospital,
or other area where use is
prohibited.
The terminal may adversely affect
electronic or medical equipment.
Follow the instructions provided by the
medical facility for the use of mobile
phones.
Use of the phone in an airplane is
prohibited, and be punished by law.
However, to enable use inside an
airplane such as by using a nonemission setting, follow the
instructions of the airline before using.
Make sure to hold the FOMA
terminal at a safe distance from
your ear when you talk with the
speaker ON or the ring tone
sounds. Also, when you play
games, music, etc. with an
earphone/microphone etc.
connected to the FOMA terminal,
adjust the volume properly.
Too large a volume may lead to
defective hearing.
Also, hearing difficulties may cause an
accident.
Do
Do
Do
If you have a weak heart, take
precautions when setting the
Vibrator or Ring volume.
Failure to observe this precaution may
affect your heart.
If you are wearing electronic
medical devices, ask the
manufacturer or sales agent
whether the devices can be
affected by radio waves before
using your FOMA terminal.
The terminal may adversely affect
electronic medical devices.
If the display or camera lens is
broken, be careful with the broken
glass and any exposed FOMA
terminal parts.
Shock-resistant plastic is used for the
display, and a plastic panel is used for
the camera lens surfaces to avoid glass
scattering. However, touching broken
or exposed parts may cause injury.
11
Contents/Notes
Do
Do not turn on the light against
the car drivers, etc.
Doing so may interfere with driving
and cause a traffic accident.
CAUTION
Don't
Contents/Notes
Don't
Don't
Don't
12
Do not swing the FOMA terminal
by its antenna, strap or other parts.
The terminal may strike you or others
around you, resulting bodily injury.
Do
Do not use the damaged FOMA
terminal.
Doing so may cause fire, burns, injury
or electric shock.
When using motion sensor, make
sure you are in a safe place, hold
the FOMA terminal securely, and
do not shake it more than
necessary.
Failure to observe this precaution may
cause injury.
If the display is broken and any
matter leaks, do not touch it with
your face, hands, etc.
Failure to observe this precaution may
cause loss of eyesight or damage to
your skin. If any matter comes into
your eyes or mouth, immediately rinse
with clean water and see a doctor.
If the liquid crystal adheres to your skin
or clothing, immediately wipe it off
with alcohol and wash with soap and
water.
Do
Do
Before using your FOMA terminal
in a vehicle, ask the manufacturer
or sales agent whether the
operation of the vehicle can be
affected by radio waves.
In some types of vehicle, using the
FOMA terminal may interfere with the
operation of the vehicle's electronic
equipment. In this case, stop using the
FOMA terminal immediately.
There may be cases where the
customer's physical condition or
predisposition leads to itchiness,
rashes, or sores. If this occurs,
immediately stop using the FOMA
terminal and see a doctor.
Material used in each part → P.19
"Material list"
When viewing the display, keep a
proper distance between your eyes
and it in a bright place.
Failure to observe this precaution may
impair your vision.
3. Precautions for the Battery Pack
Display
Li-ion00
Battery type
Lithium-ion
Don't
Do
DANGER
Don't
Don't
Don't
Do not place metal items such as
wires in contact with the charging
terminals. Also, do not carry or store
the battery with metal items such as
necklaces.
Doing so may cause the battery pack
to ignite, explode, overheat or leak.
Check the orientation of the
battery pack before attaching it. If
you have difficulty attaching it to
the FOMA terminal, do not put
excessive pressure on the battery.
Failure to observe this precaution may
cause the battery pack to ignite,
explode, overheat or leak.
Do not throw the battery pack into
fire.
Doing so may cause the battery pack
to ignite, explode, overheat or leak.
If battery fluid etc. comes into
contact with your eyes, do not rub
your eyes but immediately rinse
your eyes with clean water and see
a doctor.
Failure to observe this precaution may
result in loss of eyesight.
WARNING
Don't
Do
Never use the battery pack if it has
fallen to have something abnormal
such as deformation and damage.
Failure to observe this precaution may
cause the battery pack to ignite,
explode, overheat or leak.
If the battery pack leaks or emits
an unusual odor, stop using it
immediately and move it away
from any flame or fire.
The battery fluid is flammable and
could ignite, causing a fire or
explosion.
13
Contents/Notes
■
to the information shown on the
■Refer
battery pack label to check the type of
battery pack.
Do not puncture the battery pack,
hit it with a hammer or step on it.
Doing so may cause the battery pack
to ignite, explode, overheat or leak.
Do
Contents/Notes
Keep your pets away from the
battery pack as they may
accidentally bite it.
Failure to observe this precaution may
cause the battery pack to ignite,
explode, overheat or leak.
CAUTION
Don't
Don't
14
Do not dispose of used battery
packs with ordinary garbage.
Doing so may cause fire and create an
environmental hazard. Put insulation
tape on the terminals of used battery
pack and return it to a docomo Shop
or Service Counter, or dispose of the
battery pack in accordance with your
local regulations.
Do not use or charge the wet
battery pack.
Doing so may cause the battery pack
to ignite, explode, overheat or leak.
Do
If the battery pack leaks, do not
touch battery fluid etc. with your
face, hands, etc.
Failure to observe this precaution may
cause loss of eyesight or damage to
your skin. If the battery fluid etc.
comes into your eyes or mouth or it
adheres to your skin or clothing,
immediately rinse with clean water. In
the case that it comes into contact
with your eyes or mouth, see a doctor
immediately after rinsing.
4. Precautions for the Adapter and
Wireless Charger
WARNING
Don't
Do not use the AC adapter or
wireless charger in humid locations
such as a bathroom.
Doing so may cause fire, burns or
electric shock.
Don't
Don't
The DC adapter must be used only
in vehicles with a negative ground.
Do not use the adapter in vehicles
with a positive ground.
Doing so may cause fire, burns or
electric shock.
Do not touch the adapter or
wireless charger when you see
lightning or hear thunder.
Doing so may cause electric shock.
Don't
Don't
Don't
Contents/Notes
Don't
Do not use the adapter or wireless
charger if its power cord is
damaged.
Doing so may cause fire, burns or
electric shock.
Don't
Do not short-circuit the charging
terminals when the adapter is
plugged into the power outlet or
cigarette lighter socket.
Also, do not let the charging
terminals contact with your body
(hand, finger, etc.).
Doing so may cause fire, burns or
electric shock.
Do not put heavy objects on the
power cord of the adapter or
wireless charger.
Doing so may cause fire, burns or
electric shock.
When plugging/unplugging the AC
adapter into/from the power
outlet, make sure that no metallic
straps or other metallic objects are
caught between the plug and the
socket.
Metallic objects may cause fire, burns
or electric shock.
Do not place foreign objects
between the wireless charger and
the FOMA terminal.
Doing so may cause overheating, fire,
or burns.
15
Don't
Contents/Notes
Don't
No wet hands
No liquids
Do not adhere metallic stickers
(aluminum, etc.) or metal items on
the wireless charger.
Doing so may cause overheating, fire,
or burns.
Do
Do not use a travel transformer
with the wireless charger.
Doing so may cause overheating, fire,
or electric shock.
Do not touch the power cord of
the adapter, wireless charger or
the power outlet with wet hands.
Doing so may cause fire, burns or
electric shock.
Do not use the wireless charger to
charge items that have become
wet.
Doing so may cause fire, burns, injury,
or electric shock.
Do
Do
Do
16
Use the specified voltage and
current. Use the AC Adapter for
Global use to charge the battery
overseas.
Using the adapters with incorrect
voltage may cause fire, burns or
electric shock.
AC Adapter : AC 100V
DC Adapter : DC 12V/24V
(specific to vehicle with negative
ground)
AC Adapter for Global Use :
AC 100V to 240V (household AC
outlet only)
If the fuse in the DC adapter blows,
always replace it with the specified
type of fuse.
Failure to observe this precaution may
cause fire, burns or electric shock. Refer
to the respective manuals for the
information on the specified fuse.
Wipe off any dust on the plug.
Failure to observe this precaution may
cause fire, burns or electric shock.
When plugging the AC adapter
into the power outlet, make sure
to insert it firmly.
Failure to observe this precaution may
cause fire, burns or electric shock.
Do
Unplug
Unplug
If you have an implanted cardiac
pacemaker or ICD, carefully consult
with a doctor regarding use of the
wireless charger.
Operation of an implanted cardiac
pacemaker or ICD may be adversely
affected by its radio waves.
Unplug
Unplug the adapter from the
power outlet or cigarette lighter
socket before cleaning it.
Failure to observe this precaution may
cause fire, burns or electric shock.
5. Precautions for the miniUIM
CAUTION
Do
Be careful with sharp edges when
removing the miniUIM.
Sharp edges may cause injury.
Unplug the adapter from the
power outlet or cigarette lighter
socket when the adapter will be
left unused for a long period.
Failure to observe this precaution may
cause fire, burns or electric shock.
If water or other liquid gets into
the adapter, immediately unplug it
from the power outlet or cigarette
lighter socket.
Failure to observe this precaution may
cause fire, burns or electric shock.
17
Contents/Notes
Do
Always grasp the adapter or
wireless charger when unplugging
the plug from the power outlet or
cigarette lighter socket. Do not pull
the cord itself.
Failure to observe this precaution may
cause fire, burns or electric shock.
6. Precautions for Use Near Electronic
Medical Devices
Do
Contents/Notes
■
to the Guidelines on the Use
■According
of Radio communication Equipment
such as Cellular Telephones Safeguards for Electronic Medical
Equipment established by the
Electromagnetic Compatibility
Conference Japan.
WARNING
Do
18
Take care of the following inside
hospitals.
•Do not take your FOMA terminal
into an operating room, intensive
care unit (ICU), or coronary care unit
(CCU).
•Turn off the power inside hospital
wards.
•Turn off the power even in hospital
lobbies, waiting rooms, and
corridors if electronic medical
devices may be in use near you.
•For use inside medical institutions,
please follow the instructions given
at individual locations.
Do
Do
Turn off the power in crowded places
such as peak-hour trains if implanted
pacemakers and ICDs may be in use
near you.
Radio waves emitted by the FOMA
terminal may adversely affect
implanted pacemakers and ICDs when
used in close proximity.
A person with an electronic
medical device such as an
implanted pacemaker or ICD should
use or carry the FOMA terminal at
a distance more than 22 cm from
the site of implantation.
Radio waves emitted by the FOMA
terminal may adversely affect an
electronic medical device when used in
close proximity.
Electronic medical devices other
than implanted pacemakers and
ICDs may also be used outside
hospitals. Users of electronic
medical devices are advised to
ask the manufacturer whether
these instruments can be affected
by radio waves.
Radio waves from the FOMA terminal
can adversely affect electronic medical
devices.
■
list
■Material
Outer case
Display panel
Display-side panel
Light and infrared data port panel
Camera panel
Camera ring
Back cover
Outer side
Water stop
Keys
Power key
Volume key
External
Body
connector
terminal cap
Water stop
1Seg antenna
Top, middle sections
Bottom section
Base hinge
Cap
Battery pack
Sides
recess
Bottom
Lock switch
Inner frame
Lever
Screws
Battery terminal Terminal connector
Terminals
Material
Nylon resin
Nylon resin
PC resin
Reinforced glass
Acrylic, Polycarbonate
composite resin
Surface treatment
UV coating
Tin deposition/UV coating
UV coating
Fluorine coating
Hard coating
ABS resin
PC resin
Silicon rubber
PC resin
Tin deposition/UV coating
UV coating
Fluorine coating
Tin deposition/UV coating
PC resin, Polyester
thermoplasticity elastomer
Silicon rubber
Stainless alloy
Nickel titanium alloy
Stainless alloy
ABS resin
Nylon resin
Magnesium alloy MD1D (JIS)
equivalent
POM resin
PC resin
Stainless alloy
Stainless alloy
LCP resin
Phosphor bronze
Tin deposition/UV coating
Contents/Notes
Part
Display surface
Battery side
Bottom
Silicon coating
Chemical conversion
treatment
Black oxide finish
Gold plating
19
Battery pack
(terminal)
Part
Battery pack
Terminals
Contents/Notes
20
Material
Resin: PP resin
Label: PET resin
Glass epoxy resin
Surface treatment
Gold plating
7. Precautions for the microUSB Cable
for PC Connection (Sample)
DANGER
Do not use, keep or leave in a
location subject to high
temperatures, such as near fire, in
direct sunlight, or inside a vehicle
on a hot day.
Doing so may cause fire, burns, or
injury.
WARNING
Do not put in a cooking heater
(microwave oven, etc.) or
pressurized container.
Doing so may cause fire, burns, injury,
or electric shock.
Don't
Do not disassemble or modify.
Doing so may cause fire, burns, injury,
No disassembly
or electric shock.
Don't
Don't
No liquids
Do not allow to become wet with
liquids such as water, beverage, or
pet urine.
Doing so may cause fire, burns, injury,
or electric shock.
Don't
Do not throw the microUSB cable
for PC connection or subject it to
strong shocks/force.
Doing so may cause fire, burns, injury,
or electric shock.
Do not place electrically conductive
objects (metal parts, pencil lead,
etc.) in contact with the charging
terminals or external connector
terminal. Do not insert those
materials inside.
Doing so may cause fire, burns, injury,
or electric shock.
Do not use the microUSB cable for
PC connection if its cord is
damaged.
Doing so may cause fire, burns, or
electric shock.
21
Contents/Notes
Don't
Do
Use the battery pack and microUSB
cable for PC connection specified
by NTT DOCOMO for the FOMA
terminal.
Failure to observe this precaution may
cause fire, burns, injury, or electric
shock.
Don't
Contents/Notes
Don't
Don't
Don't
Don't
22
Do not use the microUSB cable for
PC connection in humid locations
such as a bathroom.
Doing so may cause fire, burns, or
electric shock.
Do not touch the microUSB cable
for PC connection when you see
lightning or hear thunder.
Doing so may cause electric shock.
No wet hands
Do
Do not short-circuit the USB
connector of the microUSB cable
for PC connection when it is
inserted in a PC’s USB port. Also,
do not let the connector contact
with your body (hand, finger, etc.).
Doing so may cause fire, burns, or
electric shock.
Do not put heavy objects on
microUSB cable for PC connection.
Doing so may cause fire, burns, or
electric shock.
When inserting/removing the
microUSB cable for PC connection
in/from a PC’s USB port, make sure
that no metallic straps or other
metallic objects contact the port.
Metallic objects may cause fire, burns,
or electric shock.
Do not touch the microUSB cable
for PC connection with wet hands.
Doing so may cause fire, burns, or
electric shock.
If something unusual happens,
such as unusual odor, overheating,
discoloration or deformation
during use, charge, or storage,
immediately:
•Disconnect the microUSB cable
for PC connection from the PC
and your FOMA terminal.
•Turn off the FOMA terminal.
•Remove the battery pack from
the FOMA terminal.
Failure to observe these precautions
may cause fire, burns, injury or electric
shock.
Do
Wipe off any dust on the USB
connector of the microUSB cable
for PC connection.
Failure to observe this precaution may
cause fire, burns, or electric shock.
Do
When inserting the microUSB cable
for PC connection into a PC’s USB
port, make sure to insert it firmly.
Failure to observe this precaution may
cause fire, burns, or electric shock.
Do
CAUTION
Don't
Don't
Do
Do
Do
Remove the microUSB cable for PC
connection from a PC’s USB port
when it will be left unused for a
long period.
Failure to observe this precaution may
cause fire, burns, or electric shock.
If water or other liquid enters,
immediately remove the microUSB
cable for PC connection from the
PC’s USB port.
Failure to observe this precaution may
cause fire, burns, or electric shock.
Remove the microUSB cable for PC
connection from the PC’s USB port
before cleaning it.
Failure to observe this precaution may
cause fire, burns, or electric shock.
Do
Do
Do not leave a connected device
on a slope or unstable surface.
The devices may fall and cause injury.
Do not store in a humid, dusty, or
hot place.
Doing so may cause fire, burns, or
electric shock.
If your child uses the microUSB
cable for PC connection, instruct
him/her on how to use it. Check if
he/she always uses it correctly as
you instruct.
Improper usage could result in bodily
injury.
Keep the microUSB cable for PC
connection out of young children’s
reach.
A young child may try to swallow it or
suffer injury.
23
Contents/Notes
Always grasp the USB connector of
the microUSB cable for PC
connection when removing from a
PC’s USB port. Do not pull the cable
itself.
Failure to observe this precaution may
cause fire, burns, or electric shock.
WARNING
8. Precautions for the microSD Card
(Sample)
DANGER
Contents/Notes
Don't
Don't
Do not use, keep or leave in a
location subject to high
temperatures, such as near fire, in
direct sunlight, or inside a vehicle
on a hot day.
Doing so may cause fire, burns, or
injury.
24
Do
Do not put in a cooking heater
(microwave oven, etc.) or
pressurized container.
Doing so may cause fire, burns, injury,
or electric shock.
Do not disassemble or modify.
Doing so may cause fire, burns, injury,
No disassembly
or electric shock.
No liquids
Don't
Do not allow to become wet with
liquids such as water, beverage, or
pet urine.
Doing so may cause fire, burns, injury,
or electric shock.
Do not throw the microSD card or
subject it to strong shocks/force.
Doing so may cause fire, burns, injury,
or electric shock.
If you notice an unusual sound,
odor, smoke, or overheating,
immediately turn off the PC/device
being used and any peripherals,
unplug them from their outlet and
do not touch card.
Contact the NEC Mobiling information
center before using it again.
CAUTION
Don't
Don't
Do not store in a humid, dusty, or
hot place.
Doing so may cause fire, burns, or
electric shock.
Keep the microSD card out of
young children’s reach.
A young child may swallow it and
choke or suffer injury. If you think your
child has swallowed it, immediately
call a doctor.
Don't
Do
Contents/Notes
Do
Do not touch or allow metal/hard
objects to contact terminals. Do
not short circuit terminals.
Static electricity may cause data to
become corrupted or erased.
If your child uses the microSD card,
instruct him/her on how to use it.
Check if he/she always uses it
correctly as you instruct.
Improper usage could result in bodily
injury.
The microSD card is formatted
according to SD Card standards,
and any data is erased when
formatted. Keep a backup or other
copy of important data in a
separate place.
Failure to write/read/erase data or
other error may occur if card is
formatted on a computer or device
that does not comply with SD Card
standards.
25
Handling Precautions
General Notes
Contents/Notes
is waterproof/dustproof, however,
N-01D
do not allow water to seep in or dust to
get in the FOMA terminal. Also, do not
allow accessories and options to get wet
or be exposed to dust.
The battery pack, adapter, wireless charger
and the miniUIM are not waterproof/
dustproof. Do not use them in a humid place
such as a bathroom or in the rain. If you carry
the FOMA terminal on your body, perspiration
may corrode the internal parts of the FOMA
terminal and cause malfunction. Note that if
trouble is diagnosed as exposure to water or
other liquid, repair of the FOMA terminal may
not be covered by the Warranty or repair may
not be possible. Repair, when possible, is not
covered by warranty and is carried out at cost.
with a soft, dry cloth (such as an
Wipe
eyeglass cleaning cloth).
•Rubbing the display of the FOMA terminal
with a dry cloth may scratch the display
surface.
•The display surface may be stained if
moisture or dirt is left on it for a long period.
•Never use chemicals such as alcohol,
thinners, benzene or detergents as these
agents may erase the printing on the FOMA
terminal or cause discoloration.
26
clean the connection
Occasionally
terminals with a dry cotton swab, etc.
Soiled connectors may result in poor
connections, loss of power, or incomplete
charging. Wipe with dry cloth or cotton swab.
not place the FOMA terminal near an air
Do
conditioning vent.
Condensation may form due to rapid changes
in temperature, and this may cause internal
corrosion and malfunction.
not put excessive pressure on the
Do
FOMA terminal or battery.
Do not put the FOMA terminal in a bag filled
with many objects or sit down with it in a hip
pocket.
Excessive pressure may result in malfunction
or damage to the display, internal circuit or
the battery pack, etc.
Also, if an external device is connected to the
external connector terminal (earphone/
microphone terminal), excessive pressure may
result in malfunction or damage to the
connector.
not scratch the display with metallic
Do
objects.
Doing so may cause scratches, malfunction or
damage.
the separate manuals supplied with
Read
the battery pack and adapter carefully.
Handling the FOMA Terminal
27
Contents/Notes
not forcefully push or use a pointed
Do
object (nails, ballpen, pin, etc.) on the
touch panel.
Doing so may damage the touch panel.
using the FOMA terminal in
Avoid
extremely high or low temperatures.
The ambient temperature of the room should
be 5˚C to 40˚C (limited to the temporary use
in a bathroom etc. when temperature is above
36˚C) with humidity of 45% to 85%.
may be affected if you use
Reception
your FOMA terminal near a land-line
phone, television, or radio in use. Use the
FOMA terminal away from such devices.
keep a separate record of the
Please
information you have registered in your
FOMA terminal.
Please be aware that DOCOMO bears no
obligation or responsibility in the event that
data is altered or lost.
not drop the FOMA terminal or expose
Do
it to strong shocks.
Doing so may cause malfunction or damage.
the FOMA terminal does not come
Ensure
near a fire (stove, etc.) or fall from a
tabletop due to the vibrator.
connecting an external device to
When
the external connector terminal
(earphone/microphone terminal), do not
insert at an angle or pull the cord.
Doing so may cause malfunction or damage.
is normal for the FOMA terminal to
It
become warm while being used or
charged. This is not a malfunction. Keep
using it.
not leave the camera exposed to
Do
direct sunlight.
Doing so may discolor or burn the
components of the camera.
the external connector terminal
Keep
(earphone/microphone terminal) cap
closed when not in use.
Failure to observe this precaution may cause
malfunction due to dust or water getting in.
not use FOMA terminal with the back
Do
cover removed.
Doing so may cause the battery pack to fall
out, or cause malfunction or damage.
not insert hard, sharp objects into
Do
earpiece/speaker.
Doing so may cause malfunction or damage
to the FOMA terminal.
not remove the microSD card or turn
Do
off the power while in use.
Doing so may cause data loss or malfunction.
not let magnetic cards, etc. come close
Do
to FOMA terminal parts.
The magnetic data in cash cards, credit cards,
telephone cards, floppy disks, etc. may be
erased.
not let strong magnetic objects come
Do
close to the FOMA terminal parts.
Strong magnetic objects may cause
misoperation.
not decorate the FOMA terminal with
Do
items such as stickers.
Doing so may prevent it from being charged
with the wireless charger.
Contents/Notes
Handling the Battery Pack
battery pack is consumable.
The
Battery life varies depending on usage
conditions, etc., but it is time to change
battery packs when the usage time has
become extremely short even though the
battery pack has been fully recharged.
In this case, please purchase a new battery
pack.
ambient temperature of the room
The
should be 5˚C to 35˚C.
available operating time of the
The
battery pack depends on the conditions
of usage and battery pack.
on the usage condition, the
Depending
battery pack may inflate slightly when
the battery life is almost over. This is not
a malfunction.
not store the battery pack in the
Do
following cases:
•The battery is fully charged (immediately
after the charging is complete)
•The battery has run out (the phone cannot
power on)
The performance and life of the battery pack
may deteriorate.
It is recommended that you store the battery
pack with around 40% battery level.
28
Handling the Adapter & Wireless
Charger
ambient temperature of the room
The
should be 5˚C to 35˚C.
not charge the battery pack:
Do
•In a humid, dusty or unstable place
•Near a land-line phone, TV or radio
is normal that the adapter or wireless
It
charger become warm while charging.
Keep using it.
not use the DC adapter to charge the
Do
battery when the car engine is not
running.
Doing so may drain the car battery.
you use an electrical outlet with an
If
unplugging-protection mechanism, follow
the instructions of the manual for the
outlet.
not expose the adapter to strong
Do
shocks. Do not deform the charging
terminal.
Doing so may cause malfunction.
not use the wireless charger when it is
Do
covered with a blanket.
not use devices or a dedicated AC
Do
adapter other than specified with the
wireless charger.
not charge with a metal item such as a
Do
metallic strap caught between the
wireless charger and the FOMA terminal.
Handling the miniUIM
not apply excessive force to the
Do
miniUIM when attaching/removing it.
that the warranty does not cover
Note
damage caused by inserting the miniUIM
into another type of IC card reader or
writer.
keep the IC part clean.
Always
with a soft, dry cloth (such as an
Wipe
eyeglass cleaning cloth).
keep a separate record of the
Please
information you have registered in your
miniUIM.
Please be aware that DOCOMO bears no
obligation or responsibility in the event that
data is altered or lost.
preserve the environment, bring
To
discarded miniUIM to a docomo Shop or
Service Counter.
not damage, scratch, unnecessarily
Do
touch, or short-circuit the IC portion.
Doing so may cause data loss or malfunction.
not drop the miniUIM or expose it to
Do
strong shocks.
Doing so may cause malfunction.
not bend the miniUIM or place a
Do
heavy object on it.
Doing so may cause malfunction.
not put a label or sticker on the
Do
miniUIM when attaching it to the FOMA
terminal.
Doing so may cause malfunction.
29
Contents/Notes
not place the FOMA terminal with an
Do
adapter (including a microUSB Adapter
for charging) or PC microUSB cable
inserted on the wireless charger.
not bring a magnetic card close to the
Do
wireless charger.
The magnetic data on a cash card, credit card,
telephone card, floppy disk, etc. may be
erased.
not bring anything with a magnetic
Do
field close to the wireless charger.
Bringing a strong magnetic field close to the
charger may cause malfunction.
Using the Bluetooth® Function
Contents/Notes
secure the Bluetooth communication
To
security, the FOMA terminal supports the
security function compliant with
Bluetooth standards, but the security may
not be sufficient depending on the
setting. Concern about the
communication using the Bluetooth
function.
be aware that DOCOMO is not
Please
responsible for data leak when making
data communications using Bluetooth.
can use a headset, handsfree, audio,
You
object push, serial port, phonebook
access, alert notification, phone alert
status, proximity, find me, and time
profiles on the FOMA terminal. The
audio/video remote control may be
available for audio (Only on compatible
Bluetooth devices).
band
Frequency
The following are frequency bands that the
FOMA terminal's Bluetooth function uses:
① ②③④⑤
2.4 FH 1/XX 4
⑥
① 2.4
② FH
30
:The radio equipment uses the
2400 MHz band.
:Modulation scheme is the FH-SS
system.
③ 1
④ XX
⑤ 4
⑥
:The estimated interference
distance is 10 m or less.
:The modulation scheme is a
different scheme.
:The estimated interference
distance is 40m or less.
:The full band between 2400
MHz and 2483.5 MHz is used
and the band of the mobile
identification device cannot be
avoided.
■
cautions
■Bluetooth
The operating frequency band of this
equipment is used by industrial,
scientific, consumer and medical
equipment including microwave ovens,
premises radio stations for identifying
mobile units used in the manufacturing
lines of plants (radio stations requiring
a license), specified low power radio
stations (radio stations requiring no
license) and amateur radio stations
(hereinafter referred to as "another
station").
1.Before using this terminal, confirm
that "another station" is not being
operated nearby.
2.In the event of this terminal causing
harmful radio wave inter ference
with "another stations", promptly
change the operating frequency or
stop radio wave emission by turning
off the power, etc.
3.If you have further questions, please
contact General Inquiries on the last
page of this manual.
wireless LAN (WLAN) uses radio waves
A
for transmission, and thereby has the
benefit of allowing a LAN connection
anywhere in an area reachable by radio
waves. Conversely, eavesdropping by a
third party or wrongful intrusion are
possible if security settings are not
configured. Users are recommended to
use discretion and configure security
settings before using.
LAN
Wireless
Do not use wireless LAN near magnetic
devices such as electrical appliances or AV/OA
devices, or in radio waves.
•Magnetism or radio waves may increase
noises or disable communications (especially
when using a microwave oven).
•When used near TV, radio, etc., reception
interference may occur, or channels on the
TV screen may be disturbed.
•If there are multiple wireless LAN access
points nearby and the same channel is used,
search may not work correctly.
① ② ③④
⑤
① 2.4
:This radio equipment uses the
2400MHz band.
② DS
:Modulation scheme is the DS-SS
system.
③ OF
:Modulation scheme is the OFDM
system.
④ 4
:The estimated interference
distance is 40m or less.
⑤
:The full band between
2400MHz and 2483.5MHz is
used and the band of the mobile
identification device can be
avoided.
•Available channels vary depending on the
country.
•For use in an aircraft, contact the airline
beforehand.
•For use of WLAN in a foreign country, the
country may have limitations on such as
frequencies and locations where you can use
it. Before using WLAN in a foreign country,
confirm the available frequencies, laws,
regulations, and other conditions for use of
WLAN of the country.
31
Contents/Notes
When Using a Wireless LAN
band
Frequency
The frequency band used by the WLAN device
is indicated on a label in the battery pack
recess of the FOMA terminal. The following
figure explains the indications on the label.
Contents/Notes
■ GHz device cautions
■2.4
The operating frequency band of this
WLAN device is used by home electrical
appliances such as microwave ovens, as
well as industrial, scientific and medical
equipment including private radio
stations on factory premises for
identifying mobile units used in
manufacturing lines (radio stations
requiring a license), specified low power
radio stations (radio stations requiring
no license), and amateur radio stations
(radio stations requiring a license).
1.Before using the device, confirm that
private radio stations for identifying
mobile units, specified low power
radio stations and amateur radio
stations are not being operated
nearby.
2.If the device causes harmful radio
interference to private radio stations
for identifying mobile units,
immediately change the frequency
band or stop use, and contact
"docomo Information Center"
described on the last page of this
manual for crosstalk avoidance, etc.
(e.g. partition setup).
32
3.If the device causes radio interference to
specified low power radio stations or
amateur radio stations, contact "General
Inquiries" described on the last page of
this manual.
Handling the FeliCa Reader/Writer
FeliCa reader/writer function of the
The
FOMA terminal handles delicate signals
that require no radio station license.
13.56 MHz frequency band is used. If
The
there is another reader/writer near the
FOMA terminal, keep enough distance
between the FOMA terminal and the
reader/writer. Also, make sure that there
is no radio station using the same
frequency band nearby.
Samples (microUSB Cable for PC
Connection & microSD Card)
away from liquids and moisture.
Keep
The microUSB cable for PC connection and
microSD card are not waterproof. Do not use
these devices in the rain or in other humid
places (e.g. bathrooms). When carrying
handset near your body (pockets, etc.),
moisture from sweat may corrode internal
parts and cause malfunction. Damage caused
by exposure to liquids or moisture is not
covered by the warranty and may be
irreparable.
only the force necessary when
Use
inserting/removing the microSD card.
should keep a separate backup of
You
information saved on the microSD card.
NTT DOCOMO will bear no liability for any
loss of saved data.
not bend or place heavy objects on
Do
the microSD card.
Doing so may cause malfunction.
not remove the microSD card or turn
Do
off the FOMA terminal while the microSD
card is being accessed.
Doing so may erase data or cause
malfunction.
not insert the microSD card in a device
Do
with stickers or labels adhered to it. You
may be unable to insert/remove it in/
from a device or it may result in poor
contact.
the microSD card for a long period
Using
or repeatedly may cause data reading/
writing failure or slower operation.
are not covered under repair
Samples
warranty.
33
Contents/Notes
not place near an air conditioner vent.
Do
Condensation may form due to abrupt
temperature changes, leading to internal
corrosion and malfunction.
metal terminals in a clean state.
Maintain
with a dry, soft cloth (for glasses,
Clean
etc.).
not scratch, touch, or short-circuit the
Do
metal terminals.
Doing so may erase data or cause
malfunction.
the terminals of the microUSB cable
Clean
for PC connection with a dry cotton swab
periodically.
Soiled terminals may cause poor contact,
resulting in insufficient charging or your
FOMA terminal to turn off. Take card not to
damage the terminals when cleaning.
not hang or pull the FOMA terminal
Do
by the microUSB cable for PC connection.
in a place with adequate
Charge
temperature (5°C to 35°C).
not charge in the following places:
Do
•Places with much humidity, dust, or vibration
•Near a telephone, TV, radio, etc.
the microUSB cable may
Although
become warm during charging, it is not a
malfunction. You can continue using it.
not subject to strong impacts. Do not
Do
deform the USB connector of the
microUSB cable for PC connection.
Doing so may cause malfunction.
Cautions
Contents/Notes
not use the altered FOMA terminal.
Do
Using an altered device is a violation of
the Radio Law.
A "Technical Conformity Mark " affixed on
the manufacturer's specification sticker certifies
that the FOMA terminal meets technical
regulations for specified radio equipment based
on the Radio Law. If you remove the screws
and alter the inside of the FOMA terminal, the
technical regulations conformity certification
becomes invalid. Do not use the FOMA
terminal with the certification invalid, as it is a
violation of the Radio Law.
careful when using the FOMA terminal
Be
while driving.
A penalty may be imposed for holding a
mobile phone while driving. However,
exceptions are made in case of emergency,
such as to safeguard injured persons or to
maintain public safety.
the FeliCa reader/writer function only
Use
in Japan.
The FeliCa reader/writer function of the FOMA
terminal complies with radio standards of
Japan. You may be punished if you use it
overseas.
not attempt to alter the basic
Do
software.
Repair of malfunction may be refused if the
software is found to be altered.
34
Waterproof/Dustproof
Function
N-01D is waterproof to IPX5*1 and IPX7*2
and dustproof to IP5X*3 standards if the
external connector terminal cap is closed
as well as the back cover is securely
attached.
*1 IPX5 means that the N-01D continues to
function as a phone after being sprayed
from all directions with 12.5 liters of water
per minute from a 6.3 mm diameter nozzle
for at least 3 minutes, from a distance of
approx. 3 meters.
*2 IPX7 means that the N-01D retains phone
functionality after slowly immersing in still,
room-temperature tap water to a depth of
1 meter and leaving it there for 30 minutes
before bringing it out of the water.
*3 IP5X means that the N-01D continues to
function as a phone and to maintain
security after being left in a device
containing dust (diameter of 75 μm or
smaller) for 8 hours, agitated and removed.
can talk or watch 1Seg without an
You
umbrella in the rain (approx. 20 mm of rain
in an hour).
not attach/remove the back cover or do
Do
not open/close the external connector
terminal cap when your hands are wet or
when your FOMA terminal has water drops
on it.
Things to keep in mind
use, ensure that you securely close the
Before
external connector terminal cap and back
cover so that they are completely attached. If
any fine dirt (fine fibers, hairs, or sands) is
between the cap/cover and the FOMA
terminal, water or dust could enter the inside
of the FOMA terminal.
not use the FOMA terminal (operate keys,
Do
etc.) under water.
not spray or immerse the FOMA terminal
Do
in liquids other than water of room
temperature as illustrated below.
<Example>
Soap/Detergent/
Bath powder
Sea water
Pool
Hot spring
35
Contents/Notes
can rinse the FOMA terminal by
You
immersing and slowly moving in tap water
of room temperature filled in a bowl, or
rinse it with hands under light running
water from the faucet.
•Rinse the FOMA terminal with the back
cover securely attached while covering
the external connector terminal cap to
prevent it from opening.
•Do not use a brush, sponge, soap, or
detergent for washing.
•Do not apply running water directly to
the mouthpiece or earpiece/speaker.
not immerse or drop in pool water or
Do
sea water.
mud or dirt gets on the FOMA terminal,
If
wash off immediately. May be more
difficult to remove when dry/hard, and may
scratch/damage the FOMA terminal.
can use the FOMA terminal in the
You
bathroom. However, do not immerse it in
the bathtub.
•Never immerse the FOMA terminal in hot
spring water or water containing soap,
detergent or bath powder.
•Avoid using the FOMA terminal for a
long time in the bathroom.
Opening/closing the external connector
terminal cap
■
■Opening
Contents/Notes
Hook your finger on the slot and open the cap in
the direction of arrow.
Attaching/removing the back cover
■
■Removing
the FOMA terminal, then
1 Hold
hook your finger in the slot and
lift in direction ①
your finger in the gap
2 Insert
formed and remove gently as
shown
②
Slot
■
■Closing
Insert the tab on the back of the cap in direction
①, then close the cap by pressing securely in
direction ②.
Tab
36
Slot
■
■Attaching
NOTE
Tab
Securely push the areas
illustrated by
and make
sure that there is no space
between the back cover
and the FOMA terminal.
attaching the back cover, make sure that
When
the miniUIM, the microSD card and the battery
pack are attached securely. If the miniUIM or
microSD card is not securely inserted, the battery
pack sits on the miniUIM or microSD card which
causes a gap between the FOMA terminal and
the back cover when attaching the back cover.
The waterproof/dustproof function might
deteriorate because of the gap.
To maintain waterproof/dustproof function,
replacement of parts is required once every
2 years regardless of whether the FOMA
terminal appears normal or abnormal.
DOCOMO replaces the parts as a
chargeable service. Bring the FOMA
terminal to a repair counter specified by
DOCOMO.
NOTE
removing the back cover, make sure that
When
you drain water and wipe moisture off the
FOMA terminal.
attaching the back cover, make sure that
When
no dust or dirt adheres to the back cover
(especially to the rubber packing).
might enter the inside of the FOMA
Water/dust
terminal unless you attach the back cover
securely.
37
Contents/Notes
the tabs on the back cover
1 Insert
in direction ① and press firmly in
direction ②
Important notices
Contents/Notes
the FOMA terminal gets wet with water or
If
other liquids with the external connector
terminal cap or the back cover open, the
liquid may get inside the FOMA terminal
causing electric shock or malfunction. Stop
using the FOMA terminal, turn off the power,
remove the battery pack and contact a repair
counter specified by DOCOMO.
external connector terminal cap and the
The
rubber packing of the back cover play an
important role in maintaining waterproof/
dustproof function. Do not remove or scratch
them. Also, prevent dust from adhering to
them. If the external connector terminal cap
and the rubber packing of the back cover is
damaged or deformed, replace it at a repair
counter specified by DOCOMO.
not insert sharp objects through the gap
Do
of the external connector terminal cap or back
cover. Doing so may damage the rubber
packing and allow water/dust to seep in.
the back cover is damaged, replace it. Water
If
may seep into the inside of the FOMA
terminal through a damaged section causing
electric shock, corrosion of the battery pack,
or other malfunctions.
not leave the FOMA terminal with water
Do
drops. In cold places, water may freeze and
cause malfunction.
prevent condensation, do not bring the
To
FOMA terminal from a cold place to a
bathroom, etc. without letting the FOMA
terminal get back to room temperature.
38
not apply water flow stronger than allowed
Do
(e.g., such water flow that gives you pain when
applied to your skin directly from a faucet or
shower head). Doing so may cause malfunction
though N-01D is waterproof to IPX5 standard
(P.34).
not wash the FOMA terminal in a washing
Do
machine etc.
not put the FOMA terminal in hot water,
Do
use it in a sauna or apply hot air flow (from a
hair dryer etc.) to it.
not poke the mouthpiece or earpiece/
Do
speaker with cotton swabs or sharp objects.
The waterproof/dustproof function may
deteriorate.
FOMA terminal does not float on water.
The
not drop the FOMA terminal. Scratches
Do
may lead to lowered waterproof/dustproof
capability.
not leave water on the mouthpiece or
Do
earpiece/speaker. If water adheres to the
FOMA terminal, the volume during a call or
ringtone may be decreased or sound quality
may deteriorate. In such a case, drain the
water to recover the function.
does not guarantee all operations
DOCOMO
under actual use conditions. Malfunctions
deemed to be caused by inappropriate
operation by the customer are not covered by
the warranty.
if the back cover is securely attached,
Even
removing the sealing shown may result in a
loss of waterproof capability. Do not remove
sealing.
the surface of the FOMA
1 Wipe
terminal with a clean dry cloth,
etc.
Contents/Notes
Sealing
Draining water when the FOMA
terminal gets wet
When the FOMA terminal gets wet, drain
the water following the steps below.
water adheres to the mouthpiece or
If
earpiece/speaker, the volume of the other
party's voice or melody may be decreased or
sound quality may deteriorate. In such a case,
drain the water following the steps below and
dry the FOMA terminal in open air to recover
the function.
hold the FOMA terminal
2 Securely
and shake it approx. 20 times
until there is no more water
splattering
<Draining from mouthpiece or earpiece/
speaker>
39
press a clean dry cloth etc.,
3 Softly
on the FOMA terminal to wipe
Contents/Notes
off water remaining in the
mouthpiece or earpiece/speaker
• Do not wipe off water remaining in gaps
directly with a cotton swab etc.
wipe off water
4 Thoroughly
drained from the FOMA terminal
with a clean dry cloth, etc.
• Water, if any, remaining in the FOMA
terminal may leak out after wiping off.
40
When charging the battery
Accessories and options are not waterproof/
dustproof. Check the following before and
after charging.
sure that the FOMA terminal is not wet.
Make
If the FOMA terminal is wet, thoroughly drain
the water and wipe off with a clean dry cloth,
etc. before placing it on the provided wireless
charger or opening the external connector
terminal cap.
the external connector terminal cap is
When
opened for charging, close the cap securely
after charging. It is recommended that the
wireless charger be used for charging to
prevent water from seeping in or dust from
entering through the external connector
terminal.
•Never try to charge the battery pack when
the FOMA terminal is wet.
•Do not touch the AC adapter or wireless
charger with wet hands. Doing so may cause
electric shock.
•Use the AC adapter or wireless charger in a
place free from water splashes. Do not use
them in a bathroom, shower room, kitchen,
washroom and other places subject to water.
Otherwise, it may cause fire or electric
shock.
Getting Started
Part Names and Functions
Getting Started
41
❶Earpiece (receiver)/Speaker
❷Proximity/Illuminance sensor
Getting Started
•Hides tappable icons on the touch panel
when your face comes close to the touch
panel. This prevents you from unintentionally
activating functions when you are engaged
in a call.
•Detects the brightness around the terminal
and automatically adjusts the illuminance of
the display. → P.109
*Do not put labels or stickers on the sensors.
❸Notification LED
•Charging
•Incoming call (incoming call lamp) → P.109
•Missed calls, new mail (notification lamp) →
P.109
❹Display (Touch panel)
•Allows you to scroll the screen on the display
or tap to select objects. → P.54
❺mMenu key → P.56
❻hHome key → P.56
❼rBack key → P.56
❽Mouthpiece/microphone
❾Power key
•Powers the terminal on/off or sets it in sleep
mode.
External connector terminal
•Provides connections to the adapters,
earphone/headphone, and PC, etc.
Strap slot
Volume key
•Adjusts the volume.
42
Light/shot-ready LED
•Turn it on when taking a picture as needed.
•Blinks red during camera shooting.
Infrared data port
•Serves for infrared data exchange. → P.132
Camera
•You can use the camera to take videos or
photos. → P.137
1Seg antenna
•For 1Seg reception. → P.151
GPS / Wi-Fi / Bluetooth antenna*
q mark
•When charging with the wireless charger,
match this mark with the q mark on the
wireless charger.
miniUIM slot
•Insert a miniUIM here. → P.43
microSD card slot
•Set the microSD card to the slot. → P.44
Back cover
•Do not remove the sticker on the back cover.
If removed, data transfer with the e mark
may no longer be possible.
emark
•Put the mark close to the reader when using
おサイフケータイ (Osaifu-Keitai). → P.155
FOMA antenna*
*The antennas are built-in. To ensure good
signal quality, avoid covering the antenna
section with your hands.
miniUIM
side facing down, slide
1 IC
miniUIM into miniUIM slot in
orientation shown
miniUIM slot
Getting Started
miniUIM is an IC card that stores your
phone number and other information.
Only a miniUIM can be used on your
FOMA terminal. Exchange your miniUIM
or FOMA card at a docomo Shop Service
Counter.
functions are not available if the
Some
miniUIM is not inserted.
details on the miniUIM, refer to the
For
manual for the miniUIM.
should insert/remove the miniUIM
You
after turning the power off and removing
the battery pack (P.48). Hold the FOMA
terminal firmly in your hand.
■
■Inserting
miniUIM
IC
Gold IC side
facedown
Notch
2
Push miniUIM in until it locks
43
■
■Removing
1 Pull lever to remove miniUIM
2 Slide miniUIM out by lever
Getting Started
Lever
❷
microSD Card
You can save data in the FOMA terminal
to microSD card or transfer data on a
microSD card to the FOMA terminal.
N-01D supports a microSD card of up
The
to 2 GB, and a microSDHC card of up to
32 GB (as of November 2011). Refer to the
following website for information on the
latest operation check information,
including microSD card manufacturers and
card capacities.
http://www.n-keitai.com/ (in Japanese only)
For microSD cards other than those given,
inquire with the manufacturer of each
microSD card.
Given information is the result of operation
checks, and is not a guarantee of operation.
Before using a microSD card
NOTE
not insert/remove miniUIM forcefully. May
Do
damage miniUIM.
44
Make sure to format microSD card on N-01D.
You may not be able to use microSD card
formatted on another terminal or PC. → P.116
that formatting the microSD card deletes
Note
all data in it.
sure to make a backup or otherwise
Be
separately store data saved to a microSD card.
If saved data becomes lost or is altered,
DOCOMO will not be held liable.
not turn off the power while the microSD
Do
card is being accessed. The data may be
destroyed or the card may no longer function
properly.
■
■Attaching
the microSD card into the
1 Insert
microSD slot until it is locked
■
■Removing
the microSD card in, and
1 Push
then release it
• The microSD card comes out slightly.
Note that the card may jet completely out
of its slot.
the microSD card at its
2 Hold
groove, and then pull it straight
out slowly
• Insert the microSD card into the slot
slowly and straight in with the metal
contacts facing down. When the card is
fully inserted, it is locked.
microSD card slot
microSD card
Getting Started
from another device saved to microSD
Data
card may not be displayable or playable on
the FOMA terminal. Data saved to microSD
card from the FOMA terminal may also not be
displayable or playable on another device.
should insert/remove a microSD card after
You
turning the power off and removing the
battery pack (P.48). Hold the FOMA terminal
firmly in your hand.
❶
❷
45
Battery Pack
Getting Started
the Battery Pack N29 for the FOMA
Use
terminal.
should insert/remove the battery pack
You
after turning the power off. Hold the
FOMA terminal firmly in your hand.
the back cover → P.36
Attaching/removing
2 Slide lock switch to LOCK
Hook tabs in
slots
■
■Attaching
Lock switch
the product name label on
1 With
the battery pack facing up, insert
in the direction ① by hooking the
tabs on the battery pack in the
slots in the FOMA terminal, so
that the metal terminals on the
battery pack and FOMA terminal
are aligned. Then set the battery
pack in the direction ②
• Unlock the lock switch to remove the
battery pack.
46
NOTE
not press forcefully if tabs are not hooked in
Do
slots. May break tabs.
■
■Removing
1 Slide lock switch to FREE
the tab of the battery pack
2 Push
in the direction ① then pull it up
in the direction ②
Getting Started
Lock switch
Tab
47
Charging
battery pack is not fully charged at
The
time of purchase. Be sure to fully charge
before use.
■
charging
■Battery
Getting Started
•For more details, see the respective manuals
of the FOMA microUSB Adapter N01 for
charging (optional), the FOMA AC Adapter
01/02 (optional), the FOMA AC Adapter 01
for Global use (optional) and the FOMA DC
Adapter 01/02 (optional).
•The FOMA AC Adapter 01 is only compatible
with AC 100V. The FOMA AC Adapter 02 and
the FOMA AC Adapter 01 for Global use are
compatible with AC 100V-240V.
•The AC adapter has an AC 100V plug
(Japanese specification). When using an AC
100-240V adapter overseas, you will need a
converter plug adapter compatible with local
voltage. Do not charge the FOMA terminal
using a travel transformer.
•You must attach the battery pack to the
FOMA terminal if you want to charge using
the FOMA microUSB Adapter N01 for
charging and an AC or DC adapter.
•Do not force the connector when inserting/
pulling it out. Instead, insert or pull it out
slowly.
• If you start charging when the battery pack is
empty, you may not be able to power ON the
FOMA terminal for a while.
48
•Depending on conditions of use, charging
may stop before the battery level is 100%. If
this happens, charge again after exiting all
functions in use. Before charging again, first
disconnect the FOMA terminal from the
FOMA microUSB Adapter N01 for charging or
microUSB cable for PC connection (sample),
and then reconnect it.
■
time (estimate)
■Charging
Charging time is an estimate of the time
required to charge a completely empty battery
pack while the FOMA terminal is powered off.
FOMA AC Adapter 01/02* Approx. 200 minutes
FOMA DC Adapter 01/02* Approx. 200 minutes
Wireless Charger N01 Approx. 300 minutes
*Charging when connected to FOMA microUSB
Adapter N01 (optional) for charging.
■
time when fully charged
■Usage
(estimate)
Usage time differs with the operating
environment and the condition of the battery
pack.
time for the FOMA terminal becomes
Usage
shorter as you view 1Seg or use GPS.
Continuous standby time
FOMA/3G
•Stationary (Automatic):Approx. 630 hours
GSM
•Stationary (Automatic):Approx. 400 hours
Continuous call time
FOMA/3G: Approx. 380 minutes
GSM: Approx. 450 minutes
Continuous 1Seg viewable time
Approx. 380 minutes
■
pack life
■Battery
q
Products with this mark comply with
wireless charging standards of the
Wireless Power Consortium (WPC).
names:
Part
Charge assist button*
Charging area
To prevent damage to the
environment, bring used battery
packs to a docomo service
counter, a docomo agent or a
recycling center.
capability
■
■Waterproof/dustproof
•The battery pack, AC adapter, and supplied
wireless charger are not waterproof/
dustproof. You must not charge when the
FOMA terminal is wet.
•To prevent intrusion of water/dust from the
external connection terminal, charging is
recommended using the wireless charger.
•After charging is completed, securely close
the external connection terminal cap.
Otherwise, water/dust may enter.
Charge
information
*Used when charging of a small-size compatible
device does not start automatically.
A small-size device is one with small output
(approx. 1 W) and which does not start
charging when placed in the center of the
wireless charger’s charging area.
the connector of the
1 Insert
special AC adapter in the wireless
charger
• Do not connect anything other than the
special AC adapter.
49
Getting Started
•The battery pack is a consumable accessory.
The usage time of the battery per 1 charge
decreases gradually each time the battery is
recharged.
•When the usage time from 1 charge becomes
about half of a new battery pack, the life of
the battery pack is assumed to be almost over.
We recommend that you replace the battery
ahead of time.
•If you view 1Seg while charging for a long
period, the life of the battery pack may
decrease.
Charging with the wireless charger
any compatible DOCOMO product
Charge
with the q mark by placing it on the wireless
charger, without need for connection. Refer
to the product manual.
the special AC adapter into
2 Plug
an outlet
the FOMA terminal on the
3 Place
wireless charger with their q
marks matched
Getting Started
• Align the FOMA terminal with the design
on the label of the wireless charger, and
gently place the FOMA terminal.
• Charge information will blink slowly.
Once information remains displayed,
charging starts.
charging completes,
4 Once
remove the FOMA terminal from
the wireless charger
the special AC adapter
5 Unplug
from the outlet, and remove its
connector from the wireless
charger
■
information
■Charge
Information blinks or remains lit (blue)
depending on the charge level as follows.
Displayed
Lit
No display
Connector
Blinking
(1 sec. apart)
Blinking
Charge error or malfunction
(0.25 sec. apart)
Blinking
Waiting for charging
(lit for 2 sec. → no temperature
display for 1 sec.)
Notification LED
Charge
information
100V AC outlet
Special AC adapter
Plug
50
State
Charging*
Charging completed or FOMA
terminal not recognized
Recognizing FOMA terminal
*Charge information remains displayed even
after charging completes and the FOMA
terminal’s notification lamp goes out.
Charging with the AC adapter/DC
adapter
sure to refer to the manuals for the FOMA
Be
AC Adapter 01/02 (optional) or FOMA DC
Adapter 01/02 (optional) and the FOMA
microUSB Adapter N01 for charging (optional).
microUSB
plug
* Engraved
side facedown
• Insert the microUSB plug horizontally
with the engraved side facing down.
Notification LED
■For DC Adapter
(option)
To AC100V
outlet
FOMA
microUSB
Adapter N01 for
charging
microUSB plug of the FOMA
microUSB Adapter N01 for
charging horizontally into the
FOMA terminal's external
connector terminal
Getting Started
External connector
terminal cap
the external connector
2 Open
terminal cap (P.36), and plug the
To lighter socket
Connection
terminal
Power
plug
outlet/the DC adapter plug into
the car’s lighter socket
Plug
Connector
Release clips
the AC adapter plug
3 Insert
horizontally into the power
AC
adapter
charging is completed,
4 When
unplug the AC adapter from the
outlet/ the DC adapter from the
socket
the AC adapter/DC adapter
the AC adapter/DC
1 Insert
5 Remove
connector horizontally into the
adapter connector horizontally
connection terminal of the FOMA
microUSB Adapter N01 for
charging
• Insert the connector with the engraved
side facing up horizontally into the
connection terminal with print side facing
up.
from the connection terminal of
the FOMA microUSB Adapter N01
for charging
the microUSB plug
6 Remove
straight from the FOMA terminal
and close the external connector
terminal cover (P.36)
51
Charging with the microUSB cable
for PC connection
You can charge your FOMA terminal by
connecting the FOMA terminal and a PC
with the microUSB cable for PC connection
(sample).
charging is completed,
3 When
remove the microUSB plug
horizontally from the FOMA
terminal and close the external
connector terminal cover (P.36)
Getting Started
the USB plug
4 Remove
horizontally from the PC USB
port
NOTE
microUSB cable for
PC connection (sample)
Engraved side
facedown
the external connector
1 Open
terminal cap (P.36), and plug the
microUSB plug of the microUSB
cable for PC connection
horizontally into the external
connector terminal of the FOMA
terminal
• Insert the microUSB plug horizontally
with the engraved side facing down.
the other USB plug of the
2 Insert
microUSB cable for PC connection
horizontally into the PC USB port
52
LED turns red while charging, green
Notification
when the battery level is over 90%, and off when
charging is complete.
charging starts with power off, it may take
If
some time for charging to start.
<Wireless charger>
with the wireless charger on a stable and
Charge
level surface.
wireless charger may beep when plugged
The
into an outlet or the FOMA terminal is placed on
it or removed from it. This is not a malfunction.
one FOMA terminal can be charged at a
Only
time.
the charge information flashes (approx. every
If
0.25 sec.), check whether anything is between
the FOMA terminal and the wireless charger,
then place the FOMA terminal properly on the
wireless charger again or unplug the charger and
plug it back in.
the wireless charger does not recognize the
If
FOMA terminal, remove it from the charging
area, and wait 2 seconds before placing back in
the center of the charger.
NOTE
Turning Power ON and OFF
■
power ON
■Turning
the power key for 2
1 Press
seconds or longer
• When turning power on for the first time,
the initial setting screen appears. → P.56
• The Home screen appears. → P.72
■
power OFF
■Turning
the power key for 1 second
1 Press
or longer ▶ "Power off" ▶ "OK"
Sleep mode
When the power key is pressed or the FOMA
terminal is not operated for a specified
duration of time, the display turns off and
the terminal enters sleep mode.
Pressing the power key quits sleep mode.
Screen lock
When you turn power on or quit sleep
mode, the touch panel is locked.
Tap
to unlock the screen.
53
Getting Started
cover attached to the FOMA terminal may
A
prevent charging depending on its material/
thickness. Remove a cover to ensure charging.
you perceive noise interference from a TV or
If
radio while using the wireless charger, remove
the charger as far as possible.
may not be possible if another
Charging
electronic device is being used nearby. Use
another electronic device at least 30 cm away
from the charger.
not move the wireless charger or the FOMA
Do
terminal while charging.
not allow the FOMA terminal’s vibrator to
Do
start while charging. Vibration may cause the
FOMA terminal to move out of place or to fall.
might not be received if charging a
Calls
commercially available product with the q mark.
Charge using the supplied wireless charger N01.
<DC adapter>
DC adapter takes a 2A fuse. If the fuse (2A)
The
blows, be sure to replace with a designated fuse.
The fuse (2A) is a consumable and can be
purchased at a local car dealer.
<microUSB cable for PC connection>
you perceive noise interference from a radio or
If
similar device while charging, distance the
microUSB cable for PC connection from the
radio, antenna, etc.
not use the microUSB cable for PC
Do
connection to connect the FOMA terminal and a
PC in regions where its use is prohibited.
Switching the Screen Display
Orientation
Getting Started
The FOMA terminal can automatically
switch the display orientation by sensing
the sideway tilt of the body.
display may not switch depending on
The
the content being displayed.
on the terminal, setting the display
Operate
vertically to the ground. If the display is
placed horizontally to the ground, the
display orientation does not switch.
can disable screen rotation by tapping
You
in the Notifications panel.
54
Basic Operations
Operate the FOMA terminal by directly
touching the touch panel (display).
■
on using the touch panel
■Precautions
touch panel has been designed for light
The
finger touches. Do not press it hard with your
finger or with sharp objects (nail, ballpoint
pen, pin etc.).
The following user actions may cause the
touch panel not to work properly. They may
also cause malfunction.
•Touching the screen with gloved hands
•Touching the screen with the tip of a
fingernail
•Placing a foreign object on the screen
•Sticking a protective sheet or seal on the
screen
•Touching the screen when it is wet
•Touching the screen with sweaty or wet
fingers
the FOMA terminal to sleep mode before
Set
carrying it in your pocket or bag. Carrying the
FOMA terminal while not in sleep mode may
cause unintended operation.
Tap
Flick
Select or run items.
Quickly scroll in direction you want to view.
Touch the panel
then release your
finger.
In some screens, continuing to touch the touch
panel displays a menu.
Slide
Scroll up/down/left/right in direction you want
to view.
Slide your finger
while touching the
touch panel.
Getting Started
■
and hold
■Touch
Quickly slide your
finger and release it.
Pinch with two fingers
Zoom in or zoom out.
Touch the touch
panel with two
fingers, then slide
them apart or
together.
■
■Drag
Slide your finger while touching an item (icon,
etc.) to move it.
55
The WmWhWr keys
Getting Started
You can use the mhr keys mainly
for the following.
•m :Display the menu available for the
current screen. Depending on the
current screen, menu items may include
search, settings, or delete options.
•h :Display the Home screen. You can
return to the Home screen when using
a function. Touch and hold to carry out
task management.
•r :Go back one screen. Use when you
want to return to the previous screen.
•You can set key illumination for an incoming
call, during a call, new mail, etc. → P.109
Initial Settings
Settings when power is first turned
ON
When the FOMA terminal power is first
turned ON, the following settings are
required.
the initial setting screen
1 When
appears, tap the language ▶ "次
へ"
the displayed content ▶
2 Check
"Next"
configure a Google account,
3 To
"Settings"
• Follow onscreen instructions to configure
a Google account and back up data, and
then tap "Next".
use Google Location Service,
4 To
mark the checkbox ▶ "Agree" ▶
"Next"
use GPS, mark the checkbox ▶
5 To
"Agree" ▶ "Next"
the explanation for
6 Check
updating software ▶ "Next"
the DOCOMO Services
7 When
initialization screen appears,
"Next"
56
the displayed content, and
8 Check
tap the "Install" radio button to
install all applications ▶ "Next"
initialize Osaifu-Keitai, tap the
9 To
"Set" radio button ▶ "Next"
set a docomo application
10 To
password, "Set"
• Follow onscreen instructions to set a
docomo application password.
the displayed settings for
11 Check
providing location, and tap a
radio button to set an item ▶
"Next"
12
"OK"
Configuring access point to be used
the Home screen, m ▶
1 From
"Settings" ▶ "Wireless &
networks" ▶ "Mobile networks"
▶ "Access Point Names" ▶ tap
the radio button for the access
point
Adding an access point
the Home screen, m ▶
1 From
"Settings" ▶ "Wireless &
networks" ▶ "Mobile networks"
▶ "Access Point Names"
2 m ▶ "New APN"
▶ enter the name of the
3 "Name"
new network profile ▶ "OK"
▶ enter the access point
4 "APN"
name ▶ "OK"
57
Getting Started
• Follow onscreen instructions to initialize
Osaifu-Keitai.
Setting an access point
The access points (sp-mode, mopera U)
required for connecting to the Internet are
preset. You may add or change them as
required.
sp-mode is set as the default access point.
The
any other items requested
5 Enter
by your network operator
6 m ▶ "Save"
NOTE
Getting Started
not change MCC to anything other than
Do
440, or MNC to anything other than 10. If you
do this, registered/added access points will no
longer display on the screen. If access points no
longer display due to the MCC and MNC
settings being changed, you can either restore
default settings or manually set the access points
again.
Initializing an access point
you initialize an access point, it returns
When
to its default settings.
the Home screen, m ▶
1 From
"Settings" ▶ "Wireless &
networks" ▶ "Mobile networks"
▶ "Access Point Names"
2 m▶ "Reset to default"
sp-mode
sp-mode is an ISP for NTT DOCOMO
smartphones. In addition to Internet
connection, this also provides an email
service that uses the same email addresses as
i-mode (@docomo.ne.jp).
is a paid service that requires
sp-mode
subscription. For details about sp-mode, refer
to the NTT DOCOMO website.
mopera U
mopera U is an NTT DOCOMO ISP. If you
have subscribed to mopera U, you can use
the Internet after making the simple
settings.
U is a paid service that requires
mopera
subscription.
Setting mopera U
the Home screen, m ▶
1 From
"Settings" ▶ "Wireless &
networks" ▶ "Mobile networks"
▶ "Access Point Names"
to select the "mopera U (ス
2 Tap
マートフォン定額)" (Smartphone
flat-rate)/"mopera U 設定"
(mopera U settings) radio button
58
NOTE
Wi-Fi settings
Wi-Fi is a function that allows you to use
email and the Internet, via access points for
household/corporate networks or public
wireless LAN services.
■
wave interference with
■Radio
Bluetooth devices
Since a Bluetooth device and a wireless LAN
(IEEE802.11b/g/n) device use the same
frequency ranges (2.4GHz), radio wave
interference may occur when the Bluetooth
device is used near a device equipped with a
wireless LAN. This may cause deterioration in
the communication speed, noise and
connection problems. If this occurs, take the
following measures:
Getting Started
to flat-rate packet communication
Subscription
service is required if you want to use "mopera
U (スマートフォン定額)" (Smartphone flat-rate).
For details on mopera U (Smartphone flat-rate),
refer to the NTT DOCOMO website.
U設定" (mopera U settings) is the
"mopera
access point for setting mopera U. When you
use the access point for setting mopera U,
packet communication charges for setting do
not apply. Note that you can only connect to the
initial setting screen or the setting change screen
for mopera U. For details on mopera U settings,
refer to the mopera U website.
a distance of at the nearest 10 m from
Keep
a wireless LAN device when you connect the
Bluetooth device or the FOMA terminal.
off the Bluetooth device in case you
Turn
should use the Bluetooth device within 10 m
from the wireless LAN device.
Turning Wi-Fi ON to connect to a
network
the Home screen, m ▶
1 From
"Settings" ▶ "Wireless &
networks" ▶ "Wi-Fi settings"
59
the "Wi-Fi" checkbox
2 Mark
• A scan for Wi-Fi networks begins
automatically. A list of available networks
appears.
the name of the Wi-Fi
3 Tap
network that you want to
Getting Started
connect to
• To connect to a protected Wi-Fi network,
enter the required information and tap
"Connect".
Connecting to a Wi-Fi network with
easy Wi-Fi settings
an access point-capable device supports
When
"らくらく無線スタート" (Easy Wireless Setup)
and "WPS", you can easily complete required
settings, including ESSID and the security
method.
the Home screen, m ▶
1 From
"Settings" ▶ "Wireless &
networks" ▶ "Wi-Fi settings"
2 Mark the "Wi-Fi" checkbox
Easy Settings" ▶ "Easy
3 "Wi-Fi
Wireless Setup"/"WPS"
■
Wireless Setup
■Easy
• Keep touching the easy setup button
until the POWER LED blinks in Green on
the access point.
60
• Again, keep touching the easy setup
button until the POWER LED is lit Orange
on the access point.
• When the status bar shows
, you are
accessible to the Wi-Fi network.
■
■WPS
• Push Button Control method: Search for
access points begins, so you should press
the pushbutton on an access point itself
or an access point’s setting screen.
Continue by following onscreen
instructions.
• PIN method: Search for access points
begins. Continue by following onscreen
instructions. When "PIN code" (Pin code
for WPS) appears on the FOMA terminal,
register the displayed number in the
access point.
• When the status bar shows
, you are
accessible to the Wi-Fi network.
• If the security for a WPS-set access point
is WEP, connection is not possible.
Adding a Wi-Fi network manually
information on using an access point,
For
refer to the manual for the access point.
the Home screen, m ▶
1 From
"Settings" ▶ "Wireless &
networks" ▶ "Wi-Fi settings"
2 Mark the "Wi-Fi" checkbox
3 "Add Wi-Fi network"
the network SSID for the
4 Enter
Wi-Fi network to be added, and
additional security
5 Enter
information as required ▶ "Save"
Disconnecting a connected Wi-Fi
network
the Home screen, m ▶
1 From
"Settings" ▶ "Wireless &
networks" ▶ "Wi-Fi settings"
the connected Wi-Fi network
2 Tap
▶ "Forget"
NOTE
communication is still available when
Packet
Wi-Fi is turned on. However, if the FOMA
terminal is connected to a Wi-Fi network, the
Wi-Fi network takes precedence. When the
Wi-Fi network is disconnected, the FOMA
terminal automatically connects to the 3G/GPRS
network. If you continue using the FOMA
terminal connected to the 3G/GPRS network,
note that you will incur costly packet
communication charges.
the application list screen,
1 In
"Email"
Getting Started
then select the security (Open,
WEP, WPA/WPA2 PSK, 802.1x
EAP)
Setting an Email account
Setting an email account provided by
mopera U or any general providers, you can
use email.
information required for completing
Obtain
settings from your service provider
beforehand.
■ set an additional account
■To
▶ m ▶ "Accounts" ▶ m ▶ "Add
account"
the email address and
2 Enter
password ▶ "Next"
• For an email account with preset provider
information, settings for the send/receive
mail servers are complete automatically.
• For an email account without preset
provider information, settings must be
completed manually. Contact your
provider for settings information.
the account name and user
3 Enter
name ▶ "Done"
61
Setting a Google or other account
By configuring a Google account, you can
use Gmail, market, and other services.
the Home screen, m ▶
1 From
"Settings" ▶ "Accounts & sync"
Getting Started
2
▶ "Add account"
Tap the type of account
Reading the Status Bar
Notification icons for new information
and status icons for FOMA terminal status
are displayed in the status bar.
Notification icons are displayed on the
left side, and the FOMA terminal status
icons are displayed on the right side of
the status bar.
Status bar
onscreen instructions to
3 Follow
configure the account
Status icons
Icon
/
/
*
*
Description
The battery needs to be charged /
Battery level / The battery is
charging
Signal status
International roaming
Out of service area
/
*
/
*
3G communicating / available
GPRS communicating / available
Airplane mode activated
*
/
62
Connected to Wi-Fi
Bluetooth is ON / connected to
compatible device
Synchronizing data
Icon
/
/
/
/
Description
New Area Mail
miniUIM not inserted
Upcoming calendar event
The alarm is set
Upcoming Schedule event
Speaker ON during call
Alarm is snoozed
Microphone is mute
Media Player playing
Silent mode with vibration ON/OFF
eco mode is ON
(Gray "eco": Original eco mode
Aqua "eco": Full eco mode)
GPS is positioning
Enterable text type (hiragana /
katakana / alphabet / numerals /
/
smileys, emoticons, symbols, fixed
phrases, character codes / T9
input)
Unsecured Wi-Fi network found
Newly received file via Bluetooth
communication
USB is connected
/
In call / On hold
Missed call
Data upload/send
Data download/receive
Description
New Gmail
Application installation completed
Update of installed application
available
Some notification icons
undisplayed
Sending/receiving data by infrared
data exchange
Viewing 1Seg
New Email
Recording 1Seg
New sp-mode mail
MEDIAS NAVI update notification
New SMS message
Software update notification
Major software update
notification, updating
PC Link is connected
*When a Google account is configured
(synchronized), the icon appears blue, and
when not configured (not synchronized), grey.
Notification icons
Icon
Icon
Getting Started
/
Description
Osaifu-Keitai lock activated
Failed to send SMS
New Voice Mail message
New instant message
PC Link available
63
Icon
Description
PC Link confirmation message
Connected by USB PC Link
Tap searching
Error/Alert message
No available space in phone
Using the Notifications panel
When a notification icon appears, you can
open the Notifications panel to check a
message or event notification.
1 Drag the status bar downwards
Getting Started
Using USB tethering
Using Wi-Fi tethering
/
Using USB and Wi-Fi tethering
VPN (PPTP) is connected /
Unconnected
VPN (IPSec/L2TP) is connected
①
②
③
④
⑤
⑦
⑥
①Activates Tap search. → P.82
②Tap the following icons to change the
function status.
64
/
: Automatic screen rotation on/off →
P.54
: eco mode on/off → P.110
: GPS function on/off → P.147
: Silent mode (vibration on/off)
on/off → P.108
: Bluetooth function on/off → P.99
: Wi-Fi function on/off → P.99
: Brightness level → P.109
Text Entry
The FOMA terminal has an onscreen
keyboard that is displayed in the screen.
Tap a text box on the screen to display
the onscreen keyboard.
can use the following two kinds of
You
keyboards.
Getting Started
: Account auto-synchronization on/off
→ P.115
③Shows the name of the network carrier
you are connecting to.
④Shows the name of the network carrier
that provides services.
⑤Tap this to delete the checkmarked (⑦)
notifications and the notification icons
displayed on the status bar.
⑥Shows the missed call log and other
information such as completion of a
download.
⑦Mark a checkbox for the notifications you
want to delete, and then tap ⑤; the
notification icons are deleted.
■
keyboard
■QWERTY
This keyboard uses a PC keyboard layout.
Enter Japanese in romaji.
⑩
■
the Notifications panel
■Close
▶ Drag bottom of Notifications panel to
top
⑧
①
⑦
⑥
② ③ ④ ⑤
keyboard
■
■10-key
This is an ordinary keyboard of mobile phones.
⑩
⑨
⑦
⑤
⑤
②
③
①
⑥
65
①
Getting Started
/
: Toggle the QWERTY keyboard
and 10-key keyboard.
→ P.68
Change text to hiragana/kana/
alphabet/etc.
With the 10-key keyboard, changes
text to kana/alphanumeric/etc.
Also toggle half-width/full-width.
Toggle the kind of text to enter.
Touch and hold to display the ATOK
menu.
[ATOK Menu]
•"ATOK Settings": "Configuring text
entry settings" → P.69
• "Register Words": Add words. Added
words are usable when converting
kana to kanji.
Enter a space.
②
③
Convert entered text.
④
Enter a line feed or confirm entered
text.
When there is a text entry box such as
for Phonebook, completes entry and
moves to the next item.
When entering text for a web page or
for search words, runs the function of
the text box.
Delete text to the left of the cursor.
For the 10-key keyboard, you can also
set "Character delete key" (P.69) to
delete text to the right ( ).
Tap once to change the next character
to be entered to upper case ( ), tap
twice to lock in upper case ( ). Some
symbols can also be entered.
Display one character before (reverse).
⑦
⑧
⑨
Undo one action before.
⑩
Change the keyboard to symbol entry.
⑤
/
66
⑥
Move the cursor. When converting,
change the conversion range.
-
Prediction candidates are displayed
when entering text, and you can tap
to enter text.
•Slide left/right to display other
candidates.
•Flick up/down for wider candidates
display.
Selecting the 10-key keyboard entry
method
Example: To enter "ぱ"
Select a text entry method for the 10-key
keyboard.
a text entry screen, touch and
1 On
hold
/ / ▶ "ATOK
keypad input"/"Gesture
2 "Numeric
input"/"Flick input"/"T9 input"
■
keypad input
■Numeric
Tap the key with the desired character assigned
on repeatedly until you get to the character.
■
input
■Gesture
Keep touching on the key with the desired
character; the associated gesture guide
(characters) is displayed around the key. Slide
your finger to the target character without
releasing it from the panel.
You can slide the finger you tapped downward
once or twice to display a gesture guide with a
voiced consonant, unvoiced consonant, or small
kana (during alphabet entry, toggle upper/lower
case).
■
input
■Flick
Keep touching on the key with the desired
character; the associated flick guide (characters)
is displayed on the key. Flick your finger toward
the target character without releasing it from
the panel.
After flick input, you can tap
once or twice
to enter a voiced consonant, unvoiced
consonant, or small kana.
67
Getting Started
Settings" ▶ "Input mode"
Slide
downward
twice
■ input
■T9
Tap each key with a desired character once, and
then select the desired text from the displayed
prediction candidates to enter it.
Example: To enter "春"
▶ Tap "は" then "ら"
Getting Started
Tap "春" displayed in the
prediction candidates.
•If desired text does not
appear in the
candidates, tap
and
enter the reading.
•To enter a voiced/
unvoiced consonant, tap
.
•To toggle English and
Japanese, tap
/
.
to toggle
•You can tap
display of candidates
between "漢字/かな"
(kanji/kana).
A "はる" candidate appears
in "変換" (convert), so tap
"春". Prediction candidates
from "はる" appear in "予
測" (prediction).
•To change the
conversion range, tap
/
.
Entering with the smiley/emoticon/
symbol palette
1 In a text entry screen, "
"
"/" "
2 "• The"/"
palette for the keyboard is displayed.
■
from fixed phrases/
■Entering
character codes
▶"
"/"
"
■
Phonebook data
■Quoting
▶ " " ▶ "電話帳/ATOKダイレクト" ▶
tap the entry ▶ checkmark the item to
quote ▶ "OK"
Entering text by handwriting
hiragana, katakana, alphabet,
Handwritten
and numbers can be recognized.
1 "In a "text entry screen, "
"▶
to enter characters
2 Write
• Tap a tab to select the type of text to
enter.
Area for handwriting
68
Configuring text entry settings
Configure settings for text entry including
sound/vibration for key operation and text
size.
a text entry screen, touch and
1 In
hold
/ / ▶ "ATOK Settings"
Input mode → P.67
Entering auxiliaries
Keypad sound······Set sound for when
keys are pressed.
Keypad vibration······Set vibration for
when keys are pressed.
Multi-tap input······Enable numeric
keypad input for both gesture input and
flick input.
Mark the "Enable auto cursor moving"
checkbox to move the cursor to the
right after a period of no entry during
numeric keypad input. Also set how
quickly the cursor moves. Mark the
"Enable multi-tap input when gesture /
flick input" checkbox to automatically
move the cursor during both gesture
input and flick input.
The setting for auto cursor moving
changes with each "Input mode"
setting.
Number type keypad······Set whether
to use a numeric keypad when using
the 10-key keyboard.
Gesture guide······Set whether the
gesture guide is displayed at entry by
gesture. Mark the checkbox to display
the gesture guide. You can set the time
length before the guide is displayed.
Flick guide······Set whether the flick
guide is displayed at entry by flicking.
Flick Sensitivity······Set the sensitivity
of character selection for a character
input by flicking.
Modifier key flick······Set to enable
entry of dakuon/han-dakuon by flicking
for flick input.
Auto alphanumeric select······Set to
enter in half-width letters when
switching to the QWERTY keyboard
from the 10-key keyboard.
Direct alphanumeric input······Set to
enter half-width letters only after they
are confirmed in alphabet entry.
Show numeric keys (vertical screen)
······Set to display numeric keys when
displaying the QWERTY keyboard in the
vertical screen. When set not to display,
enter numbers by flicking.
69
Getting Started
2 Select any item:
Character delete key······When
deleting text, set to delete to the left of
the cursor ("Backspace ( )") or the
right ("Clear ( )").
Show numeric keys (horizontal
screen)······Set to display numeric keys
when displaying the QWERTY keyboard
in the horizontal screen. When set not
to display, enter numbers by flicking.
Getting Started
Use half-width space······Set to enter
half-width spaces also when entering
Japanese text.
Auto space insert······Set to
automatically put a space following a
word after it is confirmed in alphabet
entry.
Delete key flick······Set whether to
/
delete a string of text by flicking
upward or to the left.
Auto full screen (horizontal) ······Set
whether to display the text entry field
automatically at full screen when in the
horizontal screen.
Converting / Candidates
Input prediction······Set to display the
prediction candidates for conversion.
Showing prediction candidates
before next input······Set to predict
and display candidates for words to
follow confirmed (converted) text.
Selectable when the "Input prediction"
checkbox is marked.
Initializing learning data······Reset
learning data and smiley/emoticon/
symbol entry panel log.
70
User’s dic / Common phrases
Dictionary utility······Maintains the
user dictionary.
Common phrase utility······Maintains
user-registered fixed phrases. Common
phrases that use smileys are not
displayed in text boxes that do not
support smileys.
Display
Theme······Set the design for the
keyboard.
Key size······Set the size of the
keyboard.
Font size······Set the font size for
conversion candidates.
Number of lines to display (vertical
screen) ······Set the number of lines of
conversion candidates to display in
vertical screen.
Number of lines to display
(horizontal screen) ······Set the number
of lines of conversion candidates to
display in horizontal screen.
Initializing settings → P.71
JapaneseInputMethod ATOK ······Displays
version information for ATOK.
Initializing text entry settings
You can restore the "ATOK Settings" to their
defaults.
a text entry screen, touch and
1 In
hold
/ / ▶ "ATOK
Getting Started
Settings" ▶ "Initializing settings"
▶ "OK"
NOTE
data, user-registered words, and
Learning
user-registered fixed phrases are not initialized.
71
docomo Palette UI
Managing the Home screen
Home Screen
The Home screen is the starting screen for
using applications. You can tap h to
open the screen.
docomo Palette UI
Indicator
Number of Home screen pages
and position
Widgets
Application shortcuts
Dock
Launch browser
Launch sp-mode mail
Launch phone/call log, Phonebook
Open the application list screen
You can move the Home screen to a page on
the right or left by sliding the screen.
"ひつじのしつじくん® (Butler Sheep)"
©NTT DOCOMO
"docomo Palette UI" is set to the Home
screen by default. In the Home screen,
you can add application shortcuts, create
folders, etc.
Adding an application shortcut to
the Home screen
1 Touch and hold the Home screen
2 "Shortcut"
■
a widget
■Adding
▶"Widget"
■
an application group (P.75)
■Adding
▶ "Group" ▶ tap the group to add
the shortcut that you want
3 Tap
to add
• An application shortcut is added to the
Home screen.
Moving a shortcut
the Home screen, touch and
1 From
hold the shortcut that you want
to move
72
it to the desired position
2 Drag
and release your finger
• To move a shortcut to another page, drag
the shortcut to the right or left edge of
the screen, and the Home screen moves
to the right or left page.
Docking a shortcut
Creating a folder on the Home
screen
1 Touch and hold the Home screen
2 "Folder"
it to the desired position in
2 Drag
the Dock and release your finger
• The shortcut changes places with the
icon where it is dragged to.
NOTE
cannot change places.
Deleting a shortcut
and hold the shortcut to
1 Touch
delete
it to the trash icon at the
2 Drag
bottom of the screen and release
Adding a shortcut to a folder
can only be added to the folder type
Shortcuts
"New Folder".
and hold the shortcut you
1 Touch
want to add to a folder
the shortcut to the desired
2 Drag
folder and release your finger
• You can tap a folder to open it and
access shortcuts.
Renaming a folder
your finger
the folder that you want to
1 Tap
rename
• Alternatively, after touching and holding
the shortcut, tap "Delete".
2 Touch and hold the title bar
3 Enter a title ▶ "OK"
73
docomo Palette UI
the Home screen, touch and 3 Tap the type of folder that you
1 From
want to create
hold the shortcut to add
Switching the Home screen
Adding a Home screen
the application list screen,
1 From
"Home Switcher" ▶ "Clear
the Home screen, m ▶
1 From
"Home screens"
default" ▶ "Clear defaults" ▶
h ▶ checkmark "Use by
default for this action." ▶ tap
the Home application you want
to switch to
docomo Palette UI
Using Kisekae Themes
the Home screen, m ▶
1 From
"Kisekae/Wallp"
▶ slide and select a
2 "Kisekae"
Kisekae you want to set ▶ "Set"
■
wallpaper
■Changing
▶ "Wallpaper" ▶ "Gallery" / "Live
wallpapers" / "Wallpaper gallery" /
"Wallpapers" ▶ tap the image you want to
set ▶ "Set wallpaper"
• If you have selected "Gallery", select the
image to set as wallpaper, and then drag
the trimming frame to where wallpaper
will be used.
Tap "Save" to set the wallpaper.
• If you have selected "Live wallpapers",
tap "Settings..." depending on the
wallpaper to set the wallpaper.
74
• Thumbnails of Home screens appear.
"
2 "• You
can add up to 11 Home screens.
■ delete Home screens
■To
▶ Touch and hold the thumbnail of the
Home screen to delete ▶ drag it to the
trash icon at the bottom of the screen and
release your finger
■
Home screens
■Repositioning
▶Touch and hold the thumbnail of the
Home screen to reposition ▶ drag it to
where you want to move it and release your
finger
Editing a group
Application List Screen
The application list screen shows a list of
the applications installed in the FOMA
terminal in groups.
1 From the Home screen,"
"
Applications
■
to list format
■Change
▶ m ▶ "List format"
• In list format, m ▶ "Tile format" to
change to tile format.
the application list screen,
1 From
touch and hold the group you
want to change
name" ▶ enter the group
2 "Edit
name ▶ "OK"
■
a label
■Changing
docomo Palette UI
Group name/number of
applications
Tap the group to
show/hide application
icons.
Changing a group name
▶ "Edit label" ▶ tap the color
■
a group
■Deleting
▶ "Delete" ▶ "OK"
Adding a group
the application list screen,
1 From
m
2 "Add group"
3 Enter a group name ▶ "OK"
Repositioning groups
the application list screen,
1 From
touch and hold the group to
reposition
it to where you want to
2 Drag
move it and release your finger
75
Adding a group shortcut to the Home
screen
the application list screen,
1 From
touch and hold the group to add
▶ "Add"
NOTE
docomo Palette UI
automatically displays the preceding
"Recently"
eight applications used.
names cannot be changed or deleted
Group
with "Recently", "DOCOMO Services", or
"Download Application".
Editing applications
Repositioning the applications
and hold the application
1 Touch
you want to reposition on the
application list screen
it to where you want to
2 Drag
move it and release your finger
Uninstalling an application
and hold the application
1 Touch
you want to uninstall on the
application list screen ▶
"Uninstall" ▶ "OK" ▶ "OK"
76
Adding an application shortcut to the
Home screen
and hold the application
1 Touch
you want to add on the
application list screen ▶ "Add"
Applications list
Applications
Anshin Scan
Description
Protects your FOMA
terminal from viruses.
Detects viruses hiding in
installed applications or on
the microSD card.
あんしんモード Ensures safe FOMA terminal
アプリ (Anshin use by your children by
Mode Appli) restricting installation/
launch/etc. of applications,
dialing/receiving of calls,
Wi-Fi internet access, etc.
Area Mail
Allows you to receive and
check early warning Area
Mail. → P.126
AUTO-GPS
Use GPS-paired notification
services for weather
reports, shops and other
vicinity information, tourist
information, etc. geared to
your location.
Osaifu-Keitai → P.155
Applications
Music
TV
Description
Supports your outings using
functions such as maps/shop
& facility search/navigation/
train connections/visited
places/etc.
You can easily use Twitter
through Twipple.
→ P.151
Calendar
→ P.159
Calculator
→ P.161
Gallery
→ P.141
Phone
→ P.84
Google
Search
Koe-noTakuhaibin
→ P.82
Phonebook
→ P.88
Voice Search
Allows you to use Koe-noTakuhaibin as a convenient
and easy function on a
smartphone. Easily record
and play back voice
messages. → P.92
災害用キット Post and check messages to
(Saigai-yo Kit) a disaster emergency board.
Schedule
Create and manage
schedule events. → P.160
Infrared
Send/receive Phonebook
data by infrared. → P.132
Settings
→ P.99
Applications
地図アプリ
("Chizu
Appli" map
application)
Twipple
docomo Palette UI
Camera
Description
Use Music Player to play
music saved to microSD
card.
Your spoken words are
recognized, then searched
in the Browser by Google
search.
→ P.137
PhoneBookCopy Transfer or copy
Phonebook data using
external media such as a
microSD card. → P.90
Talk
→ P.127
Clock
→ P.158
docomo
location
information
Provides location
information by imadoco
search, imadoco kantan
search, Keitai-Osagashi
Service, and emergency/
location notification. You
can change settings and
access the settings site and
service site.
77
Applications
Description
ドコモ海外利用 Supports packet
docomo Palette UI
(docomo while transmission while
overseas)
overseas. Easily set the
service provider for data
roaming settings and
Global Pake-hodai.
docomo
Back up or restore
backup
Phonebook and other data.
Instruction
The manual for your FOMA
Manual
terminal. You can also
launch functions directly
from the explanations.
ToruCa
You can obtain, view,
search, update, etc.
ToruCa. → P.157
Navigation
→ P.149
Browser
→ P.128
Places
→ P.150
Home
Switcher
Market
Switch the Home
application. → P.74
→ P.144
Machi-chara
Displays a pet character on
the screen. The character
appears in the widgets
screen and informs you of
new mail, calls, etc.
→ P.148
Maps
78
Applications
Email
Name card
creator
Messaging
Description
→ P.122
Create an original name
card displayed in the My
profile tab in the
Phonebook application.
→ P.120
Media Player Play music or movies. →
P.142
Memo
Create/manage memos. →
P.161
BEAUTY
→ P.162
Book Store
MyShelf
Days
dmarket
View e-books purchased
from the BOOK store
through "dmarket".
Automatically create a
viewable journal from mail/
call logs and SNS postings.
Application for launching
dmarket. From dmarket,
you can purchase such
contents as music, videos,
and books. Applications
available through Android
Market are also introduced.
Applications
dmenu
Gmail
Connect a BLE (Bluetooth
Low Energy)-capable
G-SHOCK and your FOMA
terminal via Bluetooth to
notify the G-SHOCK with
FOMA terminal information
(new calls, mail, etc.), or
sync the G-SHOCK’s time
with your FOMA terminal’s.
Set information that can be
notified. → P.104
Gガイド番組表 With this application you
(G-GUIDE EPG) can view program guides
for terrestrial digital, BS
digital, and other broadcast
services. You can search
programs by keyword,
genre, etc., book viewing/
recording of 1Seg
programs, and use remote
recording from a place of
outing. → P.153
Applications
Description
iD 設定アプリ Setting application to
(application enable you to use iD
for iD
electronic money. → P.162
settings)
iチャネル
Access i-Channel.
(i-Channel)
Latitude
→ P.150
MEDIAS NAVI Connect to the
manufacturer’s site
"MEDIAS NAVI".
Quickoffice
→ P.161
spモードメー
ル (sp-mode
mail)
Topics
You can use a DOCOMO
email address (@docomo.
ne.jp) to send and receive
email. Use smileys and
Deco-mail, and autoreceive
mail. → P.120
Automatically gather
everything from Twipple
trends to the most talkedabout topics, as well as you
and your friends’ hot topics
from SNS services, for easy
browsing.
79
docomo Palette UI
G-SHOCK
App
Description
A shortcut to "dmenu",
where you can easily search
for contents you used with
i-mode and enjoyable and
useful contents unique to
smartphones.
→ P.123
Applications
Twonky
Special
WELLNESS
docomo Palette UI
YouTube
80
Description
Connects your FOMA
terminal with other home
electronics. Allows wireless
playback on TV or audio of
movies, photographs, and
music saved on your FOMA
terminal or downloaded
over the Internet.
Navigate get-in-shape and
health maintenance
programs. Choose training
and recording that suits
your likes, and keep up an
enjoyable health regimen.
You can watch/upload
YouTube videos.
Widgets list
You can add widgets to the Home screen to
use the following functions.
Widget
Setting
manager
widget(Going
out)
Setting
manager
widget(Home)
Setting
manager
widget (Sleep)
Music (small)
Description
Change settings you have
made (for going out) all
together with one touch.
Traffic
Display traffic conditions as
far as your destination.
Change settings you have
made (for home) all
together with one touch.
Change settings you have
made (for sleep) all
together with one touch.
Display a simple music
control panel.
Music (large) Display a music control
panel that includes album
cover images.
Calendar
Display upcoming events
(upcoming
scheduled in the calendar.
events)
Calendar
Add a small-size calendar.
(small)
Calendar
Add a large-size calendar.
(large)
Google
Add a search box. → P.82
Search
Picture frame Add an image.
Widget
Schedule &
Memo
docomo
location
information
Displays settings/log for
providing of location
information.
ドコモ地図ナビ Displays a map and vicinity
ウィジェット information for your
(docomo
current location.
Chizu Navi
widget)
Personal area Displays information for My
Profile, My Menu, etc.
Rate Places
Displays information for
nearby shops.
Pedometer
Use the pedometer.
Widget
Market
Machi-chara
BEAUTY
Contents
Headline
Days
Flashlight
iチャネル
ウィジェット
(i-Channel
widget)
Latitude
Topics
YouTube
Description
Display information for
Android Market.
Displays a pet character on
the screen. The character
appears in the widgets
screen and informs you of
new mail, calls, etc.
Launches the MEDIAS
BEAUTY application.
Displays docomo store
contents.
Display information for
Days.
Turns on the FOMA
terminal’s light.
A widget that obtains and
displays information for
i-Channel.
Display information for
Latitude.
Display information for
Topics.
Search and view YouTube.
NOTE
subscription (paid) is required for use of
Separate
some applications/widgets.
content and icon positions
Application/widget
may change by performing either a software or
major update.
81
docomo Palette UI
Description
Display the calendar and
check schedule and
memos.
Soradas
Displays the day’s weather
(small)
forecast.
Soradas
Displays a four-day weather
(large)
forecast.
Phonebook
Displays a selection it
Select
makes of contacts saved to
members
Phonebook.
Clock (world) Display the local time and
the time for a specified city.
Clock
Add an analog clock.
(analog)
Clock (digital) Add a digital clock.
Using the Search Function
You can search Phonebook or
applications in the FOMA terminal, or
search web pages.
information on search settings → P.117
For
the application list screen,
1 From
"Google Search"
docomo Palette UI
2 "
" ▶ tap the search item
the search text ▶ "実行"
3 Enter
• Search results are displayed.
• After entering search text, search
candidates are displayed. You can select a
candidate to search with.
• Tap an application from a candidate to
launch the application.
■
by voice
■Searching
▶ " " ▶ say the search words clearly into
the microphone
• Not usable with some search items.
82
Using Tap search
Make a search by tapping words that appear
on the screen you want to search.
the Notifications panel,
1 Open
" "
the text you want to search
2 Tap
by on the screen
• Recognized text is highlighted.
Drag / to adjust the search text
characters.
• Touch and hold to zoom in.
"実行"
3 "• You"can▶tap
the text box and edit the text
before searching.
NOTE
search has the following requirements for
Tap
recognizing text.
•Recognizable text: kanji/hiragana/alphabet/
katakana/numbers/symbols (black text on
white background recommended)
•Recommended size: 20 to 40 dots
applications may be not displayed correctly
Some
in Tap search mode.
Task Manager
The Task manager shows the running
applications and allows you to switch to
the one you want to use. It also allows
you to quit applications you do not use.
Touch and hold h
1 • Running applications are displayed.
■ close an application
■To
"
the Home screen, m ▶
1 From
"More"
■
version information
■Checking
▶"Application info"
■
Home application
■Checking
settings
▶"Home settings"
docomo Palette UI
▶"
Checking the Home application
■ close all applications
■To
▶ "Close all" ▶ "Yes"
the application that you
2 Tap
want to display
NOTE
more than one application may
Running
consume more energy and make the operation
of the terminal unstable. Doing so may cause
applications to be terminated forcibly or slow
down.
83
Calling/Network Services
■
call
■Emergency
Making/Receiving Calls
Making a call
the application list screen,
1 From
"Phone"▶"Dial"
• Tap "Favorites" to display only entries
saved to Phonebook. → P.89
Calling/Network Services
the phone number
2 Enter
• If you enter a wrong number, tap
to delete the number.
• Enter "186"/"184" before entering the
number to notify/not notify your number,
for that call only.
■
Koe-no-Takuhaibin (P.92)
■Using
▶ "Koe-no-Takuhaibin"
3 "
"
4 When the call is finished, "
NOTE
and hold "*" to enter a push signal
Touch
(pause).
84
"
Emergency call
Police emergency
Fire brigade/Ambulance
emergency
Maritime distress call
Phone number
110
119
118
FOMA terminal supports "Emergency
Your
Location Report".
Calls made to emergency service organizations
(e.g. by dialing 110, 119 or 118) disclose
information on the caller's location to the
organization receiving the call.
The location information and phone number
are not disclosed when, before each individual
call made, "184" or another blocking prefix is
dialed first. If the information is deemed
necessary for the protection of life, etc., this
information may be acquired by the
organization being called.
Locations/timing planned for adoption of this
feature vary according to the status of the
preparations by the relevant emergency
service organizations.
calling 110, 119 or 118 from the FOMA
When
terminal, first say you are calling from a
mobile phone, give your number, and state
your location clearly, because the police or fire
department may call you back for
confirmation.
Also, do not move around when making the
call. Do not turn off the power immediately
after ending the call, but leave it turned on
for ten minutes or so, so that you can receive
a call.
on the area you are calling from,
Depending
you may not be connected with the nearest
police or fire department, etc.
WORLD CALL is an international phone
service that can be used from DOCOMO
mobile phones. Customers who have
subscribed to the FOMA service would also
have automatically subscribed to "WORLD
CALL" at the same time (excepting those
who have declined it).
details on WORLD CALL, refer to
For
DOCOMO "International Services website".
the application list screen,
1 From
"Phone" ▶ "Dial"
and hold "0"
2 Touch
• A plus sign "+" appears.
the country code → area
3 Enter
code (city code) → recipient's
phone number ▶ "
"
NOTE
the area code begins with "0", omit "0".
If
However, "0" may be required for calling some
countries or areas, such as Italy.
85
Calling/Network Services
NOTE
you have set PIN1 code entry and Airplane
When
mode, you need to enter the PIN1 code to make
an emergency call.
you have locked the screen, you can make
When
an emergency call without drawing screen
unlock pattern and entering the lock number for
each screen. On each screen, tap "Emergency
call". The "Emergency Dialer" screen appears;
you can make phone calls only to the emergency
phone numbers.
Japan, the 110, 119, and 118 emergency
In
numbers cannot be dialed from the FOMA
terminal when the miniUIM is not set to it.
Japan, the 110, 119, and 118 emergency
In
numbers cannot be dialed by tapping
"Emergency call" from the PIN code input screen
on startup. For details on PIN code, see "Security
codes used with the FOMA terminal" (P.112).
Making an international call
(WORLD CALL)
Receiving a call
In-call operations
a call is received,
1 When
"Activate" ▶ "Accept"
①
■
a call
■Declining
▶ "Activate" ▶ "Reject"
■
an incoming call on hold
■Putting
2
▶ m ▶ "On hold"
• The call is connected and immediately
placed on hold.
②
When the call is finished, "
④
Calling/Network Services
NOTE
"
call fee is incurred even for an incoming call
A
placed immediately on hold.
you decline an incoming call when Voice Mail
If
service or Call Forwarding service are set to
"Activate", the call is forwarded to the Voice
Mail service center or the designated forwarding
number.
③
⑥
⑤
①Place on hold/take off hold.
②Place on hold and make other call. → P.96
③Display dial pad.
④Use Bluetooth function. Toggle on/off with
each press. Available when connected to
Bluetooth device compatible with a headset or
handsfree.
⑤Mute yourself to the other party. Toggle on/off
with each press.
⑥Hear the other party through the speaker.
Toggle on/off with each press.
the volume
■
■Adjusting
▶Press the volume key
86
⑤A series of calls to/from a same party are
Call Log
You can check the outgoing/incoming
calls history.
the application list screen,
1 From
"Phone" ▶ "Recent calls" ▶
"Incoming history"/"Outgoing
history"
①
④
⑤
■
a phone number from the
■Adding
call log to Phonebook
▶ Touch and hold the log entry you want
to add ▶ "Add to phonebook" ▶ "Register
new" ▶ enter required items ▶ "Save"
• If multiple accounts are registered, select
one from the accounts.
• If you want to select a phonebook
already registered, just select the
phonebook.
■
the log
■Deleting
▶ m ▶ "Delete all" ▶ "OK"
• To delete individual entries, touch and
hold an entry to delete and then tap
"Remove from call log".
①Log icons are displayed.
: Outgoing call
: Incoming call
: Missed call
②The names of other parties to/from which
calls were made are displayed.
③The following icons are displayed.
: Call other than withhold ID
: Call and withhold ID
: International call (outgoing)
: International call (incoming)
: Koe-no-Takuhaibin transmission
④Make a call.
87
Calling/Network Services
②
③
displayed as one entry with . The
number in parentheses is the number of
logged calls.
⑦Makes new Phonebook addition.
Phonebook
You can save phone numbers, email
addresses, etc.
the application list screen,
1 From
"Phonebook"
①
③
②
• Enter required items such as name,
number, and email address, and then
tap "Save".
• When several accounts are registered,
select the account to add to.
⑧Enter keywords to search Phonebook.
• Tap
to narrow down the groups.
■
entries
■Deleting
▶ m ▶ "Delete" ▶ checkmark entries you
want to delete ▶ "Delete" ▶ "OK"
⑤
④
■
from/exporting to a microSD
■Importing
card and importing from the miniUIM
Calling/Network Services
▶ m ▶ "Others" ▶ "Import/Export" ▶
Select any item:
Import from SIM card······Load entries from the
miniUIM to the FOMA terminal.
⑥
⑦
⑧
Phonebook Screen
①Displays log of your exchanges.
②Displays the Phonebook screen.
③Your profile (MyProfile) is displayed.
④Displays Phonebook details (profile). →
P.89
• Tap the image and then the icon that is
displayed, to make a call or create mail.
⑤Displays Japanese syllabary, and allows
jump to selected syllable.
⑥Displays Phonebook by groups.
88
Import from SD card······Load entries from a
microSD card to the FOMA terminal.
Export to SD card······Save entries from the
FOMA terminal to a microSD card.
Share phonebook data······Send all viewable
phonebook via Bluetooth transmission, email,
etc.
Displaying the profile screen
NOTE
the name of the person you
1 Tap
want to display in the
Phonebook screen
• Tap "My profile" to display your profile.
①
②
③
④
⑤
⑥
the same entry (same name, reading, etc.) is
If
registered several times, you can collect (join) the
several instances of entry information together
into one (
displayed beside name).
In the Profile screen, m ▶ "Join/Separate" ▶
tap the entries to join
Use the following procedure to cancel joining.
In the Profile screen, m ▶ "Join/Separate" ▶
"Separate"
Using name cards
⑦
Flick to select a name card.
Profile Screen
①Image and name are displayed.
• Select an image and tap the displayed
icon to make a call or create email.
②Edit a profile.
③Display the profile screen.
④Display history.
⑤Display groups.
⑥Add to Favorites. → P.84
⑦Display profile.
• Displayed items depend on added
content.
• Depending on added content, you can
tap the icon to make a call, send email/
SMS, launch Google Maps, etc.
Zoom in/out on name card.
Exchange name card.
Delete name card.
Launch "Name card creator" to edit an existing card or
create a new one.
89
Calling/Network Services
Create name cards with "Name card
creator" that you can exchange with others
via a network. Name cards can be viewed in
the Profile screen.
PhoneBookCopy
You can use a microSD card to copy contacts
data between your and another FOMA
terminal. You can also copy Phonebook data
registered in a Google account to a docomo
account.
the application list screen,
1 From
"PhoneBookCopy"
• When you first use PhoneBookCopy, you
need to accept a "License agreement".
Calling/Network Services
Phonebook data stored
■
■Exporting
at docomo account to a microSD
card
▶ "エクスポート" (export) ▶ "開始" (start)
▶ "OK"
■
Phonebook data from a
■Importing
microSD card to your docomo
account
▶ "インポート" (import) ▶ tap the entries
to import ▶ "上書き"/"追加" (overwrite/
add) ▶ "OK"
■
Google account entries to
■Copying
your docomo account
▶ "docomoアカウントへコピー" (copy to
docomo account) ▶ tap the Google
account to copy ▶ "上書き"/"追加"
(overwrite/add) ▶ "OK"
90
NOTE
the designation of a contacts item (phone
If
number, etc.) on another FOMA terminal differs
with that on your FOMA terminal, the
designation may be changed or deleted.
The number of characters registerable to an
entry varies with each FOMA terminal. Some
characters may be deleted during copying to
another terminal.
exporting contacts to microSD card, you
If
cannot copy data that does not have a name
registered.
importing contacts from microSD card, files
If
created with "Bulk backup" cannot be read.
Available Network Services
You can use the following DOCOMO
network services on the FOMA terminal.
Application
cannot use the network services when
You
you are outside of the service area or in a
location with no radio reception.
does not result in a
"Deactivate"
cancelation of subscription to Voice Mail
service, Call Forwarding service, or any
other service.
subscriptions and inquiries, contact
For
"General Inquiries" provided on the last
page of this manual.
Using network services
the Home screen, m ▶
1 From
"Settings" ▶ "Call settings" ▶
"Network service"
2 Select any item:
Koe-no-Takuhaibin → P.92
Voice mail service → P.93
Call forwarding service → P.95
Call waiting → P.96
Caller ID notification → P.97
Nuisance call blocking service → P.97
Caller ID notification service······Answer a
caller who withholds their number with a
message to inform them that their number
is required. After the message is played, the
call is ended automatically.
Second call settings······Informs you during
a call that there is another call. This function
is not required if you are using Call Waiting.
Call notification······Informs you by SMS
that there was a call while power was
turned off, you were out of service range,
or during a call.
91
Calling/Network Services
Monthly
charge
Not required
Free
Koe-no-Takuhaibin
Voice Mail service
Required
Paid
Call forwarding service Required
Free
Call Waiting service
Required
Paid
Caller ID notification
Not required
Free
service
Nuisance call blocking
Not required
Free
service
Caller ID notification
Not required
Free
service
Not required
Free
Call notification
Not required
Free
English guidance
Public mode (power off) Not required
Free
Service name
this manual, the outlines of each
In
network service are described with menu
operations of the FOMA terminal. For
details, see "Mobile Phone User's Guide
[Network Services]".
English guidance······Set language to
English for guidance when configuring
network services (Voice Mail service, etc.)
and audio guidance when out of service
range.
Remote operation settings······Enable
Voice Mail service and Call Forwarding
service to be operable from a general
push-button land-line phone, pay phone,
Docomo mobile phone, etc.
Public mode (power OFF) settings
→ P.98
Koe-no-Takuhaibin
This service allows you to record a message
over the phone and send it to another party.
can record up to 500 messages, each up
You
to 15 minutes, and save them for up to 720
hours. You can also protect up to 5 important
messages (after protection is canceled, they
are erased automatically after the 720 hours).
details on Koe-no-Takuhaibin, refer to the
For
NTT DOCOMO website.
■
flow of Koe-no-Takuhaibin
■Basic
service
Calling/Network Services
Use Koe-no-Takuhaibin to designate a
recipient, send
➡
Follow audio guidance to record a message
➡
Recorded SMS notification informs recipient
of message
➡
Recipient accesses and plays message from
the notification
➡
SMS notification arrives to inform you the
message was played
92
Using Koe no Takuhaibin
the Home screen, m ▶
1 From
"Settings" ▶ "Call settings" ▶
"Network service" ▶ "Koe-noTakuhaibin"
2 Select any item:
Service usage(launch application)
······Launches the Koe no Takuhaibin
application.
Confirm/Change settings(voice call)
······Record a message and inform recipient
of message.
NOTE
are incurred for recording and playing
Charges
back messages.
no Takuhaibin is not available overseas.
Koe
93
Calling/Network Services
Confirm/Change settings(site
connection) ······Connects to Koe no
Takuhaibin site.
Voice Mail service
If you are in a location with no radio
reception, the FOMA terminal is powered
off, or you are unable to take the phone
call, the Voice Mail service answers a call
with a Voice Mail greeting and records the
caller's message.
to twenty 3-minute messages can be
Up
recorded, and are storable for up to 72 hours.
you are unable to answer after starting
Calls
the Voice Mail service are recorded as "Missed
call" to "Call log", and
appears in the
status bar.
(indicating the number of messages)
appears in the status bar when a message is
recorded.
FOMA terminal does not support video
The
voicemail for video phone calls. Make a call to
1412 and disable the video phone support
setting.
■
flow of Voice Mail service
■Basic
Activate the Voice Mail service
➡
The FOMA terminal receives a call
➡
The call is connected to the Voice Mail
service center if not answered
➡
The caller records a message
Calling/Network Services
If you are in a hurry and wish to record a
message immediately without listening to the
answering message, enter "#" to interrupt the
answering message and switch to recording
mode.
➡
You are notified that there is a message at
the Voice Mail service center
➡
Play back the message
Using the Voice Mail service
the Home screen, m ▶
1 From
"Settings" ▶ "Call settings" ▶
"Network service" ▶ "Voice mail
service"
94
2 Select any item:
Activate service······Makes the Voice Mail
service activated. You can also set the ring
time.
Ring time settings······Set time to wait
before connecting to the Voice Mail service.
If the ring time is set to 0 seconds, calls are
not recorded to the call log, and are instead
connected to the Voice Mail service center
directly.
Deactivate service······Makes the Voice
Mail service deactivated.
Settings confirmation······Check current
settings.
Play messages······Connects to Voice Mail
service center. Follow the audio guidance to
play back recorded messages.
Settings······Connects to Voice Mail service
center. Follow the audio guidance to change
the Voice Mail service settings.
Checking messages······Check whether
there are new Voice Mail messages.
Message notification settings······Set
whether to notify when there is a new
message.
NOTE
operating "Setting" or "Checking
After
messages" or a Voice Mail message is recorded,
an SMS message "NTT DOCOMO:VM:XX" is
received.
Call Forwarding service
The Call Forwarding service forwards a call
to a preset forwarding number if you do not
answer the call within the preset ring time,
or if the FOMA terminal is outside of the
service area or is powered off.
you do not answer an incoming call after
If
the Call Forwarding service is set to "Active",
the call is stored as a missed call in the log,
and
appears in the status bar.
■
flow of Call Forwarding
■Basic
Register the forwarding number
➡
Your FOMA terminal receives a call
➡
The call is automatically forwarded to the
specified forwarding number
■
Forwarding service fees
■Call
Caller
➡
Call Forwarding
Forwarding
➡
service subscriber
destination
Charged to
caller.
Charged to Call
Forwarding service
subscriber.
the Home screen, m ▶
1 From
"Settings" ▶ "Call settings" ▶
"Network service" ▶ "Call
forwarding service"
2 Select any item:
Activate service······Set the number of the
forwarding destination and the ring time
and then start the service.
If the ring time is set to 0 seconds, calls are
not recorded to the call log, and are instead
forwarded directly.
Deactivate service······Makes the Call
Forwarding service deactivated.
Change call forwarding number······
Change the number of the forwarding
destination.
Call forwarding settings*······Set whether
to connect the caller to the Voice Mail
service center when the forwarding
destination is busy.
Guidance settings······Set whether a
message is played to inform a caller when
their call is being forwarded.
Settings confirmation······Check current
settings.
*A subscription to the Voice Mail service is
required.
95
Calling/Network Services
➡
Activate the Call Forwarding service
Using the Call Forwarding service
Call Waiting service
When there is a second incoming call while
you are in call, this service notifies you with
a ringtone so you can place the first call on
hold to answer. You can also put your
current call on hold and place a call to
another party.
Setting the Call Waiting service
the Home screen, m ▶
1 From
"Settings" ▶ "Call settings" ▶
Calling/Network Services
"Network service" ▶ "Call
waiting"
2 Select any item:
Activate service······Makes the Call Waiting
service activated.
Deactivate service······Makes the Call
Waiting service deactivated.
Setting confirmation······Check current
settings.
NOTE
when on hold, a caller is charged a call fee.
Even
Putting a call on hold and answering an
incoming call
you hear a beep during a call,
1 If"Activate"
▶ "Accept"
• Put the first call on hold and answer the
incoming call.
■
an incoming call
■Declining
▶ "Activate" ▶ "Reject"
the call is finished, "
"
2 When
• Calling with the second caller ends, and
switches to the first caller.
■
a call on hold to switch
■Placing
calling
▶" "
• Tap " " to toggle calls with other
parties.
Putting a call on hold and making a call
to another party
1 During a call, "
"
the other party's phone
2 Enter
number ▶ "
"
• Put the first caller on hold, and calling
switches to the second caller.
the call is finished, "
"
3 When
• Calling with the new second caller ends,
and switches to the first caller.
96
Caller ID notification service
When making a call, you can display your
phone number on the other party's phone.
phone number is important information.
Your
Use caution when notifying your number.
the Home screen, m ▶
1 From
"Settings" ▶ "Call settings" ▶
"Network service" ▶ "Caller ID
notification"
2 Select any item:
Settings confirmation······Check current
settings.
NOTE
function is only active when the other
This
party's phone can display the caller ID.
you hear an announcement requesting caller
If
ID, activate Caller ID notification or add the
"186" prefix to the phone number and call
again.
the Home screen, m ▶
1 From
"Settings" ▶ "Call settings" ▶
"Network service" ▶ "Nuisance
call blocking service"
Calling/Network Services
Settings······Set whether to notify your
number.
Nuisance call blocking service
Allows you to register prank call numbers
and other nuisance calls to prevent them
from arriving. By registering callers to reject,
any further calls are met with a voice
message and rejected automatically.
there is a call from a number registered
When
as a caller to reject, the ringtone does not
sound. The call is also not recorded to the call
log.
2 Select any item:
Caller ID reject registration······Register
the number of the last call answered as a
caller to reject.
Specified caller ID reject registration
······Directly enter a number or select one
from Phonebook/call log to register it as a
caller to reject.
Delete all registered caller ID······Delete
all numbers registered as callers to reject.
Delete latest registered number
······Delete the number last registered as a
caller to reject.
Check the number of registration
······Check how many numbers are
registered as callers to reject.
97
Advanced settings······Connect to the
settings site for the Nuisance call blocking
service, and check/delete registered
numbers.
Public mode (power off)
Calling/Network Services
Public mode (power off) is an automatic
response service dedicated to etiquette
required in highly public locations. When
Public mode is enabled and the FOMA
terminal is powered off, a message is played
to callers, telling that you cannot answer
the call because you are in a situation where
you have to power off the phone (e.g., you
are in a hospital or airplane, or close to a
priority seat in a train), and the call is
automatically terminated.
Public mode (power off) message is played
A
when outside service range or in a place with
poor signal reception.
Voice mail service* and Call forwarding
The
service* take precedence over Public mode
(power off).
* When the ring time is not set to 0 second, the
services operate after the Public mode (power
off) message to incoming calls.
the Home screen, m ▶
1 From
"Settings" ▶ "Call settings" ▶
"Network service" ▶ "Public
mode (power OFF) settings"
98
2 Select any item:
Activate service······Enter Public mode
(power off).
Deactivate service······Quit Public mode
(power off).
Settings confirmation······Check the
current settings.
Settings
Wireless & Networks
Configure settings for Airplane mode,
Wi-Fi, Bluetooth function, etc.
the Home screen, m ▶
1 From
"Settings" ▶ "Wireless &
networks"
2
Select any item:
Airplane mode → P.100
Wi-Fi······Turns on/off Wi-Fi.
Wi-Fi settings → P.59
Advanced settings →P.104
Scan for devices······Search for
Bluetooth devices.
Tethering → P.105
VPN settings → P.106
Mobile networks
Data enabled······Toggle data
communications on/off.
Data roaming → P.166
Access Point Names → P.57
Network Mode → P.166
PC Link······Set PC Link on/off. → P.135
Bluetooth settings
PC Link settings
Settings
Network operators → P.166
Bluetooth······Turns on/off Bluetooth.
→ P.101
Bluetooth······Turns on/off Bluetooth.
PC Link······Set PC Link on/off.
Device name······When Bluetooth
communication is performed, change
the name displayed on a partner's
device.
USB PC Link······Set USB PC Link on/off.
→ P.136
Discoverable······Allow the FOMA
terminal to be detectable by another
Bluetooth device.
Change Hostname······Set the host
name used for the connection URL.
Discoverable timeout······Set time
within which the FOMA terminal can be
detected from another Bluetooth
device.
Destination URL······Display connection
URL.
Initialize User Name/Password······
Initialize user name and password.
99
Setting to Airplane mode
When Airplane mode is set, all wireless
functions of the FOMA terminal (phone calls,
packet communication, etc.) are disabled.
the Home screen, m ▶
1 From
"Settings" ▶ "Wireless &
networks" ▶ mark the "Airplane
mode" checkbox
NOTE
"Airplane mode" also turns off the
Checking
Wi-Fi and Bluetooth functions, but they can be
turned on again in Airplane mode.
Wi-Fi settings
Settings
the Home screen, m ▶
1 From
"Settings" ▶ "Wireless &
networks" ▶ "Wi-Fi settings"
2 Select any item:
Wi-Fi······Turns on/off Wi-Fi.
Network notification······Set whether to
notify when an open Wi-Fi network is
detected.
Wi-Fi Easy Settings → P.60
Add Wi-Fi network → P.60
100
NOTE
communication is still available when Wi-Fi
Packet
is turned on. However, if the FOMA terminal is
connected to a Wi-Fi network, the Wi-Fi network
takes precedence. When the Wi-Fi network is
disconnected, the FOMA terminal automatically
connects to the 3G/GPRS network. If you continue
using the FOMA terminal connected to the 3G/
GPRS network, note that you will incur costly
packet communication charges.
Using other Wi-Fi network functions
turn on Wi-Fi beforehand.
Please
the Home screen, m ▶
1 From
"Settings" ▶ "Wireless &
networks" ▶ "Wi-Fi settings"
2 m ▶ select any item:
Scan······A scan of Wi-Fi networks starts,
and a list of available Wi-Fi networks is
displayed.
Change priority······Change the priority of
Wi-Fi networks to be used. Touch and hold
the name of a network you want to change
to switch its priority.
Advanced
Wi-Fi sleep policy······Configure sleep
settings for Wi-Fi.
Set Wi-Fi to enter sleep if no keys are
pressed for 15 minutes after the screen
dims. After entering sleep, Wi-Fi
connection will be closed, but it will
connect to an access point automatically
once a screen lights.
You can also set the Wi-Fi function not
to enter sleep either at any time or
during charging.
MAC address······A MAC address is
displayed.
IP address······The IP address currently
used is displayed.
Proxy······Set whether to use a proxy
server.
Netmask······Set a net mask.
DNS 1······Set DNS 1.
DNS 2······Set DNS 2.
Bluetooth Communication
Connect the FOMA terminal and a Bluetoothcompatible device via Bluetooth
communication. You can connect a Wireless
Earphone Set 02 (option), etc. to the FOMA
terminal, and talk on the phone or listen to
music while the FOMA terminal is still in your
bag.
is no guarantee that the FOMA terminal
There
is capable of wireless communication with all
types of Bluetooth devices.
information about the settings and
For
operation procedures, see also the instruction
manual of the Bluetooth-compatible device.
Advanced settings for proxy
······Configure detailed proxy settings.
Use static IP······Set whether to specify
static IP address for connecting with a
Wi-Fi network. If checkmarked, "IP
address", "Gateway", "Netmask",
"DNS 1", and "DNS 2" can be set. To
use a static IP address, "IP address",
"Gateway", "Netmask", and "DNS 1"
need to be set.
IP address······Set an IP address.
101
Settings
Handover······Set whether to enable
handover.
Gateway······Set a gateway.
Settings
Precautions when using Bluetooth devices
the following in order to ensure a
Note
good connection.
•Connect with another Bluetooth device
within about a 10-meter viewable
distance. Depending on surroundings
(walls, furniture, etc.) and building
structure, the connectable distance is
shorter. The connectable distance will
also be shorter if an obstacle is between
the FOMA terminal and another
Bluetooth device. Connection may be
unestablishable if your FOMA terminal
and the device are located on opposite
sides of walls containing metal rods, such
as on upper and lower storeys or in
adjoining rooms, especially in a building
made of reinforced concrete.
Also note that the above connection
distances are not guaranteed.
•Connect the FOMA terminal distanced
from other devices (electric products/AV
equipment/OA equipment, etc.) as much
as possible (since the terminal is easily
affected by a microwave oven in use,
distance the terminal as far as possible).
If the terminal is brought closer when
another device is on, it may be unable to
connect normally or may be a cause of
television and radio noise or interference
(television picture may be unclear for
particular UHF or satellite channels).
102
•If you cannot connect normally due to a
nearby broadcasting station, wireless
transmitter, etc. change the location of
the partner Bluetooth device. You may
not be able to connect normally if
surrounding radio waves are too strong.
•You can establish a wireless connection
while a Bluetooth device is in a bag or
pocket. However, if you body is located
between the Bluetooth device and the
FOMA terminal, decreased
communication speed or noise may
occur.
devices and wireless LAN (IEEE
Bluetooth
802.11 b/g/n) use the same frequency
band (2.4 GHz). If you use the FOMA
terminal or Bluetooth device near a
device equipped with a wireless LAN,
radio wave interference may occur and
can result in decreased communication
speed, noise, a poor connection, etc. If
this happens, do the following.
•Keep the FOMA terminal and a Bluetooth
device in wireless connection at least
10 m from a wireless LAN.
•Turn off a wireless LAN when used within
10 m.
radio waves emitted by a Bluetooth
The
device may affect operation of medical
electronics or other equipment. Since it
may be the cause of an accident
depending on circumstances, turn off the
FOMA terminal and any nearby Bluetooth
devices in the following places.
•Trains
•Airplanes
•Hospitals
•Locations near automatic doors and
emergency alert devices
•Places with ignitable gas, such as gas
stations
Connecting to a Bluetooth device
To connect the FOMA terminal with another
Bluetooth device and exchange data, first
carry out pairing (connection setting) with
the other Bluetooth device and then connect.
Bluetooth devices only pair, and some
Some
Bluetooth devices proceed all the way to
connection.
on the partner's Bluetooth function and
Turn
check that it is connectable beforehand.
the Home screen, m ▶
1 From
"Settings" ▶ "Wireless &
networks" ▶ "Bluetooth
settings"
• A scan for devices starts and a list of
available Bluetooth devices is displayed.
• To let your FOMA terminal be
recognizable by the partner Bluetooth
device, tap "Discoverable".
the Bluetooth device you
3 Tap
want to communicate with
• Connection may be established with this
procedure, depending on the Bluetooth
device.
or enter the passcode (PIN)
4 "Pair"
▶ "OK"
103
Settings
the "Bluetooth" checkbox
2 Mark
▶ "Scan for devices"
■
the Bluetooth device
■Canceling
connection
▶ Tap the Bluetooth device to disconnect
▶ "OK"
• To cancel pairing, touch and hold the
Bluetooth device you want to disconnect,
and tap "Disconnect" or "Disconnect &
unpair".
■
the connection type
■Selecting
▶ Touch and hold a paired Bluetooth device
▶ "Options..." ▶ checkmark the
connection type
• Only supported Bluetooth devices are
selectable.
NOTE
Settings
not using the Bluetooth function, turn off
When
the Bluetooth function to prevent battery
consumption.
the Bluetooth device is not SCMS-T-compliant,
If
sound cannot be heard regardless of the audio
data type.
Advanced settings when connected to
a BLE-compatible device
You can connect to a BLE (Bluetooth Low
Energy)-compatible device (G-SHOCK, etc.)
and notify it of FOMA terminal information
(new call, new mail, etc.) or sync with the
FOMA terminal clock. Set details such as
what kinds of information are notified.
to a BLE-compatible device
Connect
beforehand. → P.103
104
the Home screen, m ▶
1 From
"Settings" ▶ "Wireless &
2
networks" ▶ "Bluetooth
settings" ▶ "Advanced settings"
Select any item:
Alert Notification······Set to notify you by
a BLE-compatible device of new calls, new
mail, etc.
Find Me······Set the beep made when you
operate a BLE-compatible device to ring the
FOMA terminal.
Proximity······Set the notification level or
no notification by a BLE-compatible device
when canceling its connection with the
FOMA terminal.
Time······Set whether to sync a BLEcompatible device clock with the FOMA
terminal’s clock.
NOTE
following applications can be linked to a
The
BLE-compatible device.
•Phone
•spモードメール (sp-mode mail)
•Email
•Gmail
•Messaging
•Pedometer
•Clock
•Calendar
Using USB tethering
Using Wi-Fi tethering
Connect your FOMA terminal to a USBsupported PC, etc. and access the Internet
using mobile network communication. Use
the microUSB cable for PC connection
(sample) to connect your FOMA terminal
and the PC or other device.
You can use the tethering function via Wi-Fi
connection. Using the FOMA terminal as an
access point (main device), you can use a
Wi-Fi-compatible device (subdevice) to
connect to the Internet or enjoy gaming
services.
your FOMA terminal to
1 Connect
a PC with the supplied microUSB
the Home screen, m ▶
1 From
"Settings" ▶ "Wireless &
cable for PC connection
the Home screen, m ▶
2 From
"Settings" ▶ "Wireless &
networks" ▶ "Tethering" ▶
checkmark "USB tethering"
■
the microUSB cable for
■Removing
PC connection → P.134
NOTE
following are PC operating requirements
The
(supporting OS) for USB tethering.
•Windows XP
•Windows Vista (32-bit/64-bit)
•Windows 7 (32-bit/64-bit)
special driver is required for communication
A
via USB tethering.
For details including downloading a driver, refer
to the following website.
http://www.n-keitai.com/guide/download/
Wi-Fi hotspot" ▶ set
2 "Configure
"Network SSID", "Security", and
"Password" ▶ "Save"
• "Network SSID" is set to "N-01DXXXXXX" by default.
"Wi-Fi tethering" ▶
3 Checkmark
confirm details of notices ▶ "OK"
the same network SSID and
4 Set
security on the Wi-Fi-compatible
device (subdevice) as on the
FOMA terminal
• The Wi-Fi-compatible device (subdevice)
and the FOMA terminal (main device)
connect.
NOTE
to 5 Wi-Fi-compatible devices can connect at
Up
the same time.
105
Settings
details of notices ▶
3 Confirm
"OK"
networks" ▶ "Tethering" ▶
"Wi-Fi tethering settings"
NOTE
"Security" setting is "Open" by default.
The
Select from "Open", "WEP", "WPA PSK" (TKIP),
"WPA2 PSK" (AES), and "WPA/WPA2 PSK"
(TKIP/AES mixed) as necessary.
channel sets automatically to one of 1ch,
The
6ch, and 11ch. Since a Wi-Fi-compatible device
(subdevice) may not be able to connect
depending on its settings, be sure to check
settings on any device you want to connect.
Connecting to a VPN (Virtual
Private Network)
Settings
A VPN (Virtual Private Network) is
technology allowing connection externally
to information on a protected local network
such as in a corporation or university. When
configuring VPN connection from your
FOMA terminal, obtain security information
from the network administrator.
VPN (PPTP) is unavailable if the access point
A
is set to sp-mode.
Adding a VPN
the Home screen, m ▶
1 From
"Settings" ▶ "Wireless &
networks" ▶ "VPN settings"
■
PPTP
■Adding
▶ "PPTP" ▶ "Add PPTP VPN" ▶ follow
the administrator’s instructions to configure
each item of the VPN setting ▶ m ▶
"Save"
106
■
IPSec/L2TP
■Adding
▶ "IPSec/L2TP" ▶ m ▶ "New" ▶ enter
keystore password ▶ follow the
administrator’s instructions to configure
each item of the VPN setting ▶ "Finish"
• Enter any text for the keystore password.
Enter the same text the next time you
enter the keystore password.
Connecting to a VPN
the Home screen, m ▶
1 From
"Settings" ▶ "Wireless &
networks" ▶ "VPN settings"
■
by PPTP
■Connecting
▶ "PPTP" ▶ tap the VPN you want to
connect to ▶ enter the required information
to connect ▶ "Connect"
by IPSec/L2TP
■
■Connecting
▶ "IPSec/L2TP" ▶ tap the VPN you want to
connect to ▶ "Connect" ▶ enter keystore
password
Disconnecting from a VPN
the Notifications panel and
1 Open
tap the notification for the VPN
connection
■
PPTP
■Disconnecting
▶ Tap the connected VPN
■
IPSec/L2TP
■Disconnecting
▶ Tap the connected VPN ▶ "Disconnect"
▶ "OK"
Call Settings
Configure settings for caller reject,
network services, Internet telephoning,
etc.
the Home screen, m ▶
1 From
"Settings" ▶ "Call settings"
2 Select any item:
Call rejection list······Displays list of
numbers that are rejected based on
"Specified numbers". Tap "Add phone
number" to add a number. Enter a
number directly, or tap
to add a
number from Phonebook/call log.
Network service → P.91
Roaming settings······Configure settings
for roaming overseas.
Power key ends call······Set to end calls
using the power key. During a call in sleep
mode, cancels sleep mode instead of ending
the call.
Advanced call settings······Configure
detailed call settings.
Call rejection······Rejects calls from
designated numbers.
Accounts······Set an account for Internet
calls.
Use Internet calling······Set method for
Internet calls.
Settings
Not saved in Contacts······Rejects calls
from callers not registered in
Phonebook.
Femtocell search······Search signals in the
vicinity to connect to a femtocell.
Unknown······Rejects calls from callers
unable to notify their caller ID.
Payphone······Rejects calls from pay
phones.
User unset······Rejects calls from callers
who do not notify their caller ID.
Specified numbers······Rejects calls
from numbers added to the "Call
rejection list".
107
docomo service
Configure settings such as a docomo
application password and AUTO-GPS.
the Home screen, m ▶
1 From
"Settings" ▶ "docomo service"
2 Select any item:
Application manager······Set regular
checks for updates, etc.
Wi-Fi······Set to use docomo service via
Wi-Fi.
docomo apps password······Set a
password to use with docomo applications.
Settings
AUTO-GPS······Configure AUTO-GPS
function settings, etc.
Open source licenses······Confirm open
source licenses.
Sound
This allows you to configure various
sound settings, such as Silent mode and
ringtones.
the Home screen, m ▶
1 From
"Settings" ▶ "Sound"
2 Select any item:
Silent mode······Set the FOMA terminal not
to emit sound, etc. for etiquette when in a
public or similar place.
• Alternatively, press the power key for
1 second or longer, and then tap "Silent
mode".
Vibrator······Set vibration for incoming calls.
Volume······Set the volume for ringtones,
media playback sound, alarm sound, etc.
Phone ringtone······Set the ringtone.
Notification ringtone······Set sound for
email and other notifications.
Audible touch tones······Set dial pad
operation sound on/off when entering a
phone number, etc.
Audible selection······Set operation sound
on/off when selecting from a menu.
Screen lock sounds······Set operation
sound on/off when locking/unlocking the
screen.
Haptic feedback······Set vibration on/off for
specific screen operations.
108
Display
Set brightness and other screen settings
including font, key illumination, and
touch panel sensitivity.
the Home screen, m ▶
1 From
"Settings" ▶ "Display"
Notification lamp······Set the notification
LED to flash for missed calls, new mail, and
new messages.
Key illumination······Set mhr to
illuminate for an incoming call, during a call,
for new mail, etc.
Use key illumination······Set whether
key illumination is activated.
2 Select any item:
TimeToneSet······Set key illumination to
be activated at the set time.
Brightness······Adjust the brightness of the
display. Mark the "Automatic brightness"
checkbox to detect surrounding brightness
and adjust automatically.
Voice call – Charging······Set a key
illumination pattern for each operation.
Power ON – Osaifu-Keitai······Set
whether key illumination is activated for
each operation.
Auto-rotate screen······Set whether the
display switches automatically according to
the orientation of the FOMA terminal.
Screen timeout······Set the time until the
backlight turns off. For approx. 5 seconds
after it turns off, you can tap mhr
to turn it back on.
Select Font······Set the font for displayed
text.
Touch panel Setting
NOTE
<Screen brightness>
the battery level becomes low,
When
"Brightness" automatically sets to its minimum
to conserve power.
<Notification lamp>
notification LED sometimes flashes
The
regardless of the notification lamp setting,
depending on the application (Gmail, etc.).
Touch panel sensitivity······Set the
touch panel to be more sensitive to
operation.
Incoming call lamp······Set the illumination
pattern and color of the notification LED for
incoming calls.
109
Settings
Animation······Set the animation to display
when the screen switches.
eco mode
Turn off Wi-Fi······Set the Wi-Fi
function off.
You can set eco mode to reduce power
consumption.
Unuse GPS satellites······Set the GPS
function off.
the Home screen, m ▶
1 From
"Settings" ▶ "eco mode"
Stop sync······Stop application
synchronization.
2 Select any item:
eco mode······Set eco mode.
OFF······Set eco mode off.
Auto······Set to "Original eco mode" or
"Full eco mode" automatically
according to the battery level set with
"Auto setting".
Settings
Original eco mode······Configure eco
mode with "Original eco mode
settings".
Full eco mode······Set an eco mode
that keeps battery consumption to a
minimum.
Original eco mode settings······Configure
operation when Original eco mode is set.
Brightness······Dims the display.
Screen timeout······Set the time until
the screen back light turns off.
Stop Illumination······Set key
illumination off.
Turn off Bluetooth······Set the
Bluetooth function off.
110
Stop live wallpapers······Sets a still
image as wallpaper when live wallpaper
is set.
Auto setting······Set the battery level at
which Original eco mode or Full eco mode
turns on automatically, when eco mode is
set to "Auto".
Advice for saving energy······Displays tips
for saving on battery power.
Location & Security
Configure settings such as for security
lock and obtaining location information.
the Home screen, m ▶
1 From
"Settings" ▶ "Location &
security"
2 Select any item:
Use wireless networks → P.147
Use GPS satellites → P.147
Screen lock security······Configure to enter
an unlock security code for unlocking the
screen.
Use secure credentials······Permit access to
safe certificates and other credentials
information.
• A credentials information storage
password must be set beforehand.
Install from SD card······Install an encrypted
certificate from a microSD card.
Set password······Set a password for
credentials information storage.
Settings
Set up (Change) unlock security
······Configure unlock security codes for
unlocking the screen, Osaifu-Keitai, etc. You
can set a pattern, lock number, or
password.
Device security policy······Check security
information set by a remote administrator.
You can also encrypt FOMA terminal or
microSD card data.
• If you update data from within another
application while encrypting/decrypting
data, your FOMA terminal may no longer
function properly.
Clear storage······Delete all credentials
information and reset the credentials
information storage password.
Set up Osaifu-Keitai lock → P.157
PIN setting → P.113
Visible passwords······Set to display
characters when entering a password.
Select device administrators······Enable/
disable administrators for the FOMA
terminal.
111
Setting device administrators
Set administrators for the FOMA terminal to
be enabled/disabled.
using Omakase Lock, you must enable
Before
"Omakase Lock". Omakase Lock is
unavailable as of November, 2011.
the Home screen, m ▶
1 From
"Settings" ▶ "Location &
security" ▶ "Select device
administrators"
administrators ▶
2 Select
"Activate" / "Deactivate"
Settings
Security codes used with the FOMA
terminal
Some features of your FOMA terminal
require security codes, to make various
functions more convenient. These include a
password for locking the FOMA terminal
and a network security code for network
services. By using different codes for
different purposes, you can get the most
out of your terminal.
Precautions for all security codes
setting security codes using your
Avoid
birthday, part of your phone number, your
address or room number, "1111" or
"1234" that can be easily guessed by
others. Be sure to write down the security
codes and store them in a safe location.
112
not reveal your security codes to
Do
others. DOCOMO is not responsible for
damage caused by misuse of your
revealed security codes by others.
you forget your security codes, you
If
need to bring your identification
document (driver's license, etc.), the
FOMA terminal and the miniUIM to a
docomo Shop Service Counter. For
details, contact "General Inquiries"
provided on the last page of this manual.
PIN unblocking key is written in the
Your
application form (copy for subscriber)
given at the time of contract. If you have
subscribed at a place other than a
docomo Shop, bring your identification
document (driver's license, etc.) and the
miniUIM to a docomo Shop Service
Counter, or contact "General Inquiries"
provided on the last page of this manual.
Network security code
The network security code is a 4-digit
number necessary for using the docomo
Network Services or identification at
reception of your request in docomo Shop
or at docomo Information Center. It can be
set any number at the subscription and also
changed later by yourself.
You can change your network security code
to the new one from your PC if you have a
"docomo ID/Password" for General support
site for PC "My docomo".
information about "My docomo", see the
For
inside of the back cover of this manual.
PIN1 code
Enabling the miniUIM's PIN
Set to require entry of the PIN1 code when
power is turned on.
From the Home screen, m ▶
1 "Settings"
▶ "Location &
security" ▶ "PIN setting"
2 "PIN1 code entry set"
■ change the PIN1 code
■To
▶ "Change SIM PIN" ▶ enter the current
PIN1 code ▶ "OK" ▶ enter the new PIN1
code ▶ "OK" ▶ enter the new PIN1 code
again ▶ "OK"
• "PIN1 code entry set" must be enabled
beforehand.
3 Enter the PIN1 code ▶ "OK"
PIN unblocking key (PUK)
The PIN unblocking key (PUK) is an 8-digit
number used to unblock the PIN1 code. You
cannot change the key yourself.
you enter the incorrect PIN unblocking key
If
10 times in succession, the miniUIM is locked.
If this happens, please contact a docomo
Shop.
113
Settings
The miniUIM has a settable security code,
PIN1 code. These codes are set to "0000"
(four zeroes) at the time of subscription, but
you may subsequently change it. → P.111
PIN1 code is a 4- to 8-digit number (code)
that is entered to confirm the user when the
miniUIM is inserted in the FOMA terminal or
the terminal power is turned on. It is
intended to prevent unauthorized use by a
third party. Entering PIN1 code makes the
FOMA terminal operable.
you want to use a miniUIM that has been
If
used on a different FOMA terminal, use the
same PIN1 code that had been set on the
different terminal. The code is "0000" if the
default setting has not been changed.
you enter the incorrect PIN1 code 3 times in
If
succession, the PIN1 code is locked. Unlock
using "PIN unblocking key".
■
the PIN1 locked miniUIM
■Unblocking
•When the message indicating that a SIM card
is PIN1 locked is displayed, perform the
following to unlock.
"Emergency call" ▶ Enter "
05 [PIN
unblocking key] [new PIN1 code] [new
PIN1 code]#"
•For example, to change the miniUIM PIN1
code to "2580" when the PIN unblocking key
is "88888888", enter "
05 88888888
2580 2580#"
Applications
This allows you to configure application
management settings.
the Home screen, m ▶
1 From
"Settings" ▶ "Applications"
2 Select any item:
Unknown sources······Set whether to allow
installation of applications obtained from
non-Android Market sites, email, etc.
Manage applications······You can check
name, version, etc. of applications, or
force-close/delete/etc. applications.
Settings
Running services······You can display a
service that is running to stop it, change its
settings, etc.
Storage use······Display the state of storage
use for an application.
Battery use······Check the amount of
battery used for each application.
Development······Configure various
settings required for application
development.
114
Accounts & Sync
You can configure accounts for online
services such as Twitter, Facebook, Google,
mixi, Microsoft® Exchange ActiveSync®, to
synchronize data as well as exchange data
between the FOMA terminal and servers for
the various services. If set to synchronize
automatically, the FOMA terminal is
automatically updated with update
information via the web.
an account → P.62
Adding
the Home screen, m ▶
1 From
"Settings" ▶ "Accounts & sync"
Background data······Set whether all
applications carry out data communication
automatically.
the Home screen, m ▶
1 From
"Settings" ▶ "Accounts & sync"
the account you want to
2 Tap
synchronize
■
an account
■Deleting
▶ Tap the account you want to delete ▶
"Remove account" ▶ "Remove account"
▶ "Sync now"
3 m
• To stop synchronization, tap m and
then tap "Cancel sync".
NOTE
<Deleting an account>
delete the Google account that was
To
configured first, data on the FOMA terminal
must be initialized. → P.116
Settings
2 Select any item:
Starting synchronization manually
Auto-sync······Set whether applications
synchronize data automatically.
NOTE
on this setting, you may incur packet
Depending
communication fees. The battery also depletes
faster compared with when the checkbox is
unmarked.
115
Privacy
Storage
This allows you to configure backup for
Google applications reset the FOMA
terminal.
You can check the capacity of a microSD
card or the FOMA terminal, or format a
microSD card.
the Home screen, m ▶
1 From
"Settings" ▶ "Privacy"
the Home screen, m ▶
1 From
"Settings" ▶ "Storage"
2 Select any item:
2 Select any item:
Back up my data······Back up application
settings and data to the Google server.
Automatic restore······Set to restore the
backed up settings and data when
reinstalling an application.
Settings
Data transfer mode······Set a mode for
using "iC transfer Service".
Factory data reset······Delete all data on
the FOMA terminal and return it to its state
at time of purchase. Mark the "Erase SD
card" checkbox to delete all data on a
microSD card.
Total space······Check the capacity of a
microSD card.
Available space······Check the free space
on a microSD card.
Unmount SD card/Mount SD card······
Cancel recognition or make a microSD card
recognizable by the FOMA terminal so that
the microSD card can be removed safely.
Erase SD card······Format a microSD card.
Note that formatting erases all content on a
microSD card.
• Carry out "Unmount SD card"
beforehand.
Available space······Check the free space
on the FOMA terminal.
116
Search
You can configure the search function
(P.82).
the Home screen, m ▶
1 From
"Settings" ▶ "Search"
any item:
2 Select
• Displayed items differ with the application
set.
Google search
Show web suggestions······Display
entry candidates when searching with
Google.
Search history······Set to display the
customized search history.
Manage search history······Manage
the customized search history.
Searchable items······Specify objects for
data search.
Clear shortcuts······Delete the history
searched with the search box.
This allows you to change the language and
configure keyboard settings for using the
FOMA terminal.
the Home screen, m ▶
1 From
"Settings" ▶ "Language &
keyboard"
2 Select any item:
Select language······Change the language
used on the FOMA terminal.
ATOK → P.69
Voice Input & Output
You can features such as voice search and
the text-to-voice conversion function.
the Home screen, m ▶
1 From
"Settings" ▶ "Voice input &
output"
2 Select any item:
Voice recognizer settings
Language······Configure the language
settings for voice recognition.
SafeSearch······Configure search result
filtering.
Block offensive words······Configure
display of inappropriate results of voice
recognition.
117
Settings
Use My Location······Set to share the
FOMA terminal's location information
with Google.
Language & Keyboard
Text-to-speech settings
Listen to an example······Plays a
synthesized voice sample.
Always use my settings······Configure
application settings to operate
according to "Default Engine", "Install
voice data", "Speech rate", and
"Language" settings.
Default Engine······Configure the voice
synthesizer engine settings for text
reading out.
Install voice data······Install entities
required for the voice synthesizer to run.
Speech rate······Configure the text
reading out speed.
Settings
Language······Configure the language
for text reading out.
Pico TTS······Configure the installed
voice synthesis engine. Japanese
support not provided.
Accessibility
Configure user-aide applications which
react with sound or vibration when
operated.
applications are not registered
Accessibility
at time of purchase. You must download
and install compatible applications
beforehand from Android Market or other
sites before you can set "Accessibility".
the Home screen, m ▶
1 From
"Settings" ▶ "Accessibility" ▶
"ON"
Date & Time
You can set the FOMA terminal's clock.
the Home screen, m ▶
1 From
"Settings" ▶ "Date & time"
2 Select any item:
Automatic······Set the time to be adjusted
automatically.
Set date······Set the date manually.
Select time zone······Configure the time
zone manually.
Set time······Set the time manually.
Use 24-hour format······Set the clock to
12-hour display or 24-hour display.
Select date format······Set the date display
format.
118
About Phone
You can check your FOMA terminal's
state, update software, or upgrade the
OS.
the Home screen, m ▶
1 From
"Settings" ▶ "About phone"
2 Select any item:
Software Update → P.179
Major updates → P.184
MEDIAS NAVI······Set to receive update
notifications from MEDIAS NAVI.
Status······Check battery level, your phone
number, etc.
Settings
Battery use······Check the amount of
battery used for each application.
Legal information······Check the open
source license and Google usage
agreement.
Model number······Check your FOMA
terminal's model number.
Firmware version······Check the firmware
version.
Baseband version······Check the baseband
version.
Kernel version······Check the kernel
version.
Build number······Check the build number.
119
Email/Browser
sp-mode Mail
This allows you to send and receive emails
using an i-mode mail address (@docomo.
ne.jp). It allows you to use smileys and
Deco-mail, and also supports auto
receive.
more information on sp-mode mail,
For
refer to "ご利用ガイドブック (spモード編) "
(Mobile Phone User's Guide [sp-mode], in
Japanese only).
the application list screen,
1 From
"spモードメール" (sp-mode mail)
SMS
Email/Browser
You can send and receive text messages
with a cell phone number as the address.
the application list screen,
1 From
"Messaging"
• The message screen appears.
■
and sending SMS
■Creating
▶ "New message" ▶ enter the number in
"To", and the message in "Type to
compose" ▶ "Send"
■
sent/received SMS
■Displaying
▶ Tap a message thread
120
■
to SMS
■Replying
▶ Tap the address you want to reply to ▶
enter the message ▶ "Send"
■
SMS
■Forwarding
▶ Tap a message thread ▶ touch and hold
the SMS you want to forward ▶ "Forward"
▶ enter the forwarding phone number in "To"
▶ "Send"
■
an SMS phone number to
■Add
Phonebook
▶ Touch and hold a message thread ▶
"Add to Phonebook" ▶ "Register new" or
tap an entry
■
SMS from/to
■Importing/exporting
a microSD card
▶ m ▶ "Import/Export" ▶ "Import
from SD card"/"Export to SD card"
NOTE
entering a message, m ▶ You can use
While
"Insert smiley" to insert smileys that will be
displayable on any terminal with Android installed.
They are displayed as emoticons while being
entered, but are displayed as smileys once received
by an Android terminal.
can also send/receive SMS messages to/from
You
users of overseas network operators. For
available countries/compatible overseas network
operators, see "Mobile Phone User's Guide
[International Services]" or the DOCOMO
"International Services website".
NOTE
NOTE
send SMS messages to users of overseas
To
network operators, enter "+" → "Country
code" → "the recipient mobile phone number".
Omit "0" if the recipient phone number starts
with "0". You can also send an SMS message by
entering "010", "Country code" and "the
recipient mobile phone number".
can protect SMS with the following
You
operations.
From the message screen, tap a thread ▶ touch
and hold the SMS you want to protect ▶ "Lock
message"
Deleting SMS
the message screen, m ▶
1 From
"Settings"
the application list screen,
1 From
"Messaging"
■
one message
■Deleting
▶ Tap a message thread ▶ touch and hold
the SMS you want to delete ▶ "Delete
message" ▶ "Delete"
a message thread
■
■Deleting
2 Tap the item to set
a notification for new
■
■Configuring
SMS
▶ Select any item:
Notifications······Set whether a notification
appears in the status bar for new SMS.
Select ringtone······Set a ringtone for
notifying new SMS.
Vibrate······Set vibration for when there is
notification of new SMS.
■
all message threads
■Deleting
▶ m ▶ "Delete threads" ▶ "Delete"
■
automatic deletion for SMS
■Setting
▶ m ▶ "Settings" ▶ mark the "Delete
old messages" checkbox ▶ "Text message
limit" ▶ enter a messages limit for each
message thread ▶ "Set"
121
Email/Browser
▶ Touch and hold the message thread you
want to delete ▶ "Delete thread" ▶
"Delete"
• All SMS messages in a message thread
are deleted.
Changing SMS settings
Email
By setting an email account provided by
mopera U or any general service
providers on your FOMA terminal, you
can send and receive emails in the same
way as your PC.
an Email account"→ P.61
"Setting
Displaying email
the application list screen,
1 From
"Email"
• The inbox screen appears.
■
the Inbox
■Refreshing
▶ m ▶ "Refresh"
• The FOMA terminal receives any new
email, and displays it in the "Inbox".
Email/Browser
2 Tap the email you want to read
■
to email
■Replying
▶ "Reply"/"Reply all" ▶ enter a message
▶ "Send"
■
email
■Forwarding
m ▶ "Forward" ▶ enter the forwarding
email address in "To" ▶ "Send"
■■ Deleting email
▶ "Delete"
122
Creating and sending email
the inbox screen, m ▶
1 From
"Compose"
the partner email address
2 Enter
in "To"
■
a Cc or Bcc
■Adding
▶ m ▶ "Add Cc/Bcc"
3 Enter a title in "Subject"
a message in "Compose
4 Enter
Mail"
■
an attachment
■Adding
▶ m ▶ "Add attachment" ▶ tap the
type of attachment ▶ tap the attachment
5 "Send"
Opening mailboxes
the inbox screen, m ▶
1 From
"Folders"
• The Inbox, Outbox, etc. are displayed.
■
email from/to
■Importing/exporting
a microSD card
▶ m ▶ "Import/Export" ▶ "Import
from SD card"/"Export to SD card"
Changing email settings
the inbox screen, m ▶
1 From
"Account settings"
■
email accounts
■Switching
• You can switch email accounts when two
or more accounts are configured.
▶ "Accounts" ▶ tap the email account to
switch to
2 Tap the item to set
■
a notification for new email
■Setting
▶ Select any item:
Email notifications······Set whether a
notification appears in the status bar for
new email.
Select ringtone······Set a ringtone for
notifying new email.
■
automatic check of new
■Setting
email
• You can set the FOMA terminal to check
automatically if new email has arrived at
the server.
▶ "Inbox check frequency" ▶ "Never" or
set the interval to automatically check at
• If you set to connect to the server at a
certain interval, and if you are using a
pay-as-you-go plan, you will incur a
charge whenever the FOMA terminal
checks for new email.
Gmail is an email service provided by
Google. You can use Gmail to send and
receive email with your FOMA terminal.
must configure a Google account to
You
use Gmail. → P.62
Viewing an email
the application list screen,
1 From
"Gmail"
• The message thread list screen appears.
• In Gmail, email is displayed grouped into
a message thread according to reply. If
newly arrived emails are replies to an
existing email, they will be grouped into
the same message thread. A new thread
is created for newly created email and
changes of subject name.
■
accounts
■Switching
▶ m ▶ "Accounts" ▶ tap the account
you want to display
■
Gmail
■Refreshing
▶ m ▶ "Refresh"
• Synchronize the Gmail on your FOMA
terminal and on the website, and refresh
the Inbox.
■
email
■Searching
▶ m ▶ "Search" ▶ enter a keyword in
the search box ▶ " "
123
Email/Browser
Vibrate······Set vibration for when there is
notification of new email.
Gmail
a message thread
2 Tap
• When there are two or more emails, tap
"X read messages" to display a list of
messages. You can tap the message you
want to read and check it.
• You can tap
to add, check, etc. entries
to Phonebook.
■
to email
■Replying
▶ " " ▶ enter a message ▶ m ▶
"Send"
• To reply to all members, tap "
" and
tap "Reply all".
■
email
■Forwarding
" ▶ "Forward" ▶ enter the
▶"
forwarding email address in "To" ▶ m
▶ "Send"
■
email
■Deleting
▶ "Delete"
Creating and sending email
the message thread list
1 From
screen, m ▶ "Compose"
the partner email address
2 Enter
in "To"
■
a Cc and Bcc
■Adding
▶ m ▶ "Add Cc/Bcc"
3 Enter a title in "Subject"
a message in "Compose
4 Enter
Mail"
■
an attachment
■Adding
▶ m ▶ "Attach" ▶ tap the attachment
type ▶ tap the attachment
Email/Browser
5 m ▶ "Send"
Managing message threads
the message thread list
1 From
screen, touch and hold a thread
2 Select any item:
Read······Open a message thread.
Archive······Archive (store) message threads.
Archived message threads are not displayed
in the Inbox.
Mute······Hide message threads.
124
Mark unread/Mark read······Designate a
message thread as unread/read.
Delete······Delete a message thread.
Add star/Remove star······Assign/remove a
star from a message thread.
Change labels······Add/change the label of
a message thread.
Report spam······The message thread is
deleted and is reported to Google as spam.
Help······The Google mobile help page is
displayed.
■
archived or muted
■Showing
message threads.
From the message thread list screen, m
▶ "Go to labels" ▶ "All Mail"
NOTE
Display message threads by label
You can display only the message threads
for which "Change labels" is set.
the message thread list
1 From
screen, m ▶ "More" ▶
"Settings" ▶ tap "General
preferences" or the account to
set
2 Tap the item to set
■
a notification for new email
■Setting
▶ checkmark "Email notifications" ▶
"Labels to notify" ▶ tap a label to set ▶
Select any item:
Email notifications······Set whether a
notification appears in the status bar for
new email.
Ringtone······Set a ringtone for notifying
new email.
Vibrate······Set vibration for when there is
notification of new email.
Notify once······Set to notify only the first
new mail and not for every new mail.
the message thread list
1 From
screen, m ▶ "Go to labels"
the type of label you want to
2 Tap
display
• You can also configure settings to only
show message threads with a star (★),
sent email, etc.
125
Email/Browser
cannot be created on your FOMA
Labels
terminal. Create labels on the Gmail website.
Changing Gmail settings
Early Warning "Area Mail"
Email/Browser
When the FOMA terminal is in service
range, it can receive emergency and
other reports from the weather bureau
and municipal governments.
Mail is a free service available without
Area
subscription.
Mail cannot be received in the
Area
following instances.
•Out of service range
•Power is off
•Roaming overseas
•In Airplane mode
•Using an other-carrier SIM card
•During a call
Mail might not be received in the
Area
following instances.
•During packet communication (during
data transmission)
•During Wi-Fi tethering
•During USB tethering
•During a software update
•During a major software update
•With only little memory capacity
remaining on the FOMA terminal
Mail that you could not receive
Area
cannot be received later.
Receiving early warning "Area Mail"
A notification screen will appear, and a buzzer
(earthquake alert)/ringtone (non-earthquake
alert (disaster/evacuation information/etc.))
will sound and the FOMA terminal will vibrate
and the notification LED will flash to notify
you.
volume of the buzzer and ringtone cannot
The
be changed.
Viewing an Area Mail later
the application list screen,
1 From
"Area Mail"
2 Tap the Area Mail
Configuring early warning "Area
Mail"
the application list screen,
1 From
"Area Mail" ▶ m ▶ "Settings"
▶ select any item
Receive setting······Set whether to receive
Area Mail.
Beep tone
Beep time······Set the time that the
buzzer and Area Mail ringtone sound.
Beep in manner mode······Set whether
the buzzer and Area Mail ringtone
sound if Area Mail is received in manner
mode.
126
Check screen image and beep tone
······Check how FOMA terminal operates
when Area Mail is received for an
earthquake alert and disaster/evacuation
information.
Other settings
Receive entry······Register a "Message
ID" (enter an ID obtained from a service
provider) and "Area Mail name" (enter
any name) for information you want to
receive other than emergency
information.
Google Talk
Google Talk is an online instant
messaging service by Google. You can
enjoy online chat (chatting by text) with
a partner who has a Google account.
Talk, you must set up your own
Google
Google account. → P.62
Getting ready for Google Talk
the application list screen,
1 From
"Talk"
• The talk screen appears.
■
a chat member.
■Adding
an invitation
■
■Accepting
• "Chat invitation" is displayed when you
get an invitation.
▶ "Chat invitation" ▶ "Accept"
■
your online status and
■Changing
message
▶ Tap your account ▶ " " ▶ select the
online status you want to set ▶ "Status
message" ▶ enter a status message ▶
"Done"
127
Email/Browser
▶ m ▶ "Add friend" ▶ enter the
Google account of the member you want to
add ▶ "Send invitation"
• An invitation goes to the partner you are
inviting.
■
Google Talk settings
■Changing
▶ m ▶ "Settings"
• You can configure whether to log into
Google Talk automatically, erase search
history, display notification icons, and
configure ringtone/vibration settings.
■
out
■Logging
▶ m ▶ "Sign out"
NOTE
an invitation is accepted, it is removed
When
from the list of pending invitations.
Chatting
Browser
You can browse web pages using the
browser. Your FOMA terminal allows you
to browse sites via packet communication
and Wi-Fi.
Launching the browser and
displaying a web page
the application list screen,
1 From
"Browser"
Address bar
the talk screen, tap a chat
1 In
member's name
■
chat members
■Switching
Email/Browser
▶ m ▶ "Switch chats" ▶ tap a chat
member's name
■
with two or more
■Chatting
partners
▶ m ▶ "Add to chat" ▶ tap chat
member's names
2 Enter a message ▶ "Send"
■
a chat
■Ending
▶ m ▶ "End chat"
• To end chat with specific members, touch
and hold the chat member's names in the
talk screen, and tap "End chat".
128
the address bar ▶ enter an
2 Tap
URL or keywords
• Once you enter an URL or keywords in
the address bar, a list of candidates
appears.
■
voice search
■Using
▶ Tap the address bar ▶ " " ▶ clearly
speak the search words into the microphone
tap the web page you
3 "want" or
to display from the list of
candidates
NOTE
"/" "
3 "• Matching
before/after text is displayed.
4 "• End" the search.
latest updates have not been installed in the
If
FOMA terminal for Flash Player, web contents
may not be displayed. Access Android Market
(P.144) and check the update information for
Flash Player.
browsing a web page,
1 While
m ▶ "More" ▶ "Select text"
Operation while viewing a web page
the text to copy, and then
2 Drag
drag to the start position and
Copying text contained in a web page
to the end position ▶ tap the
selected text
■
■Scroll
•Slide in the direction you want to scroll →
P.55
■
in/out
■Zoom
■
to before/after a web page
■Moving
•r to return to the previous page, m ▶
"Forward" to go to the next page
Search text contained in a web page
Email/Browser
•Slide two of your fingers apart/together
where you want to zoom in/out → P.55
•Double-tap (tap twice) where you want to
zoom in, then double-tap again to return to
the original display
NOTE
copied text can be pasted into other
The
applications, such as a browser search box or
email. Touch and hold the text box to paste to,
and then tap "Paste".
Using bookmarks
Bookmarking a web page allows you to
quickly access that web page.
Adding to bookmarks
a web page you want to add,
1 In
browsing a web page,
m ▶ "Bookmarks"
1 While
m ▶ "More" ▶ "Find on page"
• The bookmark appears as a thumbnail.
2
Enter the search text
2
"★Add"
129
the bookmark
3 Check/change
name ▶ "OK"
Displaying web pages added to
bookmarks
browsing a web page,
1 While
m ▶ "Bookmarks"
■
frequently visited web
■Viewing
pages
▶ "Most visited" ▶ tap the web page you
want to view
web pages from browse
■
■Displaying
history
▶ "History" ▶ tap the web page you want
to view
■
bookmarks
■Importing/exporting
from/to microSD card
Email/Browser
▶ m ▶ "Import"/"Export"
the bookmark you want to
2 Tap
view
NOTE
"Most visited" or "History" is displayed,
While
appears to the right of the web page name. You
can tap this icon to add ( is gold)/delete ( is
grey) from bookmarks.
130
Opening a new browser window
You can open up to 8 web pages and switch
between them easily.
browsing a web page,
1 While
m ▶ "New window"
• A new browser window opens, and the
set homepage is displayed.
between windows
■
■Switching
▶ "Windows" ▶ tap the browser window
you want to view
Using links in web pages
You can do the following with links
appearing in web pages.
■
■URL
•Tap to open a web page.
•Touch and hold to add an URL to bookmarks,
copy an URL, or display in a new window.
■
address
■Email
•Tap to create email.
•Touch and hold to copy an email address.
■
number
■Phone
•Tap to make a call.
Saving images appearing in web
pages
browsing a web page,
1 While
touch and hold an image you
■
the homepage
■Setting
• Set the page that is displayed when you
open a new browser.
▶ "Set home page" ▶ enter the URL of
the homepage you want to set ▶ "OK"
want to save ▶ "Save image"
Checking a saved image
browsing a web page,
1 While
m ▶ "More" ▶ "Downloads"
2 Tap the list
Changing browser settings
browsing a web page,
1 While
m ▶ "More" ▶ "Settings"
Email/Browser
2 Tap the items to set
■
web pages always
■Displaying
horizontally
▶ Mark the "Landscape-only display"
checkbox
■
of web page zoom when
■Amount
double-tapped (tap twice)
▶ "Default zoom" ▶ "Far"/"Medium"/
"Close"
■
the text size
■Changing
▶ "Text size" ▶ "Tiny"/"Small"/"Normal"/
"Large"/"Huge"
131
File Management
Infrared Data Exchange
File Management
Your FOMA terminal can exchange
Phonebook, sp-mode mail, schedule, and
memo information with another FOMA
terminal or other terminal that features
the infrared data exchange function.
sure the infrared data ports are aligned
Be
in parallel. Do not place anything between
the FOMA terminals or block their infrared
data ports.
the infrared data port has any dirt on it,
If
wipe it off with a soft cloth so as not to
damage the port. Damaging the port may
cause the infrared data exchange to fail.
using infrared data exchange, make
When
sure that your terminal is not more than
20 cm away from the other terminal. Do
not move the terminals until a message
appears indicating exchange is complete.
direct sunlight, fluorescent lighting,
Under
or near infrared devices, the terminal may
not be able to communicate normally
because of their effect.
on the other FOMA terminal,
Depending
exchanging information may not be
possible.
132
15°
15°
Infrared data
port
Within approx. 20 cm
Sending Phonebook entries by
infrared data exchange
the application list screen,
1 From
"Infrared" ▶ "Send all" ▶
"Phonebook"
■
sp-mode mail
■Sending
▶ "sp-mode mail" ▶ "Inbox" / "Sent" /
"Unsent"
■
schedule and memo
■Sending
▶ "Schedule&Memo"
▶ enter your docomo
2 "Start"
application password ▶ "OK" ▶
enter your authentication
password ▶ "OK"
• Put the receiving FOMA terminal on
standby for reception.
3 "OK"
• Point the infrared data port to the
receiving terminal.
4 "OK"
Receiving data by infrared data
exchange
the application list screen,
1 From
"Infrared" ▶ "Receive all"
■ receive 1 item
■To
▶ "Receive" ▶ "OK" ▶ "OK" ▶ "OK"
authentication password ▶ "OK"
• Prepare the sending FOMA terminal to
send.
3 "OK"
• Point the infrared data port to the
receiving terminal.
4 "OK" ▶ "OK"
You can use the Bluetooth
communication function for wireless
exchange of data with another Bluetooth
device.
to a Bluetooth device → P.101
Connecting
Sending data by Bluetooth
communication
<Example: Sending a Gallery image>
the application list screen,
1 From
"Gallery" ▶ display the image
you want to send ▶ m ▶
"Share" ▶ "Bluetooth"
the Bluetooth device you are
2 Tap
sending to
Receiving data by Bluetooth
communication
a file from the sending
1 Send
terminal
•
appears in the status bar.
the Notifications panel and
2 Open
tap the notification for the
received Bluetooth file ▶
"Accept"
• Check receipt of the file from the
Notifications panel, and register the file.
133
File Management
your docomo application
2 Enter
password ▶ "OK" ▶ enter your
Bluetooth Communication
NOTE
exchanging data with a device having a
When
Bluetooth function, differing profiles may
prevent exchange of data.
Connecting to a PC
Connecting the FOMA terminal and
a PC
Connect the FOMA terminal and a PC with
the microUSB cable for PC connection
(sample).
you plug in/unplug the microUSB cable
When
for PC connection from the PC, hold the USB
plug horizontally. → P.52
NOTE
File Management
the USB plug of the microUSB cable for
Connect
PC connection directly to the USB port of the PC.
If the cable is connected via a USB hub or USB
extension cable, a malfunction may occur.
not unplug the microUSB cable for PC
Do
connection while data is being transferred.
The data may be destroyed.
Using data on a microSD card
When you connect your FOMA terminal to a
PC or other device by using the microUSB
cable for PC connection (sample), you can
read and write data on a microSD card from
the PC.
134
the FOMA terminal to a
1 Connect
PC using the microUSB cable for
PC connection
the Notifications panel, "USB
2 Open
Connection" ▶ "USB Mass
Storage" ▶ "OK" ▶ "OK"
• You can now use your PC to display files
on a microSD card.
Safely removing the microUSB
cable for PC connection
the Notifications panel,
1 Open
"Turn off USB storage"/
"Disconnect" ▶ "OK"
the microUSB cable for
2 Remove
PC connection (P.52)
Using PC Link
dedicated software on your PC
Install
beforehand. Refer to the following site for
software download and operating details.
http://www.n-keitai.com/guide/download/
(in Japanese only)
the Home screen, m ▶
1 From
"Settings" ▶ "Wireless &
networks" ▶ "PC Link settings"
the "PC Link" checkbox ▶
2 Mark
check the host name ▶ "OK"
• To change the host name, enter a host
name and tap "OK".
the FOMA terminal to
3 Connect
your PC
• Connecting via Wi-Fi→ P.59
• Connecting via USB PC Link→ P.136
the dedicated software
4 Launch
on your PC
a host name ▶ set the user
5 Enter
name/password
• This step is done on your PC.
• The host name you enter here is the host
name you checked in step ②.
• (User registration request) appears in
the Notifications panel on your FOMA
terminal.
135
File Management
You can connect your FOMA terminal and
a PC via a Wi-Fi connection, USB PC Link,
etc., to access files on your terminal from
your PC using dedicated software or a
dedicated browser.
dedicated software to do the
Use
following.
•Transfer PC files to a microSD card in your
FOMA terminal
•Copy photos/videos from your FOMA
terminal to a PC (Omakase Copy)
•Import/export Phonebook entries, email,
or bookmarks from/to your FOMA
terminal
•Open a specified web site with your
FOMA terminal
•Search an application with your FOMA
terminal
a PC browser to do the following.
Use
•Browse/edit Phonebook and bookmarks
on your FOMA terminal
•Browse the Gallery on your FOMA
terminal
Using PC Link with dedicated
software
the Notifications panel,
6 Open
"User registration request" ▶
check that the user name
displayed on your FOMA terminal
is the same as the user name
entered on your PC ▶ "Yes" ▶
"OK"
• You can now access files on your FOMA
terminal from your PC.
■
PC Link with a browser
■Using
From the Home screen, m ▶ "Settings"
▶ "Wireless & networks" ▶ "PC Link
settings" ▶ check "Destination URL", and
then enter the displayed URL in browser's
address bar on your PC
Connecting your FOMA terminal and a
PC via USB PC Link
You can now connect your FOMA terminal
and a PC using the microUSB cable for PC
connection (sample) to use PC Link.
File Management
the FOMA terminal to
1 Connect
your PC using the microUSB cable
for PC connection
the Notifications panel,
2 Open
"USB Connection" ▶ "USB PC
Link" ▶ "OK"
■
the microUSB cable for
■Removing
PC connection → P.134
136
NOTE
one FOMA terminal can be connected via
Only
USB PC Link and recognized per one PC.
Applications
Camera
137
Applications
■
using the camera
■Before
the camera is built with high-precision
While
technology, there may be cases where you
see one or more partially dark or constantly
bright points or lines. Note also that, when
you shoot in a dark place, the camera may
have more noise such as white lines.
shooting, clean the lens with a soft
Before
cloth. A fingerprint or grease marked on
the lens may put the camera out of focus
or result in a blurry photo.
the FOMA terminal is left in a warm
After
place for a long time, the image quality
may degrade.
brightness and color in your photos
The
and videos may differ from those of the
actual object.
leaving the lens exposed to direct
Avoid
sunlight for a long time or directly shooting
the sun or a bright lamp. Doing so may
cause malfunction, such as discoloration of
shot images.
shooting, take care not to have your
When
finger or hair or the strap block the lens.
the camera consumes more battery
Since
power during shooting, you are advised to
turn off the camera as soon as you finish
shooting. Operating the camera on low
battery may result in a dark or blurry
screen.
reduce camera shake (photos) or image
If
stabilization (videos) is set to OFF, moving
the FOMA terminal during shooting may
result in blurry images. Whenever possible,
it is recommended to set image
stabilization to AUTO when shooting.
the battery is low, you may not be able
If
to save your photos and videos.
in Silent mode, the camera makes the
Even
shutter sound for photo shooting and the
video recording start/end sound. You
cannot change the volume of these sounds
or turn them off.
shot-ready LED flashes during camera
The
shooting.
Copyright and portrait rights
Avoid copyright infringements when
copying or editing photos and videos that
have been shot on the FOMA terminal. You
should also avoid infringing the portrait
rights of other people by using or modifying
their portraits without their consent. Note
that the shooting or recording of stage
performances, shows or exhibitions may be
prohibited, even for personal use.
If your use of the FOMA terminal is
inappropriate and a noticeable public
annoyance, you may be subject to
punishment according to federal or local
legislation (public nuisance ordinances, etc.).
Applications
Please be considerate of the
privacy of individuals around you
when shooting and sending
photos using camera-equipped
mobile phones.
138
Viewing the camera screen
■
■Photos
⑤
⑫
④
⑪
③
⑩
②
⑨
①
⑧
⑥
⑦
①Camera Mode
•Standard: The standard camera mode.
•Quick Shot: Shoot rapidly in a short
timeframe. To shoot more stunning photos,
set the camera mode to "Standard".
•Best Photo: Shoots a succession of photos
and selects the best 3 shots automatically.
•Continuous Shot: A mode for shooting from
5 to 100 shots in succession.
•Self Shot: Aids self-portraits by notifying you
by sound and the shot-ready LED when a face
is detected. To shoot, tap the center of the
screen to take the shot.
•Touch shutter: Allows you to shoot easily by
tapping where you want to focus.
②Scene
③Auto focus
④Size (image size)
⑤Other Settings: Configure settings such as
light, quality, reduce camera shake, and
selftimer.
⑥Focus frame
⑦Number of remaining shots/reduce camera
shake/Location information acquisition status
⑧Photo/video switch
⑨Zoom: Can also be adjusted with the volume
key.
⑩Shutter
⑪Brightness
⑫Gallery: Shot photos can be viewed.
■
■Videos
④
⑩
③
⑨
②
⑧
①
⑦
⑥
Before shooting
⑤
⑨
⑧
⑦
⑪
During shooting
lighting, image quality, image stabilization,
etc. can be made.
⑤Remaining shooting time/Image stabilization
⑥Photo/video switch
⑦Zoom: Can also be adjusted with the volume
key.
⑧Recording start/end
⑨Brightness
⑩Gallery: Shot videos can be played.
⑪Shooting time elapsed
139
Applications
①Scene
②Auto focus
③Size (image size)
④Other settings: Configures the settings about
Shooting with the camera
Photos and videos shot on the camera are
automatically saved to a microSD card. If you
do not have a microSD card inserted, you
cannot start shooting.
Shooting photos
the application list screen,
1 From
"Camera"
2 Point the camera at a subject
3 "• The" camera shoots a photo with a shutter
click.
Shooting videos
Applications
the application list screen,
1 From
"Camera" ▶
2 Point the camera at a subject
"
3 "• Recording
starts with a recording start
sound.
"
"
4 • Recording
ends with a recording end
sound.
140
NOTE
there is a notification sound during video
If
shooting, it may also be recorded.
Gallery
This allows you to show or play photos/
videos saved to microSD card from a
camera, site download, etc.
following photo file formats can be
The
displayed.
JPEG (jpeg, jpg), GIF (gif), BMP (bmp), PNG
(png)
details on video file formats can be
For
played: → P.142
NOTE
you use "Factory data reset", contents
If
protected by Digital Rights Management (DRM)
can no longer be played.
the application list screen,
1 From
"Gallery"
• Shot images, downloaded images, etc.
are displayed in categories.
2 Tap a category
Applications
the photo/video you want to
3 Tap
view
• Tap
to arrange the photos by
shooting period.
• Touch and hold a category or photo/video
to send data by Bluetooth communication
or mail, or to delete data, check details,
etc.
NOTE
you have many photos saved, Gallery may take
If
time to read all the photos when it is activated.
cannot "Share" contents protected by
You
Digital Rights Management (DRM) with other
terminals.
141
Media Player
The Media Player plays video and music
files stored on a microSD card.
music files to microSD card from a PC
Save
beforehand.→ P.134
following music file formats can be
The
played.
AAC LC/LTP, HE-AACv1 (AAC+), HE-AACv2
(enhanced AAC+) (3gp,mp4,m4a),
AMR-NB, AMR-WB (3gp), MP3 (mp3), MIDI
(mid, xmf, mxmf, imy, rtttl, rtx, ota)*, Ogg
Vorbis (ogg), PCM/WAVE (wav), WMA
(wma,asf), PlayReady (.isma)
*Can be played, but do not appear listed
with the Media Player application.
Applications
following video file formats can be
The
played.
H.263 (3gp, mp4), H.264 (3gp, mp4),
MPEG-4 SP (3gp), WMV (wmv, asf), WebM
(.webm), PlayReady (.ismv)
the application list screen,
1 From
"Media Player"
Bottom bar
Launches "dmarket".
Displays the video list.
Displays a music list based on the tapped information.
Displayed icons can be set.
■
music as a ringtone
■Setting
▶m ▶ "Settings" ▶ "Ringtone
settings" ▶ tap the item to set ▶ tap the
music you want to set ▶ "Apply" ▶ "Set"
■
music and videos
■Deleting
▶m ▶ "Settings" ▶ "Delete contents"
for the music/video you want
▶ tap the
to delete to turn it red ▶ "Del" ▶ "OK" ▶
"OK"
142
■
the placement of bottom
■Changing
bar icons
▶m ▶ "Settings" ▶ "Arrange icons"
▶ touch and hold the icon whose place you
want to change ▶ drag to place in bottom
bar you want to move it to ▶ "Apply"
• "Movie" and "Store" icons cannot be
moved.
2 Tap the music or video
②
①
①Album cover image or video
• Tap the album cover image to toggle
show/hide for ②.
• Tap the video to toggle show/hide for
② – ⑧.
②Specify the playback position
③Return to list display
④Repeat off / repeat on / repeat 1 song
⑤Shuffle off / shuffle on
⑥Return to start of music/video or skip to
previous song / playback or pause / skip to
next song
⑦Adjust volume
⑧Toggle automatic screen rotation on/off
NOTE
protected under Digital Rights
Contents
Management (DRM) can no longer be played
back after initiating "Factory data reset".
④
⑤
⑥
③
Use playlists to play back music in a
preferred sequence.
the application list screen,
1 From
"Media Player" ▶ from the
②
①
⑧
③
⑥
⑦
Video playback screen
bottom bar icons, "Play list"
• If "Play list" does not appear in the
bottom bar, you can set it. → P.143
▶ tap playlist name ▶
2 "New"
enter a playlist name ▶ "OK"
143
Applications
Creating playlists
⑦
Music playback screen
"Add songs to playlist" ▶ tap the
3 music
you want to add
• You can also select music from "Artists"
and "Albums".
•
turns red for selected music. Each
time you press it, it is added to the
playlist.
4
"Apply"
■
the sequence
■Changing
▶Drag
to the position you want
■
music from a playlist
■Deleting
▶Tap
5
Applications
144
to turn it red
"Save" ▶ "OK"
Android Market
You can use Android Market to directly
access useful applications and enjoyable
games which can be downloaded and
installed on your FOMA terminal.
the application list screen,
1 From
"Market"
• The market screen appears.
• The first time you launch Android Market,
terms of service are displayed. After
confirming the terms of service, tap
"Accept".
NOTE
the security of applications before
Check
installing them. Applications are installed at
your own risk. The FOMA terminal may get
infected with a virus and all data on the terminal
may be damaged.
DOCOMO shall not accept liability for any
NTT
malfunctions caused by the applications that you
have installed. If a malfunction results, repair will
be at cost, even if within the warranty period.
DOCOMO shall not accept liability for any
NTT
disadvantage to you or a third party caused by
the applications that you have installed.
applications connect to the Internet and
Some
carry out communication automatically. Note
that you may incur costly packet transmission
charges.
you need more information about Android
If
Market, from the market screen, m ▶ tap
"Help".
Installing applications
for an application from
1 Search
the market screen
the application you want to
2 Tap
install
• Carefully check the displayed content and
follow onscreen instructions.
• By installing an application, you accept
responsibility for using the application on
your FOMA terminal. Use particular care
with applications that access a large
number of functions or large amounts of
data.
NOTE
stop download, open the Notifications panel,
To
tap the application, and then tap "Cancel".
the market screen, search
1 From
for an application
follow onscreen instructions.
• By purchasing an application, you accept
responsibility for using the application on
your FOMA terminal. Use particular care
with applications that access a large
number of functions or large amounts of
data.
• Tap the links for the displayed important
notices including "Refund Policy" and
"Google Billing and Privacy Policy" and
check their content.
■
refund
■Requesting
You can request a refund within a stipulated
time after purchase. The application will be
deleted, and you will not be charged for it.
You may obtain only one refund for each
application. If you have previously requested and
obtained a refund for a purchased application,
you cannot obtain another refund for that same
application after you purchase it again.
For information on payment methods and
refund terms, from the market screen, m ▶
from "Help", see each item for "Buying apps".
NOTE
using sp-mode can also make
Customers
payment together with their monthly FOMA
terminal fees (Content Payment Service). For
details, refer to the NTT DOCOMO website.
the application you want to
2 Tap
purchase
145
Applications
Purchasing applications
Fee-based applications must be purchased
before download.
only make payment once for an
You
application.
Once you have downloaded an application,
you do not need to make payment each time
you uninstall or redownload it.
the monetary amount box
3 Tap
• Carefully check the displayed content and
NOTE
an initial purchase by credit card, you must
For
enter information for the credit card you use for
Google Checkout. Google Checkout is a fast,
secure, and convenient method for purchasing
applications from your FOMA terminal. For more
information on Google Checkout, refer to
"http://checkout.google.com/".
Your Google Checkout information will be
stored on your FOMA terminal. Set the screen
lock to ensure the security of your FOMA
terminal. → P.111
Deleting applications
the market screen, m "My
1 In
apps"
the application you want to
2 Tap
delete
Applications
▶ "OK"
3 "Uninstall"
• For fee-based applications, an "Uninstall
& Refund" screen appears.
146
GPS
You can use your FOMA terminal's GPS
function and compatible software to
check your present location, find
directions to a destination, etc.
shall not accept liability for any
DOCOMO
damage caused by a malfunction of the
GPS system.
shall not accept liability for any
DOCOMO
purely economic damages caused by
missed opportunities to check the
measurement (communication) results due
to external factors, such as a failure or
malfunction of the FOMA terminal, or a
power failure (including the battery
running down).
cannot use the FOMA terminal as a
You
navigation device for an aircraft, vehicle or
person. DOCOMO shall therefore not
accept any liability for damages caused by
navigation using the location information.
cannot use the FOMA terminal as a
You
high-accuracy measurement GPS.
DOCOMO shall therefore accept no liability
for damages caused by measurement error.
is operated by the U.S. Department of
GPS
Defense. GPS signals are subject to control
adjustments (reduced accuracy, stoppage
of signal, etc.) at the discretion of the
Department.
Enabling the Location Service
To use the Location Service, you must enable
the GPS function beforehand. You can also
configure your terminal to find approximate
location information based on information
from Wi-Fi and mobile network base
stations.
Enabling the GPS function
the Home screen, m ▶
1 From
"Settings" ▶ "Location &
security"
the "Use GPS satellites"
2 Mark
checkbox ▶"Agree"
Enabling search of current location by
wireless network
the Home screen, m ▶
1 From
"Settings" ▶ "Location &
security"
the "Use wireless
2 Mark
networks" checkbox ▶ "Agree"
NOTE
agreeing, Google Location Service gathers
By
location information in a manner not enabling
pinpointing of individuals. Gathering of location
information occurs regardless of whether an
application is launched.
147
Applications
wireless communications products
Some
(mobile phones, data detectors, etc.) block
satellite signals and cause instability of
signal reception.
display of some maps based on
The
location information (latitude/longitude
information) may be inaccurate due to the
regulations of some countries or regions.
may find it impossible or difficult to
You
receive the GPS signal in the following
conditions because GPS uses radio waves
from a satellite.
•Inside or immediately underneath a
building
•In a basement or tunnel, underground, or
underwater
•In a bag or box
•In a built-up or residential area
•In or under thick trees
•Near a high-voltage cable
•Inside cars or trains
•In heavy rain, snow, or other bad weather
•When there are obstructions (people or
objects) near the FOMA terminal
•When the GPS antenna section of the
FOMA terminal is covered with a hand
Using Google Maps
You can use Google Maps display your
current location, search other locations,
search directions, etc.
use Google Maps, a 3G/GPRS or Wi-Fi
To
connection enabling data communication is
required.
the Location Service on beforehand.
Set
→ P.147
Maps does not cover all countries and
Google
cities.
the application list screen,
1 From
"Maps"
• The first time you launch this application,
a screen presenting new map features
appears. Tap "OK".
in/out on the map
■
■Zooming
• Zoom in
Applications
:Tap
, slide two of your
fingers apart, and then
double-tap (tap twice)
• Zoom out :Tap
, slide two of your
fingers together, and then tap
with your two fingers
■
current location
■Displaying
▶"
"
■
a location
■Searching
▶ "Search Maps" ▶ enter a location to
search ▶ "実行" or tap a search candidate
• You can tap a balloon to check details.
148
■
Street View
■Viewing
▶ Touch and hold a point you want to view
in Street View ▶ tap a balloon ▶ " "
• Some regions are not supported for
Street View.
■
layers
■Displaying
• You can display information such as
traffic conditions overlaid on a map, or
switch to an aerial photograph.
▶ " " ▶ tap the item you want to view
• Traffic conditions and railway lines are
provided for limited regions.
■
a map
■Clearing
• Clear all displayed layers and directions
search results.
▶ " " ▶ "Clear Map"
Looking up directions
You can view directions to your destination.
While viewing a map, m ▶
1 "Directions"
the starting point in the
2 Enter
textbox above
the arriving point in the
3 Enter
textbox below
• You can tap and specify a Phonebook
address, a map location, etc.
4 Tap the means (
(public transport)/
▶ "Get directions"
(car)/
(on foot))
• When several sets of directions are found,
tap the desired directions.
Using Navigation
You can use audio guidance to the
destination.
the application list screen,
1 From
"Navigation"
• The first time you launch this application,
a description of Google Maps Navigation
is displayed. Tap "Accept".
2 Select any item:
Speak Destination······Enter your
destination by voice.
Type Destination······Enter your destination
by text entry.
Contacts······Enter your destination from an
address registered in your Phonebook.
• Navigation starts.
■
navigation
■Exiting
▶ m ▶ "Exit Navigation"
NOTE
driving a car, be sure someone other than the
If
driver operates the navigation.
149
Applications
Starred Places······Enter your destination
from a location with a star added in Google
Maps.
Using Places
You can search for shops and facilities near
your current location and display
information. Shops and other locations that
were found can be displayed in the Google
Maps screen.
the application list screen,
1 From
"Places"
the facility, etc. you want to
2 Tap
find
• A list of search results is displayed.
Tap the desired facility, etc.
3 • Detailed information is displayed.
Using Latitude
Google Latitude enables you and your
friends to check each others' locations on
maps and share status messages with each
other. It also enables you to send email and
SMS messages, make calls and search for
directions to friends' locations.
information is not shared
Location
automatically. You must first join Latitude and
then invite friends to provide their locations,
or accept invitations from friends to share
your location.
more information on Latitude, use the
For
following to refer to mobile Help.
From the Latitude screen, m ▶ "See map"
▶ m ▶ "More" ▶ "Help" ▶ "Latitude"
the application list screen,
1 From
"Latitude"
Applications
150
1Seg
1Seg is a terrestrial digital TV
broadcasting service for mobile devices
and enables these devices to receive data
broadcasts in addition to video and audio
broadcasts. It allows users to obtain more
detailed information about TV programs
and to readily participate in quiz shows
and enjoy TV shopping and other
contents.
For details on the 1Seg service, refer to
the following website:
The Association for Promotion of Digital
Broadcasting
http://www.dpa.or.jp/english/
■
on the use of 1Seg
■Notes
■
■Airwaves
1Seg is a broadcasting service that operates on
radio waves (airwaves) different from those for
the FOMA service. Therefore, you cannot receive
the 1Seg service in locations that airwaves
cannot reach or during hours when program is
not available, regardless of whether you are
outside or inside the FOMA service area.
Even in areas where the terrestrial digital TV
broadcasting service is available, you may have
poor or no reception in the following places:
•Place far away from a tower that transmits
airwaves
•Place in a mountain area or behind a building
where radio waves are blocked by land or
structural features
•Inside a tunnel, underground, inner area of a
building or other place where radio waves are
weak or nonexistent
151
Applications
1Seg service is provided by TV
The
broadcasters and other organizations. You will
not be charged for the video and audio
content you receive. For information about
the viewing fees charged by NHK, please
contact the broadcaster.
data broadcast area displays two types of
The
information: "Data broadcast" and "Data
broadcast website".
A "Data broadcast" is brought by airwaves,
together with video and audio, and a "Data
broadcast website" is displayed by the mobile
device connecting to a website prepared by a
TV broadcaster or other organization.
Packet communication charges are incurred
for viewing a "Data broadcast website" or
other website. Some websites may charge you
for the information they provide.
To get good reception, fully extend the antenna
for the 1Seg service. Changing the orientation
of the antenna, or moving to another location
may result in better reception.
■
antenna
■1Seg
changing 1Seg antenna direction,
When
do not apply excessive force.
Viewing 1Seg
the application list screen,
1 From
"TV"
• The first time you launch 1Seg, you are
required to set channels. → P.152
■
the volume
■Adjusting
▶ Press the volume key
Setting channels
the 1Seg viewing screen,
1 From
m ▶ "Settings" ▶ "Change
area"
"Empty" ▶ "Auto"
2 • Scan channels and register channel
Applications
information.
• Select a registered area to switch to that
area and view 1Seg.
■
channels manually
■Setting
▶ "Area Select" ▶ tap the region,
prefecture, and locality successively for the
area
NOTE
stow the 1Seg antenna, hold it at its base and
To
push it in as far as it will go.
152
Viewing the 1Seg viewing screen
Change to vertical display to display data
broadcast.
①
Using the program guide
You can browse a program guide for
terrestrial digital TV and BS digital
broadcasting. Search for programs by
keyword, genre, etc., and book programs
for viewing/recording.
the 1Seg viewing screen, m
1 In
▶ "Program guide"
• The first time you launch the program
guide, agree to terms of usage, and a
regional setting screen appears.
②
③
①TV picture area
•Flick left/right to select a channel
•Touch and hold to display the channel list
②Data broadcast area
③Controls
■
when TV image area tapped
■Controls
Select channel
: Start recording
: End recording
■
when data broadcast area
■Controls
tapped
Data broadcast
controls
a program you want to view
1 Tap
on the program guide ▶ "ワンセ
グ (1Seg)" ▶ "ワンセグ起動"
(Launch 1Seg)
Booking viewing or recording
Book programs for 1Seg viewing or
recording. An alarm sounds at the time you
set for the start of a program or recording.
a program on the program
1 Tap
guide ▶ "ワンセグ (1Seg)" ▶ "ワン
セグ録画予約" (Book 1Seg
recording)/"ワンセグ視聴予約"
(Book 1Seg viewing)
each item ▶ "Save" ▶
2 Check
"YES"
153
Applications
Display program
information
Display channel list
Choosing a program to view
2 Tap a link ▶ "YES"
Playing a recorded program
the 1Seg viewing screen, m
1 In
▶ "Playback Recorded Program"
the program you want to
2 Tap
play
■
a TV link
■Deleting
▶ Touch and hold the TV link you want to
delete ▶ "Delete" ▶ "Delete one"/"Delete
all" ▶ "YES"
Configuring 1Seg settings
• The program plays.
• The same as with the 1Seg viewing
screen, operate programs with the
controls.→ P.153
the 1Seg viewing screen, m
1 In
▶ "Settings"
2 Select any item:
Data Broadcasting settings
Rewind
Confirm connection······Set a
confirmation message to appear before
carrying out communication.
Fast forward
: Play
: Pause
Frame forward/backward while paused (
Use location info······Set to use
location information.
/
)
Applications
Using a TV link
Depending on the data broadcast, link
information to related sites (TV links) are
displayed, and can be added to allow you to
connect to related sites later.
add TV links, tap an item that allows TV
To
links in the data broadcast area.
the 1Seg viewing screen, m
1 In
▶ "TV Link"
154
Use phone info······Set to use FOMA
terminal information.
Delete station data······Delete stations
from memory.
Sleep Timer······Set the time until 1Seg
automatically ends.
Subtitle/Sound······Set subtitles and audio.
Change area······"Setting channels"
→P.152
Product Information······Display product
information.
Osaifu-Keitai
iC transfer service
Allows you to transfer all Osaifu-Keitai data
on an iC card to a replacement Osaifu-Keitai
in such instances as when changing to a new
FOMA terminal or submitting your FOMA
terminal for repair.
Visit your nearest docomo Shop Service
Counter to receive iC transfer Service. For
details on iC transfer Service, refer to "ご利用
ガイドブック (spモード編) " (Mobile Phone
User's Guide [sp-mode], in Japanese only).
155
Applications
The Osaifu-Keitai function allows you to
make payments, use coupons, participate
in stamp rallies, etc. simply by waving the
FOMA terminal, equipped with an IC
card, over the reader in the store. In
addition, by waving the FOMA terminal
over the reader, you can access websites,
obtain the latest coupons, receive
electronic money and check the usage
status of electronic money by data
communication. Also, you can lock the
Osaifu-Keitai function for security in case
you lose the FOMA terminal.
details on Osaifu-Keitai, see "ご利用ガ
For
イドブック (spモード編)" (Mobile Phone
User's Guide [sp-mode], in Japanese only)
and dmarket.
use the Osaifu-Keitai service, you need
To
to make settings on the relevant website
or by using the relevant application.
fault in the FOMA terminal may cause
A
the data stored in the IC card (including
electronic money and earned points) to be
lost or changed. Before submitting the
FOMA terminal for repair, you should in
principle delete all data from the terminal
by yourself; the FOMA terminal will not be
accepted if it contains any data.
For information about data reissuance,
restoration, temporary storage, transfer
and other forms of support, excluding
transfer by iC transfer Service, check with
your Osaifu-Keitai service provider. You are
advised to use an Osaifu-Keitai service with
a backup service for important data.
DOCOMO shall not accept liability for
NTT
any damages arising in relation to the
Osaifu-Keitai service, including the loss or
change of the IC card data, in any events
including failures and phone model
changes.
you have your FOMA terminal stolen or
If
lost, contact your Osaifu-Keitai service
provider immediately for information about
necessary action.
Using the Osaifu-Keitai
To use an Osaifu-Keitai service, download an
Osaifu-Keitai application from an OsaifuKeitai website and then make necessary
settings. Some Osaifu-Keitai services may
not require downloading an Osaifu-Keitai
application.
Holding the FOMA terminal over a
reader
You can hold the e up to a reader to
enable an electronic transaction.
The notification LED lights (blue) when you are
using Osaifu-Keitai.
the application list screen,
1 From
"Osaifu-Keitai"
• If initial settings have not been
completed, the initialization screen
appears.
2 Tap the service you want to use
the settings related to the
3 Make
service
Applications
• Make necessary settings from the service
website or application.
156
Hold the e mark
over the reader
the following when holding your FOMA
Note
terminal up to a reader.
•Do not strike your FOMA terminal against
the reader
•Hold the e mark evenly with the reader
•Hold the e mark at the middle of the
reader as much as possible
•If unreadable by the reader, move the e
mark above/below, to the left/right of the
reader
•Do not attach anything metal on the side of
your FOMA terminal with the e mark
Locking Osaifu-Keitai
Lock Osaifu-Keitai to prevent it from being
used by another person without permission.
Osaifu-Keitai function is not unlocked
The
even if you turn off the power of the FOMA
terminal.
function is enabled when "Set up
This
(Change) unlock security" is any setting other
than "None".
set this function/unlock, you must enter
To
the unlock security code you set with "Set up
(Change) unlock security".
the application list screen,
1 From
"Osaifu-Keitai" ▶ m ▶
"Osaifu-Keitai Lock Setting"
2 Select any item:
OFF······Unlock Osaifu-Keitai.
Work with screen lock······Set to lock
together with the screen lock. Unlocking
the screen also unlocks Osaifu-Keitai.
Turning ON always ······The lock
always activates. To cancel locking, set
"Osaifu-Keitai Lock Setting" to "OFF".
ToruCa is an electronic card that can be
imported into the FOMA terminal.
Available from a reader or online, it
provides shopping information or serves
as a coupon. The imported ToruCa is
saved in the "ToruCa" application that
allows you to view, find or update a
ToruCa.
details on ToruCa, see "ご利用ガイド
For
ブック (spモード編)" (Mobile Phone User's
Guide [sp-mode], in Japanese only) and
dmarket.
the application list screen,
1 From
"ToruCa"
NOTE
communication charges may be incurred
Packet
when you import, view or update a ToruCa.
may not be able to import, view or update a
You
ToruCa that has been provided for an i-mode
terminal.
on the settings by the IP (Information
Depending
Provider), the following functions may not be
available:
•Import from a reader
•Update
•ToruCa sharing
•Transfer or copy to a microSD card
•Map display
157
Applications
ON
ToruCa
NOTE
Applications
on the IP settings, you may not be
Depending
able to display a map from a ToruCa list, even if
the ToruCa (details) supports map display.
the Osaifu-Keitai is locked, a ToruCa
When
cannot be imported from a reader.
the duplicate check is set to "ON" you
When
cannot import an identical ToruCa more than
once. To import an identical ToruCa more than
once, set the check to "OFF".
sending a ToruCa by email, it is sent in its
When
pre-import state.
may not be able to save a ToruCa that has
You
been emailed to you, depending on the email
application that you are using.
on the type of the browser, you may
Depending
not be able to import a ToruCa via it.
moving or copying a ToruCa to a microSD
When
card, it is moved or copied in its pre-import state.
the initial setup of the Osaifu-Keitai has
When
not been performed, a ToruCa cannot be
imported from a reader.
Clock
the application list screen,
1 From
"Clock"
NOTE
to switch the backlight on/off.
Tap
to view the photos stored on the microSD
Tap
card in a slideshow. Tap r to stop the
slideshow.
to start the "Media Player" (P.142) or
Tap
"Music" application and play music.
Setting the alarm
the clock is displayed, "
1 While
• m ▶ from "Settings", you can set
"
"Alarm in silent mode", "Alarm volume",
"Snooze duration", and "Volume key
behavior".
2 "Add alarm"
3 Set the alarm time ▶ "Set"
4 Select any item:
Turn alarm on······Set the alarm to operate.
Time······Set the alarm time.
Repeat······Set the alarm to sound at the
same time on each day.
Ringtone······Set the alarm sound.
158
Vibrate······Set the terminal to vibrate
together with the alarm.
Label······Assign a label to the set alarm.
• When the alarm sounds, tap "Dismiss" to
stop the alarm. By tapping "Snooze", the
alarm sounds again according to the
"Snooze duration" setting.
5 "Done"
Calendar
NOTE
appears in the status bar when the set time
arrives. You can open the Notifications panel and
check the details. Tap "Dismiss all" to clear all
notifications, and tap "Snooze all" for the
notifications to appear again in 5 minutes.
Checking the agenda
viewing the calendar, m
1 While
▶ "Agenda"
■
events
■Changing/deleting
▶ Tap an event you want to change/delete
▶ m ▶ "Edit event"/"Delete event"
You can manage your schedule by
synchronizing your FOMA terminal
calendar with an online calendar
provided by Google or other service.
•You must configure a Google account
beforehand. → P.62
viewing the calendar, m
1 While
▶ "More"
the application list screen,
1 From
"Calendar"
▶ change settings as
2 "Settings"
needed
▶ m ▶ "Day"/"Week"/"Month"
Creating a schedule
viewing the calendar,
1 While
touch and hold the day to enter
an event in ▶ "New event"
• You can set the schedule's notification
method and ringtone/vibration, and the
reminder's notification time.
with Google or
■
■Synchronizing
other Calendar
▶ "Calendars" ▶ tap the account of the
calendar to display, and then set to
synchronize/display ▶ "OK"
2 Set each item ▶ "Done"
159
Applications
■
the calendar display
■Switching
Changing calendar settings
Schedule
the application list screen,
1 From
"Schedule"
• The schedule screen appears.
Adding events
the schedule screen, tap a
1 From
date you want to add an event
to ▶ "新規作成" (New) ▶ enter
items ▶ "Save"
Checking your schedule
the schedule screen, tap the
1 From
date you want to check
Applications
• Added events are displayed below the
calendar. Tap an event to view details.
• Touch and hold an added event to edit/
delete/etc.
■
your schedule in the
■Checking
Memo list screen
• You can check information for added
events with "Memo".
▶ m ▶ "To memo list" ▶ check events
in the Memo list screen (P.161)
schedule settings
■
■Configuring
• Set an alarm, change your account, etc.
▶ m ▶ "More" ▶ "Settings"
160
Using i-schedules
You can display i-schedules downloaded
from a website, automatically received
weekly weather forecasts, etc. in the
schedule screen.
From the schedule screen, m ▶
1 "To
i-sch list"
Memo
Calculator
the application list screen,
1 From
"Memo"
the application list screen,
1 From
"Calculator"
• The Memo list screen appears.
• Tap added information to view details.
• Touch and hold added information to
edit, delete, or prioritize it.
■
a new memo
■Adding
▶ "新規作成" (New) ▶ enter items ▶
"Save"
■
memos in the schedule
■Checking
screen
• You can check memos with "ToDo" and
"いつ? " (When?) information with
"Schedule".
▶ m ▶ "To schedule" ▶ check memo
in the schedule screen (P.160)
• Flick to left/right to switch between
functions and +/-/×/÷.
• You can touch and hold the formula box
to copy/paste a formula.
• Tap "CLEAR" to delete entered digits and
operators, or touch and hold to delete all
of a formula.
• You can tap
and
to display the
formula history.
Quickoffice
*Uneditable
the application list screen,
1 From
"Quickoffice"
161
Applications
You can view and edit documents that
have been saved on a microSD card. The
following files are supported.
•Word (dot, doc, dotx, dotm, docm, docx,
txt)
•Excel (xls, xlsx, xlsm, xlt, xltm, xltx)
•PPT (ppt, potx, pptx, pptm, pps, pot, potm,
ppsx, ppsm)
•PDF (pdf)*
iD設定アプリ (iD appli)
Applications
"iD" is convenient e-money that uses a
credit system. You can shop easily and
conveniently by simply waving an OsaifuKeitai or an iD-enabled card with credit
card information over the reader unit.
You can register up to two credit cards on
an Osaifu-Keitai. This allows you to use
your credit cards appropriately for
giveaways, etc.
Depending on the credit card issuer, you
can withdraw cash.
using iD with an Osaifu-Keitai, you will
If
need to apply to a credit card issuer
compatible with iD, as well as make
configurations with iD appli.
(annual fees etc.) for using iD
Expenses
services differ by the credit card issuer.
usage charges for packet
Overseas
communication are different from those in
Japan.
more information on iD, see the iD site
For
(http://id-credit.com/) (Japanese).
the application list screen,
1 From
"iD設定アプリ (iD appli)"
162
MEDIAS BEAUTY
Offers cosmetics and fashion enjoyment.
Supports your fashion lifestyle with
cosmetics navigation/simulation,
coordinated fashions simulation, etc.
application for launching the
Menu
application.
the application list screen,
1 From
"BEAUTY"
Using Overseas
Overview of International
Roaming (WORLD WING)
The WORLD WING international roaming
service allows you to use the same
domestic phone number and email
address in the service areas of overseas
operators affiliated with DOCOMO. You
can use the call and SMS functions
without changing settings.
■
areas
■Available
Communication service
Calling
SMS
Email*1
Browser *1
GPS location verification*2
3G
GSM/GPRS
○
○
GSM
○
○
○
○
○
○
×
○
○
×
○
○
×
(○: Available ×: Not available)
*1 Turn on the data roaming setting to perform
data communication when roaming.
→ P.166
*2 Packet communication charges are incurred
during GPS measurement (finding current
location).
NOTE
services are not available depending on
Some
the overseas operator or network being used.
For information about overseas operators that
you can access, see "Mobile Phone User's Guide
[International Services]" or the DOCOMO
"International Services website".
NOTE
a country code, international call access
For
code, universal number international prefix, and
information about countries, regions, overseas
operators that you can access, see "Mobile
Phone User's Guide [International Services]" or
the DOCOMO "International Services website".
163
Using Overseas
This FOMA terminal can be used in 3G network
and GSM/GPRS network service areas, as well as in
countries and areas supporting 3G850MHz/
GSM850MHz network. Please check the available
areas.
usage overseas, see the following
Before
items.
•"Mobile Phone User's Guide [International
Services]"
•DOCOMO "International Services website"
•The "ドコモ海外利用" (docomo kaigai riyo)
application help
Services Available Overseas
Check Before Using Your
Terminal Overseas
Checks to do before departure
Before use overseas, check the following
while you are still in Japan.
■
contract
■Your
Check whether you have applied for WORLD
WING. For more details, contact "General
Inquiries" at the last page of this instruction
manual.
■
charging
■Battery
charging with an AC adapter overseas,
For
use a separately available "FOMA AC Adapter
01 for Global use" or "FOMA AC Adapter
02".
supplied wireless charger N01 cannot be
The
used overseas.
■
■Charges
Using Overseas
usage charges (call and packet
Overseas
communication) are different from those in
Japan.
applications make communications
Some
automatically and may incur high
communication charges.
Please confirm the application's behavior with
its developers.
164
Preliminary Settings
■
network services
■About
If you are subscribed to the network services,
you can operate the Voice mail service, Call
forwarding service, and Caller ID display request
service overseas. However, some network
services are unavailable.
use network services overseas, you must
To
set "Remote operation settings" (P.91) to
start. You can also set "Remote access" once
reaching your destination.
From the Home screen, m ▶ "Settings" ▶
"Call settings" ▶ "Roaming settings" ▶
"Network service" ▶ "Remote
operation(charged)"
For more information, see "Mobile Phone
User's Guide [International Services]".
network services, even if they can be set
The
on/off, may not be available depending on the
overseas operator you connect.
Checks to do in the country you
stay
When you arrive overseas, the FOMA
terminal automatically connects to an
available network operator when it is
powered on.
■
connections
■About
The FOMA terminal automatically selects the
optimal network when you enable "Select
automatically" for "Network operators" in the
"Mobile networks" setting.
You can use packet communication service
overseas at daily capped pricing by manually
connecting to the operator providing desired
service in "Network operators". To use the
flat-rate pricing service, you are required to
subscribe to it. For details, see "Mobile Phone
User's Guide [International Services]" or the
DOCOMO "International Services website".
■
screen display
■About
The type of network you are using is indicated in
the status bar on the screen.
: Roaming
/ : Using/connected to GPRS
/ : Using/connected to 3G (packet)
network operator you are connecting is
The
shown on Notifications panel.
■
date and time
■The
your FOMA terminal or miniUIM is lost or
If
stolen overseas, contact DOCOMO
immediately from your current location and
carry out the procedure to suspend usage. For
contact information, contact "General
Inquiries" provided on the last page of this
manual. Please note that you are liable for any
call or communication charges incurred after
the loss or theft of the FOMA terminal.
will need the country's international call
You
access code or universal number international
prefix if calling from a land-line phone from
overseas.
After returning to Japan
When you return to Japan, the FOMA
terminal automatically connects to the
DOCOMO network. If it is unable to connect,
change the following settings.
"Network Mode" to "Auto". → P.166
Set
the settings of "Network operators", set
In
"Available networks" to "Select
automatically". → P.166
165
Using Overseas
If the date and time are configured to update
automatically, the time and time zone of the
FOMA terminal's clock will be automatically
changed when information about the local time
and time zone is received from the network of
the overseas operator to which you are
connected. → P.118
setting may not work properly
Automatic
depending on the network of the overseas
operator. Set manually in such a case.
timing of these changes varies depending
The
on the overseas operator.
■
■Inquiries
Network Settings for Use
Overseas
Your FOMA terminal is configured to
automatically detect and switch the
network mode, operator, etc. by default,
but you can also manually switch.
the Home screen, m ▶
1 From
"Settings" ▶ "Wireless &
networks" ▶ "Mobile networks"
■
Network Mode
■Configuring
▶ "Network Mode" ▶ tap the network
mode you want to use
■
an operator
■Setting
▶ "Network operators" ▶ "Select
automatically" or tap the network of the
operator you want to use
• The operator names that are displayed
vary depending on the setting of the
"Network Mode".
Using Overseas
■
data roaming
■Enabling
▶ Mark the "Data roaming" checkbox ▶
"OK"
Making/Receiving Calls while
at Destination
Making calls to other countries
(including Japan) while overseas
You can use the international roaming
service to make calls to other countries
while overseas.
the application list screen,
1 From
"Phone" ▶ "Dial"
+ (touch and hold "0") ▶
2 Enter
country code ▶ area code (city
code) ▶ enter the number
• If the area code (city code) begins with
"0", omit "0".
You may need to dial "0" at the
beginning of the number for calls to
some countries and regions, such as Italy.
3 "
"
Using international dial assist
You can easily make an international call to
a country registered with "International dial
assist", when calling from your destination
to another country, using the international
roaming service.
must set "International dial assist"
You
beforehand. → P.167
166
enabled when a number begins with
Only
"0".
the application list screen,
1 From
"Phone" ▶ "Dial" ▶ enter the
number ▶ "
"
(XX)" (XX: country/region
2 "Dial
name)
• "+" and "Country code" are added and
the international call is made.
■
international dial assist
■Configuring
the Home screen, m ▶
1 From
"Settings" ▶ "Call settings" ▶
"Roaming settings" ▶
"International dial assist"
2 Select any item:
Automatic conversion function······Set
whether to make an international call using
the international dial assist setting.
International prefix······Register the
international prefix to use with international
dial assist.
Dial the other party's land-line phone
number or mobile phone number in the
same way as in Japan. → P.84
Making calls to WORLD WING users
overseas
When the other party that you are calling is
a WORLD WING user, make an international
call to Japan, even if the other party is in
the country in which you are staying.
"+" and "81" (country code of Japan)
Dial
first and then dial the phone number omitting
the "0" at the beginning, as when you make
an international call to Japan, because the call
is routed through Japan regardless of where
the other party is.
Receiving calls while overseas
You can receive calls overseas in the same
way as when in Japan.
NOTE
you receive a call while using the
When
international roaming service, the call is
forwarded internationally from Japan, regardless
of the country from which the call is made. The
caller incurs call charges for the call to Japan,
and the receiver incurs incoming call charges.
167
Using Overseas
Country code······Register the country/
region name and country code used when
using the international dial assist setting.
Making domestic calls while
overseas
Procedure for the other party to make a
call to you
■
the other party call you
■Having
overseas from Japan
Have the other party call you simply by dialing
your number in the same way as when you are
in Japan.
the other party call you
■
■Having
overseas from outside Japan
You need to have the other party dial the
international access code + "81" (Japan country
code) regardless of the destination.
International access code-81-90 (or 80)
-xxxx-xxxx
Configuring settings for
international roaming
might not be able to configure settings
You
depending on the overseas operator.
the Home screen, m ▶
1 From
"Settings" ▶ "Call settings" ▶
"Roaming settings"
2 Select any item:
Restricting incoming calls······Restrict calls
from arriving overseas.
Incoming notification while roaming
······SMS notifies you of missed calls
overseas.
Roaming guidance······Informs callers that
you are overseas.
International dial assist → P.166
Network service → P.164
Using Overseas
168
Appendix/Index
Introduction to Options and
Related Devices
Troubleshooting (FAQs)
Troubleshooting
check whether a software update is
First,
required. If required, update the software.
→ P.179
a symptom does not improve after its cause
If
has been identified, contact "Repairs" (in
Japanese only) at the last page of this
instruction manual or a repair counter
specified by DOCOMO.
■
supply
■Power
Power does not turn ON.
the battery pack inserted
Is
correctly?
the battery pack charged?
Is
P.46
P.48
■
■Charging
Cannot charge (Notification LED does not light
or blinks).
the battery pack inserted
P.46
Is
correctly?
the adapter power plug securely
P.51
Is
connected to an electric outlet or
cigarette lighter socket?
169
Appendix/Index
You can expand the range of the FOMA
terminal's uses, in both the personal and
business realms, by combining it with
various optional devices. Some products
may not be available in certain areas.
For more details, please contact a service
counter such as a docomo Shop.
For details on optional devices, see the
related instruction manuals.
•Battery Pack N29
•Back Cover N55
•Wireless Charger N01
•FOMA microUSB Adapter N01 for charging
•FOMA AC Adapter 01*/02*
•FOMA AC Adapter 01 for Global use*
•Carry Case 02
•FOMA DC Adapter 01*/02*
•Wireless Earphone Set 02
•Wireless Earphone Set P01
•Bluetooth Headset F01
•AC Adapter F01 for Bluetooth Headset
•FOMA Portable Charging Adapter 02*
•FOMA Dry Battery Adapter 01*
•Bone Conduction Microphone/Receiver 02
•Pocket Charger 01
•Wireless Charger 01
*FOMA microUSB Adapter N01 for charging is
required.
Appendix/Index
you are using the FOMA microUSB
If
Adapter N01 (optional) for charging
and the AC adapter (optional), is the
FOMA microUSB Adapter N01 for
charging correctly connected to the
AC adapter and to the FOMA
terminal?
you are using a microUSB cable
If
for PC connection (sample), is the
PC powered on?
using the microUSB cable for PC
If
connection (sample), remove any other
USB devices.
using the microUSB cable for PC
If
connection (sample), connect it
directly to the USB port of a PC that
is receiving power.
using the microUSB cable for PC
If
connection (sample), has the mobile
phone battery depleted? Connect
after charging for approx. 5 minutes
with an AC adapter.
you make a call, perform data
If
communication, or use some other
function for a long time while
charging, the FOMA terminal may
become hot and charging may be
stopped. In this case, charge again
after the FOMA terminal cools
down.
170
P.48
-
-
-
-
-
Cannot charge with the supplied wireless
charger (charge information does not display or
flashes (every 0.25 seconds)).
you using the special AC
P.49
Are
adapter?
the power plug of the special AC
P.49
Is
adapter plugged all the way into the
outlet?
P.49
something placed between the
Is
wireless charger and the FOMA
terminal?
the FOMA terminal centered in
P.49
Is
the charging area?
P.49
the FOMA terminal oriented
Is
correctly?
the special AC adapter from P.49
Unplug
the outlet and plug it back in after a
few seconds.
Cannot charge with the supplied wireless
charger (charge information does not display or
flashes (every 2 seconds).
the FOMA terminal too hot or too
Is
cold? Leave the FOMA terminal in a
place that is from 5°C to 35°C for a
while before charging.
Charging with the supplied wireless charger
takes a long time.
the place where you are charging
Is
too hot or too cold? Charge in a
place that is from 5°C to 35°C.
■
of the terminal
■Operation
battery pack is a consumable.
P.49
The
The available usage time shortens
every time the battery pack is
recharged.
If the usage time significantly
reduces compared to the time of
purchase even if the battery pack is
fully charged, purchase the specified
battery pack.
Power turns off or automatic restart occurs.
the battery pack terminal is dirty,
If
the contact may become poor and
the power may be turned off. If
dirty, wipe the battery pack
terminals with, for example, a dry
cotton swab.
No operation occurs by tapping or pressing a
key.
the FOMA terminal turned off?
P.53
Is
you touching the touch panel
P.54
Are
correctly?
the screen locked?
P.53
Is
the FOMA terminal in sleep
P.53
Is
mode? Press the power key to
cancel sleep mode.
Tapping does not work properly.
you tap the screen with gloved
P.54
Do
hands?
P.54
you tap with the tip of a
Do
fingernail, or is there any foreign
matter between your hand and the
screen?
171
Appendix/Index
Becomes hot during operations or charging.
FOMA terminal, battery pack, or
The
adapter may become hot during
operations or charging, or if you use
the camera function or view/record
1Seg for a long time while charging.
This is not a safety hazard, so you
can continue to use them.
you use the camera function or
If
view/record 1Seg for a long time,
the FOMA terminal may become hot
and the camera function or 1Seg
may end. Wait a while before
restarting to use the camera
function or 1Seg.
Battery usage time is short.
the FOMA terminal been out of
Has
the network service area for a long
time?
As the FOMA terminal searches for
radio waves in order to enable
communication when out of the
network service area, more
electricity is consumed than usual.
battery pack usage time varies
P.49
The
depending on the usage conditions
and the degradation level.
the display covered with a
P.54
Is
protective sheet? Some types of
protective sheets prevent correct
operation.
Screen response to tapping or key press is slow.
screen response may slow down
The
if large amounts of data are saved in
the FOMA terminal or transferred
between the FOMA terminal and
the microSD card.
The miniUIM is not recognized.
the miniUIM inserted in the right
P.43
Is
direction?
The clock shows wrong time.
power is kept on for a prolonged
P.118
If
time, the clock may show the wrong
time.
Check that the date and time are set
to "Automatic", and turn the
terminal off then back on in a
location with good signal reception.
Appendix/Index
172
FOMA operation is unstable
be due to an application
May
installed after purchasing the FOMA
terminal. If operation improves after
launching in safe mode, operation
can sometimes then be improved by
uninstalling an installed application.
*Safe mode applications to be
launched in a state close to that of
time of purchase.
■
safe mode
■Launching
With power off, turn power on and
between the time after the screen
bearing the waterproof notice has
faded and when the Home screen
appears, touch and hold m until
safe mode is entered.
*Depending on conditions of usage,
when to press m may change.
*"Safe mode" appears at lower left
when safe mode is launched.
*To end safe mode, turn power off
and then back on.
•Back up important data
beforehand before using safe
mode.
•Widgets that you have created
yourself may be erased.
•Since safe mode is not a normally
launch state, end safe mode to
enable normal use.
-
■
call
■Telephone
During a call,
etc. is not displayed/During a
call, nothing is displayed.
etc. is not displayed even after
If
quitting sleep mode, the proximity
sensor may be covered with a
protective sheet. Do not cover the
proximity sensor. You can display
etc. by tapping m or r or
other similar method.
■
■Screen
The display is dim.
the time set with "Screen
Has
timeout" elapsed?
the FOMA terminal in eco mode?
Is
"Brightness" setting changed?
Has
battery level low?
Is
P.109
P.110
P.109
P.109
■
■Sound
During a voice call, the other party's voice is
difficult to hear or is too loud.
the call volume been changed?
P.86
Has
the earpiece covered with a
P.42
Is
protective sheet?
the earpiece held correctly to your P.42
Is
ear?
The other party cannot hear / has difficulty
hearing me.
the mouthpiece covered with a
P.42
Is
protective sheet?
the mouthpiece held correctly to
P.42
Is
your mouth?
173
Appendix/Index
The ringtone does not sound.
the FOMA terminal in Silent
P.108
Is
mode?
P.93,
the ring time for the Voice mail
Is
service or Call forwarding service set P.95
to "0 sec."?
the ringtone volume set to its
P.108
Is
minimum?
you cover the proximity sensor
P.41
If
with your hand, the ringtone volume
may be lower.
shown.
Cannot make a call with
you out of the service area or in
P.62
Are
a place with poor signal strength?
does not disappear
Cannot make a call (
when you move, or calls cannot be made or
received even when the radio wave is strong
enough).
the power off and then on, or
Turn
remove and reinsert the battery pack
or miniUIM.
may not be able to make or
You
receive calls, depending on the type
is
of radio signal, even when
shown. Move to another place and
call again.
on how congested the
Depending
radio waves are, it may be difficult
to establish a connection in crowded
places due to a congestion of calls
and emails.
■
■Camera
■
overseas
■Using
Photos and videos shot with the camera are
blurred.
whether the lens is cloudy or
Check
has dirt on it.
P.138
reduce camera shake (photos) or
Is
image stabilization (videos) set to
"OFF"?
P.138
auto focus set to "AF OFF"?
Is
shooting a person, switch
P.138
When
auto focus to "Face detection AF".
FOMA terminal becomes unusable while
overseas (although
is displayed).
you applied for WORLD CALL?
Have
Check the subscription status.
FOMA terminal becomes unusable while
is displayed).
overseas (
you outside the international
Are
roaming service area or in a place
with poor signal strength?
Refer to "Mobile Phone User's
Guide [International Services]" and
DOCOMO "International Services
website" to check whether a service
area or network operator is
available.
P.166
the network settings and
Change
operator settings.
• Set "Network Mode" to "Auto".
• Set "Network operators" to "Select
automatically".
FOMA terminal may be usable by
The
rebooting.
Data communication is not available while
overseas.
"Data roaming" setting.
P.166
Activate
■
■1Seg
Cannot view 1Seg.
you out of the terrestrial digital
Are
TV broadcasting service area or in a
place where airwaves are weak?
the channels set?
Are
-
P.152
■
■Osaifu-Keitai
Appendix/Index
Cannot use the Osaifu-Keitai.
Osaifu-Keitai lock set?
Is
may not be able to use the
You
Osaifu-Keitai function regardless of
the Osaifu-Keitai lock setting if the
battery pack is removed from the
FOMA terminal. To use the OsaifuKeitai function, turn on the power
once.
you wave the FOMA terminal
Do
over a reader with the e mark
facing the reader?
174
P.157
-
P.156
■
management
■Data
Data transfer is not working.
you using a USB hub? If you use
Are
a USB hub, data transfer may not
work properly.
P.134
■
data exchange
■Infrared
Cannot receive all Phonebook data.
there available space in FOMA
Is
terminal memory?
In case of space shortage while
receiving data, data reception is
stopped.
-
function
■
■Bluetooth
FOMA terminal cannot find or be connected to
a Bluetooth enabled device.
the Bluetooth enabled device
P.101
Put
(commercial) on standby and register
it on the FOMA terminal. If you
want to delete a registered device
and register it again as a new
device, you must delete the
registered device from both the
Bluetooth enabled device
(commercial) and the FOMA terminal
before you register it again.
175
Appendix/Index
Suddenly FOMA terminal becomes unusable
while overseas.
you exceeded you maximum
Have
call charge limit?
A maximum call charge limit is
preset in the WORLD WING
international roaming service. If you
have exceeded your maximum call
charge limit, you can restart the
services by paying the accumulated
call charges.
Cannot receive calls while overseas.
"Restricting incoming calls" set to P.168
Is
"Activate"?
No caller ID is displayed/A notified caller ID is
different from that of the caller/Functions that
use Phonebook data or caller ID notifications do
not work.
when a caller notifies the caller
Even
ID, it is not displayed on the FOMA
terminal unless notified from the
network or network operator used.
And, a notified caller ID may be
different from that of the caller by
some networks or networks
operators you use.
Error message
The PIN1 is blocked. Enter PUK code.
message appears when you
This
turn on the power while PIN1 code
is locked. Tap "Emergency call" and
05
[PIN unblocking
enter "
key]
[new PIN1 code]
[new
PIN1 code]#".
message appears if you turn on
This
the power or attempt to perform an
operation related to the miniUIM
while the PIN unblocking key is
locked. Contact a docomo Shop
Service Counter.
Appendix/Index
176
Warranty and After-Sales
Service
P.113
Warranty
P.113
sure to receive a warranty at the time of
Be
purchase of the FOMA terminal. Read
contents of the warranty, confirm information
such as the "Shop name and date of
purchase" and keep it in a safe place. If
necessary items are not described,
immediately contact the shop of purchase.
The warranty for free repair is valid for one
year from the date of purchase.
product and its accessories are subject to
This
modified, in part or whole, for improvement
without prior notice.
saved in your contacts, etc. may be
Data
modified or lost due to the malfunction, repair
or other handling of the FOMA terminal. You
should therefore make a copy of your contacts
data, etc. as a precautionary measure. If you
have the FOMA terminal repaired, most of the
previously downloaded data will not be
transferred to the repaired terminal, as
prohibited by the Copyright Act.
*You can back up contacts data from the
FOMA terminal to a microSD card.
After-sales service
For problems with your FOMA terminal
Before requesting repairs, read
"Troubleshooting" in this instruction
manual. If the problem still persists, contact
"Repairs" (in Japanese only) at the last page
of this manual.
For repairs after inquiry
Bring your FOMA terminal to a repair
counter specified by DOCOMO. Repairs are
accepted during business hours of a repair
counter. Also, you must bring the warranty.
Note that it may take some days to repair
the terminal depending on the malfunction
state.
the warranty period
■
■During
•When a repair counter judges the cause of
malfunction is exposure to water (Example:
when wet-indication sticker reacts)
•When, as the result of inspection, corrosion is
found due to exposure to water, condensation
or sweat, or any of the internal boards are
damaged or deformed (damage to the
external connector terminal (earphone/
microphone terminal) or display or cracked
body could be the case as well)
*Since these conditions are outside the scope
of the warranty, any repairs, if at all possible,
will be charged.
■
expiration of the warranty
■After
All repairs that are requested are charged.
■
parts
■Replacement
Replacement parts (parts required to maintain
functions) will in principle be kept in stock for 6
years after termination of production. However,
depending on the malfunctioning part, repair
may not be possible due to a lack of
replacement parts. Even after the stock period
has expired, the repair of some malfunctioning
parts may be possible. You should therefore
contact "Repairs" (in Japanese only) at the last
page of this manual.
177
Appendix/Index
•The FOMA terminal is repaired at no charge
under the conditions of the warranty.
•Make sure to bring the warranty for repair.
You will be charged even during the warranty
period if the warranty is not presented or the
trouble or damage is caused by your
inappropriate handling (such as damage to
display or connector, etc.).
•You will be charged even during the warranty
period if malfunction is caused by the use of
devices and consumables other than those
specified by DOCOMO.
■
may not be possible in the
■Repair
following cases:
Precautions
modify the FOMA terminal or
Never
accessories.
•Doing so may result in fire, injuries or
malfunctions.
•The modified FOMA terminal may be
repaired only if the owner agrees on
that all the modified parts are restored
to the original conditions. However,
repairs may be refused depending on
the modifications.
The following cases may be considered as
modifications.
Appendix/Index
•Put a sticker on portions such as of
the display or keys.
•Glued decorations on the FOMA
terminal using adhesion bond, etc.
•Change the parts such as exterior to
other than DOCOMO standard parts.
•Malfunction and damage due to
modifications will be repaired at the
owner's expense, even if the warranty
period is still effective.
model plate must not be removed
The
from the FOMA terminal.
The model plate certifies that the FOMA
terminal satisfies technical standards.
178
It should be noted that if the plate is
removed or is replaced with a different
plate, and the original model plate
cannot be verified, it may disqualify the
unit from repairs due to not being able to
determine the technical standards of that
particular phone.
that the settings and other
Note
information may be reset (cleared) as a
result of malfunction, repair or other
handling of the FOMA terminal. In this
case, make the settings again.
the repair is executed, MAC
When
address of Wi-Fi/Bluetooth address in the
terminal may be changed regardless of
repaired part.
components are used in the
Magnetic
parts of the FOMA terminal that are
described below. Do not allow cash cards
or other devices that are vulnerable to
magnetism to come into contact with the
phone.
Parts where magnetic components are
used: camera, volume key, around
earpiece/speaker
FOMA terminal has waterproof
The
capability, however, if the inside of the
FOMA terminal has gotten wet or moist,
immediately power off the terminal and
remove the battery pack from it, and
then bring it to the DOCOMO-specified
repair office as soon as possible.
However, note that we may not repair
the FOMA terminal depending on the
extent of the damage.
Memory dial (Contacts function)
and downloaded data
Software Update is a function that
connects to the network to check
whether software on FOMA terminal
needs to be updated, downloads a
portion of the software by packet
communication as and when required,
and updates the software. The NTT
DOCOMO website provides information
about required software updates.
are three ways to update software:
There
auto update, immediate update, and
booked update.
•Auto update:
Automatically download software, and
overwrite (update) it at a time set
beforehand.
•Immediate update:
Update whenever you want to update.
•Booked update:
Book a time to install an update package,
and the software is updatead
automatically at the booked time.
Before updating software
not remove the battery pack while
Do
updating software. This may result in a failed
update.
charge the battery pack before updating
Fully
software.
cannot be updated in the following
Software
circumstances.
179
Appendix/Index
you change the model or repair the
When
FOMA terminal, data that has been imported,
downloaded or created by you may be
changed or lost. DOCOMO shall have no
liability for any change or loss of any kind.
Under some circumstances, DOCOMO may
replace your FOMA terminal with its
equivalent instead of repairing it. The data
stored in your FOMA terminal will not be
transferred to the new terminal (some of the
data may be able to be transferred).
Updating Software
Appendix/Index
•During a call/when outside service area
•During international roaming
•Airplane mode
•When connected to a Wi-Fi network
•During a major update
•During USB tethering
•During Wi-Fi tethering
•When the date/time are not correctly set
•When the battery level is too low for
software update
•When there is insufficient free space for
software update
update (download, installation) may
Software
take a long time.
a software update, you cannot make
During
or receive calls, use any communication
function, or use any functions (calls can be
received during downloading).
updating software, the FOMA terminal
When
performs SSL/TLS communication with the
server (DOCOMO site).
recommend that you update software
We
without moving and when you have strong
reception (4 wave-level bars).
*If the reception deteriorates during a
software update or the download is
stopped, move to a location with a better
reception and start the software update
again.
message appears to inform you that you
A
cannot update during international roaming
or when outside the service area.
180
there is insufficient battery level for a
When
software update, a message appears to inform
you that charge is insufficient for updating.
the software has already been updated, a
If
message appears to inform you that no
update is needed when you check for
software updates.
messages sent to you during a software
SMS
update are stored at the SMS center.
a software update, your FOMA
During
terminal information (model and
manufacturing numbers) are automatically
sent to a software update server managed by
DOCOMO. DOCOMO shall not use this
information for any purpose other than
software update.
the software update fails, a message
If
appears to inform you that the rewrite failed
and no further operation may be possible. In
this case, please take the FOMA terminal to a
repair counter specified by DOCOMO.
a PIN code has been set, you will need to
If
enter the PIN code when you restart the
FOMA terminal after the update has been
installed.
not start any other applications during a
Do
software update.
NOTE
can update software while still retaining
You
data (such as Phonebook, camera images, email,
downloaded data, etc.) on the FOMA terminal.
Please note, however, that such data may not be
protected, depending on the state of the FOMA
terminal (malfunction, damage, exposure to
water, etc.). It is recommended to back up
necessary data. Please note that some data, such
as downloaded data, cannot be backed up.
Automatically updating software
(auto update)
181
Appendix/Index
You can automatically download new
software, which will overwrite the old
software at a time you set beforehand.
auto update setting is set to "Automatic
The
Update" by default.
the FOMA terminal becomes ready to
Once
(Software
overwrite the old software,
update is available) appears in the status bar,
and after checking the overwrite time, you
can select to change the overwrite time,
immediately overwrite, etc.
the overwrite time arrives while
When
(Software update is available) is displayed, the
old software is automatically overwritten, and
(Software update is available) is no longer
displayed.
times such as when there is insufficient
At
battery level or you are in a call when the
overwrite time arrives, the software update
does not start, and instead starts at the same
time on the next day.
cannot automatically update when
Software
the automatic update setting is "Manual
Update", during data communication for an
immediate software update, etc.
Configuring automatic update
the Home screen, m ▶
1 From
"Settings" ▶ "About phone" ▶
"Software Update" ▶ "Configure
the software update"
the action when a
2 Tap
notification appears for software
update
• To update software automatically:
"Automatic Update"
• Not to update software automatically:
"Manual Update"
Operation when an update is required
(Software update is available) appears in
the status bar once software is automatically
downloaded.
the Notifications panel,
1 Open
" "
the overwrite method
2 Select
• When a software update is required, the
Appendix/Index
overwrite time is displayed.
overwriting at a specified
■
■Starting
time
▶ "OK"
• The display returns to the Home screen.
Overwriting starts when the set time
arrives.
182
•
appears in the status bar when
overwriting is completed.
no longer
appears after being checked.
■
the overwrite start time
■Changing
• Set the time for installing the update
package.
▶ Go to step 1 of "Booking a time to
update software" → P.184
■
overwriting immediately
■Starting
▶ Go to step 1 of "Updating software
immediately" → P.183
NOTE
(Software update is available) appears in the
status bar if the software update was not able to
launch at the automatic update time.
Launching a software update
(immediate update)
the Home screen, m ▶
1 From
"Settings" ▶ "About phone" ▶
"Software Update" ▶ "Start the
software update" ▶ "Yes"
• Once download starts, the software
automatically updates.
• Canceling a download partway deletes all
data downloaded until then.
• If an update is not required, "No update
is needed." appears.
2 "OK"
• Update starts after the terminal restarts.
• All operations are disabled during an
update. You also cannot cancel an
update.
• The terminal restarts twice automatically
during an update.
Home screen appears
3 The
• appears in the status bar.
no longer
appears after being checked.
Updating software immediately
1 "Starts update"
for update. Please keep
2 "Ready
application clear" ▶"OK"
• Overwriting starts automatically about 3
seconds after "Ready for update. Please
keep application clear" is displayed.
• All operations are disabled during
overwriting. You also cannot cancel
overwriting.
• Once overwriting is completed, the
terminal restarts automatically.
the terminal restarts,
3 After
software update starts
automatically
• All operations are disabled during an
update. You also cannot cancel an
update.
• Once an update is completed, the
terminal restarts automatically in about 5
seconds.
• The software update completes, and the
Home screen is displayed.
• (Update completed) appears in the
status bar to indicate an update is
completed.
(Update completed) no
longer appears after being checked.
183
Appendix/Index
the Notifications panel,
4 Open
" "
Display after a software update is
completed
appears in the status bar. Open the
Notifications panel and tap the notification.
A message notifying you that a software
update is completed appears.
Booking a time to update software
(booked update)
If you want to book a different time for
installing an update package, you can set a
time for updating software beforehand.
Time"
1 "Sets
• The screen for setting an overwrite start
time appears.
• The current FOMA terminal time is
displayed.
the desired time ▶ "Set"
2 Enter
• Set the time.
• Tap "+" / "-" to change the update time,
and then tap "Set".
When the booked time arrives
Appendix/Index
for update. Please keep
1 "Ready
application clear" appears ▶
"OK"
• The software update starts automatically
about 3 seconds after "Ready for update.
Please keep application clear" is
displayed.
184
• Before the time booked for a software
update arrives, be sure to display the
Home screen and be in a location with
good signal reception.
• If there is insufficient battery level for a
software update at the booked time,
software is updated at the same time on
the next day.
• Software is not updated at the booked
time if during a major update.
• If an alarm or other function is set for a
time that coincides with a booked time,
the software update takes priority.
• If the FOMA terminal is turned off when
the time booked for a software update
arrives, the software is updated when the
same time is again reached after turning
on the terminal.
Major Update
You can upgrade the version of your
FOMA terminal's OS (major update).
precautions on a major update, refer to
For
"Before updating software" under
"Updating Software". → P.179
the latest software information, refer
For
to the manufacturer's site (MEDIAS NAVI):
http://www.medias.net/ (in Japanese only)
the Home screen, m ▶
1 From
"Settings" ▶ "About phone" ▶
"Major updates"
2 Select any item:
Update now······Launch a major update.
Updates by network······Upgrade the
OS version via a network.
Updates by SD card······Upgrade the
OS version via an microSD card.
Confirmation of update······Check
whether the FOMA terminal is able to
update.
Auto update······Regularly check update
information automatically, and check
whether you can upgrade the version.
■
"Updates by network"
■Using
■
"Updates by SD card"
■Using
carry out a major update, connect your
To
FOMA terminal to a PC (P.135), and download
the update software from the manufacturer's
site (MEDIAS NAVI) to a microSD card by the
PC. For more information, refer to the
manufacturer's site (MEDIAS NAVI).
cannot carry out a major update:
You
•While mounting during USB connection
•if there is insufficient battery level for a
major update
•if there is insufficient free space on a
microSD card for a major update
•After the major update is completed,
manually delete the update software
downloaded to your microSD card (the
software can be safely removed once the
major update has completed normally).
185
Appendix/Index
major updates are carried out via
Since
microSD card, you must insert a microSD card
beforehand.
cannot carry out a major update:
You
•During international roaming
•While in Airplane mode
•While mounting during USB connection
•While updating software
•During USB tethering
•During Wi-Fi tethering
•If there is insufficient battery level for a
major update
•If there is insufficient free space on a
microSD card for a major update
communication charges are incurred
Packet
for a major update using a 3G network. Since
packet communication charges can become
costly, a flat-rate packet rate is strongly
recommended.
to a Wi-Fi network may be
Connection
necessary depending on the version of the
software to be updated.
updating software via a Wi-Fi network,
Before
configure Wi-Fi settings beforehand and
check that the terminal is connected to a
Wi-Fi network. → P.59
Main Specifications
■
■Phone
Product name
Dimensions
Weight
Memory
ROM
RAM
Continuous FOMA/3G
standby time GSM
Continuous FOMA/3G
call time
GSM
Charging time
Appendix/Index
1Seg viewing time
Display
Type
Size
Pixels
Image pickup Type
device
Size
Effective pixels
Camera
Recorded pixels
(maximum)
Digital zoom
186
N-01D
Approx. 128 mm (height) × approx. 63 mm (width) × approx.
10.9 mm (thickness) (Approx. 11.4 mm at the thickest part)
Approx. 135 g (with battery pack)
2GB
512 MB
Stationary (when "auto" is set*1): Approx. 630 hours
Stationary (when "auto" is set*1): Approx. 400 hours
Approx. 380 minutes
Approx. 450 minutes
AC adapter: Approx. 200 minutes
DC adapter: Approx. 200 minutes
Wireless charger N01: Approx. 300 minutes
Approx. 380 minutes
Organic EL 16,777,216 colors
Approx. 4.0 inches
384,000 pixels (480 × 800 dots)
CMOS
1/3.2 inch
Approx. 8.1 million pixels
Approx. 8.0 million pixels
Photos: Approx. 3.4 times max. / Videos: Approx. 4.0 times max.
Recorder
Number of photos
that can be
recorded
Continuous photo
shooting
Photo file format
Video recording
time
Video file format
1Seg recording
time
WMA file
MP3 file
When recorded in the microSD card (2 GB): Approx. 9,999 photos
max.*2
Shooting interval 0.03/0.1 seconds: 5 to 25 photos; Shooting
interval 0.5/1/2 seconds: 5 to 100 photos
JPEG
When recorded in the microSD card (2 GB): Approx. 164 minutes
max.*3
MP4
When recorded in the microSD card (2 GB): Approx. 600
minutes max. (total)*4
Audio
Approx. 1,380 minutes
Approx. 1,380 minutes
IEEE802.11b/g/n (2.4GHz band) compliant
Wireless LAN*5
Bluetooth
Compliant version Bluetooth Specification Version 4.0 compliant*6
Power
Bluetooth Specification Power Class 2
Up to approx. 10 m
Line-of-sight
communication
distance*7
Compliant profile HSP, HFP, A2DP, AVRCP, OPP, PBAP, SPP, ANP, PASP, FMP, TIP, PXP
187
Appendix/Index
*1 To set the network connection change, use "Mobile networks" (P.99).
*2 This is the maximum number of photos that can be saved to 1 folder, when Size = VGA (640 ×
480) and Quality = Normal (file size = 160 KB).
*3 This is the recording time per video under the following conditions:
Size = VGA (640×480), Quality = Normal
*4 The maximum recording time depends on the broadcaster and program recorded.
*5 The wireless LAN of this product has received Wi-Fi certification.
*6 It is confirmed that this FOMA terminal and all Bluetooth devices are compliant with Bluetooth
standards designated by Bluetooth SIG, and they are authenticated. However, procedures may
differ or data transfer may not be possible depending on the device's characteristics or
specifications.
*7 The available connection distance may be extremely shorter depending on the ambient
environment (wall, furniture, etc.) or building structure.
■
pack
■Battery
Product name
Battery type
Nominal voltage
Nominal capacity
Battery pack N29
Lithium ion battery
3.8 V DC
1700 mAh
■
charger
■Wireless
Input
Output
Dimensions
Wireless charger N01
12 V DC 600 mA
Max. 5 W
138 x 90 x 19 mm
Weight
Approx. 140 g
Operating temperature 5°C–35°C
Conforms to
WPC standards
Appendix/Index
188
Special AC adapter
100–240 V AC 50–60 Hz 18–24 VA
12 V DC 600 mA
70.5 x 30.5 x 45.0 mm
(excl. projections, cord)
Approx. 120 g
5°C–35°C
-
Specific Absorption Rate (SAR),
etc. of Mobile Phones
Specific Absorption Rate (SAR) of
Mobile Phones
This model N-01D mobile phone complies
with Japanese technical regulations and
international guidelines regarding exposure
to radio waves.
This mobile phone was designed in
observance of Japanese technical
regulations regarding exposure to radio
waves*1 and limits to exposure to radio
waves recommended by a set of equivalent
international guidelines. This set of
international guidelines was set out by the
International Commission on Non-Ionizing
Radiation Protection (ICNIRP), which is in
collaboration with the World Health
Organization (WHO), and the permissible
limits include a substantial safety margin
designed to assure the safety of all persons,
regardless of age and health condition.
189
Appendix/Index
The technical regulations and international
guidelines set out limits for radio waves as
the Specific Absorption Rate, or SAR, which
is the value of absorbed energy in any 10
grams of tissue over a 6-minute period. The
SAR limit for mobile phones is 2.0 W/kg. The
highest SAR value for this mobile phone
when tested for use at the ear is 0.408 W/kg.
There may be slight differences between the
SAR levels for each product, but they all
satisfy the limit.
The actual SAR of this mobile phone while
operating can be well below that indicated
above.
This is due to automatic changes to the
power level of the device to ensure it only
uses the minimum required to reach the
network. Therefore in general, the closer
you are to a base station, the lower the
power output of the device.
This mobile phone can be used in positions
other than against your ear. This mobile
phone satisfies the international guidelines
when used with a carrying case or a
wearable accessory approved by NTT
DOCOMO, INC.*2 In case you are not using
the approved accessory, please use a product
that does not contain any metals, and one
that positions the mobile phone at least
1.5 cm away from your body.
The World Health Organization has stated
that to discern whether mobile phones
bring about any hidden health risks, an
abundance of research has been carried over
the past 20 years. Until present, no effects at
all on health have been found that can be
deemed attributable to mobile phone use.
Please refer to the WHO website if you
would like more detailed information.
http://www.who.int/docstore/peh-emf/
publications/facts_press/fact_japanese.htm
Appendix/Index
Please refer to the websites listed below if
you would like more detailed information
regarding SAR.
Ministry of Internal Affairs and
Communications Website:
http://www.tele.soumu.go.jp/e/sys/ele/index.
htm
Association of Radio Industries and
Businesses Website:
http://www.arib-emf.org/index02.html (in
Japanese only)
NTT DOCOMO, INC. Website:
http://www.nttdocomo.co.jp/english/
product/sar/
NEC CASIO Mobile Communications, Ltd.
Website:
http://www.n-keitai.com/lineup/sar/ (in
Japanese only)
190
*1 Technical regulations are defined by the
Ministerial Ordinance Related to Radio Law
(Article 14-2 of Radio Equipment
Regulations).
*2 Regarding the method of measuring SAR
when using mobile phones in positions
other than against the ear, international
standards (IEC62209-2) were set in March
of 2010.
On the other hand, technical regulation is
currently being deliberated on by national
council. (As of November 2011)
Radio Frequency (RF) Signals
THIS MODEL PHONE MEETS THE U.S.
GOVERNMENT'S REQUIREMENTS FOR
EXPOSURE TO RADIO WAVES.
Your wireless phone contains a radio
transmitter and receiver. Your phone is
designed and manufactured not to exceed
the emission limits for exposure to radio
frequency (RF) energy set by the Federal
Communications Commission of the U.S.
Government. These limits are part of
comprehensive guidelines and establish
permitted levels of RF energy for the
general population. The guidelines are
based on standards that were developed by
independent scientific organizations
through periodic and thorough evaluation
of scientific studies.
The exposure standard for wireless mobile
phones employs a unit of measurement
known as the Specific Absorption Rate (SAR).
The FCC has granted an Equipment
Authorization for this model phone with all
reported SAR levels evaluated as in
compliance with the FCC RF exposure
guidelines. SAR information on this model
phone is on file with the FCC and can be
found under the Display Grant section at
https://gullfoss2.fcc.gov/oetcf/eas/reports/
GenericSearch.cfm after search on FCC ID
A98-QLC5698.
For body worn operation, this phone has
been tested and meets the FCC RF exposure
guidelines when used with an accessory
designated for this product or when used
with an accessory that contains no metal
and that positions the handset a minimum
of 1.0 cm from the body.
Non-compliance with the above restrictions
may result in violation of FCC RF Exposure
guidelines.
-------------------------------------------------------------*In the United States, the SAR limit for wireless
mobile phones used by the public is 1.6 watts/
kg (W/kg) averaged over one gram of tissue.
SAR values may vary depending upon national
reporting requirements and the network band.
191
Appendix/Index
The SAR limit set by the FCC is 1.6 W/kg.*
Tests for SAR are conducted using standard
operating positions accepted by the FCC
with the phone transmitting at its highest
certified power level in all tested frequency
bands. Although the SAR is determined at
the highest certified power level, the actual
SAR level of the phone while operating can
be well below the maximum value. This is
because the phone is designed to operate at
multiple power levels so as to use only the
power required to reach the network. In
general, the closer you are to a wireless base
station antenna, the lower the output.
Before a phone model is available for sale to
the public, it must be tested and certified to
the FCC that it does not exceed the limit
established by the U.S. government-adopted
requirement for safe exposure. The tests are
performed on position and locations (for
example, at the ear and worn on the body)
as required by FCC for each model. The
highest SAR value for this model phone as
reported to the FCC when tested for use at
the ear is 0.57 W/kg, and when worn on the
body, is 0.79 W/kg. (Body-worn
measurements differ among phone models,
depending upon available accessories and
FCC requirements). While there may be
differences between the SAR levels of
various phones and at various positions,
they all meet the U.S. government
requirement.
FCC Regulations
Appendix/Index
This mobile phone complies with part 15 of
the FCC Rules. Operation is subject to the
following two conditions: (1) This device
may not cause harmful interference, and (2)
this device must accept any interference
received, including interference that may
cause undesired operation.
This mobile phone has been tested and
found to comply with the limits for a Class B
digital device, pursuant to Part 15 of the
FCC Rules. These limits are designed to
provide reasonable protection against
harmful interference in a residential
installation.
This equipment generates, uses and can
radiate radio frequency energy and, if not
installed and used in accordance with the
instructions, may cause harmful interference
to radio communications. However, there is
no guarantee that interference will not
occur in a particular installation; if this
equipment does cause harmful interference
to radio or television reception, which can
be determined by turning the equipment
off and on, the user is encouraged to try to
correct the interference by one or more of
the following measures:
Reorient or relocate the receiving antenna.
•Increase the separation between the
equipment and receiver.
•Connect the equipment into an outlet on a
circuit different from that to which the
receiver is connected.
192
•Consult the dealer or an experienced radio/TV
technician for help.
Changes or modifications not expressly
approved by the party responsible for
compliance could void the user’s authority
to operate the equipment.
Declaration of Conformity
The product "N-01D" is declared to conform
with the essential requirements of European
Union Directive 1999/5/EC Radio and
Telecommunications Terminal Equipment
Directive 3.1(a), 3.1 (b) and 3.2. The
Declaration of Conformity can be found on
http://www.n-keitai.com/lineup/index.html
(Japanese only).
This mobile phone complies with the EU
requirements for exposure to radio waves.
Your mobile phone is a radio transceiver,
designed and manufactured not to exceed
the SAR* limits** for exposure to radiofrequency (RF) energy, which SAR* value,
when tested for compliance against the
standard was 0.424 W/kg. While there may
be differences between the SAR* levels of
various phones and at various positions,
they all meet*** the EU requirements for RF
exposure.
* The exposure standard for mobile phones
employs a unit of measurement known as
the Specific Absorption Rate, or SAR.
** The SAR limit for mobile phones used by the
public is 2.0 watts/kilogram (W/kg) averaged
over ten grams of tissue, recommended by
The Council of the European Union. The
limit incorporates a substantial margin of
safety to give additional protection for the
public and to account for any variations in
measurements.
***Tests for SAR have been conducted using
standard operating positions with the phone
transmitting at its highest certified power
level in all tested frequency bands. Although
the SAR is determined at the highest
certified power level, the actual SAR level of
the phone while operating can be well
below the maximum value. This is because
the phone is designed to operate at multiple
power levels so as to use only the power
required to reach the network. In general,
the closer you are to a base station antenna,
the lower the power output.
Export Administration
Regulations
This product and its accessories may be
under coverage of the Export
Administration Regulations of Japan
("Foreign Exchange and Foreign Trade
Control Laws" and the related laws and
regulations). When exporting this
product and its accessories, take necessary
procedures on your responsibility and
expense. For details, contact Ministry of
Economy, Trade and Industry of Japan.
Intellectual Property Right
Copyright and portrait rights
193
Appendix/Index
You have no right to copy, modify, or
distribute contents such as text, images,
music, or software downloaded from
websites on the Internet, or images captured
by the camera of this product without
permission from the copyright holder except
when the copy or quote is for personal use
that is allowed under Copyright Law.
Note that it may be prohibited to capture or
record live performances or exhibitions even
for personal use.
Refrain from taking portraits of other
people and uploading such portraits to
websites using this product without their
consent, as this violates portrait rights.
Trademarks
•"FOMA", "i-mode", "i-αppli", "Deco-mail",
"ToruCa", "mopera", "mopera U", "WORLD
CALL", "iD", "WORLD WING", "sp-mode"
and "ToruCa" logo, "mopera U" logo,
"Osaifu-Keitai" logo, "iD" logo, "iC" logo,
"sp-mode" logo, are trademarks or registered
trademarks of NTT DOCOMO, INC.
•"Catch Phone (Call waiting service)" is a
registered trademark of Nippon Telegraph and
Telephone Corporation.
•Powered by emblend™ Copyright 2010-2011
Aplix Corporation. All Rights Reserved.
emblend and emblend-related trademarks are
trademarks or registered trademarks of Aplix
Corporation in Japan and other countries.
•e is a registered trademark of FeliCa
Networks, Inc.
•microSDHC logo is a trademark of
SD-3C, LLC.
•Rovi, G-GUIDE, G-GUIDE MOBILE
and G-Guide related logos are trademarks or
registered trademarks of Rovi Corporation
and/or its subsidiaries in Japan.
Appendix/Index
• "PictMagic", "MEDIAS", "MEDIAS NAVI", "Tap
search", "Quick Shot", "MEDIAS WELLNESS",
"Days" and "MEDIAS BEAUTY" are trademarks
or registered trademarks of NEC CASIO Mobile
Communications, Ltd.
194
• Microsoft®, Windows®, Windows Media® and
Windows Vista® are trademarks or registered
trademarks of Microsoft Corporation in the
United States and/or other countries.
•Microsoft® Exchange ActiveSync® is a
trademark or registered trademark of
Microsoft Corporation in the United States
and/or other countries.
•T9® is a trademark or registered
trademark of Nuance
Communications, Inc. and corporate
owners of Nuance in the United States and/or
other countries.
•MovieSolid® and its logo are trademarks or
registered trademarks of Morpho Inc. in Japan
and other countries.
• "Google", "Android", "Android Market",
"Gmail", "Google Calendar", "Google Maps",
"Google Talk", "Google Latitude", "YouTube",
"Picasa", "Google" logo, "Android" logo and
"Android Market" logo are trademarks or
registered trademarks of Google Inc.
•The Wi-Fi CERTIFIED Logo is a certification
mark of the Wi-Fi Alliance.
•The Wi-Fi Logo is a certification mark of the
Wi-Fi Alliance.
•The Wi-Fi Protected Setup Mark is a mark of
the Wi-Fi Alliance.
•Wi-Fi®, Wi-Fi CERTIFIEDTM, Wi-Fi Protected
SetupTM, WPATM and WPA2 TM are marks or
registered marks of the Wi-Fi Alliance.
•"らくらく無線スタート" is a registered
trademark of NEC AccessTechnica, Ltd.
•"Twitter" is a trademark or registered
trademark of Twitter, Inc.
•"mixi" is a registered trademark of mixi, Inc.
•"Facebook" is a trademark or registered
trademark of Facebook, Inc.
•"ATOK" is a registered trademark of
JustSystems Corporation.
•"ついっぷる" is a trademark or registered
trademark of NEC BIGLOBE, Ltd.
•"Soradas" is a registered trademark of MTI
Ltd.
•G-SHOCK is a registered trademark of CASIO
COMPUTER CO., LTD.
•The 'Qi' symbol is a trademark of the Wireless
Power Consortium.
•This product uses "FontAvenue" of NEC
Corporation.
•Other company names or product names
described in this manual are trademarks or
registered trademarks of those companies.
Others
195
Appendix/Index
• THIS PRODUCT IS LICENSED UNDER THE
MPEG-4 VISUAL PATENT PORTFOLIO LICENSE
FOR THE PERSONAL AND NON-COMMERCIAL
USE OF A CONSUMER FOR (i) ENCODING
VIDEO IN COMPLIANCE WITH THE MPEG-4
VISUAL STANDARD ("MPEG-4 VIDEO") AND/
OR (ii) DECODING MPEG-4 VIDEO THAT WAS
ENCODED BY A CONSUMER ENGAGED IN A
PERSONAL AND NON-COMMERCIAL ACTIVITY
AND/OR WAS OBTAINED FROM A VIDEO
PROVIDER LICENSED BY MPEG LA TO PROVIDE
MPEG-4 VIDEO. NO LICENSE IS GRANTED OR
SHALL BE IMPLIED FOR ANY OTHER USE.
ADDITIONAL INFORMATION INCLUDING THAT
RELATING TO PROMOTIONAL, INTERNAL AND
COMMERCIAL USES AND LICENSING MAY BE
OBTAINED FROM MPEG LA, L.L.C. SEE HTTP://
WWW.MPEGLA.COM.
• THIS PRODUCT IS LICENSED UNDER THE AVC
PATENT PORTFOLIO LICENSE FOR THE
PERSONAL USE OF A CONSUMER OR OTHER
USES IN WHICH IT DOES NOT RECEIVE
REMUNERATION TO (i) ENCODE VIDEO IN
COMPLIANCE WITH THE AVC STANDARD
("AVC VIDEO") AND/OR (ii) DECODE AVC
VIDEO THAT WAS ENCODED BY A CONSUMER
ENGAGED IN A PERSONAL ACTIVITY AND/OR
WAS OBTAINED FROM A VIDEO PROVIDER
LICENSED TO PROVIDE AVC VIDEO. NO LICENSE
IS GRANTED OR SHALL BE IMPLIED FOR ANY
OTHER USE. ADDITIONAL INFORMATION MAY
BE OBTAINED FROM MPEG LA, L.L.C. SEE
HTTP://WWW.MPEGLA.COM.
•FeliCa is a contactless IC card technology
developed by Sony Corporation. FeliCa is a
registered trademark of Sony Corporation.
•Contains Adobe® Flash® Player by Adobe
Systems Incorporated.
Adobe Flash Player Copyright© 1996-2011
Adobe Systems Incorporated. All rights
reserved.
Adobe, Flash and Flash logo are registered
trademarks or trademarks of Adobe Systems
Incorporated in the United States and/or other
countries.
•The Bluetooth word mark and logos are
owned by the Bluetooth SIG, INC. and any
use of such marks by NTT DOCOMO, INC. is
under license. Other trademarks and trade
names are those of their respective owners.
Appendix/Index
196
•Content owners use Microsoft PlayReadyTM
content access technology to protect their
intellectual property, including copyrighted
content. This device uses PlayReady
technology to access PlayReady-protected
content and/or WMDRM-protected content. If
the device fails to properly enforce restrictions
on content usage, content owners may
require Microsoft to revoke the device’s ability
to consume PlayReady-protected content.
Revocation should not affect unprotected
content or content protected by other content
access technologies. Content owners may
require you to upgrade PlayReady to access
their content. If you decline an upgrade, you
will not be able to access content that
requires the upgrade.
•©MTI Ltd.
Notational conventions for
Windows
•The abbreviations of operating systems
(Japanese versions) below are used in this
manual.
•Windows 7 stands for Microsoft® Windows®
7 (Starter, Home Basic, Home Premium,
Professional, Enterprise and Ultimate).
•Windows Vista stands for Windows Vista®
(Home Basic, Home Premium, Business,
Enterprise and Ultimate).
•Windows XP indicates the Microsoft®
Windows® XP Professional operating system
or Microsoft® Windows® XP Home Edition
operating system.
Using Adobe® Flash® Player
■
source code
■Obtaining
For information on obtaining source code, see
the following website.
http://www.n-keitai.com/guide/download/
(in Japanese only)
Inquiries regarding the content of source code
cannot be responded to.
Appendix/Index
•Adobe® Flash® Player embedded in this
product ("Software") is protected by
copyright laws. Be sure to observe the
following rules when using the Software.
①You shall not copy or distribute the
Software.
②You shall not modify, adapt, translate or
create derivative works based upon the
Software.
③You shall not reverse engineer, decompile,
disassemble, or otherwise attempt to
discover the source code of the Software.
④You shall not make a claim for any
consequential, indirect, incidental, special
damages, or any lost profits by using the
Software.
GPL/LGPL-applicable software
•This product contains software licensed
complying with GNU General Public License
(GPL) or GNU Lesser General Public License
(LGPL). You can obtain the source code for
the software and reproduce, redistribute, or
modify the software in accordance with the
GPL or LGPL.
For information on GPL and LGPL, from the
Home screen, m ▶ "Settings" ▶ "About
phone" ▶ "Legal information" ▶ "Open
source licenses"
197
Index
Alphabets
Appendix/Index
About Phone .........................................119
Accessibility (settings) ...........................118
Accessories .................................................1
Access point .............................................57
Account ....................................................61
Email account .........................................61
Setting..................................................115
After-sales service..................................176
Airplane mode.......................................100
Alarm .....................................................158
Alarm volume ........................................108
Android Market.....................................144
Applications
Installing ...............................................145
List .........................................................76
List screen...............................................75
Purchasing ............................................145
Setting..................................................114
Shortcuts ................................................72
Uninstalling ............................................76
Area Mail ...............................................126
Attaching/removing the back cover.......36
Backlight ................................................109
Battery pack.............................................46
BLE advanced settings...........................104
Bluetooth
Calling ....................................................86
Communication ....................................133
Setting..................................................133
198
Booking (1Seg) ......................................153
Booking recording ................................153
Booking viewing (1Seg) ........................153
Bookmarks .............................................129
Brightness (screen) ................................109
Browser ..................................................128
Calculator...............................................161
Calendar.................................................159
Caller ID notification service...................97
Call Forwarding service ...........................95
Call Log ....................................................87
Call rejection (settings) .........................107
Call settings ...........................................107
Call volume ..............................................86
Call Waiting service .................................96
Camera ...................................................137
Changing wallpaper................................74
Channel setting .....................................152
Charging ..................................................48
Adapter ..................................................51
PC ..........................................................52
Wireless charger .....................................49
Charging with an AC adapter ................51
Charging with an DC adapter ................51
Charging with a PC .................................52
Charging with the adapter .....................51
Charging with the wireless charger .......49
Chat ........................................................127
Check phone number (yours) .................88
Clock (application) ................................158
Clock setting ..........................................118
Connecting to a PC................................134
Gallery ....................................................141
Gesture input...........................................67
Gmail ......................................................123
Google Maps .........................................148
Google Talk............................................127
GPS .........................................................146
Gガイド番組表 (G-GUIDE).........................153
Handling precautions..............................26
Home screen ............................................72
iC transfer Service..................................155
iD設定アプリ (iD appli) ............................162
Importing
Bookmarks ...........................................130
Email ....................................................122
Phonebook .............................................88
SMS......................................................120
Incoming call lamp ................................109
Incoming calls history..............................87
Infrared data exchange ........................132
Initializing (FOMA terminal).................116
Initial Settings..........................................56
Installing (applications).........................145
Intellectual propery right .....................193
International dial assist .........................166
International roaming ..........................163
Keyboard
QWERTY.................................................65
Settings ................................................117
10-key ....................................................65
Key illumination ....................................109
Koe-no-Takuhaibin..................................92
Language (setting) ................................117
199
Appendix/Index
Data roaming (overseas) .......................166
Date setting ...........................................118
Declining calls ..........................................86
Display (setting).....................................109
Docking a shortcut ..................................73
docomo application password .............108
Drag .........................................................55
Draining water ........................................39
eco mode ...............................................110
Email
Area Mail..............................................126
Email ....................................................122
Email account .........................................61
Gmail ...................................................123
SMS......................................................120
sp-mode mail........................................120
Emergency call.........................................84
Entering emoticons .................................68
Entering smileys ......................................68
Entering symbols .....................................68
Entering text............................................65
Error messages.......................................176
Export Administration Regulations......193
Exporting
Bookmarks ...........................................130
Email ....................................................122
Phonebook .............................................88
SMS......................................................120
Flick ..........................................................55
Flick input ................................................67
Folders (Home screen).............................73
Formatting (microSD card) ...................116
Appendix/Index
Latitude..................................................150
Location Service.....................................147
Location (setting) ..................................111
Main specifications................................186
Major update.........................................184
Making a call ...........................................84
Making a call (overseas)........................166
Making a call overseas ....................85, 166
Making an international call ..........85, 166
Market ...................................................144
Media playback volume ........................108
Media Player ..........................................142
MEDIAS BEAUTY ...................................162
microSD card............................................44
Accessing from a PC .............................134
Capacity ...............................................116
Formatting............................................116
Inserting/removing ..................................44
miniUIM ...................................................43
Mobile networks .....................................99
Mobile networks (overseas)..................166
mopera U .................................................58
MyProfile .................................................88
Name card................................................89
Navigation .............................................149
Network Mode (overseas).....................166
Network operators (overseas) ..............166
Network security code ..........................113
Network services .....................................91
Network (setting) ....................................99
Notification icons ....................................63
Notification lamp ..................................109
200
Notification ringtone ............................108
Notifications pannel................................64
Nuisance call blocking service ................97
Numeric keypad input ............................67
Opening/closing the external connector
terminal cap.............................................36
Options ..............................................1, 169
Osaifu-Keitai ..........................................155
Osaifu-Keitai lock setting .....................157
Outgoing calls history .............................87
Part names and functions .......................41
PC Link ...................................................135
Phonebook ..............................................88
PhoneBookCopy ......................................90
PIN1 code ...............................................113
PIN1 code entry setting.........................113
PIN setting .............................................111
PIN unblocking key ...............................113
Places......................................................150
Playback
Media Player .........................................142
Photos ..................................................141
Videos ..................................................141
1Seg .....................................................154
Precautions ................................................6
Privacy (setting) .....................................116
Profile.......................................................89
Program guide.......................................153
Public mode (power off) .........................98
Purchasing (applications) ......................145
Quickoffice ............................................161
QWERTY keyboard ..................................65
Sleep mode ..............................................53
Slide..........................................................55
SMS.........................................................120
Sound (setting) ......................................108
Specific Absorption Rate (SAR).............189
sp-mode ...................................................58
sp-mode mail .........................................120
Status bar .................................................62
Status icons ..............................................62
Street View ............................................148
Synchronize (setting) ............................115
T9 input....................................................68
Tapping ....................................................55
Tap search ................................................82
Task Manager ..........................................83
Time setting ...........................................118
Toggling entry modes (text) ...................67
ToruCa ....................................................157
Touch and hold........................................55
Touch panel operation............................54
Trademarks ............................................194
Troubleshooting ....................................169
Turning power on/off..............................53
TV ...........................................................151
TV Link ...................................................154
Uninstalling (applications) ......................76
Unlock security ......................................111
Updating software ................................179
USB PC Link ............................................135
USB tethering ........................................105
Using overseas .......................................163
201
Appendix/Index
Receiving a call ........................................86
Receiving a call (overseas) ....................167
Receiving a call overseas .......................167
Receiving an international call .............167
Related devices ......................................169
Repositioning pages (Home screen).......74
Ringtone
Call.......................................................108
Email ....................................................123
Gmail ...................................................125
SMS......................................................121
Ring volume...........................................108
SAR (Specific Absorption Rate).............189
Screen
Backlight ..............................................109
Brightness.............................................109
Display orientation ..................................54
Lock .......................................................53
Screen lock security ..............................111
Settings ................................................109
Zooming in/zooming out ........................55
Search
Google search ........................................82
Within web page ..................................129
Search (setting)......................................117
Security codes ........................................112
Security (setting) ...................................111
Select Font .............................................109
Settings menu..........................................99
Shooting photos ....................................140
Shooting videos .....................................140
Silent mode............................................108
Vibration
Email ....................................................123
Gmail ...................................................125
Incoming call ........................................108
SMS......................................................121
Voice Input & Output (setting) .............117
Voice Mail service ....................................93
Volume ...................................................108
VPN.........................................................106
Warranty ................................................176
Waterproof/dustproof function .............34
Widgets
List .........................................................80
Shortcuts ................................................72
Wi-Fi settings ...................................59, 100
Wi-Fi tethering ......................................105
Wireless (setting) .....................................99
WORLD CALL ...........................................85
WORLD WING ........................................163
Numerals
1Seg........................................................151
10-key keyboard ......................................65
Appendix/Index
202
You can view/change your contract contents, subscribe to services, and request
information materials on the Internet.
My docomo (http://www.mydocomo.com/) ⇒ 各種お申込・お手続き (Various Applications/Procedures) (in Japanese only)
*You need your docomo ID and password in order to access this page.
*If you do not have or you have forgotten your "docomo ID/password", contact "General Inquiries" at the last
page of this instruction manual.
*You may not be able to access the site depending on the content of your subscription.
*You may not be able to access the site due to system maintenance, etc.
Using mobile phone with good manners!
Please be considerate of others around you when using the FOMA terminal.
Always turn OFF your FOMA terminal in the
following situations
Be considerate of where you use your FOMA
terminal and keep your voice and ringtone down
■■ In a place where the use of mobile phones is prohibited ■■Keep your voice down when using the FOMA
Always turn off your FOMA terminal on an
terminal in a quiet place such as a restaurant
airplane and in a hospital.
or hotel lobby.
*Please note that medical electrical equipment is
■■If you are in an outdoor public place, make
also used in other parts of a hospital in addition to
sure you do not disturb others.
its wards. Always turn off your FOMA terminal in
lobbies and waiting rooms as well.
■■When you are in a place where you may be near to
people with implanted cardiac pacemakers or
implanted defibrillators, such as in a crowded train
The FOMA terminal may exert a harmful effect on
implanted cardiac pacemakers and implanted defibrillators.
Set your FOMA terminal to Public mode in the
following situations
■■While driving
Using the mobile phone in your hand while driving
is subject to punishment. However, this excludes
situations when the use of a mobile phone is
unavoidable, such as the rescue of the sick and
injured or the maintenance of public safety.
■■When you are in a public place such as a
theater, movie theater, or museum Using the
FOMA terminal in a public place, where you
need to be quiet, annoys people around you.
Respect privacy
Please be considerate of the privacy of individuals
around you when shooting and sending photos
using camera-equipped mobile phones.
The following functions will help you to keep good
manners in public
There are useful functions you can use to set your FOMA
terminal not to answer incoming calls, and to silence all
sounds.
■■ Airplane mode: enables/disables the function to emit
radio waves.→ P.100
■■ Manner (Silent) mode: Silences the ringtone and other
sounds from the FOMA terminal.→ P.108
■■ Public mode (Power off): A message plays notifying
callers that you are where you have to power off the
phone and cannot answer, and the phone automatically
hangs up.→ P.98
■■ Vibrator: Notifies incoming calls by vibration. → P.108
Other optional services such as Voice Mail service and Call
Forwarding service are also available.
Loss or theft of FOMA terminal or payment of cumulative cost overseas
<docomo Information Center>
Failures encountered overseas
<Network Support and Operation Center>
(available 24 hours a day)
■ From DOCOMO mobile phones
(available 24 hours a day)
■ From DOCOMO mobile phones
International call access code
for the country you stay
International call access code
for the country you stay
-81-3-6832-6600* (toll free)
-81-3-6718-1414* (toll free)
* You are charged a call fee to Japan when calling from a land-line phone, etc.
※ If you use N-01D, you should dial the number +81-3-6832-6600 (to enter
'+', press and hold the '0' key for at least one second).
* You are charged a call fee to Japan when calling from a land-line phone, etc.
※ If you use N-01D, you should dial the number +81-3-6718-1414 (to enter
'+', press and hold the '0' key for at least one second).
■ From land-line phones <Universal number>
■ From land-line phones <Universal number>
Universal number
international prefix
-8000120-0151*
* You might be charged a domestic call fee according to the call rate for the country you stay.
※ For international call access codes for major countries and universal number
international prefix, refer to DOCOMO International Services website.
Universal number
international prefix
-8005931-8600*
* You might be charged a domestic call fee according to the call rate for the country you stay.
※ For international call access codes for major countries and universal number
international prefix, refer to DOCOMO International Services website.
● If you lose your FOMA terminal or have it stolen, immediately take the steps necessary for suspending the use of the FOMA terminal.
● If the FOMA terminal you purchased is damaged, bring your FOMA terminal to a repair counter specified by DOCOMO after
returning to Japan.
General Inquiries
<docomo Information Center>
Repairs
0120-005-250 (toll free)
■ From DOCOMO mobile phones (In Japanese only)
(No prefix) 113 (toll free)
* Service available in: English, Portuguese, Chinese, Spanish, Korean.
* Unavailable from part of IP phones.
* Unavailable from land-line phones, etc.
(Business hours : 9:00 a.m. to 8:00 p.m.)
■ From land-line phones (In Japanese only)
0120-800-000 (toll free)
■ From DOCOMO mobile phones (In Japanese only)
(No prefix) 151 (toll free)
* Unavailable from part of IP phones.
* Unavailable from land-line phones, etc.
(Business hours : 24 hours (open all year round))
■ From land-line phones (In Japanese only)
0120-800-000 (toll free)
* Unavailable from part of IP phones.
(Business hours : 9:00 a.m. to 8:00 p.m. (open all year round))
● Please confirm the phone number before you dial.
● For Applications or Repairs and After-Sales Service, please contact the above-mentioned information center or the docomo shop etc. near you on the
NTT DOCOMO website.
NTT DOCOMO website http://www.nttdocomo.co.jp/english/
Inquiries regarding samples <NEC Mobiling information center>
■ From land-line phones
0120-102001
■ From mobile phones
0570-064919
*Calls are not accepted from PHS. Call from a land-line phone/mobile phone
Business hours : Weekdays 9:00 a.m. to 12:00 p.m.
1:00 p.m. to 5:00 p.m.
(Except Saturdays/Sundays/holidays/designated NEC holidays)
● Please confirm the phone number before you dial.
● Check this manual for information on samples.
Don’t forget your mobile phone … or your manners!
When using your mobile phone in a public place, don't forget to show
common courtesy and consideration for others around you.
To prevent damage to the
environment, bring used battery
packs to a docomo service
counter, a docomo agent or a
recycle center.
Sales: NTT DOCOMO, INC.
Manufacturer:
2011.11 (1st Edition)


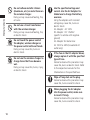
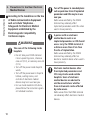


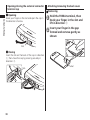

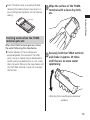

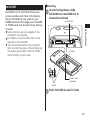

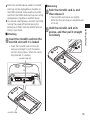
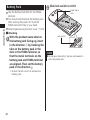


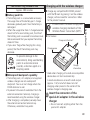


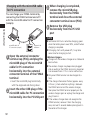


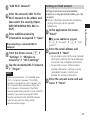

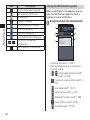

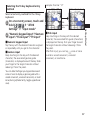


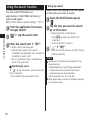


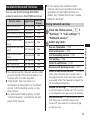
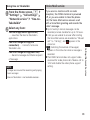

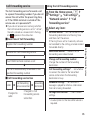

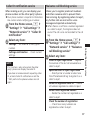


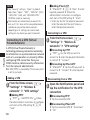
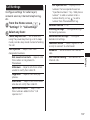
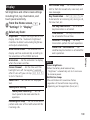
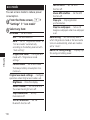


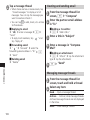
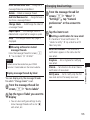

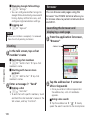


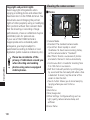
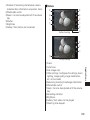
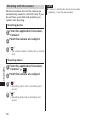

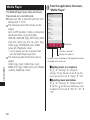

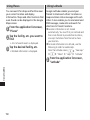
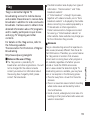
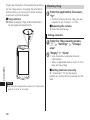
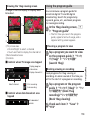
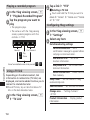
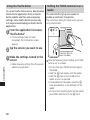
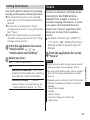


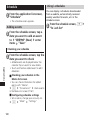
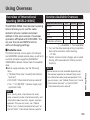
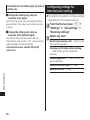


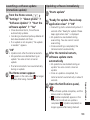


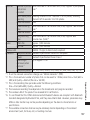


![取扱説明書 [SC-01D]](http://vs1.manualzilla.com/store/data/005959699_1-0f2252ea3ae3eaa3bd318f5696531d67-150x150.png)
![取扱説明書 [T-01C] - Altehandys.de](http://vs1.manualzilla.com/store/data/005976622_1-ee4b343c9b29b95568184d76cb0584e4-150x150.png)