Download USER`S MANUAL
Transcript
1-800-899-0553
assuredautomation.com
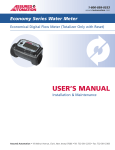
TM Series
Plastic Digital Flow Meter (Rate & 2 Totals, 1 Resetable)
USER’S MANUAL
Installation & Maintenance
Assured Automation • 19 Walnut Avenue, Clark, New Jersey 07066 • Tel: 732-381-2255 • Fax: 732-381-2383
1-800-899-0553
assuredautomation.com
1. IMPORTANT NOTICE
Use TM Series meters with water and other chemicals compatible
with wetted components (see Specifications Section). Do not use
to meter fuel or incompatible chemicals. TM Series meters are
available with either a computer for local electronic display, or a
conditioned signal output module to provide a digital signal to
customer interfacing equipment. TM Series meters with computer
display measure in gallons or liters. Refer to the Calibration
Section for details.
WIRING DIAGRAM 1: OPEN COLLECTOR SIGNAL OUTPUT
TERMINAL
BLOCK
RED
1
BLACK
2
2. INSTALLATION
COMMON GROUND
3
4
CUSTOMER
INTERFACING
EQUIPMENT
WHITE
OPEN COLLECTOR
SIGNAL
These meters are not legal for trade applications.
TM Series meters are very sensitive to electric noise if operated
within one to two inches of some electric motors or other sources
of electronic noise.
+9 TO 35 VOLT DC
1 6 VOLT SQUARE WAVE (NOT USED)
2 +9 TO 35 VOLT DC INPUT
3 COMMON GROUND
4 OPEN COLLECTOR SIGNAL OUTPUT
Connections
Install your meter in-line either horizontally or vertically or at the
end of the hose adjacent to the nozzle. Installation to metal
connections is not recommended. Install as follows:
1. Plan to install turbine with a minimum straight pipe length
as follows:
WIRING DIAGRAM 1: OPEN COLLECTOR SIGNAL OUTPUT
Square Wave Output
TERMINAL
RED
+9 TO 35 VOLT DC
To achieve
square wave output, reference Wiring Diagram 2 and
BLOCK
use an Electronic Digital Meter Battery Kit (sold separately) for
1
battery power. TheBLACK
terminal block and
battery location
are located
CUSTOMER
COMMON GROUND
WAVE OUTPUT
2 WIRING DIAGRAM 2: SQUARE
INTERFACING
on the back
side of the module. Access as follows:
EQUIPMENT
3
6 VOLT SQUARE
1.1 Upstream from the turbine, allow a minimum straight pipe
length of 10 times the internal diameter of the turbine.
TERMINAL
1. Remove
Phillips-head
from the front of the
WHITE
WAVEscrews
SIGNAL
WHITE
4 the four
BLOCK
module
and lift the module
from the turbine.
OPEN COLLECTOR
1.2 Downstream from the turbine, allow a minimum straight
pipe length of 5 times the internal diameter of the turbine.
2. To change terminal block connections, loosen the
appropriate
CUSTOMER
2
INTERFACING
1 6 VOLT
SQUARE WAVE
screws.
Reconnect
the (NOT
wiresUSED)
in the proper positions
and tighten
EQUIPMENT
the2 screws.
+93TO 35 VOLT DC INPUT
SIGNAL
1
2. For Soc Fittings use only primer and solvents approved for
PVC gluing.
For NPT Fittings wrap all connections with 3 to 4 wraps of
thread tape. Make sure the tape does not intrude into the
flow path.
4
BLACK
COMMON GROUND
3 COMMON GROUND
3. Install
the batteries. Make sure the positive post is in the
4 OPEN COLLECTOR SIGNAL OUTPUT
correct
position.
1 6 VOLT SQUARE WAVE
4. Position
module
on the
2 +9 TOthe
35 VOLT
DC INPUT
(NOTturbine
USED) housing. To avoid moisture
damage,
make
sure the O-ring is fully seated. Tighten the four
3 COMMON
GROUND
screws
onCOLLECTOR
the frontSIGNAL
of theOUTPUT
module.
4 OPEN
(NOT USED)
3. Attach meter with arrow pointed in the direction of flow.
4. For NPT Fittings hand tighten the meter at the housing ends.
Do no use a wrench or similar tool to tighten. This can damage
the housing.
Conditioned Signal Output Module Wiring
This conditioned signal output module can be wired to provide an
open collector signal output or 6-volt square wave output.
WIRING DIAGRAM 2: SQUARE WAVE OUTPUT
TERMINAL
BLOCK
6 VOLT SQUARE
WAVE SIGNAL
1
CUSTOMER
INTERFACING
EQUIPMENT
2
Open Collector Signal Output
3
To achieve an open collector signal output, reference Wiring
Diagram 1. The terminal block is located on the back side of the
module. The module is factory assembled for open collector signal
output. Please provide the (820 ohm minimum) resistor.
4
Ten feet (3m) of cable is provided with the module. Trim it to
desired length or extend it as necessary. Distances up to 5,000 feet
(1,524m) can be achieved for open collector signal output.
WHITE
BLACK
COMMON GROUND
1 6 VOLT SQUARE WAVE
2 +9 TO 35 VOLT DC INPUT (NOT USED)
3 COMMON GROUND
4 OPEN COLLECTOR SIGNAL OUTPUT (NOT USED)
Contact us for the most recent product and technical information. Visit our website for more details: assuredautomation.com
2
1-800-899-0553
assuredautomation.com
Ten feet (3m) of cable is provided with the module. Trim the cable
to desired length or extend it as necessary.
Verify Meter Accuracy
Before using, check the meter’s accuracy and verify calibration.
1. Make sure there is no air in the system by starting the flow until
it runs steadily. Then, stop the flow using a valve or nozzle.
2. Meter an exact known volume into an accurate container. For
best results, meter with one continuous full stream.
3. Check the volume against the display or recording equipment.
If the amount metered is accurate, further calibration is not
necessary. If not, refer to the Calibration Section for further
instructions.
3. OPERATION
Computer Display – Batch and Cumulative Totals
The computer maintains two totals. The Cumulative Total provides
continuous measurement and cannot be manually reset. The Batch
Total can be reset to measure flow during a single use. The
Cumulative Total is labeled with TOTAL 1 LOCKED indicating that
this total is locked and cannot be manually zeroed. Batch Total is
labeled with TOTAL 2.
When the Cumulative Total reaches a maximum reading of
999,999, it will automatically reset to zero.
Press the DISPLAY button briefly to switch between the batch,
cumulative total, and flowrate.
NOTE: Totalization counts total units without differentiating
between gallons, liters or field calibrated units.
Flowrate Feature
To use this feature, press and release DISPLAY until FLOWRATE
appears to the left of the bottom line.
When FLOWRATE is displayed, the numbers on the middle line
reflect the rate of flow, for example, the current gallons per
minute (GPM) or liters per minute (LPM).
Activate the Meter
Turn the computer display ON by starting water flow or briefly
pressing the DISPLAY button. The Batch or Cumulative Total from
last use will be displayed.
Press DISPLAY briefly to display the Batch Total. Hold the DISPLAY
button down for 3 seconds to reset the Batch Total to zero.
The computer display is programmed to turn off automatically if
not used for 4 minutes.
Factory and Field Calibration Curves
All units are configured with a “factory” calibration curve. Both
gallons and liters are available (“GAL” or “LTR” will be displayed).
Use the CALIBRATE and DISPLAY buttons to switch between
gallons and liters. This curve is NOT user adjustable: the word
“PRESET” is displayed to show this. (The factory calibration is
stored permanently in the computer’s memory.)
The “field” calibration curve may be set by the user, and can be
changed or modified at any time using the calibration procedure
described below in the Calibration Section. Totals or flowrate
derived from the field calibration are visible when the field
calibration setting is selected (“CAL B” will be visible on the
top line).
Selecting a Different Calibration Setting
You can switch between GAL and LTR modes at will without
“corrupting” totalizer contents. For example, the computer can
totalize 10.00 gallons. If the user switches to LTR mode, the
display will immediately change to “37.50” (the same amount in
units of liters). GAL / LTR switching also works in FLOWRATE mode.
To select a different calibration setting, first press and hold the
CALIBRATE button. Continue to hold it while also pressing and
releasing the DISPLAY button. (You may then also release the
CALIBRATE button.) The flag indicators in the top line of the
display will change to show the newly selected calibration setting.
Calibration settings change in this order: GAL, LTR, CAL B, GAL,
etc. While fluid is flowing, only the GAL and LTR selections may be
made. However, when NO fluid flow is occurring, any setting may
be selected.
4. CALIBRATION
Before Beginning Field Calibration
For the most accurate results, dispense at a flowrate which best
simulates your actual operating conditions. Avoid “dribbling”
more fluid or repeatedly starting and stopping the flow. This can
result in less accurate calibrations.
Make sure you meet the meter’s minimum flowrate requirements:
TM Series Meters
1/2 inch meter
3/4 inch meter
1 inch meter
1-1/2 inch meter
2 inch meter
Flowrate
1 GPM (3.8 LPM)
2 GPM (7.5 LPM)
5 GPM (18.8 LPM)
10 GPM (37.5 LPM)
20 GPM (75 LPM)
The use of a uniformly dependable, accurate calibration container
is highly recommended for the most accurate results. Due to high
flowrate, it is strongly recommended that calibration be completed
with a combination of volume and weight using fine resolution
scales. For best results, the meter should be installed and purged
of air before field calibration.
All calibration information is visible to the user as words in the
upper part of the display, above the numeric digits.
Contact us for the most recent product and technical information. Visit our website for more details: assuredautomation.com
3
1-800-899-0553
assuredautomation.com
Field Calibration with Computer Display
Field Calibration and Factory Calibration are defined in the
previous section. Factory calibration settings are custom
programmed into each computer during production, using water
at 70º F (21º C). Readings using the standard factory calibration
curves may not be accurate in some situations, for example, under
extreme temperature conditions or with fluids other than water.
For improved accuracy under such conditions, the flow computer
allows for “field” calibration, that is, user entry of custom
calibration parameters. A “single point” calibration may yield
acceptable accuracy in the middle of the flow range, but five or
more calibration points may yield a higher level of accuracy,
especially at the lower end of the flow range. Up to 15 custom
calibration points can be entered.
Dispense/Display Field Calibration Procedures
1. Hold down CALIBRATE while pressing and releasing DISPLAY
until the field calibration curve appears (“CAL B” message will
be displayed). Release both buttons.
2. To calibrate, press and hold the CALIBRATE button. While
continuing to hold CALIBRATE, also press and hold the DISPLAY
button. Hold both buttons for about 3 seconds until you see a
blinking “dd CAL” message. Once the “dd CAL” message
appears, release both buttons. You are now in field
calibration mode.
3. Once the buttons have been released from Step 2, the display
will show the blinking message “run 01”. If you want to exit
the calibration now before dispensing any fluid, go to Step 11.
4. If you want to continue with the calibration, but have not
dispensed any fluid yet, make your final preparations to your
pumping system, but don’t start pumping yet.
5. Start your pumping system so that fluid flows through the
meter. The display will stop blinking and show the “run 01”
message. Dispense into a container that allows you to judge the
amount of fluid pumped. When you have pumped the desired
amount (for example, 10 gallons), stop the fluid flow quickly.
6. Once the flow has stopped, briefly press and release both
buttons. At this point the computer display will change to
“0000.00” with the left-hand digit blinking.
7. Enter the volume (amount) of fluid that you dispensed (for
example, if your 10-gallon container is full, enter “10.0” for
gallons or “37.5” for liters). To enter numbers, use the
CALIBRATE button to change the value of the digit that is
blinking and use the DISPLAY button to shift the “blink” to the
next digit.
8. Once the correct number is entered, briefly press and release
both buttons. The display will now change to a blinking “run 02”
message. You have installed the new calcurve point. You are
ready to end calibration (Step 10) or enter another new
calibration point (Step 9).
9. To enter another calibration point, go back and repeat Steps 3
through 8. It is possible to set up to 15 cal-curve points, and
the “run ##” message will increment each time you repeat the
calibration process (run 01, run 02, run 03, etc., up to run 15).
10. To end calibration, press and hold both buttons for about 3
seconds until you see the “CAL End” message. After you
release the buttons the computer will resume normal
operations with the new cal point(s) active.
11. If you HAVE NOT dispensed any fluid, you can exit calibration
without changing the cal curve. If the message “run 01” is
showing and you have not dispensed any fluid, hold both
buttons for about 3 seconds until you see a “CAL End”
message. After you release the buttons, the computer will
resume normal operation and the old curve (if you entered one
in the past) is still intact.
Calibration with Conditioned Signal Output Module
The K-factor of your meter appears on the calibration report as
the number of pulses per gallon. The factor is determined during
production using water at 70ºF (21ºC). This K-factor may be used
for “single point” calibration and provide acceptable accuracy.
However, readings may not be accurate when using this
calibration method in some situations. One example is when using
the meter under extreme temperature conditions or with fluids
other than water.
For improved accuracy under such conditions, we recommend that
a K-factor specific to the application be determined and used for
calibration. A “single point” calibration may yield acceptable
accuracy in the middle of the flo range, but five or more
calibration points may yield a high level of accuracy, especially at
the lower end of the flow range.
5. MAINTENANCE
Proper handling and care will extend the life and service of
the meter.
Turbine Rotor
The meter is virtually maintenance-free. However, it is important
the rotor moves freely. Keep the meter clean and free of
contaminants.
If the rotor does not turn freely, apply a penetrating lubricant on
the rotor, shaft, and bearings. Remove any debris or deposits from
the rotor using a soft brush or small probe. Be careful not to
damage the turbine rotor or supports.
Caution: Blowing compressed air through the turbine
assembly could damage the rotor.
Battery Replacement
The computer display is powered by two 3-volt lithium batteries
which may be replaced while the meter is installed.
Contact us for the most recent product and technical information. Visit our website for more details: assuredautomation.com
4
1-800-899-0553
assuredautomation.com
When batteries are removed or lose power, the batch and
cumulative totals reset to zero but the field and factory
calibrations are retained.
If the display becomes dim or blank, replace the batteries as
follows:
1. Remove the four Phillips-head screws from the face of the
meter and lift the faceplate from the turbine.
2. Remove the old batteries and clean any corrosion from the
terminals.
3. Install new batteries. Make sure the positive post is in the
correct position.
4. When the batteries are replaced, the faceplate will power ON.
Check the display to ensure normal functions have resumed
before assembling again.
5. Reseat batteries, if necessary, and position the faceplate on the
turbine housing. To avoid moisture damage, make sure the
O-ring is fully seated. Tighten the four screws on the faceplate.
Contact us for the most recent product and technical information. Visit our website for more details: assuredautomation.com
5


