1
User Manual
English
Connections & Settings
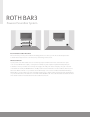
1. Connecting to your TV’s Digital Toslink Audio
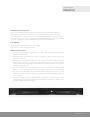
Soundbar remote then connect your Soundbar’s 12 Volt
Output: If your TV has an optical digital audio output
power supply to live wall power and to the input power
(usually located on the rear connection panel), use the
jack on the rear of the Sound bar. Using the Input &
included optical cable to connect your TV’s digital audio
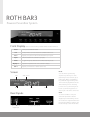
Vol+ buttons on the front of the Soundbar select the
output to the digital audio input on the rear of the
Aux1 input and turn the Volume up to -40. For this
Soundbar. Check the Audio Settings section in your TVs
connection type you may simply continue to use your
Menu System and ensure that the digital output audio
TV remote to control the volume and do not need to
type is set to PCM. Skip to Point number 4.
use the soundbar remote except to access its specialized
Connecting your TV’s Headphone Output: If your
functions. Please skip to Point number 5. 4) To prevent
TV has a headphone output jack (usually located on the
the TV’s speakers from interfering with the Soundbar’s
front or side), use the 1/8” to 1/8” connection cable to
output, please find the Audio Settings section in your TV’s
connect your TV’s headphone output jack to the Aux1
Menu System and turn off the TV’s internal speakers. If
input on the rear of the Soundbar. In most cases, use of
you are unable to turn off your TV’s speakers please try
the headphone jack should automatically turn off your
using the headphone output instead. If no headphone
TV’s internal speakers. If after connecting the cable to
output is available then simply turn the TV volume all
your TV’s headphone jack your TV speakers remain on
the way down. Install the included batteries into your
skip to Point number 2, otherwise skip to Point number 3.
Soundbar remote then connect your Soundbar’s 12 Volt
Connecting to your TV’s RCA Outputs: If your TV
power supply to live wall power and to the input power
does not have a headphone output jack or you would
prefer to connect your Soundbar to your TV’s RCA audio
outputs (usually located on the rear connection panel),
use the included Stereo RCA to 1/8” connection cable to
connect your TV’s RCA audio outputs to the Aux1 input
on the rear of the Soundbar. Note: TV RCA audio outputs
jack on the rear of the Sound bar. Using the Input &
Vol+ buttons on the front of the Sound bar select the
input you connected your TV to (Digital or Aux1) and
turn the Volume up to a satisfactory level. To control the
Soundbar’s volume with this connection type you must
use the Soundbar remote.
are either Variable (output level changes with TV volume
5.Connecting Audio Only Sources: For the easiest system
setting) or Fixed (output level does not change with TV
setup, video sources (Bluray, DVD, VHS, Cable/Satellite
volume setting). Some TV’s RCA outputs can be set to
receivers, Video Games, etc.) should be connected directly
be Fixed or Variable in the Audio Settings section of your
to your TV and the Soundbar directly to your TV’s audio
TV’s Menu System. Please use the Variable outputs if
outputs as described above. If you have additional audio
available. If your TV only has Fixed RCA outputs please
only sources (portable music players, computers, etc.) you
skip to Point number 4.
may connect them to one of the other inputs on the rear
2.To prevent the TV’s speakers from interfering with the
of the Soundbar.
Soundbar’s output, please find the Audio Settings section
6.Connecting Through Bluetooth: Press the input button
in your TV’s Menu System and turn off the TV’s internal
on the remote control until the input displays Bluetooth
speakers. They must be turned ‘off, the TV volume cannot
on the front panel of the soundbar. Search for the
just be turned down as this would result in no output on
soundbar with your Bluetooth device and select / Pair.
the headphone or RCA jacks for the Soundbar! If you are
unable to turn off your TV’s speakers and are connected
to its RCA outputs please try using the headphone
output instead. 3) Install the included batteries into your
Continued...
rothaudio.co.uk | 5