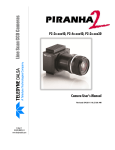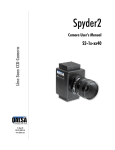
1
Line Scan CCD Cameras P-2x-xxx40, P2-4x-xxx40, P2-2x-xxx30 Camera User’s Manual Printed 3/29/2006 9:03:00 AM 29-Mar-06 03-32-00493-11 www.dalsa.com 2 Piranha2 User’s Manual © 2006 DALSA. All information provided in this manual is believed to be accurate and reliable. No responsibility is assumed by DALSA for its use. DALSA reserves the right to make changes to this information without notice. Reproduction of this manual in whole or in part, by any means, is prohibited without prior permission having been obtained from DALSA. About DALSA DALSA is an international high performance semiconductor and electronics company that designs, develops, manufactures, and markets digital imaging products and solutions, in addition to providing wafer foundry services. DALSA’s core competencies are in specialized integrated circuit and electronics technology, and highly engineered semiconductor wafer processing. Products include image sensor components; electronic digital cameras; and semiconductor wafer foundry services for use in MEMS, power semiconductors, image sensors and mixed signal CMOS chips. DALSA is a public company listed on the Toronto Stock Exchange under the symbol “DSA”. Based in Waterloo, On. Canada, the company has operations in Bromont, PQ; Colorado Springs, CO; Tucson, AZ; Eindhoven, NL; Munich, Germany and Tokyo, Japan. All DALSA products are manufactured using the latest state-of-the-art equipment to ensure product reliability. All electronic modules and cameras are subjected to a 24 hour burn-in test. For further information not included in this manual, or for information on DALSA’s extensive line of image sensing products, please call: DALSA Sales Offices Waterloo Europe Asia Pacific 605 McMurray Rd Waterloo, ON N2V 2E9 Canada Tel: 519 886 6000 Fax: 519 886 8023 www.dalsa.com [email protected] Breslauer Str. 34 D-82194 Gröbenzell (Munich) Germany Tel: 49 - 8142 – 46770 Fax: 49 - 8142 – 467746 www.dalsa.com [email protected] Space G1 Building, 4F 2-40-2 Ikebukuro Toshima-ku, Tokyo 171-0014 Japan 81 3 5960 6353 (phone) 81 3 5960 6354 (fax) www.dalsa.com [email protected] DALSA Worldwide Operations Waterloo Colorado Springs Europe Asia Pacific 605 McMurray Rd Waterloo, ON N2V 2E9 Canada Tel: 519 886 6000 Fax: 519 886 8023 www.dalsa.com [email protected] 4820 Centennial Blvd., Suite 115 Colorado Springs, CO 80919 USA Tel: 719 599 7700 Fax: 719 599 7775 www.dalsa.com [email protected] Breslauer Str. 34 D-82194 Gröbenzell (Munich) Germany Tel: 49 - 8142 – 46770 Fax: 49 - 8142 – 467746 www.dalsa.com [email protected] Ikebukuro East 13F 3-4-3 Higashi-Ikebukuro Toshima-ku, Tokyo 170-0013 Japan Tel: 81 3 5960 6353 Fax: 81 3 5960 6354 (fax) www.dalsa.com [email protected] Camera Link is a trademark registered by PULNiX America Inc., as chair of a committee of industry members including DALSA. 03-32-00493-11 DALSA 3 Piranha2 User’s Manual Contents Introduction to the Piranha2 Line Scan Camera __________________________________ 5 1.1 Camera Highlights.......................................................................................................................................................5 1.2 Image Sensors .............................................................................................................................................................7 1.3 Camera Performance Specifications ............................................................................................................................8 Camera Hardware Interface________________________________________________ 13 2.1 Installation Overview...................................................................................................................................................13 2.2 Input/Output................................................................................................................................................................13 2.3 Connectors, Pinouts, and Cables..................................................................................................................................14 2.4 Power Supplies ............................................................................................................................................................16 2.5 Control Inputs, Camera Link........................................................................................................................................16 2.6 Data Bus, Camera Link................................................................................................................................................17 2.7 Timing .........................................................................................................................................................................19 2.8 Camera Link Serial Communication............................................................................................................................22 Software Interface: How to Control the Camera __________________________________ 23 3.1 Overview......................................................................................................................................................................23 3.2 Command Format........................................................................................................................................................24 3.3 Processing Chain..........................................................................................................................................................24 3.4 Startup.........................................................................................................................................................................25 3.5 Saving and Restoring Settings.....................................................................................................................................25 3.6 Setting Baud Rate........................................................................................................................................................26 3.7 Setting the Data Mode.................................................................................................................................................26 3.8 Setting the Video Mode ...............................................................................................................................................27 3.9 Setting Line Rate and Exposure Mode.........................................................................................................................27 3.10 Setting a Region of Interest.......................................................................................................................................29 3.11 Returning Video Information ....................................................................................................................................29 3.12 Optimizing Offset Performance .................................................................................................................................31 3.13 Setting Gains .............................................................................................................................................................34 3.14 How to Calibrate the Camera ....................................................................................................................................35 3.15 Setting and Reading FPN Coefficients.......................................................................................................................38 3.16 Setting and Reading PRNU Coefficients ....................................................................................................................39 3.17 Generating Test Patterns...........................................................................................................................................39 3.18 Monitoring the Camera .............................................................................................................................................40 3.19 Rebooting the Camera...............................................................................................................................................41 03-32-00493-11 DALSA 4 Piranha2 User’s Manual 3.20 Setting the Pre-trigger ..............................................................................................................................................41 Optical, Mechanical, and Thermal Considerations_________________________________ 43 4.1 Mechanical Interface....................................................................................................................................................43 4.2 Optical Interface ..........................................................................................................................................................47 4.3 Compliance ..................................................................................................................................................................49 CCD Handling Instructions _________________________________________________ 51 5.1 Electrostatic Discharge and the CCD Sensor ................................................................................................................51 5.2 Protecting Against Dust, Oil and Scratches..................................................................................................................51 5.3 Cleaning the Sensor Window.......................................................................................................................................52 Troubleshooting ________________________________________________________ 53 6.1 Common Solutions.......................................................................................................................................................53 6.2 Troubleshooting Using the Serial Interface.................................................................................................................54 6.3 Specific Solutions .........................................................................................................................................................56 6.4 Product Support...........................................................................................................................................................58 Camera Link™ Reference _________________________________________________ 59 EMC Declaration of Conformity______________________________________________ 61 Communications Protocol _________________________________________________ 63 C1 Protocol Overview.........................................................................................................................................................63 C2 Protocol Features..........................................................................................................................................................63 C3 Command Format and Examples .................................................................................................................................63 C4 Networking Mode .........................................................................................................................................................64 C5 Error Handling..............................................................................................................................................................67 C6 Camera Parameter Screen............................................................................................................................................70 C7 Commands....................................................................................................................................................................73 DC Offset De-rating Curve _________________________________________________ 79 Revision History ________________________________________________________ 81 Index _______________________________________________________________ 83 03-32-00493-11 DALSA 5 Piranha2 User’s Manual 1 Introduction to the Piranha2 Line Scan Camera 1.1 Camera Highlights Features • Data rates up to 160MHz • Resolutions from 1k to 8k for 40MHz model • Resolutions from 1k to 8k for 30MHz model • High responsivity • Exposure control and antiblooming • Pinned photodiode sensor for low image lag • Programmable integration time, line rate, gain, offset, bit depth, test pattern, and diagnostics • Flat-field correction—minimizes sensor FPN and PRNU, lens vignetting and nonuniform lighting • Camera Link™ interface • Single 12V to 15V power supply • Compact design Performance • 03-32-00493-11 4x40MHz quad output data rate, 2x40MHz dual output data rate with 40MHz model • 2x30MHz dual output data rate with 30MHz model • 8 or 10-bit output from 10-bit digitization • 1024, 2048, and 4096 pixels, 10µm x 10µm, and 4096, 6144 and 8192 pixels, 7µm x 7µm, 100% fill factor DALSA 6 Piranha2 User’s Manual • Line rates up to 65kHz Programmability • Simple ASCII protocol controls gain, offset, line rates, trigger mode, pixel correction, test pattern output, and camera diagnostics. • Serial interface (ASCII, 9600 baud, adjustable to 19200, 57600, 115200), through Camera Link. Usability • Programmable gains, offsets, and camera controls • End-of-line sequence and test pattern output for debugging • Single input supply (+12V to +15V) • Compliant with CE and MIL-STD-810E (shock and vibration) Description Piranha2 takes performance to a new level. Two and four 8 or 10-bit outputs (selectable) at up to 40MHz deliver up to 160MHz throughput. Available in 1k to 8k resolutions, Piranha2 is small, light, and uses a single voltage power supply. Cabling and interface are simplified with the Camera Link high-speed serial standard. The camera is sensitive, but still provides quiet, uniform output thanks to CDS (correlated double sampling) and embedded flat-field correction algorithms. Gain and offset are fully programmable for each output channel, and the camera can output test patterns for cable/system troubleshooting. All resolutions provide appropriate, readilyavailable standard lens options (C-mount, F-mount, and M72x0.75 large format photography standards). All these features combine to make Piranha2 the most powerful line scan camera in the world. Set it loose on your toughest imaging challenge. Applications The Piranha2 is ideal for applications requiring high speed, superior image quality, and high responsivity. Applications include: 03-32-00493-11 • Electronics manufacturing inspection • Postal/parcel sorting • High performance document scanning/image lift • Narrow and large web inspection • High-end industrial inspection DALSA 7 Piranha2 User’s Manual 1.2 Image Sensors The image sensor used in your camera depends on the camera’s resolution and number of taps. 1k, 2k, 4k (10 µm), 2 taps: IL-P1 (Figure 1) 2k, 4k (10 µm), 4 taps: IT-P1 (Figure 2) 4k (7 µm), 6k, 8k, 2 taps: IL-P4 (Figure 3) 4k (7 µm), 6k, 8k, 4 taps: IT-P4 (Figure 4) Figure 1: IL-P1 Image Sensor (1k, 2k, 4k (10 µm), 2 tap models) CR1S, CR2S, CR1B, CR2B, CRLAST OS2 5I CCD Readout Shift Regist er 4I Stor ageWell with Exposure Control and Reset Structure 32 S 4I N Pinned Photodiodes (10µm x 10µm) 4I TCK 32 S VSTOR PR VPR Stor ageWell with Exposure Control and Reset Structure VDD 5I OS1 1 CCD Readout Shift Regist er VBB RST VSET VOD CR1S, CR2S, CR1B, CR2B, CRLAST 4I 32 S Light-shielded pixels 4 I Isolation pixels N = 1024 or 2048 VSS Relative position of package Pin 1 Figure 2: IT-P1 4k Image Sensor (2k, 4k (10 µm), 4 tap models) Relative position 1 of package Pin 1 N=2048 or 4096 03-32-00493-11 DALSA 8 Piranha2 User’s Manual Figure 3: IL-P4 Image Sensor (4k (7µm), 6k, and 8k, 2 tap models) CR1, CR2, CRLAST OS2 5I CCD Readout Shift Regist er 4I Stor ageWell with Exposure Control and Reset Structure 32 S 4I N Pinned Photodiodes (7µm x 7µm) 4I TCK 32 S VSTOR PR VPR Stor ageWell with Exposure Control and Reset Structure VDD 5I CCD Readout Shift Regist er 4I 32 S Light-shielded pixels VBB RST VSET VOD OS1 1 4 I Isolation pixels N = 4096, 6144 or 8192 CR1, CR2, CRLAST VSS Relative position of package Pin 1 Figure 4. IT-P4 Image Sensor (4k (7µm), 6k, and 8k, 4 tap models) CR1, CR2, CRLAST-L OS2 CR1, CR2, CRLAST-R 5I CCD Readout Shift Regist er OS4 5I Stor ageWell with Exposure Control and Reset Str ucture 32 S 4I N Pinned Photodiodes (7µm x 7µm ) 4I TCK 32 S VSTOR PR VPR Stor ageWell with Exposure Control and Reset Str ucture 5I CCD Readout Shift Regist er CR1, CR2, CRLAST-L 5I 32 S Light-shielded pixels 4 I Isolation pixels N = 4096, 6144 or 8192 CR1, CR2, CRLAST-R VDD VBB OS1 RST-L VSET-L VOD-L Relative position 1 of package Pin 1 VSS-L VDD VSET-R VBB RST-R VOD-R VSS-R OS3 1.3 Camera Performance Specifications The following two tables list the camera’s performance specifications. The first table lists the operating ranges of the camera, and the second table lists the performance specifications at minimum, nominal and maximum gain levels at 1kHz data rate. Note that as gain levels increase, performance decreases, because your signal to noise decreases. Also note that the cameras performance specifications were obtained using a line rate of only 1kHz. At low line rates, dark current can become a significant source of noise and appears in specifications such as FPN, PRNU and noise. If you operate the camera at faster line rates, such as 10kHz or greater, the amount of dark current will be reduced by 10x or greater. 03-32-00493-11 DALSA 9 Piranha2 User’s Manual Table 1. Piranha2 Operating Requirements and Ranges Operating Requirements Units Typical Notes Power 1024—2 o/p W 6 2048—2 /4 o/p W 6 / 8.5 4096 (7µm)—2 / 4 o/p W 6 / 8.5 4096 (10µm)—2 o/p W 9 4096 (10µm)—4 o/p W 11 6144—2 / 4 o/p W 7 / 9.5 8192 —2 / 4 o/p W 7.5 / 10 Power Supply Current (Vin = +12V) 1024—2 o/p mA 480 2048—2 /4 o/p mA 500 / 700 4096—2 / 4 o/p mA 500 / 690 4096 (10µm)—2 o/p mA 750 4096 (10µm)—4 o/p mA 900 6144—2 / 4 o/p mA 650 / 850 8192 —2 / 4 o/p mA 680 / 900 sec. 15 1024 sec. 10 2048 sec. 19 4096 sec. 38 6144 sec. 85 8192 sec. 115 Time to power up, typ Time to calibrate (FPN/PRNU) Specification Units Min Max 40 MHz Data Rate, per tap (40 MHz model) MHz 40 40 (30 MHz model) MHz 30 30 Units Min Specification Notes 1 Max 30 MHz Max 40 MHz 1 49.6 65.3 1 27 35.4 1 Line Rate 1024, 2 o/p kHz 2048, 2 o/p kHz 1 2048, 4 o/p kHz 1 4096, 2 o/p kHz 1 4096, 4 o/p kHz 1 36.2 6144, 2 o/p kHz 1 12.3 6144, 4 o/p kHz 1 8192, 2 o/p kHz 1 8192, 4 o/p kHz 1 14 68 1 18.5 1 24.4 7.15 9.3 18.6 Temperature Front plate Temperature 03-32-00493-11 °C 10 50 2 DALSA 10 Piranha2 User’s Manual Specification Units Min Max 40 MHz Temperature drift before recalibration, (recommendation) °C 10 x,y um ±175 z mm ±0.25 θz ° ±0.6 Notes Sensor Alignment Note that the environment conditions represent the state of the environment when the camera was being tested. Typical results are the average values obtained with at a 1kHz line rate and 30°C. Maximum results represent the worst case results from any camera operating at 50°C with a 1kHz line rate. 03-32-00493-11 DALSA Piranha2 User’s Manual 0 0 30 50 40 40 1 1 +10 +1 0 30 50 3 3.4 3.8 9.4 10.7 12 30 34 38 DN/(nJ/cm2) 6 6.8 7.6 18.8 21.4 24 60 68 76 Dynamic Range Ratio 496:1 207:1 390:1 62:1 135:1 Pk-Pk Noise, max DN 2 3 4 8 15 32 4 RMS Noise, max DN 0.5 0.5 0.75 1.2 2.2 4 4 FPN uncorrected, max 4K and under DN 1.1 4 3.5 8 8 27 5 FPN uncorrected, max 6K and over DN 1.6 4 4 8 14 27 5 FPN corrected, max DN 0.3 2 1 2 2 8 2 1K and 2K, ECD/ECE DN 5 18 5 23 8/10 39 4k, ECD/ECE DN 9 28 10 28 12/2 0 43 6K and 8K, ECD/ECE DN 15 38 16 38 14/2 7 55 PRNU corrected ECD/ECE DN 1.5 /2 3/3 1.2/ 1.5 3/ 8 2/3. 5 5/ 27 2 DC Offset DN 4k and under 2 3 5 5 7 17 6 6k and over 2 3 5 5 14 17 6 Typ Min 3 Broadband Responsivity, 10um pixels Min DN/(nJ/cm2) Typ Broadband Responsivity, 7um pixels Electro-Optic Specifications Min Max +10 Typ 0 40 Notes 50 1 Notes 30 40 1 Max -10 40 Typ -10 -10 40 Max. Gain Min 1 Max °C 40 1 Typ Front Plate Temperature 40 Min dB Max Gain Setting 40 Max kHz Typ MHz Line Rate Min Data Rate (40MHz model) Environment Conditions Units Units Table 2. Pirahna2 Performance Specifications, 1kHz line rate, 40MHz Model Min. Gain Nom. Gain Max 11 PRNU uncorrected Notes: DN = Digital Numbers (0-255); also known as gray levels. ECE = Exposure Control Enabled ECD = Exposure Control Disabled 03-32-00493-11 • All measurements taken in 8-bit output mode. • All measurements are valid for front plate temperatures in still air. • All measurements used a Tungsten halogen light source, 3200K bulb temp., and 750nm cutoff filter 1. All specifications for the 30MHz model are preliminary. 2 Due to FPN/PRNU correction calculations, certain digital numbers will be unavailable when outputting 10 bits with FPN/PRNU correction. 3 Measured at front plate. The corresponding ambient temperature range with still air is 0°C - 37°C. 4 Measurements taken at maximum line rates. DALSA 12 Piranha2 User’s Manual 5 Exposure control enabled to set the maximum integration time to 200 microseconds. 6. Refer to Appendix D for DC Offset de-rating curves. Figure 5: P2 Responsivity 2 Responsivity [DN/(nJ/cm )] Responsivity, Nominal Gain 03-32-00493-11 24 10µm pixels 20 16 12 7µm pixels 8 4 0 400 500 600 700 800 900 1000 Wavelength (nm) DALSA 13 Piranha2 User’s Manual 2 Camera Hardware Interface 2.1 Installation Overview In order to set up your camera, you should take these steps: 1. Connect Camera Link™ cables from camera to framegrabber. 2. Connect power. You must also set up the other components of your system, including light sources, frame grabbers, camera mounts, heat sinks, host computers, optics, encoders, and so on. 2.2 Input/Output Camera Link™ (2 and 4Tap models) Camera Link™ (4Tap model only) Diagnostic LED (See section 3.18) +12V to +15V and Ground ! 03-32-00493-11 WARNING: It is extremely important that you apply the appropriate voltages to your camera. Incorrect voltages will damage the camera. See section 2.4 for more details. DALSA 14 Piranha2 User’s Manual 2.3 Connectors, Pinouts, and Cables The camera uses a high-density 26-pin MDR26 connector for Camera Link control signals, data signals, and serial communications, and a 6-pin Hirose connector for power. MDR26 Female 13 1 26 14 Base, Medium, and Full Configuration Medium and Full Configuration Only M at ing Par t: 3M 334-31 ser ies Cable: 3M 14X 26-SZ LB-X X X-0LC* * Table 3: Camera Link Medium and Full Configuration Medium and Full Configurations Up to an additional 2 Channel Link Chips Camera Right Angle Channel Cable Name Connector Frame Link Signal Grabber 1 1 inner shield Inner Shield 14 14 inner shield Inner Shield 2 25 Y0- PAIR1- 15 12 Y0+ PAIR1+ 3 24 Y1- PAIR2- 16 11 Y1+ PAIR2+ 4 23 Y2- PAIR3- 17 10 Y2+ PAIR3+ 5 22 Yclk- PAIR4- 18 9 Yclk+ PAIR4+ 6 21 Y3- PAIR5- 19 8 Y3+ PAIR5+ 7 20 100 ohm PAIR6+ 20 7 terminated PAIR6- 8 19 Z0- PAIR7- 21 6 Z0+ PAIR7+ 9 18 Z1- PAIR8- 22 5 Z1+ PAIR8+ 10 17 Z2- PAIR9+ 23 4 Z2+ PAIR9- 11 16 Zclk- PAIR10- 24 3 Zclk+ PAIR10+ 12 15 Z3- PAIR11+ 25 2 Z3+ PAIR11- 13 26 13 26 inner shield inner shield Inner Shield Inner Shield *Exterior Overshield is connected to the shells of the connectors on both ends. **3M part 14X26-SZLB-XXX-0LC is a complete cable assembly, including connectors. 03-32-00493-11 DALSA 15 Piranha2 User’s Manual Table 4: Camera Link Base Configuration Base Configuration One Channel Link Chip + Camera Control +Serial Communication Camera Connector Right Angle Channel Link Frame Grabber Signal 1 1 inner shield 14 14 inner shield 2 25 X0- 15 12 X0+ 3 24 X1- 16 11 X1+ 4 23 X2- 17 10 X2+ 5 22 Xclk- 18 9 Xclk+ 6 21 X3- 19 8 X3+ 7 20 SerTC+ 20 7 SerTC- 8 19 SerTFG- 21 6 SerTFG+ 9 18 CC1- 22 5 CC1+ 10 17 CC2+ 23 4 CC2- 11 16 CC3- 24 3 CC3+ 12 15 CC4+ 25 2 CC4- 13 13 inner shield 26 26 inner shield Unused pairs should be terminated in 100 ohms at both ends of the cable. Table 5: DALSA Camera Control Configuration Signal Configuration Pin CC1 EXSYNC 9, 22 CC2 PRIN 10, 23 CC3 Spare 11, 24 CC4 Spare 12, 25 See Appendix B for the complete DALSA Camera Link configuration table, and refer to the DALSA Web site, vfm.dalsa.com, for the official Camera Link documents. 03-32-00493-11 DALSA 16 Piranha2 User’s Manual Hirose 6-pin Circular Male 6 1 5 2 4 3 Mat ing Par t: HIRO SE HR10A -7P-6S Pin Description Pin Description 1 +12V to +15V 4 GND 2 +12V to +15V 5 GND 3 +12V to +15V 6 GND 2.4 Power Supplies The camera requires a single voltage input (+12V to +15V). The camera meets all performance specifications using standard switching power supplies, although wellregulated linear supplies provide optimum performance. See the Performance Specifications for current requirements. When setting up the camera’s power supplies follow these guidelines: • Protect the camera with a fast-blow fuse between power supply and camera. • Do not use the shield on a multi-conductor cable for ground. • Keep leads as short as possible to reduce voltage drop. See section 1.3 for power requirements. ! WARNING: It is extremely important that you apply the appropriate voltages to your camera. Incorrect voltages will damage the camera. Protect the camera with a fast-blow fuse between power supply and camera. Visit http://vfm.dalsa.com for a list of companies that make power supplies that meet the camera’s requirements. The companies listed should not be considered the only choices. Many high quality supplies are available from other vendors. DALSA assumes no responsibility for the use of these supplies. 2.5 Control Inputs, Camera Link The camera accepts control inputs through the Camera Link MDR26F connector. All inputs are optional. The camera ships in exposure mode 1 (maximum line rate and exposure time). All Camera Control (CCx) signals are in a logic HIGH state. Line rate can be set internally using the serial interface. Power-on rate is always 9600 baud. Data rate for the 40MHz model is always 40MHz. Data rate for the 30MHz model is always 30MHz. The external control signals, EXSYNC and PRIN, are optional and enabled through the serial interface. PRIN PRIN is an optional input signal used for exposure control (PRIN). 03-32-00493-11 PRIN Indicates High Integration DALSA 17 Piranha2 User’s Manual Low IMPORTANT: This camera uses the falling edge of EXSYNC to trigger line readout, unlike previous DALSA cameras, which used the rising edge. Pixel reset EXSYNC (Triggers Line Readout) EXSYNC is an optional input signal that can be used to trigger the line readout rate. This camera uses the falling edge of EXSYNC to trigger line readout. Note: EXSYNC should not be clocked faster than the camera’s specified maximum line rate. The camera ignores the EXSYNC pulse until it has completed reading the last line out. 2.6 Data Bus, Camera Link These signals indicate when data is valid, allowing you to clock the data from the camera to your acquisition system. These signals are part of the Camera Link configuration and you should refer to the DALSA Camera Link Implementation Road Map, available at vfm.dalsa.com, for the standard location of these signals: Clocking Signal Indicates LVAL (high) DVAL (high) STROBE (rising edge) Outputting valid line Valid data Valid data IMPORTANT: This camera’s data should be sampled on the rising edge of STROBE. Digital Data The camera digitizes internally to 10 bits and outputs either all 10 bits or the most significant 8 bits in LVDS format on the Camera Link connector. Note: Due to flat-field correction calculations, certain digital numbers will be unavailable when outputting 10 bits with flat-field correction enabled (i.e. you will experience missing codes). 03-32-00493-11 DALSA 18 Piranha2 User’s Manual Test Pattern Pixels and End-of-line Sequence For information on the test pattern and end of line sequence commands, see section 3.17 Generating Test Patterns. To facilitate system-level debugging and verification of data path integrity, the camera can generate a test pattern. The test pattern is a ramp from 0 to 255DN, then starts at 0 again. Use the test pattern to verify the proper timing and connections between the camera and the frame grabber. To alleviate post-processing, Piranha2 offers an end-of-line sequence that provides basic calculations including "line counter", "line average", "pixels above threshold", "pixels below threshold", and "derivative line sum". These basic calculations are the center of most automatic gain control (AGC) algorithms. To further aid in debugging and cable/data path integrity, the first six bits of the output of the end-of-line sequence are "aa", "55", "aa". Refer to the table below. 03-32-00493-11 Location Value Description 1 A’s 2 5’s By ensuring these values consistently toggle between "aa" and "55", you can verify cabling (i.e. no stuck bits) 3 A’s 4 4 bit counter LSB justified Counter increments by 1. Use this value to verify that every line is output 5 Line sum LSB 6 Line sum MID Use these values to help calculate line average 7 Line sum MSB 8 0 9 Pixels above threshold LSB 10 Pixels above threshold MSB 11 Pixels below threshold LSB 12 Pixels below threshold MSB 13 Derivative line sum LSB 14 Derivative line sum Mid 15 Derivative line sum MSB 16 0 Monitor these values (either above or below threshold) and adjust camera gain to keep these values relatively constant. This provides a basis for automatic gain control (AGC) Use these values to focus the camera. Generally, the greater the sum the greater the image contrast DALSA 19 Piranha2 User’s Manual 2.7 Timing Figure 6. Piranha2 Overview Timing Showing Input and Output Relationships Figure 7. Piranha2 Fixed (Programmed) Integration Timing with External EXSYNC 03-32-00493-11 DALSA 20 Piranha2 User’s Manual Table 6: Piranha2 40MHz Timing (Fixed Integration Mode) Symbol Definition 03-32-00493-11 Min (ns) twSYNC The minimum low width of the EXSYNC pulse when not in SMART EXSYNC mode. twSYNC(SMART) * The minimum low width of the EXSYNC pulse when in SMART EXSYNC modes to guarantee the photosites are reset. twSYNC_INT The minimum width of the high pulse when the “SMART EXSYNC” feature is turned off twSYNC_INT (SMART) * Is the integration time when the “SMART EXSYNC” feature is available and turned on. Note that the minimum time is necessary to guarantee proper operation. tLINE PERIOD (t LP) The minimum and maximum line times made up of tTransfer, tREADOUT plus tOVERHEAD to meet specifications. 53,190 (8K4T) 106,382 (8K2T) 40,485 (6K4T) 80,645 (6K2T) 27,624 (4K4T) 54,054 (4K2T) 28,248 (2K2T) 15,313 (1K2T) tTransfer The time from the reception of the falling edge of EXSYNC to the rising edge of LVAL when pretrigger is set to zero. Pretrigger reduces the number of clocks to the rising edge of LVAL but doesn’t change the time to the first valid pixel. If the fixed integration time mode of operation is available and selected then the integration time is added to the specified value. 1,420 +/-50 twFixed Int. Fixed Integration Time mode of operation for variable exsync frequency. 800 tREADOUT Is the number of pixels per tap times the readout clock period. Pretrigger = 0. 51,200 (8K4T) 102,400 (8K2T) 38,400 (6K4T) 76,800 (6K2T) 25, 600 (4K4T) 51,200 (4K2T) 25,600 (2K2T) 12,800 (1K2T) tOVERHEAD Is the number of pixels that must elapse after the falling edge of LVAL before the EXSYNC signal can be asserted. This time is used to clamp the internal analog electronics 540+/-50 thPR Applies when the PRIN exposure control feature is enabled . The PRIN signal must be held a minimum time after the EXSYNC falling edge to avoid losing the integrated charge 0 Typ (ns) Max (ns) 100 2,000 100 2,000 106 t LP – 2,000 DALSA 21 Piranha2 User’s Manual Symbol Definition Min (ns) twPR_LOW Minimum Low time to assure complete photosite reset 2,000 +/- 200 tPR_SET The nominal time that the photo sites are integrating. Clock synchronization will lead to integration time jitter, which is shown in the specification as +/- values. The user should command times greater than these to ensure proper charge transfer from the photosites. Failure to meet this requirement may result in blooming in the Horizontal Shift Register. 2,000+/-200 Typ (ns) Max (ns) *SMART EXSYNC refers to exposure mode 4. Refer to section 3.9 Setting Line Rate and Exposure Mode for further information on exposure modes. Table 7: Piranha2 30MHz Timing (Fixed Integration Mode) Note: All values are preliminary for the Piranha2 30MHz 03-32-00493-11 Symbol Definition Min (ns) twSYNC The minimum low width of the EXSYNC pulse when not in SMART EXSYNC mode. 132 twSYNC(SMART) * The minimum low width of the EXSYNC pulse when in SMART EXSYNC modes to guarantee the photosites are reset. twSYNC_INT The minimum width of the high pulse when the “SMART EXSYNC” feature is turned off twSYNC_INT (SMART) * Is the integration time when the “SMART EXSYNC” feature is available and turned on. Note that the minimum time is necessary to guarantee proper operation. 2,000 tLINE PERIOD (t LP) The minimum and maximum line times made up of tTransfer, tREADOUT plus tOVERHEAD to meet specifications. 140487 (8K2T) 70,170 (4K2T) 36,378 (2K2T) 19,483 (1K2T) tTransfer The time from the reception of the falling edge of EXSYNC to the rising edge of LVAL when pretrigger is set to zero. Pretrigger reduces the number of clocks to the rising edge of LVAL but doesn’t change the time to the first valid pixel. If the fixed integration time mode of operation is available and selected then the integration time is added to the specified value. 1,874 +/-66 twFixed Int. Fixed Integration Time mode of operation for variable exsync frequency. 800 Typ (ns) Max (ns) 2,640 132 106 t LP – 2,000 DALSA 22 Piranha2 User’s Manual Symbol Definition Min (ns) tREADOUT Is the number of pixels per tap times the readout clock period. Pretrigger = 0. 138033 (8K2T) 33, 792 (4K4T) 67,584 (4K2T) 33,792 (2K2T) 16,896 (1K2T) tOVERHEAD Is the number of pixels that must elapse after the falling edge of LVAL before the EXSYNC signal can be asserted. This time is used to clamp the internal analog electronics 712+/-66 thPR Applies when the PRIN exposure control feature is enabled . The PRIN signal must be held a minimum time after the EXSYNC falling edge to avoid losing the integrated charge 0 twPR_LOW Minimum Low time to assure complete photosite reset 2,640 +/- 264 tPR_SET The nominal time that the photo sites are integrating. Clock synchronization will lead to integration time jitter, which is shown in the specification as +/- values. The user should command times greater than these to ensure proper charge transfer from the photosites. Failure to meet this requirement may result in blooming in the Horizontal Shift Register. 2,640+/-264 Typ (ns) Max (ns) 2.8 Camera Link Serial Communication Camera features can be controlled through the Camera Link™ serial communication (LVDS, 9600 baud). The serial interface uses simple ASCII-based protocol. The following chapter describes how to configure the camera using the serial interface. 03-32-00493-11 DALSA 23 Piranha2 User’s Manual 3 Software Interface: How to Control the Camera 3.1 Overview i This chapter details the most commonly used commands. See Appendix C for the complete syntax and command reference for the camera’s serial interface. All camera features can be controlled through the serial interface. The camera can also be used without the serial interface after it has been set up correctly. Functions available include: • Controlling basic camera functions such as gain and sync signal source • Camera calibration • Measuring internal temperature and voltages • Capturing video • Generating a test pattern for debugging The serial interface uses a simple ASCII-based protocol. The complete protocol is described in Appendix C, Communications Protocol. Online Help For quick help, the camera can return all available commands and parameters through the serial interface. To generate this list, send the command h to the camera. Retrieving Camera Settings To read current camera settings, send the command gcp. For an explanation of the camera parameter screen, see section C6 Camera Parameter Screen on page 70. 03-32-00493-11 DALSA 24 Piranha2 User’s Manual 3.2 Command Format • A carriage return (CR) ends each command. • Values in square brackets are optional. • There are two methods for entering the commands: In long form each command is written in its entirety. In short form, only a predefined abbreviation is required. The manual uses the short form. • The camera will answer each command with either "OK >" or "Error x: Error Message >". The ">" is always the last character sent by the camera. • The following parameters are used in the manual: i = integer f = float s = string t = tap x1, x2 = pixel start and stop values 3.3 Processing Chain The figure below is a simplified block diagram of the camera's processing chain. The analog processing chain contains two elements–a gain stage and an offset stage. The digital processing chain contains the FPN correction, PRNU correction, background subtract, and a system gain stage. The software commands allow you to set and change all the elements of the processing chain. This enables maximum processing flexibility depending on your requirements. Digital Processing In addition, the two elements of the analog processing chain, analog gain and analog offset, can be adjusted to separate values in the calibrated and uncalibrated modes. For example, the analog gain value can be set to –5db in calibrated mode and 6dB in uncalibrated mode. When switching between calibrated and uncalibrated modes, the camera automatically uses the corresponding value. 03-32-00493-11 DALSA 25 Piranha2 User’s Manual 3.4 Startup When the camera is first started, it must perform several actions before it is ready for imaging. This startup routine takes approximately 15 seconds, and follows this sequence: 1. Initializes the camera and all internal hardware. 2. Loads the last settings saved to non-volatile memory, including the last set of video correction coefficients, if previously saved. 3. Restores user settings if previously saved, otherwise factory settings. 4. Performs a memory test and voltage test and reports an error if any occurred. After this startup sequence is complete, the camera will return either the prompt "OK>" if no error occurred, or an error code if a problem has been discovered. 3.5 Saving and Restoring Settings The camera provides a number of commands for restoring, storing, and saving settings. To restore the original factory settings, use the command rfs. The FPN and PRNU coefficients are reset to 0. To save all current settings to EEROM, use the command wus. The camera will automatically restore the saved user settings when powered up. Note: While settings are being written to nonvolatile memory, do not power down camera or camera memory may be corrupted. • To save all current pixel coefficients to EEROM, use the command wpc. • To restore the last saved user settings and the FPN and PRNU coefficients, use the command rus. Factory Settings restore 03-32-00493-11 User Settings / EEROM Current Session write / restore DALSA 26 Piranha2 User’s Manual 3.6 Setting Baud Rate To set the speed of the camera serial communication port, use the command: Syntax: sbr i Syntax Elements: i Baud rate. Available baud rates are: 9600 (Default), 19200, 57600, and 115200. Notes: Example: • Power-on rate is always 9600 baud. • The rc (reset camera) command will not reset the camera to the power-on baud rate. sbr 57600 3.7 Setting the Data Mode To select the camera output mode, use the command: Syntax: sdm i Syntax Elements: i See Table 8: Mode Selection Values below for allowable parameter values. Notes: Example: To obtain the current data mode, use the command gcp. sdm 0 In the table below, ports A-F refer to ports in the Camera Link specification. Table 8: Mode Selection Values Mode Description 0 8-bit, using A/B/C/D ports for single processor configuration 1 10-bit, using A/B/C and D/E/F for single processor configuration 2 8-bit using ports A/B and D/E for dual processor configuration 3 10-bit, using A/B/C and D/E/F for dual processor configuration To obtain the current data mode, use the command gcp. 03-32-00493-11 DALSA 27 Piranha2 User’s Manual 3.8 Setting the Video Mode The video mode sets whether the camera is running in calibrated or uncalibrated mode, or if it is generating a test pattern. To set the video mode, use the command: Syntax: svm i Syntax Elements: i Video mode to use. Allowable values are: 0 Uncalibrated video, deactivated video correction 1 Calibrated video, activated video correction 2 Test pattern right Notes: To obtain the current video mode, use the command gcp. 3.9 Setting Line Rate and Exposure Mode The camera’s line rate (synchronization) is generated internally or input from a frame grabber/host system. With six different exposure mode settings, the Piranha2 delivers many possibilities for flexible camera timing. Table 9 outlines each of these six exposure modes, and is followed by a full explanation on how to set the camera’s frame rate and exposure time. Table 9: Piranha2 Exposure Modes Programmable Line Rate Programmable Exposure Time Mode SYNC PRIN Description 1 Internal Internal No No Maximum line rate and exposure time (factory setting) 2 Internal Internal Yes Yes Exposure control OFF until a set command is sent 3 External Internal No No Maximum exposure time 4 External Internal No No Smart EXSYNC 5 External External No No 6 External Internal No Yes Fixed integration time To obtain the current value of the exposure mode, use the command gcp. When setting the camera to external signal modes, EXSYNC and/or PRIN must be supplied. Overview: Setting Line Rate and Exposure Time The camera’s line rate (synchronization) can be generated internally through software commands or input externally from a frame grabber/host system. To select how you want the camera’s line rate to be generated: 1. 03-32-00493-11 You must first set the camera mode using the sem command. Refer to Setting the Exposure Mode on the following page for details. DALSA 28 Piranha2 User’s Manual 2. Then, when applicable, use the commands ssf (mode 2 only) to set the line rate and/or set (mode 2 or 6), to set the exposure time. Refer to Setting Line Rate and Setting Exposure Time below for details. Setting the Exposure Mode To select an exposure mode, use the command: Syntax: sem i Syntax Elements: i Exposure mode to use. Factory setting is 1. Refer to Table 9 on page 27 for a list of available modes. Notes: To obtain the current value of the exposure mode, use the command gcp. Related Commands: ssf, set Example: sem 3 Setting Line Rate Camera must be operating in exposure mode 2. To set the line rate, use the command: Syntax: ssf i Syntax Elements: i Desired line rate in Hz. Allowable range is 1000Hz to the camera’s maximum line rate. See Table 1. Piranha2 Operating Requirements and Ranges for maximum line rates. Notes: 03-32-00493-11 • To read the current line rate frequency, use the command gcp. • If you enter an invalid line rate frequency, the valid range of values will be displayed. Related Commands: sem, set Example: ssf 3000 DALSA 29 Piranha2 User’s Manual Setting Exposure Time Camera must be operating in exposure mode 2 or 6. To set the camera exposure time, use the command: Syntax: set f Syntax Elements: f Floating point number in µsecs. Notes: • To read the current exposure time, use the command gcp. • If you enter an invalid exposure time, the valid range of values will be displayed. Related Commands: sem, ssf Example: set 2100 3.10 Setting a Region of Interest The roi command sets the pixel range used to collect the end of line statistic and sets the region of pixels used in the cag, cao, gl, gla, ccf, and ccp commands. To define a region of interest, use the command: Syntax: roi x1 x2 Syntax Elements: x1 Pixel start number. Must be an odd number and less than the pixel end number. x2 Pixel end number. Must be an even number and greater than the pixel start number. Related Commands cag, cao, gl, gla, ccf, ccp Example: roi 10 50 3.11 Returning Video Information The camera’s microcontroller has the ability to read video data. This functionality can be used to verify camera operation and to perform basic testing without having to connect the camera to a frame grabber. This information is also used for collecting line statistics for calibrating the camera. 03-32-00493-11 DALSA 30 Piranha2 User’s Manual Returning a Single Line of Video The gl command returns a complete line of video (without digital processing or test pattern) displaying one pixel value after another. It also displays the minimum, maximum, and mean value of the line sampled. If a region of interest has been set, the statistics are generated for the region of interest only. Use this command, or the following gla command, to ensure the proper video input range into the processing chain before executing any pixel calibration commands. To return a single line of video, use the command: Syntax: gl [x1] [x2] Syntax Elements: [x1] Optional parameter. This sets the start pixel to display on screen. Allowable range is 1 to sensor pixel count. This parameter does not affect the Min, Max, and Mean statistics generated at the end of the line output. [x2] Optional parameter. This sets the end pixel to display on screen. Allowable range is 1 to sensor pixel count. This parameter does not affect the Min, Max, and Mean statistics generated at the end of the line output. Notes: Example: • If you do not specify a pixel range to display, the line output will display all sensor pixels on screen. • If a region of interest has been set using the roi command, the Min, Max, and Mean statistics at the end of the line output include statistics for the region of interest only. • If you are using the 4 tap model, and your region of interest is in one half of the sensor only (taps 1 and 2, or taps 3 and 4), the values displayed on screen for the taps outside the ROI are a mean of the ROI line statistics. • Values returned are in DN. gl 10 20 Returning Multiple Lines of Video You can also return the average for multiple lines of video data. The number of lines to sample is set and adjusted by the css command. The camera displays the Min., Max., and Mean statistics. If you are using a region of interest, the camera displays the statistics for the region of interest only. 03-32-00493-11 DALSA 31 Piranha2 User’s Manual To set the number of lines to sample, use the command: Syntax: css i Syntax Elements: i Notes: Example: Number of lines to sample. Allowable values are 16, 32, or 64 (factory setting). To return the current setting, use the gcp command. css 32 To return the average of multiple lines of video, use the command: Syntax: gla [x1] [x2] Syntax Elements: [x1] Optional parameter. This sets the start pixel to display on screen. Allowable range is 1 to sensor pixel count. This value does not affect the Min, Max, and Mean statistics generated at the end of the line output. [x2] Optional parameter. This sets the end pixel to display on screen. Allowable range is 1 to sensor pixel count. This value does not affect the Min, Max, and Mean statistics generated at the end of the line output. Notes: Example: • If you do not specify a pixel range to display, the line output will display all sensor pixels on screen. • If a region of interest has been set using the roi command, the Min, Max, and Mean statistics at the end of the line output include statistics for the region of interest only. • If you are using the 4 tap model, and your region of interest is in one half of the sensor only (taps 1 and 2, or taps 3 and 4), the values displayed on screen for the taps outside the ROI are a mean of the ROI line statistics. • Values returned are in DN. gl 10 20 3.12 Optimizing Offset Performance Optimizing offset performance in the analog domain allows you to achieve a better signal-to-noise ratio (dynamic range) than you would achieve by trying to optimize the offset in the digital domain. 03-32-00493-11 DALSA 32 Piranha2 User’s Manual Setting Analog Offset To set the analog offset of the camera, use the command: Syntax: sao t i Syntax Elements: t Tap selection. Allowable range is 1 to 4, or 0 for all taps. i Analog offset value. Allowable range is 0 to 1023. Notes: Example: • The offset increases linearly with higher values. A value of 100 does not equal an offset of 100DN. • The resulting analog offset value depends on other camera parameters such as temperature, line rate, and gain. • The offset for calibrated and uncalibrated video is set and saved separately. sao 0 200 Subtracting Offset or Background To subtract the video scene offset or any other background from the output video signal, use the command: Syntax: ssb t i Syntax Elements: t Tap selection. Allowable range is 1 to 4, or 0 for all taps. i Subtracted value in a range from 0 to 511. 03-32-00493-11 Notes: When subtracting a digital value from the digital video signal the output can no longer reach its maximum. Use the ssg command to correct for this. See section 3.13 Setting Gains for details on the ssg command. Example: ssb 0 20 DALSA 33 Piranha2 User’s Manual Subtracting Offset in Calibrated Mode To subtract the A/D offset from the video signal in calibrated mode only (svm 1), prior to the PRNU correction, use the command: Syntax: sdo t i Syntax Elements: t Tap selection. Allowable range is 1 to 4, or 0 for all taps. i Subtracted offset value in a range from 0 to 511. Notes: Example: • When subtracting a digital value from the digital video signal, the output can no longer reach its maximum. Use the ssg command to correct for this. See section 3.13 Setting Gains for details on the ssg command. • Available in calibrated mode only (svm 1). sdo 0 100 Calibrating Offset To calibrate the analog offset, use the command: Syntax: cao t i Syntax Elements: t Tap selection. Allowable range is 1 to 4, or 0 for all taps. i The line average in a range dependent on the current camera data mode setting. 8 bit: 1 to 100DN 10 bit: 4 to 400DN See section 3.11 Returning Video Information for more information on line averages 03-32-00493-11 Notes: This command sets offset in uncalibrated mode (svm 0). Example: cao 0 100 DALSA 34 Piranha2 User’s Manual 3.13 Setting Gains Optimizing gain in the analog domain allows you to achieve a better signal-to-noise ratio (dynamic range) than you would achieve by trying to optimize the gain in the digital domain. To set the analog gain mode, use the command: Syntax: sg t f Syntax Elements: t Tap selection. Allowable range is 1 to 4, or 0 for all taps. f Gain setting. A gain value of 0 sets the camera to its nominal gain (0dB). The specified gain value range is from –10 to 10dB. Example: sg 0 5.2 To set the digital gain, following a background subtraction, use the command: Syntax: ssg t i Syntax Elements: t Tap selection. Allowable range is 1 to 4, or 0 for all taps. i Gain setting. The gain ranges are 0 to 511 (equal to a gain from 1 to 1.999). Use this command in conjunction with the ssb command. Related Commands: ssb Example: ssg 1 15 Calibrating Gains Instead of setting the analog gain to a specific value, you can have the camera determine the gain value by providing the camera with an average output level to use. Note: This function requires a constant light input while it executes. This feature is beneficial for achieving a common output level for multiple cameras in a system. 03-32-00493-11 DALSA 35 Piranha2 User’s Manual To calibrate the analog gain: Syntax: cag t i Syntax Elements: t Tap selection. Allowable range is 1 to 4, or 0 for all taps. i Line average in a range dependent on the current camera data mode setting: 8-bit: 64 to 251 DN 10 bit: 256 to 1007 DN See section 3.11 Returning Video Information for more information on line averages Notes: • This function requires constant light input while executing. • This command sets gain in uncalibrated mode. Related Commands: gla, gl Example: cag 1 156 3.14 How to Calibrate the Camera Calibration Overview This camera has the ability to calibrate itself in order to remove non-uniformity in the image. This video correction operates on a pixel-by-pixel basis and implements a two point correction for each pixel. This correction can reduce or eliminate image distortion caused by the following factors: Fixed Pattern Noise (FPN) Photo Response Non Uniformity (PRNU) Lens and light source non-uniformity The two point correction is implemented such that for each pixel: Voutput = (Vinput - FPN( pixel ) - digital offset) * PRNU(pixel) where Voutput = digital output pixel value Vinput = digital input pixel value from the CCD PRNU( pixel) = PRNU correction coefficient for this pixel FPN( pixel ) = FPN correction coefficient for this pixel The calibration algorithm is performed in two steps. The fixed offset (FPN) is determined first by performing a calibration without any light. This calibration determines exactly how much offset to subtract per pixel in order to obtain flat output when the CCD is not exposed. 03-32-00493-11 DALSA 36 Piranha2 User’s Manual The white light calibration is performed next to determine the multiplication factors required to bring each pixel to the required value (balance target) for flat, white output. Video output is set slightly above the brightest pixel (depending on offset subtracted). For FPN (dark light) the value of all pixels must be between 1DN and 127DN. For PRNU (white light) the value must be between 128DN and 254DN. Use the gl command to ensure the proper input to the digital processing, Vinput. White light calibration will gain up to maximum white light pixel plus the maximum FPN subtract pixel. When performing any camera calibration, random noise is minimized by averaging out up to 64 lines of valid data. To adjust the sample line size, use the css i command, where i is 16, 32, 64 (factory setting). A lower value reduces the camera’s calibration time, at the expense of increased coefficient error. Calibration time Typical 1024 2048 4096 6144 8192 10 sec. 19 sec. 38 sec. 85 sec. 115 sec. LED blinks green while calibrating. IMPORTANT: While camera is blinking green, do not power down camera or memory may be corrupted. Calibration Steps Overview 1. Change camera video mode to calibrated using the command svm 1 2. Set up the camera operating environment (i.e. line rate, exposure, gain, etc.) 3. Make sure there are suitable calibration targets. The target to calibrate should be a flat field, e.g. plastic or ceramic for white calibration. 4. Set the calibration sample size using the command css (see Returning Multiple Lines of Video page 30). 5. Perform Dark (FPN) calibration (see Dark Calibration on page 36). 6. Perform White (PRNU) calibration (see White Light Calibration on page 37). 7. Save settings and pixel coefficients using the commands wus and wpc. Note: It is important to do the FPN calibration first. Results of the FPN calibration are used in the PRNU procedure. We recommend that you repeat the calibration when a temperature change greater than 10°C occurs. Dark Calibration Dark calibration is used to remove the fixed analog offset from the video path. It is recommended you repeat the calibration when a temperature change greater than 10°C occurs. 03-32-00493-11 DALSA 37 Piranha2 User’s Manual To perform dark calibration: 1. Stop all light from entering the camera. (Tip: cover lens with a lens cap.) 2. Verify that output signal level is within range by issuing the command gl or gla (a valid range is 1-127). If the signal level is too low, adjust the analog offset (sao). If the signal level is too high, ensure that no light is entering the camera, reduce the analog offset or reduce the gain level (sg). 3. Issue the command ccf. The camera will respond with OK> if no error occurs. Dark calibration automatically calibrates FPN coefficients and digital offset. To perform a dark calibration with an analog offset value: Use the ccf [i] command, where i is the analog offset DN. When the optional parameter is provided, this command sets the analog offset first to i before calculating the FPN coefficients range from 1 to 100DN for 8-bit data mode, and 4 to 400DN for 10-bit data mode for the specified region of interest. If value is left blank, current offset values are used. 4. After the calibration is complete, you can save these settings, and the PRNU coefficients, to non-volatile memory so they will be remembered after power-down. To do so, issue the command wpc. White Light Calibration Note: If your illumination or white reference does not extend the full field of view of the camera, calibration will not be successful. The camera will send a warning. White light calibration is more complex than dark calibration because the camera attempts to create a flat white image. This calibration corrects PRNU effects as well as non-uniform lighting and lens vignetting affects. White light calibration requires a clean, white reference. The quality of this reference is important for proper calibration. White paper is often not sufficient because the grain in the white paper will distort the correction. White plastic or white ceramic will lead to better balancing. There are several restrictions that must be met in order for the calibration to succeed: 1. The camera is sufficiently sensitive to detect 60 Hz ambient light flicker which may affect camera performance and calibration results. 2. The light level must be set so that all pixels are between 64DN and 254DN, otherwise a warning will be sent stating that the camera could not calibrate all pixels to the same level. Use the gl command to determine input level. If the signal level is too low or too high, adjust analog gain using the command sg. 3. The variance in light intensity across the target must not be more than 4 to 1. Because the maximum per-pixel digital gain is 2x, the camera will not be able to compensate for extremely non-uniform light. These restrictions are all tested within the calibration algorithm and the camera will report an informal message code if any of these conditions could not be met. 03-32-00493-11 DALSA 38 Piranha2 User’s Manual To perform a white light calibration: 1. Place a white reference in front of the camera. 2. Verify that output signal level is within range by issuing the command gl or gla (valid range is 128-254). If signal level is too low or too high, adjust the gain using the command sg. 3. Instruct the camera to perform a white light calibration using the command ccp. The camera will respond with OK> if no error occurs. To perform a white light calibration with an analog gain value: Use the ccp [i] command. When the optional parameter is provided the analog gain is adjusted to produce an average white pixel level that is equivalent to the parameter. This command sets the analog gain first to i before calculating the PRNU coefficients range from 64 to 251DN for 8-bit data mode, and 256 to 1007DN for 10-bit data mode. If value is left blank, current gain values are used. 4. After the calibration is complete, you can save these settings to non-volatile memory so they will be remembered after power-down. To do so, issue the command wpc. Returning Calibration Results and Errors After calibration, you can retrieve the results using the command dpc. This function returns all the pixel coefficients in the order FPN, PRNU, FPN, PRNU… The camera also returns the pixel number with each coefficient. To set a range for the returned coefficients provide an optional pixel start and end value: Example: display pixel coefficient from pixel 10 to 20 dpc 10 20 The command gcp returns all other settings. 3.15 Setting and Reading FPN Coefficients You can set or read an individual pixel’s FPN coefficient. To set the FPN coefficient, use the command: Syntax: sfc i i Syntax Elements: i The pixel number from 1 to the pixel count. i Coefficient value in a range from 0 to 127. Example: 03-32-00493-11 sfc 10 50 DALSA 39 Piranha2 User’s Manual To read the FPN coefficient, use the command: Syntax: gfc i Syntax Elements: i The pixel number to read. Example: gfc 10 3.16 Setting and Reading PRNU Coefficients You can set or read an individual pixel’s PRNU coefficient. To set the PRNU coefficient, use the command: Syntax: spc i i Syntax Elements: i The pixel number from 1 to the pixel count. i Coefficient value in a range from 0 to 511 where: i PixelPRNU = 1 + 512 Example: spc 10 50 To read the PRNU coefficient, use the command: Syntax: gpc i Syntax Elements: i The pixel number to read. Example: gpc 10 3.17 Generating Test Patterns The camera can generate a test pattern to aid in system debugging. Use the command svm 2 to activate the test pattern. The test pattern is a ramp from 0 to 255DN, then starts at 0 again. Use the test pattern to verify the proper timing and connections between the camera and the frame grabber. End-of-line Sequence To further aid debugging, the camera can generate an end-of-line sequence. The end-ofline-sequence outputs "aa", "55", "aa", "line counter", "line average", "pixels above threshold", "pixels below threshold", "derivative line sum". To activate the end-of-line sequence, use the command els 1. To disable the end-of-line sequence, use the command els 0. 03-32-00493-11 DALSA 40 Piranha2 User’s Manual Use the sut and slt commands to set threshold values between 0 and 255 for 8-bit data modes, or 0 to 1023 for 10-bit data modes. 3.18 Monitoring the Camera The camera is equipped with a red/green LED used to display the operational status of the camera. The following table summarizes the operating states of the camera and the corresponding LED states: LED state Priority Camera Status Condition Blinking RED 1 Error Fatal hardware failure Steady RED 2 Warning Monitoring task failure Blinking GREEN 3 Progress Lengthy operation in progress. While camera is blinking green, do not power down camera or memory may be corrupted. Steady GREEN 4 OK Healthy Note: When more than one condition is active, the LED indicates the condition with the highest priority. Error and warning states are accompanied by corresponding messages further describing the current camera status. Monitoring Tasks The camera enters a warning state when any of camera's continuously running monitoring tasks detects a failure. Use the wed i i command, where the first parameter is the monitoring task and the second parameter is the enable or disable value, to display the status of all the defined monitory tasks (if no parameter is passed) and/or to enable/disable specific monitoring tasks. Note: If you are performing defect detection down to a single pixel, enabling monitoring tasks is not advisable because monitoring can occur during active video and could potentially provide erroneous data. The following table lists the monitoring tasks: Monitoring task number Cod e 0 03-32-00493-11 MONITORING TASK DESCRIPTION All Enable/disable all monitoring tasks 1 1 Voltage Monitoring Monitors all camera voltages 2 2 Temperature Monitoring Monitors camera temperature 3 4 External SYNC presence Monitors presence of external SYNC 4 8 External PRIN presence Monitors presence of external PRIN 5 16 Gain Out Of Spec Monitoring Monitors current setting of analog gain 6 32 Line Rate Bellow 1 Khz Monitors current line rate Value Function 0 Disable selected task 1 Enable selected task DALSA 41 Piranha2 User’s Manual Note: by default all monitoring tasks are enabled except voltage monitoring. Example: enable all monitoring tasks wed 0 1 Example: disable EXSYNC presence wed 3 0 Temperature Measurement The temperature of the camera can be determined by using the vt command. This command will return the temperature inside the cover in degrees Celsius. For proper operation, this value should not exceed 75°C. Voltage Measurement The command vv checks the camera’s input voltage and internal voltages during powerup. If they are within the proper range, the camera returns OK>. Otherwise the camera returns an error message. Note that the voltage measurement feature of the camera provides only approximate results (typically within 10%). They should not be used to set the applied voltage to the camera. The purpose of this test is to isolate gross problems with the supply voltages. 3.19 Rebooting the Camera The command rc reboots the camera. The camera starts up with the last saved settings. Previously saved pixel coefficients are also restored. 3.20 Setting the Pre-trigger A pre-trigger may be required for some frame grabbers. To set the pre-trigger, use the command: Syntax: sp i Syntax Elements: i Pretrigger value from 0 to 15. Example: 03-32-00493-11 sp 10 DALSA 42 03-32-00493-11 Piranha2 User’s Manual DALSA 43 Piranha2 User’s Manual 4 Optical, Mechanical, and Thermal Considerations 4.1 Mechanical Interface The camera’s electronics are housed in a ruggedized lightweight aluminum case. See Error! Reference source not found. and Error! Reference source not found.. Mounting The camera can be mounted using the M3 holes (metric-threaded) on its base or top, and on its front plate at the corners. Environment The camera and cables should be shielded from environmental noise sources for best operation. The camera should also be kept as cool as possible. The specified operating temperature is 10–50°C measured at the front plate, (the corresponding ambient temperature range with still air is 0°C to 37°C). Mounting holes (refer above) allow you to attach heat sinking. Thermal Management For any CCD camera optimal performance is achieved by transferring heat away from the sensor. Keeping a sensor “cool” reduces the amount of dark current generated. Dark current is the leading contributor to FPN, PRNU, dark offset, random noise and other performance specifications, especially when a camera is significantly gained (i.e. +10db). Generally, dark current doubles for every 7°C increase in temperature at the sensor and increases linearly with integration time. Further variations in dark current cannot be compensated for with our flat-field correction algorithms. For this reason, at high gains (+10dB), high temperatures (40°C front plate), and low line rates, it is recommended that you recalibrate the flat-field coefficients when the temperature shifts by ±10°C. Note: Upon initial power-up the front plate camera temperature is near ambient. It is recommended to perform flat-field correction once the camera gets within 10°C of its 03-32-00493-11 DALSA 44 Piranha2 User’s Manual steady state temperature. For Piranha2, at an ambient temperature of 25°C and with no airflow, the camera takes 90 minutes to achieve steady state and 20 minutes to reach within 10°C of steady state. If your system cannot perform flat-field correction after warm-up consider the recommended methods of reducing dark current and overall camera temperatures (see below). Reducing Dark Current The Piranha2 mechanicals have been optimized to transfer heat from the sensor to the front plate. Therefore, to reduce dark current the front plate is the ideal place to mount heat sinks. The heat fins on Piranha2 improve conduction and provide a greater surface area for convection (airflow). Mount fans away from the camera to avoid vibration, and direct the airflow on the heat fins to decrease the temperature delta between ambient and front plate temperatures. Convection is the ideal method to minimize camera warm-up times and reduce dark current generation. Both methods— either conduction through heat sinking, or convection through air flow— greatly reduce dark current and will improve your system performance. 03-32-00493-11 DALSA 45 Piranha2 User’s Manual Figure 8: Piranha2, 2 tap models PIXEL 1 (1K) 19.88±0.18 PIXEL 1 (2K) 14.76 ±0.18 PIXEL 1 (4K) 10.66 ±0.18 STATUS 6.0 (4X) 4 9 .3 53.8 1 0 .5 57.0(2X) 85.0 32.5 4.0(2X) 9.0 (2X) 32.0 (2X) 54.9(2X) POWER OPTICAL DISTANCE 6.56±0.25 CAMERA SURFACE TO DIE SURFACE 89.2 60.3 CONTROL/DATA 1 OPTICAL DISTANCE 6.56±0.25 CAMERA SURFACE TO DIE SURFACE 27.0 M3x0.5 - 6H(4X) 6.0 DEEP M42X1 4.5 DEEP 54 .9 (2X) 1k/2k (10 µm) , 4k ((7 µm) 2 TAP WITH F-MOUNT 1k/2k (10 µm), 4k(7 µm) 2 TAP WITH C-MOUNT M3x0.5 - 6H(4X) 5.0 DEEP 10.3 4.0 (2X) 42.0 (2X) 56.1 19.1 (2X) 3.5 (2X) CONTROL DATA 1 3 2 .5 46.81 (2X) 58.0 (2X) 65.0 85.0 89.2 62.3 PIXEL 1 (4K) 22.02 ±0.18 PIXEL 1 (6K) 21.00 ±0.18 PIXEL 1 (8K) 13.83 ±0.18 M3x0.5 - 6H (4X) 7.0 DEEP M2x0.4 - 6H (4X) 7.0 DEEP M72X0.75 STATUS POWER 7.5 (2X) 25.0 9.1 (2X) 3.5 (2X) Ø78.0 10.5 6K (7 µm), 4K (10 µm) 2 TAP WITH F MOUNT 6K/8K (7 µm), 4K (10 µm) 2 TAP WITH LARGE FORMAT ADAPTER 6.0 (4X) 4 9 .3 5 3 .7 50.0 70.0 (2X) M3x0.5 - 6H (4X) 5.0 DEEP 46.81 (2X) 78.0 (2X) 85.0 Figure 9: Piranha2, 4 tap, 10 µm models 2K Camera 4K Camera PIXEL 1 (4K) 22.02 ±0.18 19.1 (2X) 3.5 (2X) M3x 0.5 - 6H (4X ) M42x1 x 4.5 (10.9) 2X A 85.0 CO NTROL DATA 1 65.0 58.0 (2X) 58.0 (2X) 32.50±0.18 CCD IMAGING CENTER (85.0) (64.0) 2X (10.5) 2X M2x0.4 - 6H (4X) 7.0 DEEP 46.81 (2X) M3x0.5 x 6.0 (4X) (32.8) 2X 7 .0 DE EP 32.5 PIXEL 1 (2K) 32.26 ±0.18 (85.0) (65.0) DATA 2 STATUS 3.5 (2X) 3.5 (2X) 78.0 (2X) 9.1 (2X) POW ER 46.81 (2X) 78.0 (2X) (49.3) (53.8) (10.0) (54.8) (32.1) (10.5) (24.9) (41.6) 2X 8 5.0 M3x0.5 x 5.0 (4X) 7.5 (2X) 03-32-00493-11 6.0 (4X) 70.0 (2X) CAMERA ASSEMBLY WITH C-MOUNT LENS ADAPTER SCALE (1:2) CAMERA ASSEMBLY WITH F-MOUNT LENS ADAPTER SCALE (1:2) DALSA 46 Piranha2 User’s Manual Figure 10: Piranha2, 4 tap, 7 µm models PIXEL 1 (4K) 28.16 ±0.18 19.1 (2X) 3.5 (2X) 7.5 (2X) 32.5 70.0 (2X) 54.9 (2X) 10.5 S L IM L IN E 8 K 4 T A P CONTROL DATA 1 DATA 2 STATUS 3.5 (2X) 9.1 (2X) M3x0.5 - 6H (4X) 5.0 DEEP M72X0.75 46.81 (2X) 78.0 (2X) 85.0 32.1 (2X) POWER 25.0 76.0 MAX WITH LARGE FORMAT ADAPTER 49.3 5.6 (2X) PIXEL 1 (8K) 9.32±0.18 39.6 (2X) CONTROL DATA 1 M72x0.75 6.0 (4X) 32.8 (2X) 22.8 66.8 85.0 Ø78.0 65.0 M2x0.4 - 6H (4X) 7.0 DEEP 46.81 (2X) 49.3 M3x0.5 - 6H (4X) 7.0 DEEP 53.7 6.0 (4X) PIXEL 1 (6K) 21.00 ±0.18 PIXEL 1 (8K) 13.83 ±0.18 58.0 (2X) OPTICAL DISTANCE 6.56±0.25 CAMERA SURFACE TO DIE SURFACE 89.2 62.3 STANDARD 8K 4 TAP WITH STANDARD 4K/6K 4 TAP LARGE FORMAT ADAPTER WITH F MOUNT 105.0 DATA 2 85.0 37.6 78.0 (2X) STATUS 13.0 7.5 (2X) 61.0 (2X) M3x0.5 - 6H 5.0 DEEP (4X) POWER 42.50±0.18 PIXEL 1 10.0 3.5 (2X) 3.5 (2X) 69.0 (2X) 22.9 6.56±0.25 OPTICAL DISTANCE (ACTIVE AREA TO FRONT PLATE MOUNT SURFACE) 16.0 M3x0.5 - 6H 6.0 DEEP (4X) 03-32-00493-11 DALSA 47 Piranha2 User’s Manual 4.2 Optical Interface Depending upon resolution the cameras can be ordered with different lens mounts. The following table provides this information. Lens Mounts Camera Configuration Available Lens Mount Options 1K, 2 Tap No mount and C-mount 2K, 2 Tap, 4 Tap No mount, C-mount and F-mount 4K, 2 Tap No mount and F-mount and M72x0.75 (10µm model only) 4K, 4 Tap No mount, F-mount and M72x0.75 6K, 2 Tap No mount, F-mount and M72x0.75 6K, 4 Tap No mount, F-mount and M72x0.75 8K, 2 Tap No mount, and M72x0.75 8K, 4 Tap No mount, and M72x0.75 All C-mount and F-mount adapters have the appropriate back focal distance for the lens type being used. Ensure that the image circle diameter of the lens to be used is as great as the length of the imaging region. The following table provides information regarding the lens mount used and the back focal distance. The M72x0.75 lens adapter originated from the high-end photography standard. Distances to its inner flat surface and the outer flat surface are provided. Mount Back Focal Distance (sensor die to adapter) C-Mount 17.52 ±0.25mm F-Mount 46.5 ±0.25mm M72x0.75 19.55mm (nominal)—outer flat surface Detailed mechanicals, including front plate opening sizes, and the distance from the sensor die to the opening, can be found in section 4.1 Mechanical Interface. Note: Lens manufacturers have readily available lens mounts and lenses to adapt to the M72x0.75 adapter available on the 6K and 8K cameras. Illumination The amount and wavelengths of light required to capture useful images depend on the particular application. Factors include the nature, speed, and spectral characteristics of objects being imaged, exposure times, light source characteristics, environmental and acquisition system specifics, and more. DALSA’s web site, vfm.dalsa.com, provides an introduction to this potentially complicated issue. See “Radiometry and Photo Responsivity” and "Sensitivities in Photometric Units" in the CCD Technology Primer found under the Application Support link. It is often more important to consider exposure than illumination. The total amount of energy (which is related to the total number of photons reaching the sensor) is more 03-32-00493-11 DALSA 48 Piranha2 User’s Manual important than the rate at which it arrives. For example, 5µJ/cm2 can be achieved by exposing 5mW/cm2 for 1ms just the same as exposing an intensity of 5W/cm2 for 1µs. Light Sources Keep these guidelines in mind when setting up your light source. • LED light sources are relatively inexpensive, provide a uniform field, and longer life span compared to other light sources. However, they also require a camera with excellent sensitivity, such as DALSA’s Piranha2 camera. • Halogen light sources generally provide very little blue relative to IR. • Fiber-optic light distribution systems generally transmit very little blue relative to IR. • Some light sources age; over their life span they produce less light. This aging may not be uniform—a light source may produce progressively less light in some areas of the spectrum but not others. Filters CCD cameras are extremely responsive to infrared (IR) wavelengths of light. To prevent infrared from distorting the images you scan, use a “hot mirror” or IR cutoff filter that transmits visible wavelengths but does not transmit wavelengths over 750nm. Examples are the Schneider Optics™ B+W 489, which includes a mounting ring, the CORION™ LS750, which does not include a mounting ring, and the CORION™ HR-750 series hot mirror. Lens Modeling Any lens surrounded by air can be modeled for camera purposes using three primary points: the first and second principal points and the second focal point. The primary points for a lens should be available from the lens data sheet or from the lens manufacturer. Primed quantities denote characteristics of the image side of the lens. That is, h is the object height and h′ is the image height. The focal point is the point at which the image of an infinitely distant object is brought to focus. The effective focal length (f′) is the distance from the second principal point to the second focal point. The back focal length (BFL) is the distance from the image side of the lens surface to the second focal point. The object distance (OD) is the distance from the first principal point to the object. Figure 11. Primary Points in a Lens System Magnification and Resolution The magnification of a lens is the ratio of the image size to the object size: 03-32-00493-11 DALSA 49 Piranha2 User’s Manual m= h′ h where m is the magnification, h’ is the image height (pixel size) and h is the object height (desired object resolution size). By similar triangles, the magnification is alternatively given by: m= f′ OD These equations can be combined to give their most useful form: h′ f′ = h OD This is the governing equation for many object and image plane parameters. Example: An acquisition system has a 512 x 512 element, 10µm pixel pitch area scan camera, a lens with an effective focal length of 45mm, and requires that 100µm in the object space correspond to each pixel in the image sensor. Using the preceding equation, the object distance must be 450mm (0.450m). 10µm 45mm = 100µm OD OD = 450mm (0.450m) 4.3 Compliance The Piranha2 cameras have been designed for EMC compliance. The test setup has been verified to the following EMC standards: CISPR-22:1997 EN 50082-1:1997 EN 61000-4-2; ±6kV CD, ±8kV AD:1995 EN 61000-4-3; 3V/m:1996 EN 61000-4-4; 500V, 1100V:1995 Follow these specific guidelines to ensure best performance: 03-32-00493-11 • Keep Camera Link cables as short as possible. • Ensure that all cable shields have 360° electrical connection to the connector. • Fasten and secure all connectors. DALSA 50 03-32-00493-11 Piranha2 User’s Manual DALSA 51 Piranha2 User’s Manual 5 CCD Handling Instructions 5.1 Electrostatic Discharge and the CCD Sensor Cameras contain charge-coupled device (CCD) image sensors, which are metal oxide semiconductor (MOS) devices and are susceptible to damage from electrostatic discharge (ESD). Electrostatic charge introduced to the sensor window surface can induce charge buildup on the underside of the window that cannot be readily dissipated by the dry nitrogen gas in the sensor package cavity. When charge buildup occurs, surface-gated photodiodes (SGPDs) may exhibit higher image lag. Some SGPD sensors, such as the IL-P4 and the ITP4 used in the Piranha2 cameras, may also exhibit a highly non-uniform response when affected by charge buildup, with some pixels displaying a much higher response when the sensor is exposed to uniform illumination. The charge normally dissipates within 24 hours and the sensor returns to normal operation. ! WARNING: Charge buildup will affect the camera’s flat-field correction calibration. To avoid an erroneous calibration, ensure that you perform flat-field correction only after a charge buildup has dissipated over 24 hours. 5.2 Protecting Against Dust, Oil and Scratches The CCD window is part of the optical path and should be handled like other optical components, with extreme care. Dust can obscure pixels, producing dark patches on the sensor response. Dust is most visible when the illumination is collimated. The dark patches shift position as the angle of illumination changes. Dust is normally not visible when the sensor is positioned at the exit port of an integrating sphere, where the illumination is diffuse. Dust can normally be removed by blowing the window surface using a compressed air blower, unless the dust particles are being held by an electrostatic charge, in which case either an ionized air blower or wet cleaning is necessary. 03-32-00493-11 DALSA 52 Piranha2 User’s Manual Oil is usually introduced during handling. Touching the surface of the window barehanded will leave oily residues. Using rubber fingercots and rubber gloves can prevent oil contamination. However, the friction between the rubber and the window may produce electrostatic charge that may damage the sensor. To avoid ESD damage and to avoid introducing oily residues, only hold the sensor from the edges of the ceramic package and avoid touching the sensor pins and the window. Scratches can be caused by improper handling, cleaning or storage of the sensor. Vacuum picking tools should not come in contact with the window surface. CCDs should not be stored in containers where they are not properly secured and can slide against the container. Scratches diffract incident illumination. When exposed to uniform illumination, a sensor with a scratched window will normally have brighter pixels adjacent to darker pixels. The location of these pixels changes with the angle of illumination. 5.3 Cleaning the Sensor Window 1. Use compressed air to blow off loose particles. This step alone is usually sufficient to clean the sensor window. 2. If further cleaning is required, use a lens wiper moistened with alcohol or acetone. 3. We recommend using lint-free ESD-safe cloth wipers that do not contain particles that can scratch the window. The Anticon Gold 9”x 9” wiper made by Milliken is both ESD safe and suitable for class 100 environments. Another ESD acceptable wiper is the TX4025 from Texwipe. 4. An alternative to ESD-safe cloth wipers is Transplex swabs that have desirable ESD properties. There are several varieties available from Texwipe. Do not use regular cotton swabs, since these can introduce charge to the window surface. 5. Wipe the window carefully and slowly. 6. When cleaning long linear sensors, it may be easier to wipe along the width (i.e. as opposed to the length) of the sensor. 03-32-00493-11 DALSA 53 Piranha2 User’s Manual 6 Troubleshooting The information in this chapter can help you solve problems that may occur during the setup of your camera. Remember that the camera is part of the entire acquisition system. You may have to troubleshoot any or all of the following: power supplies cabling frame grabber hardware & software host computer light sources optics operating environment encoder Your steps in dealing with a technical problem should be: 1. Try the general and specific solutions listed in sections 6.1, 6.2 and 6.3. 2. If these solutions do not resolve your problem, see section 6.4 on getting product support. 6.1 Common Solutions Connections The first step in troubleshooting is to verify that your camera has all the correct connections. Power Supply Voltages Check for the presence of all voltages at the camera power connector. Verify that all grounds are connected. EXSYNC When the camera is powered on for the first time, it defaults (no external input required) to exposure mode 2 (5kHz line rate, and internal Sync to trigger readout). After a user has saved settings, the camera powers up with the saved settings. Note, a warning appears when switching to exposure mode requiring external signals if external signals are not present (EXSYNC or PRIN). 03-32-00493-11 DALSA 54 Piranha2 User’s Manual PRIN PRIN is an optional input signal used to control exposure control (PRIN). PRIN Indicates High Low Integration Pixel reset Data Clocking/Output Signals To validate cable integrity, have the camera send out a test pattern and verify it is being properly received. Refer to section D11 Generating Test Patterns for further information. 6.2 Troubleshooting Using the Serial Interface The following commands can aid in debugging. (The complete command protocol is described in Appendix B and C.) Communications To quickly verify serial communications send the help command . The h command returns the online help menu. If further problems persist, review Appendix C for more information on communications. Verify Parameters To verify the camera parameters, send the gcp command. See section C6 Camera Parameter Screen for a complete explanation of the camera parameters screen. Verify Factory Calibrated Settings To restore the camera’s factory settings and reset the FPN and PRNU coefficients to 0, send the rfs command. After executing this command send the gcp command to verify the factory settings. Verify Timing and Digital Video Path Use the test pattern feature to verify the proper timing and connections between the camera and the frame grabber and verify the proper output along the digital processing chain. See below. Generating Test Patterns The camera can generate a test pattern to aid in system debugging. Use the command svm 2 to activate the test pattern. The test pattern is a ramp from 0 to 255DN, then starts at 0 again. Use the test pattern to verify the proper timing and connections between the camera and the frame grabber. 03-32-00493-11 DALSA 55 Piranha2 User’s Manual • No test pattern or bad test pattern — May indicate a problem with the camera (e.g. missing bit) or a system setup problem (e.g. frame grabber or timing). Verify the presence of the LVAL and STROBE signals. • Test pattern successful — Run the svm 0 command to deactivate video correction. Then run the gl command under both dark and light conditions to retrieve a line of raw video (no digital processing). Under dark conditions, with factory settings, the analog offset value should be within the specified range (refer to the user specifications). Adjust the analog offset using the cao or sao commands. Under light conditions, you should receive a value. Verify Voltage To check the camera’s input voltages and internal voltages, use the vv command. If they are within the proper range, the camera returns OK>. Otherwise the camera returns an error message. Verify Temperature To check the internal temperature of the camera, use the vt command. For proper operation, this value should not exceed 75°C. Verify Pixel Coefficients To activate video correction, send the command svm 1. Then use the dpc command to display the pixel coefficients in the order FPN, PRNU, FPN, PRNU… The camera also returns the pixel number with each coefficient. End-of-line Sequence To further aid debugging, the camera can generate an end-of-line sequence. The end-ofline-sequence outputs "aa", "55", "line counter", "line average", "pixels above threshold", "pixels below threshold". To activate the end-of-line sequence, use the command els 1. To disable the end-of-line sequence, use the command els 0. Use the sut and slt commands to set threshold values between 0 and 255 for 8-bit data modes, or 0 to 1023 for 10-bit data modes. LED Status Located on the back of the camera is a red/green LED used to display the operational status of the camera. Red lights indicate errors or warnings and green lights indicate progress and OKs. Error and warning states are accompanied by corresponding messages further describing current camera status. Monitoring Tasks The camera enters a warning state when any of the camera's continuously running monitoring tasks detects a failure. Use the wed command to display the status of all the defined monitory tasks (if no parameter is passed) and/or to enable/disable specific monitoring tasks. 03-32-00493-11 DALSA 56 Piranha2 User’s Manual 6.3 Specific Solutions No Output or Erratic Behavior If your camera provides no output or behaves erratically, it may be picking up random noise from long cables acting as antennae. Do not attach wires to unused pins. Verify that the camera is not receiving spurious inputs (e.g. EXSYNC or PRIN, if camera is in exposure mode that regulates external signals). Line Dropout, Bright Lines, or Incorrect Line Rate Verify that the frequency of the internal sync is set correctly, or when the camera is set to external sync that the EXSYNC signal supplied to the camera does not exceed the camera’s maximum specified line rate. Noisy Output Check your power supply voltage outputs for noise. Noise present on these lines can result in poor video quality. Low quality or non-twisted pair cable can also add noise to the video output. Dark Patches If dark patches appear in your output the optics path may have become contaminated. Clean your lenses and sensor windows with extreme care. 1. Take standard ESD precautions. 2. Wear latex gloves or finger cots 3. Blow off dust using a filtered blow bottle or dry, filtered compressed air. 4. Fold a piece of optical lens cleaning tissue (approx. 3" x 5") to make a square pad that is approximately one finger-width 5. Moisten the pad on one edge with 2-3 drops of clean solvent—either alcohol or acetone. Do not saturate the entire pad with solvent. 6. Wipe across the length of the window in one direction with the moistened end first, followed by the rest of the pad. The dry part of the pad should follow the moistened end. The goal is to prevent solvent from evaporating from the window surface, as this will end up leaving residue and streaking behind. 7. Repeat steps 2-4 using a clean tissue until the entire window has been cleaned. 8. Blow off any adhering fibers or particles using dry, filtered compressed air. Stuck Bits If data bits seem to be stuck or do not change, check that the camera is not saturated by preventing light from entering. To verify the data path integrity, check the levels of the 2 03-32-00493-11 DALSA 57 Piranha2 User’s Manual test pattern pixels (first 2 pixels following the last End-of-line pixel. You may need to turn the End-of-line sequence “on” by sending the command els 1). Any deviation from a consistent value of these pixels (170DN/85DN) could be an indication of the following: • shorted bits • stuck bits • digital noise pickup on the I/O cable • open connection. To activate the test pattern, use the command svm 2. Use the test pattern to verify the proper timing and connections between the camera and frame grabber. To receive a complete line of raw video data (without digital processing or test pattern) through the RS232 port, use the command gl. The returned data displays one pixel value after another and the minimum, maximum, and mean value of the sampled line. Use this command to ensure the proper video input range. Probe the output lines with an oscilloscope. Disconnect the digital cable from the camera and check the digital signals at the output of the camera. Ensure that the correct values are present. Check all cable connections, especially right at the connector; poor connections or broken wires will cause randomly changing bits or stuck bits. Horizontal Lines or Patterns in Image A faulty or irregular encoder signal may result in horizontal lines due to exposure time fluctuations; ensure that your exposure time is regular. If you have verified that your exposure time is consistent and patterns of low frequency intensity variations still occur, ensure that you are using a DC or high frequency light source. 03-32-00493-11 DALSA 58 Piranha2 User’s Manual 6.4 Product Support If there is a problem with your camera, collect the following data about your application and situation and call your DALSA representative. Note: You may also want to photocopy this page to fax to DALSA. Customer name Organization name Customer phone number fax number Complete Product Model Number (e.g. P2-21-xxx40, P2-21-xxx30...) Complete Serial Number Your DALSA Agent or Dealer Acquisition System hardware (frame grabber, host computer, light sources, etc.) Acquisition System software (version, OS, etc.) Power supplies and current draw Data rate used Control signals used in your application, and their frequency or state (if applicable) EXSYNC MCLK PRIN BIN Other _______ Results when you run the get_camera_parameter command Detailed description of problem encountered. please attach description with as much detail as appropriate In addition to your local DALSA representative, you may need to call DALSA Technical Sales Support: Voice: Fax: 03-32-00493-11 North America 519-886-6000 519-886-8023 Europe +49-8142-46770 +49-8142-467746 Asia 519-886-6000 519-886-8023 DALSA 59 Piranha2 User’s Manual Appendix A Camera Link™ Reference Camera Link is a communication interface for vision applications. For years, the scientific and industrial digital video market has lacked a standard method of communication. Both frame grabbers and camera manufacturers developed products with different connectors, making cable production difficult for manufacturers and very confusing for consumers. A connectivity standard between digital cameras and frame grabbers is long overdue and will become even more necessary as data rates continue to increase. Increasingly diverse cameras and advanced signal and data transmissions have made a connectivity standard like Camera Link a necessity. The Camera Link interface will reduce support time, as well as the cost of that support. The standard cable will be able to handle the increased signal speeds, and the cable assembly will allow customers to reduce their costs through volume pricing. LVDS Technical Description Low Voltage Differential Signaling (LVDS) is a high-speed, low-power general purpose interface standard. The standard, known as ANSI/TIA/EIA-644, was approved in March 1996. LVDS uses differential signaling, with a nominal signal swing of 350mV differential. The low signal swing decreases rise and fall times to achieve a theoretical maximum transmission rate of 1.923 Gbps into a loss-less medium. The low signal swing also means that the standard is not dependent on a particular supply voltage. LVDS uses currentmode drivers, which limit power consumption. The differential signals are immune to ±1 V common volt noise. Camera Signal Requirements This section provides definitions for the signals used in the Camera Link interface. The standard Camera Link cable provides camera control signals, serial communication, and video data. Video Data The Channel Link technology is integral to the transmission of video data. Image data and image enable signals are transmitted on the Channel Link bus. Four enable signals are defined as: • FVAL—Frame Valid (FVAL) is defined HIGH for valid lines. 03-32-00493-11 DALSA 60 Piranha2 User’s Manual • LVAL—Line Valid (LVAL) is defined HIGH for valid pixels. • DVAL—Data Valid (DVAL) is defined HIGH when data is valid. • Spare— A spare has been defined for future use. All four enable signals must be provided by the camera on each Channel Link chip. All unused data bits must be tied to a known value by the camera. For more information on image data bit allocations, refer to the official Camera Link specification on the vfm.dalsa.com web site. Camera Control Signals Four LVDS pairs are reserved for general-purpose camera control. They are defined as camera inputs and frame grabber outputs. Camera manufacturers can define these signals to meet their needs for a particular product. The signals are: • Camera Control 1 (CC1) • Camera Control 2 (CC2) • Camera Control 3 (CC3) • Camera Control 4 (CC4) Communication Two LVDS pairs have been allocated for asynchronous serial communication to and from the camera and frame grabber. Cameras and frame grabbers should support at least 9600 baud. These signals are • SerTFG—Differential pair with serial communications to the frame grabber. • SerTC—Differential pair with serial communications to the camera. The serial interface will have the following characteristics: one start bit, one stop bit, no parity, and no handshaking. It is recommended that frame grabber manufacturers supply both a user interface and a software application programmming interface (API) for using the asynchronous serial communication port. The user interface will consist of a terminal program with minimal capabilities of sending and receiving a character string and sending a file of bytes. The software API will provide functions to enumerate boards and send or receive a character string. See Appendix B in the Official Camera Link specification on the vfm.dalsa.com web site. Power Power will not be provided on the Camera Link connector. The camera will receive power through a separate cable. Camera manufacturers define their own power connector, current, and voltage requirements. 03-32-00493-11 DALSA 61 Piranha2 User’s Manual Appendix B EMC Declaration of Conformity DALSA 605 McMurray Rd., Waterloo, ON CANADA N2V 2E9 We, declare under sole responsibility, that the product(s): P2-2x-xxx40 P2-4x-xxx40 P2-2x-xxx30 fulfill(s) the requirements of the standard(s) EMC: CISPR-22:1997 EN 50082-1:1997 EN 61000-4-2; +/- 6kV CD, +/-8kV AD:1995 EN 61000-4-3; 3V/m:1996 EN 61000-4-4; 500V, 1100V:1995 This product complies with the requirements of the Low Voltage Directive 73/23/EEC and the EMC Directive 89/336/EEC and carries the CE mark accordingly. Place of Issue Waterloo, ON, CANADA Date of Issue October 2003 Name and Signature of authorized person Hank Helmond Quality Manager, DALSA Corp. This Declaration corresponds to EN 45 014. 03-32-00493-11 DALSA 62 03-32-00493-11 Piranha2 User’s Manual DALSA 63 Piranha2 User’s Manual Appendix C Communications Protocol C1 Protocol Overview This protocol defines the method used to control the camera via a serial interface. The communication protocol defines the command format used and error messages provided. C2 Protocol Features • ASCII-based Camera Serial Port Defaults • 8 data bits • 1 stop bit • No parity • No flow control • 9.6Kbps • Camera does not echo characters C3 Command Format and Examples • A carriage return (CR) ends each command. • Values in square brackets are optional. • There are two methods for entering the commands: In long form each command is written in its entirety. In short form, only a predefined abbreviation is required. The manual used the short form. • The following parameters are used in the manual: i = integer f = float s = string t = tap x1, x2 = pixel start and stop values • The camera will answer each command with either "OK >" or "Error x: Error Message >". The ">" is always the last character sent by the camera. Command Format command_long/short_form [parameters…] CR 03-32-00493-11 DALSA 64 Piranha2 User’s Manual Example: to set the gain to –3.5dB on all taps set_gain 0 –3.5 or sg 0 –3.5 Example: to return the camera model number get_camera_model or gcm Example: to begin a camera calibration (dark correction) correction_calibrate_fpn or correction_calibrate_fpn i or ccf or ccf i C4 Networking Mode The camera's network feature provides the capability to connect and control multiple cameras over a multi-drop RS485 link. The network feature consists of three commands and a set of definitions describing the behavior of the camera when the commands are sent in network mode. Command Short Form Description set_camera_ID sci Sets camera network ID get_camera_ID gci Reads camera ID set_netmessage_mode snm 0: disable, default (messages enabled) 1: enable (messages disabled) Camera ID The camera ID is a single, case insensitive ASCII alphanumeric character: A to Z or 0 to 9. To change the network ID for a camera, use the command sci i i. Where the first parameter is an ID of A to Z or 0 to 9, and the second, optional, parameter is the camera's serial number. To read current camera ID, use the gcp command. Changing Network ID of a Camera To change the ID of a networked camera, even if some or all of the cameras share the same camera ID, provide the serial number of the camera as the second parameter when sending the broadcast version of the sci command. 03-32-00493-11 DALSA 65 Piranha2 User’s Manual Example: change network ID of camera with serial number abcd to 1 : sci 1 abcd Note: each camera must be polled following use of a broadcast command. The Network Commands The network command is an ordinary camera command prefixed by a network prefix. Network prefixes always start with the colon character ":" and are followed immediately by the camera ID (addressing a single camera on the network), or space (addressing all cameras on the network or a Broadcast command). The camera replies to the network command only if it is addressed directly. The last line of the camera reply (error or OK message) to the network command is prefixed with the ID of the camera. Example: return camera ID for camera a :a gci camera id: a a OK> Special Case: Empty Network Command The empty network command is a special case of network commands. If the last command issued was not a Broadcast command, the empty network command will cause the addressed camera to output an "OK" message followed by the ">" prompt and prefixed by the network ID. If the last command issued was a broadcast command, the empty network command is used to query each camera for its READY/BUSY status. Example: empty network command issued :a CR a OK> Broadcast Commands and READY/BUSY Status Broadcast commands are commands sent to all cameras on the network at the same time. After a broadcast command is sent, and before issuing the next command, each camera on the link must be polled until a READY status is returned. A BUSY status indicates that the camera is not ready to receive the next command. To poll the status of a networked camera, send an empty network command to each camera until they each return the READY reply. Both the READY and BUSY reply consist of six characters: Carriage Return (CR), Line Feed (LF), and the network ID of the queried camera, followed by a space and either the BUSY code "0", or the READY code "1" and the prompt character ">". 03-32-00493-11 DALSA 66 Piranha2 User’s Manual Example: query command followed by a BUSY reply :a CR <CR><LF>a 0> Example: query command followed by a READY reply :a CR <CR><LF>a 1> After all cameras return the READY status, use the gps to poll each camera for the return codes of the sent broadcast command. Note, the QUERY BUSY mode is active only after a broadcast command, normally the camera does not support this mode of operation. The controlling software must wait for a reply from the camera before sending the next command. Camera will not reply to the Broadcast command. To read the status of the last command executed (major error code + coded value of informal messages) and coded value for all pending monitoring task warnings poll each camera by using network version of the gps command. Example: reading status from camera ID "a" :a gps Enabling/Disabling Non-Command Messages in the Network Environment To enable/disable camera messages unrelated to the executed command, such as initialization and monitoring task messages, use the command snm i. 03-32-00493-11 Value Function 0 Enable messages, default 1 Disable messages DALSA 67 Piranha2 User’s Manual C5 Error Handling Use the gps command to read the status of the last command executed. Return values come in the following order: • Decimal number representing the code of the last command. • Decimal number representing the error code for last command executed. • Decimal value representing sum of all informal message codes caused by last command executed. • Decimal number representing sum of all pending warning values from all monitoring tasks. Example: value returned following a ccf command gps 2 0 192 33 The returned value, 2 0 192 33, reads as follows: Returned value Description 2 Command code: correction_calibrate_fpn 0 Error code: successful 192 Informal message: code 64 + code 128 33 Monitoring task message: code 1 + code 32 The following tables list the codes for errors, informal messages, and monitoring task messages. (Refer to section E7 for a list of all available commands.) Error Codes 03-32-00493-11 Cod e Description Suggested Cause 0 Command executed successfully Command executed without major error detected 1 Internal camera error (PIXEL INDEX) Internal software error trap 2 Internal camera error (RESULT CODE) Internal software error trap 3 Invalid command Command not recognized 4 Command parameters incorrect or out of range Command parameters are invalid or out of range 5 Command not available in current exposure mode ssf and set are allowed only in mode 2 (ssf and set) and in mode 6 (set) 6 Command available in CALIBRATED mode only ccf, ccp 7 Command available in UNCALIBRATED mode only cao, cag 8 Command not available in VIDEO TEST mode sao, sg DALSA 68 Piranha2 User’s Manual Error Codes 03-32-00493-11 Cod e Description Suggested Cause 9 Start value must be an odd number less than the even numbered end value roi: invalid starting or ending pixel index 10 Camera memory check failure Memory test of external RAM failed 11 Unable to configure DSP DSP (FPGA) configuration failure 12 DSP configuration reset failure DSP (FPGA) could not be placed in configuration mode 13 Get line process command timed out, check for the presence of external signals gl,gla,cao,cag,ccf,ccp timed out. Current exposure mode requires external SYNC, however SYNC signal not present 14 DSP echo test error DISC bus communication test failure 15 Invalid sensor configuration (DSP) Invalid sensor configuration read from DSP (FPGA) 16 Invalid sensor configuration (ADC) Invalid sensor configuration encoding on the board 17 Sensor configuration mismatch Sensor configuration read from DSP is different than one encoded on the board 18 One (or more) of the supply voltages is out of specification vv command result 19 The camera's temperature is outside the specified operating range vt command result 20 Not Used Not Used 21 Analog offset calibration failure Analog offset calibration failure (could not tune the analog offset to obtain targeted video level) 22 Analog gain calibration failure Analog gain calibration failure (could not tune the analog gain to obtain targeted video level) 23 CRC check failure while attempting to restore the camera settings Camera setting will initialize to default settings, since restore of USER/FACTORY settings failed (internal micro EE memory failure). Contact your DALSA representative or Product Support if this error code is returned. 24 Camera settings not saved rus, rfs attempted but settings were not saved. Contact your DALSA representative or Product Support if this error code is returned. 25 Pixel coefficients write failure Failure while writing pixel coefficients to EEROM (I2C EEROM external to micro) 26 I2C communication fault while accessing temperature sensor Serial communication fault (I2C) while accessing temperature sensor 27 Timeout waiting for DISC SYNC to go LOW Internal communication protocol error 28 Unable to calibrate gain. Tap Analog gain could not be calibrated because DALSA 69 Piranha2 User’s Manual Error Codes Cod e 29 Description Suggested Cause number outside ROI. tap number specified in cag command is outside region of interest. Unable to calibrate offset. Tap number outside ROI. Analog offset could not be calibrated because tap number specified in cao command is outside region of interest. Informal Message Codes Code Description Suggested Cause 1 INFO: CRC check failure while attempting to restore calibration status Pixel calibration status will be set to NOT CALIBRATED (internal micro EEROM failure) 2 INFO: CRC check failure while attempting to restore pixel coefficients All pixel coefficients will be reset to zero (external EEROM (I2C) failure) 4 INFO: Flash memory ID error Reported from boot process, only if DSP configuration fails (possible cause: communication error with serial flash memory ) 8 INFO: DSP configuration file missing or corrupt Reported from boot process, only if DSP configuration fails (possible cause) 16 INFO: Serial communication failure while accessing external ADC chip Reported from boot process if communication verification fails with external ADC chip (camera voltage measurement, SPI) 32 INFO: Calibration may be outof-specification (PRNU coefficient clipped) ccp: several coefficients were clipped INFO: Calibration may be outof-specification (FPN coefficient clipped) ccf: several coefficients were clipped INFO: Calibration may be outof-specification (DO+FPN > 511) ccf: at least one pixel -> digital offset + INFO: Changing analog settings of calibration mode voids pixel calibration sao, sg in calibration mode after 512 INFO: For better calibration results, run FPN calibration first ccp: ccp called before ccf 1024 INFO: Coefficient may be inaccurate. A/D clipping has occured. Insufficient analog offset or too much gain for given light. 64 128 256 during the ccp command process during the ccf command process FPN coefficient > 511 calibration has been done Monitoring Task Message Codes 03-32-00493-11 Code Description Suggested Cause 1 WARNING: One or more At least one of voltages is out of DALSA 70 Piranha2 User’s Manual Monitoring Task Message Codes Code Description Suggested Cause voltages out of specification specification 2 WARNING: Camera temperature exceeds specified limit Current camera temperature exceeds specification limit 4 WARNING: External SYNC not detected Exposure Mode 3,4,5,6: external SYNC not detected 8 WARNING: External PRIN not detected Exposure Mode 2: external PRIN not detected 16 WARNING: Analog gain is over/under the specification Current analog gain setting is out of specification 32 WARNING: Line rate is set below 1000 Hz Exposure mode 2: current line rate is below 1Khz C6 Camera Parameter Screen You can read current camera settings with the gcp command. The table below lists the settings displayed on the gcp screen with sample values, along with a description of some of these settings: GCP Screen Desctiption GENERAL CAMERA SETTINGS See the following section for a complete command list. Camera Model No.: P2-xx-xxxxx Camera model number. Camera Serial No.: xxxxxxxxx Camera serial number. Sensor Serial No.: xxxxxxxxx Sensor serial number. Camera Network ID: x Camera network id set with the sci command. Network Message Mode: disabled Displays whether network messages are enabled or disabled. Set with the snm command. See C4 Networking Mode for details. Firmware Design Rev.: xx-xx-xxxxx-xx DSP Design Rev.: xx.xx Firmware design revision number. DSP design revision number. SETTINGS FOR UNCALIBRATED MODE: 03-32-00493-11 DALSA 71 Piranha2 User’s Manual GCP Screen Desctiption Analog Gain (dB): +0.0 +0.0 +0.0 +0.0 Analog gain value set with the sg and cao commands. Available only in uncalibrated mode (svm 0). See section 3.13 Setting Gains for details. Analog Offset: 308 324 304 292 Analog offset value set with the sao and cag command. The cag command is available only in uncalibrated mode (svm 1). See section 3.12 Optimizing Offset Performance for details. SETTINGS FOR CALIBRATED MODE: Analog Gain (dB): +0.0 +0.0 +0.0 +0.0 Analog gain value set with the sg or ccp command. The ccp command is available only in calibrated mode (svm 1). See sections 3.13 Setting Gains and White Light Calibration (page 37) for details. Analog Offset: 0 0 0 0 Analog offset value set with the sao or ccf command. The ccf command is available only in calibrated mode (svm 1). See section 3.12 Optimizing Offset Performance and Dark Calibration (page 36) for details. Digital Offset: 0 0 0 0 Digital offset value set with the sdo command. Available only in calibrated mode (svm 0). See section 3.12 Optimizing Offset Performance for details. Calibration Status: FPN(uncalibrated) Calibration status will change to calibrated after a ccf or ccp command has been issued PRNU(uncalibrated) 03-32-00493-11 DALSA 72 Piranha2 User’s Manual GCP Screen Desctiption after a power up. Calibration status will return to uncalibrated after camera reboot or a rpc or svm 0 command had been issued. SETTINGS COMMON TO CALIBRATED AND UNCALIBRATED MODES: 03-32-00493-11 System Gain: 0 0 0 0 Digital gain value set with the ssg command. See section 3.13 Setting Gains for details. Background Subtract: 0 0 0 0 Background subtract value set with the ssb command. See section 3.12 Optimizing Offset Performance for details. Pretrigger: 0 Pretrigger value set with the sp command. See section 3.20 Setting the Pre-trigger for details. Number of Line Samples: 64 Number of lines samples set with the css command. See section 3.11 Returning Video Information for details. Video Mode: 1 Current video mode value set with the svm command. See section 3.8 Setting the Video Mode for details. Data Mode: 0 Current data mode value set with the sdm command. See section 3.7 Setting the Data Mode for details. Exposure Mode: 2 Current exposure mode value set with the sem command. See section 3.9 Setting Line Rate and Exposure Mode for details. SYNC Frequency: 5000 (4998.51) Hz Current line rate. Value is set with the ssf command. See DALSA 73 Piranha2 User’s Manual GCP Screen Desctiption section 3.9 Setting Line Rate and Exposure Mode for details. Exposure Time: 197.950 uSec Current exposure time setting. Value is set with the set command. See section 3.9 Setting Line Rate and Exposure Mode for details. End-Of-Line Sequence: on States whether an end of line sequence is turned on or off. Set using the eol command. See section 3.17 Generating Test Patterns for details. Upper Threshold: 240 Upper threshold value set with the sut command. Lower Threshold: 15 Lower threshold value set with the slt command. Region of Interest: 0001-4096 Region of interest size set with the roi command. See section 3.10 Setting a Region of Interest for details. C7 Commands The following table lists all of the commands available to the camera user. The first column of the table lists command codes returned as first code from gps. Code Command Short Form Parameters Description 0 calibrate_analog_gain cag t i Calibrates the analog gain. The first parameter is the tap selection 1 to 4, 0 for all taps. The second parameter is a line average in a range from 64 to 251DN for 8-bit mode and 256 to 1007DN for 10-bit. This command requires a constant light input and only works in uncalibrated mode. 1 calibrate_analog_offset cao t i Calibrates the analog offset. The first parameter is the tap selection 1 to 4, 0 for all taps. The second parameter is a line average in a range from 1 to 100DN for 8-bit mode and 4 to Parameters: i = integer f = float t = tap selector s = string x1 = pixel start number x2= pixel end number []= optional parameter 03-32-00493-11 DALSA 74 Piranha2 User’s Manual Code Command Parameters: i = integer f = float t = tap selector s = string x1 = pixel start number x2= pixel end number []= optional parameter 03-32-00493-11 Short Form Parameters Description 400 for 10-bit. This command only works in uncalibrated mode. 2 correction_calibrate_fpn ccf [i] Start FPN coefficient calibration. Use css to set sample size. Values range from 1 to 100DN for 8-bit mode and 4 to 400 for 10-bit. 3 correction_calibrate_prnu ccp [i] Start PRNU coefficient calibration. Use css to set sample size. Values range from 64 to 251DN for 8-bit mode and 256 to 1007DN for 10-bit. 4 correction_set_sample css i Set number of line samples averaged for pixel coefficient calculations or for output of gla command. Values: 16, 32, 64. Factory setting: 64 5 display_pixel_coeffs dpc [i] [i] Display the pixel coefficients in the order FPN, PRNU, FPN, PRNU, … Optional pixel start and end values in a range from 1 to sensor pixel count. 6 endof_line_sequence els i Set the end-of-line sequence: 0: Off 1: On, default value 7 get_camera_id gci Read the camera ID. 8 get_camera_model gcm Read the camera model number. 9 get_camera_parameters gcp Read camera parameters. 10 get_camera_serial gcs Read the camera serial number. 11 get_camera_version gcv Read the firmware version and FPGA version. 12 get_fpn_coeff gfc i Read the FPN coefficient. 14 get_line gl [i] [i] Get a line of raw video (no digital processing or test pattern) displaying one pixel value after another and the minimum, maximum, and mean value of the sampled line. Optional pixel start and end values in a range from 1 to sensor pixel count. 15 get_line_average gla [i] [i] Read the average of line samples. Use css to set sample size. Optional pixel DALSA 75 Piranha2 User’s Manual Code Command Parameters: i = integer f = float t = tap selector s = string x1 = pixel start number x2= pixel end number []= optional parameter 03-32-00493-11 Short Form Parameters Description start and end values in a range from 1 to sensor pixel count. 13 get_prnu_coeff gpc 16 get_processing_status gps Read the status of last executed command and coded value for all pending monitoring task warnings. 17 get_sensor_serial gss Read the sensor serial number. 18 help h Display the online help. 19 region_of_interest roi 20 reset_camera rc Reset the entire camera (reboot). 21 reset_pixel_coeffs rpc Reset the pixel coefficients to 0. 22 restore_factory_settings rfs Restore the camera’s factory settings. FPN and PRNU coefficients reset to 0. 23 restore_user_settings rus Restore the camera's last saved user settings and FPN and PRNU coefficients. 24 set_analog_offset sao t i Set the analog offset. The first parameter is the tap selection 1 to 4, 0 for all taps. The second parameter controls the digital analog convertor (DAC), in a range from 0 to 1023, that sets analog offset. Offset increases with higher values. 25 set_baud_rate sbr i Set speed of serial communication port. Baud rates: 9600, 19200, 57600, and 115200. Default baud: 9600 26 set_camera_id sci s [s] Set camera ID. The first parameter is a character A to Z, or 0 to 9. The second optional parameter is the serial number of the addressed camera. i i i Read the PRNU coefficient. Set the pixel range for reading end-of-line statistic and for the region of pixels used in the cag, cao, gl, gla, ccf, and ccp commands. Pixel start and end values in a range from 1 to sensor pixel count. DALSA 76 Piranha2 User’s Manual Code Command Short Form Parameters Description 27 set_data_mode sdm i Set the data mode of camera output to: 0: 8-bit, A/B/C/D ports, single processor 1: 10-bit, A/B/C and D/E/F ports, single processor 2: 8-bit, A/B and D/E ports, dual processor 3: 10-bit, A/B/C and D/E/F ports, dual processor 28 set_digital_offset sdo t i Subtracts the input value from the video signal prior to the PRNU correction. The first parameter is the tap selection 1 to 4, 0 for all taps. The second parameter is the offset in a range from 0 to 511. Use in calibrated mode only. 29 set_exposure_mode sem i Set the exposure mode: 1: Internal SYNC and PRIN, max line rate and exposure time, factory setting 2: Internal SYNC and PRIN, programmable line rate and exposure time using commands ssf and set 3: External SYNC, internal PRIN, maximum exposure time 4: Smart EXSYNC 5: External SYNC and PRIN 6: External SYNC, internal PRIN, programmable exposure time 30 set_exposure_time set f Set the exposure time in exposure mode 2 or 6. Value will be a floating point number in µsecs 31 set_fpn_coeff sfc i i Set the FPN coefficient. The first parameter is the pixel number within the range 1 to 8192. The second value is a specified value within the range 0 to 127. 32 set_gain sg t f Set the analog gain. The first parameter is the tap selection 1 to 4, 0 for all taps. The second parameter is a gain value specified from –10 to 10. A Parameters: i = integer f = float t = tap selector s = string x1 = pixel start number x2= pixel end number []= optional parameter 03-32-00493-11 DALSA 77 Piranha2 User’s Manual Code Command Parameters: i = integer f = float t = tap selector s = string x1 = pixel start number x2= pixel end number []= optional parameter Short Form Parameters Description gain value of 0 sets the camera to its nominal gain. 33 set_lower_threshold slt i Set the lower threshold to a value from 0 to 255 for 8-bit data modes, and 0 to 1023 for 10-bit. 34 set_netmessage_mode snm i Enable/disable camera messages unrelated to the executed network command: 0: Enable messages, default 1: Disable messages 35 set_pretrigger sp i Set the pretrigger to a value from 0 or 15. 36 set_prnu_coeff spc i i Set the PRNU coefficient. The first parameter is the pixel number within the range 1 to 8192. The second parameter is a specified value within the range 0 to 511where: i PixelPRNU = 1 + 512 03-32-00493-11 37 set_subtract_background ssb t i Subtracts the input value from the output signal. The first parameter is the tap selection 1 to 4, or 0 for all taps. The second parameter is the subtracted value range from 0 to 511. 38 set_sync_frequency ssf i Sets the line rate, in exposure mode 2, to a value from 1000Hz to camera's maximum line rate. Value rounded up/down as required. 39 set_system_gain ssg t i Set the digital gain. The first parameter is the tap selection 1 to 4, or 0 for all taps. The second parameter is a gain value is specified from 0 to 511. 40 set_upper_threshold sut i Set upper threshold to a value from 0 to 255 in 8-bit data modes, and 0 to 1023 in 10-bit. 41 set_video_mode svm i Switch between calibrated and uncalibrated modes: 0: Uncalibrated video, deactivate video correction 1: Calibrated video, activated correction 2: Test pattern 42 verify_temperature vt Check the internal DALSA 78 Piranha2 User’s Manual Code Command Parameters: i = integer f = float t = tap selector s = string x1 = pixel start number x2= pixel end number []= optional parameter 03-32-00493-11 Short Form Parameters Description temperature of the camera. 43 verify_voltage vv Check the camera voltages and return OK or fail. 44 warning_enable_disable wed 45 write_pixel_coeffs wpc Write all current pixel coefficients to EEROM. 46 write_user_settings wus Write all of the user settings to EEROM except pixel coefficients which are written using the wpc command. [i] [i] Read enable/disable status of all defined monitoring tasks. Optionally, the first parameter selects a monitoring task and the second parameter enables/disable the selected task. DALSA 79 Piranha2 User’s Manual Appendix D DC Offset De-rating Curve As of December 2004, all Piranha2 line scan cameras have been modified. This modification has caused: • The Charge Transfer Efficiency (CTE) of the sensor to be improved, and • An increase in dark current at the minimum line rate and maximum gain. This increased dark current is only an issue when the camera is using long integration times, at the maximum gain setting, or at high ambient temperatures. Operating the camera at high temperatures or at low line rates with maximum gain, impacts the camera’s ability to perform offset calibration. Figure 12 illustrates camera operating conditions and the associated limits for optimal offset calibration. The offset values indicated are the values obtained after issuing the cao 0 5 (calibrate analog offset) command. The plot shows the DC offset over temperature at maximum gain with the optimal offset calibration limit being represented by the Limit line. The area under the Limit line shows the operating conditions where the camera’s offset can be calibrated to camera specifications; the area above the Limit line shows the operating conditions where the camera’s DC offset is greater than camera specifications. If you are operating the camera in this range, you may want to reduce the effect of the increased dark current by: 03-32-00493-11 • Adjusting the calibration target value higher to enable offset compensation to work. For example, cao 0 30. • Adding cooling to reduce temperature. Refer to the Thermal Management section on page 43 for more information. • Operating the camera at higher line rate and averaging or discarding the extra lines DALSA 80 Piranha2 User’s Manual Figure 12: Worst Case Calibrated DC Offset vs. Temperature and Exposure Time Worst case calibrated DC offset VS temperature and exposure time 80 70 999 usec 60 DC Offset (DN) 900 usec 50 800 usec 700 usec 40 600 usec 500 usec 30 400 usec 20 Limit 10 0 15.5 27.5 36.5 45 56 65.5 Camera internal Temperature C Notes: 03-32-00493-11 • Camera ambient temperature is approximately 15°C less than the internal camera temperature. • Camera gain is 10dB DALSA 81 Piranha2 User’s Manual Appendix E Revision History 03-32-00493-11 Revision Number Change Description 00 Preliminary release 01 Updated pgs 9-10: Added sensor alignment specifications of x,y: ±175um, z: ±0.18mm and ø: 0.6°. Changed FPN uncorrected: Max Gain 27DN. Changed RMS Noise: typ. 1.2DN, max 4DN. Added Notes: All measurements taken in 8bit output mode; All specifications are valid for the front plate temperature range of 10°C to 50°C, in still air. Added Notes 4 and 5. Page 25,26 Mechanicals drawings: Included specifications on the location of pixel 1 with respect to edges of the front plate. On page 27 removed nominal from C, F-Mount chart and replaced with ±0.18mm 02 1K, 2k, and 4K--2 tap Piranha2 cameras available. 03 Mostly minor text and spec changes, plus replacing Doody with Helmond on EMC declaration 04 Added note 4 on page 10. Added section 3.10, page 27, Setting a Region of Interest. Added section 3.11, page 27, Returning Video Information. Removed all references of the css command default being 128 and changed it to 64. On page 31, Calibrating Gains, changed allowable ranges from 64 (was 128) to 251 and 256 (was 512) to 1007. Added error message 28 and 29 on page 64. Removed error message 20. Added informal message codes 32 and 64 on page 65. Added section C6 Camera Parameter Screen on page 65. In section C7, command table: cag: range is now 64 (was 128) to 251 or 256 (was 512) to 1007 ccp: range is now 64 (was 128) to 251 or 256 (was 512) to 1007 css: 64 is now the factor setting. 128 was removed. roi: explanation expanded to include the roi influence on the cag, cao, gl, gla, ccf and ccp commands. 05 Added P2x-xxx30 part number to front cover. Added 30MHz info to section 1.1 Camera Highlights. Added 30MHz specs to section 1.3 Camera Performance Specifications Added Note 1 on page 10 Added table 5, page 20, 30MHz timing values Added P2-2x-xxx30 to EMC Declaration of Conformity, page 61. 06 Updated drawing in section 2.2. LED was referenced to section D13 which no longer exists. It is now referenced to section 3.18. In section 3.16, page 39, and Appendix B, All Available Commands table, added equation for determining the PRNU coefficient for the spc command. DALSA 82 Piranha2 User’s Manual Revision Number Change Description 07 Added the following note (or similar) to these sections, "While settings are being written to nonvolatile memory, do not power down camera or camera memory may be corrupted." 1. Section 3.5, page 25, second bullet 2. Page 36, middle of page in calibration section 3. Section 3.18 in the LED description table, Blinking Green section Added revision history. 03-32-00493-11 08 Fixed incorrect ± character in mechanical drawings. Updated Colorado Springs address Added Appendix D: De-rating Curves Removed maximum DC Offset specification from Specification table in Chapter 1 and added note 6 to refer to Appendix D for DC Offset de-rating curves. 09 Added 8k 30MHz model to: Table 1: Operating Requirements and Ranges (max line rate) Table 7: Piranha2 30MHz Timing 10 Added 4k, 10µm model to: Section 1.2 Image Sensors [Figure 2: IT-P1 4k Image Sensor (2k, 4k (10 µm), 4 tap models) ] Section 1.3 Camera Performance Specifications (power and power supply current specs) 11 Added 2k, 4 tap model to: Section 1.2 Image Sensors [Figure 2: IT-P1 4k Image Sensor (2k, 4k (10 µm), 4 tap models) ] Section 1.3 Camera Performance Specifications (power and power supply current, line rate specs) Added Figure 1: IL-P1 Image Sensor (1k, 2k, 4k (10 µm), 2 tap models) to Chapter 4, Mechanical Interface Updated z tolerance from .18mm to .25mm in table 1 and Lens Mount table (page 47). DALSA 83 Piranha2 User’s Manual Index 30MHz model, 5, 9 Data Bus, 17 data mode, 26 debugging, 18, 39, 53 digital data, 17 4 E 40MHz model, 5, 9 EIA-644 Reference, 59 EMC compliance, 49 EMC Declaration of Conformity, 61 end of line sequence, 18 generating, 39 environmental considerations, 43 error handling, 67 error messages, 40 exposure mode setting, 27 exposure time, 27, 29 EXRCLK, 16 EXSYNC, 17 setting, 21, 27, 72 troubleshooting, 53 3 A about DALSA, 2 applications, 6 B baud rate, 26 bright lines, 56 C cables, 16 calibrating the camera, 35 calibration dark, 36 errors, 38 overview, 35 results, 38 steps, 36 time, 36 white light, 37 camera controls, 15, 60 Camera Link, 59 command reference, 63 commands descriptions, 72 long form, 24 parameters, 24 short form, 24 communications protocol, 63 connector Camera Link, 14 MDR26, 14 power, 14 cooling, 43 D dark calibration, 36 dark current, 44 dark patches, 56 03-32-00493-11 F fiber-optic light sources, 48 filters, 48 FPN, 36, 38 G gain analog, 34 calibrating, 34 digital, 34 setting, 34 H halogen light sources, 48 help, 23 hot mirror, 48 I illumination, 47 IL-P1 image sensor, 7 incorrect line rate, 56 input/output, 13 DALSA 84 Piranha2 User’s Manual inputs Camera Link, 16 exteranl sync, 17 PRIN, 16 interface mechanical, 43 optical, 47 serial, 23 software, 23 IT-P1 image sensor, 7 L LED, 40 lens modeling, 48 mounts, 47 light sources, 48 line dropout, 56 line rate, 21, 27, 28, 72 setting, 21, 27, 72 line statistics, 29 LVDS, 59 P performance, 8 pixel statistics, 29 power supplies, 16 pretrigger, 41 PRIN, 16 PRNU, 37, 39 R rebooting, 41 region of interest, 29 responsivity graph, 11 roi. See Region of Interest S magnification, 49 mechanical interface, 43, 47 mode data, 26 exposure, 27 networking, 64 video, 27 model 30MHz, 5, 9 40MHz, 5, 9 modes exposure, 27 operating, 27 monitoring tasks, 40 mounting, 43 sensor, 7 alignment, 47 cleaning, 51 serial interface, 23 settings gain, 34 offset, 31 pretrigger, 41 restoring, 25 saving, 25 specifications electro-optic, 10 performance, 8 startup, 25 statistics, 29 STROBE troubleshooting, 54 stuck bits, 56 N T network commands, 65 networking, 64 noisy output, 56 Technical Sales Support, 58 temperature, 43 measurement, 41 recommendations, 40 test patterns, 18 generating, 39, 54 timing fixed (programmed), 19 input and output, 19 troubleshooting, 53 M O offset analog, 32 calibrating, 33 optimizing, 31, 70, 71 subtracting, 32 online help, 23 operating requirements, 8 03-32-00493-11 operational status of camera, 40 optical interface, 47 output mode, 26 DALSA 85 03-32-00493-11 Piranha2 User’s Manual V W video data, 30, 59 voltage measurement, 41 warning messages, 40 white light calibration, 37 DALSA