1
LC-32LE631
LC-40LE631
LC-46LE631
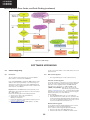
Service Modes, Error Codes, and Fault Finding (continued)
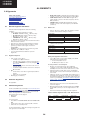
Contents of SAM
• Hardware Info.
– A. SW Version. Displays the software version of the
main software (example: Q555X-1.2.3.4
S5551_0.9.21.0=
AAAAB_X.Y.W.Z).
• AAAA= the chassis name.
• B= the SW branch version. This is a sequential
number (this is no longer the region indication, as
the software is now multi-region).
• X.Y.W.Z= the software version, where X is the
main version number (different numbers are not
compatible with one another) and Y.W.Z is the sub
version number (a higher number is always
compatible with a lower number).
– B. STBY PROC Version. Displays the software
version of the stand-by processor.
–
•
•
•
•
•
•
•
How to Navigate
In SAM, the menu items can be selected with the
“CURSOR-DOWN/UP/LEFT/RIGHT” knob of the RC
transmitter.
•
Store - go right. All options and alignments are stored
when pressing “cursor right” (or the “OK” button) and then
the “OK”-button.
Operation hours display. Displays the accumulated total
of operation hours of the screen itself. In case of a display
replacement, reset to “0” or to the consumed operation
hours of the spare display.
SW Maintenance.
– SW Events. In case of specific software problems, the
development department can ask for this info.
– HW Events. In case of specific software problems, the
development department can ask for this info :
- Event 26: refers to a power dip, this is logged after
the TV set reboots due to a power dip.
- Event 17: refers to the power OK status, sensed even
before the 3 x retry to generate the error code.
Test settings. For development purposes only.
Development file versions. Not useful for Service
purposes, this information is only used by the development
department.
Upload to USB. To upload several settings from the TV to
an USB stick, which is connected to the SSB. The items are
“Channel list”, “Personal settings”, “Option codes”,
“Alignments”, “Identification data” (includes the set type
and prod code + all 12NC like SSB, display, boards),
“History list”. The “All” item supports to upload all several
items at once.
First a directory “repair\” has to be created in the root
of the USB stick.
To upload the settings, select each item separately, press
“cursor right” (or the “OK” button), confirm with “OK” and
wait until the message “Done” appears. In case the
download to the USB stick was not successful, “Failure” will
be displayed. In this case, check if the USB stick is
connected properly and if the directory “repair” is present in
the root of the USB stick. Now the settings are stored onto
the USB stick and can be used to download into another TV
or other SSB. Uploading is of course only possible if the
software is running and preferably a picture is available.
This method is created to be able to save the customer’s
TV settings and to store them into another SSB.
Download from USB. To download several settings from
the USB stick to the TV, same way of working needs to be
followed as described in “Upload to USB”. To make sure
that the download of the channel list from USB to the TV is
executed properly, it is necessary to restart the TV and
tune to a valid preset if necessary. The “All” item supports
to download all several items at once.
•
•
C. Production Code. Displays the production code
of the TV, this is the serial number as printed on the
back of the TV set. Note that if an NVM is replaced or
is initialized after corruption, this production code has
to be re-written to NVM.
Operation Hours. Displays the accumulated total of
operation hours (not the stand-by hours). Every time the
TV is switched “on/off”, 0.5 hours is added to this number.
Errors (followed by maximum 10 errors). The most recent
error is displayed at the upper left (for an error explanation
see section “5.5 Error Codes”).
Reset Error Buffer. When “cursor right” (or “OK” button)
pressed here, followed by the “OK” button, the error buffer
is reset.
Alignments. This will activate the “ALIGNMENTS” submenu. See Chapter 6. Alignments.
Dealer Options. Extra features for the dealers.
Options. Extra features for Service. For more info
regarding option codes, see chapter 6. Alignments.
Note that if the option code numbers are changed, these
have to be confirmed with pressing the “OK” button before
the options are stored, otherwise changes will be lost.
Initialize NVM. The moment the processor recognizes a
corrupted NVM, the “initialize NVM” line will be highlighted.
Now, two things can be done (dependent of the service
instructions at that moment):
– Save the content of the NVM for development analysis,
before initializing. This will give the Service department
an extra possibility for diagnosis (e.g. when Development asks for this).
–
•
•
•
•
Initialize the NVM.
Note: When the NVM is corrupted, or replaced, there is a high
possibility that no picture appears because the display code is
not correct. So, before initializing the NVM via the SAM, a picture is necessary and therefore the correct display option has
to be entered. Refer to Chapter 6. Alignments for details. To
adapt this option, it’s advised to use a method via a standard
RC (described below).
•
Changing the display option via a standard RC: Key in the
code “062598” directly followed by the “MENU” (or “HOME”)
button and “XXX” (where XXX is the 3 digit decimal display
code as mentioned on the below table).
•
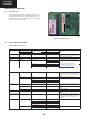
Table 5-1-2 Display options (More details on Table 6-6)
Size
Display option
Panel (Y)
Display option
New VE Panel (F)
32”
327
374
40”
329
366
46”
330
375
NVM editor. For NET TV the set “type number” must
be entered correctly.Also the production code (serial
number) can be entered here via the RC-transmitter.
Correct data can be found on the side/rear sticker.
“CURSOR UP/DOWN” key on the RC-transmitter. The
selected item will be highlighted. When not all menu items
Make sure to key in all three digits, also the leading zero’s. If
the above action is successful, the front LED will go out as an
indication that the RC sequence was correct. After the display
option is changed in the NVM, the TV will go to the Stand-by
mode. If the NVM was corrupted or empty before this action, it
will be initialized first (loaded with default values). This initializing can take up to 20 seconds.
46