1
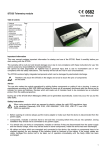
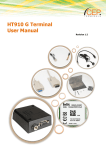
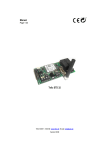
User Manual
for
Telic Standard BC
1 A Word in Advance
Thank you very much for choosing to purchase a remote surveillance module from
Telic!
The remote surveillance modules of the Telic locate product line belong to a
highly-esteemed class of devices. Especially noteworthy is the price-performance
ratio of these devices.
The device can immediately inform you if your vehicle is, for instance, forcibly
removed from its location. Using the coordinates transmitted from the device, you,
a security centre or the police can determine where the monitored object is.
Furthermore, using optional sensors attached to the device, you can be
immediately informed if something with your vehicle is not as it should be.
We wish you lots of success with your new Telic device!
We have carefully checked the information that follows for accuracy. The
documentation is, however, not a warranty of product attributes. Telic strictly
adheres to the established sales and delivery terms.
Propagation or duplication of the product’s documentation or software and its
contents are only permitted with written permission from Telic GmbH.
Trademarks
The Telic logo and the terms Telic and Telic Standard BC are registered
trademarks of Telic GmbH.
All other names and labels used in this document are the registered trademarks of
their respective owners.
Telic does not preclude the possibility to change the data in question without
announcement and takes no responsibility for technical imprecision and/or
omissions.
Oberhaching, den 16. Februar 2007
© 2006 Telic GmbH, Oberhaching
Version: 100
Page 2
2
Tips for the use of this manual
This documentation is directed towards users of the remote control unit Telic
Standard BC.
In order to bring you this documentation several employees from different
departments of the company have worked together to bring you the best possible
support for the use of your Telic product.
If you should, however, find a mistake, or would like to provide a suggestion,
please send an e-mail directly to
E-Mail: [email protected]
This documentation should help you to take advantage of the many functions of
the device. Please read it through carefully.
If you are in a hurry and would like to catch up with the details later, then
skip to Chapter 14 “Quick Start“ on page 39.
There you can find a concise tutorial which will get you up and running in
no time.
Page 3
4
Content of this manual
1 A Word in Advance ............................................................................................2
2 Tips for the use of this manual.............................................................................3
3 Package Contents ..............................................................................................4
4 Content of this manual .......................................................................................5
5 Introduction .......................................................................................................8
5.1
What is a remote surveillance module?...................................................8
5.2
Operational Range................................................................................8
5.3
What means GPRS? ..............................................................................9
5.4
Precision of the GPS Position..................................................................9
5.5
What are the necessary components of a remote surveillance
module?11
5.6
5.5.1
Power Source ..............................................................................11
5.5.2
Antennas.....................................................................................11
5.5.3
Mobile Technology – SIM card .....................................................11
5.5.4
If possible, avoid prepaid SIM cards!.............................................11
Getting started ....................................................................................12
5.6.1
First Step: Open the Device..........................................................12
5.6.2
Second Step: Insert the SIM Card..................................................12
5.6.3
Third Step: Replace the Cover ......................................................14
5.6.4
Fourth Step: Connecting the Antennas ..........................................14
5.6.5
Fifth Step: Connecting the Unit to the Vehicle ................................15
5.6.6
Sixth Step: Mounting the Remote Surveillance Module....................20
5.6.7
Switching the device on and off ....................................................21
6 The tracking via a tracking program or a tracking server.....................................22
7 General functionality of Telic Standard BC.........................................................22
8 The Digital Inputs .............................................................................................23
9 The digital Outputs...........................................................................................24
9.1
Switch of the digital outputs .................................................................24
9.2
Automatic answer of the digital outputs.................................................24
10 The analog inputs ............................................................................................25
Page 5
10.1
Board net-voltage (analog input 1).......................................................25
10.2
Battery-voltage (analog input 2) ...........................................................25
11 The Serial Interface...........................................................................................25
11.1
Internal Debugging Messages ..............................................................26
11.2
The transparent GSM-modem Mode ....................................................29
11.2.1
Switching from VTU Mode to the GSM-modem Mode..................29
11.2.2
Switching from GSM-modem Mode to VTU Mode .......................29
12 Other Features.................................................................................................29
12.1
Testing the Device ...............................................................................29
12.1.1
Verification of the LEDs Blinking Patterns .....................................30
12.1.2
Test Transmission of a Status Report............................................32
12.2
Buffering of Data while GSM Reception is bad ......................................32
12.3
Reset of Telic Standard BC remote control unit......................................32
12.4
The integrated Watchdog ....................................................................32
13 The Status message ..........................................................................................33
13.1
13.2
13.3
Content of a Status Report ...................................................................33
13.1.1
Event- and Log-Codes ...............................................................34
13.1.2
The Kilometer Counter...............................................................35
Strategies for Status Report Generation.................................................36
13.2.1
Distance based status reports .....................................................36
13.2.2
Direction based Status Reports....................................................37
13.2.3
Status Reports due to Special Events............................................37
13.2.4
The Speed Filter.........................................................................37
Information about some special Situations ............................................38
13.3.1
First Position of a new Route.......................................................38
13.3.2
Last Position of a new Route .......................................................38
14 Quick Start ......................................................................................................39
14.1
Hardware Installation ..........................................................................39
14.2
Quick test...........................................................................................39
15 Factory settings ................................................................................................39
15.1
SIM Card specific Parameters...............................................................40
15.1.1
PIN Code of the SIM Card .........................................................40
Page 6
15.1.2
15.2
Roaming ...................................................................................40
Default Values.....................................................................................41
16 Error Handling .................................................................................................41
17 Power consumption ..........................................................................................45
18 Technical information .......................................................................................45
Page 7
5
5.1
Introduction
What is a remote surveillance module?
A remote surveillance module is the combination of a compact computer
system with various interfaces, a GSM modem (mobile phone without a keypad
or display), and a GPS receiver to receive satellite-supported location
information.
But, what does GPS mean?
GPS means “Global Positioning System“. Originally, this satellite tracking
system was developed by the U.S. Military for its own purposes.
A GPS receiver is able to determine its position on the earth’s surface and its
height above sea level to within a few meters. To accomplish this amazing feat,
24 satellites at a height of 20,183 km continuously cross our planet in six
different patterns. They continuously send location data and time signals using
an atomic clock.
GPS receivers simultaneously receive the signals of up to 12 satellites and
compare the time of reception with their own built-in clock. Since the satellites
operate at different distances from the receiver, the signal delay indicates the
distance of the various satellites to the remote surveillance module. Using this
difference, the GPS receiver is able to calculate its own position.
In order to transmit three dimensional results - length, height, width - the
signals from at least four satellites are necessary.
Through the combination of the above technology, the device can apprehend
surveillance and control tasks and transfer them to a user via SMS or GPRS –
and all this for a price far less than that of a laptop or a PDA with comparable
functions.
Remote surveillance modules are available with or without satellite-supported
positioning. With the Telic Standard BC remote control unit you have made the
choice to use a device with satellite-supported positioning.
Therefore, aside from all of the surveillance possibilities of the device, you can
also find its precise location and react to changes in its position.
5.2
Operational Range
The Telic Standard BC remote control unit is composed of two primary
components: a GPS module and a GSM module.
Page 8
The GPS module receives signals from the GPS satellites which are operated by
the U.S. Department of Defense. These signals are available worldwide at every
location. However, the precision of the positioning fluctuates. A thorough
introduction to GPS can be found in Chapter 5.4, “Precision of the GPSPosition“, on page 8.
The GSM module is responsible for communication. It is a cellular module
working at 850 MHz / 900 MHz / 1800 MHz / 1900 MHz. It functions
properly anywhere in the world as long as GSM coverage is available.
Thus, you can use your Telic Standard BC remote control unit anywhere where
you can receive network signals on your mobile phone.
This means for you: You will be able to locate your vehicle pretty much
anywhere in the world – distance under control!
5.3
What means GPRS?
GPS and GPRS are two different things:
GPS is a set of 24 satellites that send out positioning signals free of
charge. This signals can be used to calculate the current position of a
vehicle anywhere in the world with little technical needs.
GPRS is a very cheap TCP/IP connection of the Telic Standard BC
remote control unit to the internet. Data exchange using GPRS is much
cheaper than data transmission using SMS messages.
In most cases, the billing of the connection of the device to the internet
is not based on time but on data volume basis.
Because the Telic Standard BC device sends very small amount of
data to the internet, many thousand status- and position reports can
be sent to the internet for less than 10 Euros in most countries around
the world.
If you want to use the GPRS interface of the Telic Standard BC remote
control unit the SIM card you are using must be enabled for using the
GPRS service. Please contact the provider of your SIM card. All SIM
cards Telic is delivering are already GPRS enabled.
5.4
Precision of the GPS Position
Page 9
The Global Positioning System (GPS)
was developed in the early seventies by
the U.S. Department of Defense. It is
comprised of 24 satellites in various
locations around the globe.
Due to the travel patterns of the satellites
and their transmission technique, the
precision of the data has its limits. Here
we briefly present them:
A GPS receiver calculates its position by
differentiating the signal from several
GPS satellites. The more satellite signals it receives, the greater the precision.
With a clear view of the sky, up to 12 satellite signals can be received. In order
to receive a valid position, a minimum of three satellite signals are necessary.
In an open field this is no problem. If the vehicle is standing still, precision of a
meter and under can be achieved.
Unfortunately, we are not always presented with such an ideal terrain. In the
city, for instance, several problems present themselves.
For example, shading. This means, one or more satellites are blocked out by
high buildings. It is then perhaps the case that signals can only be received
from some of the west, north, and south satellites, but all of the east satellites
are completely blocked. This is also the case when the vehicle is stationary (or
parked) by a building.
Another source of imprecision is reflections. The signals sent out from the GPS
satellites are radio signals which spread out in waves and which can be possibly
reflected by, for instance, large metal surfaces. Due to this reflection, the GPS
module may not receive the signal directly, but rather reflected from another
wall. As a result, the signal propagation delay is changed and a declination
results. In areas with high density and high buildings, this can result in
miscalculations of tens of meters!
A navigation system attempts to adjust for such problems by on the one hand,
taking into account that you are moving, and on the other, by checking to see if
the received GPS positions make sense compared to the route being driven
(You would not turn and drive into a field 100 meters before an intersection).
A remote surveillance module cannot and should not use such tricks.
Page 10
5.5
What are the necessary components of a remote surveillance
module?
Now that you are the proud owner of a remote surveillance module, you would
like to know: What does it need to smoothly operate it?
5.5.1
Power Source
The remote surveillance module needs to be connected to a power source
(7 volt - 36 volt direct current). It can be powered by a car battery, a
rechargeable battery or a power plug.
5.5.2
Antennas
In order to use the device, a combined antenna or two antennas are
needed:
a GSM quad band (900 MHz / 950 MHz / 1800 MHz / 1900 MHz)
antenna to communicate over the mobile network
an antenna to receive GPS position satellite signals
The antenna included with the Telic Standard BC device is a combined
GSM/GPS quad band antenna. This makes mounting the antenna inside the
vehicle as easy as possible.
Under certain circumstances, it may be necessary to use special antennas.
In such a case, the enclosed antennas may clash with other devices with the
same electrical value.
Other antennas, e.g. roof antennas, and other useful additional devices can
be found at www.Telic.de or on request under [email protected].
5.5.3
Mobile Technology – SIM card
Information from the remote surveillance device is transmitted over the
cellular network. As a result, a 3 volt or a 1.8 volt SIM card is needed.
A prepaid SIM card or a contract card can be used.
5.5.4
If possible, avoid prepaid SIM cards!
Prepaid SIM cards have the advantage of having no base fees. However,
they have the big disadvantage that at some point the card will be used up.
This results in the remote surveillance module not being able to send an alert
in an emergency situation.
In order to avoid this situation, we advise you not to use prepaid SIM cards.
Page 11
5.6
Getting started
The remote surveillance module can be installed into your vehicle using the
following six steps.
5.6.1
First Step: Open the Device
Please open the SIM card cover by sliding the cover in the direction of the
red arrow.
The SIM card cover con be found on top of the device below the three LEDs.
5.6.2
Second Step: Insert the SIM Card
Before the Telic Standard BC remote control unit logs into the device it
checks if the SIM card inserted into the device needs a PIN code to operate
properly. If this is the case it is necessary to change the PIN code of the SIM
card to “0000”. The PIN code of the SIM card can be changed with any
GMS mobile phone.
Some SIM cards also allow to de-activate the PIN code. In this case you
have the choice if you want to use PIN code 0000 or if you want to deactivate the PIN code.
Inserting the SIM card into the Telic Standard BC remote control unit is as
easy as with your mobile phone:
Put the device in front of you on the table as follows: the slider of the
SIM card cover must point to the ceiling and the three LEDs should be
above the SIM card cover.
Slide the SIM card cover carefully away from yourself towards the
direction of the arrow between the two words “OPEN”.
Page 12
carefully flap the card reader upwards (see picture).
Now insert the SIM card into the SIM card holder so that the cut edge
matches with the corresponding marking on the SIM card holder.
As a result, the gold contacts of the SIM card should face downwards.
Flap the SIM card holder back into its original position and slide the
lock back towards your body.
Page 13
If you are not able to return the SIM card holder to its original
position, then you have not properly installed the SIM card.
With this step you have finished the SIM card installation.
5.6.3
Third Step: Replace the Cover
Please slide the SIM card cover back into its original position. Please ensure,
that the SIM card cover locks auditable.
5.6.4
Fourth Step: Connecting the Antennas
The device is equipped with connectors for a cellular network antenna
(GSM antenna) and a satellite antenna (GPS antenna).
Please connect now the two antennas according to the picture below. You
cannot mix the two antennas because they have different connectors.
connector for the GSM-antenna
Page 14
connector for the GPS antenna
5.6.5
Fifth Step: Connecting the Unit to the Vehicle
Please connect the Telic Standard BC remote control unit to the vehicle
according to the following instructions using the connection cable with the
white 6-pin MOLEX plug which is included with the device.
Please do not connect the white connector to the Telic Standard BC remote
control unit before all cables you intent to use are connected to the vehicle.
5.6.5.1
Power Supply
Depending on the intended mode of usage, you can connect the device to
the power supply in two different ways:
5.6.5.1.1
The device must stay active after ignition off
This operating mode has the disadvantage, that the device even
consumes power while the ignition is off. This means, that the battery of
the vehicle can run out of energy which means, that the vehicle might
not be able to start its engine after a few days without operation
(depending on the size, age and charging level of the battery).
The advantage of this operating mode is, that the device is able to
connect faster to the GSM network and it can find faster a new GPS
position after ignition was switched from “OFF” to “ON”. This means
that for example working time calculations will be more precise.
If the Telic Standard BC remote control unit is configured not to use the
power save feature, then the device can detect and report in this mode
that it is moving (e.g. if it is stolen or while a construction machine is
transported on a truck) even while ignition is off.
GROUND
(vehicle pin 31)
VCC
(vehicle pin 30)
Page 15
IGNITION
(vehicle pin 15)
To operate the Telic Standard BC remote control unit in this mode,
the black wire must be connected to GROUND (pin 31 of the vehicle)
and the red wire must be connected to VCC (pin 30 of the vehicle).
The brown wire must be connected to ignition (pin 15 of the vehicle)
in this mode.
5.6.5.1.2
The device must be switched off when ignition is switched off
This operating mode has the advantage, that the device does not
consume any power while the ignition is off. This means, that the
battery of the vehicle cannot run out of energy which means, that the
vehicle will always be able to start its engine even after a few days
without operation.
The disadvantage of this operating mode is, that it takes the device
longer to connect to the GSM network and it takes longer to find a new
GPS position after ignition was switched from “OFF” to “ON”. This
means that for example working time calculations will be less precise.
In addition it can happen in this operating mode, that short trips are
not registered at all.
If the Telic Standard BC remote control unit is configured not to use the
power save feature, then the device can detect and report in this mode
that it is moving (e.g. if it is stolen or while a construction machine is
transported on a truck) even while ignition is off, but only as long as the
internal backup battery can provide enough energy (typically a few
hours)
GROUND
(vehicle pin 31)
VCC
(vehicle pin 15)
IGNITION
(vehicle pin 15)
To operate the Telic Standard BC remote control unit in this mode,
the black wire must be connected to GROUND (pin 31 of the vehicle)
and the red wire and the brown wire must be connected to IGNITION
(pin 15 of the vehicle).
Page 16
The brown wire must be connected to ignition (pin 15 of the vehicle)
in this mode.
Even if you connect the device according to the above mentioned
scheme to the cigarette lighter and if the cigarette lighter is switched on
and off together with the IGNITION (which is the case in most vehicles)
the routes driven by the vehicle will be reported correctly.
5.6.5.1.3
Fuses
The device contains internal fuses to protect it against high voltage and
wrong connection to the vehicle.
If these fuses are damaged (which can hardly occur in a 12 volt /
24 volt vehicle, then you need to send the device to your supplier for
repair. You cannot repair the fuses yourself.
5.6.5.2
Digital Input 1
The Digital Input 1 can be connected to any signal which reports “ON“ or
“OFF“. The input can be used with a voltage up to 36,0 volt.
The color of the wire of Digital Input 1 is green.
The status of this digital input is reported with each status report to the
control server and can be found in a report.
Function:
if GROUND or nothing or a voltage between 0.0 volt and 1.0 volt is
connected, then the input reports “OFF”.
If a voltage between 7,0 volt and 36,0 volt is connected to the input,
“ON“ will be reported.
If a voltage between 1,0 volt and 7,0 volt is connected to the input, the
result will be undetermined.
Page 17
5.6.5.3
Digital Input 2 (IGNITION)
The Digital Input 2 can be connected to any signal which reports “ON“ or
“OFF“. The input can be used with a voltage up to 36,0 volt.
The color of the wire of Digital Input 2 is brown.
Function: if GROUND or nothing or a voltage between 0.0 volt and
1.0 volt is connected, then the input reports “OFF”.
If a voltage between 7,0 volt and 36,0 volt is connected to the input,
“ON“ will be reported.
A multitide of tracking programs from Telic respectively from Telic Partners
use Digital Input 2 as IGNITION input. We therefore strongly recommend to
connect Digital Input 2 to IGNITION (vehicle pin 15).
5.6.5.4
Digital Outputs 1 and 2
Digital Output 1
Digital Output 2
The digital outputs 1 and 2 can be switched with an SMS command or with
a GPRS command. Please ask your supplier for details.
Page 18
The voltage provided by the digital outputs is the same like the voltage of
the power supply of the device. A current of max. 400mA can be drawn
from each digital output.
The blue wire is connected to Digital Output 1, the white wire is connected
to Digital Output 2.
5.6.5.5
Pin out and Colors of the 6-pin Molex Connector
Please note that Digital Output 1 and Digital Output 2 provide VCC if they
are activated.
You should never connect these two wires to GROUND. This can destroy
the device.
If you do not use some of the wires of the MOLEX connector, then please
ensure, that these wires cannot get into contact by accident with any metal
parts of the vehicle.
Page 19
5.6.6
Sixth Step: Mounting the Remote Surveillance Module
In order to protect your vehicle from theft and vandalism, the device should
be installed in a location where the device, its antennas and its power supply
are well-hidden and where it is easy at the same time to switch the main
switch of the device (located below the SIM card holder) on and off.
Using the corresponding two screws and holes in the device, please mount
the device at a suitable, dry location.
When mounting the antennas, please be aware that the antennas must have
a free view to the sky (not blocked by metal or liquids) in order to receive
good signals.
The antenna should have a minimum distance to metallic components of the
vehicle in each direction.
The included combined GSM/GPS antenna is only intended to be mounted
inside the vehicle because the antenna cannot withstand wet environment.
Other types of antennas (e.g. roof antennas) are available. Please contact
your supplier of the device.
A perfect place for the combined GSM/GPS window antenna is inside the
vehicle glued to the windshield with the adhesive side of the antenna under
the white protection paper. Please clean the window with alcohol or similar
and then remove the white paper in order to fix the antenna at the desired
place.
Page 20
If you choose another place for the antenna please ensure, that the side of
the antenna with the white paper points towards the sky. This is important
because this side of the antenna is the active one.
Attention:
a buckled or furled cable can, even if its isolation is not damaged, reduce
the quality of the received signal significantly so that a proper function of the
device might not longer be given.
Please also be aware that metallised windshields can strongly block the
signals of the GPS satellites causing reception of the GPS position signals to
be impossible.
In addition, the antenna should not be mounted behind the OFF position of
the windscreen wiper.
5.6.7
Switching the device on and off
I
ON
Normally the device is delivered by Telic with the power switch being switched
on.
Page 21
If the Telic Standard BC remote control unit is switched off, you can switch it
on by moving the switch marked with ON/1 with a non metallic tool (e.g. a
toothpick) from position “1” into the position marked with “ON”. You can
find the switch below the cover of the SIM card near to the edge of the
device.
If you want to switch the device off, then please move the switch marked with
ON/1 with a non metallic tool (e.g. a toothpick) from position “ON” into the
position marked with “1”.
Tip: indication “1” of the switch does not mean “ON”. “1” indicates pin 1 of
the switch.
6
The tracking via a tracking program or a tracking server
Die Usage of the Telic Standard BC remote control unit on a tracking program or
a tracking server is the preposition for the efficient usage of the Telic Standard BC.
For the set-up of the Telic Standard BC remote control unit, the Telic Standard BC
has to be configured with the necessary data. For this purpose a configurationSMS (Short Message) has to be sent to the device, which includes the operation
relevant parameters (e.g. the IP address of the server, to which the tracking data
have to be sent. Alternatively to that the configuration parameters can also be setup via the serial interface (pls. see as well chapter 12.45).
After the configuration of the relevant parameters status messages will be
generated and will be sent via GPRS. Together with them, also the GPS-position
and the status of the digital In- and Outputs, as well as the measuring values of
the analogue Inputs will be additionally sent. More details for this you will find in
chapter 12.4 „The status message”
7
General functionality of Telic Standard BC
The Telic Standard BC remote control unit has primarily the task, to communicate
GPS position data with additional status information via an existing TCP/IP
connection as status messages.
If a message can’t be communicated, it is stored in the device and will be sent
later on. There can be stored min. 1000 position messages.
The following events will create a position messages:
The driving over a distance of x meters (air line) (x is configurable) in
where ever direction (x is configurable)
Page 22
A change of direction by a configurable minimum angle during a ride at
a, as well, configurable minimum speed.
Changes of status at the both digital Inputs
Cut off and Connect to the main power supply
After the switch-on of the Telic Standard BC remote control unit at the beginning
the GSM module as well as the GPS module will be switched on.
As soon as the GSM module has successfully logged into the GSM network, all
currently available GSM networks are recorded which allow using GPRS with the
SIM card inserted into the device.
Then a GPRS connection and a TCP/IP connection will be established to the
preconfigured IP address.
The selection of the GPRS provider takes approx.1minute as well as the log in
process into the control center software. This means, that it takes 2-3 minutes after
switching the device on until the first status report can be sent to the control
center.
Independent of this delay the first GPS positions will be recorded and will be
stored as status reports inside the device until they can be sent to the control
center.
The first recorded GPS position will be used as a reference to find out if a new status
report must be sent because the vehicle has moved more than x meters since the last
transmission of a status report.
In addition, a status report will be sent every time the vehicle changes its direction
for more than x degrees compared with the direction reported with the last status
report to the control center (default: 60 degrees).
Changes of a digital input cause the transmission of a status report in any case. If
no actual GPS position is available, the last known GPS position will be
transmitted.
Each new status report sets a new reference point for distance calculations.
8
The Digital Inputs
The Telic Standard BC remote control unit puts at your disposition 2 digital inputs.
To detect a signal as „high“ (logical 1) a voltage between 7 volts and 36 volts has
to be put. The input will recognized as „low“ (logical 0), if a voltage between 0
volts and 1 volt is put to the digital input. If the input is not connected, a „low“ is
recognized as well.
Page 23
For each change of the digital input a status message incl. the latest valid GPS
position will be sent to the control center.
9 The digital Outputs
A change of the digital outputs can be made via GPRS from a Server.
A change of the digital outputs via SMS (in 7-Bit text format, as usual in a regular
GSM-Mobile network device) is also possible.
9.1
Switch of the digital outputs
The digital outputs can be via GPRS or SMS. The related message is as follows:
004000886610
With this SMS the digital output 1 is set and the digital output 2 is re-set.
The message is composed of:
00 – Message-ID (free choice between 00 and 99)
40 – Code Setting of the outputs
008866 – the first 6 numbers of the labelled serial number of the device.
xy – Mask for change of the digital outputs, x: DOUT1, y:DOUT2
More details are described in the Software Protocol Specification.
9.2
Automatic answer of the digital outputs
I fit has to be ensured, that the outputs have been set respectively re-set
correctly, there can be requested an acknowledgement from the remote control
unit.
This can be done via the codes 41.
Example: 004100886610 to be sent via SMS or GPRS
Reply:
0044008866TSBC0019,1,359563000008668,241006114259,115872,480
334,3,0,340,,,,,0,,10,00,223,217
The reply is re-tramsmitted via GPRS only.
Page 24
10 The analog inputs
The analog inputs of the Telic Standard BC remote control unit reflect the actual
status of the voltage supply of the Telic Standard BC remote control unit.
Within the transmitted data a numeric value is indicated being between 0 until
max. 255.
10.1
Board net-voltage (analog input 1)
The value of the analog input 1 represents the voltage value of the board net. 1
Digit is the equivalent of 0,064V + Offset 0,34V.
10.2
Battery-voltage (analog input 2)
The value of the analog input 2 represents the voltage value of the internal
battery. 1 Digit is the equivalent of 0,0198V.
11 The Serial Interface
The Telic Standard BC remote control unit provides a serial interface with a
female DSUB-9 connector.
This interface can be used for the following purposes:
Access to internal debugging messages. These messages are mainly
used for debugging the software of the Telic Standard BC remote
control unit in case there are bug reports which must be evaluated.
The Telic Standard BC remote control unit can be used as a pure
GSM modem. This mode can for example be used in conjunction with
a standard handheld PC like for ex. PSION TECLOGIC Workabout in
order to transmit data between any third-party application and the
handheld PC.
Page 25
11.1
Internal Debugging Messages
The Telic Standard BC remote control unit can be connected to any standard
PC using the serial interface of the device.
The serial cable needed can be ordered from Telic.
After connecting the Telic Standard BC remote control unit and the PC with the
serial cable, please open your favorite terminal program like Windows
HyperTerminal or ZOB.
After launching Windows HyperTerminal, the following window appears:
In the field named “Name:” please enter any name of your choice and
confirm this name by clicking the OK button.
In the subsequent window please enter the serial COM port of your PC you
connected the serial cable to.
Page 26
If you are using a USB to serial converter then you need to select the virtual
serial port of this converter.
To find out which virtual COM port is used by the adapter, please click Start
Settings
System management
System
Hardware
Device manager
Connections.
There you will find the name of the virtual serial port in brackets besides the
name of the USB-to-serial converter.
Click OK when you are finished with the configuration of the name of the COM
port.
In the next window please enter the data as shown below:
Page 27
As soon as you click on OK HyperTerminal will display the debugging
messages of the Telic Standard BC remote control unit as follows:
Page 28
11.2
The transparent GSM-modem Mode
The Telic Standard BC remote control unit can be used in two modes:
Vehicle tracking mode (VTU mode)
Transparent GSM-modem mode
If the device is operated in the transparent GSM-modem mode, it acts like a
standard GSM modem, which means that it can be used with standard AT
modem commands to transmit data thru GPRS, SMS, data call etc. to any 3 rd
party server.
While the device is operated in GSM-modem mode, all functions regarding
GPS, vehicle tracking, status reports etc. are disabled.
11.2.1
Switching from VTU Mode to the GSM-modem Mode
If you want to switch the device from VTU mode to the GSM-modem mode
you need to send the following AT command to the serial interface of the
device:
“AT*E2APC=0,0“ (without the quotation marks).
After sending this command to the device, you receive an answer as follows:
If you receive “OK”, then the device has entered the GSM-modem mode
successfully and can now be operated with the AT commands for the
WAVECOM GS64 GSM modem. A description of the available AT
commands can be ordered from Telic.
If you receive “ERROR” then please try to enter the GSM-modem mode
again.
11.2.2
Switching from GSM-modem Mode to VTU Mode
If you want to switch the device from the GSM-modem mode to the VTU
mode, then please send “+++++” to the serial interface of the device.
As an alternative you can also switch off and on the device with the small
switch near to the SIM card holder.
12 Other Features
12.1
Testing the Device
After the installation of the device inside the vehicle we strongly recommend to
verify the proper installation as follows:
Page 29
12.1.1
Verification of the LEDs Blinking Patterns
The device has four LEDs. The blinking patterns of these LEDs can give you
valuable information about the proper function of the device.
LED
Description of the Blinking Patterns
This LED is blinking yellow and reports the status of the GPS
reception as follows:
LED on the
right side
(close to the
connector for
the GPS
antenna)
off:
GPS is not activated
1 blink
no valid GPS information is available
2 blinks
a valid GPS information is available
but without height information
3 blinks
Complete GPS information is available
After switching the device on as well as after a phase without
GPS reception the device only accepts 3D GPS positions.
This ensures, that position reports with serious deviations
from the real position are not reported to the control center.
After a while, 2D position reports are accepted because the
GPS receiver then had enough time to evaluate the signal
quality of all available GPS satellites.
Page 30
LED
Description of the Blinking Patterns
The LED in the middle consists of 2 LEDs: a green LED and a
red LED.
LEDs in the
middle
The green led is continuously on as soon as the Telic
Standard BC remote control unit is powered by an external
power source.
The red LED indicates if the internal backup battery is
currently in the process to be charged.
If the LEDs in the middle are both off, this does not mean,
that the Telic Standard BC remote control unit has been
switched off. Instead, this means, that the device currently
does not receive any power from an external power source.
This green LED indicates the GSM status and at the same
time it indicates if the device is switched on at all.
LED is off
off
the GSM module has been switched
LED is continuously on GSM has been switched on but no
GSM network is available
LED on the left
Single flash
side
GSM connection has been
established
and GPRS is available but no
connection to the control server been
established
(close to the
connector for
the GSM
Double flash
antenna)
GSM connection has been
established
and GPRS is available, connection to
the control server has
been established
2x blinking
incoming SMS
3x blinking
outgoing SMS
Page 31
12.1.2
Test Transmission of a Status Report
After you have verified that all 4 LEDs are showing the expected blinking
patterns we strongly recommend a test transmission of a status report as
follows:
Park your vehicle at a place with a good view to the sky.
Switch the ignition on. It is not necessary that the engine is running.
Wait minimum 5 minutes
Switch off the ignition
Now you should see an actual position report in your control center
software. Details regarding your control center software and functionality is
available from your dealer.
12.2
Buffering of Data while GSM Reception is bad
If you are going with your vehicle to an area with bad or even no GSM
reception, the unit buffers all status reports internally. The unit will even keep
this data if the power is switched off or the internal backup battery runs empty.
The buffer can keep up to 1000 position reports.
If more than 1000 status reports must be stored then the oldest status reports
will be replaced.
The data will be sent to the control server as soon as the connection to a
mobile phone network can be re-established. The oldest status report will be
sent first.
While sending previously recorded status reports, newly generated status
reports will be sent immediately which means that sending the older status
reports will be interrupted for a short while.
12.3
Reset of Telic Standard BC remote control unit
If the external power supply is interrupted and therefore the internal backup
battery runs empty after a while the Telic Standard BC remote control unit will
be shut off completely.
Despite the fact that no more power is available for the device all settings and
all buffered data will be kept and used again as soon as external power is
available again.
12.4
The integrated Watchdog
The Telic Standard BC remote control unit comes with an integrated watchdog.
Page 32
This watchdog is independent of the rest of the electronics in the unit. It surveys
the proper function of the program inside the GSM module and resets the unit
as soon as a malfunction of the program is detected.
The watchdog covers a big range of potential malfunctions like problems with
the GSM connection, problems with GPS reception etc.
This watchdog ensures, that the unit will automatically return to a stable status
after a malfunction.
There is no need for the user to configure the watchdog.
If the watchdog needs to restart the device after a malfunction it can happen,
that a few status reports cannot be recorded and therefore will not be
transmitted to the control server because the Telic Standard BC remote control
unit cannot record status information while being in the restart phase.
13 The Status message
Status messages are data sets, having been generated due different types of
events. Status messages will be sent immediately after their creation or also out of
the database via GPRS to the control server.
13.1
Content of a Status Report
Content
Description
Event/Log Code
reason for the status report
Event/Log
Timestamp
time stamp of the event
GPS
Timestamp
GPS timestamp of the moment when the GPS coordinate was
recorded
Longitude
longitude in 100µ degrees (in binary mode 10µ°)
Latitude
latitude in 100µ degrees (in binary mode 10µ°)
Fix Type
1,2 or 3, depending on 1d Fix, 2d Fix or 3d Fix
Speed over
ground
speed in km/h
Course over
ground
direction in degrees (0 degrees = North)
Mileage
Kilometer counter (in meters)
Page 33
Content
Description
Digital Inputs
01
Digital Outputs 10
13.1.1
DigIn1= 0, DigIn2 = 1
DigOut1 = 1, DigOut2 = 0
Analog
Input 1
value of Analog Input 1 (external power supply)
Analog
Input 2
value of Analog Input 2 (voltage of the backup battery)
Event- and Log-Codes
This code describes, which event was the reason for a particular status report.
The following event codes are implemented:
Code
Description
1
Start-Up Event
this event is sent immediately after switching the device on.
It contains the last valid GPS position which was typically
generated when the ignition changed from “ON” to “OFF”.
6
Change-of-Direction - Event
Default:
- minimum speed: 6 km/h
- minimum change of direction compared with the value
of the last status report: 60 degrees
11
Digital Input 1 changed from “low“ to “high“
12
Digital Input 1 changed from “high“ to “low“
13
Digital Input 2 changed from “low“ to “high“
14
Digital Input 2 changed from “high“ to “low“
15
External power source was connected to the device
16
External power source was removed from the device
Page 34
Code
98
13.1.2
Description
The device has moved more than a configurable distance
(straight line) away from the GPS position of the last status
report
The Kilometer Counter
A kilometer counter is implemented into the software of the Telic Standard
BC remote control unit. This kilometer counter adds up short pieces of the
distances of each driven route.
The calculation of these distances is based on GPS data. Due to tolerances
of the kilometer counter in the vehicle in combination with tolerances of the
GPS information discrepancies between both values of up to 5% are normal.
The values of the GPS based kilometer counter are transmitted with each
status report to the control server.
The Telic Standard BC remote control unit provides the possibility to set the
kilometer counter in the Telic Standard BC remote control unit with an SMS
command.
This makes sense if for ex. you mount the device in a vehicle which is not
new and therefore in this moment reports a kilometer counter value > zero.
The new value you want to set in the Telic Standard BC remote control unit
must be expressed in meters (not kilometers).
Example:
if you want to set the new value of the kilometer counter inside the Telic
Page 35
Standard BC remote control unit to 83213,789 km the SMS command must
look as follows:
0011008866,,,,,,,,,,,,,83213789
This command is composed as follows:
Value
00
Message-ID (a value of your choice between 00 and 99)
11
Command code to change the configuration
008866
The last 6 digits of the serial number of the device
(can be found on the sticker of the device)
,,,,,,,,,,,,,
13 parameters which are not going to be changed with
this command
83213789
13.2
13.2.1
Description
New value for the kilometer counter in meters
Strategies for Status Report Generation
Distance based status reports
One of the key features of the device is to report information about routes a
vehicle has driven based on the GPS information contained in each status
report.
The default value for distance based status reports is 5.000 meters.
The device sends a new distance based status report as soon as the distance
between the last status report and the current position of the device (straight
line) is more than x meters (default: 5.000 meters)
In reality the distance between two status reports is most likely significantly
shorter because of the direction based status reports (see chapter 13.2.2,
“Direction based Status Reports“).
In combination with direction based status reports the status reports of a
typical route from one city to another looks as follows:
Frequent position reports at the beginning of the trip while the vehicle is
driving from an office building thru downtown to the entrance of the highway
frequently turning left or right at crossings.
On the highway position reports are pretty seldom because typically the
highway is just a straight road which means that pretty no direction based
status reports will be sent.
Page 36
In the target area position reports will be more frequent again because the
vehicle must turn left or right at various crossings in order to hit the target
address of the trip.
This feature can be disabled and the value can be changed. Please contact
the supplier of the device if you want to change the value or you want to
disable the feature at all.
13.2.2
Direction based Status Reports
The Telic Standard BC remote control unit is configured to send a direction
based status report every time the angle between the direction reported in
the last status report and the current direction is more than x degrees.
Default: 60 degrees
The above mentioned default value ensures, that most of the direction
changes at a crossing will be recognized and reported.
This feature can be disabled and the value can be changed. Please contact
the supplier of the device if you want to change the value or you want to
disable the feature at all.
13.2.3
Status Reports due to Special Events
The Telic Standard BC remote control unit sends a status report if one of the
following situations occurs:
Event
Description
The Telic Standard BC remote control unit sends a
status report every time when a digital input
A digital input
changes its status changes its status (e.g. when IGNITION is switched
ON or OFF)
Disconnection
from external
power supply
13.2.4
The Telic Standard BC remote control unit sends a
status report every time when the device is
disconnected from the external power supply and
therefore activates power supply thru the built-in
backup battery
The Speed Filter
The Telic Standard BC remote control unit provides a filter that allows to
block direction based status reports if the speed of the vehicle is lower than x
Page 37
km/h. Details regarding direction based status reports can be found in
chapter 13.2.2, “Direction based Status Reports“.
Default value: 6km/h.
This filter can for ex. be used in construction machines like cranes which turn
around in the construction area during their normal work all the time. In this
case, the information that the direction of the crane changed does not have
any value for the dispatching centre.
On the other side it is very interesting for the dispatching centre to see, that
the machine is moving from one construction site to an other, where it
currently is and where it has been driving around.
The higher the configured value for the speed filter is, the more behind a
crossing the position report will be sent to the control server because the
vehicle needs some time to exceed the speed limit that allows to send a
direction based status report.
13.3
13.3.1
Information about some special Situations
First Position of a new Route
The first position of a new route is always the same like the last position of
the former route.
If you switch off the device after a trip and you switch it on at an other place
later control server will report the last position of the former route as the first
position of the new route which is not the case in reality and which can cause
a mistake in the calculation of the kilometer counter.
Therefore we do not recommend switching the device off while taking it from
one place to another.
13.3.2
Last Position of a new Route
As soon as the ignition is switched off at the end of a new route, the current
GPS position will be stored in the Telic Standard BC remote control unit in a
special memory that even remembers this information if the device runs out
of battery power.
When the device is restarted later, this last GPS position will be read from the
memory and will be sent to the control server as soon as GPS delivers a valid
timestamp. It can take several minutes to receive valid time information from
the GPS receiver if it was switched off before without power supply.
Page 38
14 Quick Start
14.1
Hardware Installation
Ask your mobile phone network provider to activate GPRS on your SIM card
De-activate the PIN of the SIM card with a standard mobile phone
Insert the SIM card into the unit.
To do so, the small square on the top of the unit must be opened.
Mount the unit in your vehicle
14.2
o
Connect the combined antenna with both cables to the unit.
The antenna should have free view to the sky.
o
Connect the cables for power supply (red) and ignition (brown) to
the vehicle (pin 15 of the vehicle)
o
Connect the black cable to GROUND of the vehicle
(pin 31 of the vehicle)
o
Connect the white MOLEX connector to the device
Quick test
Move the vehicle to a place where the Telic Standard BC remote control unit
has good GPS and GSM reception (free view to the sky on all sides).
A good GPS signal is indicated by the yellow GPS LED which is located close to the GPS
antenna connector flashing three times continuously.
Make sure, that you have a good reception of the GSM signal.
A good GSM signal is indicated by the green GSM LED close to the connector
for the GSM antenna flashing two times continuously according to chapter
12.1.1 “Verifcation of the LEDs blinking paramters”.
15 Factory settings
The device contains a set of default values that have influence on the status
messages sent to the control server. The default values have been selected very
carefully by Telic in order to be suitable for most of the Telic customers.
If you’d like to change the configuration of one or the other value, please contact
your supplier of the device. He can load a new configuration file into the device
over the air.
Page 39
15.1
15.1.1
SIM Card specific Parameters
PIN Code of the SIM Card
The device assumes that the PIN code of the SIM card is “0000”.
Alternatively you can insert a SIM card with a de-activated PIN code
verification.
The GPRS parameters can be set via SMS or via the serial connection.
Example of configuration via ser- connection:
IPCONFIG=,,a1.net,[email protected],[email protected]
Example of configuration via SMS
00B0008866,,a1.net,[email protected],[email protected]
where
00 – Message-ID (variable between 00 and 99)
B0 – Code zum Setting the IP configuration
008866 – the last 6 digits of the labelled serial number of the device.
,, – 2 Parameter IP Address and IP Port, which shouldn’t be changed in this
case
a1.net,[email protected],[email protected] – APN, User name and Password
More details are described in the Software Protocol specification.
15.1.2
Roaming
In some cases it is much more expensive to transmit data thru GPRS if you
are outside your home country compared with the tariff inside your home
country. Price difference can easily be a factor of 10 and more in the same
country.
The Telic Standard BC remote control unit provides the possibility to load a
GPRS roaming table into the device. This allows specifying, which GSM
network provider(s) should be used in which country depending on the SIM
card that is inserted into the device.
If you’d like to adapt the GPRS roaming table then please contact your
supplier of the device. He can load a new configuration file into the device
over the air adapted to your needs.
As an alternative you can block the SIM card used inside the Telic Standard
BC remote control unit to be used outside your home country. In this case
the device can remember up to 1.000 status reports that will be sent to the
control server as soon as the vehicle enters the home country again and
therefore can use the cheap local GPRS tariff.
Page 40
15.2
Default Values
The unit contains the following default configuration:
Parameter
Default Value
Distance between two waypoints
5.000 m
GPS kilometer counter
0m
GPRS reconnect delay
60 s
Internet address of the control sever
No default
GPRS IP port of the controls server
No default
Direction event threshold
60 degrees and a minimum speed of 6
km/h
Binary data transmission
De-activated.
With this configuration the amount of
data to be transmitted per status report
can be significantly reduced without any
loss of information compared with an
ASCII representation of the data
Acknowledge Mode
De-activated.
With this configuration the amount of
data to be transmitted per status report
will be approx. 30% higher compared
with the data transmission without
acknowledge mode. On the other side
this configuration ensures, that no data
will be lost during its transmission from
the Telic Standard BC remote control
unit to the control server.
GPS kilometer counter
0m
16 Error Handling
It exists a number of possible problems that might occur and that might prevent
the Telic Standard BC remote control unit from functioning properly.
This chapter is intended to help you to find out and to solve the most common
problems.
Page 41
Possible Problems:
The device does not do anything
Possible cause
Solution
The ON/1 switch is set to 1
Switch on the ON/1 switch located
besides the SIM card by sliding it to ON
The unit is not connected correctly to
your vehicle
Please connect the unit to the vehicle
according to the scheme in chapter 5.6.5,
“Fifth Step: Connecting the Unit to the
Vehicle“
On-board power supply failure or
defective fuse
You cannot fix this problem yourself.
Instead please send the device to Telic for
repair.
The device cannot connect to a GSM network
Possible cause
Solution
The Telic Standard BC remote control
unit is not within the range of GSM
reception
Check whether or not the GSM network is
actually available at this location (e.g.
with a mobile phone) and move to
another place if no GSM signal is
available.
The GSM antenna is not properly
attached or the antenna cable is
defective
Check to see if the GSM antenna is
properly attached and if the cable of the
antenna is damaged.
The SIM card in the device is new and is
not yet activated
Check to see if the SIM card is activated.
You can do this by inserting the SIM card
in your mobile phone and checking if it is
then able to log in to the mobile network.
Page 42
Possible cause
Solution
The SIM card is blocked by the network
provider
Check if the SIM card is blocked.
You can do this by inserting the SIM card
in your mobile phone and checking if it is
then able to log in to the mobile network.
If it is able to do so, attempt to send an
SMS to somebody. If you are able to do
so, then the SIM card is definitely not
blocked.
Your pre-paid SIM card is empty
“Re-fill” the pre-paid SIM card
Your pre-paid SIM card is expired
Pre-paid cards usually expire when they
are not regularly re-filled (often after 12
or 24 months).
If this is the case, you must buy a new
card.
The SIM card’s PIN code was not
changed to “none” or “0000”
Remove the SIM card from the device and
check the PIN code using a mobile
phone. The PIN code must be deactivated or it must match with ”0000”.
Please note that a PUK code is needed
after three attempts to log in to a SIM
card with a wrong PIN.
The SIM card is not properly inserted into Make sure that the SIM card is properly
the SIM card reader
inserted into the SIM card holder
The device is unable to log in to the GPRS service
Possible cause
Solution
The GPRS service is not enabled for this
SIM card
Call your mobile phone network provider
in order to check, if the GPRS service is
enabled for this SIM card.
Page 43
The device does not receive any GPS-coordinates
Possible cause
Solution
The GPS antenna is not connected
correctly
Please connect the GPS antenna according to chapter 5.6.4, ”Fourth Step:
Connecting the Antennas”
The GPS antenna does not have a free
view to the sky
The GPS antenna must always have a
free view to the sky.
Quite often antennas also have symbols
that point the way the antenna should be
mounted (they might for example have an
upper side and a bottom side)
Windows of cars that are protected with a
metal layer to protect the driver from the
sun do not allow the GPS signal to go
thru.
In this case, the GPS antenna must be
mounted outside the vehicle (e.g. on the
roof) or behind the windows in the fond
of the car (which sometimes have no
metal layer even if the front window has a
metal layer).
Your vehicle is at a place with bad GPS
signal
A good reception of the GPS signal is
only possible if the GPS antenna has a
free view to the sky.
In order to have positive test results
please move your vehicle to an
appropriate place (no houses around, no
garage etc.)
Further hints regarding the potential problem with your Telic Standard BC remote
control unit can be retrieved from the four LEDs which are implemented into the
unit.
Details regarding the LEDs can be found in chapter 12.1, “Testing the Device
After the installation of the device inside the vehicle we strongly recommend to
verify the proper installation as follows:
“.
Page 44
17 Power consumption
If you have read this user manual up to this point, you have certainly realized that
this little device can do a lot. We have put a lot of effort into making its operation
as simple as possible, without limiting your possibilities.
This versatility unfortunately provides the following limitation:
If your vehicle is not used for more than one week, we recommend that you
disconnect the Telic Standard BC remote control unit or that you switch it off with
the switch near the SIM card holder marked ON/1, because it may result in an
empty car battery.
Alternatively, you can mount the Telic Standard BC remote control unit so that it
switches off as you remove the ignition key.
In addition it is good to know, that the unit enters a sleep mode with low power
consumption when the ignition is switched off.
18 Technical information
Item
Description
Size
77 mm(W) x 67 mm (L) x 26 mm(H)
Connectors
- 1 serial interface, DSUB-9 female
- 1 FME connector for the GSM antenna
- 1 SMA connector for the GPS antenna
- 6 pin Molex I/O connector
- Mini-USB - connector
used only for production purposes
LEDs
4 status – LEDs to indicate the status of GPS, GSM
and power supply
GSM/GPRS Module
Wavecom GS64
GPS Module
u-blox LEA-4A
Backup Battery
610 mA/h, 3,7 volt
Operating Temperature -20°C ~ +60°C
Power Supply
7volt – 36 volt DC
Housing
Black, plastic
Page 45
Item
Description
Approvals
E1
Telic GmbH
Raiffeisenallee 12b
D – 82041 Oberhaching (near Munich)
Germany
www.Telic.de
Page 46